

Page 1
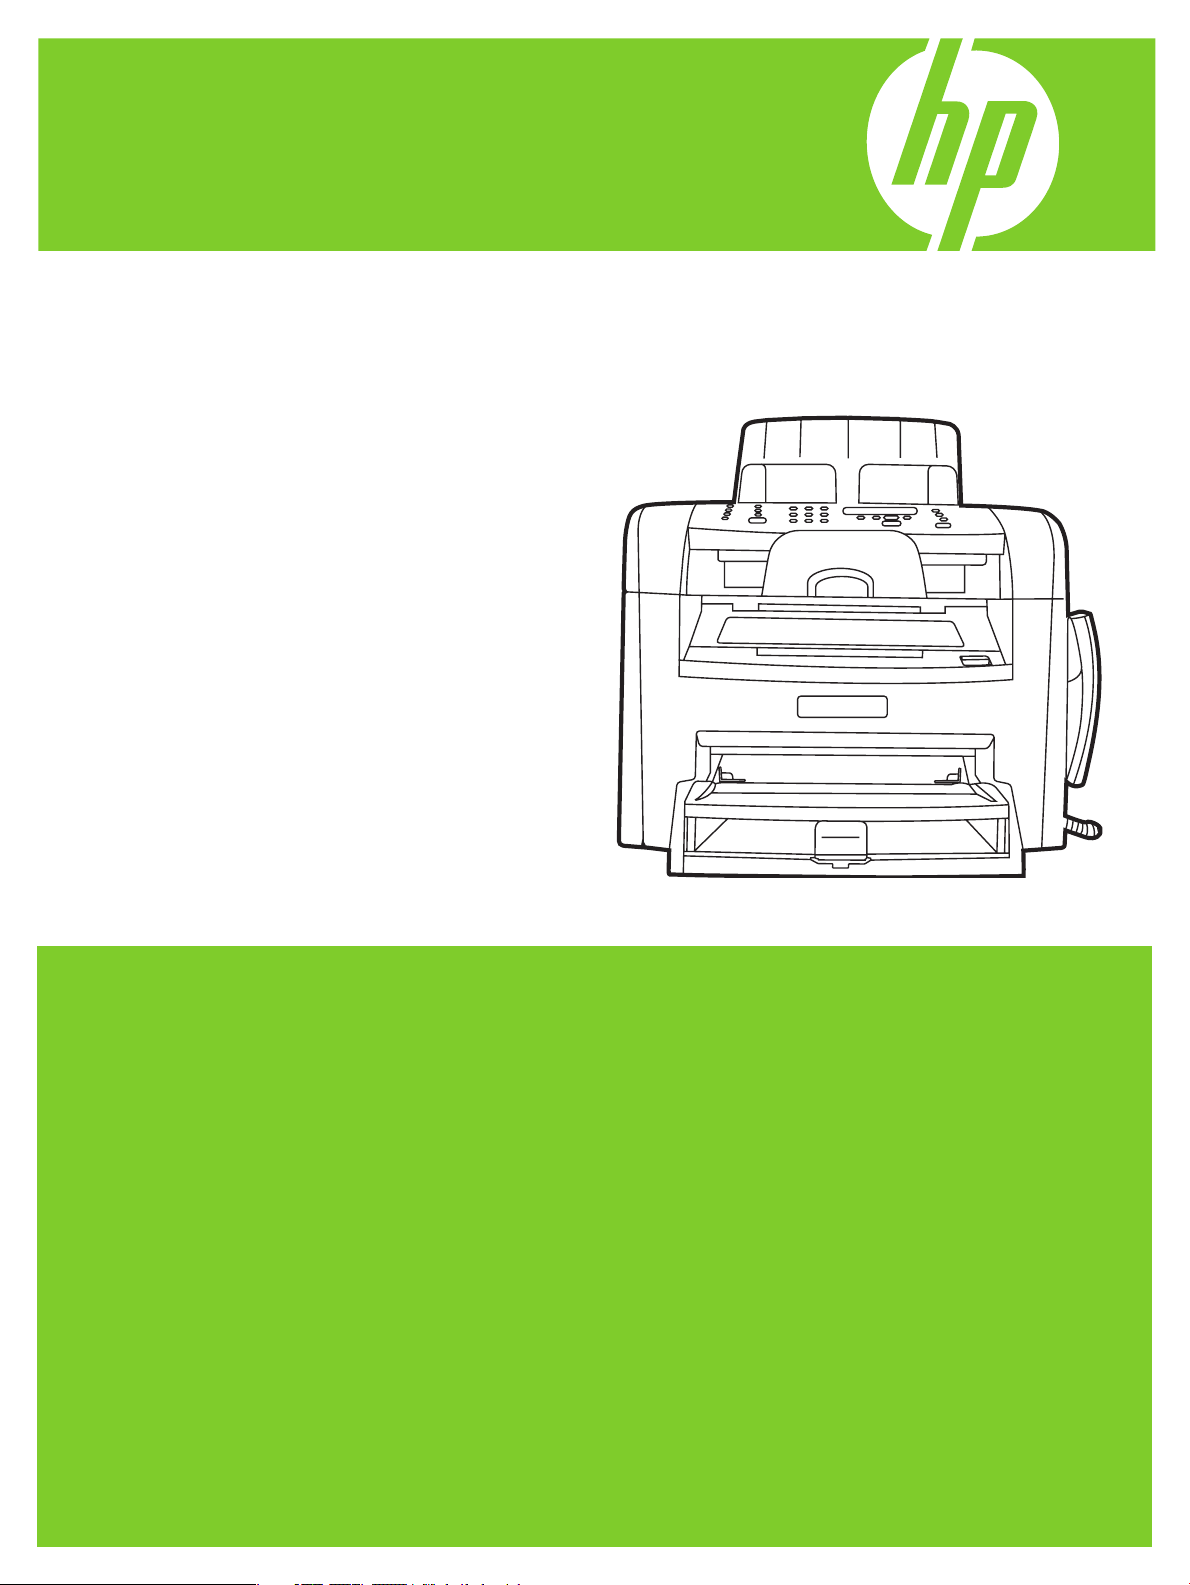
HP LaserJet M1319 MFP Series
HP LaserJet série M1319 MFP
Getting Started Guide
Guide de mise en route
Introduktionsvejledning
Aloitusopas
Komme i gang
Starthandbok
Read Me First
Lisez-moi d'abord
Læs dette først
Lue tämä ensin
Les meg først
Läs det här först
Page 2

Copyright and License
© 2008 Copyright Hewlett-Packard Development Company, L.P.
Reproduction, adaptation or translation without prior written
permission is prohibited, except as allowed under the copyright
laws.
The information contained herein is subject to change without
notice.
The only warranties for HP products and services are set forth in
the express warranty statements accompanying such products
and services. Nothing herein should be construed as constituting
an additional warranty. HP shall not be liable for technical or
editorial errors or omissions contained herein.
Part number: CB536-91026
Edition 1, 7/2008
FCC Regulations
This equipment has been tested and found to comply with the
limits for a Class B digital device, pursuant to Part 15 of the FCC
rules. These limits are designed to provide reasonable protection
against harmful interference in a residential installation. This
equipment generates, uses, and can radiate radio-frequency
energy. If this equipment is not installed and used in accordance
with the instructions, it may cause harmful interference to
radio communications. However, there is no guarantee that
interference will not occur in a particular installation. If this
equipment does cause harmful interference to radio or television
reception, which can be determined by turning the equipment
off and on, correct the interference by one or more of the
following measures:
• Reorient or relocate the receiving antenna.
• Increase separation between equipment and receiver.
• Connect equipment to an outlet on a circuit different from
that to which the receiver is located.
• Consult your dealer or an experienced radio/TV technician.
Any changes or modications to the product that are not
expressly approved by HP could void the user’s authority to
operate this equipment. Use of a shielded interface cable is
required to comply with the Class B limits of Part 15 of FCC
rules. For more regulatory information, see the electronic
user guide. Hewlett-Packard shall not be liable for any direct,
indirect, incidental, consequential, or other damage alleged in
connection with the furnishing or use of this information.
Trademark Credits
Windows® is a U.S. registered trademark of Microsoft
Corporation.
Copyright et Licence
© 2008 Copyright Hewlett-Packard Development Company, L.P.
Il est interdit de reproduire, adapter ou traduire ce manuel sans
autorisation expresse par écrit, sauf dans les cas permis par les
lois régissant les droits d'auteur.
Les informations contenues dans ce document sont sujettes à
modication sans préavis.
Les seules garanties concernant les produits et services HP sont
énoncées dans la garantie qui accompagne ces produits et
services. Rien en ceci ne devra être interprété comme constituant
une garantie supplémentaire. HP ne pourra être tenue pour
responsable des erreurs techniques et rédactionnelles ou des
omissions présentes dans ce document.
Référence : CB536-91026
Edition 1, 7/2008
Réglementations de la FCC
Les tests effectués sur cet équipement ont déterminé qu'il est
conforme aux prescriptions des unités numériques de classe B,
telles que spéciées à l'article 15 des normes de la FCC
(Commission fédérale des communications). Ces limites
sont destinées à assurer une protection sufsante contre les
interférences produites dans une installation résidentielle. Cet
équipement génère, utilise et peut émettre de l'énergie sous
forme de fréquences radio. Si ce matériel n'est pas installé
et utilisé conformément aux instructions, il peut causer des
interférences nuisibles aux communications radio. Aucune
garantie n'est néanmoins fournie quant à l'apparition
d'interférences dans une installation particulière. Si cet
appareil provoque des interférences nuisibles (qui peuvent
être déterminées en éteignant et rallumant l'appareil) à des
communications radio ou télévision, corrigez ce problème en
appliquant une ou plusieurs des mesures suivantes :
• Réorientez ou déplacez l'antenne de réception.
• Augmentez la distance séparant l'équipement du récepteur.
• Connectez l'équipement à une prise située sur un circuit
différent de celui sur lequel se trouve le récepteur.
• Consultez votre revendeur ou un technicien radio/télévision
expérimenté.
Toute modication apportée au produit sans le consentement de
HP peut se traduire par la révocation du droit d'exploitation de
l'équipement dont jouit l'utilisateur. Un câble d'interface blindé
est requis an de satisfaire aux stipulations de l'article 15 des
réglementations de la FCC sur les appareils de classe B. Pour de
plus amples informations sur les réglementations, reportez-vous
au Guide de l'utilisateur au format électronique. Hewlett-Packard
ne sera en aucun cas tenu responsable des dommages directs,
indirects, accessoires, consécutifs ou autres pouvant résulter de
la mise à disposition de ces informations ou de leur utilisation.
Marques commerciales et déposées
Windows® est une marque déposée aux Etats-Unis de Microsoft
Corporation.
Page 3
15˚ - 32.5˚C
(59˚ - 90.5˚F)
10% - 80%
10 kg
22 lb
429 mm (16.9 inches) 443 mm (17.3 inches)
459 mm (18.1 inches)
Select a sturdy, well-ventilated, dust-free area to position the product.
Choisissez un emplacement stable, aéré et non poussiéreux pour installer le produit.
Vælg et stabilt, velventileret, støvfrit område til placering af produktet.
Valitse laitteelle tukeva, ilmastoitu ja pölytön paikka.
Plasser produktet på et stabilt, godt ventilert og støvfritt sted.
Välj en stadig dammfri plats med god ventilation för produkten.
1
Page 4

There are three sections in this guide:
• Set up the hardware
• Install the software
• Set up the fax hardware for copy and fax only
Ce guide est divisé en trois sections :
• Installation du matériel
• Installation du logiciel
• Conguration du matériel de télécopie pour la copie et la télécopie uniquement
Denne vejledning indeholder tre sektioner:
• Opsætning af hardwaren
• Installation af softwaren
• Opsætning af faxhardwaren til kopiering og fax
Tässä oppaassa on kolme osaa:
• Laitteiston asentaminen
• Ohjelmiston asentaminen
• Faksilaitteiston asentaminen ainoastaan kopiointia ja faksausta varten
Denne veiledningen har tre deler:
• Monter maskinvaren
• Installer programvaren
• Kongurer faksmaskinvaren for bare kopiering og faksing
Handboken innehåller tre avsnitt:
• Ställa in maskinvaran
• Installera programvaran
• Ställa in faxmaskinvaran endast för kopiering och fax
2
Page 5
1
Set up the hardware. Unpack the product.
Installation du matériel. Déballez le produit.
Opsætning af hardwaren. Pak produktet ud.
Laitteiston asentaminen. Poista laite pakkauksesta.
Monter maskinvaren. Pakk ut produktet.
Ställ in maskinvaran. Packa upp produkten.
3
Page 6
2
Remove all orange shipping tape.
Retirez toutes les bandes adhésives orange.
Fjern al orange forseglingstape.
Irrota oranssi pakkausteippi.
Fjern all den oransje beskyttelsestapen.
Ta bort all orange förpackningstejp.
3
Install the control panel faceplate.
Installez la plaque du panneau de commande.
Sæt kontrolpanelets frontplade på.
Asenna ohjauspaneelin etulevy.
Monter kontrollpanelets frontpanel.
Sätt fast kontrollpanelens överstycke.
Page 7

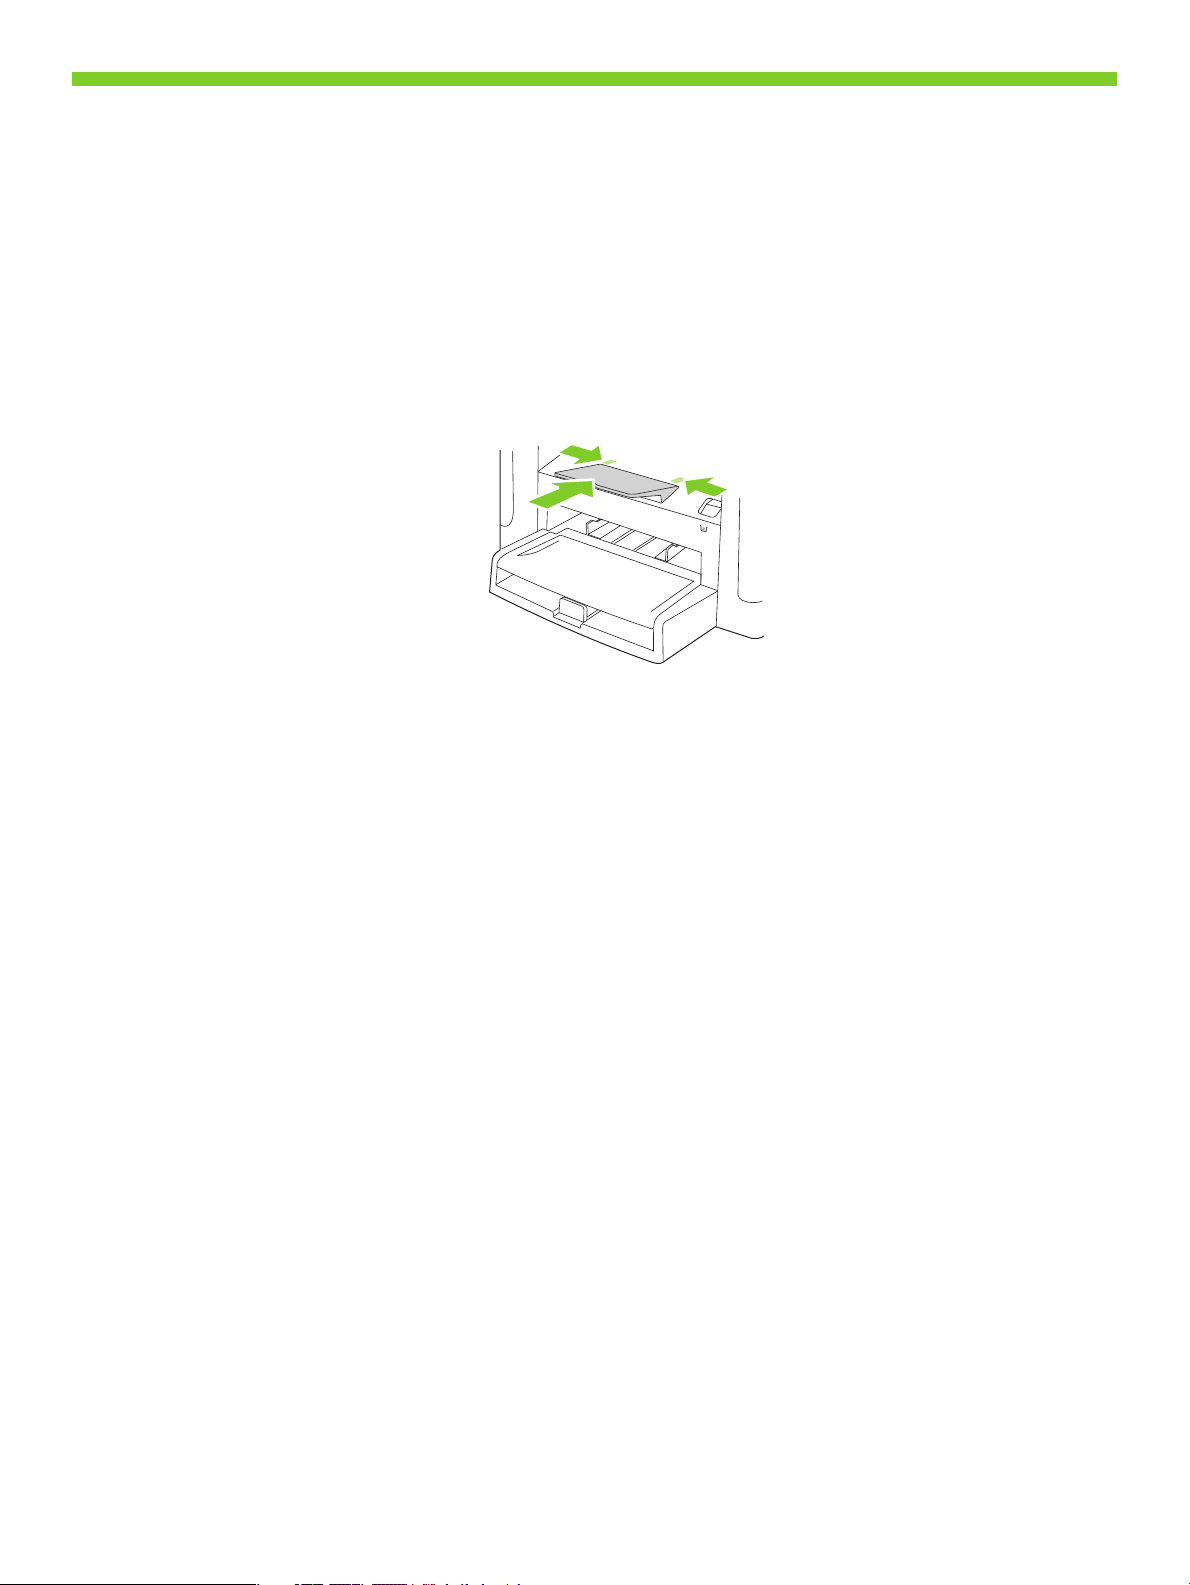
Install the automatic document feeder (ADF) input tray.
Installez le bac d'alimentation du bac d'alimentation automatique (BAA).
Sæt den automatiske dokumentføders (ADF) papirbakke i.
Asenna asiakirjansyöttölaitteen (ADF) syöttölokero.
Sett inn skuffen til den automatiske dokumentmateren (ADM).
Sätt fast inmatningsfacket för den automatiska dokumentmataren.
5
Install the ADF output support.
Installez le support de sortie du BAA.
Installer ADF-udskrivningsunderstøttelse.
Asenna asiakirjansyöttölaitteen tulostetuki.
Monter ADM-utskriftsstøtten.
Montera stödet för utmatning från den automatiska dokumentmataren.
5
Page 8
6
Install the paper support.
Installez le support papier.
Installer papirunderstøttelse.
Asenna paperituki.
Monter papirstøtten.
Installera pappersstödet.
6
Page 9
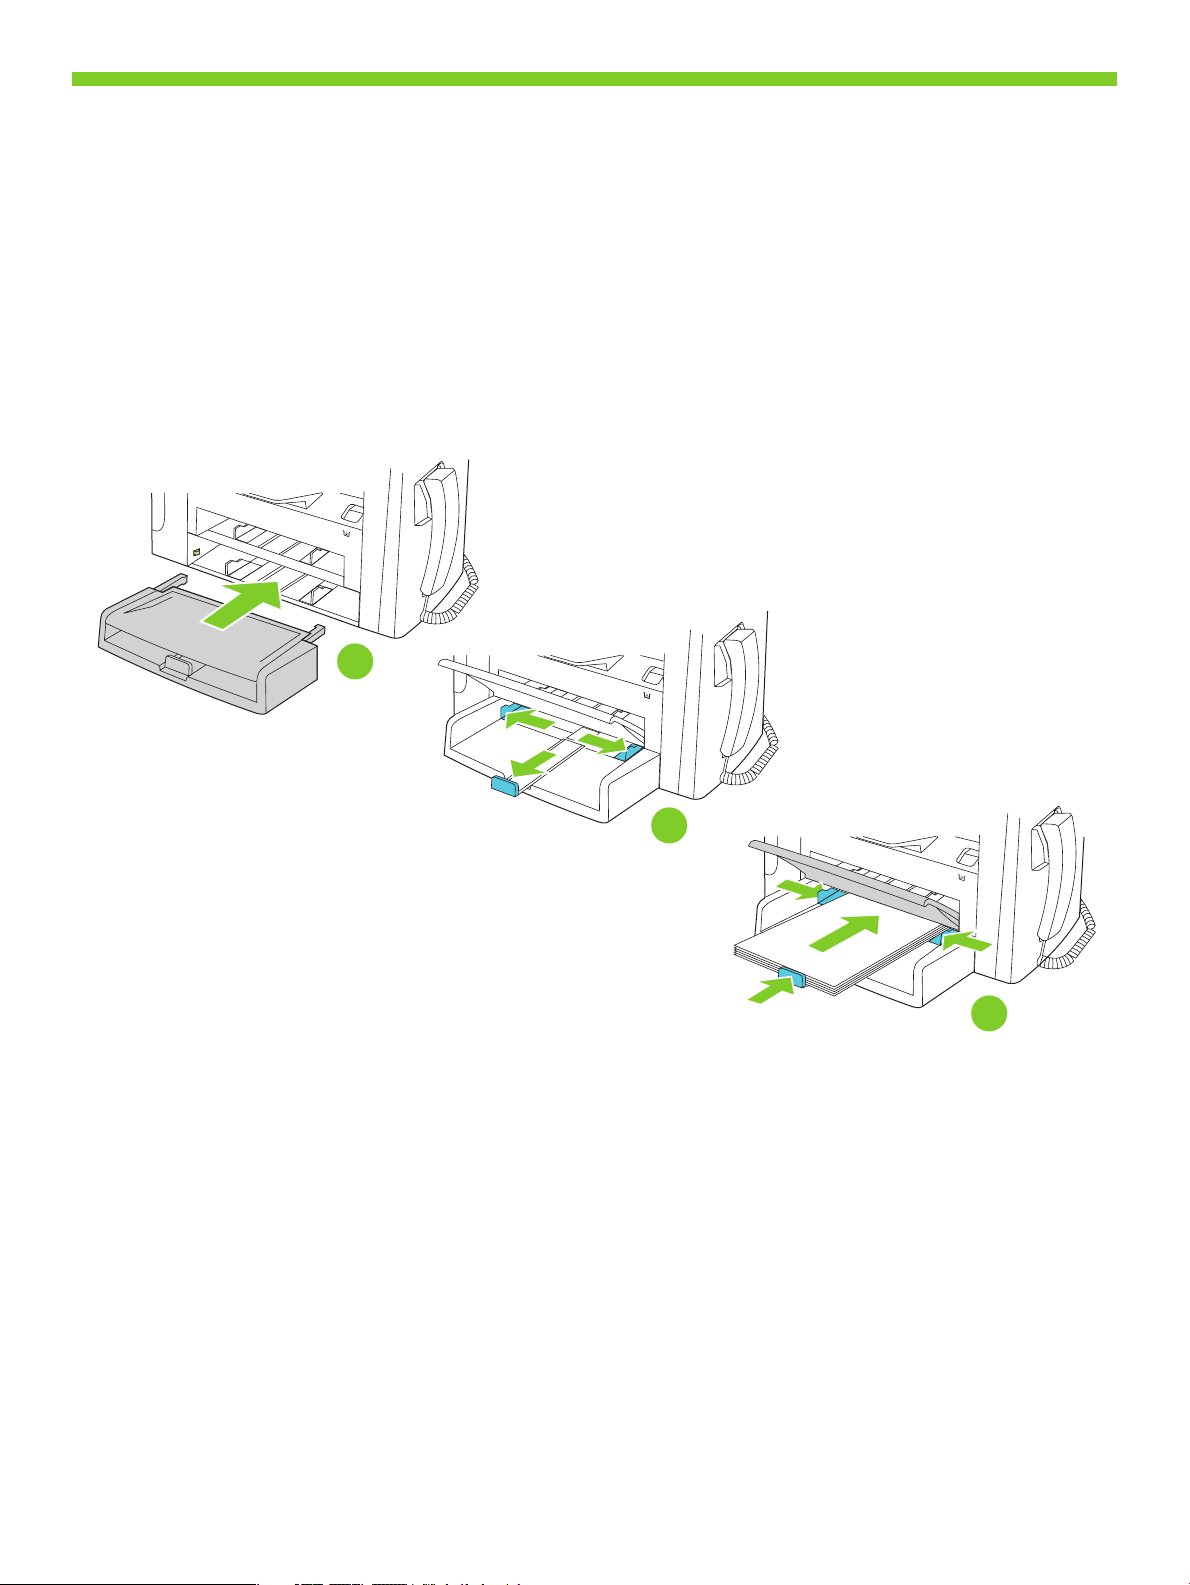
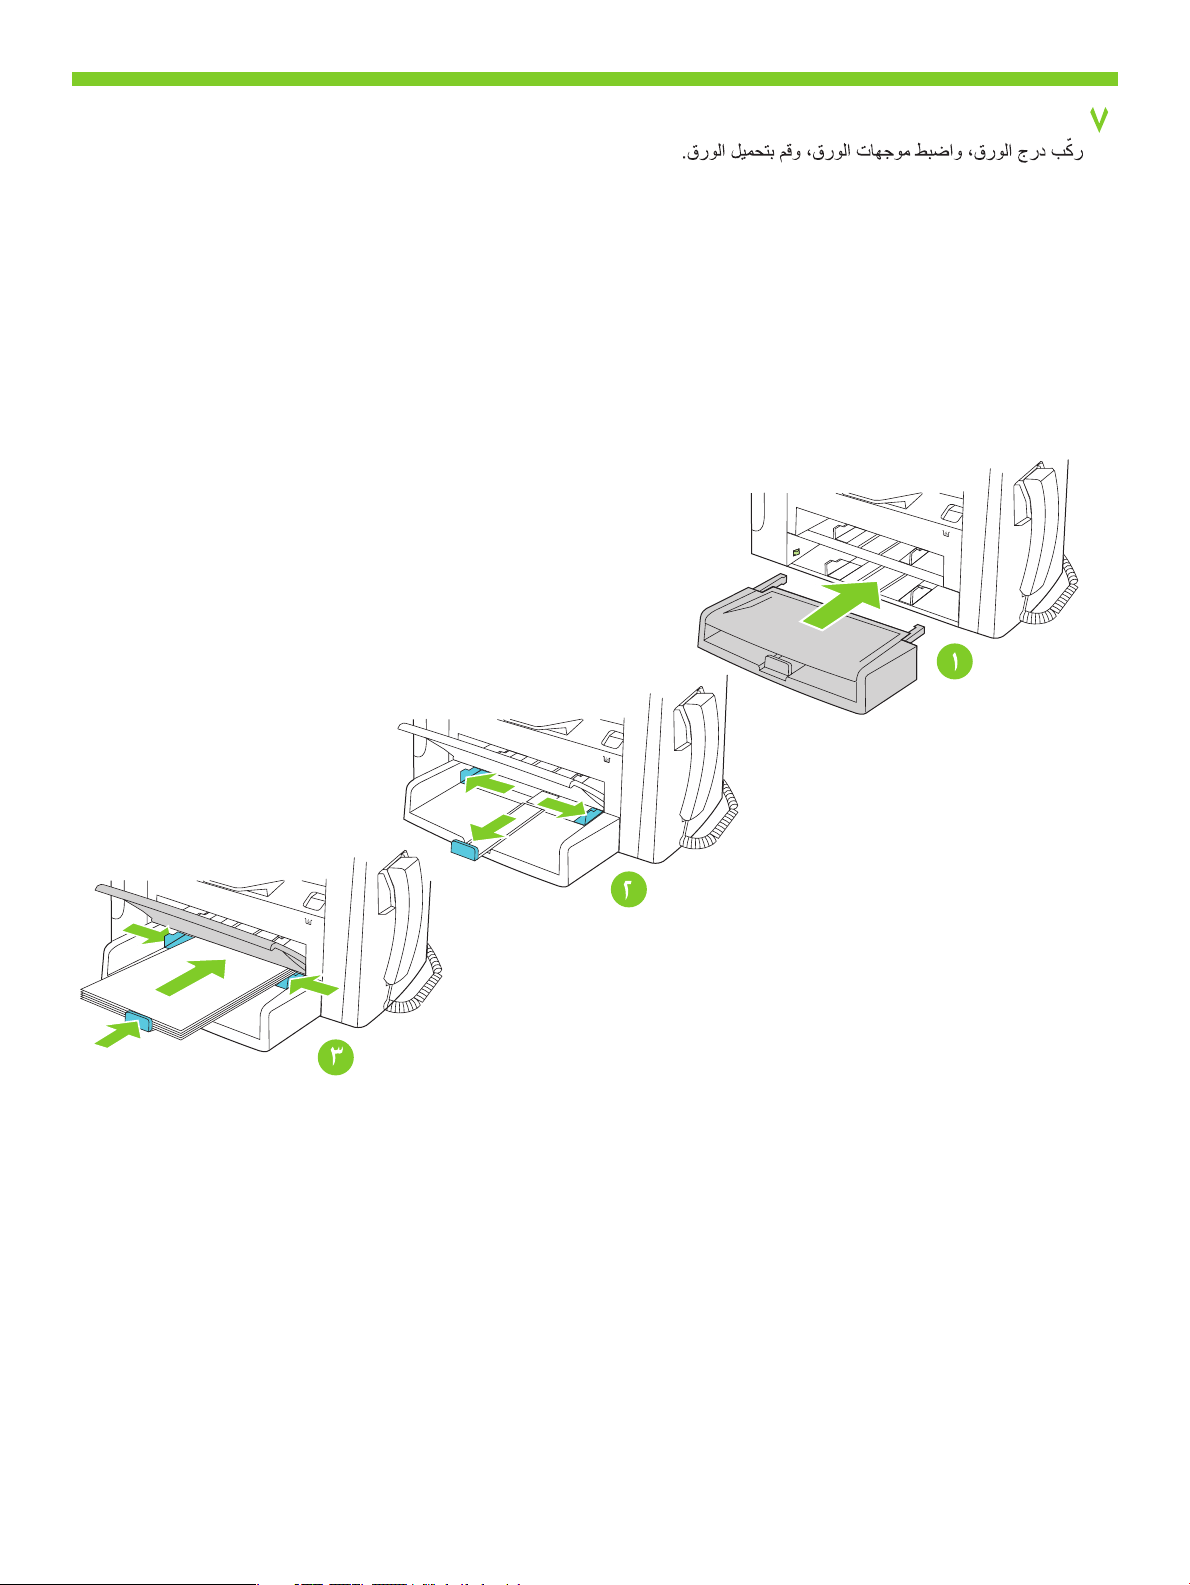
7
2
1
3
Install the paper tray, adjust the paper guides, and then load paper.
Installez le bac à papier, réglez les guides papier, puis chargez du papier.
Installer papirbakken, juster papirstyrene, og læg derefter papir i.
Asenna paperilokero, säädä paperinohjaimet ja lisää paperia.
Sett inn papirskuffen, juster papirskinnene, og legg deretter i papir.
Sätt i pappersfacket, justera pappersstöden och fyll sedan på papper.
7
Page 10
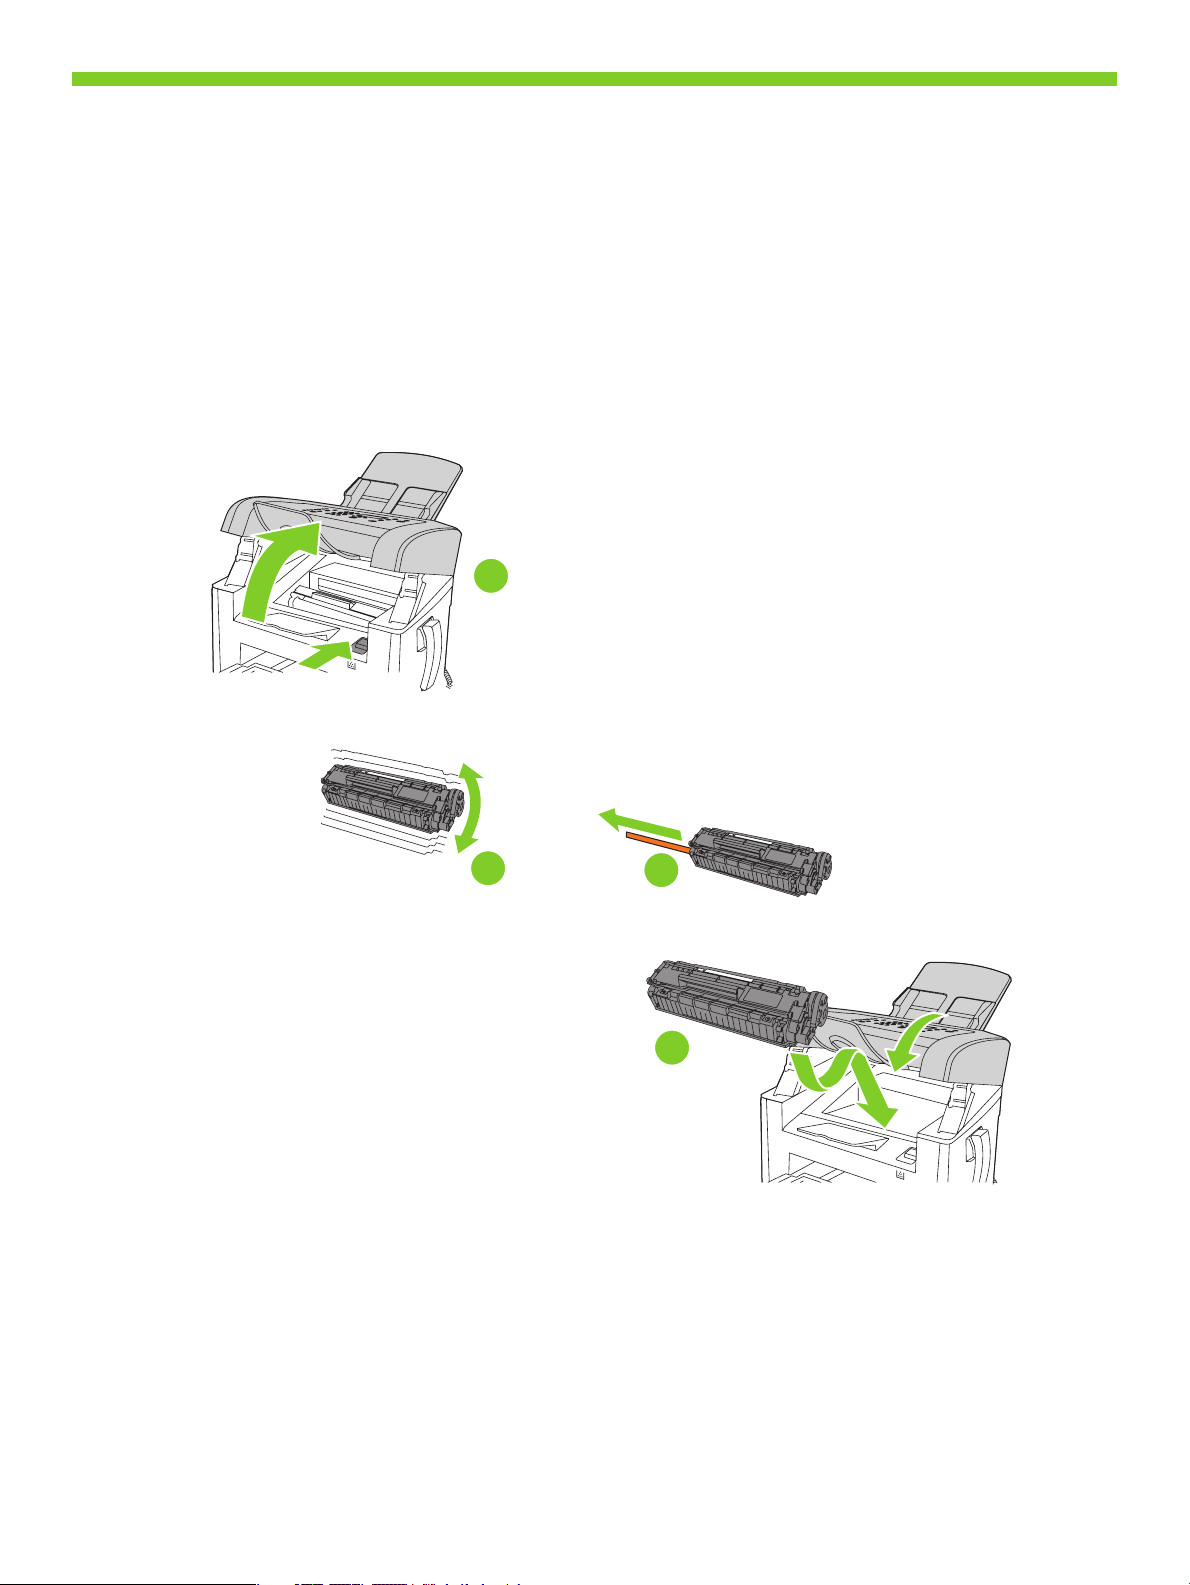
8
1
2
3
4
Install the print cartridge.
Installez la cartouche d'impression.
Sæt printerpatronen i.
Asenna tulostuskasetti.
Sett inn skriverkassetten.
Sätt i tonerkassetten.
8
Page 11
9
Connect the handset.
Branchez le combiné du téléphone.
Tilslut håndsættet.
Liitä puhelimen kuuloke.
Koble til håndsettet.
Anslut telefonluren.
9
Page 12
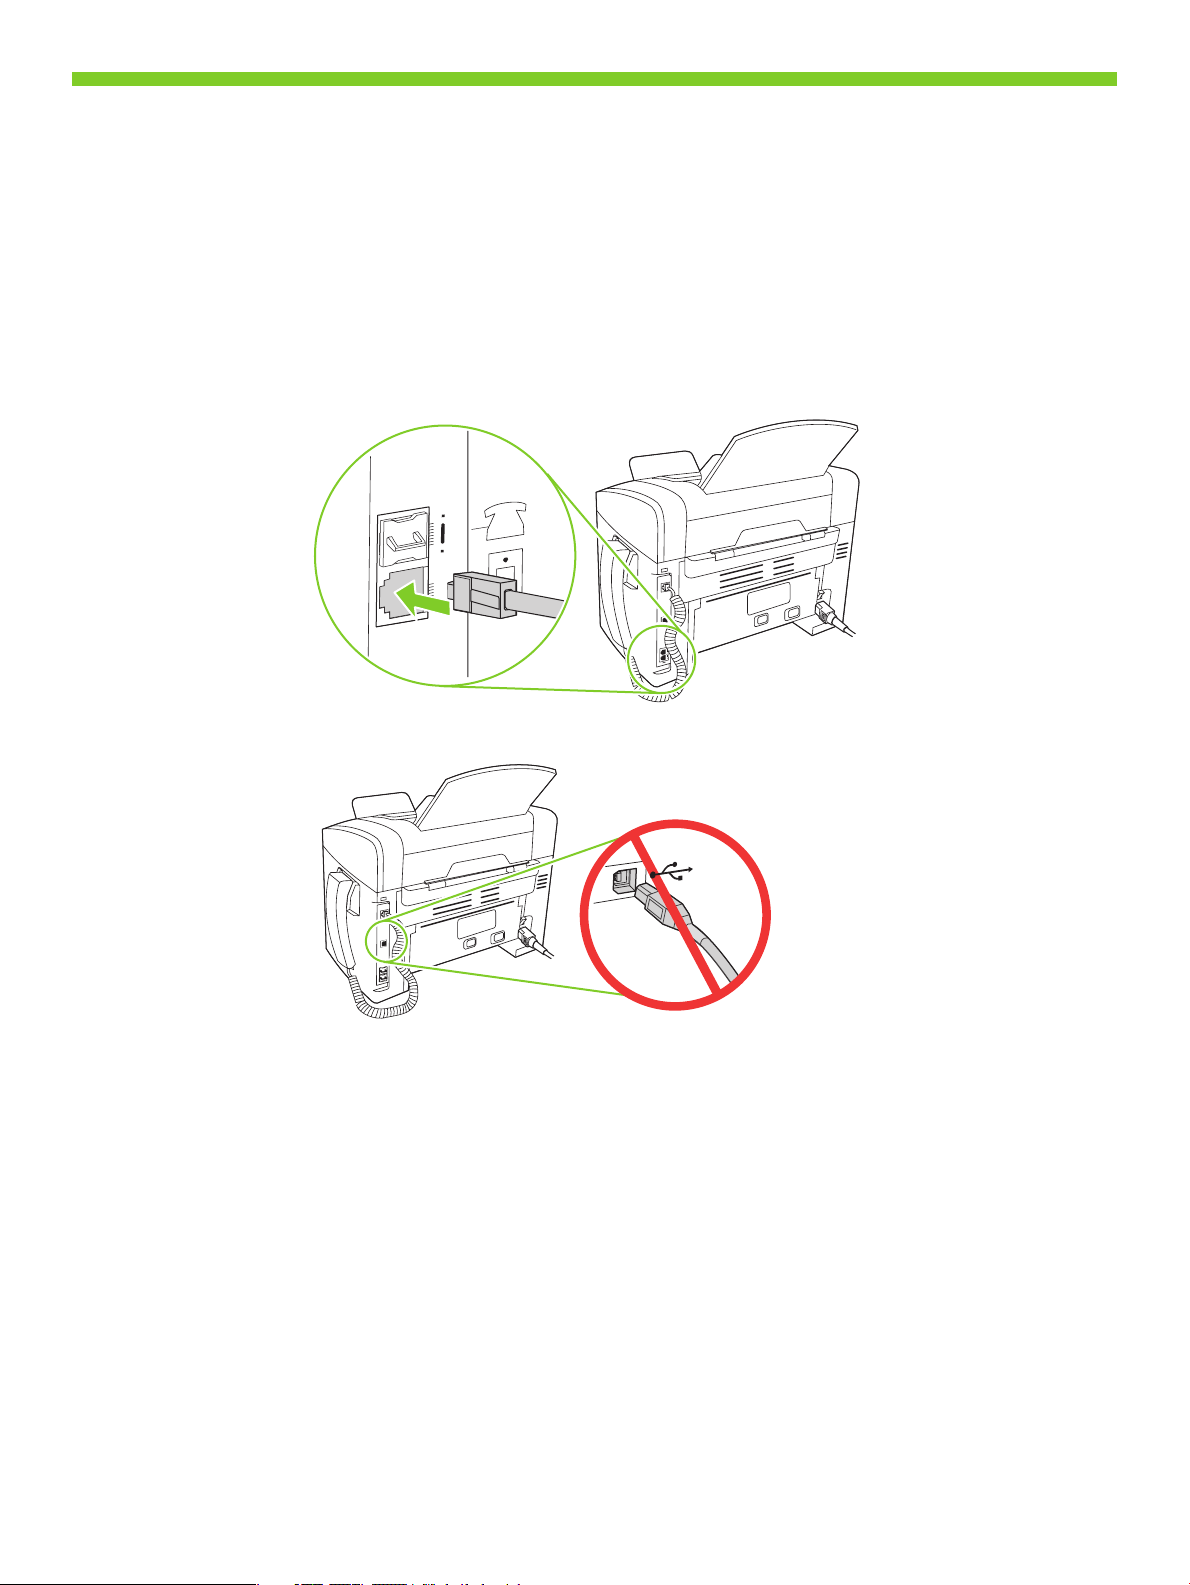
10
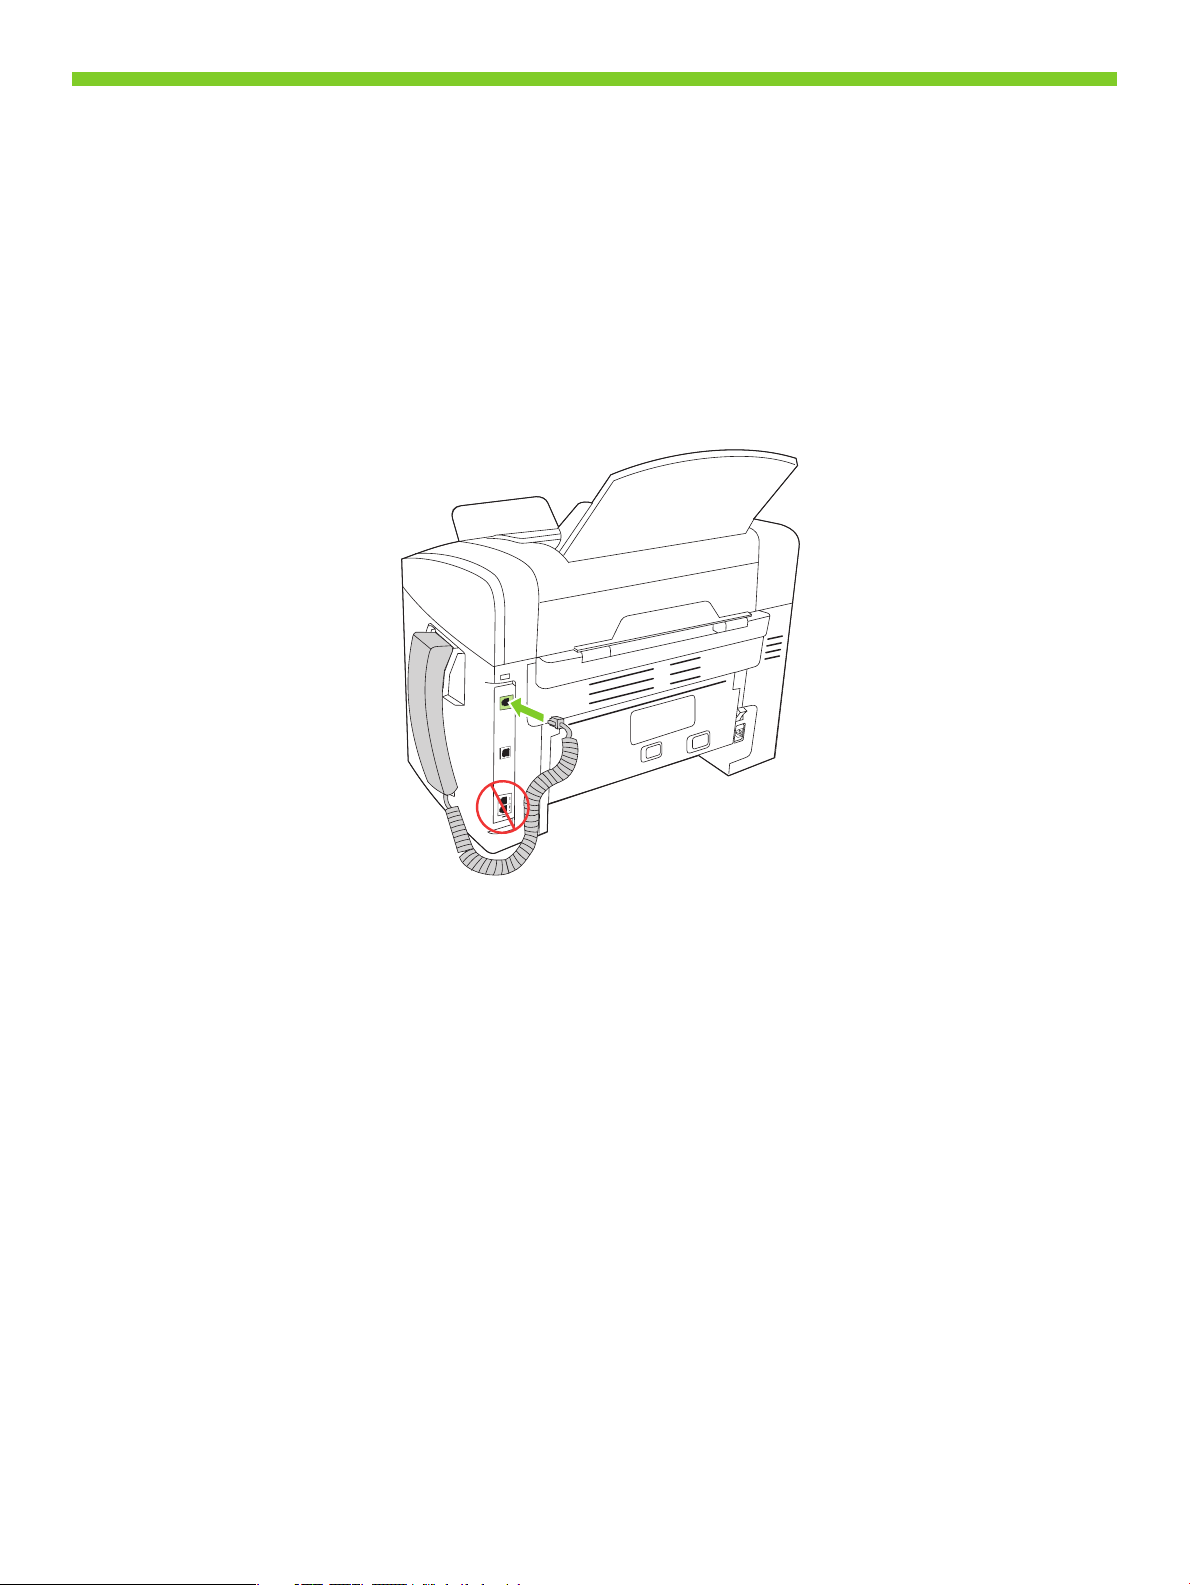
Connect the phone cord for the fax.
Branchez le cordon téléphonique au télécopieur.
Slut telefonledningen til faxen.
Liitä puhelinjohto faksia varten.
Koble til telefonledningen for faksen.
Anslut telefonsladden för fax.
Caution! Do not connect USB now. Wait until the software prompts you.
Attention ! Ne branchez pas le câble USB tout de suite. Attendez les instructions du logiciel.
Forsigtig! USB-kablet må ikke tilsluttes endnu. Vent, til du bliver bedt om at gøre det.
Muistutus! Älä liitä USB-kaapelia nyt. Odota, kunnes ohjelmisto kehottaa siihen.
Forsiktig! Ikke koble til USB nå. Vent til du blir bedt om det.
Varning! Anslut inte USB nu. Vänta tills programvaran uppmanar dig att göra det.
10
Page 13
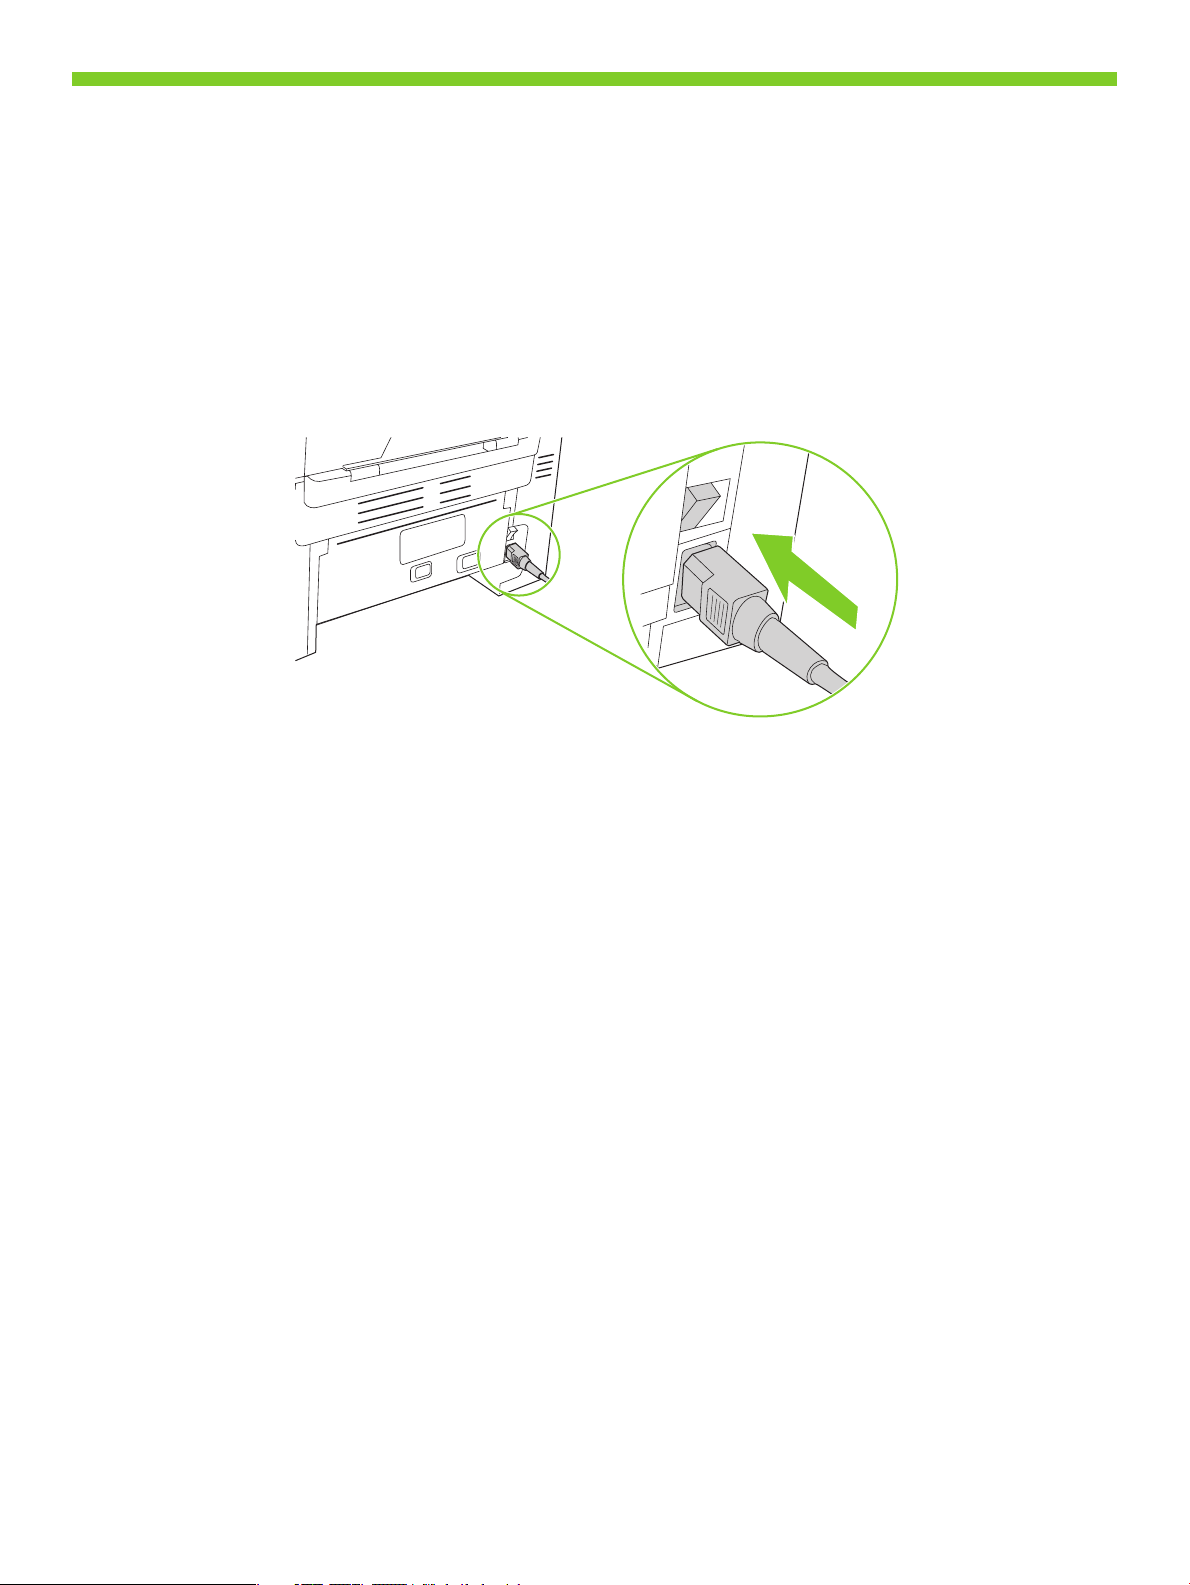
11
Connect the power cord, and then turn on the product.
Branchez le cordon d'alimentation, puis allumez le produit.
Tilslut netledningen, og tænd for produktet.
Liitä virtajohto ja kytke laitteeseen virta.
Koble til strømledningen, og slå deretter på produktet.
Anslut strömsladden och slå på produkten.
11
Page 14
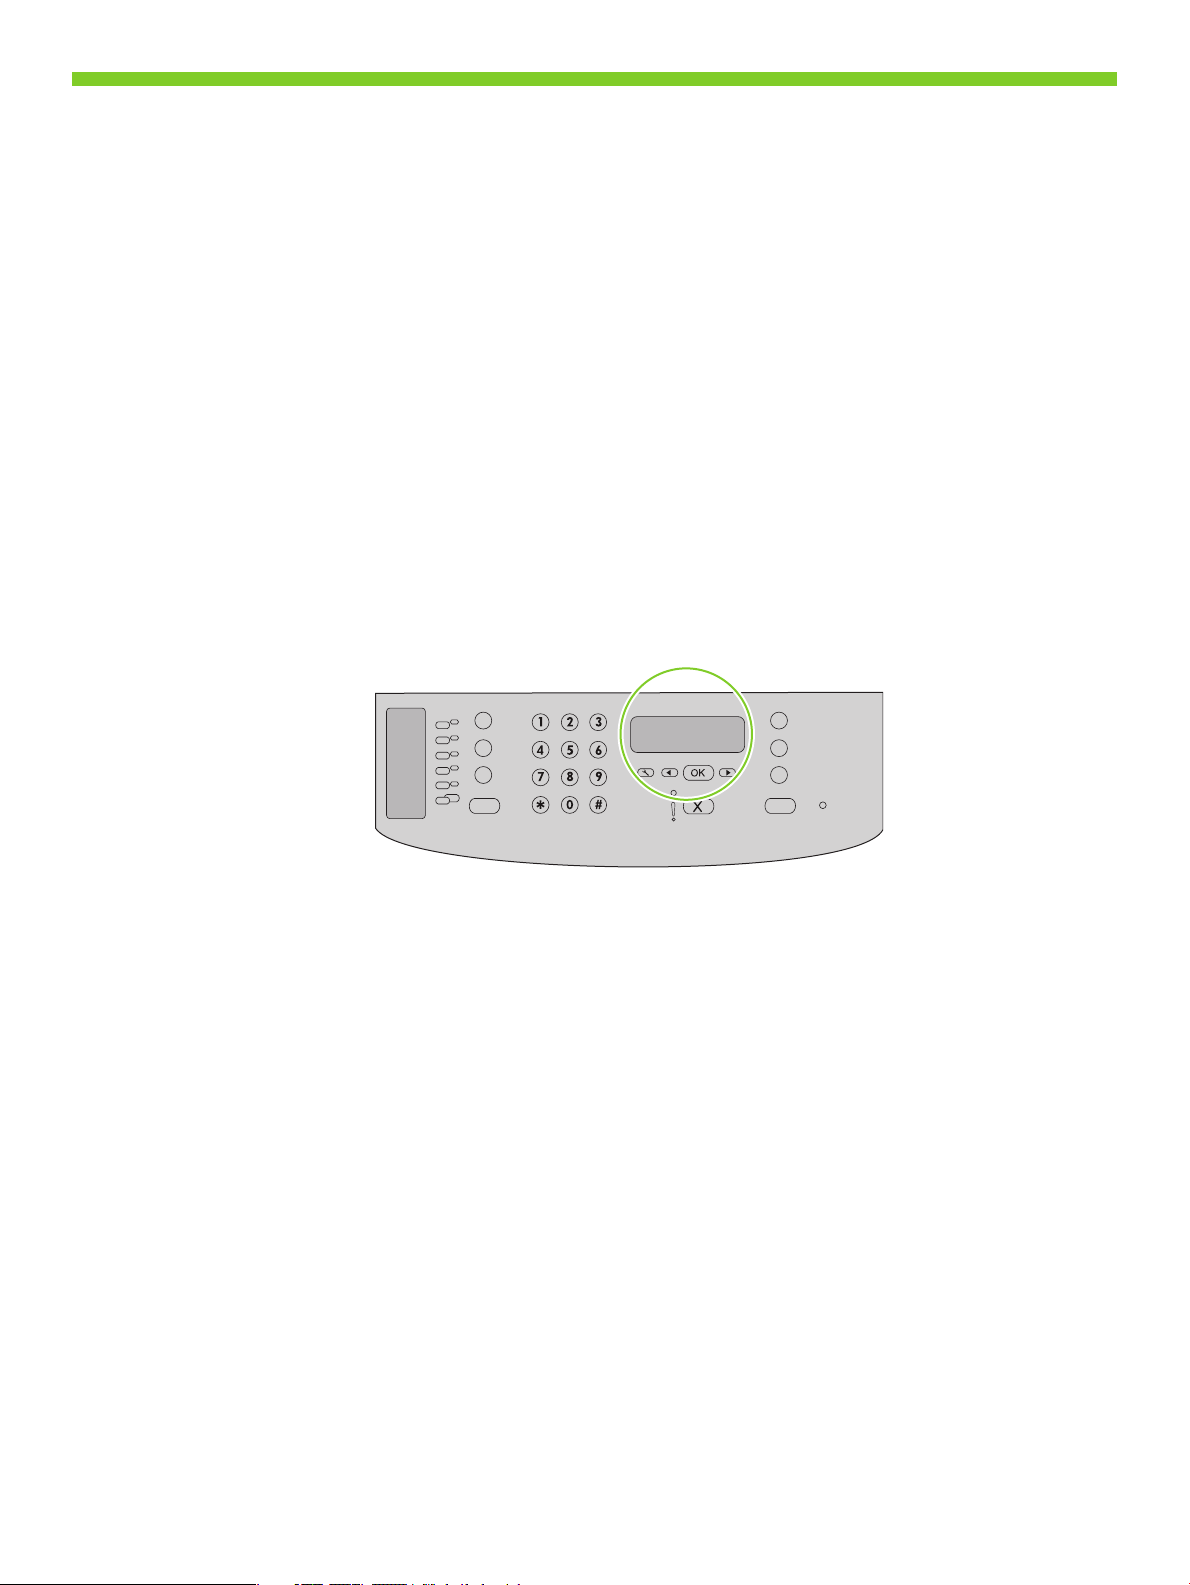
12
Control panel features. Press Setup to view menus. Use the arrows to select the menu options. Press OK to accept
the selection. Press Cancel to return to the ready screen.
Fonctions du panneau de commande. Appuyez sur Congurer pour afcher les menus. Utilisez les èches pour
sélectionner les options de menu. Appuyez sur OK pour accepter la sélection. Appuyez sur Annuler pour revenir à
l'écran Prêt.
Kontrolpanelfunktioner. Tryk på Opsætning for at få vist menuer. Brug pilene til at vælge menupunkter. Tryk på
OK for at godkende dit valg. Tryk på Annuller for at vende tilbage til klar-skærmbilledet.
Ohjauspaneelin toiminnot Voit avata valikkoja painamalla Asetukset-painiketta. Voit valita valikkokohtia nuolilla.
Voit hyväksyä valinnan painamalla OK-painiketta. Voit palata valmiusnäyttöön painamalla Peruuta-painiketta.
Kontrollpanelfunksjoner. Trykk på Oppsett for å vise menyer. Bruk pilene til å velge menyalternativer. Trykk på OK
for å godta et valg. Trykk på Avbryt for å gå tilbake til Klar-skjermbildet.
Funktioner på kontrollpanelen Tryck på Inställningar så visas menyerna. Använd pilknapparna för att välja
menyalternativ. Tryck på OK så bekräftas valet. Tryck på Avbryt om du vill återgå till ursprungsskärmen.
12
Page 15
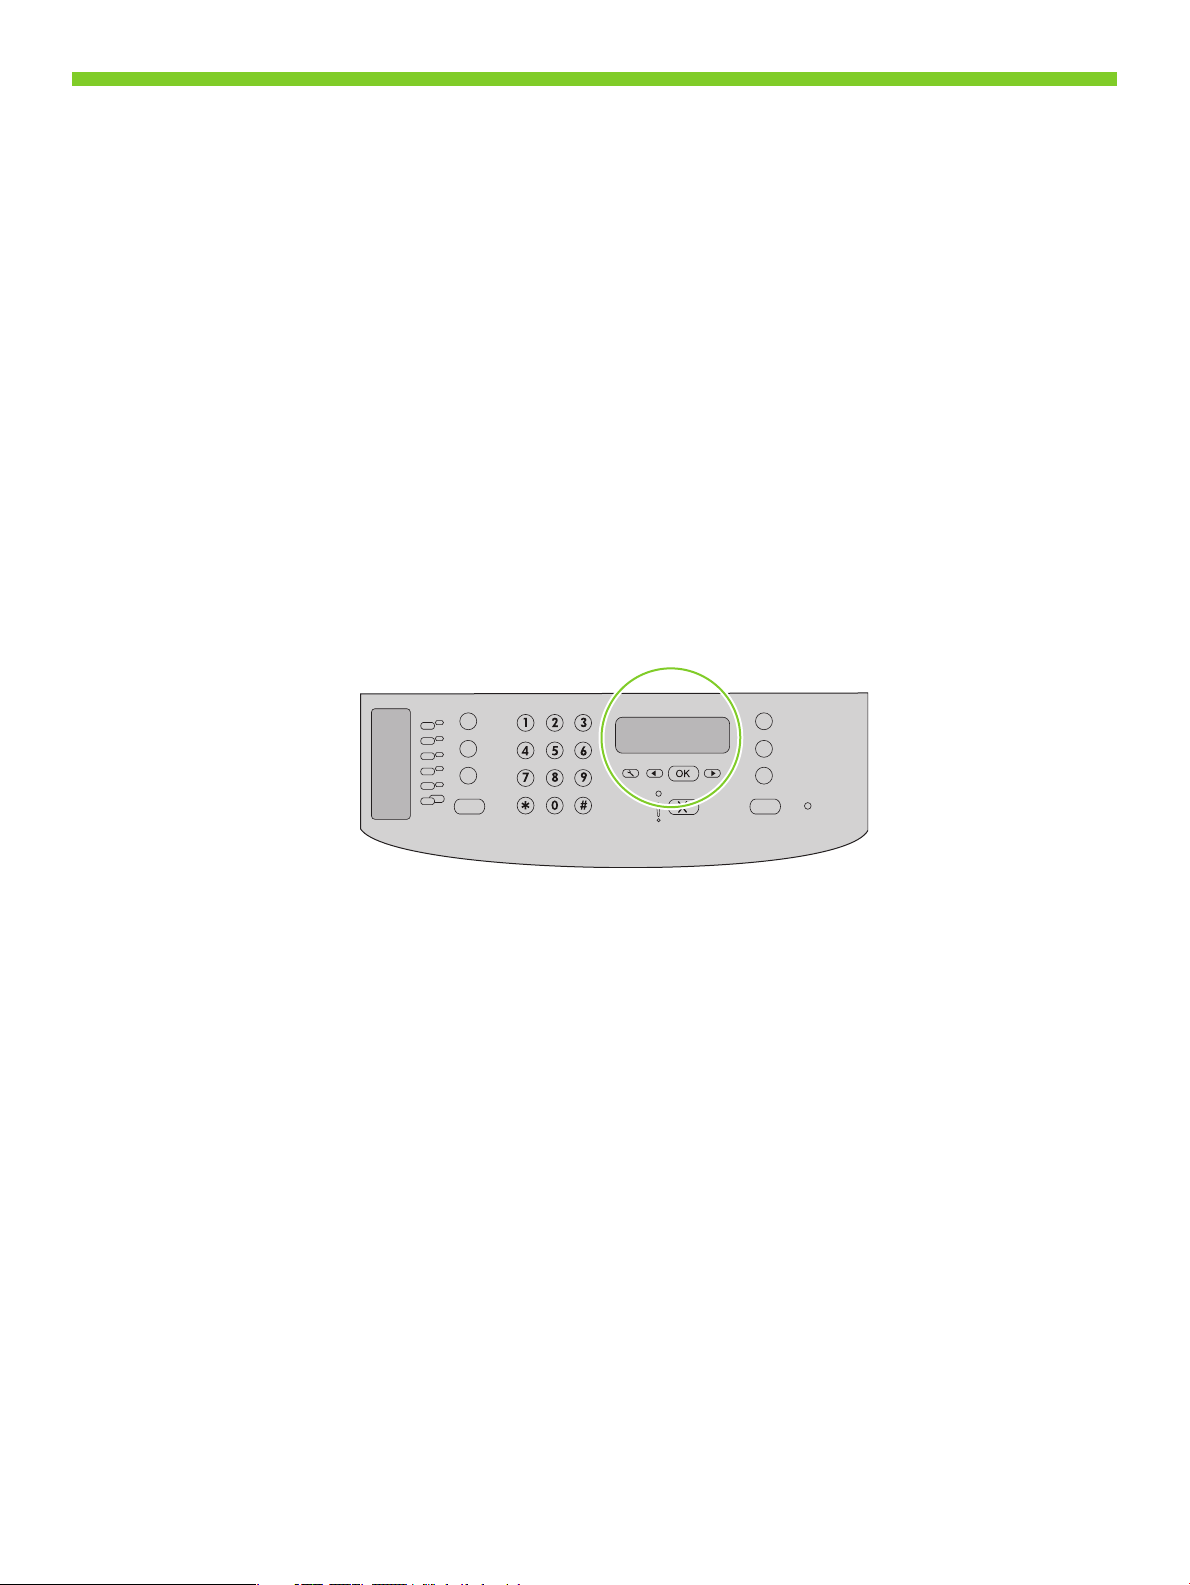
13
Set default language and location. Follow the instructions on the control panel. The product automatically restarts
after you select the location.
Réglage de la langue et du pays/de la région par défaut. Suivez les instructions qui s'afchent sur le panneau de
commande. Le produit redémarre automatiquement une fois que vous avez sélectionné le pays/la région.
Angiv standardsprog og placering. Følg vejledningen på kontrolpanelet. Produktet genstartes automatisk, når du
har valgt placering.
Määritä oletuskieli ja -sijainti. Noudata ohjauspaneelin ohjeita. Laite käynnistyy automaattisesti uudelleen sijainnin
valitsemisen jälkeen.
Angi standardspråket og stedet. Følg instruksjonene på kontrollpanelet. Produktet startes automatisk på nytt etter at
du har valgt stedet.
Ange standardspråk och plats. Följ anvisningarna på kontrollpanelen. Produkten startas om automatiskt när du har
valt plats.
13
Page 16
1
Install the software.
Installation du logiciel.
Installation af softwaren.
Asenna ohjelmisto.
Installer programvaren.
Installera programvaran.
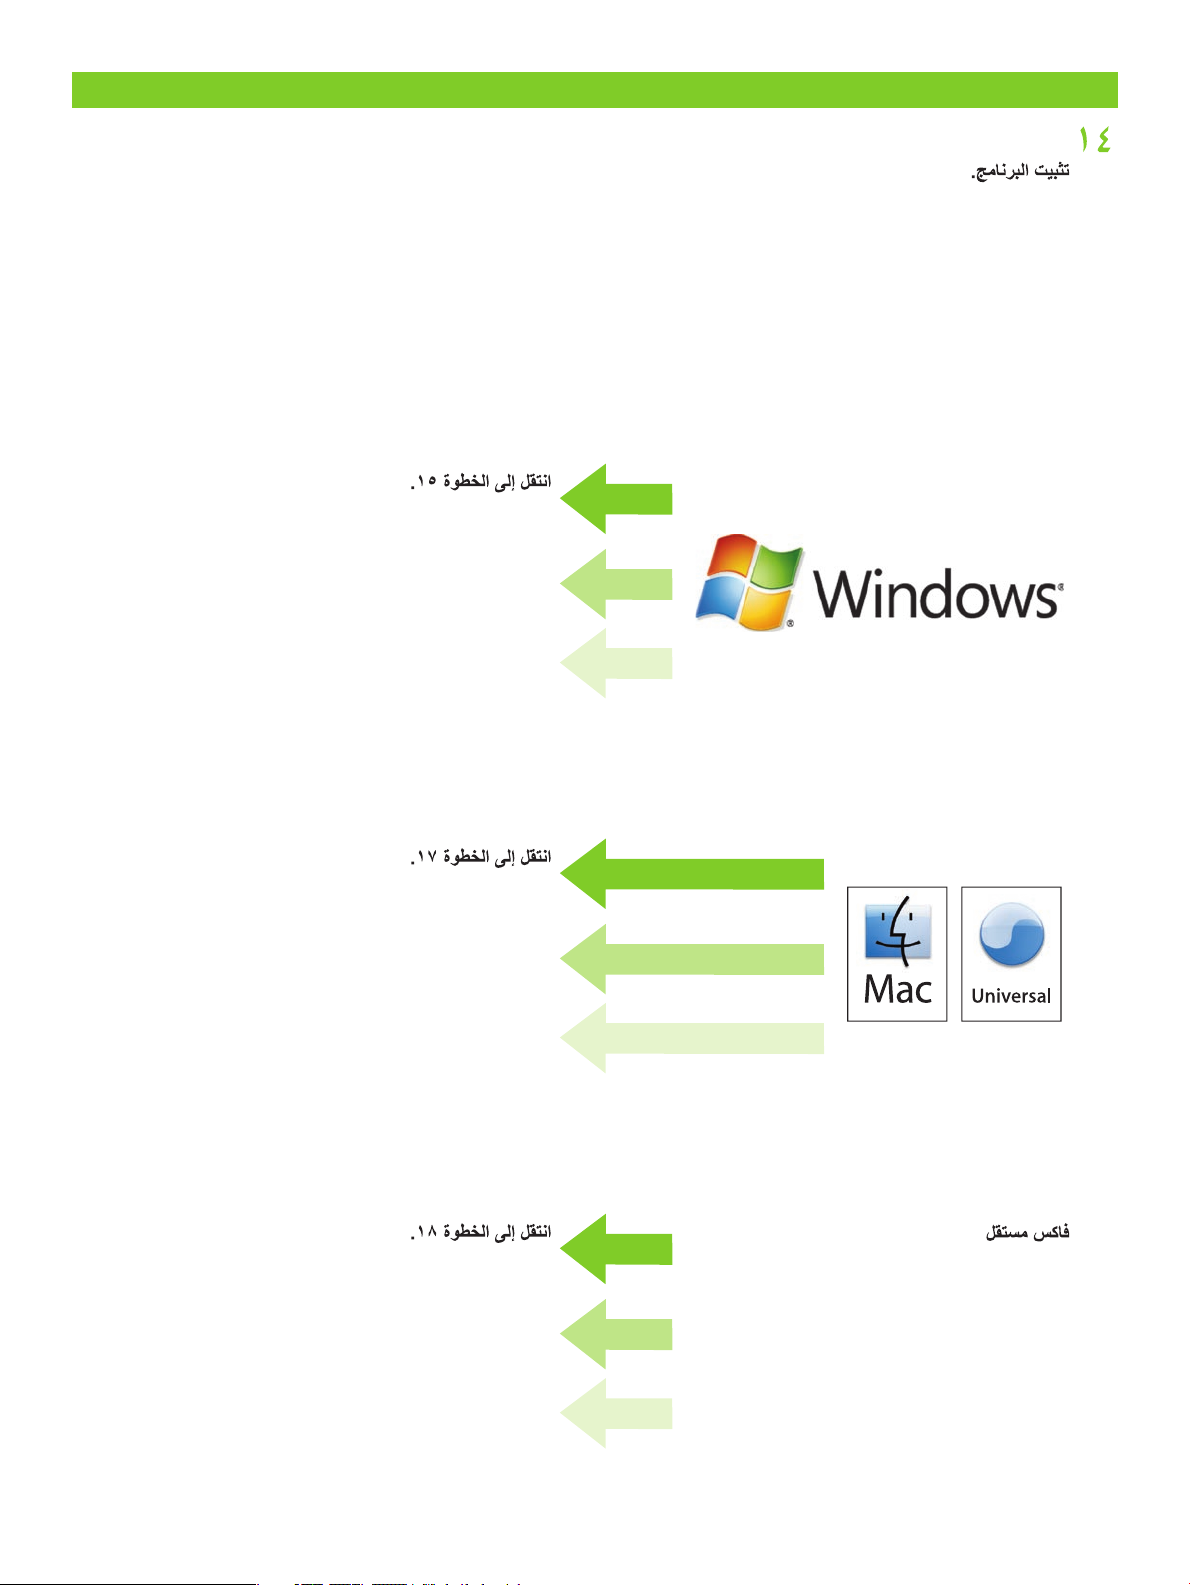
Go to step 15.
Passez à l'étape 15.
Gå til trin 15.
Siirry vaiheeseen 15.
Gå til trinn 15.
Gå till steg 15.
Go to step 17.
Passez à l'étape 17.
Gå til trin 17.
Siirry vaiheeseen 17.
Gå til trinn 17.
Gå till steg 17.
Standalone fax
Télécopieur autonome
Selvstændig fax
Itsenäisfaksaus
Frittstående faks Gå til trinn 18.
Fristående fax
Go to step 18.
Passez à l'étape 18.
Gå til trin 18.
Siirry vaiheeseen 18.
Gå till steg 18.
1
Page 17

15
HP
La
serJet M1
31
9
Se
ri
es
H
P
La
se
rJet
M
1
3
1
9
Se
ri
e
s
Insert the CD and follow the instructions onscreen to install the software.
• If the installation program does not start, click Start, click Run, click Browse, select the Setup.exe le on the CD,
and then click OK.
Insérez le CD et suivez les instructions à l'écran pour installer le logiciel.
• Si le programme d'installation ne démarre pas, cliquez sur Démarrer, Exécuter, cliquez sur Parcourir,
sélectionnez le chier Setup.exe sur le CD, puis cliquez sur OK.
Sæt cd'en i, og følg vejledningen på skærmen for at installere softwaren.
• Hvis installationsprogrammet ikke starter, skal du klikke på Start, klikke på Kør, klikke på Gennemse, vælge len
Setup.exe på cd'en og derefter klikke på OK.
Aseta CD-levy CD-asemaan ja asenna ohjelmisto näytön ohjeiden mukaan.
• Jos asennusohjelma ei käynnisty, valitse Käynnistä, Suorita, Selaa, valitse CD-levyltä Setup.exe ja valitse sen
jälkeen OK.
Sett inn CDen, og følg instruksjonene på skjermen for å installere programvaren.
• Hvis installasjonsprogrammet ikke starter automatisk, klikker du på Start, Kjør og Bla gjennom og velger len
Setup.exe på CDen. Klikk deretter på OK.
Sätt i cd-skivan och installera programvaran genom att följa anvisningarna på skärmen.
• Om installationsprogrammet inte startar klickar du på Start och Kör. Klicka sedan på Bläddra, sök upp
installationslen Setup.exe på cd-skivan och klicka på OK.
Select cancel for all Microsoft Windows New Hardware Found messages.
Cliquez sur Annuler sur tous les messages Nouveau matériel détecté de Microsoft Windows.
Vælg Annuller i alle meddelelser af typen Der er fundet ny hardware i Microsoft Windows.
Valitse kaikissa Windowsin Uusi laite löydetty -ikkunoissa Peruuta.
Velg avbryt for alle Microsoft Windows-meldinger av typen Ny maskinvare funnet.
Välj avbryt för alla Microsoft Windows-meddelanden Hittade ny maskinvara.
15
Page 18

16
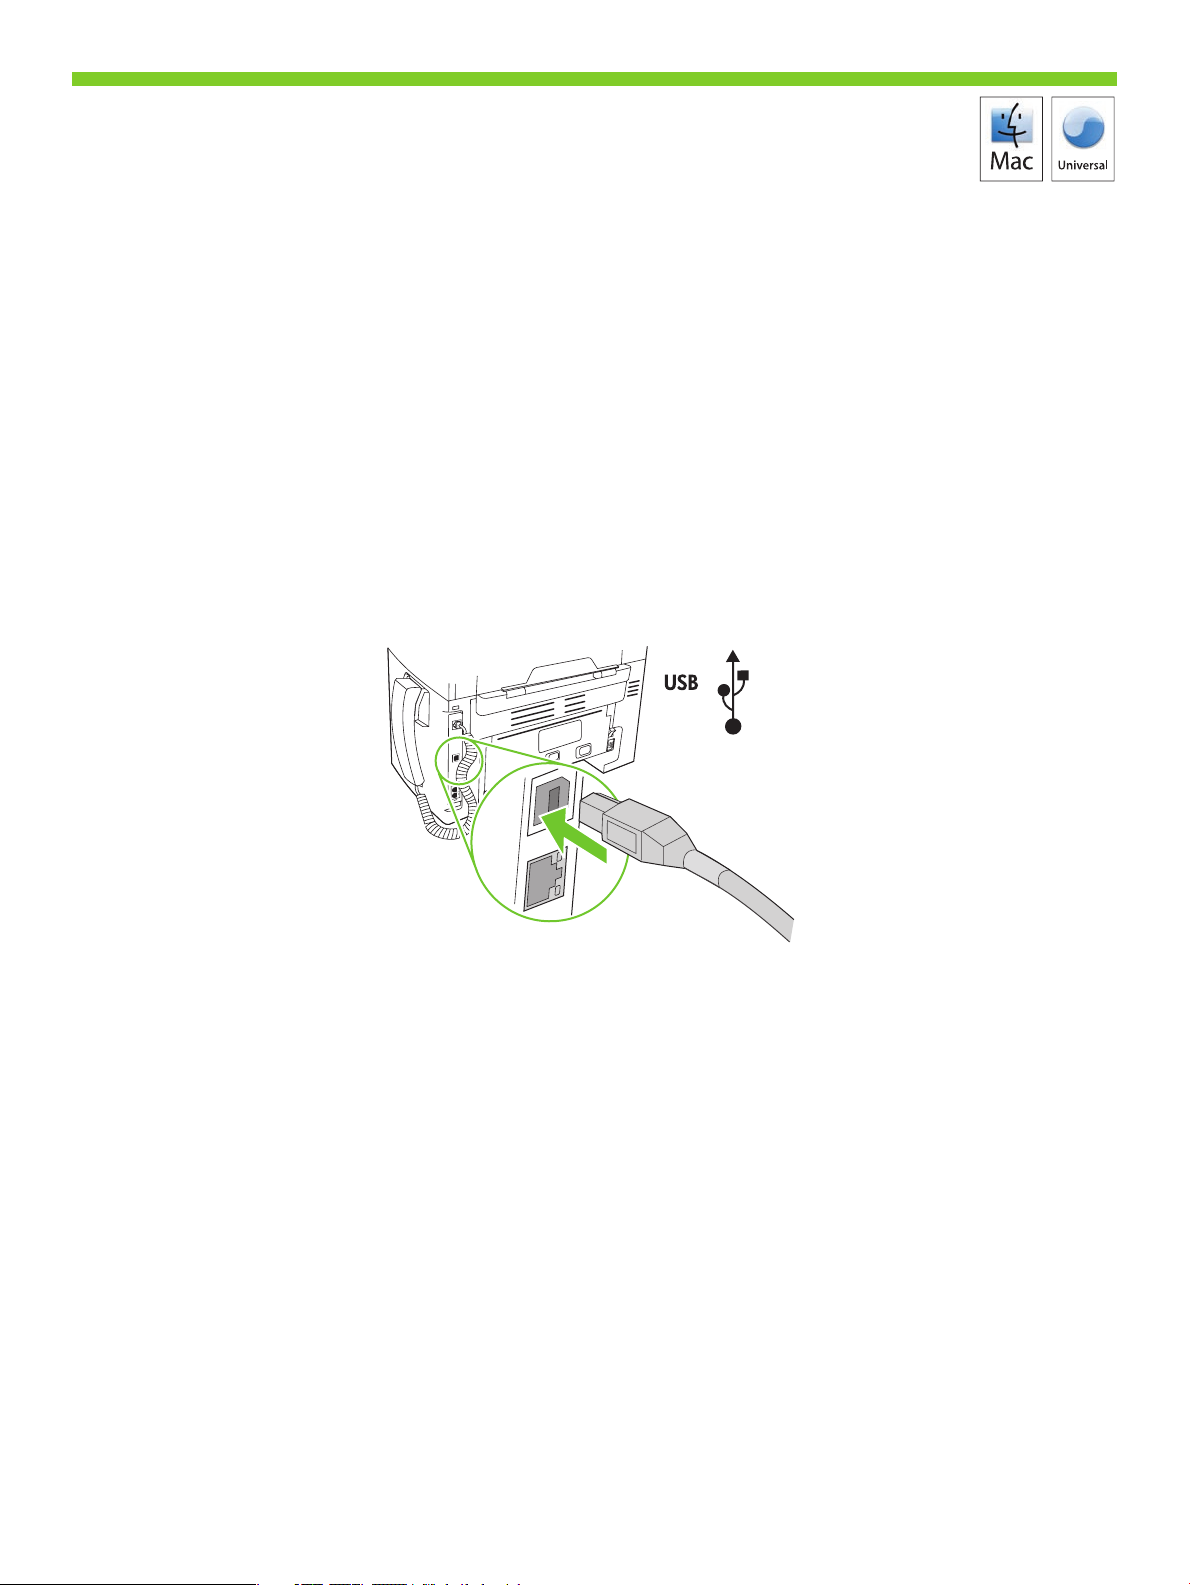
Connect the USB cable when prompted by the software.
Connectez le câble USB lorsque le logiciel vous y invite.
Tilslut USB-kablet, når du bliver bedt om det.
Liitä USB-kaapeli, kun ohjelma kehottaa siihen.
Koble til USB-kabelen når du blir bedt om det av programvaren.
Anslut USB-kabeln när du uppmanas att göra det.
16
Page 19
17
For Macintosh, connect the USB cable. Insert the CD and double-click the installer icon.
Follow the instructions onscreen to install the software.
Sous Macintosh, connectez le câble USB. Insérez le CD et double-cliquez sur l'icône d'installation.
Suivez les instructions à l'écran pour installer le logiciel.
Macintosh: Tilslut USB-kablet. Sæt cd'en i, og dobbeltklik på installationsikonet.
Følg vejledningen på skærmen for at installere softwaren.
Liitä Macintoshissa USB-kaapeli. Aseta CD-levy CD-asemaan ja kaksoisnapsauta asennussymbolia.
Asenna ohjelmisto noudattamalla näytön ohjeita.
Koble til USB-kabelen for Macintosh. Sett inn CDen, og dobbeltklikk på ikonet for installasjonsprogrammet.
Følg instruksjonene på skjermen for å installere programvaren.
För Macintosh ansluter du USB-kabeln. Sätt i cd-skivan och dubbelklicka på installeraren.
Följ anvisningarna på skärmen för att installera programvaran.
When nished with this step, go to step 29.
Une fois cette étape terminée, passez à l'étape 29.
Når du er færdig med dette trin, skal du gå til trin 29.
Kun tämä vaihe on valmis, siirry vaiheeseen 29.
Når du er ferdig med dette trinnet, går du til trinn 29.
När du är klar med det här steget går du till steg 29.
17
Page 20

18
Set up the fax. If you did not complete a recommended install, set time, date and fax header.
Conguration du télécopieur. Si vous n'avez pas effectué l'installation recommandée, réglez l'heure, la date et l'en-
tête de télécopie.
Opsætning af faxen. Hvis du ikke gennemførte en anbefalet installation, skal du indstille klokkeslæt, dato og faxhoved.
Asenna faksi. Jos et tehnyt suositeltua asennusta, määritä aika, päiväys ja faksin otsikko.
Kongurer faksen. Hvis du ikke fullførte en anbefalt installering, angir du dato, klokkeslett og fakstopptekst.
Ställ in faxen. Om du inte slutförde en rekommenderad installation anger du tid, datum och faxrubrik.
19
At the control panel, press Setup.
Depuis le panneau de commande, appuyez sur Congurer.
Tryk på Opsætning på kontrolpanelet.
Paina ohjauspaneelissa Asetukset-painiketta.
Trykk på Oppsett på kontrollpanelet.
På kontrollpanelen trycker du på Inställningar.
18
Page 21

20
Use the arrow buttons to select System setup, and then press OK.
Sélectionnez Congur. système à l'aide des èches, puis appuyez sur OK.
Brug pileknapperne til at vælge Systemopsætning, og tryk derefter på OK.
Valitse nuolipainikkeilla Järjestelmän asetukset ja paina sitten OK-painiketta.
Bruk piltastene til å velge Systemoppsett, og trykk deretter på OK.
Använd pilknapparna för att välja Systeminställningar och tryck sedan på OK.
21
Use the arrow buttons to select Time/Date, and then press OK.
Sélectionnez Heure/date à l'aide des èches, puis appuyez sur OK.
Brug pileknapperne til at vælge Klokkeslæt/dato, og tryk derefter på OK.
Valitse nuolipainikkeilla Aika/pvm ja paina sitten OK-painiketta.
Bruk piltastene til å velge Tid/dato, og trykk deretter på OK.
Använd pilknapparna för att välja Tid/datum och tryck sedan på OK.
19
Page 22

22
Use the arrow buttons to select the 12-hour clock or the 2-hour clock, and then press OK.
Sélectionnez le format horaire 12 ou 2 heures à l'aide des èches, puis appuyez sur OK.
Brug pileknapperne til at vælge 12-timers format eller 2-timers format, og tryk derefter på OK.
Määritä 12- tai 2-tuntinen kello nuolipainikkeilla ja paina sitten OK-painiketta.
Bruk piltastene til å velge 12- eller 2-timers-klokken, og trykk deretter på OK.
Använd pilknapparna för att välja 12- eller 2-timmarsklocka och tryck sedan på OK.
23
Use the alphanumeric buttons to enter the current time.
Entrez l'heure à l'aide des touches alphanumériques.
Brug de alfanumeriske knapper til at indtaste det aktuelle klokkeslæt.
Anna nykyinen kellonaika kirjain- ja numeronäppäimillä.
Bruk de alfanumeriske tastene til å angi gjeldende klokkeslett.
Använd sifferknapparna för att ange aktuell tid.
20
Page 23

2
Complete one of the following:
• For the 12-hour clock, use the arrow buttons to move past the fourth character. Select 1 for a.m. or 2 for p.m.
Press OK.
• For the 2-hour clock, press OK.
Procédez de l'une des manières suivantes :
• Pour l'horloge sur 12 heures, appuyez sur les èches pour vous déplacer au-delà du quatrième caractère.
Sélectionnez 1 pour le matin (a.m.) ou 2 pour l'après-midi (p.m.) Appuyez sur OK.
• Pour l'horloge sur 2 heures, appuyez sur OK.
Gør ét af følgende:
• Hvis du vil bruge 12-timers formatet, skal du bruge pileknapperne til at hoppe forbi det fjerde tegn. Vælg 1 for
a.m. eller 2 for p.m. Tryk på OK.
• Hvis du vil bruge 2-timers formatet, skal du trykke på OK.
Toimi jommallakummalla seuraavista tavoista:
• Jos määrität 12-tuntisen kellon, siirry neljännen merkin ohi nuolipainikkeella. Valitse ajaksi 1 (ennen
puoltapäivää) tai 2 (puolenpäivän jälkeen). Paina OK-painiketta.
• Jos määrität 2-tuntisen kellon, paina OK-painiketta.
Gjør ett av følgende:
• For 12-timers-klokken bruker du piltastene til å gå forbi det fjerde tegnet. Velg 1 for a.m. eller 2 for p.m.
Trykk på OK.
• For 2-timers-klokken trykker du på OK.
Gör något av följande:
• För 12-timmarsklocka använder du pilknapparna för att ytta förbi det fjärde tecknet. Välj 1 för förmiddag eller 2
för eftermiddag. Tryck på OK.
• För 2-timmarsklocka trycker du på OK.
25
Use the arrow buttons to select the date format. Press OK.
Sélectionnez le format de date à l'aide des èches. Appuyez sur OK.
Brug pileknapperne til at vælge datoformatet. Tryk på OK.
Valitse päivämäärän muoto nuolinäppäimillä. Valitse OK.
Bruk piltastene til å velge datoformatet. Trykk på OK.
Använd pilknapparna för att välja datumformat. Tryck på OK.
21
Page 24

26
Use the alphanumeric buttons to enter the current date. Use two digits to specify the month, day, and year.
Press OK.
Utilisez les touches alphanumériques pour saisir la date actuelle. Utilisez deux chiffres pour indiquer le mois, le
jour et l'année.
Appuyez sur OK.
Brug de alfanumeriske knapper til at indtaste den aktuelle dato. Brug to cifre til at angive måneden, dagen og året.
Tryk på OK.
Anna nykyinen päivämäärä kirjain- ja numeronäppäimillä. Määritä kuukausi, päivä ja vuosi kaksinumeroisilla luvuilla.
Valitse OK.
Bruk de alfanumeriske tastene til å angi gjeldende dato. Bruk to sifre til å angi måned, dag og år.
Trykk på OK.
Använd sifferknapparna för att ange aktuellt datum. Använd två siffror för att ange månad, dag och år.
Tryck på OK.
22
Page 25

27
Use the arrow buttons to select Fax setup, and then press OK.
Sélectionnez Cong. télécop. à l'aide des èches, puis appuyez sur OK.
Brug pileknapperne til at vælge Faxopsætning, og tryk derefter på OK.
Valitse nuolipainikkeilla Faksin asetukset ja paina sitten OK-painiketta.
Bruk piltastene til å velge Faksoppsett, og trykk deretter på OK.
Använd pilknapparna för att välja Faxinställningar och tryck sedan på OK.
28
Use the arrow buttons to select Fax Header, and then press OK.
Sélectionnez En-tête télécop à l'aide des èches, puis appuyez sur OK.
Brug pileknapperne til at vælge Faxhoved, og tryk derefter på OK.
Valitse nuolipainikkeilla Faksin otsikko ja paina sitten OK-painiketta.
Bruk piltastene til å velge Fakstopptekst, og trykk deretter på OK.
Använd pilknapparna för att välja Faxrubrik och tryck sedan på OK.
23
Page 26

29
Use the alphanumeric buttons to enter the fax number and a company name or header. Press OK.
Utilisez les touches alphanumériques pour saisir le numéro de télécopie et un nom de société ou un intitulé.
Appuyez sur OK.
Brug de alfanumeriske knapper til at indtaste faxnummeret og et rmanavn eller hoved. Tryk på OK.
Kirjoita faksinumero ja yrityksen nimi tai otsikko numero- ja kirjainnäppäimillä. Valitse OK.
Bruk de alfanumeriske tastene til å angi faksnummeret og et rmanavn eller en topptekst. Trykk på OK.
Använd sifferknapparna för att ange faxnummer och ett företagsnamn eller en rubrik. Tryck på OK.
NOTE: The maximum number of characters for the fax number is 20; use up to 25 characters for the
company name.
REMARQUE : Le nombre maximum de caractères pour le numéro de fax est de 20 ; vous pouvez utiliser jusqu'à
25 caractères pour le nom de la société.
BEMÆRK! Det maksimale antal tegn til faxnummeret er 20. Du kan bruge op til 25 tegn til rmanavnet.
HUOMAUTUS: Faksinumeron enimmäismerkkimäärä on 20 ja yrityksen nimen 25 merkkiä.
MERK: Det maksimale antallet tegn for faksnummeret er 20. Bruk opptil 25 tegn for rmanavnet.
Obs! Faxnumret får innehålla högst 20 tecken. Företagets namn får innehålla högst 25 tecken.
2
Page 27
30
M1319 MFPSeries
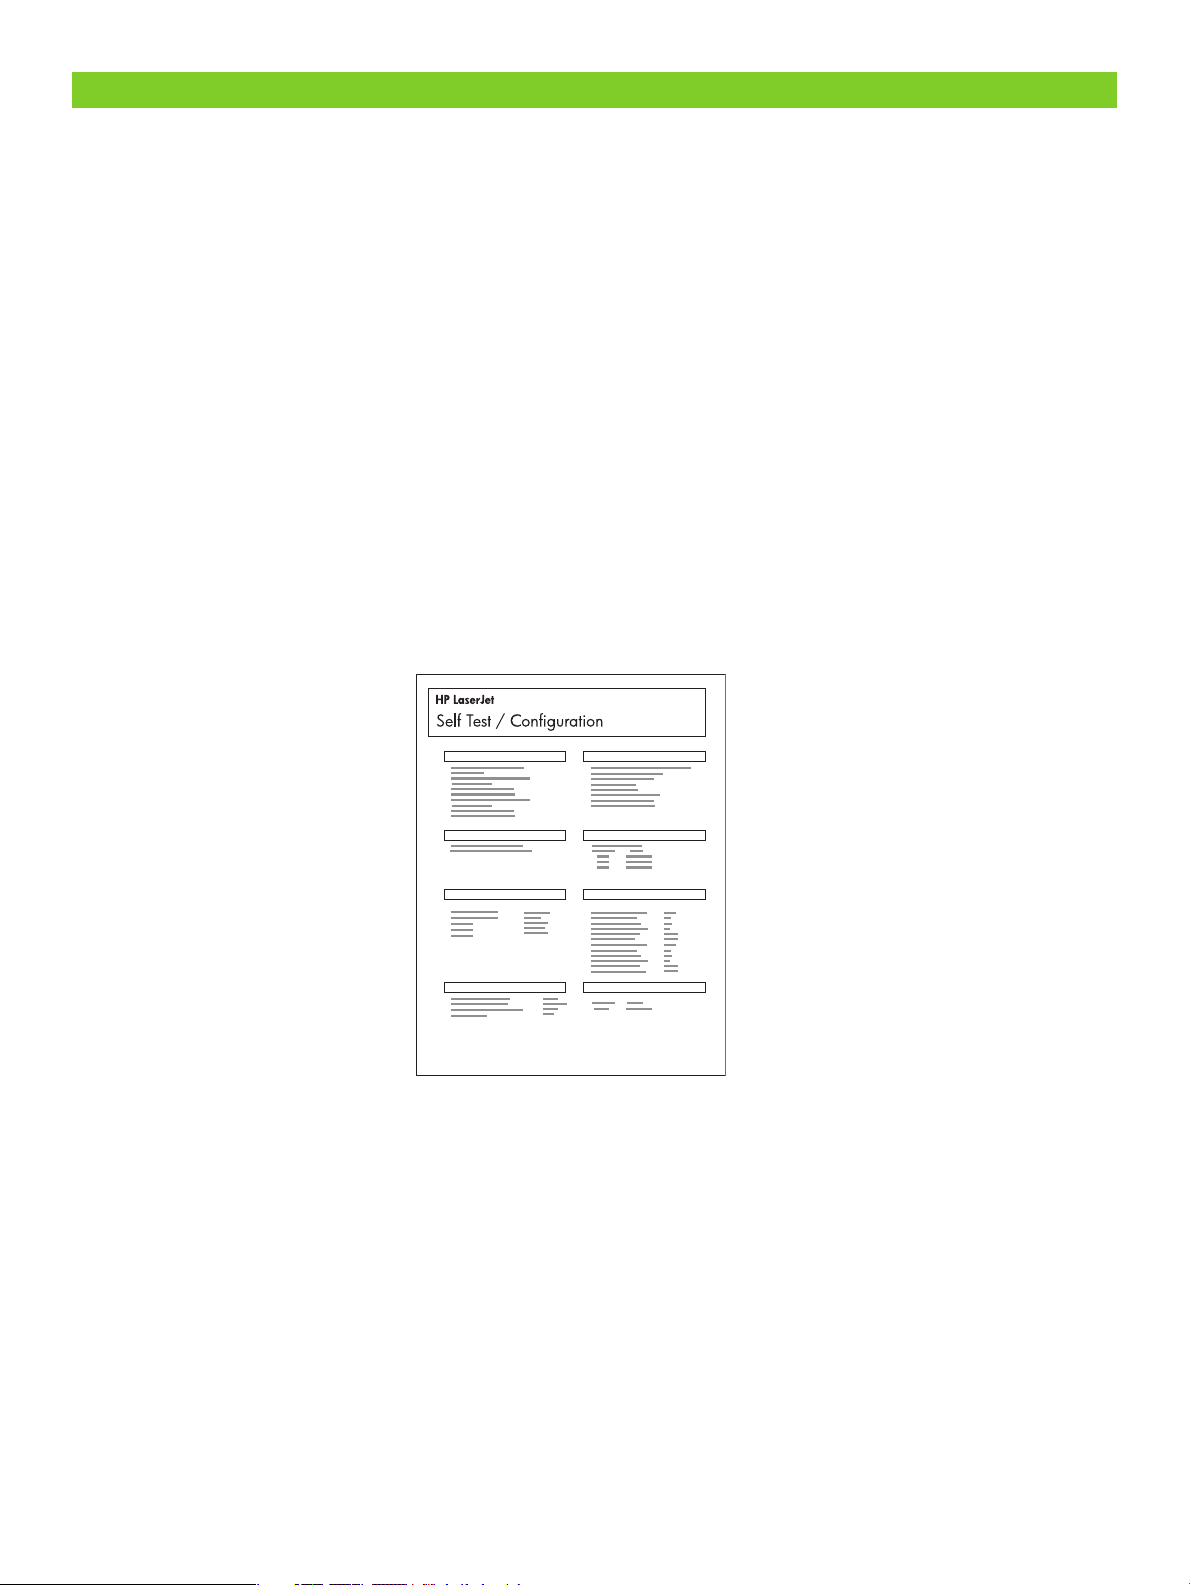
Test the product. From the control panel, press Setup, use the arrow buttons to select Reports, select Cong report,
and then press OK.
Test du produit. Depuis le panneau de commande, appuyez sur Congurer, utilisez les èches pour sélectionner
Rapports, puis Rapport cong. et appuyez sur OK.
Test produktet. Tryk på Opsætning på kontrolpanelet, brug pileknapperne til at vælge Rapporter, vælg Kong.
rapport, og tryk derefter på OK.
Testaa laite. Paina ohjauspaneelin Asetukset-painiketta, valitse nuolipainikkeilla Raportit, valitse Määritysraportti ja
paina OK-painiketta.
Test produktet. Velg Oppsett fra kontrollpanelet, og bruk piltastene til å velge Rapporter og Kong.rapport. Trykk
deretter på OK.
Testa produkten. På kontrollpanelen trycker du på Inställningar, använder pilknapparna för att välja Rapporter,
väljer Kong. rapport och trycker sedan på OK.
25
Page 28
31
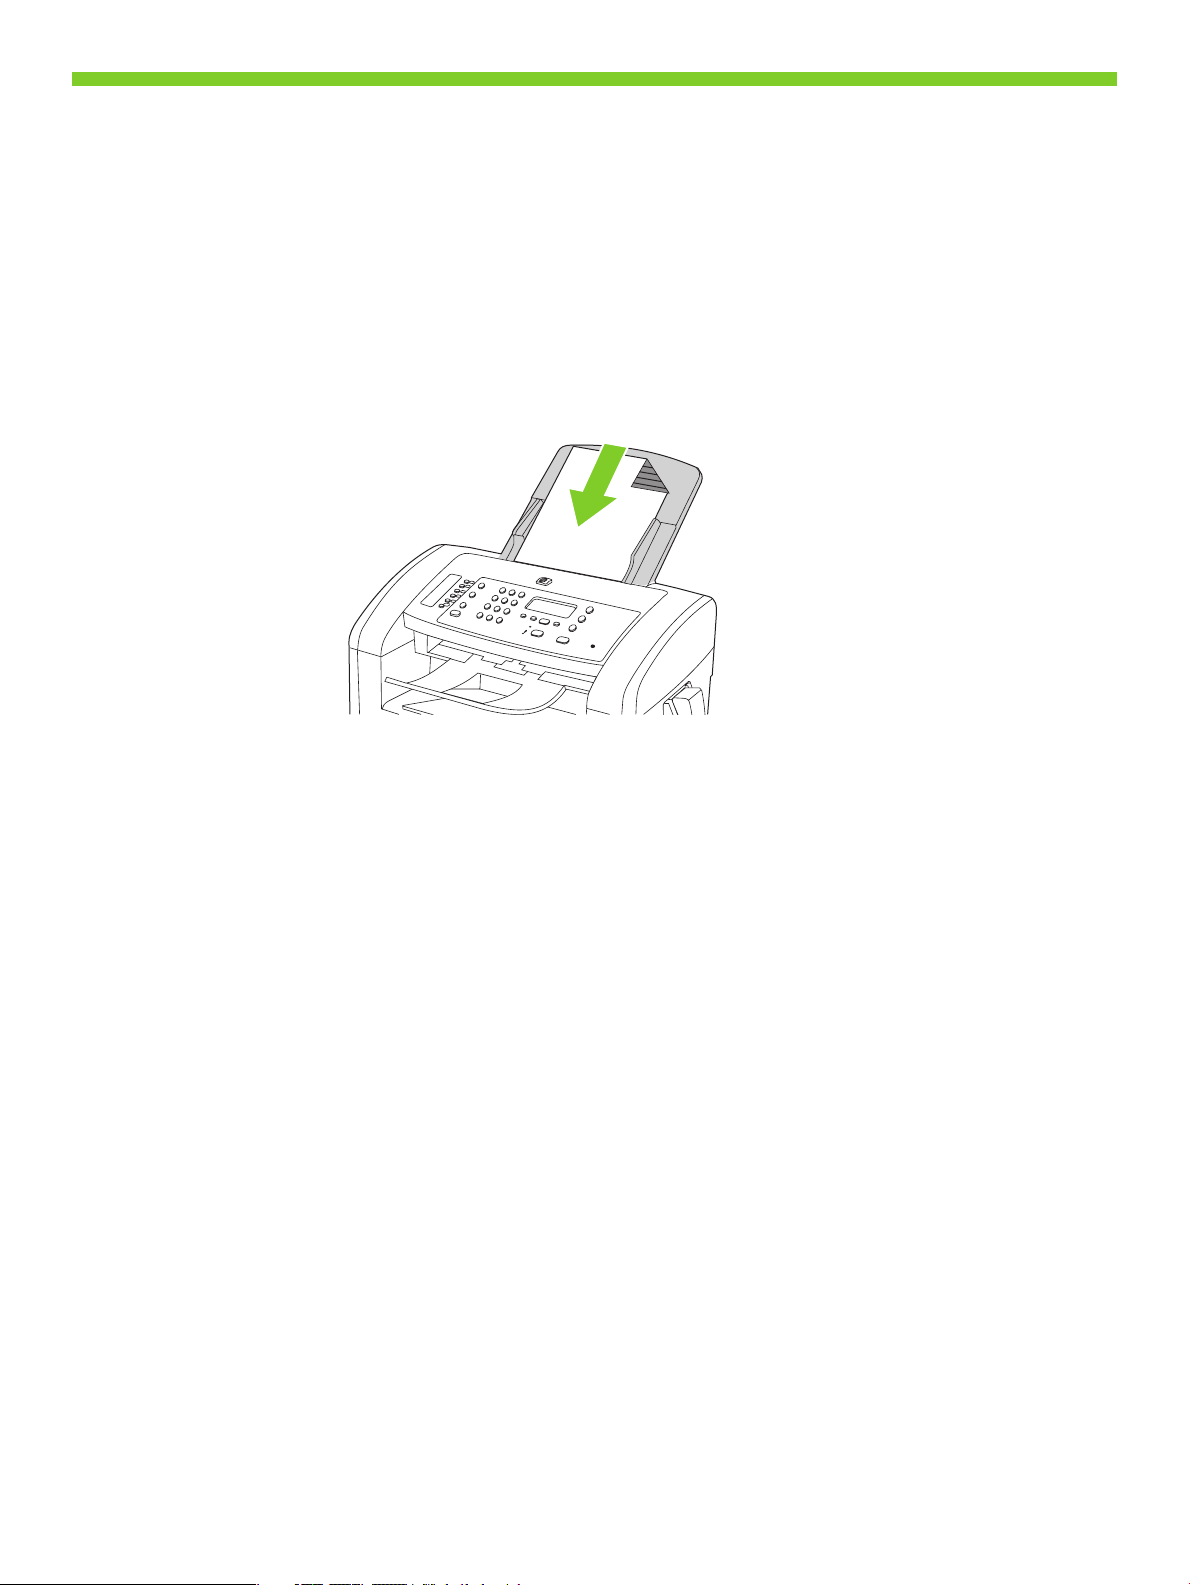
Test the ADF. Load the conguration report in the ADF, and then press Start Copy.
Test du BAA. Chargez le rapport de conguration dans le BAA, puis appuyez sur Lancer copie.
Test den automatiske dokumentføder (ADF). Læg kongurationsrapporten i ADF'en, og tryk derefter på Start kopiering.
Testaa asiakirjansyöttölaite. Aseta määritysraportti asiakirjansyöttölaitteeseen ja paina Kopioi-painiketta.
Test ADMen. Legg kongurasjonsrapporten i ADMen, og trykk på Start kopi.
Testa den automatiska dokumentmataren. Placera kongurationsrapporten i den automatiska dokumentmataren och
tryck sedan på Starta kopiering.
26
Page 29

Receive a fax when the handset rings. 1. Answer the phone. 2. If you hear fax tones, wait for the product to pick up
the fax. 3. After the line becomes silent, hang up the handset.
Réception d'une télécopie lorsque le combiné sonne. 1. Répondez au téléphone. 2. Si vous entendez la tonalité de
télécopie, attendez que le produit récupère la télécopie. 3. Lorsque la ligne devient silencieuse, raccrochez le combiné.
Modtag en fax, når håndsættet ringer. 1. Tag telefonen. 2. Hvis du hører faxtoner, skal du vente, indtil faxen går i
gang. 3. Læg håndsættet på, når linjen bliver stille.
Vastaanota faksi, kun puhelin soi. 1. Vastaa puhelimeen. 2. Jos kuulet faksin valintaääniä, odota, että laite
vastaanottaa faksin. 3. Kun linjalta ei enää kuulu mitään, voit sulkea puhelimen.
Motta en faks når telefonen ringer. 1. Svar på anropet. 2. Hvis du hører fakstoner, venter du til produktet tar imot
faksen. 3. Etter at det har blitt stille på linjen, kan du legge på håndsettet.
Ta emot fax när telefonluren ringer. 1. Svara med telefonen. 2. Om du hör faxsignaler väntar du tills enheten tar
emot faxet. 3. När telefonlinjen tystnar lägger du på telefonluren.
Dial Manually using the handset. 1. Load the document into the ADF. 2. Call the recipient.
3. When the recipient is ready, press Start Fax on the product control panel.
Numérotation manuelle à l'aide du combiné. 1. Chargez le document dans le BAA. 2. Composez le numéro du
destinataire. 3. Lorsque le destinataire est prêt, appuyez sur Démarrer télécopie sur le panneau de commande du produit.
Ring op manuelt vha. håndsættet. 1. Læg dokumentet i ADF'en. 2. Ring til modtageren.
3. Tryk på Start fax på produktets kontrolpanel, når modtageren er klar.
Lähettäminen manuaalisesti puhelimella. 1. Aseta dokumentti asiakirjansyöttölaitteeseen. 2. Soita vastaanottajalle.
3. Kun vastaanottaja on valmis, paina Käynnistä faksi -painiketta ohjauspaneelissa.
Slå nummeret manuelt fra håndsettet. 1. Legg dokumentet i ADMen. 2. Ring mottakeren.
3. Når mottakeren er klar, trykker du på Start faks på produktets kontrollpanel.
Ringa manuellt från telefonluren. 1. Placera dokumentet i dokumentmataren. 2. Ring upp mottagaren.
3. När mottagaren är klar trycker du på Starta fax på apparatens kontrollpanel.
27
Page 30

Product Documentation The electronic User Guide is on the CD-ROM that came with the product or is in the HP
program folder on your computer. It contains the following:
• Problem Solve
• Important safety notices and regulatory information
• Detailed user instructions
This information is also available at www.hp.com/support/LJM1319.
Documentation produit Le Guide de l'utilisateur électronique se trouve sur le CD-ROM livré avec le produit ou dans
le dossier de programmes HP sur votre ordinateur. Il contient les éléments suivants :
• Résolution de problèmes
• Notices de sécurité importantes et réglementations
• Instructions d'utilisation détaillées
Ces informations sont également disponibles à l'adresse www.hp.com/support/LJM1319.
Produktdokumentation Den elektroniske brugervejledning ndes på den cd-rom, der fulgte med produktet, eller
også kan du nde den i HP-programmappen på computeren. Den indeholder følgende:
• Problemløsning
• Vigtige sikkerhedsmeddelelser og oplysninger om lovbestemmelser
• Detaljeret brugervejledning
Oplysningerne er også tilgængelige på adressen www.hp.com/support/LJM1319.
Laitteen oppaat Sähköinen käyttöopas on laitteen mukana toimitetulla CD-levyllä tai tietokoneen HPohjelmakansiossa. Se sisältää seuraavat osat:
• Ongelmien ratkaiseminen
• Tärkeitä turvallisuus- ja säädöstietoja
• Yksityiskohtaisia ohjeita
Tiedot ovat saatavissa myös osoitteessa www.hp.com/support/LJM1319.
Dokumentasjon for produktet Den elektroniske brukerhåndboken nnes på CD-ROMen som fulgte med produktet,
eller i HP-programmappen på datamaskinen. Den inneholder følgende:
• problemløsing
• viktig sikkerhetsinformasjon og informasjon om forskrifter
• detaljerte brukerinstruksjoner
Denne informasjonen nner du også på www.hp.com/support/LJM1319.
Produktdokumentation Den elektroniska användarhandboken nns på den cd-skiva som medföljde produkten eller i
HP-programmappen på datorn. Den innehåller följande:
• Problemlösning
• Viktig säkerhetsinformation samt information om bestämmelser
• Detaljerade användarinstruktioner
Den här informationen nns även på www.hp.com/support/LJM1319.
28
Page 31

Page 32

303132
Page 33

Page 34

M1319 MFPSeries
Page 35

333353637
Page 36

Page 37

Page 38

Page 39

Page 40

HP
La
serJet M1
31
9
Se
ri
e
s
H
P
La
se
r
Je
t
M
1
3
1
9
S
e
r
ie
s
38
Page 41
390123567
Page 42

Page 43

Page 44

Page 45
Page 46

Page 47

Page 48

Page 49

Page 50

15˚ - 32.5˚C
(59˚ - 90.5˚F)
10% - 80%
10 kg
22 lb
429 mm (16.9 inches)443 mm (17.3 inches)
459 mm (18.1 inches)
8
Page 51

9
Page 52

© 2008 Hewlett-Packard Development Company, L.P.
www.hp.com
*CB536-91026*
*CB536-91026*
CB536-91026
 Loading...