

Page 1
LASERJET PROFESSIONAL M1130/M1210
MFP SERIES
User Guide Addendum
Wireless Models Only
Page 2

Page 3

HP LaserJet Professional M1130/M1210
MFP series
User Guide Addendum (wireless models only)
Use this addendum in conjunction with the
complete version of the product user guide.
Page 4

Copyright and License
Trademark Credits
© 2011 Copyright Hewlett-Packard
Development Company, L.P.
Reproduction, adaptation, or translation
without prior written permission is
prohibited, except as allowed under the
copyright laws.
The information contained herein is subject
to change without notice.
The only warranties for HP products and
services are set forth in the express warranty
statements accompanying such products and
services. Nothing herein should be
construed as constituting an additional
warranty. HP shall not be liable for technical
or editorial errors or omissions contained
herein.
Part number: CE844-90942
Edition 1, 3/2011
Microsoft®, Windows®, Windows® XP,
and Windows Vista® are U.S. registered
trademarks of Microsoft Corporation.
Page 5

Conventions used in this guide
TIP: Tips provide helpful hints or shortcuts.
NOTE: Notes provide important information to explain a concept or to complete a task.
CAUTION: Cautions indicate procedures that you should follow to avoid losing data or damaging
the product.
WARNING! Warnings alert you to specific procedures that you should follow to avoid personal
injury, catastrophic loss of data, or extensive damage to the product.
ENWW iii
Page 6

iv Conventions used in this guide ENWW
Page 7

Table of contents
1 Product basics .................................................................................................................. 1
Product views .......................................................................................................................... 2
Control-panel layout .................................................................................................. 2
2 Control panel menus ......................................................................................................... 5
Control-panel menus ................................................................................................................. 6
3 Connect the product .......................................................................................................... 7
Network connection ................................................................................................................. 8
Install the product on a wireless network with HP Smart Install ........................................ 8
Install the product on a wireless network with the software CD ........................................ 9
Install the software for a product currently on the network ............................................... 9
Perform a peer-to-peer (ad-hoc) wireless installation ....................................................... 9
Turn off the product wireless unit ............................................................................... 11
Configure the network product .................................................................................. 11
4 Print tasks ...................................................................................................................... 13
Use HP ePrint ......................................................................................................................... 14
Use HP Direct Print .................................................................................................. 14
5 Solve problems ............................................................................................................... 15
Solve connectivity problems ..................................................................................................... 16
Solve wireless problems ........................................................................................... 16
Appendix A Regulatory information .................................................................................. 19
Declaration of Conformity (wireless models) .............................................................................. 20
Additional statements for wireless products ................................................................................ 22
FCC compliance statement-United States .................................................................... 22
Australia statement .................................................................................................. 22
Brazil ANATEL statement .......................................................................................... 22
Canadian statements ............................................................................................... 22
ENWW v
Page 8

European Union regulatory notice ............................................................................. 22
Notice for use in France ........................................................................................... 23
Notice for use in Russia ........................................................................................... 23
Korean statement .................................................................................................... 23
Taiwan statement .................................................................................................... 23
Vietnam Telecom wired marking for ICTQC Type approved products ............................ 24
Index ................................................................................................................................. 25
vi ENWW
Page 9

1 Product basics
Product views
●
ENWW 1
Page 10
Product views
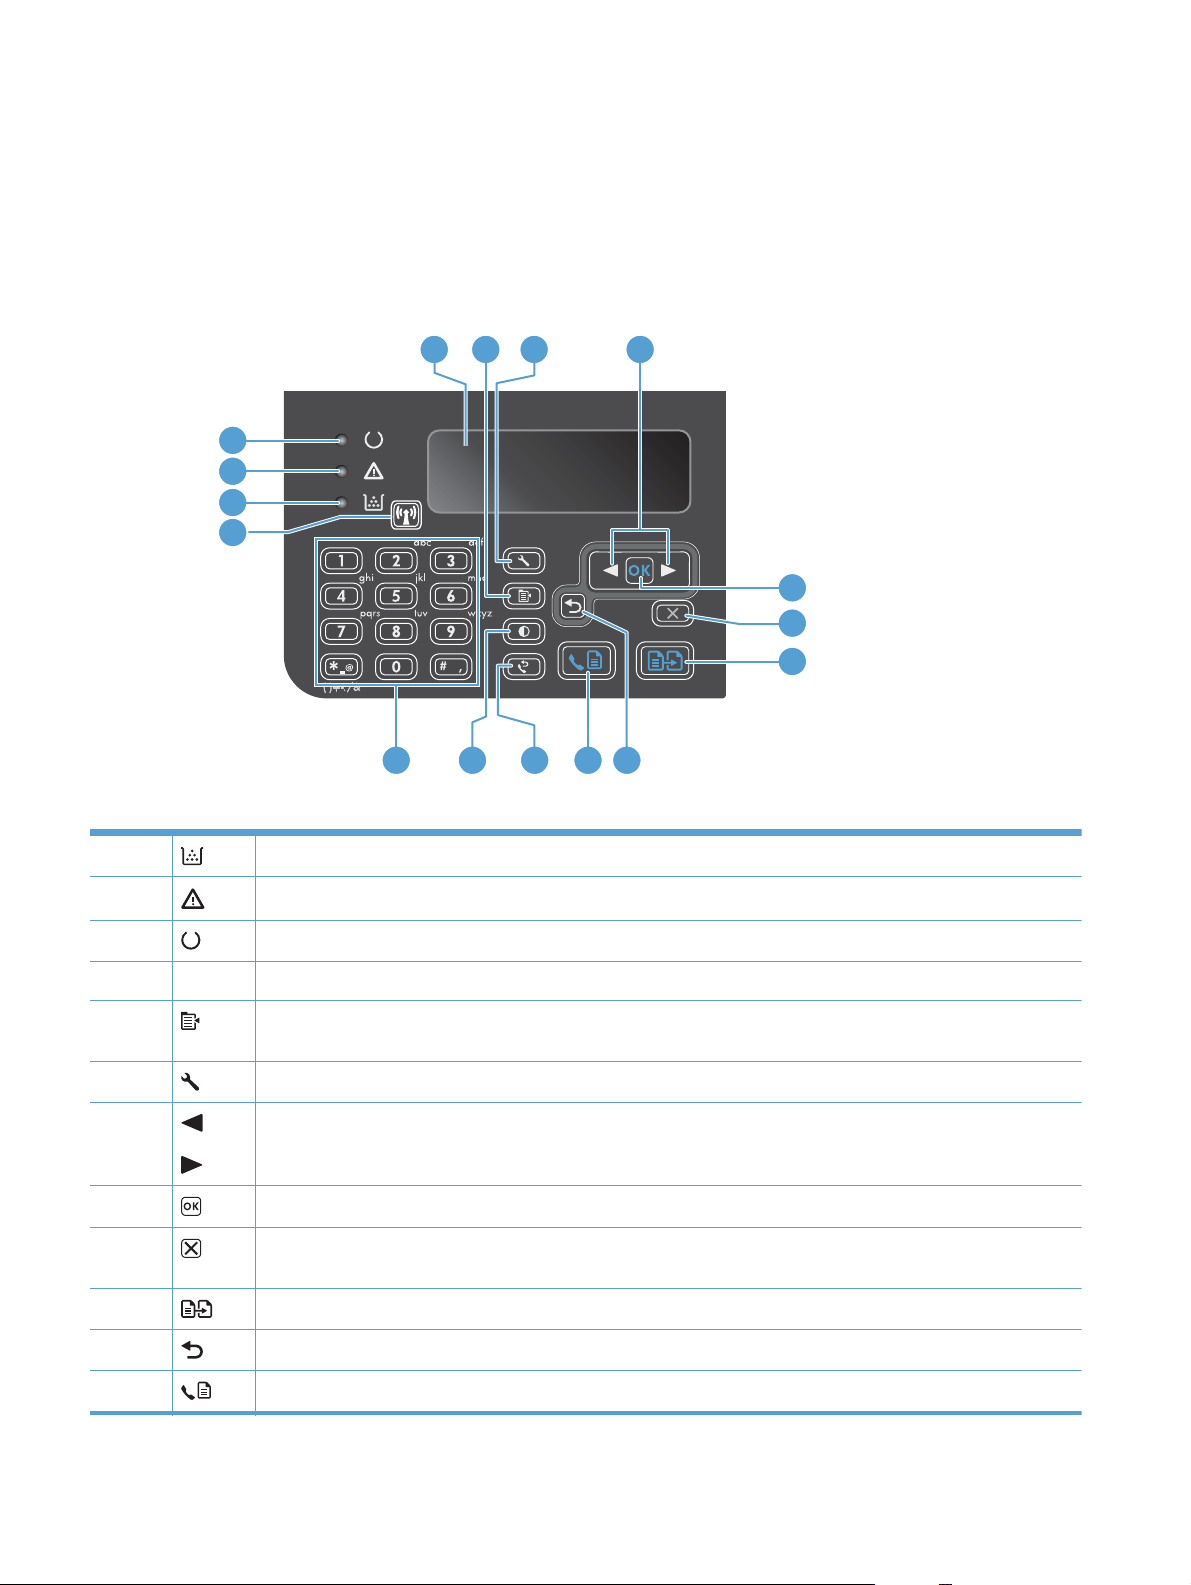
Control-panel layout
HP LaserJet Professional M1210 MFP series (wireless models only)
4 5 6
7
3
2
1
16
8
9
10
15
1 Toner-level status light: Indicates the level of toner in the print cartridge is low.
2
Attention light: Indicates a problem with the product. View the LCD display for a message.
14
13 12 11
3
4 LCD display screen: Displays status information, menus, and messages.
5 Copy Settings button: Opens the Copy Settings menu. To copy an identification card, press this button three
6
7
8
9
10
11
12
Ready light: Indicates the product is ready or is processing a job.
times to open the Copy ID menu and then press the OK button.
Setup button: Opens the menus.
Left and right arrows: Enter and navigate through the menus. Decrease or increase the current value on the
screen. Move the screen cursor backward or forward one space.
OK button: Acknowledges a setting or confirms an action to proceed.
Cancel button: Cancels the current job, or clears the last setting you made. When the product is in the Ready
state, press this button to reset the copy settings to the default values.
Start Copy button: Starts a copy job.
Back arrow: Returns to the previous level in the menus.
Send Fax button: Starts a fax job.
2 Chapter 1 Product basics ENWW
Page 11

13 Redial button: Recalls the last digits used for the previous fax job.
14
15 Numeric keypad: Use the keypad to enter fax numbers or to enter data.
16
Darker/Lighter copy button: Adjusts the darkness setting for the current copy job.
Wireless button and status light: Use the button to turn off or turn on the product wireless function. The status
light indicates wireless operation.
On: The product is connected to a wireless network.
●
Fast blinking: A Wi-Fi Protected Setup (WPS) error has occurred.
●
Slow blinking: The product is attempting to connect to a wireless network.
●
Off: The product is in one of the following states.
●
The product power is off.
◦
The product is not connected to a wireless network.
◦
The product is in Auto-Off mode.
◦
ENWW
Product views
3
Page 12

4 Chapter 1 Product basics ENWW
Page 13

2 Control panel menus
Control-panel menus
●
ENWW 5
Page 14

Control-panel menus
For the HP LaserJet Professional M1210 MFP series (wireless models only), the Wireless Menu submenu is available from the control-panel Network config. menu.
Use the Wireless Menu sub-menus to enable, disable, test, or set up the product wireless
●
functions.
Table 2-1 Wireless Menu sub menus
Menu item Sub-menu item Description
Wireless Menu Wireless Radio Enable or disable the product wireless radio
Network Test Tests the wireless network and prints a report with
WPS Setup If your wireless router supports WPS, use this method
functionality.
On
Off
The default setting is On.
the results.
to set up the product on a wireless network.
1.
Press the Wi-Fi Protected Setup
your router or access-point device.
button on
NOTE: For more information, see the user
guide for your router or access-point device.
2. On the product control panel, press the
Wireless
3. From the Wireless Menu, select the WPS
Setup sub menu, and then follow the control-
panel display prompts to complete the wireless
network setup.
button.
6 Chapter 2 Control panel menus ENWW
Page 15

3 Connect the product
Network connection
●
ENWW 7
Page 16

Network connection
The product can connect to wireless networks.
Install the product on a wireless network with HP Smart Install
NOTE: This installation type is supported for Windows only.
The HP Smart Install allows you to install the product driver and software by connecting the product to a
computer through a USB cable. If the product previously has been installed on a network, restore the
default wireless settings.
NOTE: The installation CD is not required during a HP Smart Install. Do not insert the software
installation CD into the computer CD drive.
1. Turn on the product, and then connect the USB cable to the product and the computer. The
installation program should start automatically.
If the HP Smart Install program does not start automatically, AutoPlay might be disabled on
●
the computer.
Browse the computer and double-click the HP Smart Install CD drive. Double-click the
SISETUP.EXE file to run the program and install the product.
If you cannot find the HP Smart Install CD drive, disconnect the USB cable, and then use the
product installation CD to install the software.
If the program prompts you to select a connection type, select the connection type you will
●
use to print to the product after installation.
2. Follow the onscreen instructions to complete the product installation.
3. When the installation is complete, if you want to verify that the product has a network IP address,
print a configuration page.
a. On the product control panel, press the Setup
b. Use the arrow buttons to select the Reports menu, and then press the OK button.
c. Use the arrow buttons to select the Config report option, and then press the OK button.
button
8 Chapter 3 Connect the product ENWW
Page 17

Install the product on a wireless network with the software CD
1. Insert the software CD into the computer CD tray.
If the installation program does not start automatically, browse the CD contents and run the
SETUP.EXE file.
2. Follow the onscreen instructions to complete the product installation.
3. When the installation is complete, if you want to verify that the product has a network IP address,
print a configuration page.
a. On the product control panel, press the Setup
b. Use the arrow buttons to select the Reports menu, and then press the OK button.
c. Use the arrow buttons to select the Config report option, and then press the OK button.
button
Install the software for a product currently on the network
When the product previously has been installed on a network computer (so that it already has an IP
address), and you want to install the printer driver on another computer, complete the following steps.
1. At the computer, open the HP Embedded Web Server. See the product user guide for more
information about the HP Embedded Web Server.
2. Click the HP Smart Install tab.
3. Click the Download button.
4. Follow the onscreen instructions to complete the product installation.
Perform a peer-to-peer (ad-hoc) wireless installation
Perform a wireless install to a computer through a peer-to-peer (ad-hoc) installation.
1. Use one of the following procedures to restore the default wireless settings.
NOTE: If an error occurs, uninstall the product, and then re-run the installer program. When
prompted for network settings, provide the settings. For more information about uninstalling and
installing the product, see the complete HP LaserJet Professional M1130/M1210 MFP series User
Guide.
Preferred method to restore the default wireless settings
a. Press the Setup
b. Use the right arrow
Press the OK button to select the menu.
c. Use the right arrow
OK button to select this item and restore the default wireless settings.
ENWW
button to open the menus.
or left arrow button to navigate to the Network config. menu.
or left arrow button to navigate to Restore Defaults. Press the
Network connection
9
Page 18

Alternate method to restore the default wireless settings
a. Turn the product off.
b.
Press and hold the wireless
button and the cancel button, and then turn the product on.
c. Hold the buttons until all of the lights blink in unison, and then release the buttons.
2. Print a configuration page, and find the network name (SSID) in the Network Information section.
a. On the product control panel, press the Setup
button
b. Use the arrow buttons to select the Reports menu, and then press the OK button.
c. Use the arrow buttons to select the Config report option, and then press the OK button.
3. Refresh the computer wireless network connection list, and then click the product network name
(SSID) and connect to it.
4. After several minutes, print a configuration page, and then find the product IP address.
5. At the computer, open a web browser, type the product IP address in the address box, and then
press the Enter key to open the HP Embedded Web Server.
6. Click the HP Smart Install tab, and then click the Download button to install the product
software.
The figures below show the difference between an ad-hoc network connection and an infrastructure
network connection.
Ad-hoc network Infrastructure network
10 Chapter 3 Connect the product ENWW
Page 19

Turn off the product wireless unit
If you want to disconnect the product from a wireless network, you can turn off the wireless unit in the
product.
1.
At the product control panel, press and hold the Wireless
2. To confirm that the wireless unit is turned off, print a configuration page, and then verify that the
802.11b/g wireless status item on the configuration page is disabled.
a. On the product control panel, press the Setup
b. Use the arrow buttons to select the Reports menu, and then press the OK button.
c. Use the arrow buttons to select the Config report option, and then press the OK button.
Configure the network product
Use the Wireless Configuration utility
Use the Wireless Configuration utility to configure the product to print on a wireless network.
1. Connect the wireless product to the computer through a USB cable.
2. Click the Start button, and then click the Programs or All Programs menu item.
3. Click the HP menu item, and then click the HP LaserJet Professional M1130/M1210 MFP
series menu item.
4. Click the Wireless Configuration menu item.
button for more than 5 seconds.
button
5. Follow the onscreen instructions to configure the product to print on a wireless network.
Restore default wireless settings
Use one of the following procedures to restore the default wireless settings.
NOTE: If an error occurs, uninstall the product, and then re-run the installer program. When
prompted for network settings, provide the settings. For more information about uninstalling and
installing the product, see the complete HP LaserJet Professional M1130/M1210 MFP series User
Guide.
Preferred method to restore the default wireless settings
a. Press the Setup
b. Use the right arrow
the OK button to select the menu.
c. Use the right arrow
button to select this item and restore the default wireless settings.
button to open the menus.
or left arrow button to navigate to the Network config. menu. Press
or left arrow button to navigate to Restore Defaults. Press the OK
ENWW
Network connection
11
Page 20

Alternate method to restore the default wireless settings
a. Turn the product off.
b.
Press and hold the wireless
button and the cancel button, and then turn the product on.
c. Hold the buttons until all of the lights blink in unison, and then release the buttons.
12 Chapter 3 Connect the product ENWW
Page 21

4 Print tasks
Use HP ePrint
●
ENWW 13
Page 22

Use HP ePrint
HP ePrint is a suite of Web-based printing services that enable a supported HP product to print
documents of the following types:
E-mail messages and attachments sent directly to the HP product’s e-mail address
●
Documents from select mobile device print applications
●
Use HP Direct Print
Use HP Direct Print to print directly to the product from any mobile device (such as a smart phone, net
book, or laptop computer).
NOTE: No setup is necessary, but HP Direct Print must be enabled. Your mobile device must have an
HP print application installed.
1. To enable HP Direct Print from the product control panel, follow these steps:
a. Use the arrow buttons to select the Network config. menu, and then press the OK button.
b. Use the arrow buttons to select the Wireless Menu, and then press the OK button.
c. Use the arrow buttons to select the Wireless Direct, and then press the OK button.
2. For advanced configuration options, enable HP Web Services in the HP Embedded Web Server
(EWS) by following these steps:
a. After the product is connected to the network, print a configuration page and identify the
product IP address.
b. At your computer, open a Web browser and enter the product IP address into the address
line. The HP EWS screen appears.
c. Click the Networking tab.
d. On the Networking page, click the check box, enter the network name (SSID), and then click
the Apply button. The IP address of the mobile device appears in the Networking page.
NOTE: To find the network name (SSID), click the Wireless Configuration menu in the
Networking page.
3. To print a document from an application, select File, and then select Print.
NOTE: If only one product that supports HP Direct Print is connected to the wireless network, the
document prints. If more than one product that supports HP Direct Print is connected, a list of
products appears; you must select your product before proceeding to the next step. If no product is
discovered, you are prompted to search for ePrint or local products.
14 Chapter 4 Print tasks ENWW
Page 23

5 Solve problems
Solve connectivity problems
●
ENWW 15
Page 24

Solve connectivity problems
Solve wireless problems
The installation program cannot detect the product during the setup process.
Cause Solution
The product is off. Verify that the product is on and ready. Restart the product if
necessary.
The product is too far away from the wireless router or access
point.
A personal firewall program is blocking communication. Temporarily disable the firewall program to install the product.
The product is not communicating with the wireless router or
access point.
Move the product closer to the wireless router or access point.
Re-enable the firewall program once the product installation is
complete. If disabling the firewall allows you to communicate
with the product, you might want to assign the product a static
IP address, and then re-enable the firewall. For information
about firewalls that are used in an HP environment, see
www.hp.com/support/XP_firewall_information.
●
Verify that the wireless
the Wireless
Move the product closer to the wireless router or access
●
point, and then try again.
Restore the default wireless settings. See
●
wireless settings on page 11.
If the error persists, uninstall the product, and then re-run the
installer program. When prompted for network settings,
provide the settings, and then continue the installation.
button.
light is on. If it is not on, press
Restore default
16 Chapter 5 Solve problems ENWW
Page 25

The product cannot connect to the wireless network.
Cause Solution
The product wireless settings and the network settings do not
match.
The wireless router or access point is configured with a media
access control (MAC) filter that is denying the product access
to the network.
The wireless connection is sometimes disabled.
Cause Solution
You might need to configure the product network settings
manually. Verify that you know the following network settings:
Communication mode
●
Network name (SSID)
●
Channel (ad-hoc networks only)
●
Authentication type
●
Use the Wireless Configuration utility to configure the product
to print on wireless network.
If the error persists, uninstall the product, and then re-run the
installer program. When prompted for network settings,
provide the settings, and then continue the installation.
Configure the wireless router or access point so that the list of
accepted MAC addresses includes the product hardware
address. Refer to the device owners manual for help.
The product environment might be affecting wireless
communication. The following situations can affect wireless
communication:
A concrete or metal framed wall stands between the
●
product and the wireless router or access point.
Televisions, computer appliances, microwave ovens,
●
intercoms, mobile/cellular phones, battery chargers, and
AC power adapters are installed close to the network.
A broadcast station or high-tension wire is located close
●
to the network.
A fluorescent light that is near the network is being
●
switched on or off.
Move the product to a location where it can receive a steady
signal from the wireless router or access point. Or you might
need to move the wireless router or access point.
ENWW
Solve connectivity problems
17
Page 26

18 Chapter 5 Solve problems ENWW
Page 27

A Regulatory information
Declaration of Conformity (wireless models)
●
Additional statements for wireless products
●
ENWW 19
Page 28

Declaration of Conformity (wireless models)
Declaration of Conformity
according to ISO/IEC 17050-1 and EN 17050-1
Manufacturer's Name: Hewlett-Packard
Information Technology
R&D (Shangai) Co., Ltd
Manufacturer's Address: Building 6, No. 690 BiBo Road
ZhangJiang, Shanghai, China
declares, that the product
Product Name: HP LaserJet Professional M1217nfw MFP Series
2)
Regulatory Model Number
BOISB-0901-05
Product Options: ALL
Accessories
4)
BOISB-0906-00 — (US-Fax Module LIU)
BOISB-0906-01– (Euro-Fax Module LIU)
SDGOB-0892 — (Wireless Module)
Print Cartridges: CE285A, CC388A
conforms to the following Product Specifications:
SAFETY: IEC 60950-1:2001 / EN60950-1: 2001 +A11
DoC#: BOISB-0901-05-rel.1.0
IEC 60825-1:1993 +A1 +A2 / EN 60825-1:1994 +A1 +A2 (Class 1 Laser/LED Product)
IEC 62311:2007 / EN 62311:2008
EMC:
CISPR22:2005 +A1 / EN55022:2006 +A1 - Class B
EN 61000-3-2:2006
EN 61000-3-3:1995 +A1 +A2
EN 55024:1998 +A1 +A2
FCC Title 47 CFR, Part 15 Class B / ICES-003, Issue 4
GB9254-1998, GB17625.1-2003
EN 301 489-1:V1.8.1 / EN 301 489-17:V1.3.2
EN 300 328:V1.7.1
TELECOM:
3)
ES 203 021; FCC Title 47 CFR, Part 68
FCC Title 47 CFR, Part 15 Subpart C (Section 15.247) / IC: RSS-210
ENERGY USE: Regulation (EC) No. 1275/2008
ENERGY STAR® Qualified Imaging Equipment Typical Electricity Consumption (TEC) Test Procedure
1)
3)
20 Appendix A Regulatory information ENWW
Page 29

Supplementary Information:
The product herewith complies with the requirements of the EMC Directive 2004/108/EC, the Low Voltage Directive 2006/95/EC, the
R&TTE Directive 1999/5/EC (Annex II & Anex IV), the EuP Directive 2005/32/EC and carries the CE-Marking
This Device complies with Part 15 of the FCC Rules. Operation is subject to the following two Conditions: (1) this device may not cause
harmful interference, and (2) this device must accept any interference received, including interference that may cause undesired operation.
1. The product was tested in a typical configuration with Hewlett-Packard Personal Computer Systems.
2. For regulatory purposes, this product is assigned a Regulatory model number. This number should not be confused with the product
name or the product number(s).
3. Telecom approvals and standards appropriate for the target countries/regions have been applied to this product, in addition to those
listed above.
4. This product uses an analog fax accessory module which Regulatory Model numbers are: BOISB-0906-00 (US-LIU) or BOISB-0906-01
(EURO LIU) and SDGOB – 0892 (wireless module), as needed to meet technical regulatory requirements for the countries/regions this
product will be sold.
Shanghai, China
March 1st, 2010
For regulatory topics only:
European Contact: Your Local Hewlett-Packard Sales and Service Office or Hewlett-Packard GmbH, Department HQ-
TRE / Standards Europe, Herrenberger Straße 140, D-71034, Böblingen (FAX: +49-7031-14-3143)
www.hp.com/go/certificates
accordingly.
USA Contact: Product Regulations Manager, Hewlett-Packard Company, PO Box 15, Mail Stop 160, Boise, Idaho
83707-0015 (Phone: 208-396-6000)
ENWW Declaration of Conformity (wireless models) 21
Page 30

Additional statements for wireless products
FCC compliance statement-United States
Exposure to radio frequency radiation
CAUTION: The radiated output power of this device is far below the FCC radio frequency exposure
limits. Nevertheless, the device shall be used in such a manner that the potential for human contact
during normal operation is minimized.
In order to avoid the possibility of exceeding the FCC radio frequency exposure limits, human proximity
to the antenna shall not be less than 20 cm ( (8 in)) during normal operation.
This device complies with Part 15 of FCC Rules. Operation is subject to the following two conditions:
(1) this device may not cause interference, and (2) this device must accept any interference, including
interference that may cause undesired operation of the device.
CAUTION: Based on Section 15.21 of the FCC rules, changes of modifications to the operation of
this product without the express approval by Hewlett-Packard Company may invalidate its authorized
use.
Australia statement
This device incorporates a radio-transmitting (wireless) device. For protection against radio transmission
exposure, it is recommended that this device be operated no less than 20 cm from the head, neck, or
body.
Brazil ANATEL statement
Este equipamento opera em caráter secundário, isto é, não tem direito à proteção contra interferência
prejudicial, mesmo de estações do mesmo tipo, e não pode causar interferência a sistemas operando
em caráter primário.
Canadian statements
For Indoor Use. This digital apparatus does not exceed the Class B limits for radio noise emissions
from digital apparatus as set out in the radio interference regulations of the Canadian Department of
Communications. The internal wireless radio complies with RSS 210 of Industry Canada.
Pour l´usage d´intérieur. Le présent appareil numérique n´émet pas de bruits radioélectriques
dépassant les limites applicables aux appareils numériques de Classe B prescribes dans le règlement
sur le brouillage radioélectrique édicté par le Ministère des Communications du Canada. Le composant
RF interne est conforme à la norme CNR-210 d´Industrie Canada.
European Union regulatory notice
The telecommunications functionality of this product may be used in the following EU and EFTA
countries/regions:
Austria, Belgium, Bulgaria, Cyprus, Czech Republic, Denmark, Estonia, Finland, France, Germany,
Greece, Hungary, Iceland, Ireland, Italy, Latvia, Liechtenstein, Lithuania, Luxembourg, Malta,
22 Appendix A Regulatory information ENWW
Page 31
Netherlands, Norway, Poland, Portugal, Romania, Slovak Republic, Slovenia, Spain, Sweden,
Switzerland, and United Kingdom.
Notice for use in France
For 2.4 GHz Wireless LAN operation of this product certain restrictions apply: This equipment may be
used indoor for the entire 2400-2483.5 MHz frequency band (channels 1-13). For outdoor use, only
2400-2454 MHz frequency band (channels 1-9) may be used. For the latest requirements, see
www.arcep.fr.
L'utilisation de cet equipement (2.4 GHz Wireless LAN) est soumise à certaines restrictions : Cet
équipement peut être utilisé à l'intérieur d'un bâtiment en utilisant toutes les fréquences de
2400-2483.5 MHz (Chaine 1-13). Pour une utilisation en environnement extérieur, vous devez utiliser
les fréquences comprises entre 2400-2454 MHz (Chaine 1-9). Pour les dernières restrictions, voir,
www.arcep.fr.
Notice for use in Russia
Существуют определенные ограничения по использованию беспроводных сетей (стандарта
802.11 b/g) с рабочей частотой 2,4 ГГц: Данное оборудование может использоваться внутри
помещений с использованием диапазона частот 2400-2483,5 МГц (каналы 1-13). При
использовании внутри помещений максимальная эффективная изотропно–излучаемая мощность
(ЭИИМ) должна составлять не более 100мВт.
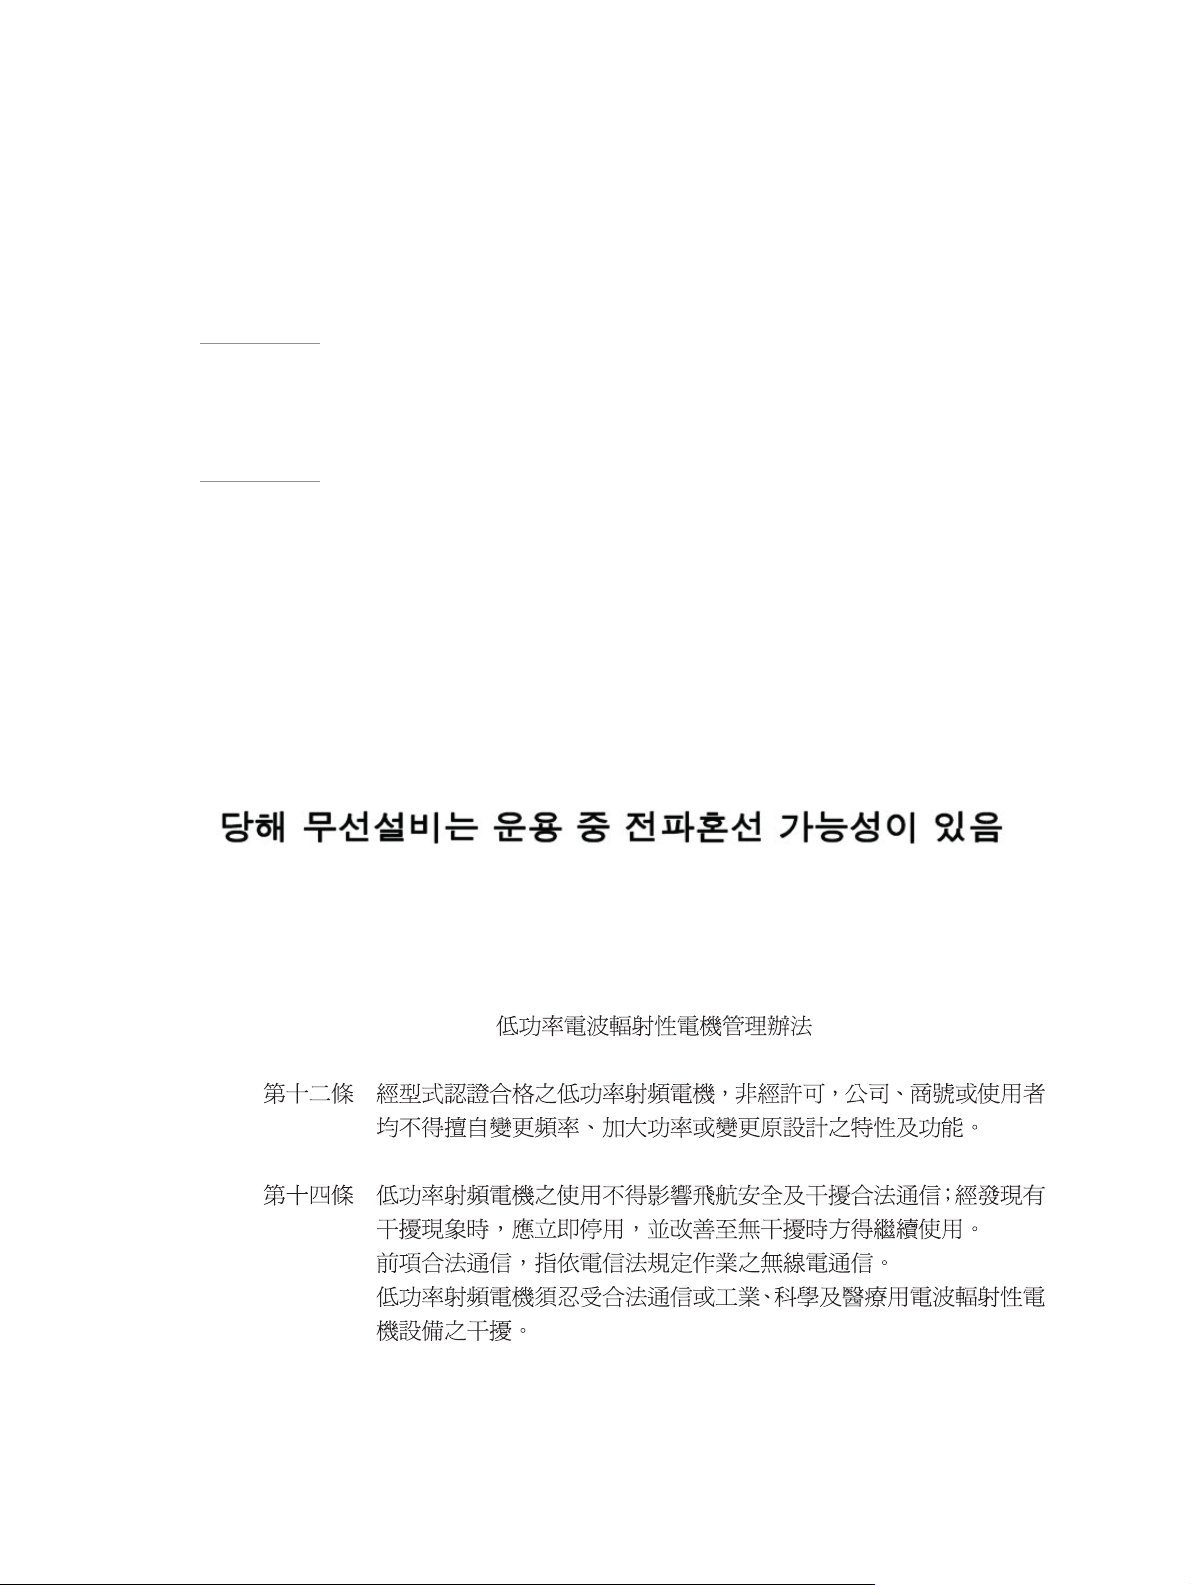
Korean statement
Taiwan statement
ENWW Additional statements for wireless products 23
Page 32

Vietnam Telecom wired marking for ICTQC Type approved products
24 Appendix A Regulatory information ENWW
Page 33

Index
C
connectivity
solving problems 16
control panel
buttons and lights 2
menus 6
D
document conventions iii
E
ePrint
HP Direct Print 14
using 14
H
HP Direct Print
using 14
P
problem-solving
connectivity 16
wireless problems 16
R
restore, wireless settings 11
S
settings, wireless
restore default 11
solving
wireless problems 16
ENWW
Index
25
Page 34

26 Index ENWW
Page 35

Page 36

© 2011 Hewlett-Packard Development Company, L.P.
www.hp.com
*CE844-90942*
*CE844-90942*
CE844-90942
 Loading...