

Page 1
HP LaserJet M1005 MFP
Software Technical Reference
Page 2

Page 3

HP LaserJet M1005 MFP
Software Technical Reference
Page 4

Copyright and license
Trademark credits
©2006 Copyright Hewlett-Packard
Development Company, L.P.
Reproduction, adaptation or translation
without prior written permission is prohibited,
except as allowed under the copyright laws.
The information contained herein is subject
to change without notice.
The only warranties for HP products and
services are set forth in the express warranty
statements accompanying such products
and services. Nothing herein should be
construed as constituting an additional
warranty. HP shall not be liable for technical
or editorial errors or omissions contained
herein.
Edition 1, 8/2006
Adobe®, Adobe Photoshop®, Acrobat®,
PostScript®, and the Acrobat logo® are
trademarks of Adobe Systems Incorporated.
Energy Star® and the Energy Star logo®
are US registered marks of the United States
Environmental Protection Agency.
Microsoft®, Windows®, Windows NT 4.0®
and Windows® XP are U.S. registered
trademarks of Microsoft Corporation.
Pentium® is a trademark or registered
trademark of Intel Corporation or its
subsidiaries in the United States and other
countries.
Page 5

Table of contents
1 Purpose and scope
Introduction ........................................................................................................................................... 1
Device features .................................................................................................................................... 3
HP LaserJet M1005 MFP software ...................................................................................................... 4
MS Windows system requirements ..................................................................................... 4
Operating-system support .................................................................................................. 4
Standalone drivers .............................................................................................. 4
Print driver support in other operating systems ................................................... 5
Availability ........................................................................................................................... 5
Software on the Web ........................................................................................... 5
In-box software CD ............................................................................................. 5
Windows partition ............................................................................... 5
CD versions ........................................................................................ 7
HP LaserJet documentation ................................................................................................................. 9
HP LaserJet M1005 MFP User Guide ............................................................................... 10
Hewlett-Packard LaserJet M1005 MFP Install Notes ........................................................ 10
2 Software description
Introduction ......................................................................................................................................... 13
MS Windows software ........................................................................................................................ 14
Software and installer ........................................................................................................ 14
HP LaserJet host-based print driver .................................................................................. 16
HP Extended Capabilities ................................................................................................................... 17
HP Status Application ......................................................................................................................... 18
Scanning system ................................................................................................................................ 19
Scanning methods ............................................................................................................. 19
HP LaserJet Scan software ............................................................................................... 19
Scan drivers ....................................................................................................................... 22
Supported third-party software ........................................................................................................... 32
HP LaserJet M1005 MFP software CD for MS Windows systems ................... 14
Installer features ................................................................................................ 15
Print-driver version numbers for MS Windows operating systems .................... 16
E-mail ................................................................................................................ 22
TWAIN DRIVER ................................................................................................ 22
TWAIN compatibility ......................................................................... 22
TWAIN scanning does not work with some programs ...................... 23
Additional information about TWAIN ................................................ 23
TWAIN driver user interface (MS Windows) ..................................... 23
WIA driver ......................................................................................................... 30
ENWW iii
Page 6

Text-recognition software .................................................................................................. 32
About text-recognition reliability ........................................................................ 32
Readiris text-recognition software ..................................................................................... 32
3 Install MS Windows software components
Installation overview .......................................................................................................................... 36
Installation options .............................................................................................................................. 37
MS Windows installation for direct connections ................................................................. 37
Set up MS Windows Sharing (peer-to-peer networking) ................................................... 37
Set up the MS Windows 2000 host computer ................................................... 38
Set up the MS Windows XP or MS Windows Server 2003 host computer ....... 38
Set up the client computers ............................................................................... 38
Installation dialog box options for MS Windows 2000, MS Windows XP, and MS
Windows Server 2003 ........................................................................................................................ 40
Uninstall .............................................................................................................................................. 46
Uninstall instructions for MS Windows 2000, MS Windows XP, and MS Windows Server
2003 ................................................................................................................................... 46
Uninstall, add, or repair by using the installation CD ......................................................... 49
4 Host-based driver features for MS Windows
Introduction to host-based printing ..................................................................................................... 52
Access to the driver ............................................................................................................................ 53
Printing Preferences tab set .............................................................................................. 53
Properties tab set ............................................................................................................... 53
Help system ........................................................................................................................................ 54
What's this? Help ............................................................................................................... 54
Context-sensitive Help ....................................................................................................... 54
Paper Type Warning .......................................................................................................... 54
Driver tabs .......................................................................................................................................... 55
Printing Preferences tab set .............................................................................................. 55
Advanced tab features ...................................................................................... 55
Paper/Output .................................................................................... 56
Printer Features ................................................................................ 57
Paper/Quality tab features ................................................................................ 57
Print Task Quick Sets ....................................................................... 58
Paper Options ................................................................................... 59
Use Different Paper/Covers options ................................................. 63
Collate .............................................................................. 56
Copy ................................................................................. 56
Print all Text as Black ....................................................... 57
REt ................................................................................... 57
Default Print Settings ....................................................... 59
User's Manual .................................................................. 59
Type new Quick Set name here ....................................... 59
Size is: .............................................................................. 60
Use Different Paper/Covers check box ........... 61
Custom Paper Size group ............................... 61
Source is: ......................................................................... 62
Type is: ............................................................................. 62
Front Cover and Back Cover options ............................... 64
iv ENWW
Page 7

First Page, Other Pages, and Last Page options ............. 65
Document preview image ................................................................. 65
Print Quality ...................................................................................... 65
Effects tab features ........................................................................................... 66
Print Task Quick Sets ....................................................................... 67
Resizing Option ................................................................................ 68
Actual Size ....................................................................... 68
Print Document On ........................................................... 68
Scale to Fit ...................................................................... 68
% of Normal Size ............................................................. 69
Document preview image ................................................................. 69
Watermarks ...................................................................................... 69
Current Watermarks ......................................................... 70
Watermark Message ........................................................ 71
Message Angle ................................................................ 71
Font Attributes .................................................................. 71
Name ............................................................... 71
Color ................................................................ 71
Shading ........................................................... 72
Size .................................................................. 72
Style ................................................................. 72
Finishing tab features ........................................................................................ 72
Print Task Quick Sets ....................................................................... 73
Document Options ............................................................................ 74
Print on Both Sides .......................................................... 74
Instructions for manually printing on both
sides ................................................................ 75
Flip Pages Up ................................................................... 75
Booklet layout ................................................................... 75
Book and booklet printing ................................ 76
Printing a Booklet ............................................ 76
Printing a book ................................................. 76
Pages per Sheet .............................................................. 76
Print Page Borders ........................................................... 77
Page Order ....................................................................... 77
Document preview image ................................................................. 77
Orientation ........................................................................................ 78
Portrait option button ........................................................ 78
Landscape option button .................................................. 78
Rotate by 180 degrees check box .................................... 78
Services tab features ........................................................................................ 78
Properties tab set ............................................................................................................... 79
Device Settings tab features ............................................................................. 80
Jam Recovery ................................................................................... 80
Print density ...................................................................................... 80
Status Message ................................................................................ 81
Courier Font Type ............................................................................. 81
Allow Manual Duplexing ................................................................... 81
About tab features ............................................................................................. 81
Driver Files: ...................................................................................... 82
ENWW v
Page 8

5 Macintosh
Introduction ......................................................................................................................................... 83
Macintosh printing-system software ................................................................................................... 84
Macintosh install and uninstall instructions ........................................................................................ 86
Macintosh remote firmware updates .................................................................................................. 92
TWAIN driver user interface (Macintosh) ........................................................................................... 93
Configuration Status: ........................................................................ 82
System requirements ......................................................................................................... 84
Availability .......................................................................................................................... 84
Software on the Web ......................................................................................... 84
Macintosh software ........................................................................... 85
Software component availability ....................................................... 85
In-box printing-system software CDs ................................................................ 85
Macintosh partition ........................................................................... 85
CD versions ...................................................................................... 85
Macintosh component descriptions ................................................................................... 86
PDEs ................................................................................................................. 86
Install notes ....................................................................................................... 86
Online help ........................................................................................................ 86
Screen fonts ...................................................................................................... 86
Install the Macintosh software ........................................................................................... 86
General installation for Macintosh operating systems ....................................... 87
Installation dialog-box options for Macintosh .................................................... 87
Device setup ..................................................................................................... 91
Uninstall ............................................................................................................................. 91
Uninstall the Macintosh software ...................................................................... 91
Remote firmware update by using the HP Printer Utility .................................................... 92
6 Engineering Details
Introduction ......................................................................................................................................... 95
Media attributes .................................................................................................................................. 96
Media sources and destinations ........................................................................................ 96
Driver-supported media sizes ............................................................................................ 96
Driver-supported media types ............................................................................................ 98
Custom paper sizes ........................................................................................................... 99
Remote firmware updates ............................................................................................................... 100
Print a configuration page ............................................................................................... 100
Downloading the new firmware from the HP Web site .................................................... 100
Download new firmware to the device ............................................................................. 100
Device messages during the firmware update ................................................................ 101
Index ................................................................................................................................................................. 103
vi ENWW
Page 9

List of tables
Table 1-1 Software technical reference overview .............................................................................................. 1
Table 1-2 Features of the HP LaserJet M1005 MFP .......................................................................................... 3
Table 1-3 BA - KO .............................................................................................................................................. 7
Table 1-4 NL - ZHTW ......................................................................................................................................... 8
Table 1-5 Documentation availability ................................................................................................................. 9
Table 2-1 Supported e-mail programs .............................................................................................................. 22
Table 4-1 Standard paper types and engine speed ......................................................................................... 62
Table 4-2 Page orientation ............................................................................................................................... 75
Table 5-1 Adding a printer in Macintosh operating systems ............................................................................ 87
Table 6-1 HP LaserJet M1005 MFP media sources and destination ............................................................... 96
Table 6-2 Supported media sizes and attributes .............................................................................................. 96
Table 6-3 Supported input media types ........................................................................................................... 98
Table 6-4 Custom media sizes ........................................................................................................................ 99
Table 6-5 Troubleshooting a firmware update .............................................................................................. 101
Table 6-6 Troubleshooting a firmware update failure .................................................................................... 101
Table 6-7 Update messages .......................................................................................................................... 102
ENWW vii
Page 10

viii ENWW
Page 11

List of figures
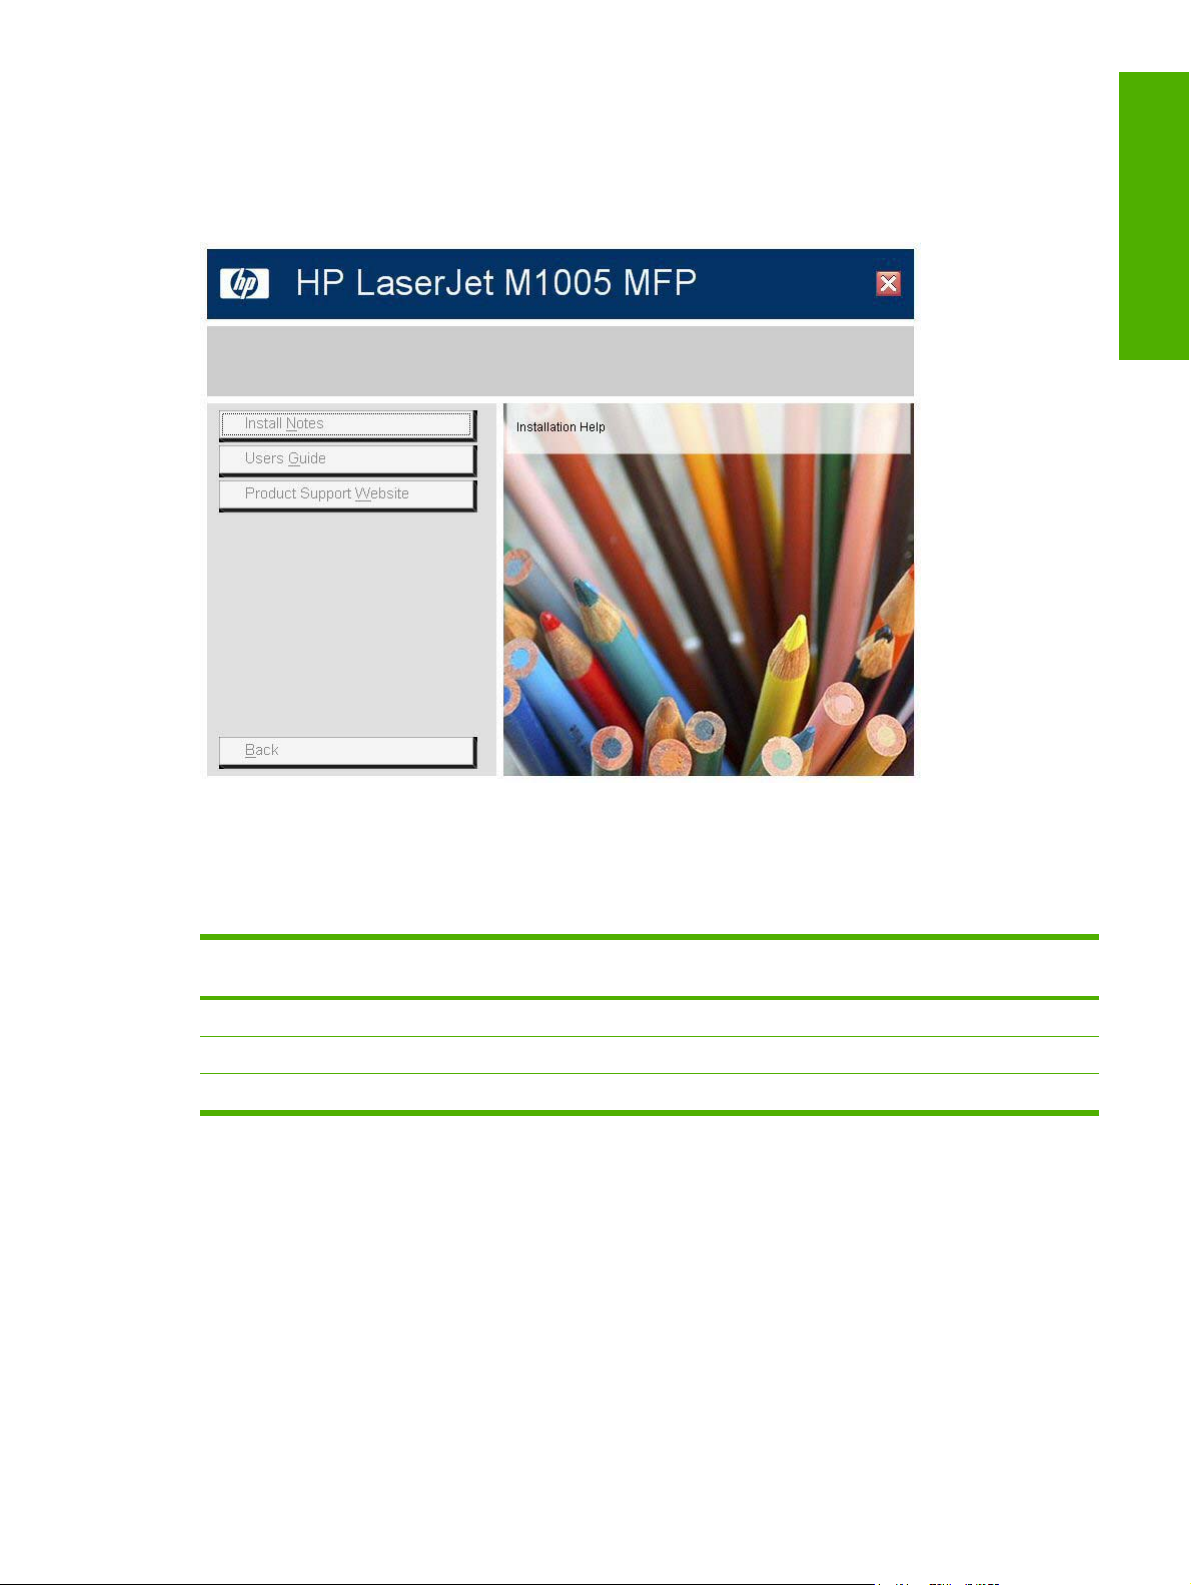
Figure 1-1 Installation software CD documentation and support screen ........................................................... 9
Figure 2-1 Installation software CD browser ................................................................................................... 15
Figure 2-2 Welcome to the HP Product Survey Program screen ..................................................................... 17
Figure 2-3 Sample pop-up error status message ............................................................................................. 18
Figure 2-4 hp LaserJet Scan dialog box .......................................................................................................... 20
Figure 2-5 Scan Settings dialog box ................................................................................................................ 21
Figure 2-6 TWAIN driver user interface (MS Windows) ................................................................................... 23
Figure 2-7 TWAIN driver user interface – Resize ............................................................................................. 25
Figure 2-8 TWAIN driver user interface – Resolution ....................................................................................... 26
Figure 2-9 TWAIN driver user interface – Lighten/Darken ............................................................................... 27
Figure 2-10 TWAIN driver user interface – Sharpen ........................................................................................ 28
Figure 2-11 TWAIN driver user interface – Color Adjustment .......................................................................... 29
Figure 2-12 TWAIN driver user interface – B/W Threshold .............................................................................. 30
Figure 3-1 Step 1 - Welcome dialog box .......................................................................................................... 40
Figure 3-2 Step 2 - HP Software License Agreement dialog box ..................................................................... 41
Figure 3-3 Step 3 - Settings dialog box ............................................................................................................ 42
Figure 3-4 Step 4 - HP LaserJet M1005 MFP Setup dialog box ...................................................................... 43
Figure 3-5 Step 5- HP Extended Capabilities dialog box ................................................................................. 43
Figure 3-6 Step 6 - Setup Complete! dialog box .............................................................................................. 44
Figure 3-7 Step 7 - Exit Setup .......................................................................................................................... 45
Figure 3-8 Step 8 - Setup Interrupted .............................................................................................................. 45
Figure 3-9 The HP LaserJet M1005 MFP Uninstall Wizard ............................................................................. 46
Figure 3-10 HP LaserJet M1005 MFP Driver Uninstall information dialog box ................................................ 47
Figure 3-11 HP LaserJet M1005 MFP Driver Uninstall information - unplug device dialog box ...................... 47
Figure 3-12 Uninstall complete! dialog box ...................................................................................................... 48
Figure 3-13 Welcome Back! screen ................................................................................................................. 49
Figure 4-1 HP LaserJet M1005 MFP host-based driver overview ................................................................... 52
Figure 4-2 A typical paper type warning ........................................................................................................... 54
Figure 4-3 Advanced tab ................................................................................................................................. 56
Figure 4-4 Paper/Quality tab ........................................................................................................................... 58
Figure 4-5 Paper Options group box .............................................................................................................. 60
Figure 4-6 Custom Paper Size dialog box ........................................................................................................ 61
Figure 4-7 Front Cover setting ........................................................................................................................ 64
Figure 4-8 First Page, Other Pages, and Last Page options .......................................................................... 65
Figure 4-9 Effects tab ..................................................................................................................................... 67
Figure 4-10 Preview images - Legal on Letter; Scale to Fit off (left) and on (right) ........................................ 68
Figure 4-11 Watermark Details ...................................................................................................................... 70
Figure 4-12 Finishing tab ................................................................................................................................. 73
Figure 4-13 Print on Both Sides Instructions .................................................................................................... 74
Figure 4-14 Page-order preview images ......................................................................................................... 77
ENWW ix
Page 12

Figure 4-15 Services tab ................................................................................................................................. 79
Figure 4-16 Device Settings tab ....................................................................................................................... 80
Figure 4-17 About tab ....................................................................................................................................... 82
Figure 5-1 Step 1 - Insert the HP LaserJet M1005 MFP software CD ............................................................. 87
Figure 5-2 Step 2 - Run the printing-system software CD ................................................................................ 88
Figure 5-3 Step 3 - Main CD screen ................................................................................................................. 88
Figure 5-4 Step 4 - License agreement, screen 1 ............................................................................................ 88
Figure 5-5 Software License Agreement, screen 2 .......................................................................................... 89
Figure 5-6 Step 5 - Select a destination ........................................................................................................... 89
Figure 5-7 Step 6 – Easy Install process .......................................................................................................... 89
Figure 5-8 Step 7 - Authenticate ...................................................................................................................... 90
Figure 5-9 Step 8 - Install files .......................................................................................................................... 90
Figure 5-10 Step 9 - Restart ............................................................................................................................. 90
Figure 5-11 Printer List screen ......................................................................................................................... 91
Figure 5-12 The configuration is not supported. screen (Macintosh) ............................................................... 93
Figure 5-13 Image Capture Devices screen (Macintosh) ................................................................................. 93
Figure 5-14 HP LaserJet M1005 MFP preview image settings screen (Macintosh) ........................................ 94
Figure 5-15 HP Scan Settings screen (Macintosh) .......................................................................................... 94
x ENWW
Page 13

1 Purpose and scope
Introduction
This software technical reference (STR) provides information about and troubleshooting tips for the
HP LaserJet M1005 MFP software.
This STR is prepared in an electronic format to serve as a quick-reference tool for Customer Care Center
(CCC) agents, support engineers, system administrators, management information systems (MIS)
personnel, and HP LaserJet M1005 MFP end users, as appropriate.
The following information is included in this STR:
Descriptions of print drivers, operating system support, and system modifications
●
Procedures for installing and uninstalling software components
●
Purpose and scope
Descriptions of various HP LaserJet M1005 MFP topics, including engineering details
●
The following table describes the structure of this STR.
Table 1-1 Software technical reference overview
Chapter Content
Chapter 1, Purpose and scope This chapter contains basic information about the HP LaserJet M1005 MFP and
Chapter 2, Software description This chapter provides an overview of the printing-system software installer and
the HP LaserJet M1005 MFP software:
Overview of the HP LaserJet M1005 MFP
●
Printing-system software overview, including the following topics:
●
System requirements
●
Operating-system support
●
Availability
●
HP LaserJet software documentation
●
print drivers.
This chapter also contains general information about other software features,
including the following topics:
HP LaserJet Scan software program and driver
●
Readiris Professional text-recognition
●
Chapter 3, Install Microsoft® (MS)
Windows® printing-system components
This chapter provides instructions for installing the HP LaserJet M1005 MFP in
MS Windows operating systems.
ENWW Introduction 1
Page 14

Table 1-1 Software technical reference overview (continued)
Chapter Content
Chapter 4, Host-based driver features for
MS Windows
Chapter 6, Installation for Macintosh
operating systems
Chapter 7, Engineering details This chapter contains information about the following special topics:
This chapter provides detailed descriptions of the host-based driver features for
MS Windows.
This chapter provides instructions for installing the HP LaserJet M1005 MFP in
Macintosh operating systems and using Macintosh features.
Media attributes
●
Remote firmware update
●
For information about the location of information within chapters, see the table of contents. An index is
provided in this STR.
Additional detailed information about the HP LaserJet M1005 MFP software is published in an
addendum to this STR. The following information is available only in the addendum:
Lists of installed files
●
System-modification information, such as changes to the registry and registry keys
●
Descriptions of known software issues and solutions
●
Topics:
Device features
●
HP LaserJet M1005 MFP software
●
HP LaserJet documentation
●
2 Chapter 1 Purpose and scope ENWW
Page 15

Device features
The following table describes the features of the device.
Table 1-2 Features of the HP LaserJet M1005 MFP
Feature HP LaserJet M1005 MFP
HP Product Number CB376A
Memory
Speed
Connectivity
Paper handling
Print
Copy
Scan
32 megabytes (MB) of random-access memory (RAM)
●
Prints letter-size pages at speeds up to 15 pages per minute (ppm)
●
and A4-size pages at speeds up to 14 ppm.
First page out in less than 10 seconds
●
A 2.0 hi-speed universal serial bus (USB) port
●
Manual feed tray holds up to 10 sheets of print media or 3 envelopes
●
Tray 1 holds up to 150 sheets of print media or 10 envelopes
●
Output bin holds up to 100 sheets of print media
●
Prints at 600 dots per inch (dpi) and FastRes 1200 dpi
●
Includes adjustable settings to optimize print quality
●
Average yield for the standard black cartridge is 2000 pages in
●
accordance with ISO/IEC 19752. Actual yield depends on specific use.
HP LaserJet M1005 MFP host-based driver
●
Copies at 300 dpi
●
HP LaserJet Scan software and driver
●
Provides 1200 pixels per inch (ppi) full-color scanning
●
Purpose and scope
Printer driver features
Economical printing
Supplies
Readiris optical character recognition (OCR)
●
NOTE The OCR software is not installed with the other
software. Separate software CD and installation is required.
FastRes 1200 produces 1200 dpi print quality for fast, high-quality
●
printing of business text and graphics
Provides N-up printing (printing more than one page on a sheet)
●
Provides an EconoMode setting, which uses less toner
●
Uses a no-shake print cartridge
●
ENWW Device features 3
Page 16

HP LaserJet M1005 MFP software
Topics:
MS Windows system requirements
●
Operating-system support
●
Availability
●
MS Windows system requirements
Pentium® II or compatible processor
●
233-MHz processor with 64 MB RAM
●
35 MB of disk space
●
Minimum 16-color/grayscale display with 800 x 600 pixel resolution super video graphics array
●
(SVGA)
Onboard USB port
●
CD-ROM drive or internet connection
●
Operating-system support
MS Windows operating systems provide full-featured support for the HP LaserJet M1005 MFP.
Operating systems that are not described in this document provide varying levels of functionality.
Throughout this document, Windows XP is used to denote Windows XP Home Edition, Windows XP
Professional, and Windows Server 2003, unless noted otherwise.
The HP LaserJet M1005 MFP has not been tested with and is not supported in the MS Windows 3.1x
or MS Windows 95 operating systems.
The MS Windows NT® 4.0, Windows 98 SE, and Windows Millennium Edition (ME) operating systems
do not support the HP LaserJet M1005 MFP. Print drivers for the device are not included on the printingsystem software CD or on the Web.
For more information about the HP LaserJet M1005 MFP, go to the following Web site:
www.hp.com/support/ljM1005
Topics:
Standalone drivers
●
Print driver support in other operating systems
●
Standalone drivers
The following operating systems support the HP LaserJet M1005 MFP software:
Windows 2000
●
Windows XP (32-bit)
●
Windows Server 2003
●
4 Chapter 1 Purpose and scope ENWW
Page 17

Print driver support in other operating systems
The HP LaserJet M1005 MFP is also supported in the following operating system:
Mac OS X V10.3 and later
●
Availability
Download the software from the Web, or order it on a CD from HP fulfillment centers.
NOTE This STR describes drivers that are shipped with the printing-system software CD. This
STR does not describe any drivers that might be released by support personnel.
Topics:
Software on the Web
●
In-box software CD
●
Software on the Web
All software that is contained on the installation CD is also available on the Web.
Web deployment is the preferred method for obtaining the latest software. The HP Web site offers an
option for automatic e-mail notification of new software releases.
The HP LaserJet M1005 MFP software is available for download at the following Web site:
www.hp.com/go/ljM1005_software
In-box software CD
The software CD for the HP LaserJet M1005 MFP contains a variety of files for installing the software
on the computer.
Purpose and scope
The HP LaserJet M1005 MFP software CD is divided into two partitions, one for each of the following
operating systems:
MS Windows
●
Macintosh
●
The files in each partition include documentation files and files that are required in order to install and
uninstall the software components.
Topics:
Windows partition
●
CD versions
●
Windows partition
The root directory in the MS Windows partition of the software CD contains the HPSETUP.EXE file, the
SETUP.EXE file, and the following directories and support files:
Bahasa
●
Czech
●
ENWW HP LaserJet M1005 MFP software 5
Page 18

Dansk
●
Deutsch
●
English
●
Espanol
●
Francais
●
images
●
Italiano
●
Korean
●
LangFls
●
Magyar
●
Nederlands
●
Norsk
●
OrderReminder
●
Polski
●
Portuguese
●
Russian
●
SChinese
●
Screen Fonts
●
Suomi
●
Svenska
●
TChinese
●
Thai
●
Turkce
●
The software files and help documentation for each language reside in the following subdirectories:
Driver
●
Manuals
●
To view the files, insert the HP LaserJet M1005 MFP software CD into the CD-ROM drive, right-click
Start, click Explore, and then select the CD-ROM drive.
6 Chapter 1 Purpose and scope ENWW
Page 19

CD versions
The HP LaserJet M1005 MFP software CD is available in a single version (Part No. CB376A-60121)
that contains software in these languages:
●
●
BA = Indonesian (Bahasa)
CS = Czech (Cesky)
DA = Danish (Dansk)
●
DE = German (Deutsch)
●
EN = English
●
ES = Spanish (Español)
●
FI = Finnish (Suomi)
●
FR = French (Français)
●
HU = Hungarian (Magyar)
●
IT = Italian (Italiano)
●
KO = Korean
●
NL = Dutch (Nederland)
●
NO = Norwegian (Norsk)
●
PL = Polish (Polski)
●
PT = Brazilian Portuguese (Português)
●
RU = Russian (Russ)
●
Purpose and scope
SV = Swedish (Svenska)
●
TH = Thai
●
TR = Turkish (Turkçe)
●
ZHCN = Simplified Chinese
●
ZHTW = Traditional Chinese
●
The following tables list the software components that are supported in each language.
Table 1-3 BA - KO
Component BA CS DA DE EN ES FI FR HU IT KO
HP LaserJet M1005 MFP
host-based driver
Common MS Windows
Installer
Add Printer Wizard
Installer
CD Browser x x x xxx xxxx
x x x x x x x x x x
x x x x x x x x x x
x x x x x x x x x x
ENWW HP LaserJet M1005 MFP software 7
Page 20

Table 1-3 BA - KO (continued)
Component BA CS DA DE EN ES FI FR HU IT KO
HP LaserJet Scan x x x x x x x x x x
Fonts x x x x x x x x x x
HP Web Registration x x x x x x x x x x
HP LaserJet M1005 MFP
User Guide (.PDF file)
HP LaserJet M1005 MFP
User Guide (.CHM file)
Hewlett-Packard
LaserJet M1005 MFP
Install Notes
x x x x x x x x x x x
x x x x x x x x x x x
x x x x xx xxxx
Table 1-4 NL - ZHTW
Component NL NO PL PT RU SV TH TR ZHCN ZHTW
HP LaserJet M1005 MFP
host-based driver
Common MS Windows
Installer
Add Printer Wizard Installer x x x x x x x x x x
CD Browser x x x x x x x x x x
HP LaserJet Scan x x x x x x x x x x
Fonts x x x x x x x x x x
x x x x x x x x x x
x x x x x x x x x x
HP Web Registration x x x x x x x x x x
HP LaserJet M1005 MFP
User Guide (.PDF file)
HP LaserJet M1005 MFP
User Guide (.CHM file)
Hewlett-Packard
LaserJet M1005 MFP
Install Notes
x x x x x x x x x x
x x x x x x x x x x
xxxxxxxxxx
8 Chapter 1 Purpose and scope ENWW
Page 21
HP LaserJet documentation
On the main screen of the printing-system software CD browser, click Help to open the
HP LaserJet M1005 MFP documentation and support screen.
Purpose and scope
Figure 1-1 Installation software CD documentation and support screen
The following table lists HP LaserJet M1005 MFP documents that are available for each operating
system.
Table 1-5 Documentation availability
Document Windows 2000/XP/
Server 2003
Hewlett-Packard LaserJet M1005 MFP Install Notes x x
HP LaserJet M1005 MFP User Guide (.PDF file) x x
HP LaserJet M1005 MFP User Guide (.CHM file) x
Macintosh
Access to HP LaserJet documents depends on the type of document and its location:
Some documents can be opened from the CD Browser.
●
Some documents appear on the software CD and can be opened by navigating to the folder where
●
they reside.
Some documents are available on the Web through links in the CD Browser or CD folders.
●
ENWW HP LaserJet documentation 9
Page 22

Documents are available in the following file formats:
Portable Document Format (.PDF). The HP LaserJet M1005 MFP software CD includes Adobe®
●
Acrobat® Reader for viewing online documentation.
Compiled HTML (.CHM). When you click a documentation link to a .CHM document, a Microsoft
●
HTML Viewer opens the file on the computer screen.
Hypertext Markup (.HTM). When you click a documentation link to an .HTM document, a Web
●
browser opens the file on the computer screen.
The following documents are available:
HP LaserJet M1005 MFP User Guide
●
Hewlett-Packard LaserJet M1005 MFP Install Notes
●
HP LaserJet M1005 MFP User Guide
The HP LaserJet M1005 MFP User Guide describes the basic device features.
To view this guide from the software CD, follow these steps:
1. In the main screen of the CD browser, click Help.
2. Click Users Guide.
The guide opens as an MS Windows Help file (.CHM file). This readable, onscreen version of the guide
is provided in accordance with the Americans with Disabilities Act (ADA).
You can also gain access to the file by following these steps:
1. Insert the software CD into the CD-ROM drive.
2. Navigate to the <language>\Manuals folder.
3. Open HP1005UG.CHM.
The HP LaserJet M1005 MFP User Guide is provided as a printable .PDF file. To print the guide, follow
these steps:
1. Insert the software CD into the CD-ROM drive.
2. Navigate to the <language>\Manuals folder.
3. Open HP1005UG.PDF.
When the file is open, click File and then click Save As to save a copy of the file to another location.
Hewlett-Packard LaserJet M1005 MFP Install Notes
The Hewlett-Packard LaserJet M1005 MFP Install Notes (in .HTM format) contains important
information about device features, instructions for installing the printing-system software, and technical
assistance.
To view this guide from the software CD, follow these steps:
1. In the main screen of the CD browser, click Help.
2. Click Install Notes.
10 Chapter 1 Purpose and scope ENWW
Page 23

You can also gain access to the file by following these steps:
1. Insert the software CD into the CD-ROM drive.
2. Navigate to the <language>\Manuals folder.
3. Open LJM1005_INSTALLNOTES.HTM.
Purpose and scope
ENWW HP LaserJet documentation 11
Page 24

12 Chapter 1 Purpose and scope ENWW
Page 25

2 Software description
Introduction
The HP LaserJet M1005 MFP comes with software and installers for MS Windows and Apple Computer,
Inc., Macintosh systems. For information about specific system installers, drivers, and components, see
the section that corresponds to that operating system.
NOTE The HP Toolbox is not available on the HP LaserJet M1005 MFP.
Topics:
MS Windows software
●
HP Extended Capabilities
●
HP Status Application
●
Scanning system
●
Supported third-party software
●
Software description
ENWW Introduction 13
Page 26

MS Windows software
Topics:
Software and installer
●
HP LaserJet host-based print driver
●
Software and installer
Topics:
HP LaserJet M1005 MFP software CD for MS Windows systems
●
Installer features
●
HP LaserJet M1005 MFP software CD for MS Windows systems
In the MS Windows 2000, Windows XP, and Windows Server 2003 operating systems, insert the
HP LaserJet M1005 MFP software CD into the CD-ROM drive to open an interactive CD browser. Use
the CD browser to install the print driver and related components, and to gain access to online user
documentation, Adobe Acrobat Reader software, and optional HP software.
The following figure shows the main screen of the HP LaserJet M1005 MFP printing-system software
CD. If the screen does not appear when you insert the software CD into the CD-ROM drive, follow these
steps to open the CD browser:
1. Click Start.
2. Click Run.
3. Click Browse…, and navigate to the root directory of the software CD.
4. Double-click the HPSETUP.EXE file to start the installer.
14 Chapter 2 Software description ENWW
Page 27
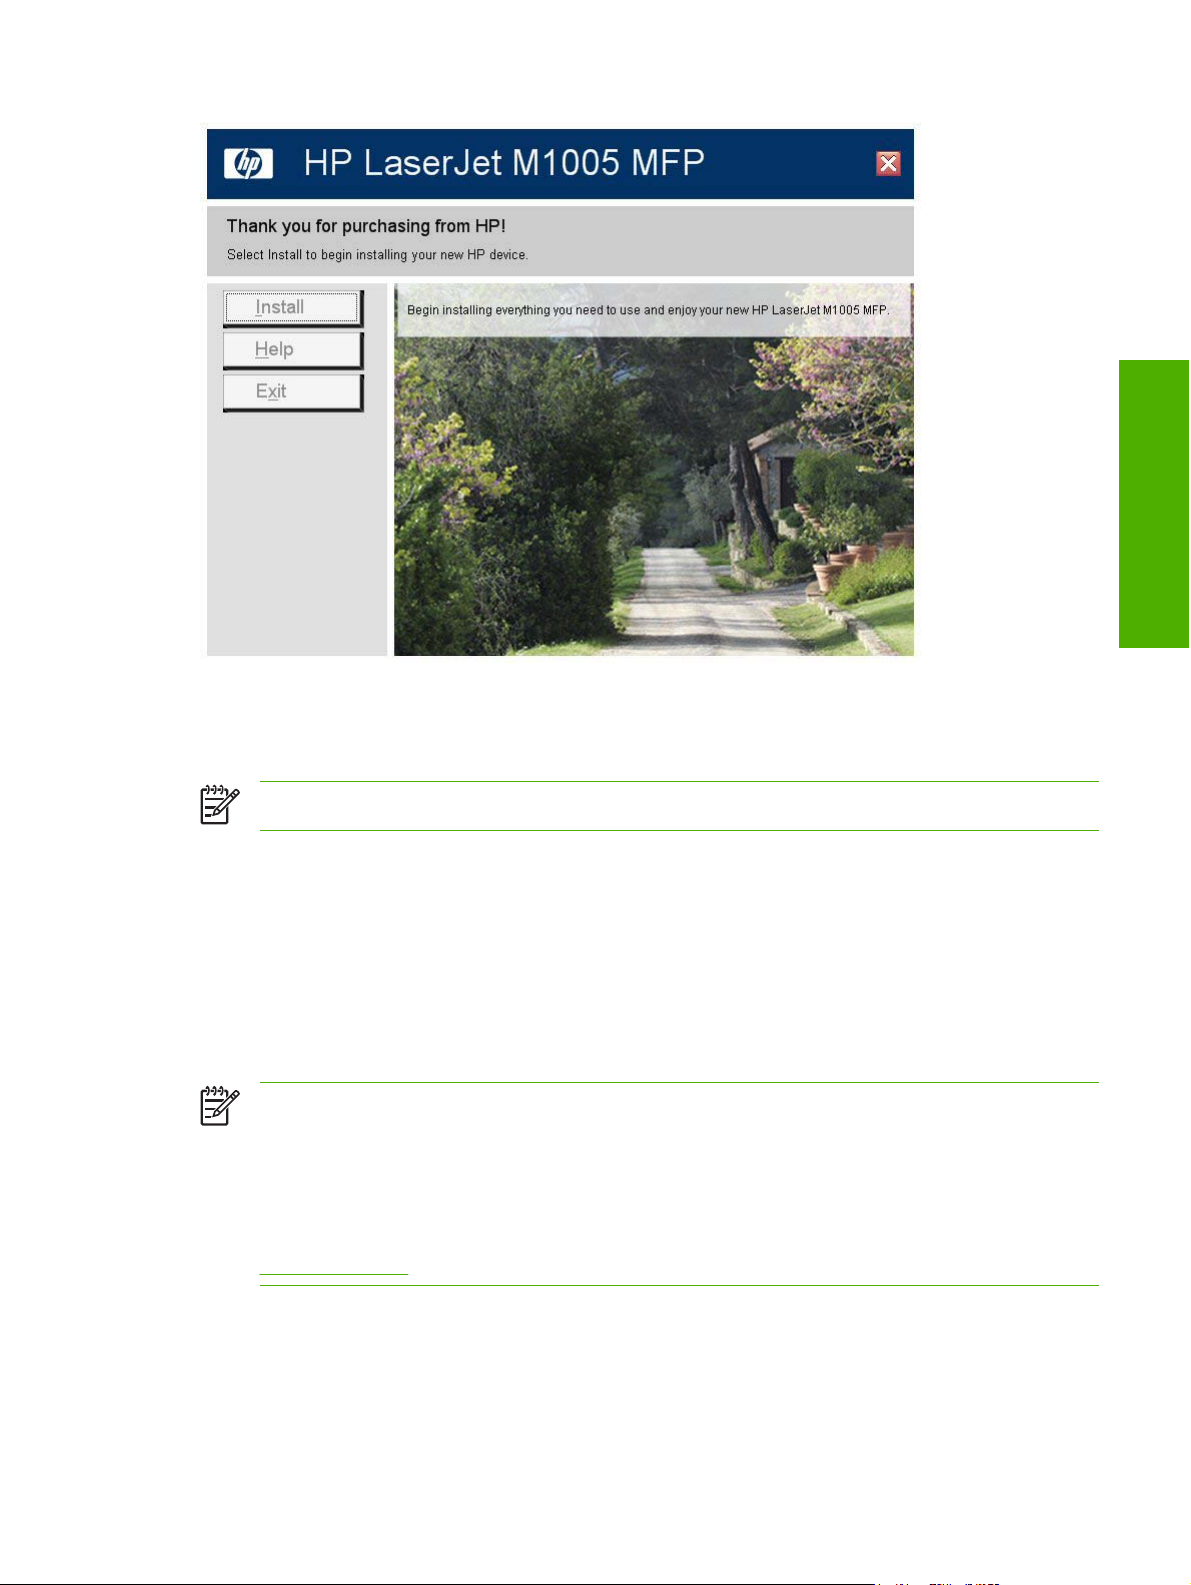
Figure 2-1 Installation software CD browser
The main screen of the software CD contains options in the left panel. Move the cursor over each option
to see a description of the option.
NOTE The options on devices might differ from the illustration.
Install. The installation wizard guides the HP LaserJet M1005 MFP software installation.
Help. Use this option to view the HP LaserJet M1005 MFP user documentation and support. The
following options are available:
Install Notes
●
Users Guide
●
Product Support Website
●
NOTE If Adobe Acrobat Reader is not installed, click any of the links to a portable document
format (.PDF) document to open it in a version of Adobe Acrobat Reader that runs from the
HP LaserJet M1005 MFP software CD. The CD browser version of Acrobat Reader is in English
only, but can be used to open localized versions of .PDF documents. The Adobe Acrobat Reader
software is not installed on the computer and can only run while the printing-system software CD
is in the CD-ROM drive. Adobe Acrobat Reader is also available at the following Web site:
Software description
www.adobe.com
Installer features
The common installer is designed to provide a simple and consistent installation method for the device.
The common installer is available for the Windows 2000, Windows XP, and Windows Server 2003
operating systems and features an interactive software interface.
ENWW MS Windows software 15
Page 28

The HP LaserJet M1005 MFP software CD also includes the following features:
The HP LaserJet Uninstaller Utility
●
HP Extended Capabilities
●
HP Status Application
●
The HP LaserJet Scan software
●
All of the MS Windows system components are installed by using the HP LaserJet M1005 MFP common
installer. The installer automatically detects the language of choice and the operating system.
HP LaserJet host-based print driver
HP LaserJet M1005 MFP host-based print driver provides access to the printing features, such as paperhandling and print-quality features, and communication between the computer and the device. The
printing system includes software for end users and network administrators who are working in the
following operating systems:
Windows 2000, Windows XP (32-bit), and Windows Server 2003 (32-bit)
●
Apple Mac OS X V10.3 and later
●
NOTE For the latest information about the software components, see the readme files on the
CD. For additional information about installing the software, see the Hewlett-Packard
LaserJet M1005 MFP Install Notes on the software CD.
Print-driver version numbers for MS Windows operating systems
Access to print-driver version numbers varies, depending on the operating system in which the
HP LaserJet M1005 MFP is installed.
NOTE For a list of HP LaserJet M1005 MFP print drivers, updated HP software, and device-
support information, go to the following Web site:
www.hp.com/go/ljM1005_software
The Windows 2000, Windows XP, and Windows Server 2003 operating systems support the HP hostbased driver. When using an HP host-based driver in a Windows 2000, Windows XP, or
Windows Server 2003 operating system, follow these steps to find driver-version information:
1. Click Start.
2. Select Settings.
3. Click Printers and Faxes (in Windows XP and Windows Server 2003) or Printers (in
Windows 2000).
4. Right-click the device icon.
5. Click Properties.
6. Click the About tab.
16 Chapter 2 Software description ENWW
Page 29
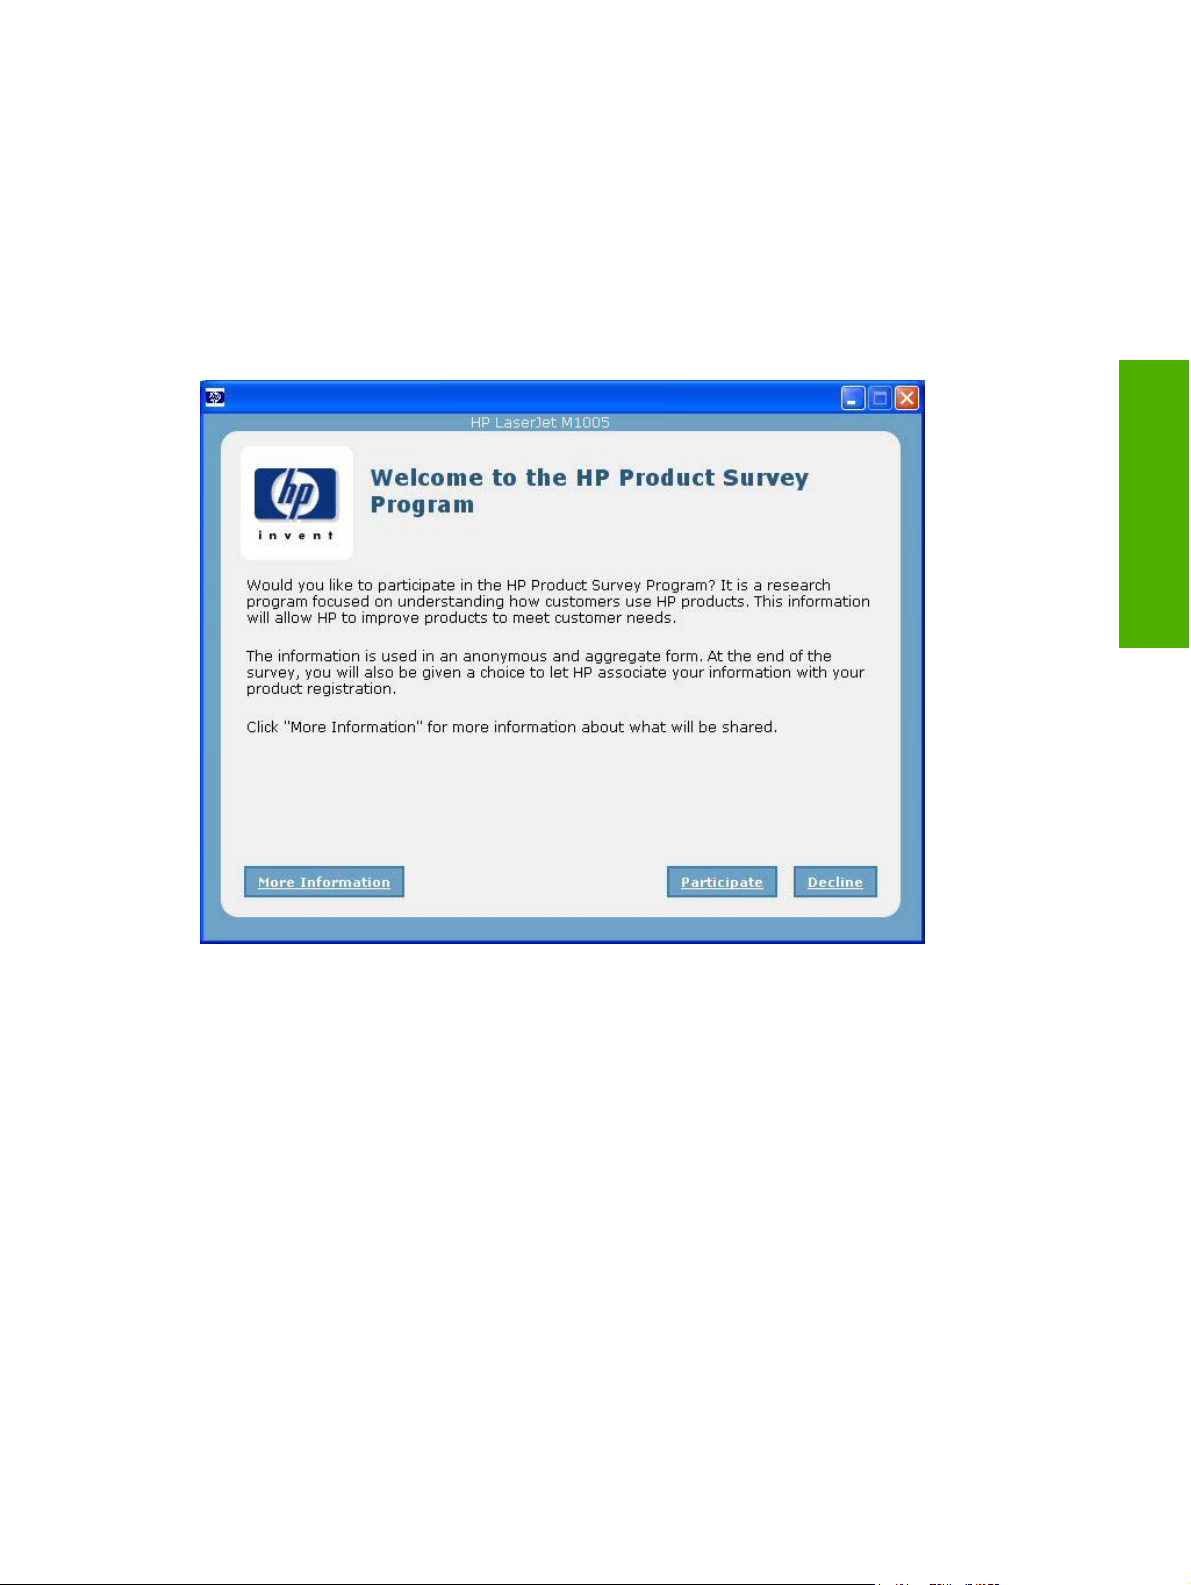
HP Extended Capabilities
When installing the device, you have the option of participating in HP's voluntary program for
communication between your system and HP. This feature, available through software that is included
on the software CD, helps HP monitor toner usage.
If you select the option to participate, you receive an invitation about two weeks after installation. It
contains full disclosure of the information to be communicated. Participation is entirely voluntary, and
the impact on processing and connecting speed is negligible. Personal information is never sent to HP
without permission. TCP/IP addresses are used only to enable the connection and for security purposes.
Software description
Figure 2-2 Welcome to the HP Product Survey Program screen
If you decline the invitation, the dialog box does not appear again and no data is gathered.
ENWW HP Extended Capabilities 17
Page 30
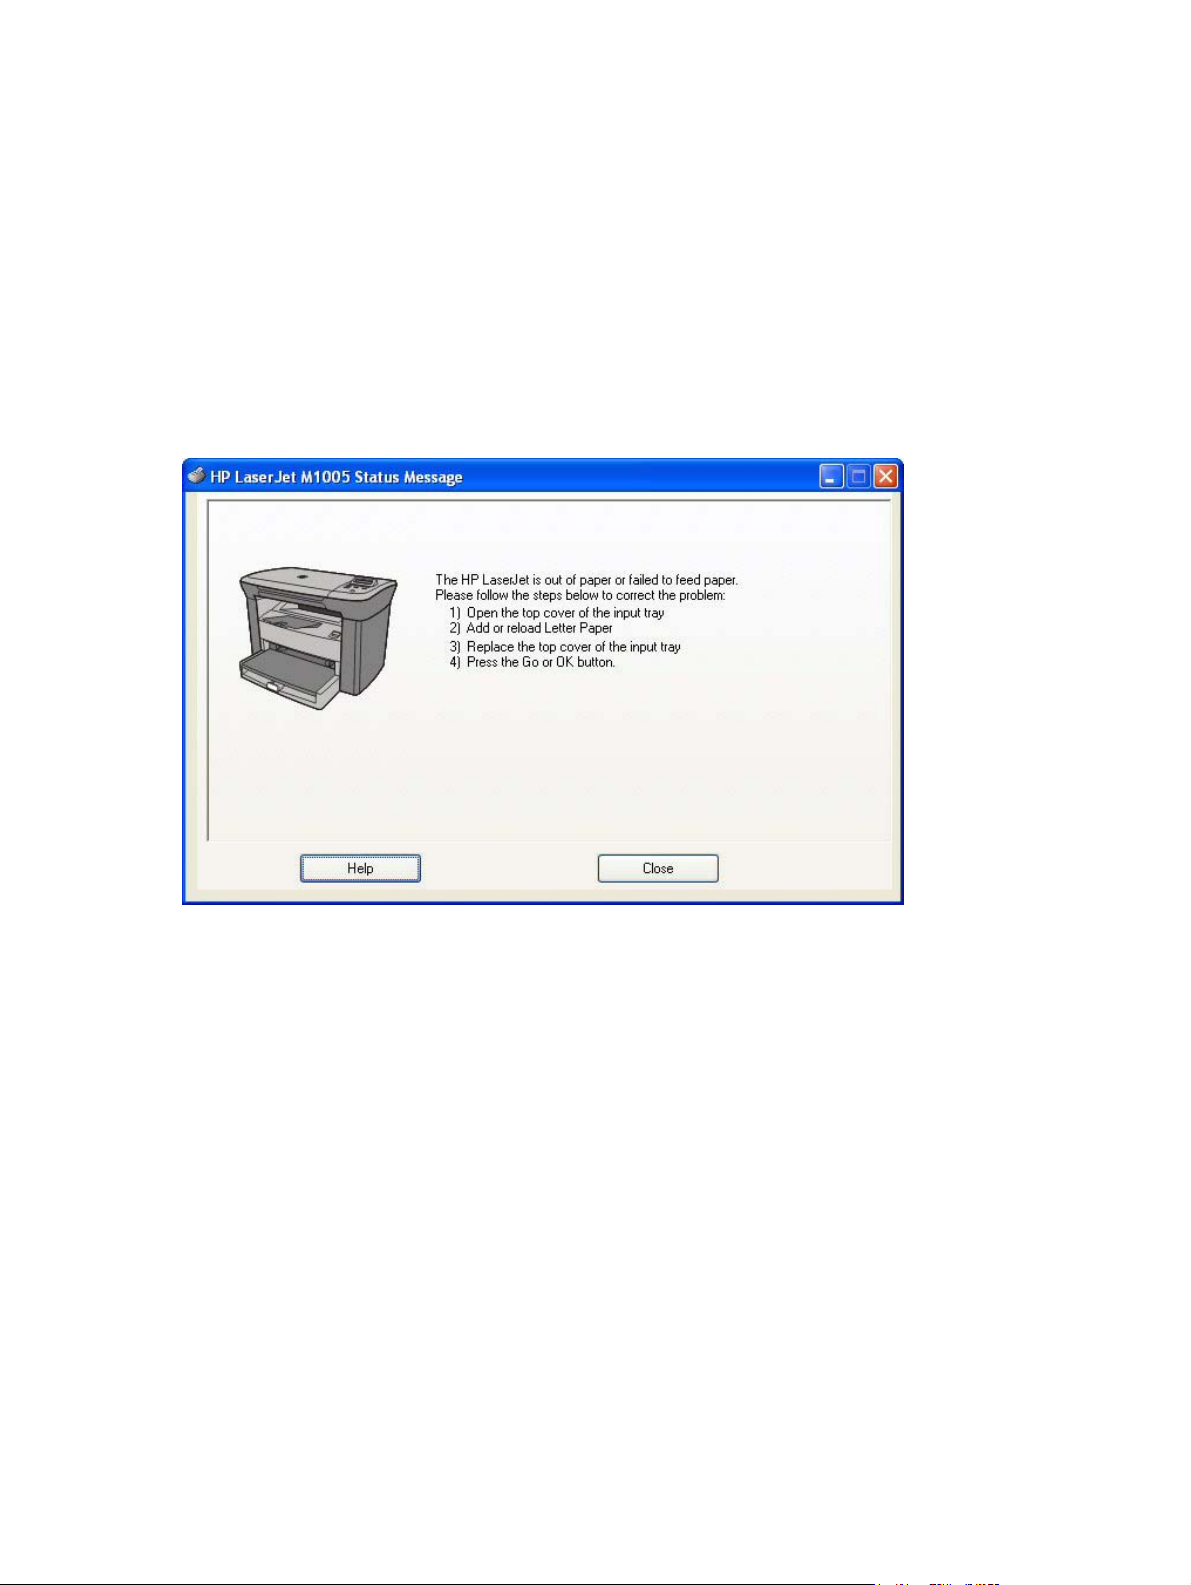
HP Status Application
Status will be reported in two ways:
In the standard Windows spooler
●
By using the HP Status Application, which provides a more user-friendly method of viewing the
●
status of the device and the print job
The HP Status Application relays device status through the input/output (I/O) communication interface.
The HP Status Application will provide pop-up error status messages from the time the printer driver is
sending data to the device until the device has completed processing the print data. This includes
printing all of the pages and the device going back to a ready state.
Figure 2-3 Sample pop-up error status message
18 Chapter 2 Software description ENWW
Page 31

Scanning system
Topics:
Scanning methods
●
HP LaserJet Scan software
●
Scan drivers
●
Scanning methods
Scan from the HP LaserJet device by using any of the following methods.
From a computer. Click Start, select Programs, select HP, select the name of the device, and
●
then click Scan To.
From a TWAIN- or WIA-compliant software program. Check the Help system in the software
●
program to learn how to scan from a TWAIN- or WIA-compliant scanner from within that program.
From the Camera and Scanner Wizard on Windows XP. In Windows XP, click Start, click
●
Control Panel, double-click Scanners and Cameras, and then double-click the HP LaserJet
device scanner icon. The Camera and Scanner Wizard appears. Follow the onscreen directions
to save your scanned item to a file.
HP LaserJet Scan software
Software description
Use the HP LaserJet Scan software to scan from the HP LaserJet device or to read from a file, and then
complete any of the following tasks with the data:
Save the scanned item to a file.
●
Attach the scanned item to an e-mail.
●
Open the scanned item with any third-party software program that supports the drag-and-drop
●
function.
Perform text recognition on the scanned item through Readiris (if Readiris text-recognition software
●
is installed on the computer).
The HP LaserJet Scan software is set up to scan by default , but the General tab does provide an
override to save a scanned item to a file. This is helpful both for testing when a scanner is not available
and for converting existing files into some other output file type. The following file types are currently
supported:
.BMP
●
.GIF
●
.JPG
●
.PDF
●
.TIFF (both regular and compressed)
●
ENWW Scanning system 19
Page 32

Readiris supports the following output file types:
.BMP
●
.DCA
●
.DOC
●
.DW
●
.HTM
●
.MM
●
.PDF
●
.RTF
●
.TXT
●
.WP
●
.WPS
●
.WS
●
.WS2
●
The HP LaserJet Scan software is composed of a simple user interface that provides a Where should
the data go? drop-down menu, a Scan button, a Cancel button, and a Settings... button.
Figure 2-4 hp LaserJet Scan dialog box
The Where should the data go? drop-down menu contains any user-defined Quick Sets and the
following default destinations:
Save it to a file
●
Send it through e-mail
●
Send it to another software program
●
Send it to the Readiris OCR software (if Readiris software is installed)
●
Click Settings... to open a more detailed property dialog box called the Scan Settings dialog box, which
contains options to change the scan settings. The tabs that are available in the Scan Settings dialog
box depend on the destination that you select on the Where should the data go? drop-down menu.
20 Chapter 2 Software description ENWW
Page 33

For example, the E-mail tab appears only if the selected destination is Send it through e-mail. Quick
Sets are also available to store settings that are used on a regular basis.
Software description
Figure 2-5 Scan Settings dialog box
If you do not change any settings in the Scan Settings dialog box, the HP LaserJet Scan software
prompts for any needed information, such as a file name if sending the scanned item to a file folder or
an e-mail address if sending the scanned item in e-mail. If you specify an e-mail address in the Scan
Settings dialog box before scanning the item, the e-mail is sent automatically without the new-message
dialog box opening.
Because the Scan Settings dialog box contains only a limited set of variable, more functionality is
available when using command-line arguments.
Every time the HP LaserJet Scan software is used, an HPPSCAN2.LOG file is generated within the
current user's temporary directory. The HPPSCAN2.LOG file develops a log of operations and aids in
troubleshooting problems.
Scanning to a file sends the scanned image to a MY SCANS directory in the MY DOCUMENTS folder.
CAUTION If you move the My Documents folder, the My Scans folder does not follow to the
new location. It remains hard-coded to the current-user's home, and scan jobs continue to be
stored there.
Selecting the third-party destination option saves the scanned image to a file of the specified file type.
The HP LaserJet Scan software then starts the specified software program by appending the filename
to the software filename. Because the HP LaserJet Scan software does not support automatic discovery
of software programs, specify the correct software program and specify a file type that the program
supports. The HP LaserJet Scan software opens when the filename is passed as a command-line
argument.
ENWW Scanning system 21
Page 34

The HP LaserJet software for Windows supports only 32-bit messaging application programming
interface-(MAPI-) compliant e-mail programs, and does not support Internet-based e-mail programs
such as Hotmail or Yahoo. The following table lists some examples of supported e-mail programs.
Table 2-1 Supported e-mail programs
Program Name Windows OS Macintosh OS
Microsoft Entourage Mac OS X
Microsoft Outlook Yes; Outlook 97, Outlook 98, Outlook 2000, Outlook XP Mac OS X
Microsoft Outlook Express Yes
Lotus Notes Yes; V3.0 and later
E-mail is always sent through the default e-mail client. To identify the default e-mail client in Windows XP
(the path varies for other Windows operating system), click Start, click Settings, click Control Panel,
click Network and Internet Options, click Internet Options, click the Programs tab, and look at the
E-mail setting.
Sending a scan to e-mail generally uses the simple MAPI protocol. If the e-mail address is added before
scanning, extended MAPI can be used to avoid security messages while the program tries to send the
e-mail automatically. Setting a MapiLevel registry key forces the scan program to always use either
simple or extended MAPI. This might be required if scanning to e-mail fails even when the default email client is set up correctly.
Scan drivers
The HP LaserJet M1005 MFP software includes the following integrated scan drivers.
TWAIN driver
●
Windows Image Acquisition (WIA) driver
●
TWAIN DRIVER
The HP LaserJet M1005 MFP software includes a TWAIN driver user interface that provides great
flexibility and a wide range of image-quality options. TWAIN is an industry standard scanning protocol.
Initiate scans from the HP LaserJet device by using any TWAIN-compliant program.
TWAIN compatibility
TWAIN-compliant programs acquire documents directly from the HP LaserJet device. Programs that
follow the TWAIN standards should work.
NOTE HP LaserJet devices support the required core functions for TWAIN compliance, but
have only limited support for extended TWAIN options.
22 Chapter 2 Software description ENWW
Page 35

TWAIN scanning does not work with some programs
For programs that are not TWAIN-compliant, use the following process as a workaround.
1. Use the HP LaserJet Scan software to scan the document, in .TIFF format (or any other file type
that the software supports), into a folder.
2. Import the .TIFF file into the program.
Additional information about TWAIN
For more information about TWAIN, visit the following Web site:
www.twain.org
TWAIN driver user interface (MS Windows)
To scan a page:
1. Place the page to be scanned on the flatbed scanner.
2. Click Start, select Programs or All Programs, and then select HP.
3. Select HP LaserJet M1005 MFP and click Scan To.
4. In the Where should the data go? drop-down menu, select the desired destination for the scanned
image, and then click Scan.
Software description
The HP LaserJet M1005 MFP scans a preview image of the page on the flatbed scanner and the TWAIN
driver user interface appears with the preview scan image.
Figure 2-6 TWAIN driver user interface (MS Windows)
ENWW Scanning system 23
Page 36

The TWAIN driver user interface contains the following drop-down menus, options, tabs, and buttons:
NOTE Many of the options in the drop-down menus control the same features that are available
by using the TWAIN user interface tabs and buttons.
Scan. This drop-down menu contains the following options:
●
New Scan. Use this option to rescan the image. Flatbed previews are always at 75 dpi and
●
in color.
Accept. Use this option to rescan the image if the original is on a flatbed scanner and then
●
send the image back to a program with the specified settings.
Exit. Use this option to exit the HP LaserJet Scan software.
●
Basic. This drop-down menu contains the following options:
●
Rotate. Use this option to rotate the scanned image 90° to the left or 90° to the right.
●
Zoom. Use this option to zoom in or out on the selected area of the scan. This automatically
●
starts a rescan if one is needed to obtain a clear image.
Resize. Use this option to change the selection area for final scan. The final scan is performed
●
within this selection area.
Lighten / Darken. Use this option to lighten or darken the scanned image.
●
Reset Tools. Use this option to reset all the controls to their default values.
●
Advanced. This drop-down menu contains the following options:
●
Resolution. Use this option to designate the final resolution for the image. The software
●
interpolates resolutions that are above 1200 dpi.
B/W Threshold. Use this option to adjust the black and white threshold, and to specify which
●
color channel is used for the scan.
Mirror. Use this option to flip the scanned image horizontally.
●
Invert Colors. Use this option to invert the colors in the scanned image.
●
Color Adjustment. Use option tab to adjust the color on the scanned image.
●
Output Type. This drop-down menu contains the following options:
●
Millions of Colors (default).
●
256 Colors (8 bit).
●
256 Colors (web palette).
●
256 Colors (system palette).
●
256 Gray Shades.
●
Black White (1 bit).
●
24 Chapter 2 Software description ENWW
Page 37

Help. This drop-down menu contains links to the following help documents:
●
User's Manual.
●
HP Photo Imaging Help.
●
About HP Scanning.
●
Resize. Use this tab to control the selection area for the final scan. The final scan is performed
●
within this selection area.
Software description
Figure 2-7 TWAIN driver user interface – Resize
ENWW Scanning system 25
Page 38

Resolution. Use this tab to designate the resolution for the final scan. The software interpolates
●
resolutions that are above 1200 dpi.
NOTE Scans that are above 1200 dpi can take a long time to complete and can consume
large amounts of memory.
Figure 2-8 TWAIN driver user interface – Resolution
26 Chapter 2 Software description ENWW
Page 39

Lighten/Darken. Use this tab to lighten or darken the final scan.
●
Software description
Figure 2-9 TWAIN driver user interface – Lighten/Darken
ENWW Scanning system 27
Page 40

Sharpen. Use this tab to control the sharpness of the final scan.
●
Figure 2-10 TWAIN driver user interface – Sharpen
28 Chapter 2 Software description ENWW
Page 41

Color Adjustment. Use this tab to adjust the color on the final scan.
●
Software description
Figure 2-11 TWAIN driver user interface – Color Adjustment
ENWW Scanning system 29
Page 42

B/W Threshold. Use this tab to adjust the black and white threshold, and to specify which color
●
channel is used for the final scan.
NOTE Select Black White (1 bit) in the Output Type drop-down menu to enable the
control on this tab.
●
●
●
●
●
WIA driver
Use any of the following methods to open the Windows Image Acquisition (WIA) scanning feature for
Windows XP.
●
●
●
Figure 2-12 TWAIN driver user interface – B/W Threshold
Invert Colors. Use this button to invert the colors in the scanned image.
Mirror. Use this button to flip the scanned image horizontally.
Preview. Use this button to rescan the preview image.
Scan. Use this button to complete the final scan with the selected output settings.
Cancel. Use this button to cancel the scan.
Start WIA scanning through a WIA-compliant software program.
Right-click on the scanner icon in the My Computer folder and click Scan.
Right-click on the scanner icon in the My Computer folder and click Scanner Wizard.
30 Chapter 2 Software description ENWW
Page 43

Right-click on the scanner icon in the Scanners and Cameras folder in the Control Panel and
●
click Scan.
Right-click on the scanner icon in the Scanners and Cameras folder in the Control Panel and
●
click Scanner Wizard.
WIA has its own user interface. It is relatively simple and does not contain the wide range of imagequality options that are available in the TWAIN driver user interface.
When using the WIA scan driver, modify the brightness and contrast after the scan. Contrast or
brightness modifications cannot be set on the device. Only native device resolutions are supported, and
software interpolation is not performed. The WIA scan driver supports the following compression types:
None
●
.JPG
●
.GIF
●
.TIFF
●
Software description
ENWW Scanning system 31
Page 44

Supported third-party software
This section describes third-party software programs that the device supports.
Text-recognition software
The device software has an integrated text-recognition feature. This feature is also known as optical
character recognition, or OCR. Text-recognition is also available through the third-party software
program Readiris, which is included on a separate CD that comes with the device.
About text-recognition reliability
Text-recognition software turns an image into computer-editable text by analyzing the image and
defining the characters. The accuracy obtained through text-recognition software depends on the
quality, size, and structure of the original document, and on the quality of the scan itself. To obtain the
best possible results when using text-recognition software, use the following guidelines:
Scan directly from the text-recognition software.
●
Process only pages that contain 9-point text or larger.
●
Limit pages that contain underlining, forms, graphics, rotated text, photographs, and handwriting.
●
Scan images squarely.
●
Make sure that the pages are free of extraneous marks.
●
Maximize the scanning resolution. Use a minimum of 300 dpi.
●
Process only pages that have crisp, clear text. Letters that have gaps, that "bleed" along their
●
edges, or that touch other letters do not work well. Text that is aligned closely to nontext items,
such as graphics, might also degrade text-recognition results.
Fine-tune the amount of black and white on scanned images. See the user guide for information.
●
Avoid scanning from thin media that has information printed on the back side. The information on
●
the back can bleed through.
Even when following these recommendations, less-than-perfect image results can occur. This is
because text-recognition technology is evolving and is still less than perfect.
Readiris text-recognition software
The Readiris text-recognition software converts scanned images into text that can be edited in wordprocessing programs.
NOTE The Readiris CD is not set up at fulfillment. The CD is available from Global Support
Organization (GSO) or HP Parts in accordance with contractual and licensing agreements.
The Readiris user interface is available in the following languages:
Dutch
●
English
●
French
●
32 Chapter 2 Software description ENWW
Page 45

German
●
Italian
●
Korean
●
Portuguese-Brazillian
●
Simplified Chinese
●
Spanish
●
NOTE Readiris can perform text recognition (also known as optical character recognition, or
OCR) in 124 languages.
Readiris Professional (V11.0 for Windows, V11.5 for Macintosh) supports text recognition in 2-byte
Asian characters. Set the operating system to display 2-byte characters in order to see the text.
NOTE For better text-recognition scanning results, start Readiris and scan directly into the
program. Readiris (V11.0 for Windows, V11.5 for Macintosh) automatically starts a wizard to
guide this process.
When Readiris is installed on the computer, it appears as an option in the destination dropdown
box in the HP Scan software. Select Readiris as the destination to scan the image into .TIFF
format. Readiris automatically starts the text-recognition process.
Software description
The Readiris software uses a separate installer that comes on a separate CD. The initial release
of the HP LaserJet M1005 MFP includes Readiris Professional (V11.0 for Windows, V11.5 for
Macintosh) software.
ENWW Supported third-party software 33
Page 46

34 Chapter 2 Software description ENWW
Page 47

3 Install MS Windows software
components
NOTE This chapter covers information about installing the HP LaserJet M1005 MFP software
for MS Windows.
Topics:
Installation overview
●
Installation options
●
Installation dialog box options for MS Windows 2000, MS Windows XP, and MS
●
Windows Server 2003
●
Uninstall
Install MS Windows
software components
ENWW 35
Page 48

Installation overview
The software for the HP LaserJet M1005 MFP comes on a single CD. On computers running MS
Windows 2000, MS Windows XP, or MS Windows Server 2003, the HPSETUP.EXE file installs the
HP LaserJet M1005 MFP software from the CD onto the hard disk and updates MS Windows files.
For all of the supported operating systems, the Installer guides the installation process as you provide
information about the computer environment.
36 Chapter 3 Install MS Windows software components ENWW
Page 49

Installation options
The HP LaserJet M1005 MFP software can be used with the HP LaserJet M1005 MFP in the following
configurations:
Install the HP LaserJet M1005 MFP software on a computer that is directly connected to the device
●
through a USB port and is running MS Windows 2000, MS Windows XP, or MS Windows Server
2003.
Install the HP LaserJet M1005 MFP software on a computer that is directly connected to the device
●
through a USB port and is running MS Windows 2000, MS Windows XP, or MS Windows Server
2003. Then share the HP LaserJet M1005 MFP with other users on the network by using MS
Windows sharing.
NOTE Scanning functions cannot be shared.
MS Windows installation for direct connections
Use the following instructions to install the device software on a computer that is running MS Windows
2000, MS Windows XP, or MS Windows Server 2003.
NOTE Set up and turn on the HP LaserJet M1005 MFP before installing the software. Do not
connect the HP LaserJet M1005 MFP to the computer until the prompt appears.
You must have administrator privileges to install the software on MS Windows 2000, MS Windows
XP, or MS Windows Server 2003.
1. Quit all open programs.
2. Insert the HP LaserJet M1005 MFP software CD into the CD-ROM drive.
NOTE If the CD does not start automatically, click Start, click Run, and then browse to
and double-click the HPSETUP.EXE file in the root directory of the CD.
3. Follow the onscreen prompts to install the software.
4. When the installation is nearly complete, the Setup Complete! dialog box appears. Click Finish
to finish the installation and print a test page.
5. If prompted to restart the computer, click Yes.
Set up MS Windows Sharing (peer-to-peer networking)
This section contains instructions for using MS Windows Sharing to make the device available to network
users when the device is directly connected to a computer.
NOTE This STR outlines the procedures for sharing a device through MS Windows Sharing
(peer-to-peer networking). If these procedures are not successful, contact Microsoft at the
following Web site:
systems and not of the HP printer drivers, HP does not support peer-to-peer networking.
In Windows-sharing, the person who uses the computer that is directly connected to the device can
allow other users on the network to print to the HP LaserJet M1005 MFP.
http://www.microsoft.com. Because it is a function of Microsoft operating
Install MS Windows
software components
ENWW Installation options 37
Page 50

When the HP LaserJet M1005 MFP is shared, install the printer driver on all of the computers that can
print to the HP LaserJet M1005 MFP.
Set up the MS Windows 2000 host computer
At the computer that is directly connected to the HP LaserJet M1005 MFP, perform the following steps:
1. Click Start, click Settings, and then click Printers.
2. In the device list, right-click the icon for the HP LaserJet M1005 MFP, and then click Sharing.
3. On the Sharing tab, click the Share As option button, and then type a name for the
HP LaserJet M1005 MFP in the Share Name field. Click OK.
NOTE The device Share Name is limited to 8 characters.
Set up the MS Windows XP or MS Windows Server 2003 host computer
At the computer that is directly connected to the HP LaserJet M1005 MFP, perform the following steps:
1. Click Start and then click Printers and Faxes.
2. In the device list, right-click the icon for the HP LaserJet M1005 MFP and then click Sharing.
3. On the Sharing tab, click the Share this printer option button and type a name for the
HP LaserJet M1005 MFP in the Share Name field. Click OK.
NOTE The device Share Name is limited to 8 characters.
4. Click the Ports tab. Click to clear the Enable bidirectional support check box, and then click
OK.
Set up the client computers
When the host computer is set up to share theHP LaserJet M1005 MFP, also configure the client
computers. Perform the following steps at all the other network computers that will use the
HP LaserJet M1005 MFP.
Set up MS Windows 2000 client computers
1. Click Start, click Settings, and then click Printers.
2. Double-click the Add Printer icon to open the Add Printer wizard.
3. Click Next to start the wizard.
4. Click the Network Printer option button, and then click Next.
5. Type the path and share name of the HP LaserJet M1005 MFP to connect to or click Browse and
navigate to it.
6. Click Next.
7. Click Yes or No when asked if you want to use this device as your default printer for MS Windows-
based programs, and then click Next.
8. Click Finish to complete the installation and close the Add Printer wizard.
38 Chapter 3 Install MS Windows software components ENWW
Page 51

NOTE You might need the software CD to complete the print-driver installations.
Set up MS Windows XP or MS Windows Server 2003 client computers
1. Click Start and then click Printers and Faxes.
2. In the column to the left, under Printer Tasks, click Add a printer to open the Add Printer wizard.
3. Click Next to start the wizard.
4. Click the A network printer or a printer attached to another computer option button, and then
click Next.
5. Type the path and share name of the HP LaserJet M1005 MFP to connect to or click Browse and
navigate to it.
6. Click Next.
7. Click Yes or No when asked if you want to use this device as your default printer for MS Windows-
based programs, and then click Next.
8. Click Finish to complete the installation and close the Add Printer wizard.
Install MS Windows
software components
ENWW Installation options 39
Page 52

Installation dialog box options for MS Windows 2000, MS Windows XP, and MS Windows Server 2003
The following section shows the dialog box options that appear during the HP LaserJet M1005 MFP
software installation on MS Windows 2000, MS Windows XP, or MS Windows Server 2003 operating
systems.
NOTE HP recommends that you install the software before connecting the HP LaserJet M1005
MFP to the computer (software-first installation). These instructions are for a software-first
installation.
Use these instructions the first time that you install the HP LaserJet M1005 MFP software.
To begin the installation, insert the software CD into the CD-ROM drive and then click Install on the
main screen of the CD Browser. If the screen does not appear when the software CD is inserted into
the CD-ROM drive, follow these steps to open the CD Browser:
1. Click Start.
2. Click Run.
3. Click Browse… and then navigate to the root directory of the software CD.
4. Double-click the SETUP.EXE file to start the installer.
5. Click Install to begin the installation process.
Figure 3-1 Step 1 - Welcome dialog box
Click Documentation to open a Web browser and the Hewlett-Packard LaserJet M1005 MFP Install
Notes.
40 Chapter 3 Install MS Windows software components ENWW
Page 53

Click Next to go to the License Agreement dialog box (step 2).
Click Cancel to go to the Exit Setup dialog box (step 7).
Figure 3-2 Step 2 - HP Software License Agreement dialog box
Click Back to return to the Welcome dialog box (step 1).
Click Yes to go to the Settings dialog box (step 3).
Click No to go to the Exit Setup dialog box (step 7).
Install MS Windows
software components
ENWW Installation dialog box options for MS Windows 2000, MS Windows XP, and MS
Windows Server 2003
41
Page 54

Figure 3-3 Step 3 - Settings dialog box
Click Back to return to the License Agreement dialog box (step 2).
Click Next to start installing the software and go to the HP LaserJet M1005 MFP Setup dialog box (step
4). A progress bar reflects the status of the installation process.
Click Cancel to go to the Exit Setup dialog box (step 7).
42 Chapter 3 Install MS Windows software components ENWW
Page 55

Figure 3-4 Step 4 - HP LaserJet M1005 MFP Setup dialog box
Click Back to return to the Settings dialog box (step 3).
Connect the USB cable to the computer and the device, and then turn on the device to continue the
installation.
Install MS Windows
software components
Figure 3-5 Step 5- HP Extended Capabilities dialog box
ENWW Installation dialog box options for MS Windows 2000, MS Windows XP, and MS
Windows Server 2003
43
Page 56

If you select the Install HP Extended Capabilities option, a dialog box appears two weeks after
installing the device inviting participation in the HP Product Survey Program.
If you select the Do not install HP Extended Capabilities option, you are not invited to participate in
the HP Product Survey Program.
Click More Information to find out more about HP Extended Capabilities and the HP Product Survey
Program.
Click Next to go to the Setup Complete dialog box (step 6).
NOTE If required, the installer updates the device firmware. This might take several minutes.
Click Back to return to the Settings dialog box (step 3).
Click Cancel to go to the Exit Setup dialog box (step 7).
Figure 3-6 Step 6 - Setup Complete! dialog box
The Register LaserJet series online check box and the Print Test Page check box are selected by
default. The Print Test Page option is unavailable.
Click Finish with the Register LaserJet series online check box selected to open the Online
Registration page in the Web browser.
Click Finish with the Print Test Page check box selected to send a test page to the device.
44 Chapter 3 Install MS Windows software components ENWW
Page 57

Figure 3-7 Step 7 - Exit Setup
Click Yes to go to the Setup Interrupted dialog box (step 8).
Click No to return to the last installer dialog box that was open.
Install MS Windows
software components
Figure 3-8 Step 8 - Setup Interrupted
Click Finish to close the installer.
ENWW Installation dialog box options for MS Windows 2000, MS Windows XP, and MS
Windows Server 2003
45
Page 58

Uninstall
Topics:
Uninstall instructions for MS Windows 2000, MS Windows XP, and MS Windows Server 2003
●
Uninstall, add, or repair by using the installation CD
●
Uninstall instructions for MS Windows 2000, MS Windows XP, and MS
Windows Server 2003
NOTE To uninstall the software from MS Windows 2000, MS Windows XP, or MS Windows
Server 2003, log on with Administrator privileges.
1. Quit all open programs.
2. Click Start, select Programs (or All Programs in MS Windows XP or MS Windows Server 2003),
select HP, select HP LaserJet M1005 MFP, and then click Uninstall HP LaserJet M1005 MFP.
3. The HP LaserJet M1005 MFP Uninstall Wizard appears. Click Next to continue.
Figure 3-9 The HP LaserJet M1005 MFP Uninstall Wizard
46 Chapter 3 Install MS Windows software components ENWW
Page 59

4. The HP LaserJet M1005 MFP Driver Uninstall information dialog box appears. Click Next to
begin the uninstall process.
Figure 3-10 HP LaserJet M1005 MFP Driver Uninstall information dialog box
NOTE If the device is on and connected to the computer, the following message appears.
Unplug the USB cable and then click Retry to continue.
Figure 3-11 HP LaserJet M1005 MFP Driver Uninstall information - unplug device dialog box
A progress bar reflects the status of the uninstall process.
Install MS Windows
software components
ENWW Uninstall 47
Page 60

5. When the uninstall process is complete, the Uninstall complete! dialog box appears.
Figure 3-12 Uninstall complete! dialog box
Click Restart to restart your computer and finish the uninstall process.
NOTE Clicking the x in the upper-right-hand corner will not clear the Uninstall
complete! dialog box.
48 Chapter 3 Install MS Windows software components ENWW
Page 61

Uninstall, add, or repair by using the installation CD
After installing the software, use the installation CD to uninstall the software, add another printer, or
repair installation errors.
1. Insert the CD into the CD-ROM drive.
Figure 3-13 Welcome Back! screen
The Welcome Back! contains options in the left panel. Move the cursor over each option to see a
description of the option.
Add/Repair. Use this option to add another printer, repair installation errors, or to uninstall the
printing-system software.
Help. Use this option to view the HP LaserJet M1005 MFP user documentation and support.
Uninstall. Use this option to start the uninstall wizard. See
2000, MS Windows XP, and MS Windows Server 2003.
Exit. Use this option to exit the process.
2. After clicking an option, follow the onscreen prompts to complete the process.
Uninstall instructions for MS Windows
Install MS Windows
software components
ENWW Uninstall 49
Page 62

50 Chapter 3 Install MS Windows software components ENWW
Page 63

4 Host-based driver features for MS
Windows
Topics:
Introduction to host-based printing
●
Access to the driver
●
Help system
●
Driver tabs
●
ENWW 51
Host-based driver
features for MS Windows
Page 64

Introduction to host-based printing
The HP LaserJet M1005 MFP is a host-based device. Host-based printing differs from PCL printing by
computing the print job on the host computer rather than computing it in the device formatter. The
following illustration shows how the HP LaserJet M1005 MFP printing-system software works.
Figure 4-1 HP LaserJet M1005 MFP host-based driver overview
As a host-based printing system, the HP LaserJet M1005 MFP print driver uses MS Windows to convert
the graphics device interface (GDI) or device driver interface (DDI) calls from software programs into
JBIG (standard-compression) compressed pages. These pages are sent in “chunks” through the driver
to the device formatter.
The HP LaserJet M1005 MFP print driver also receives status messages from the formatter firmware.
These messages are passed to the Status Application, which displays them.
The HP LaserJet M1005 MFP formatter has 2 MB of read-only memory (ROM) and 32 MB of random
access memory (RAM). Both the firmware and the compressed page must fit into the 32 MB of RAM.
52 Chapter 4 Host-based driver features for MS Windows ENWW
Page 65

Access to the driver
To gain access to driver settings from within most software programs, click File, click Print, and then
click Properties. The appearance and names of the driver tabs that appear can vary, depending on the
operating system. These settings apply only while the software program is open.
You can also control the driver directly from the Printers folder. These settings change the default
settings for all software programs.
In MS Windows 2000, click Start, select Settings, select Printers, right-click the device name, and
●
then click Printing Preferences to gain access to the same set of driver tabs that the software
program controls.
In MS Windows XP or MS Windows Server 2003, click Start, select Settings, select Printers and
●
Faxes (MS Windows XP Professional) or Printers and Other Hardware Devices (MS Windows
XP Home), right-click the device name, and then click Printing Preferences to gain access to the
same set of driver tabs that the software program controls.
Click Properties after right-clicking the device name to gain access to the Properties tab set, which
controls the driver behavior and driver connections.
Printing Preferences tab set
The HP LaserJet M1005 MFP host-based Printing Preferences tabs contain options for formatting
documents for the HP LaserJet M1005 MFP. Gain access to the Printing Preferences tabs either
through the software program or through the MS Windows Printers folder. For more information, see
Access to the driver section.
the
The following tabs are included in Printing Preferences tab set:
Advanced
●
Paper/Quality
●
Effects
●
Finishing
●
Services
●
Properties tab set
The Properties tab set contains information about and options for configuring the device.
NOTE MS Windows also has tabs in the Properties tab set. For information about those tabs,
see the documentation that came with the computer.
Host-based driver
features for MS Windows
ENWW Access to the driver 53
Page 66

Help system
The HP LaserJet M1005 MFP host-based driver includes a full-featured Help system to provide
assistance with printing and configuration options. The following Help options are available:
What's this? Help
●
Context-sensitive Help
●
Paper Type Warning
●
What's this? Help
"What's this?" Help is supported in MS Windows 2000, MS Windows XP, and MS Windows Server 2003.
Access "What's this?" Help messages in the following ways:
Right-click a control and click What's this?, and a pop-up Help window appears.
●
Click the ? button at the upper-right corner of the frame, next to the X, to change the cursor to an
●
arrow with a question mark. Use this special cursor to select a control, and the pop-up Help window
for that feature appears.
Press the F1 key, and the Help window for the currently selected control appears.
●
Context-sensitive Help
Press the Help button on a driver tab or in a dialog box, and context-sensitive Help appears.
Paper Type Warning
Paper type warnings are unsolicited messages that appear in response to specific actions. These
messages appear in response to selections that could damage the device. For example, if you select
Bond in the Type is: drop-down menu, a message appears warning you to change the setting before
printing on other types of media.
Figure 4-2 A typical paper type warning
54 Chapter 4 Host-based driver features for MS Windows ENWW
Page 67

Driver tabs
Topics:
Printing Preferences tab set
●
Properties tab set
●
Printing Preferences tab set
Topics:
Advanced tab features
●
Paper/Quality tab features
●
Effects tab features
●
Finishing tab features
●
Services tab features
●
Advanced tab features
Use the Advanced tab to set the number of copies, collation, and print-job output options. The following
illustration shows the Advanced tab.
ENWW Driver tabs 55
Host-based driver
features for MS Windows
Page 68

Figure 4-3 Advanced tab
Paper/Output
The following settings are in the Paper/Output group box:
Collate
●
Copy
●
Collate
The Collate option becomes active if the Copy setting is greater than 1. Select Collate to collate multiple
copy print jobs.
Copy
This setting is useful for software programs that do not provide a copy count. If a copy count is available
in the software program, set the copy count in the software program. Copy specifies the number of
copies to print.
56 Chapter 4 Host-based driver features for MS Windows ENWW
Page 69

The requested number of copies appears in the Copy option. Select the number by typing in the box or
by using the up and down arrows to the right of the text box. For the HP LaserJet M1005 MFP, valid
entries are numbers from 1 to 9999. The copies value will not advance from the maximum number (9999)
to 1 when the up arrow is used, or change from 1 to the maximum number (9999) when the down arrow
is used.
When you click another group box or leave the Advanced tab, invalid entries into the edit box (such as
non-numerical input, numbers less than 1, or numbers greater than the maximum allowed) change to
the last valid value that appeared in the box. The default number of copies is 1.
Because the number of copies can be set from some software programs, conflicts can arise between
the software program and the driver. In most cases, the software program and the driver communicate
so that the number of copies set in one location (such as the program) appears in the other (such as
the driver). For some programs, this communication does not happen, and the copies values are treated
independently. For example, setting 10 copies in the program and then setting 10 copies in the driver
will result in 100 copies (10 x 10) being printed. Set the number of copies in the program, wherever
possible.
Printer Features
The following settings are in the Printer Features group box:
Print all Text as Black
●
REt
●
Print all Text as Black
Print all Text as Black is off by default. When selected, the driver prints all text as black regardless of
the original document text color. However, white text remains white as a fail-safe method of printing
reverse typeface against a dark background. This setting does not affect graphic images on the
page. Print all Text as Black remains selected only for the current print job.
REt
Resolution Enhancement technology (REt) refines the print quality of characters by smoothing out
jagged edges that can occur on the angles and curves of a printed image. It is On by default. Select
Off if graphics, particularly scanned images, are not printing clearly.
Paper/Quality tab features
Use the Paper/Quality tab to specify the size, type, and source of the media for the HP LaserJet M1005
MFP. You can also use this tab to indicate different paper-selection choices for the first page, other
pages, and back cover of the document. The following illustration shows the Paper/Quality tab.
Host-based driver
features for MS Windows
ENWW Driver tabs 57
Page 70

Figure 4-4 Paper/Quality tab
Print Task Quick Sets
The first group box in the upper portion of the Paper/Quality tab is Print Tasks Quick Sets. Because
they are all the same control, any change to the Print Task Quick Sets group box that is made on
the Paper/Quality tab affects the Print Task Quick Sets group boxes on the other driver tabs. The
following tabs contain Quick Sets group boxes:
Paper/Quality
●
Effects
●
Finishing
●
Use the Print Task Quick Sets setting to store the current combination of driver settings that appears
on all of the other print driver tabs. Print Task Quick Sets are user-defined printing specifications (such
as media size, pages per sheet, and so on). The Print Task Quick Sets control does not appear on the
driver Properties tabs.
The following selections are available in the Print Task Quick Sets drop-down menu:
58 Chapter 4 Host-based driver features for MS Windows ENWW
Page 71

Default Print Settings
●
User's Manual
●
Type new Quick Set name here
●
Default Print Settings
When you select Default Print Settings, nearly all of the settings are restored to the combination that
existed after the driver was installed (the original settings). However, if the attribute combinations that
are associated with watermark definitions or custom paper sizes have been changed or deleted, the
original settings are not restored.
Type new Quick Set name here appears in the Print Task Quick Sets menu automatically if no other
driver settings have been changed since the driver was installed, or if all of the driver settings match the
original settings. Otherwise, the setting in the Print Task Quick Sets menu is the same label that
appeared when a user on the computer last closed the printing Properties dialog box by clicking OK.
User's Manual
The User's Manual option provides a Print Task Quick Sets setting for optimal printing of the HP
LaserJet M1005 User Guide.
Type new Quick Set name here
By default, the Print Task Quick Sets menu is set to Type new Quick Set name here. When you
change any of the default settings on any of the Printing Preferences driver tabs, Type new Quick
Set name here appears in the Print Task Quick Sets menu and the Save button becomes active.
Highlight the words Type new Quick Set name here, type the name for the new Print Task Quick Set,
and then click Save. Print Task Quick Sets are saved in the system registry. To delete a Print Task
Quick Set, select it from the drop-down menu and then click Delete.
Store a maximum of 25 Print Task Quick Sets on any system. If you attempt to save too many, a
message box appears that states: There are too many Quick Sets defined. Please delete some
before adding new ones.
Paper Options
The settings specified in the Paper Options group box on the Paper/Quality tab apply to all of the
pages of the document. The following illustration shows the Paper Options group box and the selections
available.
Host-based driver
features for MS Windows
ENWW Driver tabs 59
Page 72

Size is:
Figure 4-5 Paper Options group box
The following are settings in the Paper Options group box:
Size is:
●
Source is:
●
Type is:
●
The Size is: setting is a drop-down menu that lists all of the supported media sizes.
Specify the size for all the settings in the Paper Options group box. You must use the same size of
media for the entire print job. That is, if the print job uses letter-size media, any option that you select
from the available Use Different Paper/Covers options must also use letter-size media.
NOTE Certain software programs can override the size command and specify different media
sizes within a single document.
For the Other Pages and Back Cover settings, select a source (tray) and media type that differ from
the settings selected for First Page. If a conflict exists among media source, media size, and/or media
type, and you choose to keep the conflicting settings, the settings are processed in the following order:
media size, media type, and then media source.
Because driver settings are overridden by media-size settings in most software programs, use the driver
to set media size only for software programs that don't have a media-size setting, such as NotePad, or
when producing a book or a booklet that does not require different media sizes.
NOTE When using a software program that has a media-size setting, specify different media
sizes within a single document by using the Use Different Paper/Covers options. For more
information, see
Use Different Paper/Covers check box.
60 Chapter 4 Host-based driver features for MS Windows ENWW
Page 73

For more information about media sizes, see Media attributes.
Use Different Paper/Covers check box
When the Use Different Paper/Covers check box is selected, the Front Cover, First page, Other
pages, Last page, and Back Cover options become available. Click any of these options and then
select Size is:, Source is:, and Type is: for each option.
Custom Paper Size group
Click the Custom button to open the Custom Paper Size dialog box.
Figure 4-6 Custom Paper Size dialog box
Use the Custom Paper Size dialog box to create or modify custom-paper-size information. The Custom
Paper Size dialog box contains the following options:
Name field. Click the text box to type a name for the custom paper size or click the drop-down
●
menu to select a custom paper size that is already defined.
Paper Size group box. If you type in a size that is too large or too small, the driver automatically
●
adjusts the size.
Width: spin box. Use the spin controls to select the width for the custom paper size, or click
●
in the text box to type the width.
Height: spin box. Use the spin controls to select the height for the custom paper size, or click
●
in the text box to type the height.
Units group box. Select inches or millimeters to define the custom paper size.
●
Click Save to save the custom size or click Close to return to the Paper/Quality tab.
ENWW Driver tabs 61
Host-based driver
features for MS Windows
Page 74

Source is:
The Source is: setting specifies the source tray to use for printing a document.
The Source is: drop-down menu can contain the following options:
Auto Select
●
Manual Feed
●
Tray 1
●
The default setting is Auto Select. When this is selected, the device uses the source tray that supports
the selected media size. If you select a source tray other than Auto Select, make sure that the correct
media size is loaded in the source tray.
Type is:
For more information about media sources, see
Media attributes.
The Type is: drop-down menu shows all the paper types that the HP LaserJet M1005 MFP supports.
When you use the default setting, Letter, the device uses the default media type, which is usually
Plain.
The following standard paper types appear in the lists.
Table 4-1 Standard paper types and engine speed
Paper type Engine speed
Plain Full – 1:1
HP Multipurpose Paper Full – 1:1
HP Office Paper Full – 1:1
HP All-in-One Printing Paper Full – 1:1
HP LaserJet Paper Full – 1:1
HP Premium Choice LaserJet Paper Full – 1:1
Preprinted Full – 1:1
Letterhead Full – 1:1
Transparency Half – 1:2
Prepunched Full – 1:1
Labels Half – 1:2
Bond Half – 1:2
Recycled Full – 1:1
Color Full – 1:1
Light (< 75 g/m2)
Heavy (90 to 105 g/m2)
Cardstock (105 to 176 g/m2)
Envelope Half – 1:2
Full – 1:1
Half – 1:2
Half – 1:2
1
1
1
1
62 Chapter 4 Host-based driver features for MS Windows ENWW
Page 75

Table 4-1 Standard paper types and engine speed (continued)
Paper type Engine speed
Rough Half – 1:2
1
Throughput for continuous printing might be less than 4 pages per minute as a result of fuser heating
1
limitations.
The default setting is Plain. If you select a different setting, make sure that the correct media type is
loaded in the tray selected in the Source is: setting.
For more information about media types, see
Media attributes.
Use Different Paper/Covers options
Print books that include different media types by using the Use Different Paper/Covers options.
Select the Use Different Paper/Covers check box to make the following settings appear in the group
box, along with associated options:
Front Cover
●
First Page
●
Other Pages
●
Last Page
●
Back Cover
●
To use Use Different Paper/Covers options, configure the setting for the print job. Each option for
the Use Different Paper/Covers setting is described in the sections that follow this procedure. Use the
following instructions to configure the setting.
To configure the Use Different Paper/Covers options for a print job
For each option, set a different tray by using the Source Is: drop-down menu. For some options, the
Type is: drop-down menu is also available.
1. To use different paper or cover stock, select the Use Different Paper/Covers check box. A list of
options appears in the dialog box. The full set of selections is visible by using the down arrow button
to the right of the list to scroll.
2. To use different media for the pages within the print job, select the appropriate option (Front
Cover, First Page, Other Pages, Last Page, or Back Cover) in the dialog box. A check mark
appears to the left of the option when a setting is changed using the Source is: or Type is: dropdown menus.
3. Click OK to print.
NOTE Use the same size of media for the entire print job. All options selected from the
available Use Different Paper/Covers options use the size selected in the First Page settings.
When you change the type and source of the paper and covers, the settings remain configured
until you close the software program.
Each option for the Use Different Paper/Covers setting is described in the following sections.
ENWW Driver tabs 63
Host-based driver
features for MS Windows
Page 76

Front Cover and Back Cover options
Use these options to include a blank or preprinted front cover or back cover on a document.
The following illustration shows the Front Cover setting and options. These options are the same for
the Back Cover setting.
Figure 4-7 Front Cover setting
The Front Cover and Back Cover options are as follows:
Add a Blank or Preprinted Cover check box
●
Source is: drop-down menu
●
Type is: drop-down menu
●
When you select Front Cover or Back Cover, also select the Add a Blank or Preprinted Cover check
box to enable the setting. When this check box is selected, the Source is: and Type is: drop-down
menus become available and a check mark appears next to the Front Cover or Back Cover option.
NOTE The Back Cover options are not available when the Booklet Layout setting is enabled
on the Finishing tab. For two-page-per-sheet (2-up) booklet printing, include a cover by selecting
different media for the first page only. The back cover setting is unavailable, because this page
would be printed in the middle of a booklet.
The Source is: setting specifies the source tray to use for adding a back cover to the document. The
list of source trays depends on the installed accessories. Any optional media trays that are installed
through the Configure tab also appear here. For more information about the Source is: setting, see
Source is: section of this chapter.
the
The Type is: drop-down menu shows all of the media types that the printer supports. For more
information about the Type is: drop-down menu settings, see the Type is: in the
Type is: section of this
chapter.
64 Chapter 4 Host-based driver features for MS Windows ENWW
Page 77

First Page, Other Pages, and Last Page options
Use these options to select an alternative media size, type, or source for the first page, other pages, or
last page of a document. The following illustration shows the appearance of the Paper Options group
box when the Use Different Paper/Covers check box is selected.
Figure 4-8 First Page, Other Pages, and Last Page options
The First Page, Other Pages, and Last Page options are as follows:
Size is: drop-down menu
●
Source is: drop-down menu
●
Type is: drop-down menu
●
The Size is: driver setting for the first page applies to the entire print job. When this is set, the setting
becomes unavailable for all the other Use Different Paper/Covers options.
Document preview image
The document preview image is a line-drawn image of a page that represents graphics and text. The
document preview image is always oriented so that the contents of the page are right-side-up. The
document preview image appears in the upper-right corner of the Paper/Quality, Effects, and
Finishing tabs.
Switching between tabs does not change the location or appearance of the document preview image.
Move the mouse over the document preview image, and the mouse cursor changes from an arrow to a
gloved hand. Toggle between portrait and landscape page orientation by clicking on the image.
Print Quality
Host-based driver
features for MS Windows
The Print Quality group box contains the Print Quality drop-down box and the EconoMode check
box.
ENWW Driver tabs 65
Page 78

The default setting for Print Quality is FastRes 1200.
This setting controls resolution, which refers to the number of dots per inch (dpi) used to print the page.
As resolution is increased, the quality (clarity and visual appeal) of print on the page is improved.
However, higher resolution might also result in longer printing times. The following Print Quality options
are available in the drop-down box:
FastRes 1200
●
600 dpi
●
Select the EconoMode check box in conjunction with any of the print quality settings. When using
EconoMode, the device uses less toner on each page. Using this option might extend the life of the print
cartridge and can lower the cost per page, but also reduces print quality. Using the EconoMode feature
with non-HP print cartridges can result in toner spillage or device damage.
Effects tab features
Use the Effects tab to create unique media effects such as scaling and watermarks. The following
illustration shows the Effects tab.
66 Chapter 4 Host-based driver features for MS Windows ENWW
Page 79

Figure 4-9 Effects tab
The Effects tab contains the following controls:
Print Task Quick Sets
●
Resizing Option
●
Document preview image
●
Watermarks
●
Print Task Quick Sets
Use the Print Task Quick Sets control to store the current combination of driver settings that are found
on all other Printing Preferences driver tabs. Print Task Quick Sets are either preset or user-defined
printing specifications, such as paper size and pages per sheet. For more information, see
Quick Sets in the Paper/Quality tab section of this guide.
ENWW Driver tabs 67
Print Task
Host-based driver
features for MS Windows
Page 80

Resizing Option
The Resizing Option group box consists of the following controls:
Actual Size
●
Print Document On
●
Scale to Fit
●
% of Normal Size
●
Actual Size
Select the Actual Size option to print the page at normal size. This option is the default.
Print Document On
Select the Print Document On option to format the document for one paper size and then print the
document on a different paper size, with or without scaling the image to fit the new paper size.
The Print Document On control is disabled by either of the following conditions:
The % of Normal Size value is not 100.
●
The Pages per Sheet value (on the Finishing tab) is not 1.
●
When Print Document On is selected, the drop-down menu shows the available media sizes. The list
contains all of the standard media sizes that are supported by the selected media source and any custom
sizes that have been created. When Print Document On is selected, Scale to Fit is automatically
selected.
Scale to Fit
The Scale to Fit option box specifies whether each formatted document page image is scaled to fit the
target paper size. By default, Scale to Fit is selected when Print Document On is selected. If the setting
is turned off, then the document page images will not be scaled, and are instead centered at full size
on the target paper. If the document size is larger than the target paper size, then the document image
is clipped. If it is smaller, then it is centered within the target paper. The following illustration shows
preview images for a document that is formatted for legal-size paper and where the Print Document
On check box is selected and the target size is specified as Letter.
Figure 4-10 Preview images - Legal on Letter; Scale to Fit off (left) and on (right)
When the size for which the document is formatted (that is, the logical size) differs from the target size,
the preview image uses a dashed gray line to show the boundaries of the logical page in relation to the
target page size.
68 Chapter 4 Host-based driver features for MS Windows ENWW
Page 81

% of Normal Size
The % of Normal Size option provides a slider bar to use for scaling the percentage setting. The default
setting in the entry box is 100% of normal size. Normal size is defined as the paper size that is selected
within the driver or what the driver receives from the software program (if the software program does
not negotiate the paper size with the driver). The driver scales the page by the appropriate factor and
sends it to the device.
The limits of the range are from 25% to 400%, and any values outside the range are adjusted to those
limits as soon as the focus is removed from the control (that is, when the Tab key is pressed or another
control is selected).
Any change to the scale also changes the page preview, which increases or decreases from the upperleft corner of the preview.
The slider bar controls the scale directly. The value in the edit box changes as the scroll bar indicator
is dragged, and the preview image is updated to the new image scale. Each click on the scroll bar arrows
increases or decreases the scale by 1%. Each click on the slider bar affects the scale by 10%.
You cannot achieve an exact value by dragging the scroll bar indicator at the default Microsoft Windows
resolution; use the scroll bar indicator to approximate the value, and then use the scroll bar arrows to
refine the value.
The following settings disable % of Normal Size:
Print Document On (on the Effects tab) is selected
●
Pages per Sheet (on the Finishing tab) is not 1
●
Document preview image
The document preview image is a line-drawn image of a page that represents graphics and text. The
document preview image is always oriented so that the contents of the page are right-side up. The
document preview image appears in the upper-right corner of most Printing Preferences driver tabs
(the Paper/Quality, Effects, and Finishing tabs).
Switching between tabs does not change the location or appearance of the document preview image.
Move the mouse over the document preview image, and the mouse cursor changes from an arrow to a
gloved hand. Toggle between portrait and landscape page orientation by clicking on the image.
Watermarks
Use the Watermarks feature to select a watermark, create a custom watermark (text only), or edit an
existing watermark. The following watermarks are preset in the driver.
Current Watermarks
●
Watermark Message
●
Message Angle
●
Font Attributes
●
The drop-down menu shows alphabetically sorted watermarks that are currently available on the system
plus the string "(none)", which indicates that no watermark is selected. This is the default setting. Any
watermark selected from this list appears in the preview image.
Host-based driver
features for MS Windows
When the First Page Only check box is selected, the watermark is printed only on the first page of the
document. The First Page Only check box is disabled when the current watermark selection is "(none)".
ENWW Driver tabs 69
Page 82

Watermarks are applied to logical pages. For example, when Pages per Sheet is set to "4" and First
Page Only is turned off, four watermarks appear on the physical page (one on each logical page).
Click Edit, and the Watermark Details dialog box appears.
Figure 4-11 Watermark Details
The dialog box shows a preview image and provides options for creating a new watermark and
controlling the message angle and font attributes.
Click OK to accept all of the changes that are made in the Watermark Details dialog box. However,
clicking Cancel does not cancel all of the changes. If you make changes to a watermark, and then select
a different watermark or click New, all of the changes made to the previous watermark are saved, and
only the current, unsaved changes can be canceled.
Current Watermarks
The Current Watermarks group box contains a list of available watermarks, both the predefined
watermarks made available in the driver and any new watermarks that have been created.
To create a new watermark, click New. The new watermark appears in the Current Watermarks list
and in the Watermark Message edit box as "&Units" until you name it. The name typed in the
Watermark Message field appears in the Current Watermarks group box in the Watermark Details
dialog box and in the Watermarks group box on the Effects tab.
70 Chapter 4 Host-based driver features for MS Windows ENWW
Page 83

To name the new watermark, type the selected watermark text in the Watermark Message edit box.
To delete a watermark, select the watermark in the Current Watermarks list and click Delete. A warning
appears asking whether you are sure you want to delete the selected item. Click Cancel if you want to
keep the watermark. Click OK to delete the selected watermark.
NOTE No more that 30 watermarks can be saved in the Current Watermarks list at one time.
When the limit of 30 watermarks is reached, the New button is disabled.
To edit an existing watermark, select the watermark in the Current Watermarks list. If you change
the Watermark Message for that watermark, you are, in effect, creating a new watermark.
Watermark Message
The Watermark Message is also the name that identifies the watermark in the Current Watermarks
list, except when more than one watermark has the same message. For example, several different
watermarks can contain the message DRAFT, each with a different typeface or font size. When this
occurs, the string is appended with a space, a pound sign, and a number (for example, Draft #2). When
a number is added, the number two is used first, but if the resulting name is also in the list, then the
number increases until the name is unique (Draft #3, Draft #4, and so on).
Message Angle
Use the controls in the Message Angle group box to print the watermark in different orientations in
relation to the text on the page. The settings are Diagonal, Horizontal, or Angle (custom). The default
is Diagonal. All three settings automatically center the watermark string within the page; the selection
of a particular setting affects only the angle of the string placement. Diagonal places the text along a
line that spans the lower-left to upper-right corners of the page. Horizontal places the text along a line
that spans the mid-left and mid-right edges of the page. Angle places the text at the specified angle
across the page.
Font Attributes
Use the controls in the Font Attributes group box to change the font and the shading, size, and style
of the font.
The Font Attributes group box contains the following controls:
●
●
●
●
●
Name
The Name drop-down menu lists fonts that are currently installed on the system. The default is language-
dependent.
Color
The Color option is a fixed, unalterable set of color choices for the watermark: Gray.
Name drop-down menu
Color drop-down menu
Shading drop-down menu
Size spin box
Style drop-down menu
Host-based driver
features for MS Windows
ENWW Driver tabs 71
Page 84

Shading
The default Shading setting for new and preset watermarks is Very Light. The following range of shades
is available from the Shading drop-down menu:
Lightest
●
Very Light (default)
●
Light
●
Medium Light
●
Medium
●
Medium Dark
●
Dark
●
Very Dark
●
Darkest
●
These values represent the intensity of the gray that is used. A choice of Light produces a lightly
saturated gray watermark. A choice of Lightest produces the lightest shade of watermark; Darkest
produces a black watermark.
Size
Font sizes from 1 to 999 points are available from the Size menu. The default point size is languagedependent. The choice of Regular, Bold, Italic, and Bold Italic is available from the Style drop-down
menu.
Style
The choice of Regular, Bold, Italic, and Bold Italic is available from the Style drop-down menu. The
default Style setting for new and preset watermarks is Regular.
Finishing tab features
Use the Finishing tab to print booklets and control the media output. The following illustration shows
the Finishing tab.
72 Chapter 4 Host-based driver features for MS Windows ENWW
Page 85

Figure 4-12 Finishing tab
The Finishing tab contains the following controls:
Print Task Quick Sets
●
Document Options
●
Document preview image
●
Orientation
●
Print Task Quick Sets
Use the Print Task Quick Sets control to store the current combination of driver settings that appear
on all of the other Printing Preferences driver tabs. Print Task Quick Sets are either preset or userdefined printing specifications, such as paper size and pages per sheet. For more information, see
Task Quick Sets in the Paper/Quality tab section of this chapter.
ENWW Driver tabs 73
Print
Host-based driver
features for MS Windows
Page 86

Document Options
The Document Options group box contains the following controls:
Print on Both Sides
●
Flip Pages Up
●
Booklet layout
●
Pages per Sheet
●
Print Page Borders
●
Page Order
●
Print on Both Sides
NOTE The Print on Both Sides check box is unavailable if the Allow Manual Duplexing
option is disabled on the Device Settings tab in the Properties tab set.
The default setting for the Print on Both Sides option is off (not selected). Selecting Print on Both
Sides makes the Flip Pages Up and Booklet Printing options available.
When a print job is sent to the device with the Print on Both Sides option selected, the even pages
print, and then the following dialog box appears with instructions to complete the manual duplex process.
Figure 4-13 Print on Both Sides Instructions
74 Chapter 4 Host-based driver features for MS Windows ENWW
Page 87

Instructions for manually printing on both sides
Follow these steps to manually print on both sides.
1. Click File, click Print, and then click Properties.
2. Click the Finishing tab, and then click the Print on Both Sides check box. Click OK to continue.
3. When the even-numbered pages have printed, the Load Tray (X) - Press
Flip Pages Up
The Flip Pages Up check box, enabled only when Print on Both Sides is selected, is used to specify
the duplex-binding option. By default, the Flip Pages Up check box is not selected. The following table
demonstrates the results of selecting this box, depending on the paper orientation selected on the
Finishing tab.
Table 4-2 Page orientation
Orientation (Finishing tab) Flip Pages Up selected Flip Pages Up not selected
Portrait Short-edge binding Long-edge binding
Landscape Long-edge binding Short-edge binding
message appears
on the device control panel and the Print on Both Sides Instructions dialog box appears on the
computer screen.
a. Without changing the orientation, remove the paper stack from the output bin. Do not discard
blank sheets.
b. Insert the paper stack into the same input tray that the even-numbered pages (first sides)
were printed from, maintaining the same orientation (that is, with the same edge of the page
feeding into the device first).
c. Press the OK button to print the odd-numbered pages.
When Print on Both Sides is selected, the document preview image changes to show a spiral binding
along either the left edge or the top edge of the page. In addition, a folded-over corner appears in the
lower-right portion of the preview image, indicating that printing occurs on the back side. An arrow on
the folded-over corner points in the direction that the pages would be flipped if they were bound together.
Short-side binding is for print jobs with pages that read by flipping over like the pages of a notepad.
Long-side binding is for print jobs with pages that read by turning like the pages of a book.
Booklet layout
The Booklet Layout drop-down menu, visible when Print on Both Sides is selected, offers choices
that are based on the current paper size. The default setting for the Booklet Printing drop-down menu
is Off.
Left Edge Binding
●
Right Edge Binding
●
Selecting Left Edge Binding or Right Edge Binding changes the document preview image to show
the location of the binding. If the Pages per Sheet setting is on the default setting of 1, it automatically
changes to 2 pages per sheet. Changing the Pages per Sheet setting manually to 4, 6, 9, or 16 pages
ENWW Driver tabs 75
Host-based driver
features for MS Windows
Page 88

per sheet disables the booklet setting. See the Printing a Booklet section of this chapter for more
information.
The Booklet Layout setting is disabled when A6 or B6 (JIS) is selected as the media size, and an
incompatibility-error message appears when you click OK to close the driver.
Book and booklet printing
The HP LaserJet M1005 MFP supports book and booklet printing.
A book is a print job consisting of at least two pages that can have a different media type for the first
page, other pages, or back cover. Use the First Page, Other Pages, and Back Cover settings on
the Paper/Quality tab (available when you select the Use Different Paper check box) to select different
media for these pages.
A booklet is a print job that places two pages on each side of a sheet that can be folded into a booklet
that is half the size of the media type. Use the Booklet Layout drop-down menu on the Finishing tab
to control booklet settings.
Printing a Booklet
Complete the following steps to print a booklet.
1. Click File, click Print, and then click Properties.
2. Click the Device Settings tab and select the Print on Both Sides check box.
3. In the Booklet Layout drop-down menu, select the type of booklet printing that you want. For
example, Right Edge Binding.
4. Click OK in the print driver.
5. Click OK in the Print dialog box to print.
Printing a book
You can print a book in which the first page, other pages, and back cover have different media types.
For more information, see the
Pages per Sheet
Use the Pages per Sheet option to select the number of pages to print on a single sheet of media.
If you print more than one page per sheet, the pages appear smaller and are arranged on the sheet in
the order that they would otherwise be printed. The Pages per Sheet drop-down menu provides six
settings:
1 page per sheet (default)
●
2 pages per sheet
●
4 pages per sheet
●
6 pages per sheet
●
Paper/Quality tab features section of this chapter.
9 pages per sheet
●
16 pages per sheet
●
76 Chapter 4 Host-based driver features for MS Windows ENWW
Page 89

NOTE Selecting an option other than 2 pages per sheet makes booklet printing unavailable.
Print Page Borders
Related controls indented beneath the Pages per Sheet edit box are Print Page Borders and Page
Order, which become active when Pages per Sheet is greater than 1.
Print Page Borders sets a line around each page image on a printed sheet to help visually define the
borders of each logical page.
Page Order
The Page Order drop-down menu contains four selections:
Right, then Down
●
Down, then Right
●
Left, then Down
●
Down, then Left
●
The preview document image changes to reflect alterations in these settings, as shown by the examples
in the following illustration.
Figure 4-14 Page-order preview images
2 pages per sheet
●
4 pages per sheet
●
6 pages per sheet
●
9 pages per sheet
●
16 pages per sheet
●
Document preview image
The document preview image is a line-drawn image of a page that represents graphics and text. The
document preview image is always oriented so that the contents of the page are right-side up. The
document preview image appears in the upper-right corner of most Printing Preferences driver tabs
(the Paper/Quality, Effects, and Finishing tabs).
Switching between tabs does not change the location or appearance of the document preview image.
Move the mouse over the document preview image, and the mouse cursor changes from an arrow to a
gloved hand. Toggle between portrait and landscape page orientation by clicking on the image.
Host-based driver
features for MS Windows
ENWW Driver tabs 77
Page 90

Orientation
The Orientation group box contains the following options:
Portrait option button
●
Landscape option button
●
Rotate 180 degrees check box
●
Portrait option button
Select this feature to print the document in Portrait orientation. This is the default setting.
Landscape option button
Select this feature to print the document in Landscape orientation.
Rotate by 180 degrees check box
Select this feature to rotate the document image on the paper 180°. For example: If the return address
on an envelope is smudged, try using this setting and feed the envelope so that the return address area
is fed into the device first.
Services tab features
Use the Services tab to gain access to Internet services for the device. The following illustration shows
the Services tab.
78 Chapter 4 Host-based driver features for MS Windows ENWW
Page 91

Figure 4-15 Services tab
The Services tab contains the Select a destination drop-down menu with the following selections:
Support and Troubleshooting
●
Product Manuals
●
Check for Driver Updates
●
Order Supplies
●
If you have Internet access, select any of these items and then click Go! to open the corresponding HP
Web page.
Properties tab set
Topics:
Device Settings tab features
●
ENWW Driver tabs 79
Host-based driver
features for MS Windows
Page 92

About tab features
●
Device Settings tab features
Use the Device Settings tab to control driver behavior and driver connections. The following illustration
shows the Device Settings tab.
Figure 4-16 Device Settings tab
Jam Recovery
Select On to reprint a page if a paper jam occurs. Select Off to not reprint a page if a paper jam
occurs. Off is the default setting.
NOTE Jobs print faster when Off is selected.
Print density
Use this control to specify how much toner is put on the page. 3 is the default setting.
80 Chapter 4 Host-based driver features for MS Windows ENWW
Page 93

Status Message
Select On to allow error messages to display on the computer screen during error conditions. Select
Off to not allow error messages to display on the computer screen during error conditions. On is the
default setting.
NOTE The paper-out message still appears when Off is selected.
Courier Font Type
Select Regular to print any text by using TrueType Courier or Courier New with normal weight.
Select Dark to print any text by using TrueType Courier or Courier New with a dark weight but without
changing the font attributes in a program. Regular is the default setting.
Allow Manual Duplexing
Use this setting to allow printing on both sides of a page using manual two-sided printing. This option
is selected by default.
About tab features
The About tab provides detailed information about the driver. It contains an overall build number after
the model name, and specific information about each of the components. The information varies
according to the HP LaserJet M1005 MFP model, driver, date, and version numbers. The following
illustration shows the About tab.
ENWW Driver tabs 81
Host-based driver
features for MS Windows
Page 94

Figure 4-17 About tab
Driver Files:
The Driver Files: box lists driver installation file names and their version numbers.
Configuration Status:
The Configuration Status: box lists the Service Id number and the page count.
82 Chapter 4 Host-based driver features for MS Windows ENWW
Page 95

5Macintosh
Introduction
The HP LaserJet M1005 MFP comes with printing software and installers for Apple Computer, Inc.,
Macintosh operating systems.
Topics:
Macintosh printing-system software
●
Macintosh install and uninstall instructions
●
Macintosh remote firmware updates
●
TWAIN driver user interface (Macintosh)
●
ENWW Introduction 83
Macintosh
Page 96

Macintosh printing-system software
The HP LaserJet M1005 MFP printing system for Macintosh is composed of the Printer Setup Utility
(Mac OS X V10.3 and later) and HP-created printer dialog extension (PDE) files. The driver uses these
files to determine the features and postscript commands that the device supports. The following
components are installed:
The HP LaserJet Installer for Mac OS X V10.3 and later
●
LIBRARY/PRINTERS/PPDS/CONTENTS/RESOURCES/LANGUAGE.LPROJ (for Mac OS X)
●
NOTE Installation CD version 1.0 does not support the Intel-based Macintosh operating
system.
Topics:
System requirements
●
Availability
●
System requirements
G3, G4, or G5 PowerPC processor
●
Mac OS X V10.3 and later, with 128 MB RAM and 50 MB of available hard-disk space
●
CD-ROM drive or Internet connection
●
Availability
This document provides information about the availability of the HP LaserJet M1005 MFP printingsystem software and related software and firmware. Printing-system software on a CD is available from
HP fulfillment centers.
Topics:
Software on the Web
●
In-box printing-system software CDs
●
Software on the Web
All software that is contained on the installation CD is also available on the Web.
Web deployment is the preferred method for obtaining the latest software. The Web site offers an option
for automatic e-mail notification about new software releases.
NOTE This document describes drivers that are shipped with the printing-system software CD.
This document does not describe any drivers that support personnel might release.
Topics:
Macintosh software
●
Software component availability
●
84 Chapter 5 Macintosh ENWW
Page 97

Macintosh software
The HP LaserJet M1005 MFP software is available for download at the following Web site:
www.hp.com/go/ljM1005_software
Software component availability
The following HP LaserJet software components are available:
PDE files for Mac OS X V10.3 and later
●
In-box printing-system software CDs
The software CD for the HP LaserJet M1005 MFP contains the files for installing the software on the
computer.
Topics:
Macintosh partition
●
CD versions
●
Macintosh partition
The HP LaserJet M1005 MFP software CD is divided into two partitions, one for each of the following
operating systems:
●
●
The Macintosh software files are grouped by language and reside in the following directories:
●
●
CD versions
The software CD for the HP LaserJet M1005 MFP contains the files for installing the software on the
computer.
The HP LaserJet M1005 MFP software CD (Part No. CB376A-60121) is available in a single version
which contains software in various languages:
●
●
●
●
●
MS Windows
Macintosh
Mac OS X (the HP LaserJet Installer)
PDF (manuals)
DE = German (Deutsch)
EN = English
ES = Spanish (Español)
FR = French (Français)
IT = Italian (Italiano)
NL = Dutch (Nederland)
●
ENWW Macintosh printing-system software 85
Macintosh
Page 98

Macintosh install and uninstall instructions
The HP LaserJet M1005 MFP comes with software and installers for MS Windows and Apple Computer,
Inc., Macintosh systems. The following information includes procedures for installing and removing the
HP LaserJet M1005 MFP printing-system software for Macintosh operating systems.
Topics:
Macintosh component descriptions
●
Install the Macintosh software
●
Uninstall
●
Macintosh component descriptions
The device includes the following software for Macintosh computers:
PDEs for Mac OS X V10.3 and later
●
Topics:
PDEs
●
Install notes
●
Online help
●
Screen fonts
●
PDEs
Printer Dialog Extensions (PDEs) are code plug-ins (for Mac OS X V10.3 and later only) that provide
access to device features, such as number of copies, duplexing, and quality settings.
Install notes
This text file contains important information about device features, instructions for installing the printingsystem software, and technical assistance.
Online help
This HTML-based help system replaces the Apple Guide help system that was provided with
Mac OS 9.x HP devices. The help system is in English only, and can be viewed through a browser or
in the Macintosh OS Help Center.
Screen fonts
The software for Macintosh operating systems no longer includes a font installer. The
HP LaserJet M1005 MFP printer uses previously installed system fonts when it is installed on a
Macintosh computer.
Install the Macintosh software
On a Macintosh computer, the installation procedures are basically the same for a network administrator,
a network client, or a single user. Install the software on any computer that has access rights to the
device.
86 Chapter 5 Macintosh ENWW
Page 99

Topics:
General installation for Macintosh operating systems
●
Installation dialog-box options for Macintosh
●
Device setup
●
General installation for Macintosh operating systems
1. Insert the Macintosh software CD into the CD-ROM drive.
NOTE If the CD screen does not open automatically, double-click the HP LaserJet M1005
MFP CD-ROM icon on the desktop to open the CD-ROM window.
2. Double-click the Mac OS X icon.
NOTE The Continue button appears only after you type the "admin" password in the
Authenticate dialog box.
3. The main Installer dialog box appears. Click Install and then follow the onscreen instructions to
complete the software installation.
NOTE Be patient when you are installing the software. The installer must perform an initial
search of the computer for up to 1 minute. During this time the installer might appear to be
stalled.
4. When software installation is complete, click Restart.
5. Continue with the steps for setting up a device.
The software program used to finish setting up the device varies by operating system. The following
table shows the print setup tools that are available.
Table 5-1 Adding a printer in Macintosh operating systems
Operating System Print Center Printer Setup Utility
Mac OS X V10.3.9 x
Mac OS X V10.4.1 x x
Installation dialog-box options for Macintosh
The following sequence describes the dialog box options that appear during the HP LaserJet M1005
MFP software installation on Macintosh systems.
To begin the installation, insert the HP LaserJet M1005 MFP software CD into the CD-ROM drive.
Figure 5-1 Step 1 - Insert the HP LaserJet M1005 MFP software CD
Double-click the HP LaserJet M1005 MFP icon that appears on the desktop.
ENWW Macintosh install and uninstall instructions 87
Macintosh
Page 100

Figure 5-2 Step 2 - Run the printing-system software CD
Double-click the HP LaserJet M1005 MFP folder.
Figure 5-3 Step 3 - Main CD screen
Click Continue.
Figure 5-4 Step 4 - License agreement, screen 1
In the drop-down menu at the top of the screen, select the language for the installation.
Print... opens the Page Setup dialog box for your default printer so that you can print a copy of the
license agreement.
88 Chapter 5 Macintosh ENWW
 Loading...