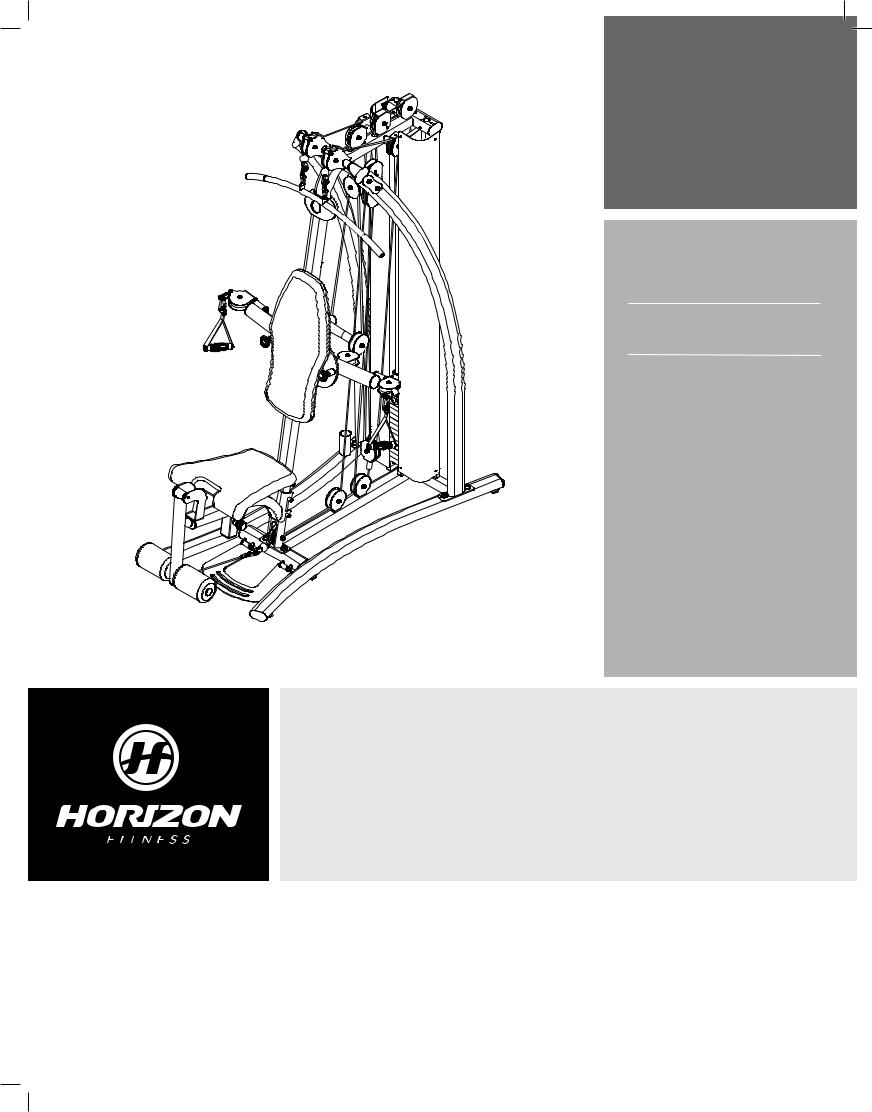
Horizon Fitness SXS 5.7 User Manual

FOR MODEL :
SXS 5.7
HOME GYM ASSEMBLY
AND USER’S GUIDE
SXS_5.7_rev.1.1.indd 1 |
|
|
|
|
|
|
|
8/30/07 11:12:33 AM |
|
|
|
|
|
|
|

I N T R O D U C T I O N
CONGRATULATIONS and THANK YOU for your purchase of this Horizon home gym!
Whether your goal is to tone your muscles, increase your strength or simply enjoy a fuller, healthier lifestyle, a Horizon home gym can help you attain it – adding club-quality performance to your at-home workouts, with the ergonomics and innovative features you need to get stronger and healthier, faster. Because we're committed to designing fitness equipment from the inside out, we use only the highest quality components. It's a commitment we back with one of the strongest warranty packages in the industry.
You want exercise equipment that offers the most comfort, the best reliability and the highest quality in its class.
A Horizon home gym delivers.
TABLE OF CONTENTS
Important Precautions |
4 |
|
|
Assembly |
5 |
|
|
Before You Begin |
17 |
|
|
Conditioning Guidelines |
18 |
|
|
Troubleshooting & Maintenance |
24 |
|
|
Limited Warranty |
26 |
|
|
CONTACT INFORMATION |
Back Panel |
INTRODUCTION
IMPORTANT PRECAUTIONS
ASSEMBLY
BEFORE YOU BEGIN
TROUBLESHOOTING CONDITIONING & MAINTENANCE GUIDELINES
LIMITED WARRANTY
SXS_5.7_rev.1.1.indd 2-3 |
8/30/07 11:12:34 AM |

INTRODUCTION
IMPORTANT PRECAUTIONS
ASSEMBLY
BEFORE BEGIN YOU
TROUBLESHOOTING CONDITIONING MAINTENANCE & GUIDELINES
LIMITED WARRANTY
IMPORTANT SAFETY INSTRUCTIONS
FOR HOUSEHOLD USE ONLY
SAVE THESE INSTRUCTIONS
Read all instructions before using this home gym. Basic precautions should always be followed, including the following: Read all instructions before using this home gym. It is the responsibility of the owner to ensure that all users of this home gym are adequately informed of all warnings and precautions. If you have any questions after reading this manual, contact Sears at the number listed on the back cover of this manual.

 WARNING To reduce the risk of injury to persons:
• Close supervision is necessary when this home gym is used by, on, or near children, invalids, or disabled persons.
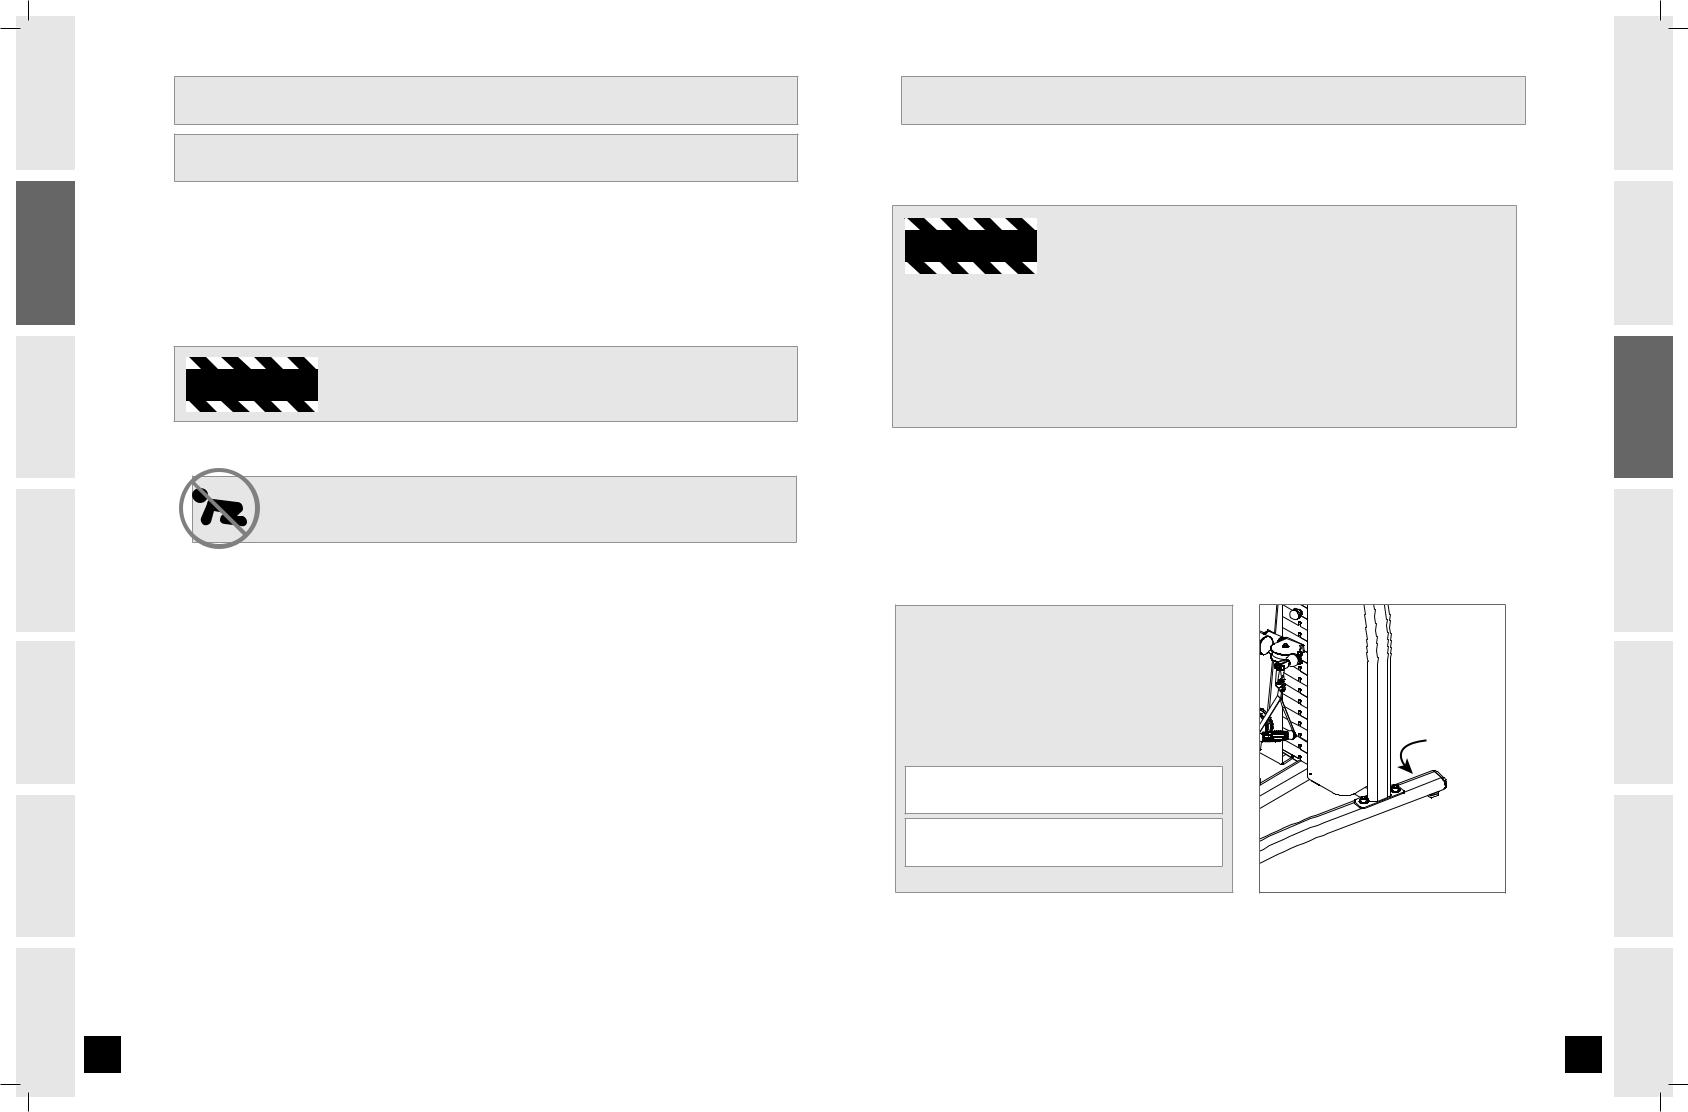
At NO time should pets or children under the age of 12 be closer to the home gym than 10 feet. At NO time should children under the age of 12 use the home gym.
Children over the age of 12 should not use the home gym without adult supervision.
•Use this appliance (or home gym) only for its intended use as described in this manual. Do not use attachments not recommended by the manufacturer.
•Never drop or insert any object into any opening.
•If you experience any kind of pain, including but not limited to chest pains, nausea, dizziness, or shortness of breath, stop exercising immediately and consult your physician before continuing.
•Do not wear clothes that might catch on any part of the home gym.
•Always wear athletic shoes while using this equipment.
•Do not jump on the home gym.
•At no time should more than one person be on home gym while in operation.
•The home gym should not be used by persons weighing more than 300 pounds. Failure to comply will void the warranty.
•The home gym is intended for in-home use only. Do not use this home gym in any commercial, rental, school or institutional setting. Failure to comply will void the warranty.
•Do not use outdoors.
ASSEMBLY
IMPORTANT: READ THESE SAFETY INSTRUCTIONS BEFORE USE!

 WARNING
During the assembly process there are several areas that special attention must be paid. It is very important to follow the assembly instructions correctly and to make sure all parts are firmly tightened. If the assembly instructions are not followed correctly, the home gym could have frame parts that are not tightened and will seem loose and may cause irritating noises. There should be no side-to-side play in the frame uprights. If there is any play in these areas, the home gym has not been properly assembled. To prevent damage to the home gym, the assembly instructions must be reviewed and corrective actions should be taken.
UNPACKING
Unpack the unit where it will be used. Place the home gym carton on a level flat surface. It is recommended that you place a protective covering on your floor. Take CAUTION when handling and transporting this unit. Never open box when it is on its side.FAILURE TO FOLLOW THESE INSTRUCTIONS COULD RESULT IN INJURY!
Before proceeding, find your home gym’s serial number and model name located on the left rear side of the base frame and enter it in the space provided below.
enter your serial number and model name in the boxes below:
SERIAL NUMBER:
MODEL NAME:
* Refer to the serial number and model name when calling for service.
INTRODUCTION
IMPORTANT PRECAUTIONS
ASSEMBLY
BEFORE YOU BEGIN
CONDITIONING GUIDELINES
TROUBLESHOOTING & MAINTENANCE
LIMITED WARRANTY
SXS_5.7_rev.1.1.indd 4-5 |
8/30/07 11:12:36 AM |

INTRODUCTION
IMPORTANT PRECAUTIONS
ASSEMBLY
BEFORE BEGIN YOU
TROUBLESHOOTING CONDITIONING MAINTENANCE & GUIDELINES
LIMITED WARRANTY
|
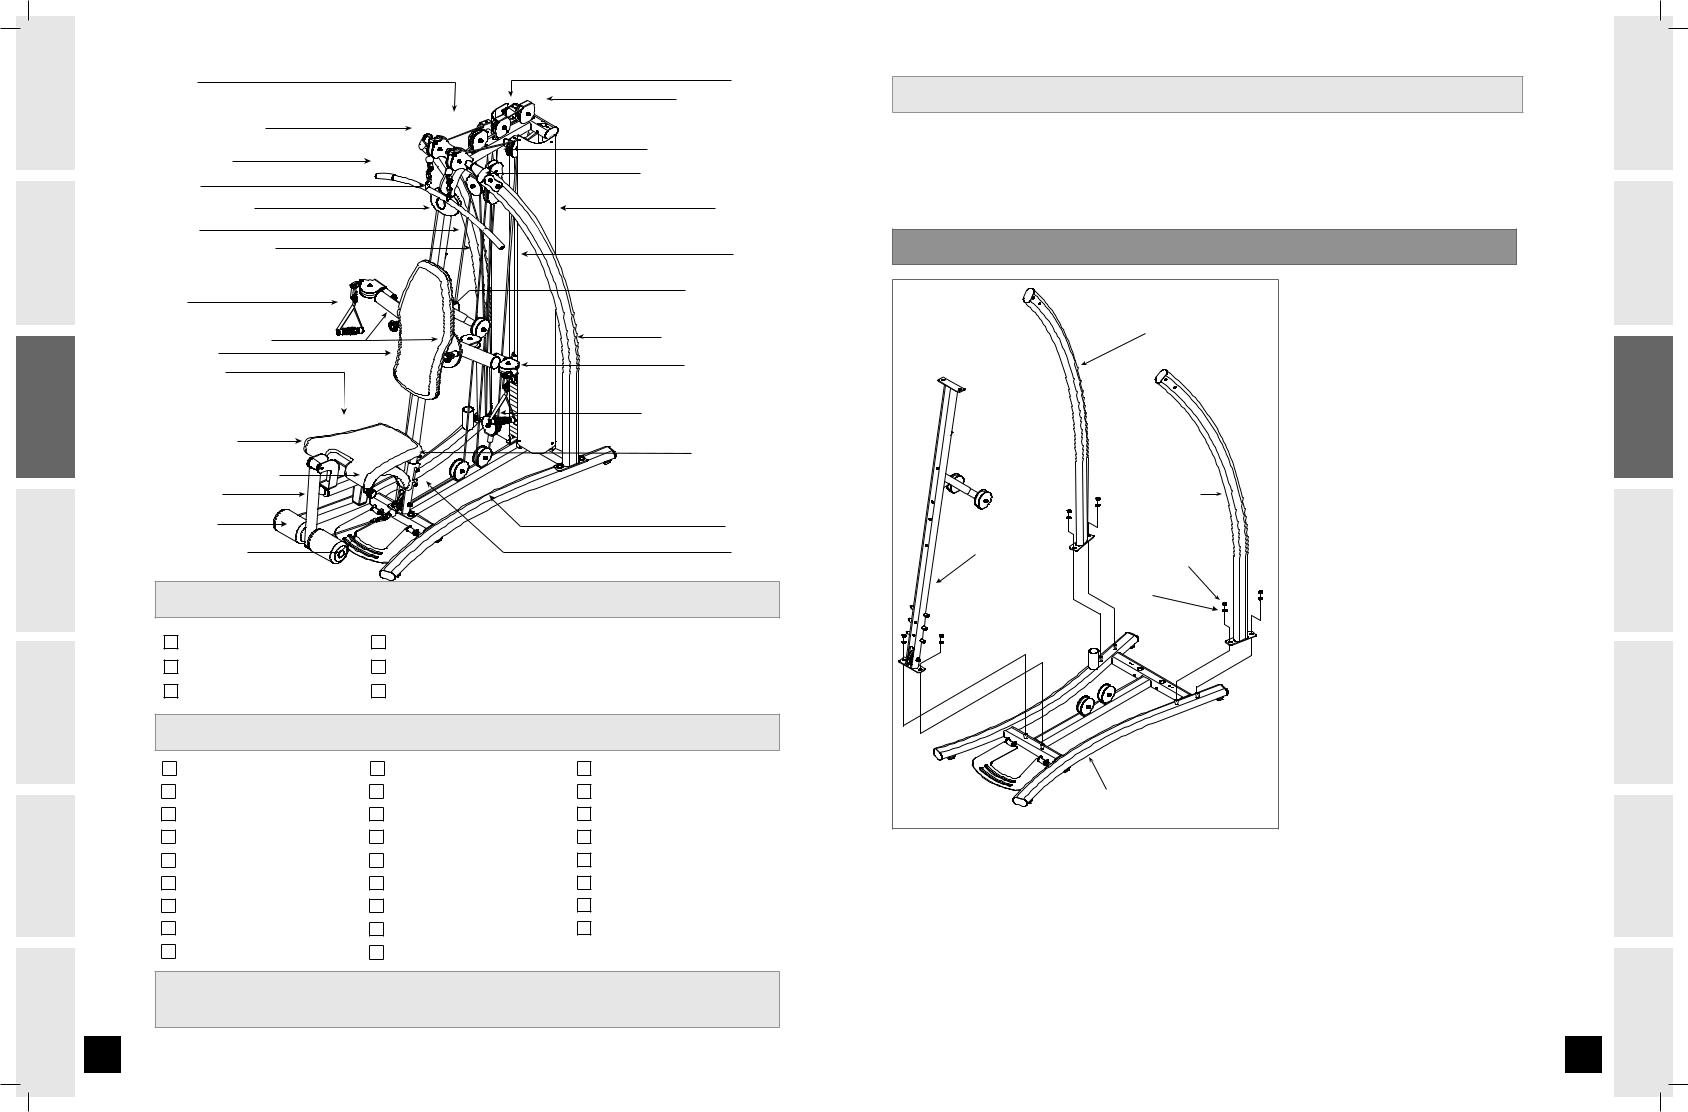
CABLE “D” |
|
|
|
CABLE “A” |
|
|
|
|
|
UPPER PULLEY ASSEMBLY |
|
LAT BAR BRACKET ASSEMBLY |
|
|
|
|
|
LAT PULLDOWN BAR |
|
|
DUAL FLOATING PULLEY BRACKET |
|
|
|
|
SINGLE FLOATING PULLEY BRACKET |
||
|
|
|
|
|
|
|
COVER SET |
|
|
|
|
|
CENTER SUPPORT FRAME |
|
|
WEIGHT SHIELD |
|
|
CABLE “C” |
|
|
|
|
|
MAIN SUPPORT FRAME (RIGHT) |
|
|
GUIDE ROD |
|
|
|
|
|
|
|
|
HANDLE |
|
|
|
RADIAL ARM ASSEMBLY |
|
|
|
|
|
|
|
RADIAL ARM ADJUSTMENT PIN |
|
|
MAIN SUPPORT FRAME (LEFT) |
|
|
SEAT BACK PAD |
|
|
WEIGHT SELECTION PIN |
|
|
SEAT BOTTOM PAD |
|
|
||
|
|
|
|
||
|
|
|
|
|
SINGLE FLOATING PULLEY BRACKET |
|
SEAT WELDMENT SET |
|
|
SEAT SET SAFETY PIN |
|
|
|
|
|
|
|
|
SEAT HEIGHT ADJUSTMENT KNOB |
|
|
|
|
|
LEG EXTENSION/ |
|
|
|
|
|
CURL DOWN TUBE |
|
|
|
|
|
FOAM ROLLERS |
|
|
BASE FRAME |
|
|
ADJUSTABLE FOOTPLATE |
|
|
CABLE “B” |
|
|
TOOLS INCLUDED |
|
|
|
|
|
Screwdriver |
4 mm Allen Wrench |
|
||
|
19 mm Flat Wrench |
6 mm Allen Wrench |
|
||
|
13 mm/17 mm Flat Wrench |
8 mm Allen Wrench |
|
||
|
PARTS INCLUDED |
|
|
|
|
|
1 |
Seat Set Safety Pin |
1 |
Center Support Frame |
1 Dual Floating Pulley Bracket |
|
2 |
Foam Rollers |
2 |
Handles |
1 Front Cover |
|
1 |
Seat Back Pad |
1 |
Leg Extension/Curl Down Tube |
1 Back Cover |
|
1 |
Seat Bottom Pad |
1 |
Seat Weldmen Set |
2 Single Floating Pulley Brackets |
|
1 |
Main Base Frame |
2 |
Weight Shields |
1 Upper Pulley Assembly |
|
1 |
Main Support Frame (Right) |
2 |
Guide Rods |
1 Lat Bar Bracket Assembly |
|
1 |
Main Support Frame (Left) |
1 |
Weight Selection Pin |
4 Cables |
|
1 |
Radial Arm Assembly |
1 |
Upper Pulley Assembly |
9 Hardware Bags |
|
1 |
Nylon Ankle Strap |
1 |
Lat Pulldown Bar |
|
|
|
If you have questions or if there are any missing parts, contact 1-800-4-MY-HOME®. |
|||
|
|
Further contact information is located on the back cover of this manual. |
|||
|
For a complete exploded diagram, see Quick Start and Parts Guide (included in User’s Guide bag). |
||||
|
|
|
|
|
|
PRE - ASSEMBLY
note: During each assembly step, ensure that ALL nuts and bolts are in place and partially threaded in before completely tightening any ONE bolt. NOTE: A light application of grease may aid in the installation of hardware. Any grease, such as lithium bike grease is recommended.
A S S E M B LY STEP 1 |
|
|
||
|
MAIN SUPPORT |
A |
Place base frame on floor in |
|
|
|
desired location. |
||
|
FRAME (RIGHT) |
|
||
|
|
|
||
|
|
B |
Remove 6 NYLON NUTS (C) |
|
|
|
|
and 6 FLAT WASHERS (B) from |
|
|
|
|
BASE FRAME. |
|
|
|
C |
Attach right MAIN SUPPORT |
|
|
|
|
FRAME to right side of base |
|
|
MAIN SUPPORT |
|
frame using 2 flat washers |
|
|
|
(B) and 2 NYLON nuts (C). |
||
|
FRAME (LEFT) |
|
||
CENTER SUPPORT |
|
D |
Repeat on other side. |
|
NYLON NUT (C) |
|
|
||
FRAME |
E |
Attach center SUPPORT |
||
|
||||
|
FLAT WASHER (B) |
|
FRAME to BASE frame using |
|
|
|
|
2 flat washers (B) and 2 |
|
|
|
|
NYLON nuts (C). |
|
|
BASE FRAME |
|
|
|
INTRODUCTION
IMPORTANT PRECAUTIONS
ASSEMBLY
BEFORE YOU BEGIN
CONDITIONING GUIDELINES
TROUBLESHOOTING & MAINTENANCE
LIMITED WARRANTY
SXS_5.7_rev.1.1.indd 6-7 |
8/30/07 11:12:39 AM |

INTRODUCTION
IMPORTANT PRECAUTIONS
ASSEMBLY
BEFORE BEGIN YOU
CONDITIONING GUIDELINES
TROUBLESHOOTING MAINTENANCE &
LIMITED WARRANTY
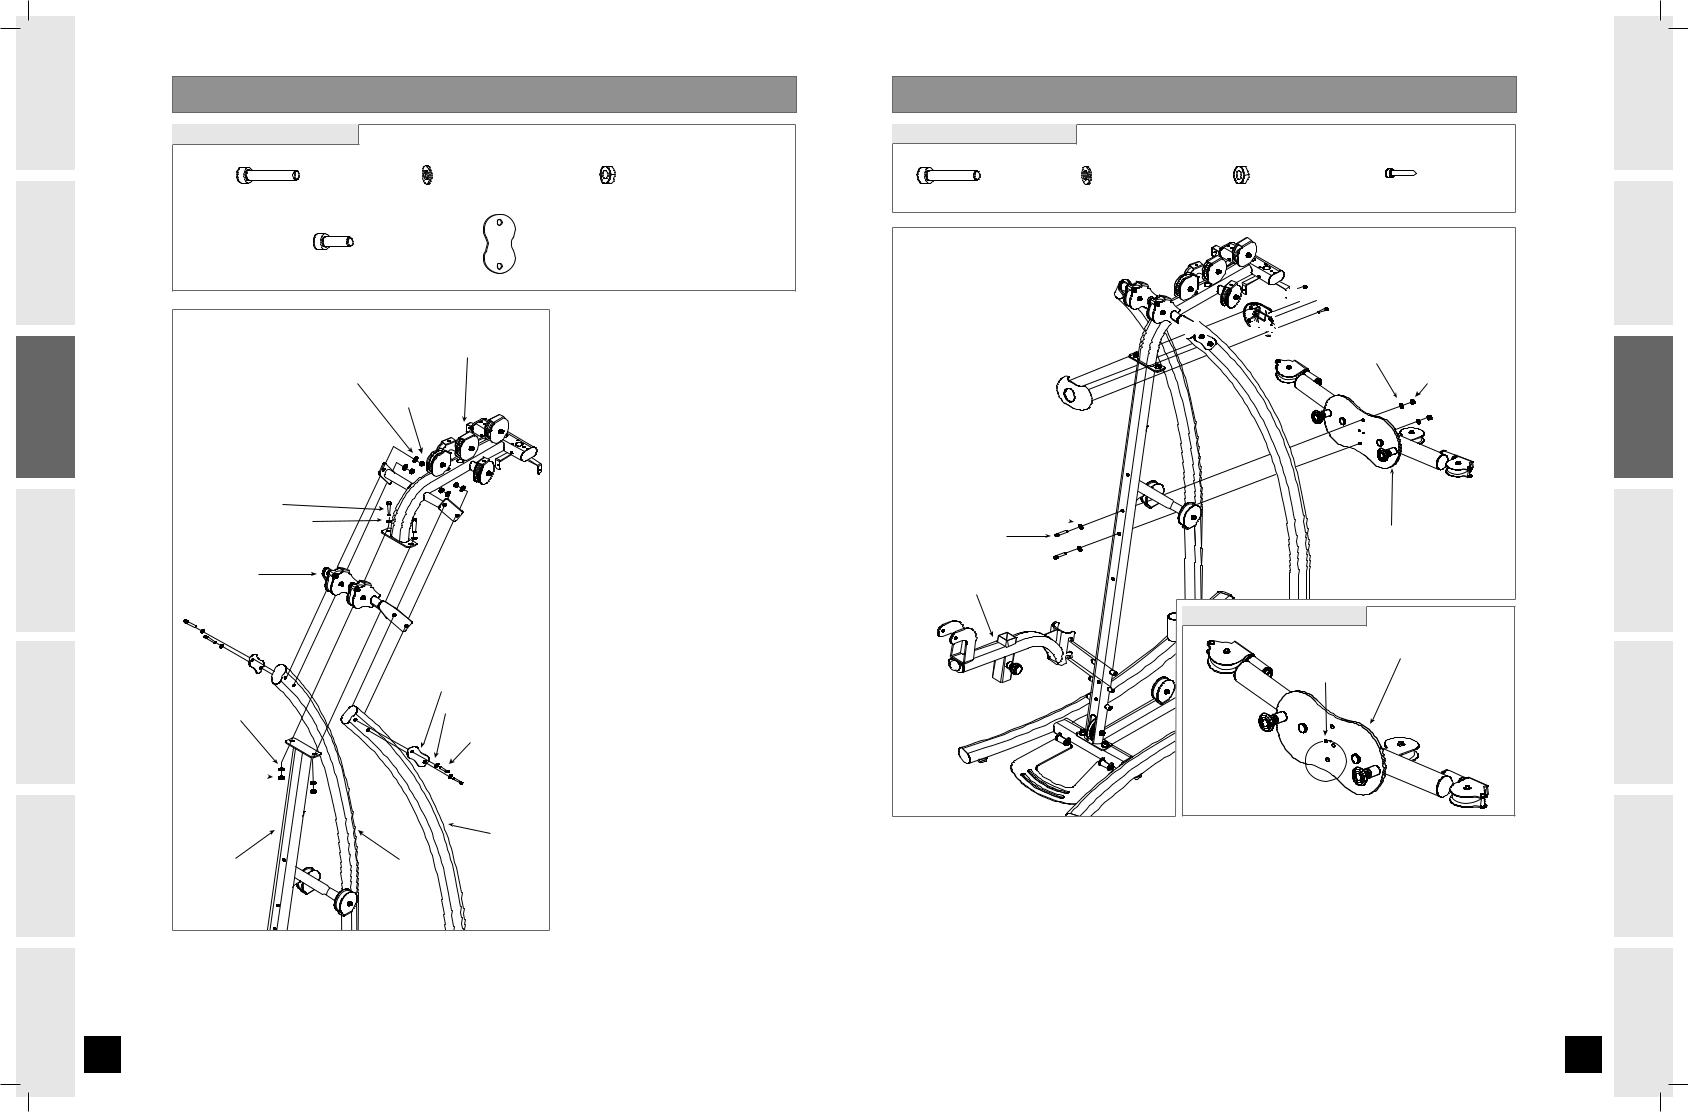
A S S E M B LY STEP 2
HARDWARE BAG 1 CONTENTS :
BOLT (A) |
FLAT WASHER (B) |
NYLON NUT (C) |
Qty: 4 |
Qty: 12 |
Qty: 6 |
BOLT (D) |
SUPPORT PLATE |
|
Qty: 2 |
Qty: 2 |
|
|
|
|
A |
Open HARDWARE BAG 1. |
|
UPPER PULLEY ASSEMBLY |
B |
Attach upper PULLEY |
|
|
FLAT WASHER (B) |
|
||
|
|
|
assembly to CENTER |
|
|
NYLON NUT (C) |
|
SUPPORT FRAME using 2 |
|
|
|
|
|
bolts (D), 4 flat washers |
|
|
|
|
(B) and 2 NYLON nuts (C). |
|
|
|
|
Tighten this hardware. |
BOLT (D) |
|
|
C |
Position LAT BAR BRACKET |
FLAT WASHER (B) |
|
|
|
ASSEMBLY in line with the |
|
|
|
|
UPPER PULLEY ASSEMBLY |
LAT BAR |
|
|
|
and the LEFT SUPPORT |
|
|
|
FRAME and RIGHT SUPPORT |
|
BRACKET ASSEMBLY |
|
|
|
|
|
|
|
|
FRAME as shown. Using 4 |
|
|
|
|
BOLTS (A), 8 FLAT WASHERS |
|
|
|
|
(B) and 4 NYLON NUTS (C) |
|
|
SUPPORT PLATE |
|
attach SUPPORT PLATES, LAT |
|
|
|
BAR BRACKET ASSEMBLY and |
|
FLAT WASHER (B) |
|
FLAT WASHER (B) |
|
|
|
|
UPPER PULLEY ASSEMBLY to |
||
|
|
|
||
|
|
BOLT (A) |
|
|
|
|
|
the LEFT SUPPORT FRAME and |
|
NYLON NUT (C) |
|
|
|
RIGHT SUPPORT FRAME as |
|
|
|
|
shown. |
|
|
LEFT SUPPORT |
|
|
CENTER |
RIGHT |
FRAME |
|
|
|
|
|
||
SUPPORT |
SUPPORT |
|
|
|
FRAME |
FRAME |
|
|
|
A S S E M B LY STEP 3
HARDWARE BAG 2 CONTENTS :
BOLT (A) |
FLAT WASHER (B) |
NYLON NUT (C) |
SCREW (F) |
Qty: 2 |
Qty: 4 |
Qty: 2 |
Qty: 4 |


 SCREW (F)


 BACK COVER
FLAT WASHER (B)
NYLON NUT (C)
FRONT COVER 
CENTER SUPPORT FRAME 
FLAT WASHER (B) 
BOLT (A) |
RADIAL ARM ASSEMBLY |
SEAT WELDMENT SET
STEP 3-D: INSTALLING THE STOPPER: |
RADIAL ARM ASSEMBLY |
STOPPER |
AOpen HARDWARE BAG 2.
BAttach SEAT WELDMENT SET.
CAttach Cover to bolted joint using 4 SCREWS (F).
DRemove STOPPER from front side of RADIAL ARM ASSEMBLY and reinstall on back side of
RADIAL ARM ASSMBLY.
EAttach RADIAL ARM ASSEMBLY to CENTER SUPPORT FRAME using 2 BOLTS (A), 4 FLAT WASHERS (B) and 2 NYLON NUTS (C).
INTRODUCTION
IMPORTANT PRECAUTIONS
ASSEMBLY
BEFORE YOU BEGIN
CONDITIONING GUIDELINES
TROUBLESHOOTING & MAINTENANCE
LIMITED WARRANTY
SXS_5.7_rev.1.1.indd 8-9 |
8/30/07 11:12:44 AM |
 Loading...