

Honda CBR1000RR2007 (2007), CBR1000RR REPSOL EDITION (2007) Repsol Edition Set-up Instructions
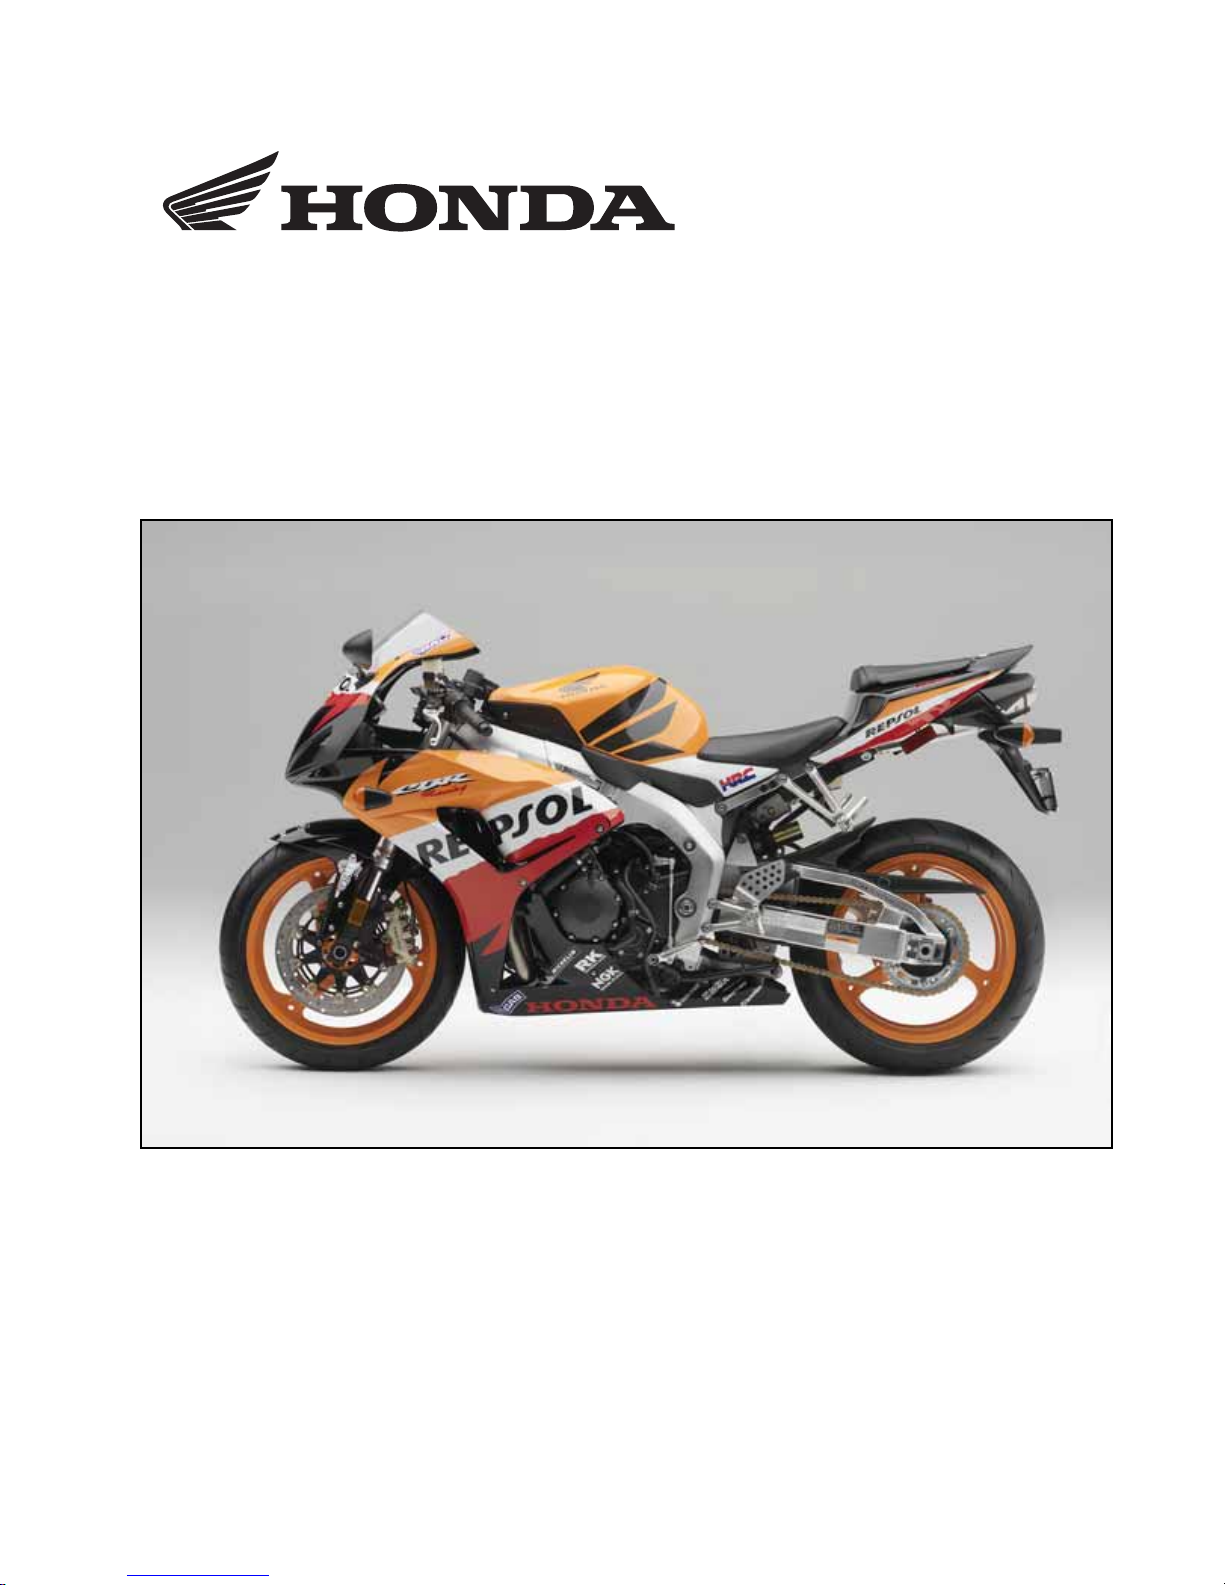
2007 CBR1000RR
REPSOL EDITION
SET-UP
INSTRUCTIONS
Set-up and pre-delivery service
must be performed by an authorized
Honda motorcycle dealer.
©2007 Amer ican Honda Motor Co., Inc. – All Rights Reserv ed
MPD 11780 (0701)
Issue d: February 2007
IMPORTANCE OF PROPER SET-UP AND PRE-DELIVERY SERVICE
FOR YOUR CUSTOMER'S SAFETY
Proper set-up and pre-delivery service are essential to rider safety and the reliability of the
machine. Any error or oversight ma de by the t echnician as sembling and ser vicing a new machine
can result in faulty operation, damage to the machine, or injury to the rider.
WARNING
Improper set-up or pre-delivery service can
create an unsafe condition that can cause
your customer to be seriously hurt or killed.
Follow the procedures and precautions in
this manual and the Service Manual carefully.
FOR YOUR SAFETY
Some of the most important safety precautions are given below. However, we cannot warn you
of every conceivable hazard that can arise in performing set-up and pre-delivery service. Only
you can decide whether or not you should perform a given task.
WARNING
Failure to properly follow instructions and
precautions can cause you to be seriously
hurt or killed.
Follow the procedures and precautions in this
manual carefully.
IMPORTANT SAFETY PRECAUTIONS
Make sure you have a clear understanding of all basic shop safety practices and that you are
wearing appropriate clothing and safety equipment. When performing the set-up or pre-delivery
service, be especially careful of the following:
• Read the instructions before you begin, a nd make sure you have the tools and skills requi red to
perform the tasks safely.
• To prevent the machine from falling on you, park it on a firm, level surface, using the proper
stand(s) to provide firm support.
Make sure the engine is off before you begin any servicing procedures. This will help eliminate
several potential hazards:
• Carbon monoxide poisoning from engine exhaust—be sure there is adequate ventilation
whenever you run the engine.
• Burns from hot parts—let the engine and exhaust system cool before touching.
• Injury from moving parts—do not run the engine unless the instruction tells you to do so.
Even then, keep your hands, fingers, and clothing away.
To reduce the possibility of a fire or explosion, be careful when working around gasoline or
batteries. Use only a nonflammable solvent, not gasoline, to clean parts. Keep all cigarettes,
sparks and flames away from the battery and all fuel-related parts.
©2007 American Honda Motor Co., Inc. – All Rights Reserved i
2007 CBR1000RR REPSOL EDITION
How To Use This Manual
Follow the complete sequence of steps as shown. Do not short-cut any steps. The sequence has
been established to ensure the unit is properly assembled.
The individual steps are composed of three components:
• Sub-heading—The large sub-headings are a brief description of the step. They are intended
to be used by the experienced technician, one who only needs a brief reminder of the
set-up sequence.
• Descriptive text—The descriptive text explains in detail what is to be done during that step.
This explanation is intended as a guide for the technician needing additional information.
• Photographs/Line art—The photographs or line art support both the sub-headings and the
detailed text.
Indicates the set-up section Indicates the pre-delivery sect ion
Modifications and Accessories
Modifications that you may have made, or should make in the future, to any Honda product, shall
be deemed by our company to have been performed at your sole risk and responsibility, and
without our company's or the manufacturer's approval, or consent, implied or expressed. We
further discla im a ny and all liability, obli gation, or responsibilit y for a ny defe cts of modif ie d pa rt s
or of the modified product, and for any claims, demands, or causes of action for damage to
property or for personal injuries resulting from the modification of said Honda product.
Tor q u e Tab l e
ITEM SIZE TORQUE
Passenger footpeg bol ts 8 mm 37 N·m (3.8 kgf·m, 27 lbf·ft)
Clutch lever assembly bolts 6 mm 12 N·m (1.2 kgf·m, 9 lbf·ft)
Rider footpeg bolts 8 mm 37 N·m (3.8 kgf·m, 27 lbf·ft)
Windscreen screws 5 mm 0.45 N·m (0.05 kgf·m, 0.3 lbf·ft)
Mirror bolts 6 mm 7 N·m (0.7 kgf·m, 5.2 lbf·ft)
Seat pan screws 6 mm 9 N·m (0.9 kgf·m, 6.6 lbf·ft )
Front brake reservoir screw 4 mm 1.2 N·m (0.12 kgf·m, 0.9 lbf· ft)
Rear brake reservoir sc rew s 4 mm 1.5 N·m (0.15 kgf·m, 1.1 lbf·ft )
Clutch reservoir screw 4 mm 1.2 N·m (0.12 kgf·m, 0.9 lbf·ft)
Rear axle nut -------- 113 N·m (11. 5 kgf·m, 83 lbf·ft)
ii ©2007 American Honda Motor Co., Inc. – All Rights Reserved
1. Remove the crate cover and check
for damage.
The CBR1000RR Repsol Edition is crated at
the factory in either a covered or uncovered
crate. Yo u m ay receive ei th er o n e.
Polypropylene covered crate:
Cut the strap, open the fastener, and remove
the polypropylene cover.
POLYPROPYL ENE COVERED CRATE
POLYPROPYLENE COVER
STRAP
Carton covered crate:
Cut the str ap and remo ve the carton c o ver.
Remove the cardboard top.
Uncovered crate:
When stacking, protect the motorcycle from
falling objects and bad weather.
Check th e u n i t fo r da m age.
If damage is found, follow the instruct ions on
the Delivery and Damage Claims Guidelines
wall char t (Reorder N o . S 0477) before
proceeding further.
CARTON COVER
CRATE LABEL
CARTON COVERED CRATE
STRAP
UNCOVERED CRATE
2. Remove the parts carton.
Cut the strap and remove the parts carton
from the crate base.
Keep the You and Your Motorcycle - Riding
Tips & Practice Guide booklet separate and
hand deliver to the customer at the time
of delivery.
©2007 American Honda Motor Co., Inc. – All Rights Reserved 1
PARTS CARTON
STRAP
2007 CBR1000RR REPSOL EDITION
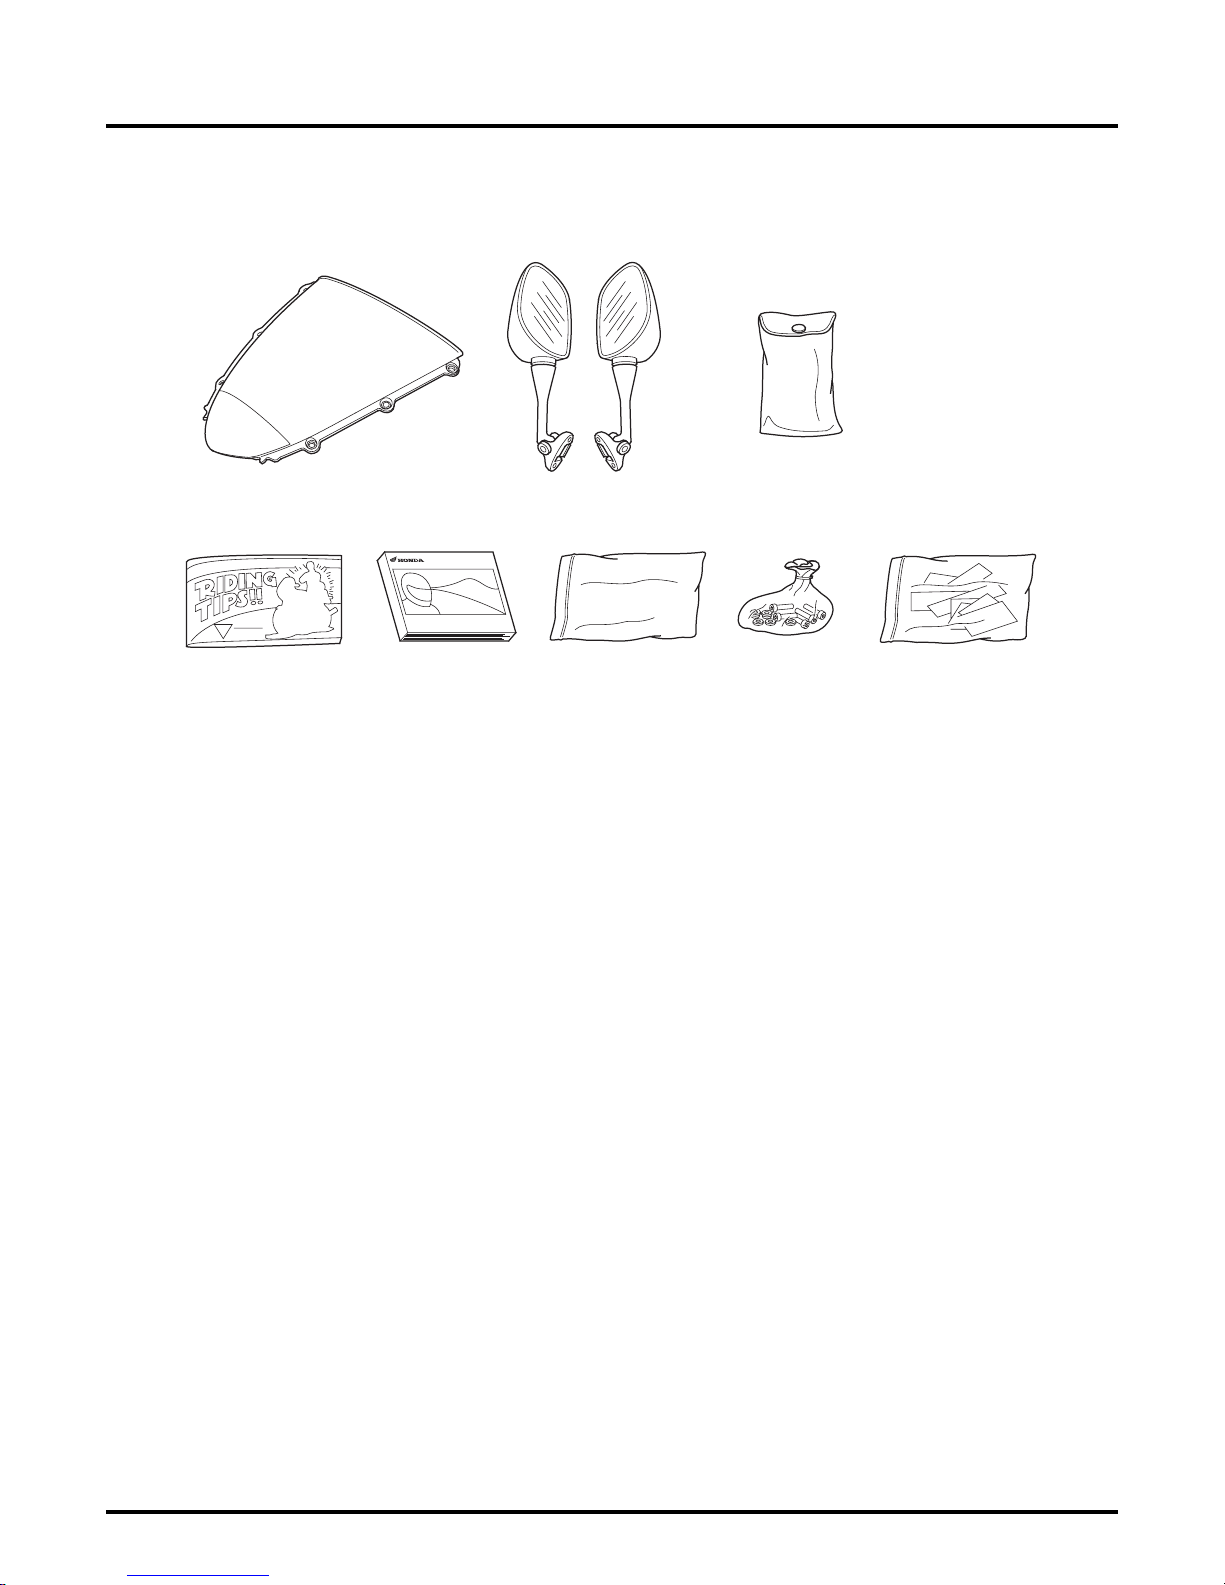
3. Loose Parts Information.
Unpack the remaining loose parts and check them against this illustration and list.
2.1.
4.
DESCRIPTION QTY PART NUMBER STEP
1. Windscreen 1 64250-MEL-D50ZA 11
2. Right mirror 1 88110-MEL-013 12
Left mirror 1 88120-MEL-013 12
3. Tool bag 1 89101-ME5-670
4. Riding Tips & Practice Guide 1 G0045* 2
5. Owner’s Manual 1 31MEL630** 13
6. Owner’s Manual bag 1 772 51-GR1-000 13
5.
6.
(Continued on next page.)
3.
7.
8.
*If missing, order from Resolve Corp.
**If missing, order from Helm Inc.
2 ©2007 American Honda Motor Co., Inc. – All Rights Reserved

3. Loose Parts Information (cont.).
DESCRIPTION QTY PART NUMBER STEP
7. Attaching Parts:
Passenger footpeg bracket:
Socket bolt 8 x 22 mm 2 90157-ME9-000 5
Top triple clamp:
Top triple clamp cap 2 53174-GS9-610 7
Rider footpeg bracke ts:
Socket bolt 8 x 22 mm 2 90157-ME9-000 10
Windscreen:
Rubber washer 6 64205-166-610 11
Thrust washer 5 mm 6 90504-964-000 11
Truss screw 5 x 18 mm 6 90111-MEL-000 11
Cowl set nut 5 mm 6 90111-KW3-003 11
Mirrors:
Socket bolt 6 x 13 mm 4 90130-MEE-000 12
Battery:
Pan screw 6 x 14 mm 1 90118-MR1-000 16
Collar 1 90522-170-700 16
8. Repsol ed ition decal set* 1 ------------------ ---- 15
*Controlled Part
INCLUDED TOOL(S) Phillips
screwdriver, handle, 5mm hex
wrench, helmet wire set
Missing Parts or Shipping Damage
Identify missing parts by referring to the Loose Parts Information section. Order the parts
using normal parts ordering procedures. Claims for missing loose parts or those damaged
during transit should be submitted to American Honda, not the carrier. After completing
repairs, submit a Transportation Claim via iN. For complete details, please refer to the
Warranty Policy and Procedures Manual.
©2007 American Honda Motor Co., Inc. – All Rights Reserved 3
2007 CBR1000RR REPSOL EDITION
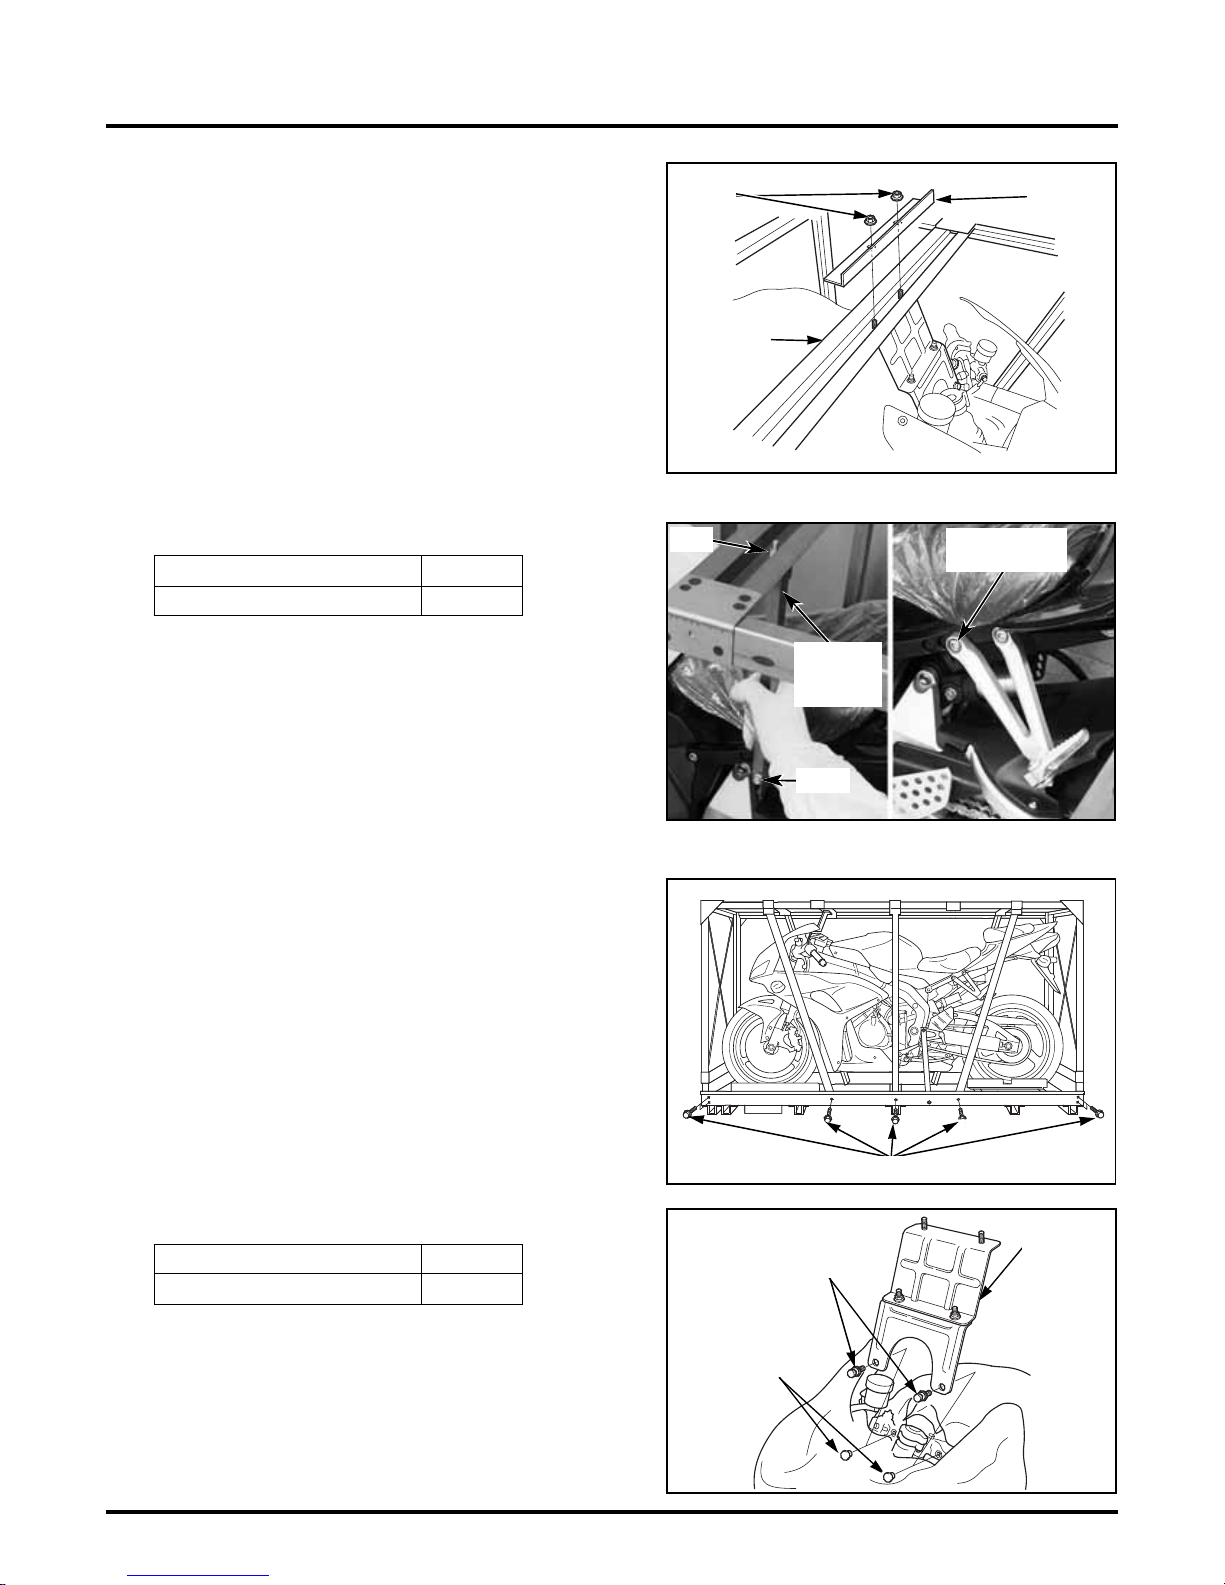
4. Remove the shipping bracket nuts
and plate.
Remove the nuts and plate that attach
the front shipping bracket to the upper
shipping brace.
NUTS
UPPER
SHIPPING
BRACE
PLATE
5. Remove the rear shipping brackets.
PART S QTY
Socket bolt 8 x 22 mm 2
While supporting the rear shipping brackets,
remove and discard the nuts, bolts, and rear
shipping brackets on both sides of
the motorcycle.
Install and torque the 8 x 22 mm socket bolts
to secure the passenger footpeg brackets.
Torque: 37 N·m (3.8 kgf·m, 27 lbf·ft)
6. Lift off the crate frame.
Remov e th e bolts that att ac h th e c r ate frame.
Using two people, carefully lift off the
crate frame.
Use extr eme care not to d amage the
motorcycle while re m o vi n g th e c r ate frame.
NUT
8 x 22 mm
SOCKET BOLT
REAR
SHIPPING
BRACKET
BOLT
7. Remove the front shipping bracket.
PART S QTY
Top triple clamp cap 2
Being careful not to damage the upper cowl,
remove the bolts and front shipping bracket.
Install the top triple clamp caps.
4 ©2007 American Honda Motor Co., Inc. – All Rights Reserved
CAPS
BOLTS
BOLTS
FRONT
SHIPPING
BRACKET
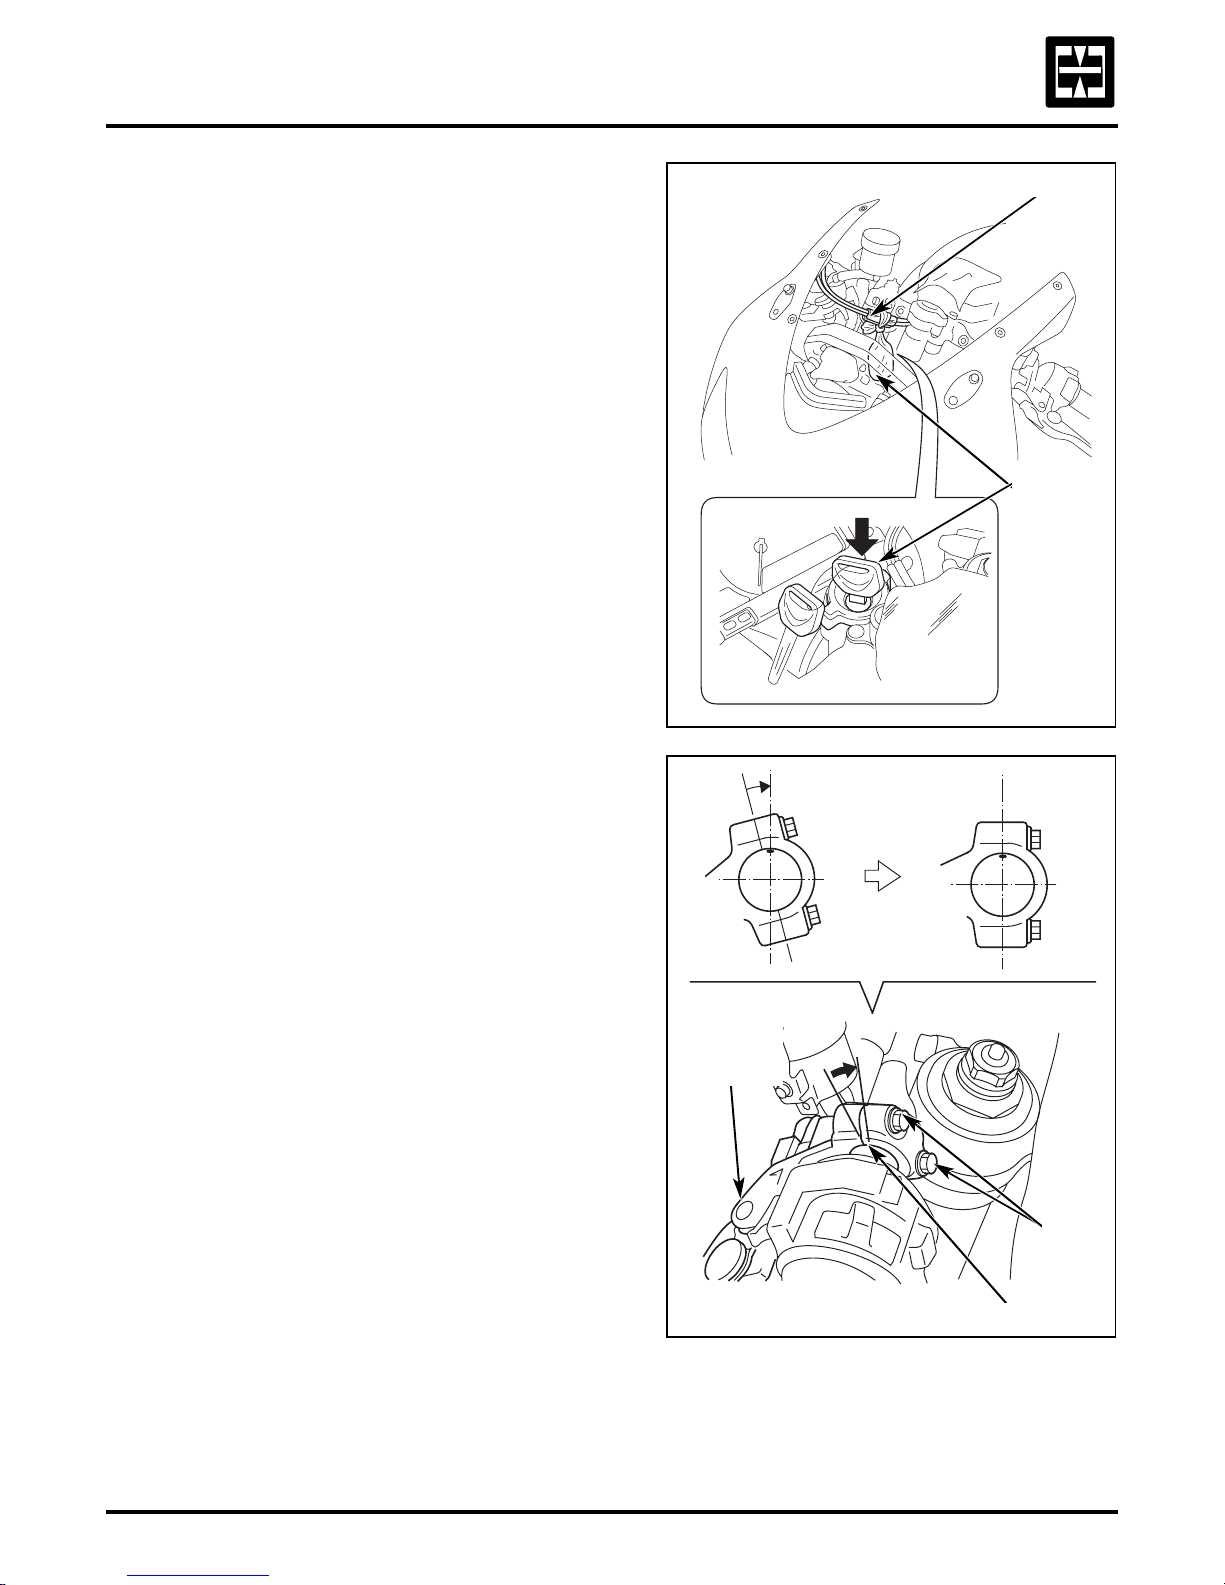
8. Relocate the ignition keys.
Remove the ignition keys and protective tube
from the th r o ttl e c ab l es .
Remove the packaging from the keys and
insert one of them into the ignition.
PROTECTIVE TU BE
IGNITION
KEYS
9. Position and secure the clutch lever
assembly.
Loosen the two bolts attaching the clutch
lever assembly.
Align the split between the holder and
the assembly with the punch mark on
the handlebar.
Torque the bolts, starting with the top one.
Torque: 12 N·m (1.2 kgf·m, 9 lbf·ft)
CLUTCH
LEVER
ASSEMBLY
BOLTS
PUNCH MARK
©2007 American Honda Motor Co., Inc. – All Rights Reserved 5
 Loading...