

Honda CASSETTE/MP3 PLAYER Installation Instructions Manual

INSTALLATION
INSTRUCTIONS
Accessory Application Publications No.
CASSETTE/MP3 PLAYER
(EX)
2006 PILOT
All 30488
Issue Date
SEP 2005
Player Attachment Kit (sold separately) :
P/N 08B06-S9V-100A
BUS cable
3 Wire ties
3 EPT sealer
DIN Bezel Kit (sold separately) :
P/N 08B23-S9V-100C
Cassette Player (sold separately) :
P/N 08A03-5E1-001
Cassette player
4 Washer-screws, 5 x 8 mm
Owner’s manual
MP3 Player (sold separately) :
P/N 08A06-4E1-201
Left player bracket
Right player bracket
DIN bezel
MP3 player
4 Washer-bolts, 5 x 8 mm
PRELIMINAR Y
Owner’s manual
© 2005 American Honda Motor Co., Inc. - All Rights Reserved. All 30488 (0509) 1 of 6
08B06-S9V-1B00-91
Y
B
TOOLS AND SUPPLIES REQUIRED
Y
Y
Phillips screwdriver
Flat-tip screwdriver
10 mm Combination wrench
Ratchet
10 mm Socket
ILLUSTRATION OF THE COMPONENTS ON
THE CAR
AUDIO UNIT
BUS
CABLE
CASSETTE
PLAYER
5804570
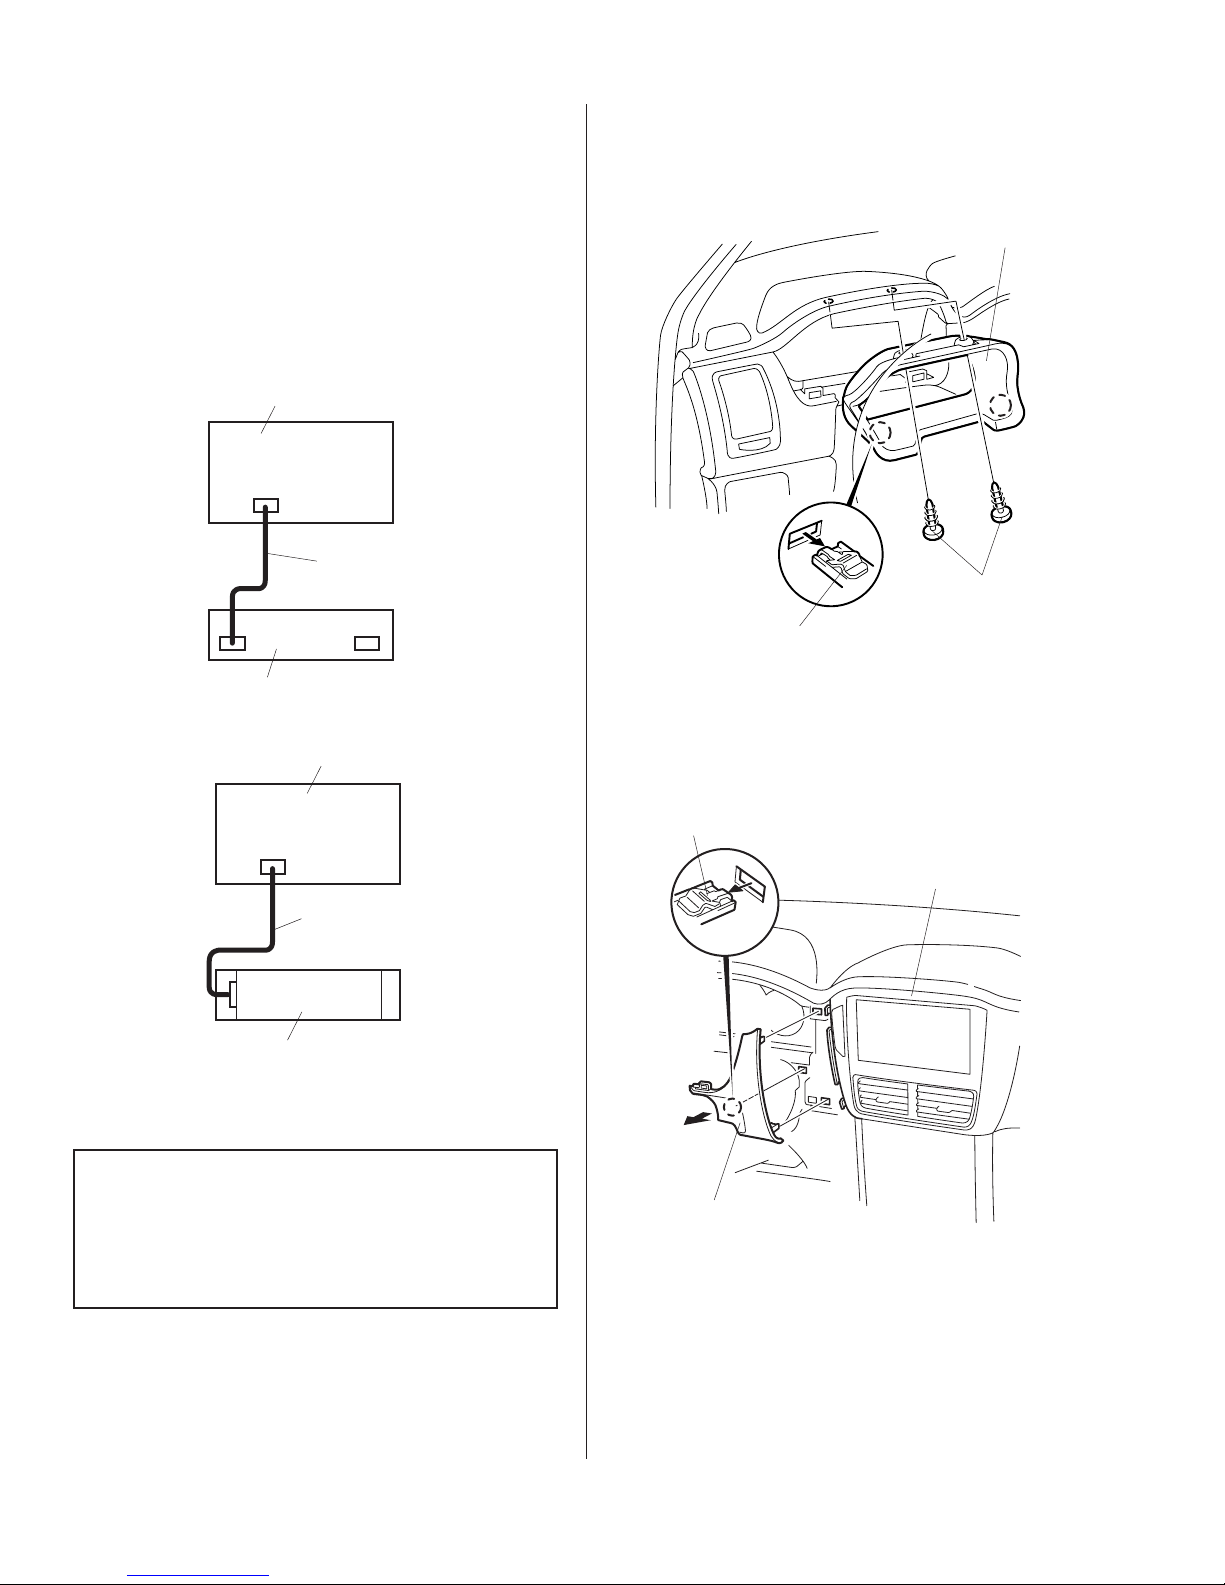
3. Remove the meter panel (two self-tapping screws
and two clips).
METER PANEL
SELF-TAPPING
SCREW
CLIPS (2)
5412041
AUDIO UNIT
BUS
CABLE
MP3
PLAYER
5804580
INSTALLATION
Customer Information: The information in this
installation instruction is intended for use only by
skilled technicians who have the proper tools,
equipment, and training to correctly and safely add
PRELIMINAR Y
equipment to your vehicle. These procedures
should not be attempted by “do-it-yourselfers”.
4. Remove the meter sub panel (three clips).
CLIPS (3)
AUDIO PANEL
METER SUB
PANEL
5601020
1. Make sure you have the anti-theft code for the
radio, then write down the frequencies for the
preset buttons.
2. Disconnect the negative cable from the battery.
2 of 6 All 30488 (0509) © 2005 American Honda Motor Co., Inc. - All Rights Reserved.
 Loading...