

Page 1
Over
Accept
OFF
kg
lb
ZERO
CLEAR
Gross
Wt.
Net
Wt.
TARE
FUNCTION
CAPACITY
300lb x 0.1 lb / 150 kg x 0.05 kg
Under
III
LEGAL FOR TRADE
lb
kg
NET
GROSS
ZERO
TARE
ON
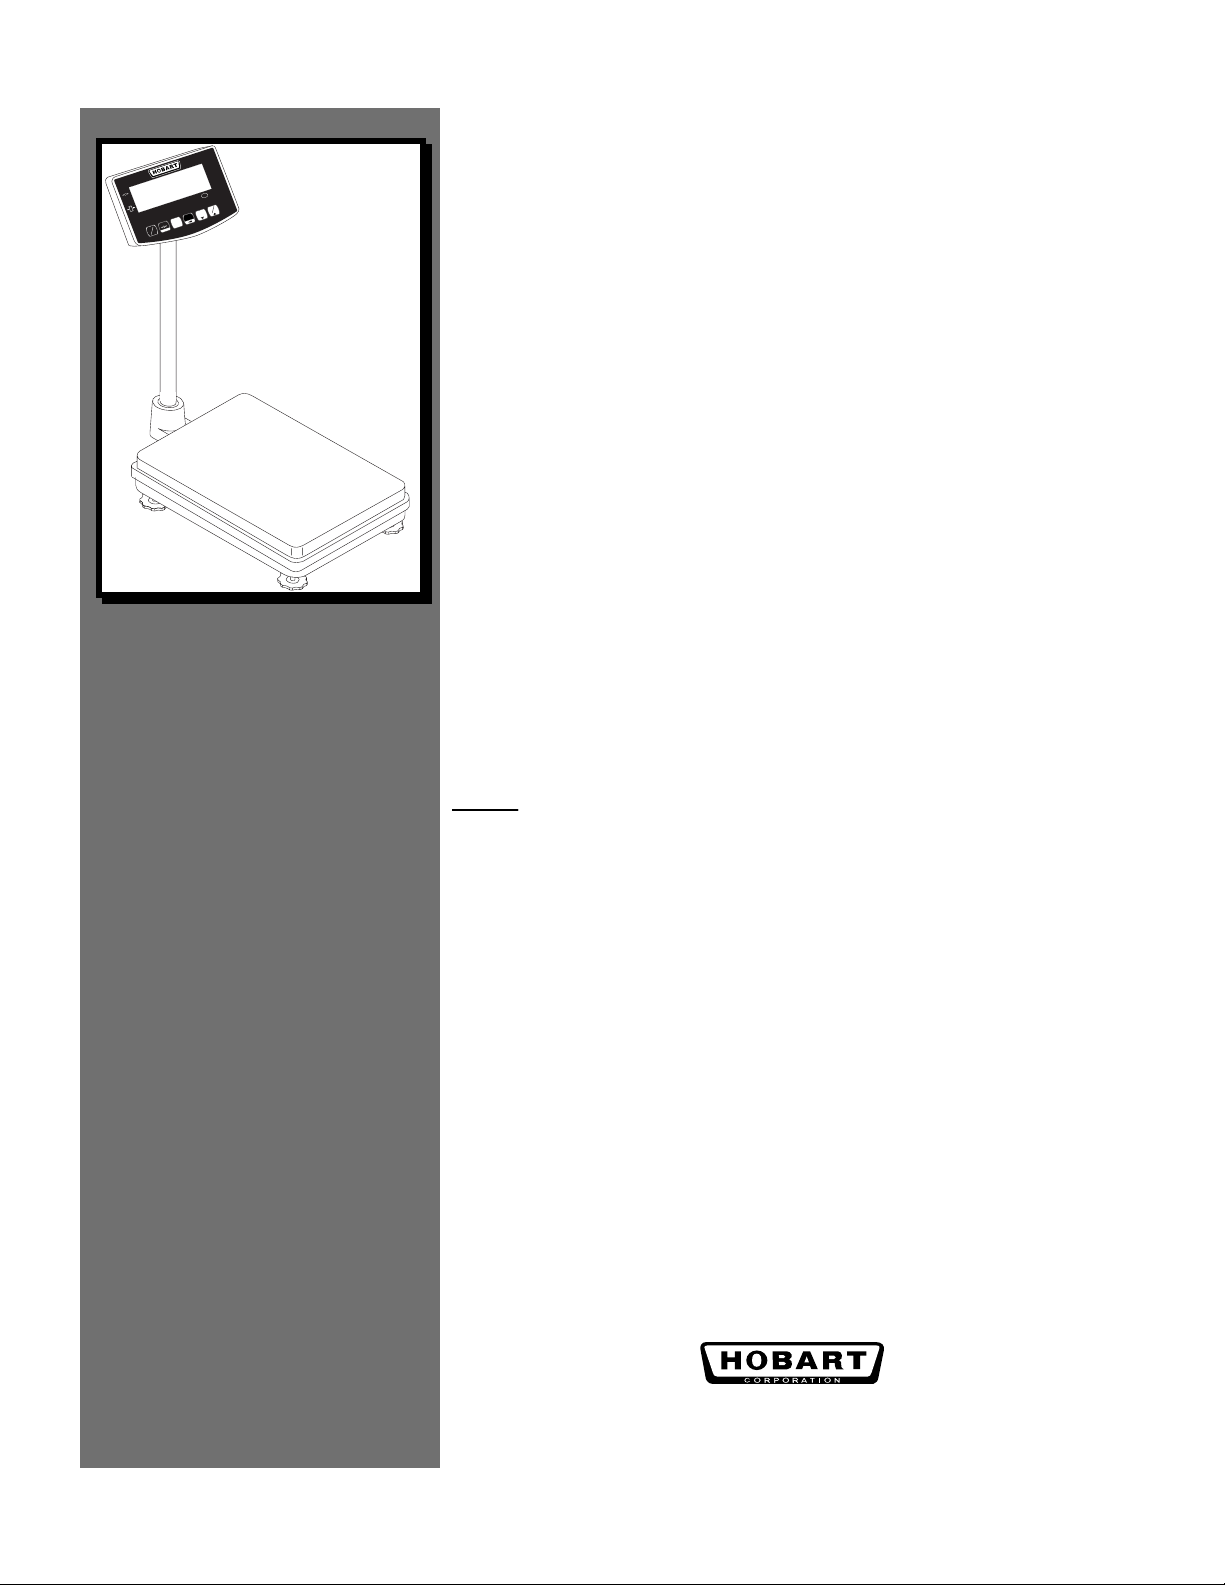
HBR300
Bench Receiving Scale
Instruction Manual
Model
ML-29116
701 S. RIDGE AVENUE
TROY, OHIO 45374
F-34220 Rev. A (2/99)
Page 2

Page 3

Bench Receiving Scale
Table of Contents
INTRODUCTION .........................................................................................................................1
FCC Note...............................................................................................................................1
Verify Correctness of Weight...................................................................................................1
Installation and Setup by An Authorized Hobart Technician .....................................................2
Manual Overview...................................................................................................................2
USING THE SCALE ......................................................................................................................3
Supplying Power to the Scale ..................................................................................................4
Leveling the Scale ...................................................................................................................5
Adjusting the Display Head for Easy Viewing ..........................................................................5
DISPLAY HEAD............................................................................................................................6
Display ..................................................................................................................................6
Keypad ..................................................................................................................................7
Operator Mode...................................................................................................................7
Setup Mode........................................................................................................................8
OPERATING THE SCALE .............................................................................................................9
Operating in Setup Mode ........................................................................................................9
Presetting Tare ...................................................................................................................9
Clearing a Preset Tare .........................................................................................................11
Setting Upper and Lower Weight Limits ..............................................................................11
Clearing Upper and Lower Weight Limits............................................................................13
Operating in Operator Mode ...................................................................................................14
Weighing a Product Using One-Touch Tare..........................................................................14
Weighing a Product When Preset Tare Is Set.........................................................................14
Weighing a Product When Upper and Lower Weight Limits Are Set......................................14
Weighing in Batches ...........................................................................................................15
CLEANING AND MAINTAINING THE SCALE............................................................................15
Cleaning ................................................................................................................................15
Sanitizing...............................................................................................................................16
Maintaining............................................................................................................................16
ERROR MESSAGES......................................................................................................................17
ACCESSORY (Mobile Cart) ...........................................................................................................18
Ó Copyright Hobart Corporation 1999
Page 4

Page 5

Bench Receiving Scale
Hobart Bench Receiving Scale (HBR300)
SAVE THESE INSTRUCTIONS
Introduction
FCC Note
The HBR300 Bench Receiving Scale features a digital display
with a 6-button keypad which tilts to create the best viewing
angle. The scale also has adjustable legs and a level indicator
to insure proper weight balance is maintained.
You can operate the scale in four modes using the 6-button
keypad on the display.
1. One-Touch Tare
2. Batch Weighing
3. Preset Tare
4. Upper and Lower Weight Limit
This is a digital display scale with a 20Ó x 16Ó stainless steel
platter which holds a capacity of 300 lb. x 0.1 lb. / 150 kg x
0.05 kg.
This equipment has been tested and found to comply with
the limits for a Class A digital device, pursuant to Part 15 of
the FCC Rules. These limits are designed to provide
reasonable protection against harmful interference when the
equipment is operated in a commercial environment. This
equipment generates, uses, and can radiate radio frequency
energy and, if not installed and used in accordance with the
instruction manual, may cause harmful interference to radio
communications. Operation of this equipment in a
residential area is likely to cause harmful interference; in
which case, the user will be required to correct the
interference at his own expense.
Verify Correctness o f
Weight
When calibrated and sealed by your local Weights and
Measures official, this scale is Legal for Trade. The NTEP
(National Type Evaluation Program) certificate of
Conformance number is 99-003.
1
Page 6
Bench Receiving Scale
Installation and Setup
by an Authorized
Hobart Technician
Manual Overview
Before using your scale for the first time, an Authorized
Hobart Service Technician must install and set up your
scale. This includes:
¥ Mounting the display and display pole to the platform.
¥ Setting an automatic shut off time as an energy saver to
extend battery life.
¥ Calibrating your scale.
The following special instructions are used in the manual:
☛ Note
A note is information that you need to know, but it is not an
actual step in the procedures.
✎ Tip
A tip is additional information that may be useful when you
are using the system.
Look At This
Look At This is information to alert you that you may be
doing something that will permanently alter your system.
2
Page 7
Bench Receiving Scale
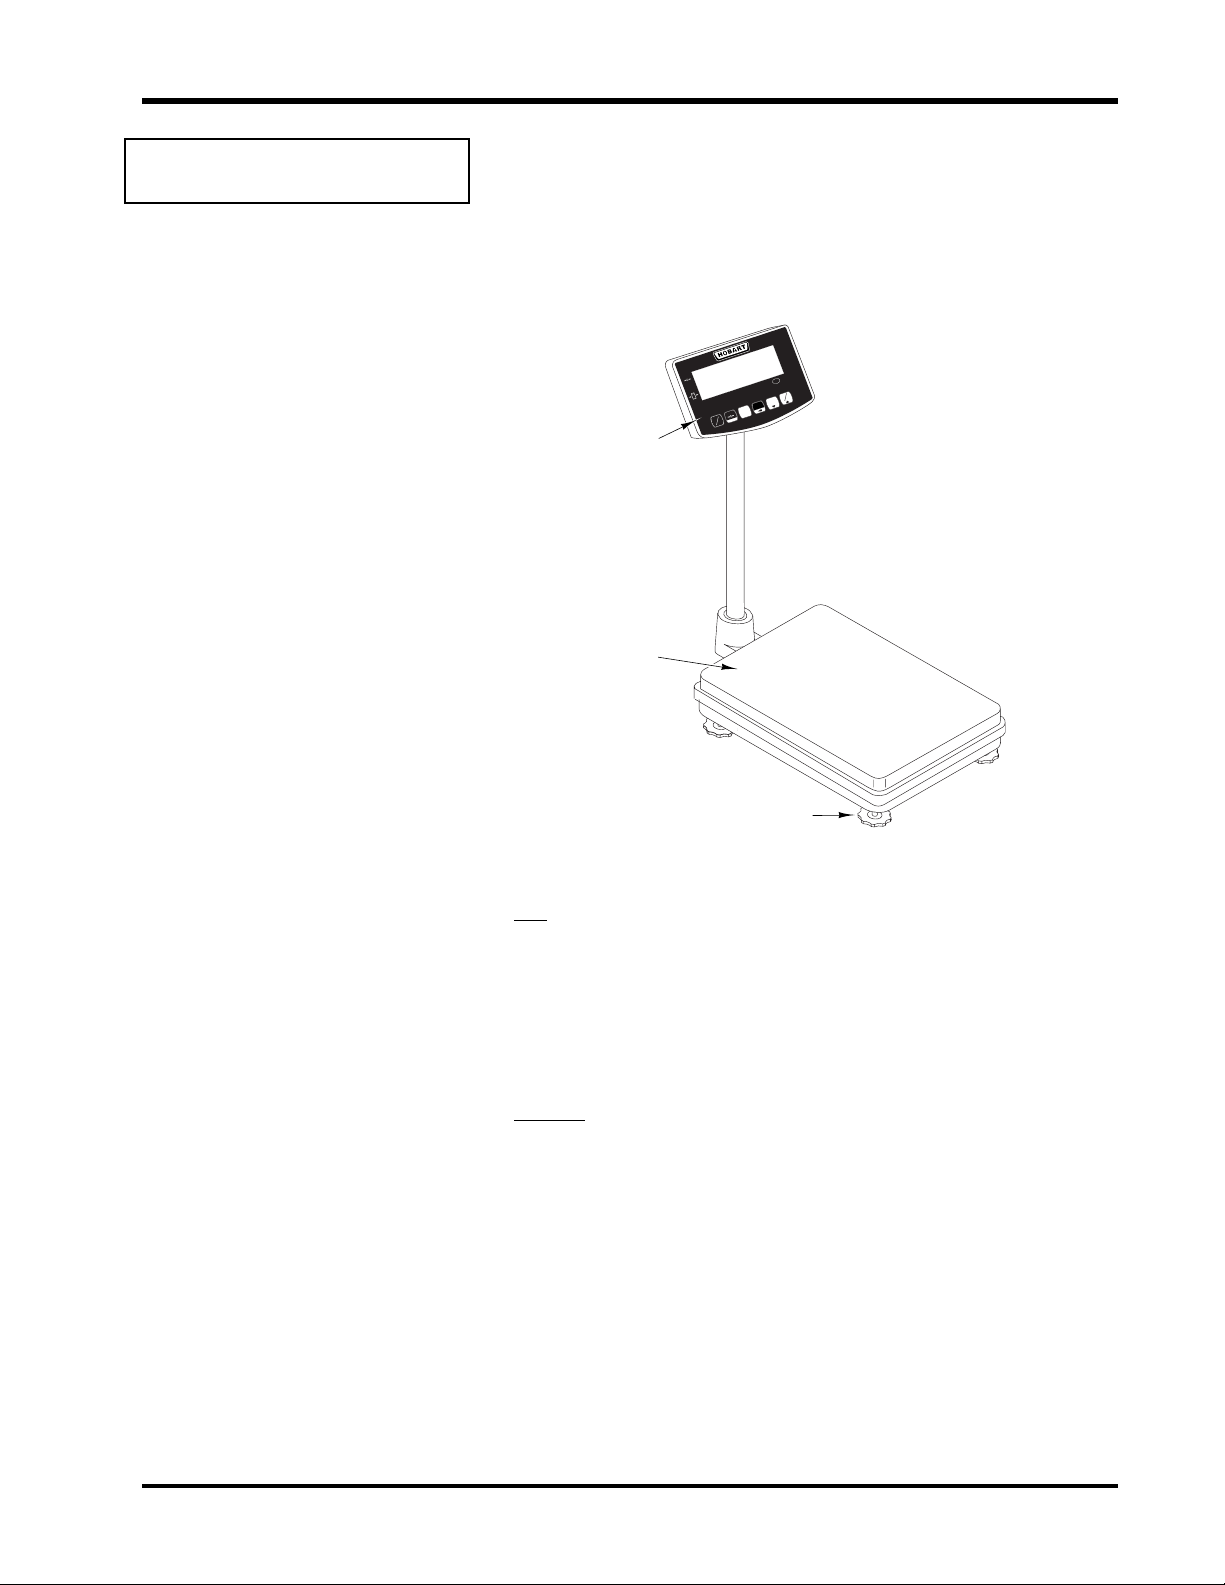
Using the Scale
When you are ready to use you scale do the following:
¥ Supply power to your scale either by battery (4 D-cell) or
a wall-mounted adapter plug.
¥ Level the scale to maintain proper scale balance.
¥ Adjust the Display Head for easy viewing.
Over
Accept
lb
ZERO
CLEAR
Gross
Wt.
Net
Wt.
TARE
FUNCTION
CAPACITY
300lb x 0.1 lb / 150 kg x 0.05 kg
NET
GROSS
III
LEGAL FOR TRADE
Under
lb
kg
Display
Head
Platter
ZERO
TARE
kg
ON
OFF
Legs
Guidelines for using your scale:
DO
¥ Set the scale in an area free of vibration.
¥ Set the scale on a firm, level surface.
¥ Operate in temperatures between -5°C and 40°C
(23°F and 104°F).
¥ Use soap and water solution to clean the scale.
¥ Use four (4) D-cell batteries to power the scale.
DONÕT
¥ Use solvents or abrasive materials to clean the scale.
¥ Place the scale in direct sunlight or direct wind (heating
ducts, etc.).
3
Page 8
Bench Receiving Scale
Supplying Power to
the Scale
Power can be supplied to the scale through the AC adapter
or optional batteries. The scale uses four (4) D-cell batteries
not supplied by Hobart.
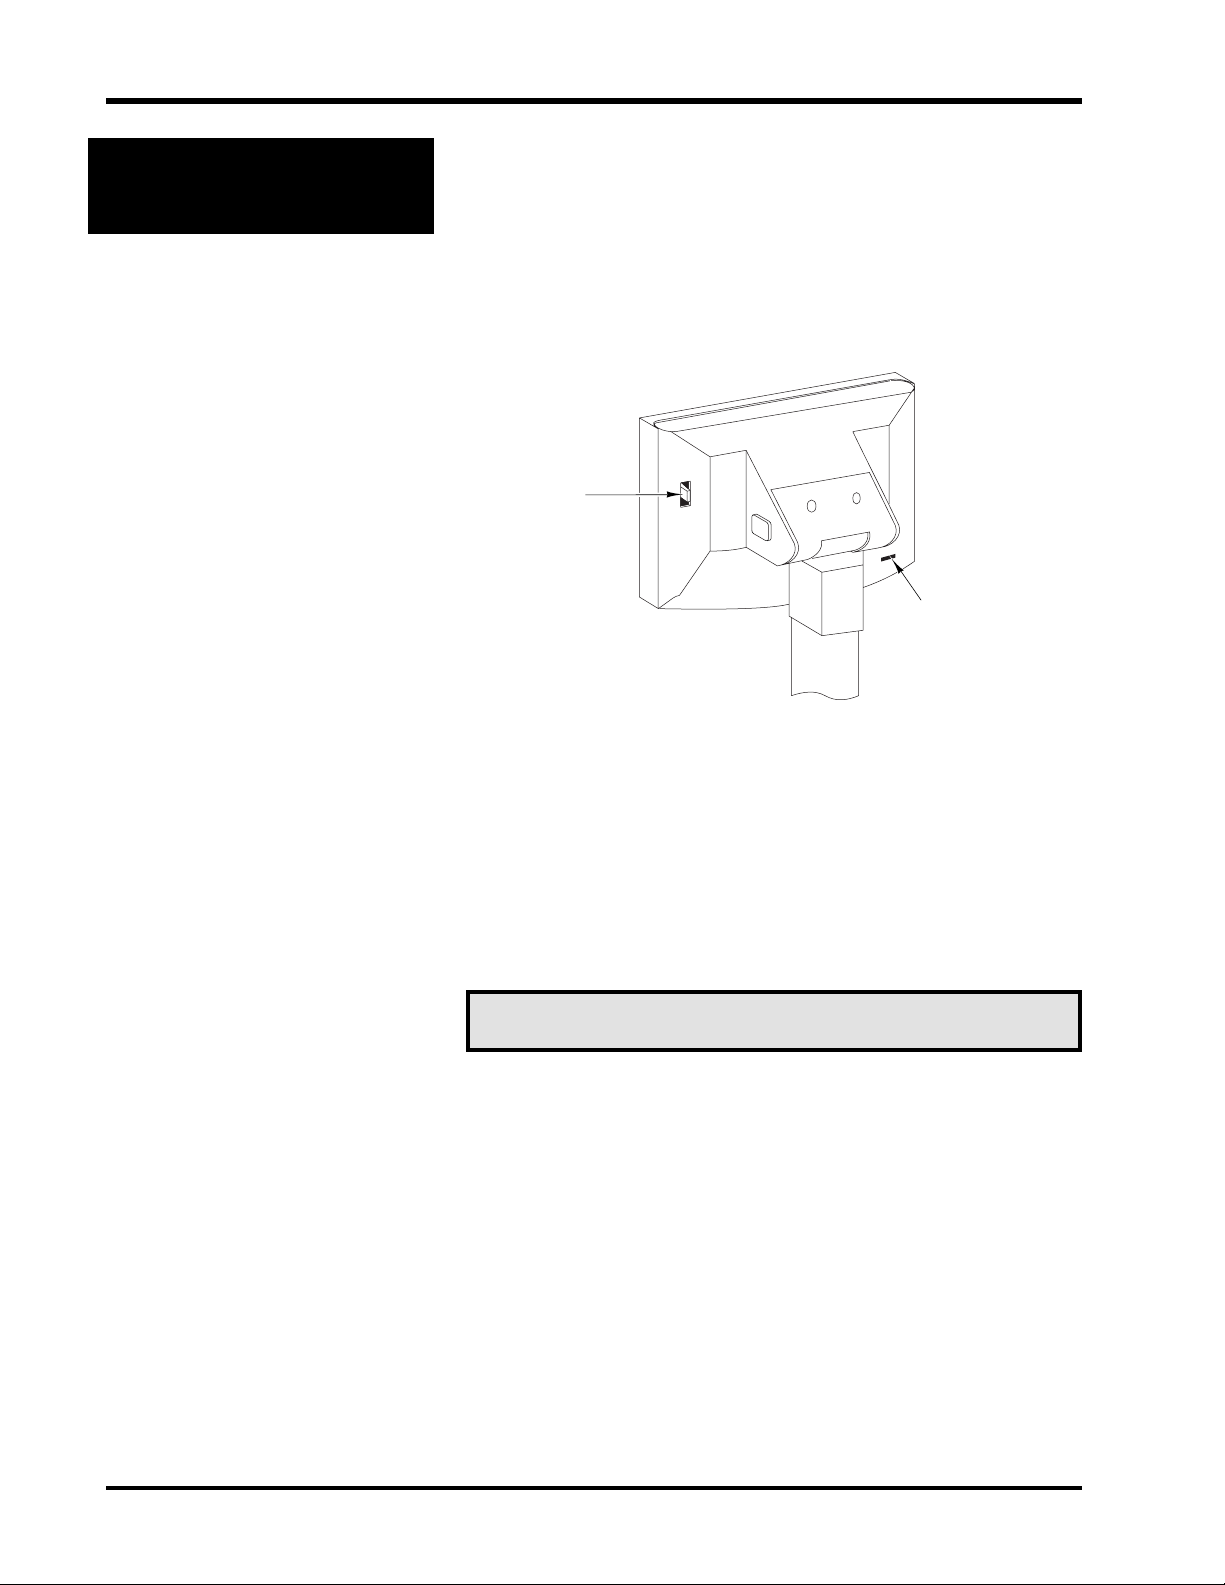
To insert batteries:
1. Open the front cover of the display by pulling the tab
(located on the back right side of the display) toward
you.
Tab
Mating
Terminal
2. Insert batteries using the imprinted diagram inside the
battery case located on the inside front cover of the
display head.
To use the power supply:
1. Connect the wall-mount adapter plug to a 120 V,
60 Hz, 1 Ph electrical outlet.
2. Connect the small, round 12V DC connector to the
Mating Terminal (located on the left lower back corner of
the display head).
☛ Note
When the scale is turned ON, all segments of the display
flash approximately 5 times. Then, zero displays and the
following indicators illuminate.
¥ Zero
¥ Stable
¥ kg
¥ Gross Wt.
-- OR -- lb
4
Page 9

Bench Receiving Scale
Leveling the Scale
There are four (4) leveling legs underneath the scale platter.
You may need to adjust these legs if the scale is not seated
properly. Proper adjustment of these legs helps you to
maintain the proper scale balance.
Level the scale by turning the leveling legs right or left until
the bubble in the leveling indicator is centered.
Leveling
Indicator
Leveling
Leg
Adjusting t he Display
Head for Easy Viewin g
To adjust display head:
1. Push and hold in button located on the back right side of
the Display Head.
2. Move the Display Head up or down to your desired
position.
3. Release button. Display Head will remain in set position.
Display Head
Adjustment
Button
5
Page 10

Bench Receiving Scale
Displ ay Head
Display
ZERO
TARE
LOW
kg
The Display Head can be adjusted for easy viewing and
includes the display, display indicators, and a 6-button
keypad.
Weight displays in lb (pounds) or kg (kilograms) and
indicator arrows illuminate on the display.
Over
Accept
Under
lb
Net
Wt.
Gross
Wt.
III
LEGAL FOR TRADE
Indicator Illuminated Arrow Indicates
ZERO
TARE
kg Unit of weight displays in kilograms.
lb Unit of weight displays in pounds.
Net
Wt.
Gross
Wt.
Under Weight is under the programmed lower limit setting.
Accept Weight is within the range of the programmed weight limits.
Over Weight is over the programmed upper limit setting.
No weight is on platter.
Tare value (weight of container) displays.
Stable Indicator.
Scale is not in motion.
The weight of the product only (gross weight Ð tare) displays.
The total weight (product and container) displays.
LOW
Battery voltage is low.
6
Page 11

Bench Receiving Scale
Keypad
You can use the 6-button keypad to perform functions in
two modes:
¥ Operator Mode
¥ Setup Mode
Operator Mode In Operator Mode you can do the following using the
keypad:
¥ Weigh products
¥ Operate one-touch tare
¥ Weigh items in batches
¥ Toggle between net and gross weight
¥ Toggle between kg and lb
ON
OFF
ZERO
CLEAR
FUNCTION
TARE
NET
GROSS
lb
kg
KEYPAD
Key Function
ON
OFF
ZERO
CLEAR
TARE
NET
GROSS
lb
kg
Turns the scale on or off.
Returns scale to zero when nothing is on the platter.
Operates one-touch taring and batch weighing.
Toggles between net and gross weight.
Toggles between pounds (lb) and kilograms (kg).
7
Page 12

Bench Receiving Scale
Setup Mode Setup Mode is used to program the scale with specific
settings before weighing the product.
In Setup Mode you can set, clear, or change:
¥ Preset tare
¥ Upper and lower weight limits
ON
OFF
ZERO
CLEAR
Key Function
ON
OFF
ZERO
CLEAR
FUNCTION
TARE
Turns the scale on or off.
Clears values in upper and lower weight limit and preset tare modes.
Used to enter and exit Setup Mode.
Programs preset tare.
-- OR --
Allows you to move left to change each digit value in preset tare and weight limit
modes.
FUNCTION
KEYPAD
TARE
NET
GROSS
lb
kg
NET
GROSS
lb
kg
Decreases upper and lower weight limit values and preset tare values by one.
Increases upper and lower weight limit values and preset tare values by one.
8
Page 13

Bench Receiving Scale
Operating the Scale
Refer to the specific section for a further explanation of each
step.
To operate the scale:
ON
1. PRESS
OFF
to turn the scale on.
2. Access Setup Mode to preset tare and set upper and
lower limits if desired.
3. Access Operator Mode to operate one-touch tare, weigh
products, and weigh items in batches. REFER to page 14.
4. Access Setup Mode to clear or change preset tare or
upper and lower weight limits if desired.
ON
5. PRESS
OFF
to turn the scale off.
✎ Tip
Upper and lower weight limits remain in memory unless
batteries are removed or cord is unplugged.
☛ Note
If at any time an incorrect weight displays, verify that your
lb
desired unit of weight (lb or kg) indicator is lit, PRESS
to change the unit of weight.
Operating in Setup
Mode
Access Setup Mode to set, clear, or change preset tare and
upper and lower weight limits.
Presetting Tare Preset the tare if you know the package weight (tare value).
☛ Note
If you want to preset tare but do not know the tare value,
weigh the package or container. The weight displayed is the
tare value. Follow the steps below to preset tare.
To preset tare:
1. HOLD DOWN
FUNCTION
and PRESS
and last digit on the display flashes.
TARE
. The tare indicator
kg
9
Page 14

Bench Receiving Scale
☛ Note
When setting the tare value, only the flashing digit can be
changed.
lb
2. PRESS
--OR--
PRESS
3. PRESS
flashes and you can increase or decrease the digit value.
4. Repeat step 3 until your tare value is set.
5. PRESS
value displays.
EXAMPLE: Mixer Bowl
1. HOLD DOWN
kg
to increase flashing digit by one.
NET
GROSS
to decrease the flashing digit by one.
TARE
to move left one digit. The digit to the left
FUNCTION
to return to Operator Mode. Your preset tare
Tare = 8.7 lb
FUNCTION
and PRESS
TARE
.
Empty 20 quart Mixer Bowl
2. PRESS
3. PRESS
4. PRESS
ZERO
TARE
kg
NET
GROSS
3 times.
ZERO
TARE
kg
TARE
1 time, then PRESS
ZERO
ZERO
TARE
TARE
kg
kg
FUNCTION
.
Over
Accept
Under
lb
Net
Gross
Wt.
lb
Net
Gross
Wt.
III
Wt.
LEGAL FOR TRADE
Over
Accept
Under
III
Wt.
LEGAL FOR TRADE
NET
GROSS
2 times.
Over
Over
Accept
III
III
LEGAL FOR TRADE
LEGAL FOR TRADE
Accept
Under
Under
lb
lb
Net
Net
Gross
Gross
Wt.
Wt.
Wt.
Wt.
10
ZERO
ZERO
TARE
TARE
Over
Over
Accept
III
III
LEGAL FOR TRADE
LEGAL FOR TRADE
Accept
Under
Under
lb
lb
kg
kg
Net
Net
Gross
Gross
Wt.
Wt.
Wt.
Wt.
Page 15

Clearing a Preset Tare To clear a preset tare:
1. Remove product and container from scale platter. The
preset tare weight displays.
2. HOLD DOWN
FUNCTION
and last digit flashes.
ZERO
3. PRESS
CLEAR
. The set tare value clears, 0.0 displays, and
the tare indicator and last digit flashes.
4. PRESS
FUNCTION
to return to Operator Mode.
and PRESS
Bench Receiving Scale
TARE
. The tare indicator
Setting Upper and Lower
Weight Limits
If you want the product to weigh a certain amount, you can
set upper and lower limits.
By setting the upper and lower limits you indicate the
maximum and minimum amount that you want the product
to weigh on the scale. The Over indicator flashes while in
the upper limit setting mode. The Under indicator flashes
while in the lower limit setting mode.
✎ Tip
Ø If the upper limit is set to zero (0.0). The over/under
mode will not work.
Ø If the upper limit is set to a smaller value than the lower
limit, an error message (------E) displays. Refer to
ERROR MESSAGES
To set weight limits:
1. PRESS
FUNCTION
to set the lower limit. The Under indicator
and the last digit on the display flashes.
.
☛ Note
To set the upper limit only, PRESS
Over indicator and the last digit on the display flashes. Go
to step 6.
FUNCTION
again now. The
☛ Note
When setting the upper and lower limit values, only the
flashing digit can be changed.
11
Page 16

Bench Receiving Scale
lb
2. PRESS
kg
to increase flashing digit by one.
--OR--
NET
PRESS
3. PRESS
GROSS
to decrease the flashing digit by one.
TARE
to move left one digit. The digit to the left
flashes and you can increase or decrease the digit value.
4. Repeat step 3 until your limit value is set.
5. PRESS
FUNCTION
. You are now in the upper limit setting
mode. The Over indicator and the last digit on the display
flashes.
☛ Note
If you want to set the lower limit only, PRESS
now to access Operator Mode.
6. Set your upper limit. Repeat steps 2 thru 4.
7. PRESS
FUNCTION
to return to Operator Mode.
EXAMPLE: Lower Limit = 18.4
Upper Limit = 20.0
1. PRESS
2. PRESS
3. PRESS
FUNCTION
.
ZERO
TARE
kg
lb
kg
4 times.
ZERO
TARE
kg
TARE
1 time, then PRESS
lb
Net
Gross
Wt.
lb
Net
Gross
Wt.
III
Wt.
LEGAL FOR TRADE
III
Wt.
LEGAL FOR TRADE
NET
GROSS
2 times.
FUNCTION
again
Over
Accept
Under
Over
Accept
Under
12
ZERO
TARE
Over
Accept
Under
lb
kg
Net
Gross
Wt.
III
Wt.
LEGAL FOR TRADE
Page 17

Bench Receiving Scale
4. PRESS
5. PRESS
6. PRESS
7. PRESS
TARE
1 time, then PRESS
ZERO
TARE
kg
FUNCTION
.
ZERO
TARE
kg
TARE
2 times, then PRESS
ZERO
TARE
kg
FUNCTION
.
lb
kg
1 time.
Over
Accept
Under
lb
Net
Gross
Wt.
lb
Net
Gross
Wt.
lb
Net
Gross
Wt.
III
Wt.
LEGAL FOR TRADE
Over
Accept
Under
III
Wt.
LEGAL FOR TRADE
lb
kg
2 times.
Over
Accept
Under
III
Wt.
LEGAL FOR TRADE
Clearing Upper and Lower
Weight Limits
ZERO
TARE
lb
kg
Net
Gross
Wt.
Wt.
To clear weight limits:
1. PRESS
FUNCTION
. The preset lower limit displays, and the
Under indicator and last digit flashes.
ZERO
2. PRESS
CLEAR
to clear the lower limit. 0.0 displays, and the
Under indicator and last digit flashes.
3. PRESS
FUNCTION
. The preset upper limit displays, and the
Over indicator and last digit flashes.
ZERO
4. PRESS
CLEAR
to clear the upper limit. 0.0 displays, and
the Over indicator and last digit flashes.
5. PRESS
FUNCTION
to return to Operator Mode.
III
LEGAL FOR TRADE
Over
Accept
Under
13
Page 18

Bench Receiving Scale
Operating in Operator
Mode
Weighing a Product Using
One-Touch Tare
Access Operator Mode to operate one-touch tare, weigh
products, and weigh items in batches.
If you do not know the package weight (tare value), use
one-touch tare.
To operate one-touch tare:
1. Place the container on the platter. The weight of the
container displays.
TARE
2. PRESS
. The display changes to 0.0 and the tare
indicator is lit.
3. Place the product in the container on the platter. The
display will indicate the net weight.
4. Remove the container and the product from the platter.
The negative weight of the container (tare) displays.
TARE
5. PRESS
. The weight display changes to 0.0, and the
tare indicator no longer illuminates.
Weighing a Product When
Preset Tare is Set
Weighing a Product When
Upper and Lower Weight
Limits Are Set
When weighing the product in Preset Tare Mode, the weight
of the product (net weight) displays.
Once the tare is preset:
1. Place the container on the platter. 0.0 displays.
2. Place the product on the platter. The net weight displays.
When weighing a product in Upper and Lower Weight
Limit Mode, the Over or Under indicator illuminates if the
product weight is over or under your set weight limits. The
Accept indicator illuminates if the weight is within the set
weight limits.
Once the weight limits are set:
1. Place the product on the platter. The weight of the
product displays, and the Over, Under, or Accept
indicator illuminates.
2. If the Over indicator illuminates, remove some of your
product until the Accept indicator illuminates.
3. If the Under indicator illuminates, add some of your
product until the Accept indicator illuminates.
14
Page 19

Bench Receiving Scale
Weighing in Batches Weighing in batches allows you to add ingredients and
return the weight back to zero repeatedly by pressing Tare
to control the weight of each added ingredient type.
To batch:
1. Place the container on the scale platter. The container
weight displays.
TARE
2. PRESS
to make the display show 0.0.
3. Add the ingredient until the desired portion displays as
the weight.
4. Repeat steps 2 and 3 for each ingredient you wish to add.
5. When done, remove the container filled with your
ingredients from the scale platter. The total negative tare
weight (container and ingredients) displays.
TARE
6. PRESS
to clear tare value.
☛ Note
Cleaning and Maintaining the Scale
Cleaning
NET
When weighing in batches, PRESS
GROSS
at any time to
display the total weight of the items. Press again to return to
the weight of the individual item.
Proper cleaning and maintenance prolongs the life and
productivity of the scale. Clean the scale as needed.
To clean the scale:
1. Dampen a soft cloth with mild detergent and water
solution.
2. Wipe down the scale housing and platter.
CAUTION — Look At This
DO NOT splash or hose down the scale. If water gets into
the display it will blank out, or the weight will be unstable.
Open the display and allow it to dry.
DO NOT use solvents to clean the scale.
15
Page 20

Bench Receiving Scale
Sanitizing
Do Don’t
DO use 5% Chlorine Bleach (5.25%
Sodium Hypochlorite).
Ratio Bleach Water Concentration
1 : 250 1 tsp. 1 gal. 200 ppm
1 : 500 1/2 tsp. 1 gal. 100 ppm
1 : 1000 1/4 tsp. 1 gal. 50 ppm
1 : 2000 1/8 tsp. 1 gal. 25 ppm
☛ Note
FDA Code of Regulations Vol. 21 require solutions
containing chlorine to be of no greater concentration than
200 ppm. Solutions containing concentrations greater than
200 ppm chlorine will accelerate corrosion of metals.
☛ Note
Proper cleaning solvent is available from your local Hobart
service office for all rubber surfaces. Observe the
instructions on the bottle.
DONÕT exceed chemical
manufacturerÕs recommended
concentrations for sanitizer.
DONÕT use solutions of greater than
200 ppm concentration of chlorine
cleaners.
Maintaining
WARNING
➱
BEFORE USING CLEANING SOLVENT, ALL FOOD
PRODUCTS AND PACKAGING MATERIALS MUST BE
REMOVED FROM THE AREA OR CAREFULLY
PROTECTED. ALSO, ALL ODOR OF THE CLEANER
MUST DISSIPATE BEFORE FOOD PRODUCTS OR
PACKAGING MATERIALS ARE EXPOSED.
To maintain your scale follow these guidelines:
¥ Do not place the scale in direct sunlight or direct wind
(heating ducts, etc.).
¥ Set the scale in an area free of vibration.
¥ Set the scale on a firm, level surface.
¥ Operate in temperatures between -5°C and 40°C
(23°F and 104°F).
¥ Promptly remove expired batteries.
16
Page 21

Erro r Messages
Error Message Possible Cause Action
Bench Receiving Scale
LOW
Item on platter is too heavy.
Remove the item and PRESS
Something is stuck between the
upper and lower platter covers,
or the upper platter cover has
Remove the item stuck between the
covers or replace the upper platter
cover.
been removed.
An item, which exceeds the scale
Remove the item.
capacity, is on the platter.
The platter cover is removed. Replace the platter cover.
Upper limit is set to a smaller
Reset the limits.
value than the lower limit.
Battery voltage is low. Replace batteries. Refer to
POWERING THE SCALE
ZERO
CLEAR
.
.
17
Page 22

Bench Receiving Scale
Accessory (M obile Ca rt)
.500
4X
An optional mobile cart with rear locking casters is available.
Contact your local Hobart Representative for further details.
18.500
TOP VIEW
33.960
.500
4X
43.750
34.793
16.850
14.000
1.250
TREAD
WIDTH
SIDE VIEW REAR VIEW
18
1.250
TREAD
WIDTH
Page 23

Page 24

F-34220 Rev. A (2/99)
 Loading...