


RHW-1
H
E
A
T
E
D
W
E
L
L
H
A
T
C
O
C
O
R
P
O
R
A
T
I
O
N
M
I
L
W
A
U
K
E
E
,
W
I
U
.
S
.
A
.
w
w
w
.
h
a
t
c
o
c
o
r
p
.
c
o
m
H
E
A
T
E
D
W
E
L
L
H
A
T
C
O
C
O
R
P
O
R
A
T
I
O
N
M
I
L
W
A
U
K
E
E
,
W
I
U
.
S
.
A
.
w
w
w
.
h
a
t
c
o
c
o
r
p
.
c
o
m
H
E
A
T
E
D
W
E
L
L
H
A
T
C
O
C
O
R
P
O
R
A
T
I
O
N
M
I
L
W
A
U
K
E
E
,
W
I
U
.
S
.
A
.
w
w
w
.
h
a
t
c
o
c
o
r
p
.
c
o
m
H
E
A
T
E
D
W
E
L
L
H
A
T
C
O
C
O
R
P
O
R
A
T
I
O
N
M
I
L
W
A
U
K
E
E
,
W
I
U
.
S
.
A
.
w
w
w
.
h
a
t
c
o
c
o
r
p
.
c
o
m
Register Online!
hatcocorp.com
WARNING
ADVERTENCIA
AVERTISSEMENT
(see page 2)
S'inscrire en ligne!
(voir page 12)
Puits Chauffants Ronds
Installation and Operating Manual
Manuel d'installation et d'utilisation
Round Heated Wells
RHW Series/Série
Do not operate this equipment unless you
have read and understood the contents of
this manual! Failure to follow the
instructions contained in this manual may
result in serious injury or death. This
manual contains important safety
information concerning the maintenance,
use, and operation of this product. If
you’re unable to understand the contents
of this manual, please bring it to the
attention of your supervisor. Keep this
manual in a safe location for future
reference.
P/N 07.04.752.00 © 2016 Hatco Corporation
English = p 2
No opere este equipo al menos que haya
leído y comprendido el contenido de este
manual! Cualquier falla en el seguimiento
de las instrucciones contenidas en este
manual puede resultar en un serio lesión
o muerte. Este manual contiene
importante información sobre seguridad
concerniente al mantenimiento, uso y
operación de este producto. Si usted no
puede entender el contenido de este
manual por favor pregunte a su
supervisor. Almacenar este manual en
una localización segura para la referencia
Ne pas utiliser cet équipement sans avoir
lu et compris le contenu de ce manuel !
Le non-respect des instructions
contenues dans ce manuel peut entraîner
de graves blessures ou la mort. Ce
manuel contient des informations
importantes concernant l'entretien,
l'utilisation et le fonctionnement de ce
produit. Si vous ne comprenez pas le
contenu de ce manuel, veuillez le signaler
à votre supérieur. Conservez ce manuel
dans un endroit sûr pour pouvoir vous y
référer plus tard.
futura.
Français = p 12

WARNING
NOTICE
CAUTION
24 Hour 7 Day Parts and Service
Assistance available in the United States
and Canada by calling 800-558-0607.
CONTENTS
English
Important Owner Information ..............................................2
Introduction...........................................................................2
Important Safety Instructions..............................................3
Model Description.................................................................4
Model Designation................................................................4
Specifications........................................................................5
Plug Configurations .............................................................5
Electrical Rating Chart .........................................................5
Dimensions ..........................................................................5
Installation.............................................................................6
General ................................................................................6
Installing a Built-In Model.....................................................6
IMPORTANT OWNER INFORMATION
Record the model number, serial number, voltage, and
purchase date of the unit in the spaces below (specification
label located on the back of the unit). Please have this
information available when calling Hatco for service assistance.
Model No. ________________________________________
Serial No. ________________________________________
Voltage __________________________________________
Date of Purchase __________________________________
Register your unit!
Completing online warranty registration will prevent delay in
obtaining warranty coverage. Access the Hatco website at
www.hatcocorp.com, select the Parts & Service pull-down
menu, and click on “Warranty Registration”.
Operation...............................................................................8
General ................................................................................8
Maintenance ..........................................................................9
General ................................................................................9
Daily Cleaning......................................................................9
Options and Accessories.....................................................9
Troubleshooting Guide ......................................................10
Limited Warranty.................................................................11
Business
Hours: 7:00
Telephone: 800-558-0607; 414-671-6350
e-mail: partsandservice@hatcocorp.com
Additional information can be found by visiting our web site at
www.hatcocorp.com.
AM to 5:00 PM Central Standard Time (CST)
(Summer Hours: June to September—
7:00
AM to 5:00 PM CST Monday–Thursday
AM to 4:00 PM CST Friday)
7:00
INTRODUCTION
Hatco Round Heated Wells are specially designed to cook or
hold a wide variety of foods including soups, curry, gravies and
a variety of toppings. Products for cooking or holding are placed
in a pot which is heated or warmed by a heating plate. The
heating element temperature is monitored by an electronic
controller for optimum results. Heat is evenly distributed
throughout the unit to hold foods at desired temperatures and
the insulated stainless steel design provides easy maintenance
and durable performance.
All units are equipped with a control panel featuring three
temperature setpoints from 120°F (49°C) to 212°F (100°C) and
an energy saving low power mode that saves electricity during
off-peak hours.
Hatco Round Heated Wells are quality built to meet
the demands of foodservice operations and provide years of
trouble-free performance. The heating elements are
guaranteed against breakage and burnout for 1 year.
Round Heated Wells are products of extensive research and
field testing. The materials used were selected for maximum
durability, attractive appearance, and optimum performance.
Every unit is inspected and tested thoroughly prior to shipment.
Th
ctio
u
str
in
i
m
wel
Safety information that appears in this manual is identified by
the following signal word panels:
WARNING indicates a hazardous situation which, if not
avoided, could result in death or serious injury.
CAUTION indicates a hazardous situation which, if not
avoided, could result in minor or moderate injury.
NOTICE is used to address practices not related to personal
injury.
2
ns
anual
tal
l
i
at
l
be read pri
.
s
on,
s
n
r
fo
operat
R
n
u
o
ng,
i
or to i
d
and
d
te
a
e
H
ety
af
s
ati
l
tal
ns
H
lls.
We
ruc
t
ns
i
on or operat
Form No. RHWM-0816
e
r
tco
a
appeari
ons
i
t
on of the heated
i
co
mme
ng
n
e
p
o
d
n
ty, a
fe
, sa
n
tio
lla
sta
in
e
s th
e
vid
o
r
l p
a
u
n
is ma
g
tin
a
r
ll
a
s
d
s
hi
t
n
i
English
NOTICE
C
A
U
TIO
N
WA
R
N
IN
G
WARNING
IMPORTANT SAFETY INFORMATION
Read the following important safety information before using this equipment to avoid serious
injury or death and to avoid damage to equipment or property.
e
p
o
r
P
t.
i
n
u
e
th
f
o
s
s
e
n
i
l
n
a
e
l
c
r
e
p
o
r
p
n
i
a
t
n
i
ELECTRIC SHOCK HAZARD:
• Plug unit into a properly grounded electrical receptacle of
the correct voltage, size, and plug configuration. If plug
and receptacle do not match, contact a qualified electrician
to determine and install the proper voltage and size
electrical receptacle.
• Turn OFF power switch, unplug power cord, and allow unit
to cool before performing any cleaning, adjustments, or
maintenance.
• DO NOT submerge or saturate with water. Unit is not
waterproof. Do not operate if unit has been submerged or
saturated with water.
• Unit is not weatherproof. Locate unit indoors where
ambient air temperature is a minimum of 70°F (21°C).
• Do not steam clean or use excessive water on unit.
• This unit is not “jet-proof” construction. Do not use jetclean spray to clean this unit.
• Do not pull unit by power cord.
• Discontinue use if power cord is frayed or worn.
• Do not attempt to repair or replace a damaged power cord.
Cord must be replaced by Hatco, an Authorized Hatco
Service Agent, or a person with similar qualifications.
• DO NOT use unit to melt or hold ice. Doing so may cause
condensation, creating an electrical hazard and causing
personal injury and/or damage to unit. Damage caused by
condensation is not covered by warranty.
• Use only Genuine Hatco Replacement Parts when service
is required. Failure to use Genuine Hatco Replacement
Parts will void all warranties and may subject operators of
the equipment to hazardous electrical voltage, resulting in
electrical shock or burn. Genuine Hatco Replacement
Parts are specified to operate safely in the environments in
which they are used. Some aftermarket or generic
replacement parts do not have the characteristics that will
allow them to operate safely in Hatco equipment.
FIRE HAZARD:
• Locate unit a minimum of 1″ (25 mm) from combustible
walls and materials. If safe distances are not maintained,
discoloration or combustion could occur.
• Do not use harsh chemicals such as bleach (or cleaners
containing bleach), oven cleaners, or flammable cleaning
solutions to clean this unit.
Make sure food product has been heated to the proper foodsafe temperature before placing in the unit. Failure to heat
food product properly may result in serious health risks. This
unit is for holding pre-heated food product only.
Hatco Corporation is not responsible for actual food product
serving temperature. It is the responsibility of the user to
ensure that food product is held and served at a safe
temperature.
Make sure all operators have been instructed on the safe and
proper use of the unit.
This unit is not intended for use by children or persons with
reduced physical, sensory, or mental capabilities. Ensure
proper supervision of children and keep them away from the
unit.
Ma
a
it
n
a
s
NTE
AI
M
u
s
Thi
is
h
t
n
o
a
t
n
o
c
7
6
-
4
1
4
BURN
o
S
•
he
w
Hot
•
ool
c
te
a
c
o
L
convenient
r it
it o
n
u
suppor
o
t
not
Do
n
r
u
T
pl
com
a
d
n
a
t
S
es
nut
i
m
ra
e
Op
Use nonand cl
m
and
Do not
uni
he
t
mo
Re
5
″ (1
6
n
u
Mo
r
ect
el
o
n
o
D
or grease from grills, fryers, etc. Excessive temperatures could
cause damage to the unit.
Unit is designed and recommended for use in or on metallic
countertops. Damage to any countertop material is not
covered under the Hatco warranty. For other surfaces, verify
with manufacturer that material is suitable for prolonged
temperatures up to 212°F (100°C).
Do not use excessive force when tightening mounting screws on
built-in units. This may damage unit and/or countertop.
Do not locate unit in area with excessive air movement around
unit. Avoid areas that may be subject to active air movements
or currents (i.e., near exhaust fans/hoods, air conditioning
ducts, and exterior doors).
Do not operate unit without food product/water in well.
Damage to unit could occur.
is
n
io
t
NANCE
s
a
h
t
i
n
,
it
n
u
e
h
t
t
c
0
5
3
6
-
1
HAZARD:
x
e
me
ouc
t
n
e
t
a
w
or
f
be
it a
n
u
f
n
o
c
s
he
t
t
ove
m
n
u
ff
o
bef
y
el
et
d
n
a
rd
duri
it with
n
u
te
abr
hs coul
ot
ng
aki
ay uni
l
coul
t
mo
te
mm) c
2
o
c
g
tin
syst
cal
i
te
a
c
t lo
H
.
t
r
or
it,
a
ng
asi
t
i
d
u
n
u
l
a
ic
it
r
c
i
t
c
e
s
e
s
u
“
no
t
c
a
t
n
o
c
Se
o
c
t
a
u
s
r
rio
e
he
t
ng
hi
t
uni
n
i
ni
i
a
dr
e
p
e
t th
use. The locat
fro
s
t
n
te
ght
ei
w
ocat
rel
or
mo
e
r
ovi
m
e
or
e
v
ro
p
p
al
i
t
ni
i
t fo
u
o
eaner
ve cl
at
d scr
suscept
he si
on t
t
.
occur
c
d
te
n
e
c
n
ra
a
le
l pa
o
tr
cont
n
i
em
a
it in
n
on
-s
r
a
rf
m
ng
o
r
m fa
of
v
d
o
ch f
o
fro
n
n
r
o
f
f
e
n
v
r
c
a
e
s
y
a
or
e
p
e
e
ng
ma
start
p
d
bl
i
de w
tr
n
l c
e
r
re
a
t
e
o
o
f
c
or
c
i
v
r
t
u
A
e
ic
s
e
e
r
a
us
a
c
c
c
r
llin
he
uni
o
fo
or
u
n
up.
d
ro
s and cl
sh of
ni
i
o
t
l pa
o
m u
lo
p
ol
s
a
e
f
a
s
-
d
ng
ni
a
e
l
pa
”
e
l
b
a
e
d
e
iz
r
o
h
me
t
r
a
p
e
D
it
n
u
n
o
.
s
a
a
c
s
e
ng.
ni
a
e
l
h
r
te
n
u
o
ion should be level t
e
id
c
c
a
g
and
t
uni
hen
w
t
d
o
r
p
d
ng.
eani
cl
g
rin
tu
c
fa
i
s
Thi
til s
n
t u
c
u
hs onl
ot
uni
accum
l
soi
he cont
h t
t
i
mu
ls
e
n
t to
o
it (n
n
y
ma
r
e
s
.
anel
t to
c
je
b
u
o
pr
r
H
will
di
l
e
n
cont
t
i
c
u
o
s
,
t
c
e
m
e
a
r
e
p
e
oc
f
I
.
s
t
o
c
t
a
a
t
n
e
g
i
ng
t in
h
ig
a
lly
a
t
ents.
contai
a
t,
ma
ils
em
t
a
k
mo
y.
ar
at
ul
ol
r
t h
s
e
c
x
s
u
a
e
c
x
io
t
dur
s
t
t
nj
n
d
e
Abr
ng i
i
r
i
p
e
e
s
s
e
l
c
r
R
.
n
.
s
e
c
i
v
r
e
ic
v
r
Se
-
0
0
8
.
t
o
h
Al
.
y
ur
a
n
a
o pr
tro
s
d
n
ood
f
ns
llo
a
d
mo
s
y
porary
ipa
s
is
asi
ts appear
on.
anel
a
e
v
a
″ [1
6
5
d
a
e
h
te
e
iv
n
a
e
i
e
e
5
5
s
U
l
r
n
w
k
ve cl
Dam
.
min
t d
mp
e
n
i
l
r
e
f
e
r
s
g
A
0
-
8
c
e
ow
th
a
e
event
e
g
pr
to
u
e
condi
.
s
te
0
2
4
ma
a
e
a
s
s
o
t
qui
t
n
e
7
0
6
t
u
a
uni
a
t
u
o
n
oduct
c
to
p
i
t
eaner
ance
age t
imu
mm]).
e
g
tu
ra
n
h
t
e
r
o
o
io
t
t
t is
he
g
o
o
3
on.
m
to
re
d
e
d
r
r
n
o
h
.
l
0
s
o
s
Form No. RHWM-0816
3
MODEL DESCRIPTION
H
E
A
T
E
D
W
E
L
L
H
A
T
C
O
C
O
R
P
O
R
A
T
I
O
N
M
I
L
W
A
U
K
E
E
,
W
I
U
.
S
.
A
.
w
w
w
.
h
a
t
c
o
c
o
r
p
.
c
o
m
H
E
A
T
E
D
W
E
L
L
H
A
T
C
O
C
O
R
P
O
R
A
T
I
O
N
M
I
L
W
A
U
K
E
E
,
W
I
U
.
S
.
A
.
w
w
w
.
h
a
t
c
o
c
o
r
p
.
c
o
m
H
E
A
T
E
D
W
E
L
L
H
A
T
C
O
C
O
R
P
O
R
A
T
I
O
N
M
I
L
W
A
U
K
E
E
,
W
I
U
.
S
.
A
.
w
w
w
.
h
a
t
c
o
c
o
r
p
.
c
o
m
H
E
A
T
E
D
W
E
L
L
H
A
T
C
O
C
O
R
P
O
R
A
T
I
O
N
M
I
L
W
A
U
K
E
E
,
W
I
U
.
S
.
A
.
w
w
w
.
h
a
t
c
o
c
o
r
p
.
c
o
m
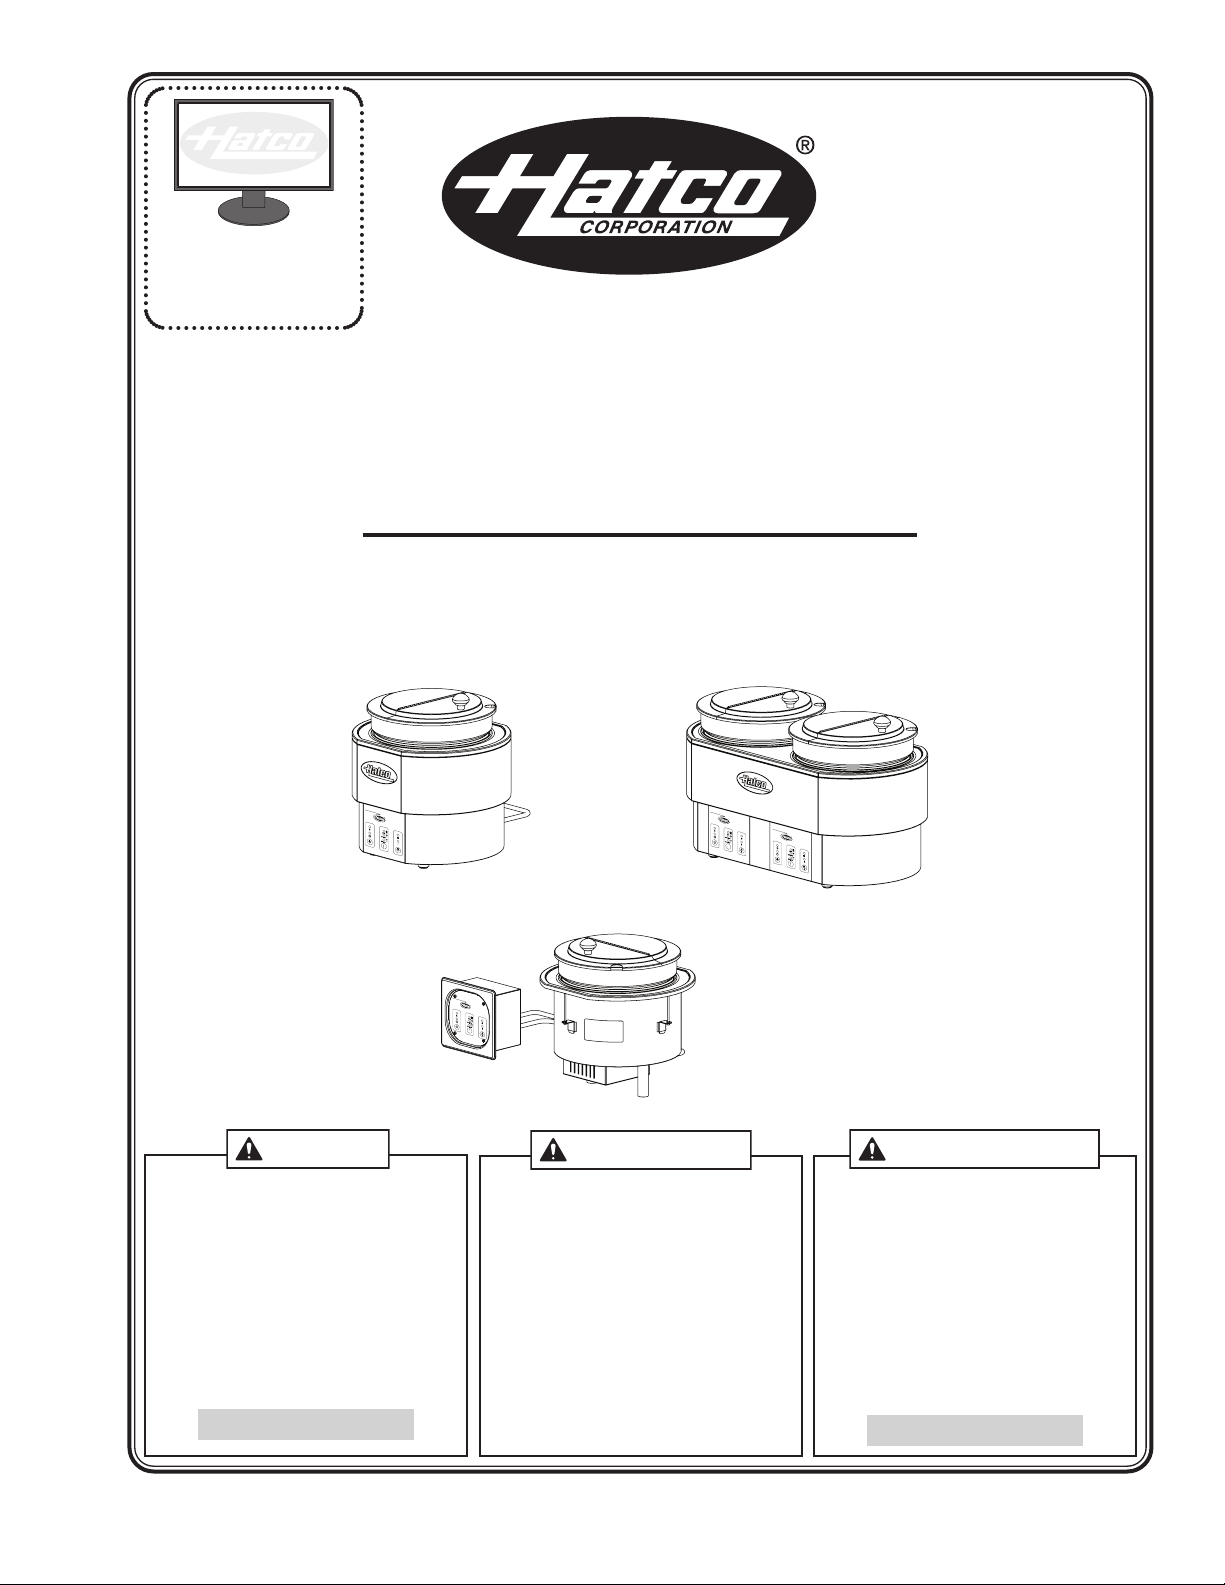
R H W - 1 B
Round
Heated Well
B = Built-In w/Remote Control
No Character = Countertop
1 = Single Unit
2 = Dual Unit
English
All Models
All Round Heated Wells are reliable and versatile. In addition for
use as a Heated Well to keep food hot for serving, food also
can be steamed when used with an optional adapter kit.
NOTE: Do not add cold food to the unit for re-thermalization
while hot food is being held.
Model RHW-1
Model RHW-1 is equipped with a single heating element for
holding food or cooking soups or sauces. It is supplied with a
specially-designed, stainless steel 11 qt (10 liter) round pot and
hinged lid.
NOTE: Actual pan capacity—6-1/4 qt (6 liter) for boiling
application or 8-1/2 quarts (8 liter) for warming
application.
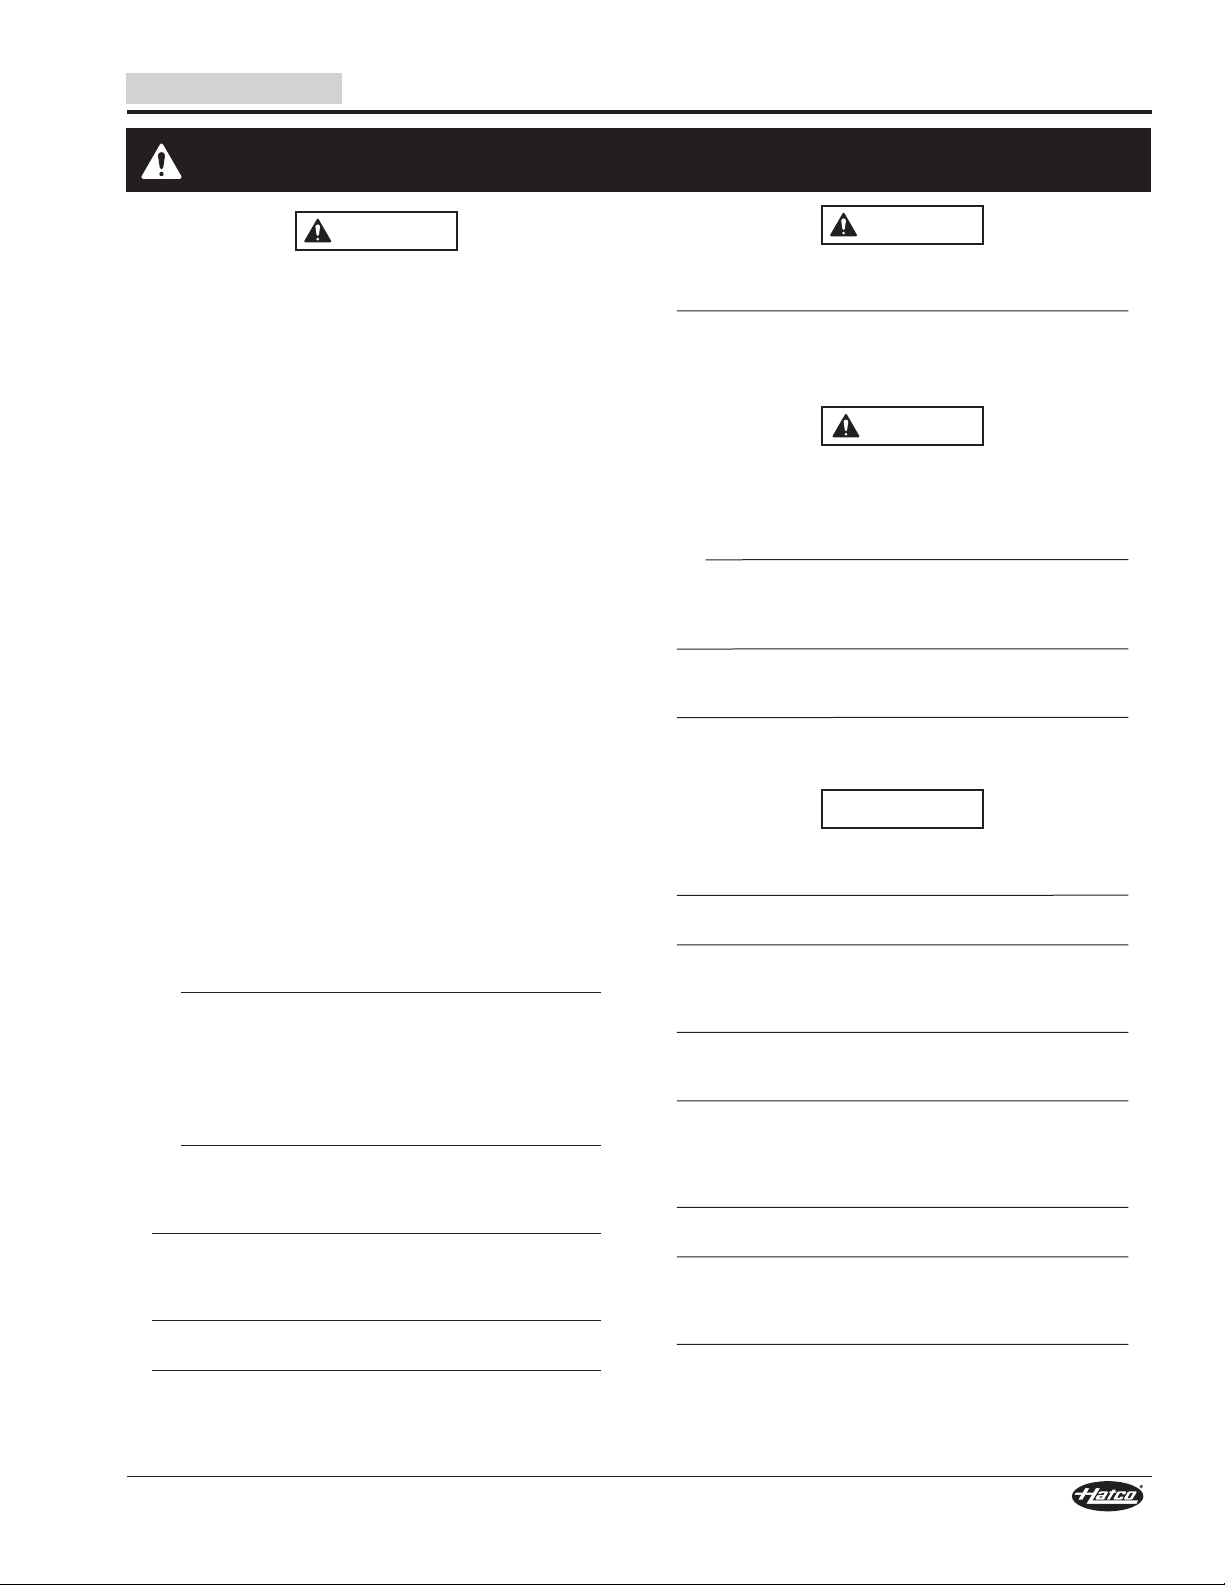
Model RHW-2
Model RHW-2 is equipped with two individually controlled
heating elements for holding food or cooking soups or sauces.
It is supplied with two specially-designed, stainless steel 11 qt
(10 liter) round pots and hinged lids.
NOTE: Actual pan capacity—6-1/4 qt (6 liter) for boiling
application or 8-1/2 quarts (8 liter) for warming
application.
Model RHW-2
Model RHW-1
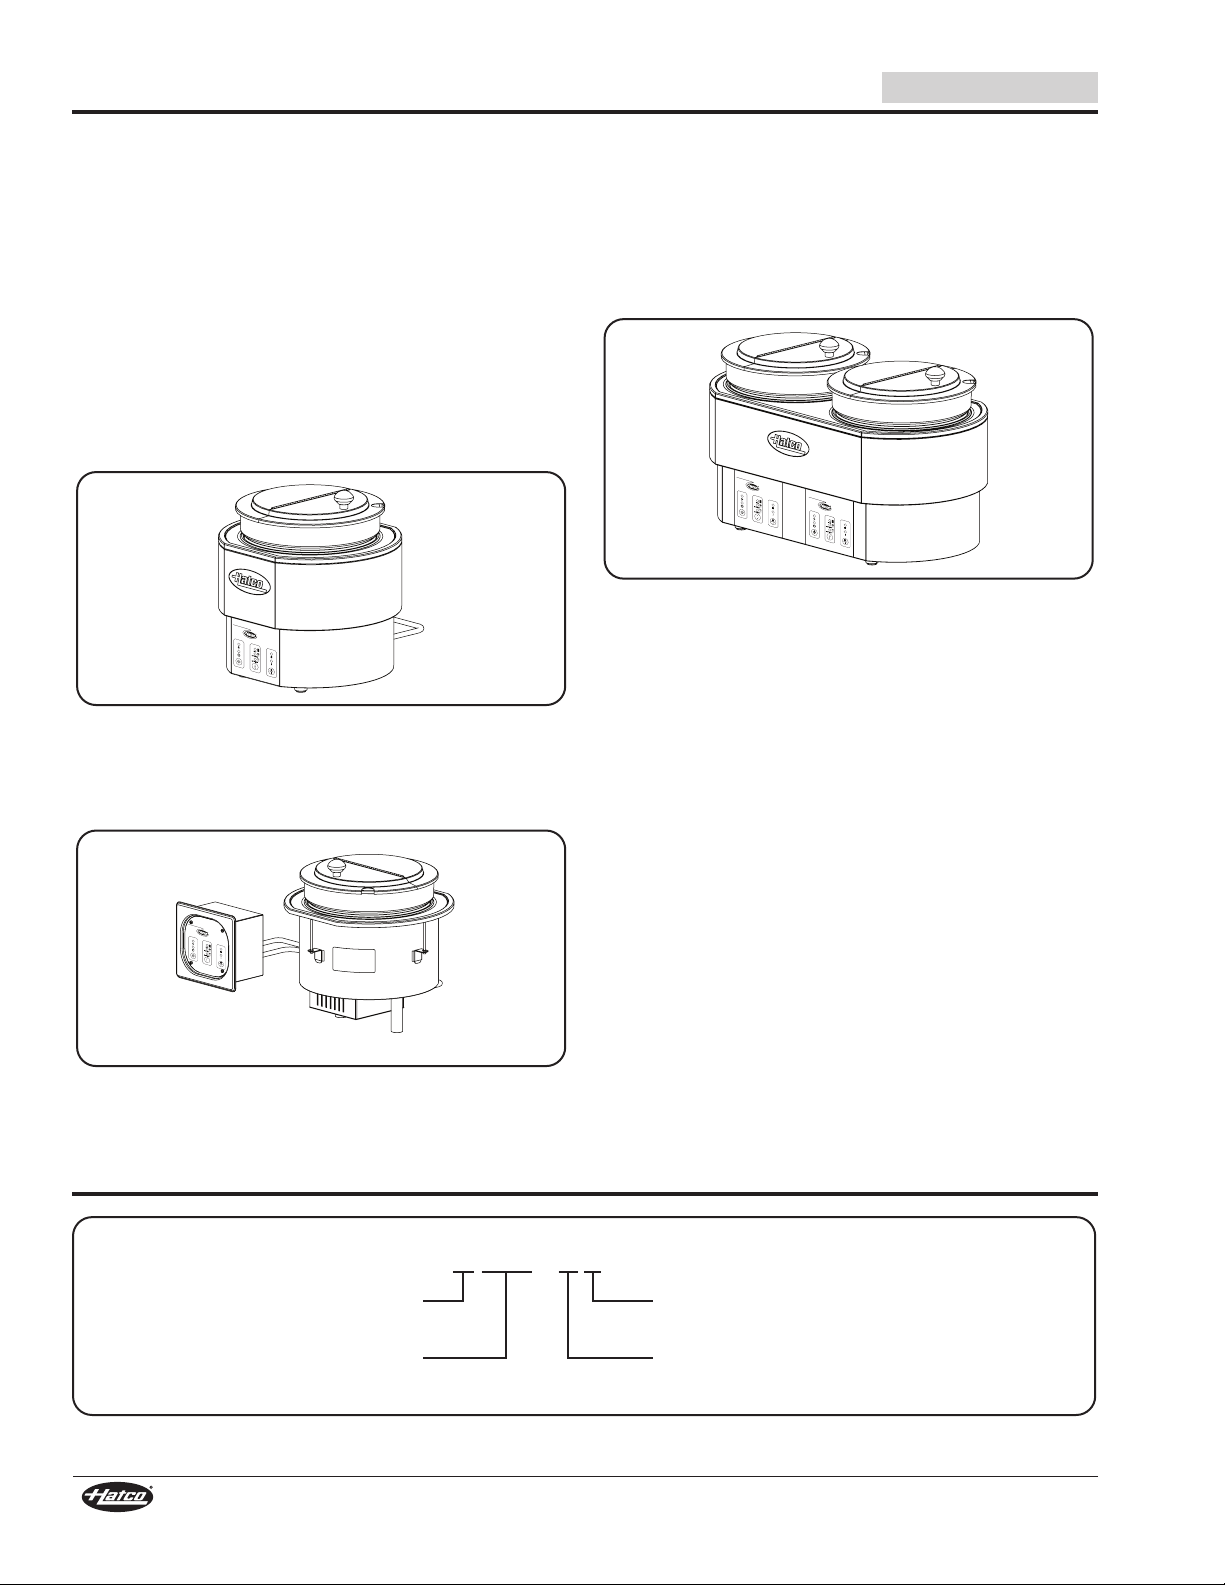
Model RHW-1B
Model RHW-1B is equipped the same as the RHW-1 but is a
built-in model equipped with a remote mounted control panel.
Model RHW-1B
MODEL DESIGNATION
4
Form No. RHWM-0816

English
WARNING
NEMA 5-15P NEMA 6-15P
P
O
W
E
R
F
A
U
L
T
1
0
0
°
C
7
0
°
C
-9
0
°
C
5
0
°
C
-7
0
°
C
T
E
M
P
O
N
/
O
F
F
o
_
F
U
L
L
P
O
W
E
R
E
N
E
R
G
Y
S
A
V
E
M
O
D
E
~
~~~
P
O
W
E
R
F
A
U
L
T
1
0
0
°
C
7
0
°
C
-9
0
°
C
5
0
°
C
-7
0
°
C
T
E
M
P
O
N
/
O
F
F
o
_
F
U
L
L
P
O
W
E
R
E
N
E
R
G
Y
S
A
V
E
M
O
D
E
~
~~~
H
E
A
T
M
A
X
HE
A
T
E
D
W
E
L
L
RHW-1 RHW-1B RHW-2
B
E
D D
E
B B
C
A
C
A
C
A
SPECIFICATIONS
Plug Configurations
Units are supplied from the factory with an electrical cord and
plug. Plugs are supplied according to the application.
ELECTRIC SHOCK HAZARD: Plug unit into a properly
grounded electrical receptacle of the correct voltage, size,
and plug configuration. If plug and receptacle do not
match, contact a qualified electrician to determine and
install the proper voltage and size electrical receptacle.
NOTE: The specification label is located on the back of the unit.
See label for serial number and verification of unit
Plug Configurations
electrical information.
Electrical Rating Chart
Model Voltage Watts Amps Plug Configuration Shipping Weight
RHW-1 120 1250 10.4 NEMA 5-15P 21 lbs. (10 kg)
RHW-1B 120 1250 10.4 NEMA 5-15P 21 lbs. (10 kg)
RHW-2 208–240 2045–2725 9.8–11.3 NEMA 6-15P 36 lbs. (17 kg)
NOTE: Shipping weight includes packaging.
Dimensions
Width
Model
RHW-1
RHW-1B
RHW-2
(A)
14-1/8″
(359 mm)
14-1/8″
(359 mm)
24-3/4″
(630 mm)
Depth
(B)
13″
(330 mm)
13″
(330 mm)
13″
(330 mm)
Footprint
Height
(C)
14″
(355 mm)
13-7/16″
(341 mm)
14″
(355 mm)
Width
(D)
7″
(179 mm)
N/A N/A
15-3/8″
(389 mm)
Footprint
Depth
(E)
8-7/8″
(224 mm)
9-7/8″
(249 mm)
Form No. RHWM-0816
5
INSTALLATION
WARNING
NOTICE
CAUTION
12″
(305 mm)
RHW-1B
NOTICE
5-1/8″
(132 mm)
5-9/16″
(144 mm)
2-9/16″
(65 mm)
1-5/16″
(33 mm)
6″
(154 mm)
Ø 3/16″
(4,5 mm)
English
General
Round Heated Wells are shipped from the factory with most
components assembled and ready for use. Care should be
taken when unpacking shipping carton to avoid damage to unit
and the components enclosed.
ELECTRIC SHOCK HAZARD: Unit is not weatherproof.
Locate unit indoors where ambient air temperature is a
minimum of 70°F (21°C).
FIRE HAZARD: Locate unit a minimum of 1″ (25 mm) from
combustible walls and materials. If safe distances are not
maintained, discoloration or combustion could occur.
Locate unit at the proper counter height in an area that is
convenient for use. The location should be level to prevent
the unit or its contents from falling accidentally and strong
enough to support the weight of the unit and contents.
Do not move or relocate unit when it contains food
product. Turn off unit, remove food product, and allow to
cool completely before moving or cleaning.
Do not lay unit on the side with the control panel. Damage
to the unit could occur.
Do not locate unit in an area subject to excessive
temperatures or grease from grills, fryers, etc. Excessive
temperatures could cause damage to the unit.
1. Remove the unit from the carton.
2. Remove the information packet.
3. Remove tape and protective packaging from all surfaces of
the unit and any accessories.
4. If the unit is a countertop model, place the unit in the
desired location.
• Locate the unit in an area where the ambient air
temperature is constant and a minimum of 70° F
(21° C). Avoid areas that may be subject to active air
movements or currents (i.e., near exhaust fans/hoods,
air conditioning ducts, exterior doors).
• Make sure the unit is at the proper counter height in an
area convenient for use.
• Make sure the countertop is level and strong enough to
support the weight of the unit and food product.
• Make sure all the feet on the bottom of the unit are
positioned securely on the countertop.
5. If the unit is a built-in model, perform the “Installing a BuiltIn Model” procedure in this section.
Installing a Built-In Model
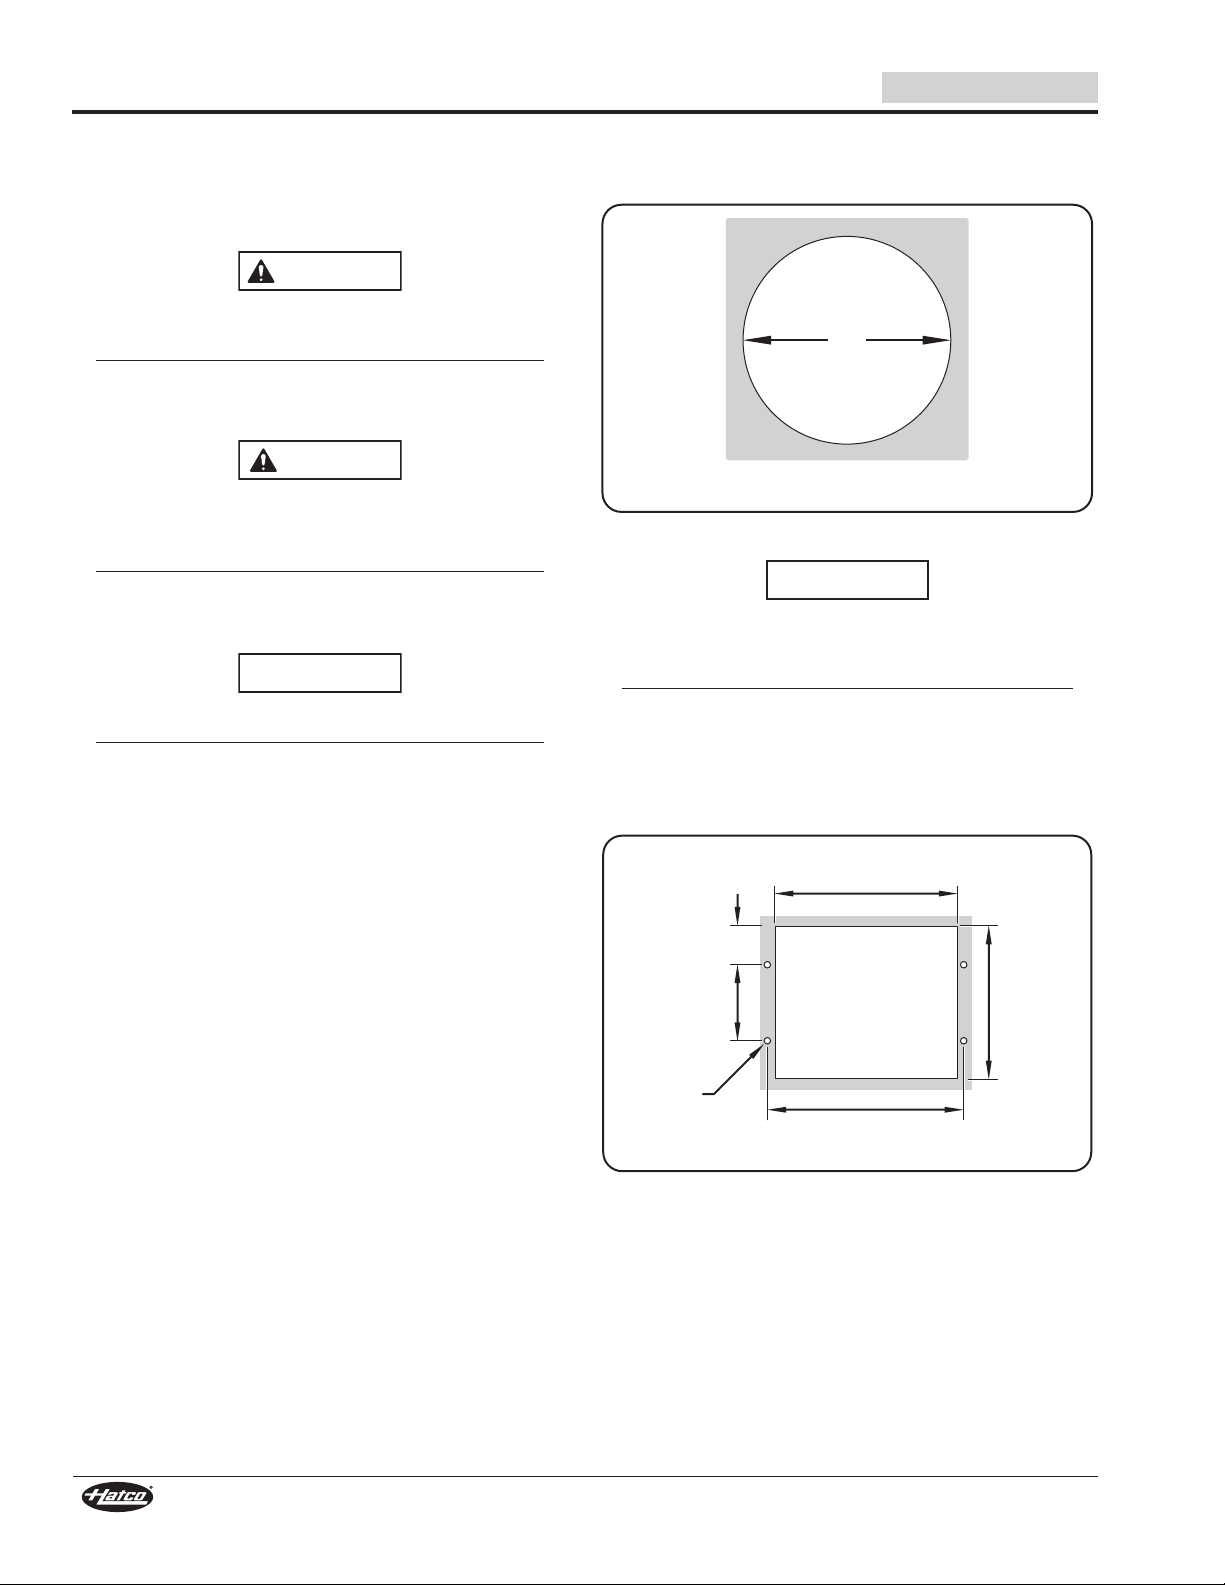
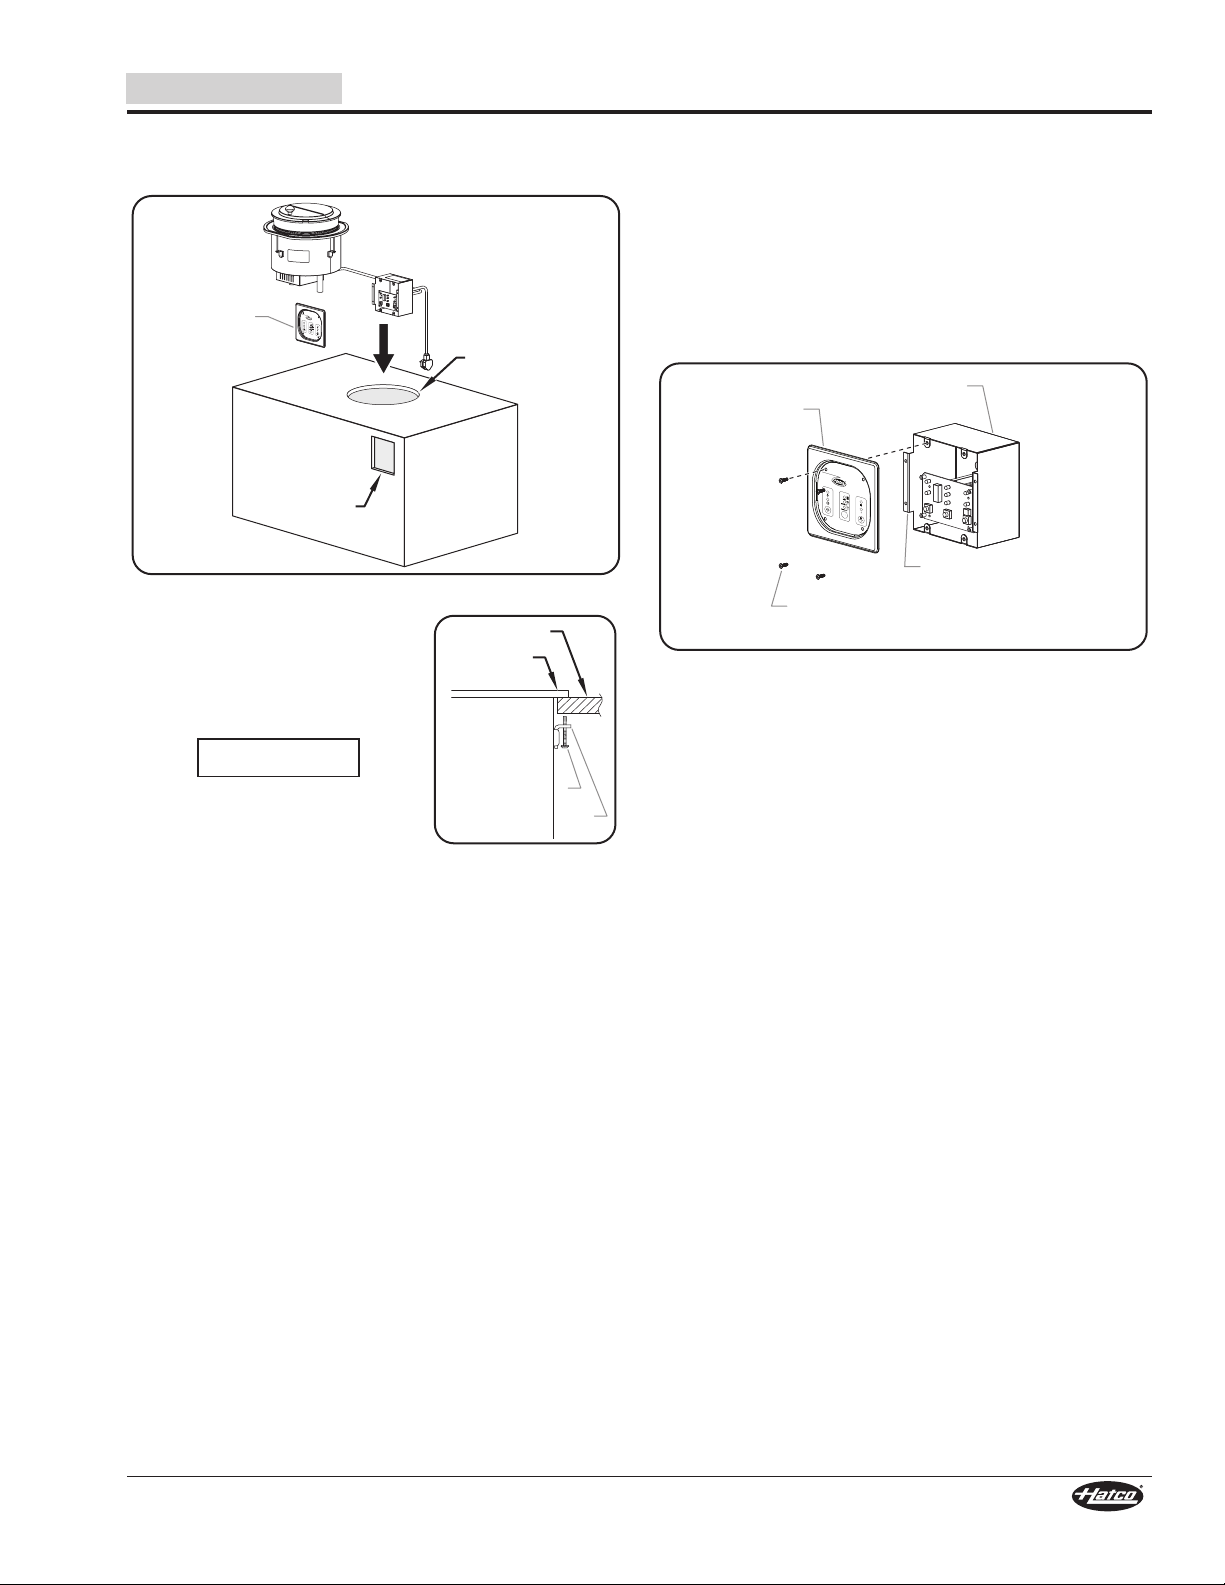
1. Cut the appropriate opening in the countertop for the unit
being installed (see below).
Countertop Cutout Dimensions
Remote mounted control panels must have a minimum
6″ (152 mm) clearance from unit (not to exceed 56″
[1420 mm]). Mounting control panel closer may cause heat
damage to electrical system in control panel.
The remote mounted control box should be installed outside
of heat zone. Locating the control box inside heat zone will
cause the control(s) to overheat, malfunction, and fail.
2. Cut the appropriate opening for the control box in a vertical
surface at least 6″ (152 mm) from the unit, but no more
than 56″ (1420 mm) (see below).
Control Box Cutout Dimensions
NOTE: The electrical cord between the unit and the control box
is 56″ (1420 mm) in length.
6
Form No. RHWM-0816
English
H
E
A
T
E
D
W
E
L
L
H
A
T
C
O
C
O
R
P
O
R
A
T
I
O
N
M
I
L
W
A
U
K
E
E
,
W
I
U
.
S
.
A
.
w
w
w
.
h
a
t
c
o
c
o
r
p
.
c
o
m
Front
Cover
Control Box
Housing
Mounting Flange
Front Cover
Screws
H
E
A
T
E
D
W
E
L
L
H
A
T
C
O
C
O
R
P
O
R
A
T
I
O
N
M
I
L
W
A
U
K
E
E
,
W
I
U
.
S
.
A
.
w
w
w
.
h
a
t
c
o
c
o
r
p
.
c
o
m
Countertop
Cutout
Control Box
Cutout
ScrewControl
Box
Front
Cover
ScrewScrew
Top Flange
Countertop
L BracketL Bracket
NOTICE
INSTALLATION
3. Guide the control box with the front cover removed and the
electrical cords through the countertop cutout, and then
lower the unit into the cutout.
Installing the Unit
4. Assemble the L-brackets to the
underside of the unit.
5. Tighten the L-bracket screws until
the top flange lies flat on the
countertop.
6. Install the control box in the control box cutout:
a. Pass one of the mounting flanges on the control box
housing through the cutout. Tilt and slide the other
flange through the cutout.
b. Align the holes on the mounting flanges with the screw
holes in the installation surface, and secure the control
box housing to the surface using four screws (not
supplied).
c. Install the front cover on the control box using the four
front cover screws.
Installing the Remote Mounted Control Box
7. Plug the power cord into a properly grounded electrical
outlet of the correct voltage, size, and plug configuration.
See the SPECIFICATIONS section for details.
Do not use excessive force when
tightening mounting screws on
built-in units. This may damage unit
and/or countertop.
Form No. RHWM-0816
7
CAUTION
WARNING
NOTICE
HEATED WELL
H
ATCO CORPORATION MILWAUKEE, WI U.S.A.
w
ww.hatcocorp.com
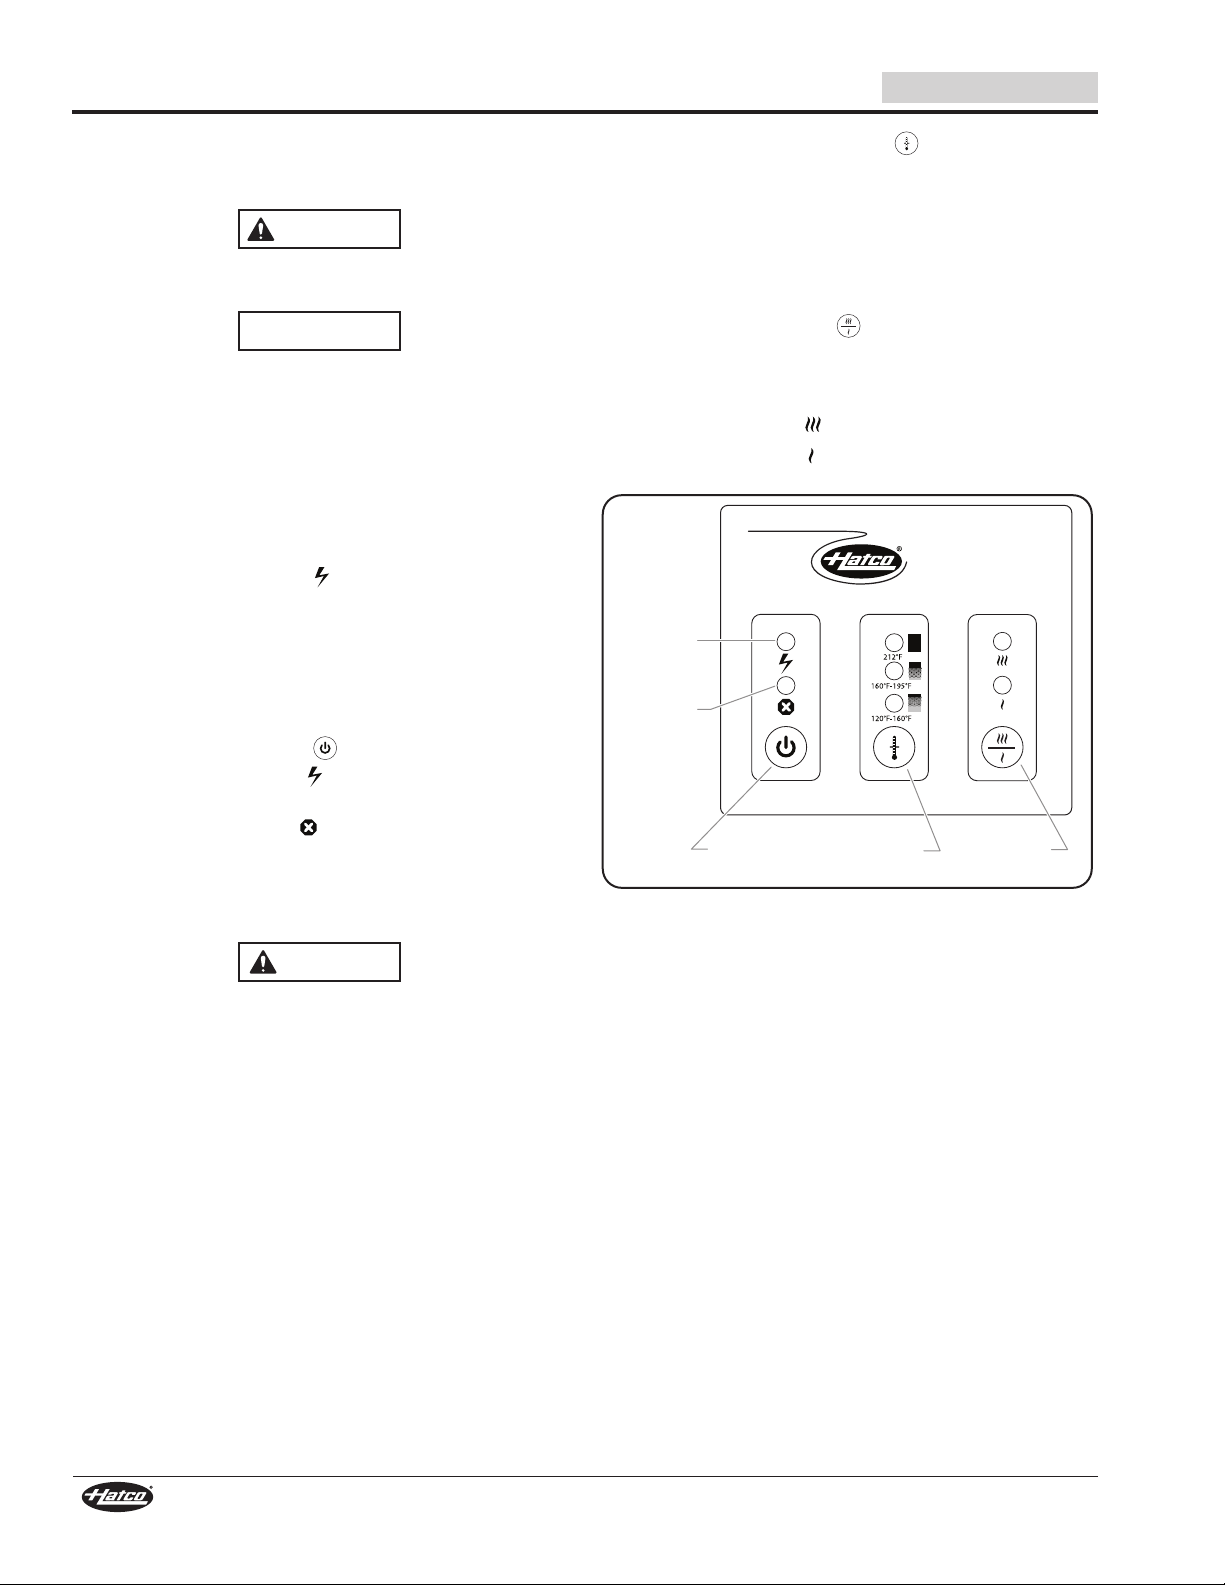
Temperature
Button
Power
Indicator
ON/OFF
Button
Mode
Button
Fault
Indicator
OPERATION
English
General
Use the following procedure to operate the Round Heated
Wells.
Read all safety messages in the IMPORTANT SAFETY
INFORMATION section before operating this equipment.
Do not operate unit without food product/water in well.
Damage to unit could occur.
NOTE: For proper heat transfer, operate the RHW series,
(Round Heated Wells), with the special pan supplied.
This pan has a curved bottom to match the shape of
the heating element.
1. Plug the unit into a properly grounded electrical outlet of
the correct voltage, size, and plug configuration. See the
SPECIFICATIONS section for details.
• The Power Indicator ( ) will glow red when the unit
has power.
2. Place a pan/pot filled with food product or water into the
unit.
NOTE: Do not operate the unit without a food pan or with an
empty/dry pan. The unit will overheat and go into
FAULT mode.
3. Press the On/Off Button ( ) to turn on the unit.
• The Power Indicator ()will glow green when the unit
is on and heating.
NOTE: The Fault Indicator ( ) will illuminate and the unit will
beep when the unit is overheated or if the temperature
sensor short circuits. When this happens, power is cut
off automatically until the temperature returns to normal
range or the temperature sensor functions normally.
4. Press the Temperature Button ()to scroll through and
select the desired temperature setting. The indicator above
each temperature setting will glow when that setting is
selected. There are three temperature settings:
• 195–212°F (91–100°C)—Steaming and rethermalizing
• 160–195°F (71–91°C)—Food warming/holding
• 120–160°F (49–71°C)—Food warming/holding
5. Press the Mode Button ( ) to scroll through and select
the desired heating mode. The indicator above each mode
will glow when that mode is selected. There are two heating
modes:
• FullPower Mode ( )—Unit operates at 100% power.
• Low Power Mode ( )—Unit operates at 50% power for
food warming and to avoid burning.
Control Panel
BURN HAZARD: Some exterior surfaces on unit will get
hot. Use caution when touching these areas.
8
Form No. RHWM-0816
 Loading...