


USER MANUAL

JOIN THE GOPRO MOVEMENT
facebook.com/GoPro |
youtube.com/GoPro |
twitter.com/GoPro |
instagram.com/GoPro |

TABLE OF CONTENTS
Your HERO5 Session |
6 |
|
|
Getting Started |
7 |
|
|
QuikCapture |
11 |
|
|
Camera Icons |
12 |
|
|
Changing Modes + Settings |
15 |
|
|
Capturing Video |
16 |
|
|
Capturing Photos |
18 |
|
|
Capturing Time Lapse Content |
20 |
|
|
Controlling Your Camera with Your Voice |
22 |
|
|
Playing Back Your Content |
25 |
|
|
Offloading Your Content |
27 |
|
|
Accessing All Modes and Settings |
28 |
|
|
Video Mode |
30 |
|
|
Photo Mode |
42 |
|
|
Time Lapse Mode |
46 |
|
|
Protune |
52 |
|
|
Customizing Your Camera |
57 |
TABLE OF CONTENTS
Important Messages |
61 |
|
|
Resetting Your Camera |
62 |
|
|
Mounting Your Camera |
63 |
|
|
Removing the Door |
68 |
|
|
Maintenance |
69 |
|
|
Battery |
70 |
|
|
Troubleshooting |
72 |
|
|
Customer Support |
74 |
|
|
Trademarks |
74 |
|
|
Regulatory Information |
74 |

YOUR HERO5 SESSION
1 |
|
2 |
|
3 |
|
4 |
5 |
|
6 |
|
4 |
|
7 |
|
3 |
1. |
Camera Status Screen |
5. |
USB-C Port |
|
2. |
Shutter Button [ |
] |
6. |
microSD Card Slot |
3. |
Microphone |
|
7. |
Menu Button |
4. |
Camera Status Light |
|
|
|
GETTING STARTED
CHARGING THE BATTERY
For the best experience with your new camera, we recommend fully charging the battery before first use.
1. Open the door. |
2. Charge the battery using the |
|
included USB cable. |
Note: The battery cannot be removed from the camera.
The camera status lights turn on during charging and turn off when charging is complete. When charging with a computer, be sure that the computer is connected to a power source. If the camera status light does not turn on, use a different USB port.
The battery charges to 100% in about 2 hours. For more battery information, see Battery (page 70).
PRO TIP: For fastest charging, use GoPro’s Supercharger (sold separately). You can charge your camera with a USB-compatible wall charger or auto charger.
6 |
7 |
GETTING STARTED
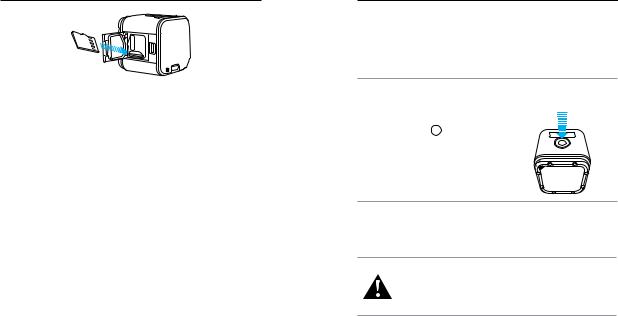
INSERTING + REMOVING MICROSD CARDS
•Insert the card (sold separately) at a downward angle with the label facing down.
•To remove the card, press it into the slot with your fingernail and it will pop out.
Use brand name memory cards that meet these requirements:
•microSD, microSDHC, or microSDXC
•Class 10 or UHS-I rating
For a list of the recommended cards, visit gopro.com/workswithgopro.
NOTICE: Use care when handling memory cards. Avoid liquids, dust, and debris. As a precaution, power off the camera before inserting or removing the card. Check manufacturer guidelines regarding use in acceptable temperature ranges.
UPDATING YOUR CAMERA SOFTWARE
To get the latest features and best performance from your GoPro, make sure your camera is always using the most current software. When you connect to the Capture app or Quik for desktop, you are automatically notified if an update is available.
1.Download these apps:
•Capture from the Apple© App Store© or Google Play™
•Quik for desktop from gopro.com/apps
GETTING STARTED
2.Connect your camera to your smartphone/tablet or computer. If an update is available, the app provides instructions for installing it.
You can also update your camera manually using the microSD card and a card reader/adapter (sold separately). For details and information about the latest software version, visit gopro.com/update.
PRO TIP: To see your current software version, press the Menu button. Your camera scrolls through several settings, including the version number.
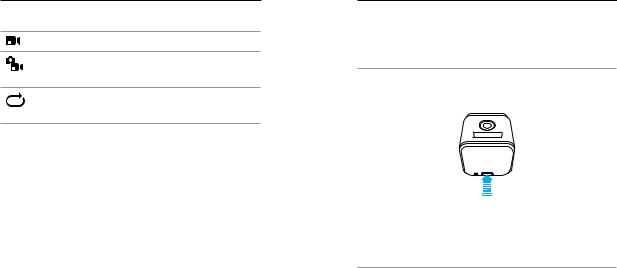
POWERING ON + OFF
HERO5 Session™ powers on when you press the Shutter button [  ] to begin capturing video or time lapse.
The camera automatically powers off to conserve battery power when you press the Shutter button to stop capturing or after a period of inactivity.
PRO TIP: When carrying your camera in a bag or pocket, place the camera upside down in a frame (with the Shutter button covered) to protect the camera from accidentally capturing video or photos. To prevent the frame from marking the surface of the camera, leave the latch on the frame open.
WARNING: Use caution when using your GoPro as part of your active lifestyle. Always be aware of your surroundings to avoid injury to yourself and others.
Abide by all local laws when using your GoPro and related mounts and accessories, including all privacy laws, which may restrict recording in certain areas.
8 |
9 |

GETTING STARTED
DISPLAYING STATUS INFO
Press the Menu button to cycle through status information about your camera.
4 |
5 |
6 |
1 |
|
7 |
2 |
|
8 |
3 |
|
9 |
1. |
Remaining microSD card |
6. |
Video Stabilization status |
|
memory for each mode |
|
(not shown) |
2. |
Mode |
7. |
Wireless status |
3. |
Settings |
8. |
Battery status |
4. |
Protune status (not shown) |
9. |
Voice Control status |
5. |
Spot Meter status (not shown) |
|
|
Note: The icons and settings that appear on the camera status screen vary by mode. Those shown above are for Video mode.
QUIKCAPTURE
QuikCapture is the fastest way to capture video or time lapse content with HERO5 Session. Because the camera is powered on only when it is recording, you also conserve battery power.
CAPTURING VIDEO WITH QUIKCAPTURE
1.With the camera powered off, press the Shutter button [  ]. Your camera powers on, beeps several times, and begins recording in the video capture mode that you last used (Video, Video + Photo, or
Looping). The camera status lights blink while the camera is recording.
2.To stop recording, press the Shutter button again.
The camera stops recording, beeps several times, and automatically powers off to maximize battery life.
CAPTURING TIME LAPSE CONTENT WITH QUIKCAPTURE
1.With the camera powered off, press and hold the Shutter button
[  ] for a few seconds until recording begins.
Your camera powers on, beeps several times, and begins recording in the time lapse capture mode that you last used (Time Lapse Photos, Time Lapse Video, or Night Lapse). The camera status lights blink while the camera is recording.
2.To stop recording, press the Shutter button again.
The camera stops recording, beeps several times, and automatically powers off to maximize battery life.
10 |
11 |
CAMERA ICONS
Auto Low Light
Auto-Rotation
Beeps
Burst Photos
Color
Date/Time
Delete
Exposure Value
Compensation
Field of View
Frames per Second
Interval
ISO Limit
Language
LEDs
Looping
Megapixels
Night Lapse Photo
Night Photo
Photo (Single)
Protune
Rate
Sharpness
Shutter
Spot Meter
CAMERA ICONS
Time Lapse Photos
Time Lapse Video
Video
Video + Photo
Video Format
Video Resolution
Video Stabilization
White Balance
Wireless
12 |
13 |
NAVIGATING YOUR GOPRO
Your HERO5 Session has three modes:
•Video
•Photo
•Time Lapse
Each of those modes has three capture modes.
Mode |
Capture mode |
Description |
|
|
|
|
|
|
Video |
|
|
Video |
Video + Photo |
Capturing Video (page 16) |
|
|
Looping |
|
|
|
|
|
|
|
Single |
Capturing Photos |
|
Photo |
Burst |
||
(page 18) |
|||
|
Night |
||
|
|
||
|
|
|
|
|
Time Lapse Photo |
Capturing Time Lapse |
|
Time Lapse |
Time Lapse Video |
||
Content (page 20) |
|||
|
Night Lapse Photo |
||
|
|
|
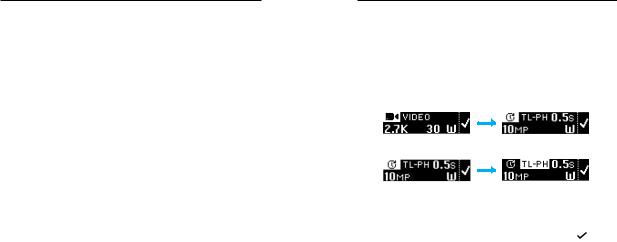
CHANGING MODES + SETTINGS
CHANGING MODES + SETTINGS
You can change almost all video and photo settings using the buttons on the camera. To access all settings and modes, see Accessing All Modes and Settings (page 28).
1.Press the Menu button to turn on the status screen.
2.Press the Menu button repeatedly to move to Camera Settings, then press the Shutter button [  ] to select it.
3.To change the mode, press the Shutter button repeatedly to display the mode that you want (Video, Time Lapse, or Photo).
4.Press the Menu button to move to the next field.
5.Press the Shutter button repeatedly to display the capture mode that you want.
6.Press the Menu button to move to a setting, then press the Shutter button to display the option that you want.
7. When you are finished, press the Menu button to move to [ ], then press the Shutter button to confirm the selection.
14 |
15 |
CAPTURING VIDEO
In Video mode, HERO5 Session has three capture modes:
Video: Captures video. Available in all resolutions.
Video + Photo: While recording video, captures a photo at regular intervals. Available in 1440p24, 1080p30, 1080p24, and 720p30.
Looping: Lets you continuously record and save only the moments that you want to save. Available in 1080p30, 960p100, 720p120, and 720p60.
PRO TIP: When the camera is off and you press the Shutter button, the camera powers on and captures video in the mode that you used most recently (Video, Video + Photo, or Looping).
CAPTURING VIDEO
The fastest way to capture video content in the same mode you used last time is to use QuikCapture (page 11). But if you want to change the video capture mode or settings, follow the steps below.
1.Press the Menu button to turn on the status screen.
2.Select a capture mode (Video, Video + Photo, or Looping) and settings:
a.Press the Menu button repeatedly to move to Camera Settings, then press the Shutter button [  ] to select it.
b.Press the Shutter button repeatedly until you get to the Video icon [  ].
].
c.Press the Menu button to move to the next field, then press the Shutter button repeatedly to select a capture mode.
d.To change a setting, press the Menu button to move to the setting, then press the Shutter button repeatedly to display the option that you want.
e.Press the Menu button to move to [  ], then press the Shutter button to to confirm the selection.
CAPTURING VIDEO
3.Press the Shutter button. Your camera beeps and the status lights blink during recording.
4.To stop recording, press the Shutter button again. The camera stops recording, beeps several times, and automatically powers off to maximize battery life.
PRO TIP: When the camera is off and you press the Shutter button, the camera powers on and begins recording in the video mode you used most recently (Video, Video + Photo, or Looping).
HILIGHT TAGGING
You can mark specific moments in your video during recording with HiLight Tags. HiLight Tags make it easy to find the best highlights to share.
To add a HiLight Tag, press the Menu button. HiLight Tags are visible during playback in Capture or Quik for desktop.
PRO TIP: You can also add HiLight Tags during recording with the Capture app, Voice Control, or the Smart Remote.
16 |
17 |

CAPTURING PHOTOS
In Photo mode, HERO5 Session has three capture modes. Photos are captured at a resolution of 10MP.
Photo: Captures a single photo.
Burst: Captures up to 30 photos in 1 second, so it is perfect for capturing the definitive moment in fast-action sports.
Night: Captures photos when the lighting is dark. The shutter remains open longer to let in more light in dark environments.
CAPTURING PHOTOS
1.Press the Menu button to turn on the status screen.
2.Select a capture mode (Photo, Burst, or Night) and settings:
a.Press the Menu button repeatedly to move to Camera Settings, then press the Shutter button [  ] to select it.
b.Press the Shutter button repeatedly until you get to the Photo icon [  ].
].
c.Press the Menu button to move to the next field, then press the Shutter button to select a capture mode.
d.To change a setting, press the Menu button to move to the setting, then press the Shutter button repeatedly to display the option that you want.
e.Press the Menu button to move to the check mark, then press the Shutter button to select it.
3.Press the Shutter button. Your camera beeps once, then beeps once for each photo that is captured. The camera status lights blink while the camera is capturing photos.
Note: To capture continuous photos at a rate of 5 photos per second, select the Photo capture mode, then hold down the Shutter button. Photos are captured until you release the button.
CAPTURING PHOTOS
4.To power off the camera, press the Menu button to move to Exit Photo Mode, then press the Shutter button to select it.
CAPTURING PHOTOS IN THE MODE THAT YOU USED LAST TIME
To take a photo using the capture mode that you used most recently (Photo, Burst, or Night), use the shortcut below.
1.Press the Menu button to turn on the status screen.
2.Press the Menu button to move to Enter Photo Mode, then press the Shutter button [  ] to select it.
3.Press the Shutter button. The camera beeps once, then beeps once for each photo that is captured. The camera status lights blink while the camera is capturing photos.
4.To power off the camera, press the Menu button to move to Exit Photo Mode, then press the Shutter button to select it.
18 |
19 |
CAPTURING TIME LAPSE CONTENT
In Time Lapse mode, HERO5 Session has three capture modes:
Time Lapse Photo: Captures a series of photos at specified intervals. Use this mode to capture photos of any activity, then choose the best ones later.
Night Lapse Photo: Captures a series of photos at set intervals when the lighting is dark. The shutter remains open longer to let in more light in dark environments.
Time Lapse Video: Creates video from frames captured at specific intervals. Time Lapse Video is available only in 4K, 2.7K 4:3, and 1080p resolutions and is captured without audio
CAPTURING TIME LAPSE CONTENT
The fastest way to capture time lapse content in the capture mode that you used last time is to use QuikCapture (page 11). But if you want to change the time lapse capture mode or settings, follow the steps below.
1.Press the Menu button to turn on the status screen.
2.Select a capture mode (Time Lapse Photos, Night Lapse, or Time Lapse Video) and settings:
a.Press the Menu button repeatedly to move to Camera Settings, then press the Shutter button [  ] to select it.
b.Press the Shutter button repeatedly until you get to the Time Lapse icon [  ].
].
c.Press the Menu button to move to the next field, then press the Shutter button repeatedly to select a capture mode.
d.To change a setting, press the Menu button to move to the setting, then press the Shutter button repeatedly to display the option that you want.
CAPTURING TIME LAPSE CONTENT
e.Press the Menu button to move to the check mark, then press the Shutter button to confirm the selection.
3.Press the Shutter button. Your camera beeps once, then beeps once for each photo that is captured. The camera status lights blink during capture.
4.To stop capturing, press the Shutter button.
20 |
21 |

CONTROLLING YOUR GOPRO WITH YOUR VOICE
You can control your HERO5 Session with your voice using a set of specific commands (see list below).
Note: Voice Control performance may be impacted by distance, wind, and noisy conditions. Keep the product clean and clear of debris.
USING VOICE CONTROL
Voice Control works best in close proximity to your GoPro.
Note: When you first turn on your camera, your GoPro allows you to select a voice control language. You can change your voice control language later through the Capture app.
1.Press the Menu button to turn on the status screen.
2.Press the Menu button repeatedly to move to Voice Control, then press the Shutter button [  ] to select it.
3.Turn on Voice Control:
a.Press the Shutter button to select On.
b.Press the Menu button to move to the check mark.
c.Press the Shutter button to confirm the selection.
4.Say a command from List of Voice Commands (page 23).
5.Turn off Voice Control:
a.Press the Shutterbutton to select Off.
b.Press the Menu button to move to the check mark.
c.Press the Shutter button to confirm the selection.
PRO TIP: To extend the voice control of your camera in windy and noisy environments, use Remo (Waterproof Voice Activated Remote). For details, visit gopro.com.
CONTROLLING YOUR GOPRO WITH YOUR VOICE
LIST OF VOICE COMMANDS
Two types of commands are available with Voice Control:
•Action commands let you immediately capture video or photos. For example, if you just stopped recording video, you can say the command to take a photo or begin capturing time lapse—without having to first change the mode.
•Mode commands are useful if you want to quickly select a mode and then use the Shutter button to capture.
Your camera does not need to be in a specific mode to capture video or photos. You can use the action commands from any mode. Your camera captures video or photos based on the settings you previously selected.
|
|
Description |
|
Action Command |
|
|
|
|
|
GoPro start recording |
Starts capturing video |
|
|
|
|
GoPro HiLight |
Adds a HiLight Tag to video during |
|
|
recording |
|
|
|
|
That was sick |
Adds a HiLight Tag to video during |
|
|
recording |
|
|
|
|
GoPro stop recording |
Stops capturing video |
|
|
|
|
GoPro take a photo |
Captures a single photo |
|
|
|
|
GoPro shoot burst |
Captures burst photos |
|
|
|
|
GoPro start time lapse |
Starts capturing time lapse |
|
|
|
|
GoPro stop time lapse |
Stops capturing time lapse |
|
|
|
|
GoPro turn off |
Powers off the camera |
|
|
|
22 |
23 |
 Loading...