

GOAL ZERO Yeti 200X User Manual
CHARGE ME NOW
Getting Started
ii. Get to Know Your Gear 2
iii. How it Works
Charging Your Goal Zero Yeti 4
i. Charging from Solar
ii. Charging from the Wall
Using Your Goal Zero Yeti 6
ii. How to Use
iii. Best-Use Strategy
iv. Cold Weather Usage
v. LED Display
Storage and Downtime Maintenance 8
Technical Specifications 9
Frequently Asked Questions 10
Troubleshooting 12
Warranty 13
Français 16
Deutsch 30
Español 44
日本語
Before using or storing, plug your Goal Zero Yeti into the wall until it is fully
charged. Keep your Goal Zero Yeti plugged in when not in use. For more tips
and tricks on keeping your battery healthy, see the BATTERY 101 section.

Table of Contents
Getting Started
ii. Get to Know Your Gear 2
iii. How it Works
Charging Your Goal Zero Yeti 4
i. Charging from Solar
ii. Charging from the Wall
Using Your Goal Zero Yeti 6
ii. How to Use
iii. Best-Use Strategy
iv. Cold Weather Usage
v. LED Display
Storage and Downtime Maintenance 8
Technical Specifications 9
Frequently Asked Questions 10
Troubleshooting 12
Warranty 13
Français 16
Deutsch 30
Español 44
日本語
58
1
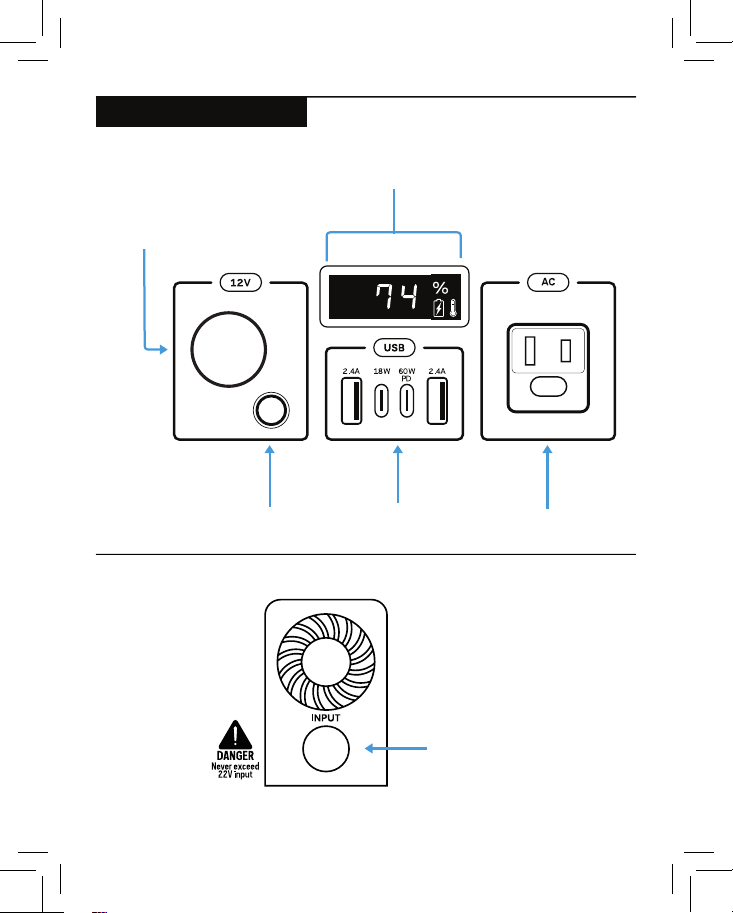
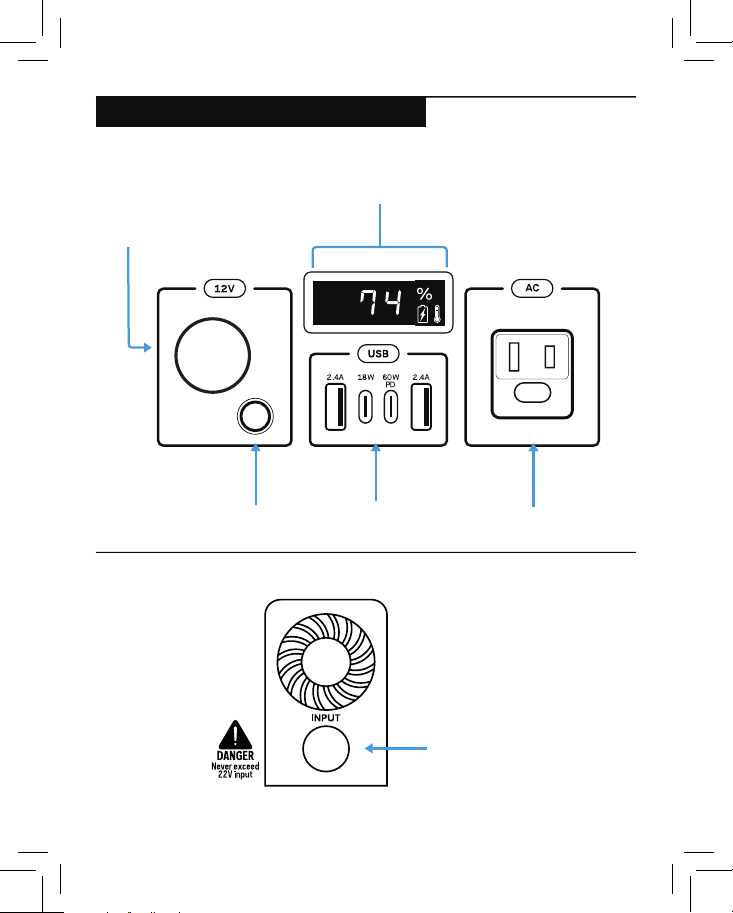
Get To Know Your Gear
Front of Yeti 200X
12V Output
Interactive LED Screen
Back of Yeti 200X
2
IN/OUT
6mm Output USB Input/
Outputs
120 W
AC Output
Input for Charging
from Goal Zero Solar
Panels, or AC
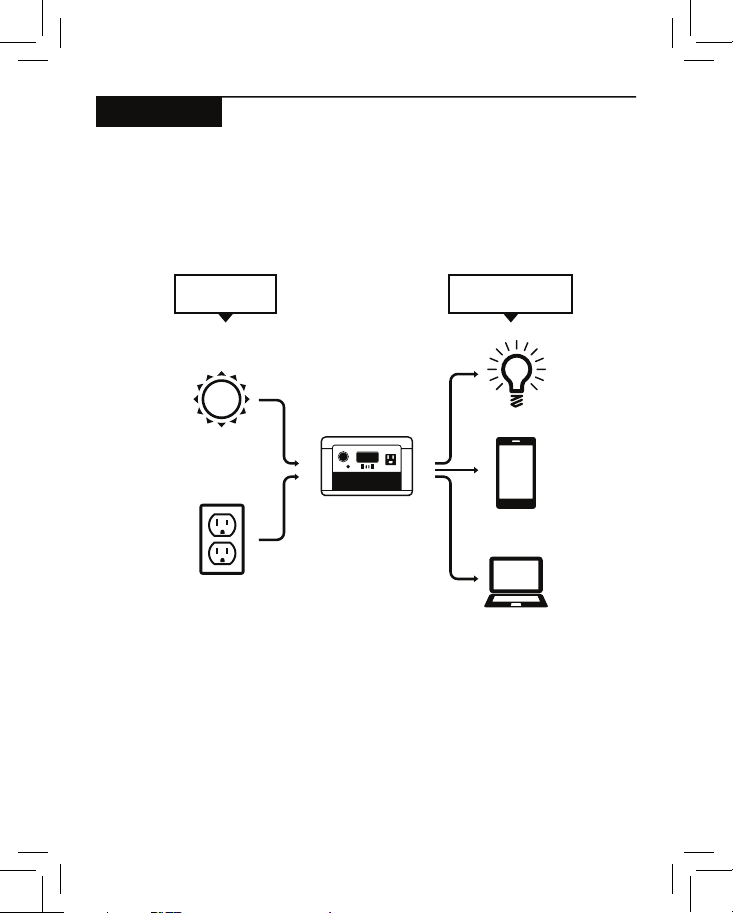
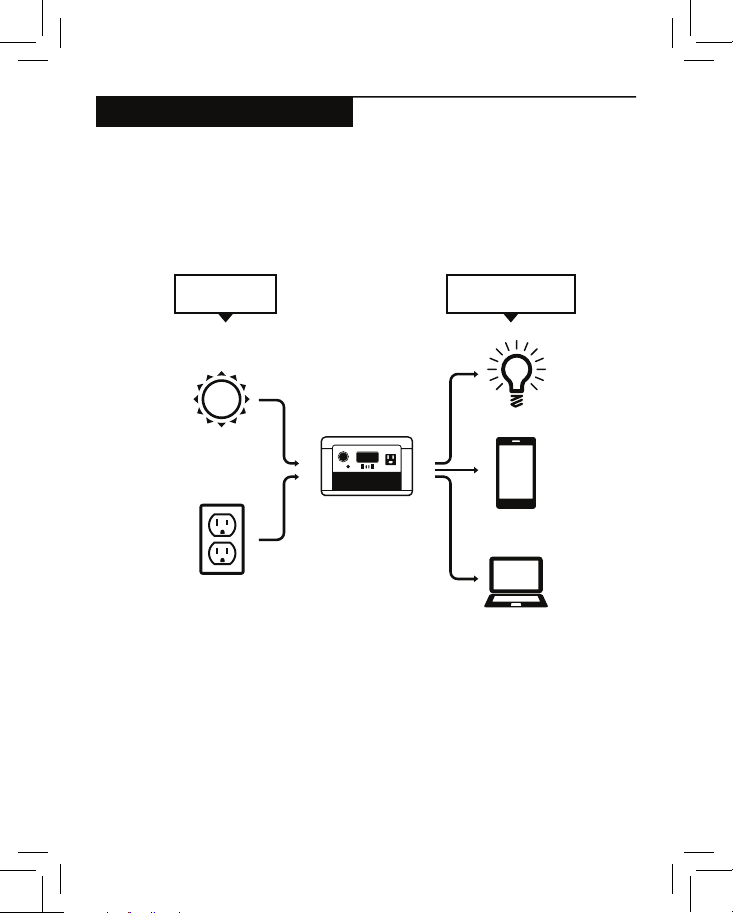
How it Works
Solar
(Sold separately)
6 Hours
(Based off max input)
AC Plug
4-5 Hours
CHARGE IT
WHAT IT POWERS
3W
12V LED
35 Hours
Phone
20+x
Laptop
3-4x
+ MORE
3

Charging Your Goal Zero Yeti
CHARGE ME NOW: Before using or storing, plug your Goal Zero Yeti into the wall until it is
fully charged. Keep your Goal Zero Yeti plugged in when not in use. For more tips and tricks
on keeping your battery healthy, see the BATTERY 101 section.
When charging your Goal Zero Yeti you will notice a lightning bolt icon that flashes blue
in the display. This indicates that it is charging. Once your Goal Zero Yeti is fully charged,
the battery display indicator will read 100.
Charging from Solar
IMPORTANT NOTE: When solar recharging your Goal Zero Yeti Lithium, take
note of the voltages of the solar panels and do not exceed 22V. Individual solar
panels, or solar panels chained in series in excess of 22V cannot be used with
the Goal Zero Yeti Lithium and can cause serious damage to the unit. For help on
chaining solar panels, call our Customer Solutions Center at 888-794-6250.
The Goal Zero Yeti’s charging port is located on the back of the Yeti and has a blue ring
around it. This 8mm port is designed to work with Goal Zero solar panels and is capable
of taking in 120W of solar.
1. Place your solar panel where it will get as much direct sunlight as possible.
2. Insert the blue-ringed plug form the panel into the input port on the back of the
Yeti. You will know the Yeti is charging when the lightning bolt icon is flashing blue on
the display. The Yeti is fully charged when the battery display indicator reads 100.
3. Some Goal Zero panels are chainable to provide more power to your Yeti and
reduce solar charge times. The input port is capable of taking in 120W of solar.
4

Charging from the Wall
Using the included AC Wall Charger, plug your Goal Zero Yeti into any wall outlet. You will
know the Goal Zero Yeti is charging when a lightning bolt icon flashes blue in the display.
The Goal Zero Yeti is fully charged when the battery display indicator reads 100. The
Goal Zero Yeti should recharge from the wall in about 5 hours.
1. The AC wall adapter comes in two pieces. Connect the two pieces by plugging the
cable into the box.
IMPORTANT NOTE: The Goal Zero Yeti Lithium can be charged from your car’s 12V port
using a Goal Zero 12V Car Charging Cable.
5

Using your Goal Zero Yeti
How to use your Goal Zero Yeti:
1. Press the power button located above each port you will be using. **When not using
certain ports, make sure to turn them off to conserve power.
2. You’ll know the port is turned on when the LED light on the button is illuminated.
3. Plug in your gear for power anywhere life takes you.
4. If possible, keep your Goal Zero Yeti plugged into a power source when not in use.
5. You can charge your Goal Zero Yeti, and run your gear at the same time.
Best-Use Strategy:
When recharging gear with your Yeti, take note of the LED Battery Display. If you plug in devices
that have a high power requirement, the charge level of your Yeti can drop very quickly and you
may not get exactly 187Wh of power. On the flipside, if you’re charging devices that draw power
more slowly (a tablet), you will get closer to 187Wh from your Yeti. Also, especially when using
the AC power output, the Goal Zero Yeti will be converting the energy from the DC power of
the battery to the AC power needed by your device. Although your Goal Zero Yeti has a highly
efficient inverter, there is still some energy lost in the conversion and you will not get the full
rated capacity of the battery. If you’re experiencing shorter runtimes, you may want to check the
device’s power requirements, see Troubleshooting for help.
Cold Weather Usage:
Cold temperatures (below freezing) can impact the Goal Zero Yeti’s battery capacity. If
you’ll be out living off-grid in sub-zero conditions, we recommend keeping your Goal Zero
Yeti in an insulated cooler, connected to a power source (solar panels), and charging your
gear. The natural heat generated by the Goal Zero Yeti contained in an insulated cooler
will keep battery capacity at its highest.
6
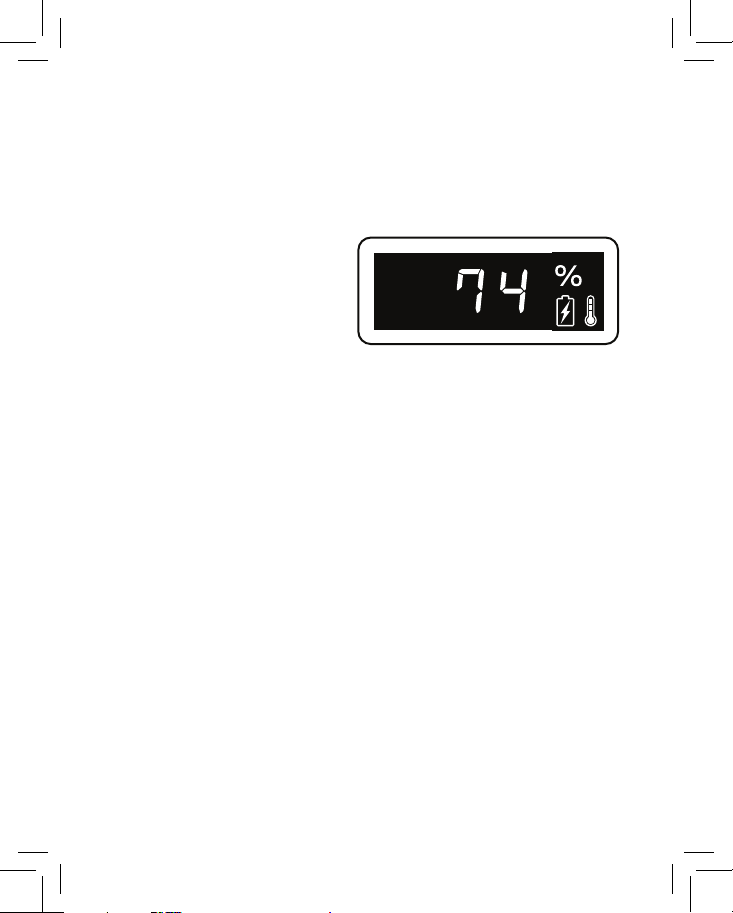
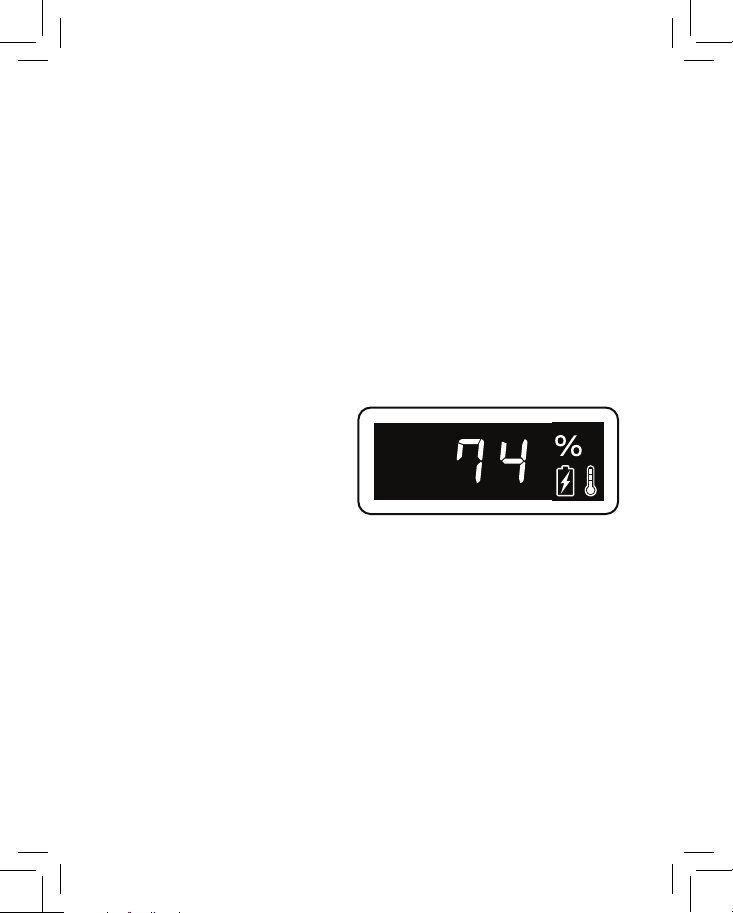
LED Display + Buttons
The built-in LED display indicates battery level. Battery level displays as a number from
0 to 100. When charging your Goal Zero Yeti you will notice a lightning bolt icon that
flashes blue in the display. This indicates the current charge status. Once your Goal Zero
Yeti is fully charged, the battery level display will read 100. Note that when you first plug
in a power source, whether it’s a solar panel or a wall charger, the Yeti may take a minute
to detect and adjust its charge circuitry
before it starts drawing power from
the source.
7

Battery:
Cell Chemistry Li-ion NMC
Pack Capacity Up to 187Wh (14.4V, up to 13Ah)
Single Cell Equivalent Capacity Up to 52000mAh @ 3.6V
Lifecycles 500 Cycles to 80% capacity
Shelf-life Charge every 3-6 months
Management System PWM charge controller, low battery protection
Ports:
USB port (output) 5V, up to 2.4A (12W max), regulated
USB-C port (output) 5-12V, up to 3.0A (18W max), regulated
USB-C port (input/output) 5-20V, up to 3.0A (60W max), regulated
6mm port (output, 6mm) 12V unregulated, up to 10A (120W max)
12V car port (output) 12V regulated, up to 10A (120W max)
120V AC Inverter (output, modified sine wave) 120VAC 60Hz, 1A (120W, 200W surge)
230V AC Inverter (output, modified sine wave)
UNIVERSAL OR AUSTRALIA TYPE AC PLUGS
Charging Port (input, 8mm, blue, circle) 13-22V, up to 10A (120W max)
General:
Chainable No
Weight 5 lbs (2.27 kg)
Dimensions 7.9 x 5.1 x 5.1 in (20.0 x 13.0 x 13.0 cm)
Operating usage temp. 32-104 F (0-40 C)
Certs
Warranty 12 months
Storage and Downtime Maintenance
Having your Goal Zero Yeti connected to a power source, like a solar panel or wall plug, between
adventures or while in storage keeps its battery healthy and topped off. This prolongs battery
life and will ensure your Goal Zero Yeti is charged and ready to go all day, every day.
If you can’t keep your Goal Zero Yeti plugged into a power source during storage,
fully-charge your Goal Zero Yeti every 3 months and store it in a cool, dry place.
Failure to maintain your Goal Zero Yeti by following these steps can result in battery
damage which will void the product warranty.
8
Technical Specifications
Battery:
Cell Chemistry Li-ion NMC
Pack Capacity Up to 187Wh (14.4V, up to 13Ah)
Single Cell Equivalent Capacity Up to 52000mAh @ 3.6V
Lifecycles 500 Cycles to 80% capacity
Shelf-life Charge every 3-6 months
Management System PWM charge controller, low battery protection
Ports:
USB port (output) 5V, up to 2.4A (12W max), regulated
USB-C port (output) 5-12V, up to 3.0A (18W max), regulated
USB-C port (input/output) 5-20V, up to 3.0A (60W max), regulated
6mm port (output, 6mm) 12V unregulated, up to 10A (120W max)
12V car port (output) 12V regulated, up to 10A (120W max)
120V AC Inverter (output, modified sine wave) 120VAC 60Hz, 1A (120W, 200W surge)
230V AC Inverter (output, modified sine wave)
UNIVERSAL OR AUSTRALIA TYPE AC PLUGS
Charging Port (input, 8mm, blue, circle) 13-22V, up to 10A (120W max)
General:
Chainable No
Weight 5 lbs (2.27 kg)
Dimensions 7.9 x 5.1 x 5.1 in (20.0 x 13.0 x 13.0 cm)
Operating usage temp. 32-104 F (0-40 C)
Certs
Warranty 12 months
230VAC 50Hz, .5A (120W, 200W surge)
9

Frequently Asked Questions
What type of battery is in my Goal Zero Yeti?
Your Goal Zero Yeti uses custom designed Lithium Ion. Here are some basic facts about
Lithium-ion batteries:
1. Lithium-ion batteries can store and release a lot of energy in a short period of time.
The batteries in your Goal Zero Yeti are in a protective enclosure with a sophisticated
battery management and protection system controlling its terminals to the outside world.
2. It is critical that your battery does not get wet as moisture and water can get into the
battery cells behind the protection circuitry and bypass that protection.
How do I know if my device will work with the Goal Zero Yeti?
First, you’ll need to determine the amount of power your device requires. This may require
some research on your end, a good internet search or examining the user guide for your
device should suffice.
Second, you will need to check the capacity for the individual output ports. For example,
the Goal Zero Yeti’s AC port is powered by an inverter that allows for 120W of power. This
means if your device is pulling more than 120W for an extended period of time, the Goal
Zero Yeti’s inverter will shut off. Another number to watch for is the surge rating of your
device as compared to that of the port. The Goal Zero Yeti inverter has an advanced surge
management system that will maximize its compatibility with various devices, but there
will still be items that will surge at a higher rate, and for a longer time, than the Goal Zero
Yeti can manage, in which case the port will turn itself off.
Finally, once you know your device is compatible, you’ll want to determine how long you’ll be
able to power your gear from the Goal Zero Yeti. Here’s a quick and dirty lesson in power.
All Goal Zero power packs and solar generators have a number in their name, ex. Guide10
Plus Power Pack, Goal Zero Yeti 200X. These numbers refer to the Watt Hours (Wh), or the
amount of energy that can be stored in each Power Station, and how you’ll know if your gear
is compatible. For example, a 200 Wh Power Station should run a 100W light for 2 hours
10

(200/100=2). If your gear falls within the 200Wh capacity of the Goal Zero Yeti, you’ll
want to check the restrictions on each of the output ports.
Another factor in the math is how much power is being converted going from the Goal
Zero Yeti battery to the device you are powering/charging. In some situations, like when
running a 12V device, such as the LAL 350, directly off the 12V port, there will be no
conversion and so no additional losses. In using the USB ports to charge a phone, you
add a layer of conversion (12V battery in the Goal Zero Yeti is being converted to a 5V
USB output), which introduces around 10% of losses.
When using the inverter, there are two layers of conversion (12V to high voltage, DC to
AC). The least efficient way of using the battery in the Goal Zero Yeti is to use an AC-DC
adapter off the AC ports, as is the case if you use a phone wall charger to charge your
phone, as it adds yet another layer of conversion in the wall adapter.
So when you’re deciding on what to power from your new GOAL ZERO recharger, do some
research into your device’s watt consumption. For more quick tips and learning tools, check
out www.GoalZero.com/learn.html
11
Troubleshooting
If your devices are not recharging from your Goal Zero Yeti, follow these steps:
1. Ensure the Output Port has been turned on. The LED light on the power button should
be lit up.
a. If any of the lights have turned red, this indicates a trip. Push the button again to reset
it. The light will turn white when it is successfully reset.
2. Check the Battery Display. If it is at 20% or below, charge your Goal Zero Yeti.
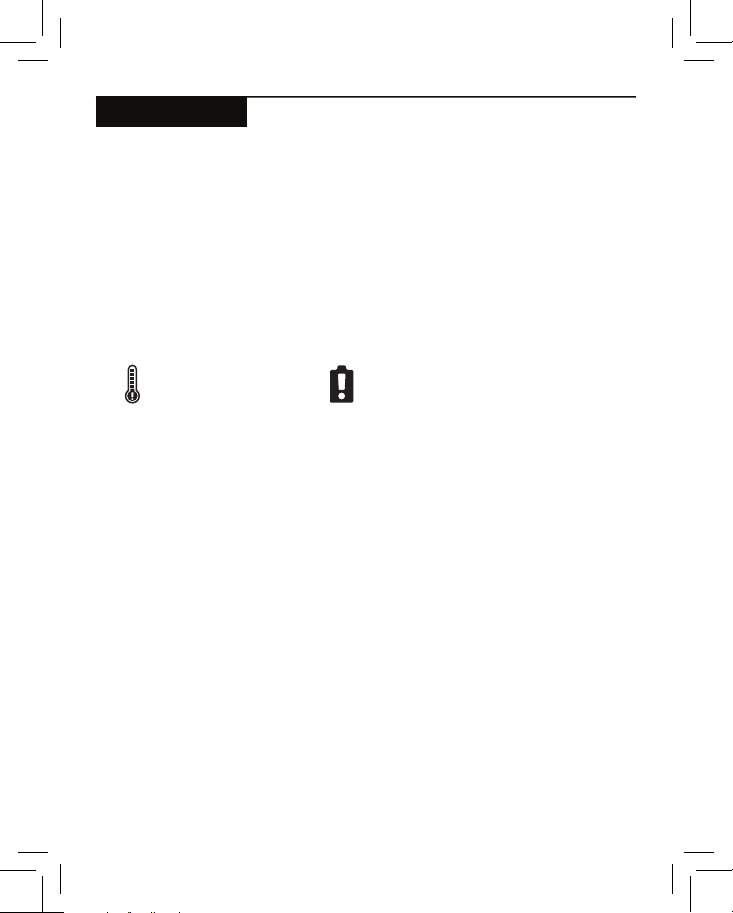
3. Check the LED Display for warning icons:
OVERLOAD: Power draw exceeds port’s maximum allowance. Indicated by red light in
the port’s button.
Temperature warning.
Allow unit to cool.
4. Verify your device is suitable for use with the Goal Zero Yeti:
a. All of the Goal Zero Yeti output ports have their own max power capacity. Check the
Goal Zero Yeti’s Tech Specs to ensure your device is compatible.
5. If you are still experiencing trouble with your Goal Zero Yeti, please call our Customer
Solutions Center at 1-888-794-6250 or by email at support@goalzero.com
Battery requires attention.
Contact customer support.
1-888-794-6250
12

Warranty & Contact
LIMITED WARRANTY
GOAL ZERO LLC warrants to the original consumer purchaser that this GOAL ZERO product will be free
from defects in workmanship and material under normal consumer use during the applicable warranty
period identified in Paragraph 2, below, subject to the exclusions set forth in Paragraph 5, below. This
warranty statement sets forth GOAL ZERO’s total and exclusive warranty obligation. We will not assume,
nor authorize any person to assume for us, any other liability in connection with the sales of our products.
WARRANTY PERIOD
The warranty period for GOAL ZERO battery cells (whether purchased on a stand-alone basis or as part
of another product) is 180 days. The warranty period for all other GOAL ZERO products and components
is one (1) year. In each case, the warranty period is measured starting on the date of purchase by the
original consumer purchaser. The sales receipt from the first consumer purchase, or other reasonable
documentary proof, is required in order to establish the start date of the warranty period. If you
completed the online GOAL ZERO Product Registration Form within 30 days after purchasing your
product, that registration can also establish the start date of the warranty period (but warranty coverage
is not conditioned upon such registration).
REMEDY
GOAL ZERO will repair or replace (at GOAL ZERO’s option and expense) any GOAL ZERO product that
fails to operate during the applicable warranty period due to a defect in workmanship or material.
LIMITED TO ORIGINAL CONSUMER BUYER
The warranty on GOAL ZERO’s products is limited to the original consumer purchaser and is not
transferable to any subsequent owner.
EXCLUSIONS
GOAL ZERO’s warranty does not apply to (i) any product that is misused, abused, modified, damaged
by accident, or used for anything other than normal consumer use as authorized in GOAL ZERO’s thencurrent product literature, or (ii) any product purchased through an online auction house. GOAL ZERO’s
warranty does not apply to any battery cell or product containing a battery cell unless the battery cell
is fully charged by you within seven (7) days after you purchase the product and at least once every 6
months thereafter.
HOW TO RECEIVE SERVICE
To obtain warranty service, you must contact our customer service team via telephone at (888) 7946250, or via email at support@goalzero.com. If our customer service team determines that further
assistance is required, they will give you a Return Material Authorization (“RMA”) number and will provide
you with prepaid return shipping label that you can use to mail back your non-functioning item(s). You must
properly package the product, clearly marking the RMA number on the package and including proof of
your purchase date with the product. We will process your return and send your repaired or replacement
product to you at our expense for product being shipped to locations in North America. For product
purchased or being shipped outside of North America, please contact the local distributor from whom you
purchased the product or email support@goalzero.com to obtain further distributor information.
13
IMPLIED WARRANTIES
THE LIMITED WARRANTY STATED HEREIN IS IN LIEU OF ALL OTHER EXPRESS WARRANTIES. IN
NO EVENT SHALL ANY IMPLIED WARRANTIES, INCLUDING BUT NOT LIMITED TO ANY WARRANTIES
OF MERCHANTABILITY, FITNESS FOR A PARTICULAR PURPOSE OR NON-INFRINGEMENT, EXTEND
BEYOND THE APPLICABLE WARRANTY PERIOD IDENTIFIED IN PARAGRAPH 2, ABOVE. Some states
do not allow limitations on how long an implied warranty lasts, so the above limitation may not apply to
you. This warranty gives you specific legal rights, and you may also have other rights which vary from
state to state.
EXCLUSIVE REMEDY; LIMITATION OF LIABILITY
The foregoing provisions state GOAL ZERO’s entire liability, and your exclusive remedy, for any breach of
warranty, express or implied. IN NO EVENT WILL GOAL ZERO BE LIABLE FOR ANY CONSEQUENTIAL
OR INCIDENTAL DAMAGES ARISING FROM ANY USE OR MALFUNCTION OF ANY GOAL ZERO
PRODUCT, OR FROM ANY BREACH OF WARRANTY, INCLUDING DAMAGE TO OTHER DEVICES. IN NO
EVENT WILL GOAL ZERO’s LIABILITY FOR ANY CLAIM, WHETHER IN CONTRACT, WARRANTY, TORT
(INCLUDING NEGLIGENCE AND STRICT LIABILITY) OR UNDER ANY OTHER THEORY OF LIABILITY,
EXCEED THE AMOUNT PAID BY YOU FOR THE GOAL ZERO PRODUCT. Some states do not allow the
exclusion or limitation of incidental or consequential damages, so the above limitation or exclusion may
not apply to you.
FREE EXTENDED WARRANTY
Get an ADDITIONAL YEAR of protection for your Goal Zero Yeti Lithium
Portable Power Station by simply registering your product at:
GOALZERO.com/extendedwarranty
This gives you TWO TOTAL years of worry-free product coverage.
It’s free and easy peace of mind for you and your new power companion.
14

15
Apprendre à Connaitre Votre Équipement
Prise Secteur (CA)
4-5 Heures
Panneau Solaire
(Vendu séparément)
6 Heures
(Basé sur l'entrée max.)
Devant le Yeti 200X
Interactifs
et Écran LED
Sortie 12V
L’arrière du Yeti 200X
16
Sortie 6mm
IN/OUT
120 W
Sorties 12V USB Sortie CA
Entrée pour charger à partir
des Panneaux Solaires de
Goal Zero ou du CA
Comment cela Fonctionne-t-il ?
Panneau Solaire
(Vendu séparément)
6 Heures
(Basé sur l'entrée max.)
Prise Secteur (CA)
4-5 Heures
RECHARGEZ
CE QUE ÇA ALIMENTE
3W
12V LED
35 Heures
Téléphone
20+x
Ordinateur
Portable
3-4x
ENCORE +
17

Recharger Votre Goal Zero Yeti
CHARGEZ-MOI MAINTENANT : avant de l’utiliser ou de le stocker, branchez votre Goal
Zero Yeti sur une prise murale jusqu’à ce qu’il soit complètement chargé. Veuillez garder
votre Goal Zero Yeti branché lorsqu’il n’est pas utilisé. Pour plus de conseils et d’astuces
pour maintenir le bon fonctionnement de votre batterie, consultez la section PRINCIPES
DE BASE SUR LES BATTERIES.
Lorsque vous rechargez votre Goal Zero Yeti, vous remarquerez une icône représentant
un éclair qui clignote en bleu à l’écran. Cela indique l’état actuel de charge. Une fois que
votre Goal Zero Yeti est complètement chargé, l’indicateur d’affichage de la batterie
indiquera 100.
Charger à partir de l’Énergie Solaire
NOTE IMPORTANTE : Lors de la recharge grâce à l’énergie solaire de votre Goal
Zero Yeti Lithium, gardez un œil sur les tensions des panneaux solaires et veillez
à ne pas dépasser 22 V. Les panneaux solaires individuels, ou panneaux solaires
enchaînés en série au-dessus de 22 V ne peuvent pas être utilisés avec votre
Goal Zero Yeti Lithium et peuvent causer des dommages sérieux à l’appareil.
Pour obtenir de l’aide sur le chaînage des panneaux solaires, appelez notre
Centre de Solutions Clientèle au +1-888-794-6250.
Le port de chargement du Goal Zero Yeti est situé sur la face arrière du Yeti et comporte
un anneau bleu autour de celui-ci. Ce port de 8 mm est conçu pour fonctionner avec des
panneaux solaires Goal Zero et est capable de recevoir 120 W d’énergie solaire.
1. Placez votre panneau solaire où il obtiendra le plus de lumière directe du soleil
que possible.
18

2. Insérez le connecteur en anneau bleu du panneau dans le port d’entrée situé à
l’arrière du Yeti. Vous saurez que le Yeti est en charge lorsque l’icône représentant
un éclair clignote en bleu sur l’écran. Le Yeti est complètement chargé lorsque
l’indicateur de la batterie affiche 100.
3. Certains panneaux solaires Goal Zero peuvent être branchés en série pour fournir
plus d’énergie à votre Yeti et ainsi réduire les temps de charge solaire. Le port
d’entrée peut supporter jusqu’à 120 W de puissance solaire.
Recharger à partir d’une Prise Murale
En utilisant le chargeur mural CA inclus, branchez votre Goal Zero Yeti dans n’importe
quelle prise murale. Vous saurez que le Goal Zero Yeti est en charge lorsque l’icône
représentant un éclair clignote en bleu sur l’écran. Le Goal Zero Yeti est complètement
chargé lorsque l’indicateur de la batterie affiche 100. Le Goal Zero Yeti devrait se
recharger à partir d’une prise murale en 5 heures environ.
1. . L’adaptateur mural CA est livré en deux parties. Connectez les deux parties en
branchant le câble dans le boîtier.
NOTE IMPORTANTE : Le Goal Zero Yeti Lithium peut être chargé à partir du port 12 V de
votre voiture à l’aide d’un câble de charge pour voiture Goal Zero 12 V.
19

Utiliser Votre Goal Zero Yeti
Utiliser votre Goal Zero Yeti
1. Appuyez sur l’interrupteur d’alimentation situé au-dessus de chaque port que vous
allez utiliser. **Si vous n’utilisez pas certains ports, veillez à les éteindre pour économiser
l’énergie.
2. Vous saurez quand le port est allumé lorsque la DEL du bouton sera illuminée.
3. Branchez votre équipement pour qu’il fonctionne partout où l’aventure vous mène.
4. Si possible, gardez votre Goal Zero Yeti branché sur une prise d’alimentation lorsqu’il
n’est pas utilisé.
5. Vous pouvez recharger votre Goal Zero Yeti et utiliser votre équipement en même
temps.
Stratégie d’Utilisation Optimale :
Lorsque vous rechargez votre équipement avec votre Yeti, gardez toujours un œil sur l’écran
LED de la batterie. Si vous branchez des appareils nécessitant une puissance élevée, le niveau
de charge de votre Yeti peut chuter très rapidement et vous pourriez ne pas obtenir exactement
187 Wh de puissance. À l’inverse, si vous chargez des appareils consommant moins d’énergie
(une tablette), votre Yeti délivrera alors proche de 187 Wh. De plus, lorsque vous utilisez la
sortie d’alimentation CA, la batterie Goal Zero Yeti convertira l’énergie du courant CC de sa
batterie en courant alternatif nécessaire au bon fonctionnement de votre appareil. Bien que
votre Goal Zero Yeti dispose d’un onduleur très efficace, il y a toujours un peu d’énergie perdue
lors de la conversion et vous n’obtiendrez pas la pleine capacité nominale de la batterie. Si vous
obtenez des durées d’utilisation bien plus courtes, vous devriez peut-être vérifier les exigences
d’alimentation de l’appareil en question, voir la section Dépannage pour obtenir de l’aide.
20
Cold Weather Usage:
Cold temperatures (below freezing) can impact the Goal Zero Yeti’s battery capacity. If
you’ll be out living off-grid in sub-zero conditions, we recommend keeping your Goal Zero
Yeti in an insulated cooler, connected to a power source (solar panels), and charging your
gear. The natural heat generated by the Goal Zero Yeti contained in an insulated cooler
will keep battery capacity at its highest.
Affichage LED + Boutons
L’écran LED intégré indique le niveau de la batterie. Le niveau de la batterie s’affiche
sous forme d’un nombre compris entre 0 et 100. Lorsque vous rechargez votre Goal Zero
Yeti, vous remarquerez une icône représentant un éclair qui clignote en bleu à l’écran.
Cela indique l’état actuel de charge. Une fois que votre Goal Zero Yeti est complètement
chargé, l’indicateur de la batterie indiquera 100. Notez que lorsque vous branchez une
source d’alimentation, qu’il s’agisse d’un panneau solaire ou d’un chargeur mural, le Yeti
peut prendre une minute pour détecter
et ajuster ses circuits de charge avant
de commencer à se charger depuis
cette source.
21
 Loading...