


DRYERS
SAFETY INFORMATION. . . . . . . . . .3
USING THE DRYER. . . . . . . . . . . . . . . . |
4 |
Appliance Communication . . . . . . . . . . . . . |
5 |
Controls .. . . . . . . . . . . . . . . . . . . . . . . . . . . . |
6 |
Settings. . . . . . . . . . . . . . . . . . . . . . . . . . . . . . . |
8 |
LOADING.. . . . . . . . . . . . . . . . . . . . . . . . . .9
VENTING.. . . . . . . . . . . . . . . . . . . . . . . . . 10
CARE AND CLEANING.. . . . . . . . . . 11 TROUBLESHOOTING TIPS. . . . . . 12 LIMITED WARRANTY. . . . . . . . . . . . 15 CONSUMER SUPPORT. . . . . . . . . . . 16
Write the model and serial numbers here:
Model #_________________
Serial #__________________
They are on the label on the front of the dryer behind the door..
OWNER’S MANUAL
ENGLISH/ESPAÑOL
49-3000198-1
GE is a trademark of the General Electric Company. Manufactured under trademark license. |
06-19 GEA |

THANK YOU FOR MAKING GE APPLIANCES A PART OF YOUR HOME.
Whether you grew up with GE Appliances, or this is your first, we’re happy to have you in the family.
We take pride in the craftsmanship, innovation and design that goes into every GE Appliances product, and we think you will too. Among other things, registration of your appliance ensures that we can deliver important product information and warranty details when you need them.
Register your GE appliance now online. Helpful websites and phone numbers are available in the
Consumer Support section of this Owner’s Manual. You may also mail in the pre-printed registration card included in the packing material.
2 |
|
49-3000198-1 |

IMPORTANT SAFETY INFORMATION.
READ ALL INSTRUCTIONS BEFORE USING THE APPLIANCE
|
To reduce the risk of fire, explosion, electric shock, or injury to persons when using your |
WARNING |
|
|
appliance, follow basic precautions, including the following: |
|
•Read all instructions before using the appliance.
•DO NOT dry articles that have been previously cleaned in, washed in, soaked in, or spotted with gasoline, dry-cleaning solvents, or other flammable or explosive substances, as they give off vapors that could ignite or explode.
•DO NOT place items exposed to cooking oils in your dryer. Items contaminated with cooking oils may contribute to a chemical reaction that could cause a load to catch fire. To reduce the risk of fire due to contaminated loads, the final part of the tumble dryer cycle occurs without heat (cool down period). Avoid stopping a tumble dryer before the end of the drying cycle unless all items are quickly removed and spread out so that the heat is dissipated.
•DO NOT allow children to play on or in this appliance. Close supervision of children is necessary when this appliance is used near children.
•Before the appliance is removed from service or discarded, remove the door to the drying compartment.
•DO NOT reach into the appliance if the drum is moving.
•DO NOT install or store this appliance where it will be exposed to the weather.
•DO NOT tamper with controls.
•DO NOT climb or stand on this unit.
•DO NOT repair or replace any part of this appliance or attempt any servicing unless specifically recommended in the user-maintenance instructions or in published user-repair instructions that you understand and have the skills to carry out.
•Follow all fabric care instructions and warnings to prevent melting of garments or damage to the appliance.
•DO NOT use fabric softeners or products to eliminate static unless recommended by the manufacturer of the fabric softener or product.
•DO NOT dry articles containing foam rubber or similarly textured rubber-like materials.
•Clean lint screen before or after each load.
•DO NOT operate the dryer without the lint filter in place.
•DO NOT store combustible materials, gasoline or other flammable liquids near the dryer. Keep area around the exhaust opening and adjacent surrounding areas free from the accumulation of lint, dust and dirt.
•The interior of the appliance and exhaust duct should be cleaned periodically by qualified service personnel.
•Unplug the appliance or turn off the circuit breaker before servicing. Pressing the Power or Start/Pause button DOES NOT disconnect power.
•DO NOT operate this appliance if it is damaged, malfunctioning, partially disassembled, or has missing or broken parts, including a damaged cord or plug.
•DO NOT spray any type of aerosol into, on or near dryer at any time. DO NOT use any type of spray cleaner when cleaning dryer interior. Hazardous fumes or electrical shock could occur.
•See “ELECTRICAL CONNECTION” located in the Installation Instructions for grounding instructions.
INFORMATION SAFETY
READ AND SAVE THESE INSTRUCTIONS
49-3000198-1 |
3 |

SAFETY INFORMATION
IMPORTANT SAFETY INFORMATION
READ ALL INSTRUCTIONS BEFORE USING THE APPLIANCE
ADDITIONAL GAS DRYER WARNINGS

 WARNING
 - Fire or Explosion Hazard
Failure to follow safety warnings exactly could result in serious injury, death, or property damage.
-DO NOT store or use gasoline or other flammable vapors and liquids in the vicinity of this or any other appliance.
-WHAT TO DO IF YOU SMELL GAS:
•DO NOT try to light any appliance.
•DO NOT touch any electrical switch; DO NOT use any phone in your building.
•Clear the room, building, or area of any occupants.
•Immediately call your gas supplier from a neighbor’s phone. Follow the gas supplier’s instructions.
•If you cannot reach your gas supplier, call the fire department.
-Installation and service must be performed by a qualified installer, service agency, or the gas supplier.
4 |
49-3000198-1 |

Getting started
|
|
To reduce the risk of fire, electric shock, or injury to persons, read the IMPORTANT SAFETY |
|
WARNING |
|
|
INFORMATION before operating this appliance. |
|
|
|
|

 WARNING
 - Fire Hazard
•Keep flammable materials and vapors, such as gasoline, away from dryer.
•DO NOT dry anything that has ever had anything flammable on it (even after washing).
•No washer can completely remove oil.
•DO NOT dry anything that has ever had any type of oil on it (including cooking oils).
•Items containing foam, rubber, or plastic must be dried on a clothesline.
•Follow all fabric care instructions and warnings to prevent melting of garments or damage to the appliance.
•Failure to do so can result in death, explosion, or fire.
Appliance communication
WiFi Connect (For customers in the United States only - on some models)
Depending on the model, your dryer is either GE Appliances WiFi Connect enabled, or compatible using the optional GE Appliances ConnectPlus module.
If enabled: Visit www.geappliances.com/connect and enter your model number to show you the proper steps to connect your appliance.
If compatible: To connect this appliance to the internet you will need to purchase a GE Appliances ConnectPlus and attach the module to your appliance through the communication port in the appliance.
The GE Appliances ConnectPlus will allow your appliance to communicate with your smartphone for remote appliance monitoring, control and notifications.
Please visit www.GEAppliances.com/connect to learn more about connected appliance features, to learn what connected appliance app’s will work with your smartphone.
WiFi Connectivity: For assistance with the appliance or the ConnectPlus network connectivity, please call GE Appliances at 800.GE.CARES.
Visit your local authorized GE Appliances Parts distributor or order by phone at 800.661.1616 during normal business hours.
Part Number |
Accessory |
PBX23W00Y0 |
WiFi ConnectPlus module |
Throughout this manual, features and appearance may vary from your model.
Step 1 |
Step 2 |
Step 3 |
Step 4 |
• Clean lint filter |
• If the screen is dark, |
|
• Press the Start/ |
• Loosely add items. |
press the Power |
• Select a dry cycle. (Defaults are set |
Pause button. |
• Close door. |
button to “wake up” |
|
|
for each dry cycle. These default |
|
||
NOTE: Dryer will not |
the display. |
|
|
settings can be changed. See the cycle |
|
||
start with door open. |
|
|
|
|
descriptions for more information.) |
|
|
|
|
|
DRYER THE USING
49-3000198-1 |
5 |

USING THE DRYER
Getting started
Features and appearance will vary.
A |
E |
C |
G |


 H
H
B |
|
F |
D |
H |
I |
A |
E |
C |
G |
|
|
B |
E I H D F H |
A |
Power |
|
Press to “wake up” the display. If the display is active, press to put the dryer into idle mode. |
||
|
NOTE: Pressing |
Power does not disconnect the appliance from the power supply. |
B |
Start and Pause |
|
|
Press Start to begin the cycle. NOTE: The door must be closed for the dryer to start the cycle. Pressing Start |
|
|
again will pause the cycle, the Start light will blink and “Pause” will display. |
|
|
To continue the cycle, press Start again. |
|
C |
Display and Status Lights |
|
The display shows the approximate time remaining until the end of the cycle. |
||
|
In addition, this display will show the dryer status: |
|
|
Pause |
The Start/Pause light will flash and the message “Pause” will show in the display when |
|
(on some models) |
the dryer’s cycle is paused. The cycle may be re-started by pressing the Start button. |
|
WiFi |
Will allow your appliance to communicate with your smartphone for remote appliance |
|
(on some models) |
monitoring control and notifications. |
|
|
|
|
|
|
|
Controls |
The dryer is locked - will blink once if you press any button or turn the cycle knob. |
|
Sensing |
Indicates the dryer is sensing the level of dampness to determine estimated cycle time |
|
|
remaining. |
|
Clean Lint Filter |
The Clean Lint Filter light will stay on for 15 seconds after the cycle stops. |
|
Check Vent |
The Check Vent light indicates an issue has been found due to reduced airflow from a possible |
|
(on some models) |
blocked or restricted vent. Checking and/or cleaning the vent system is recommended. See the, |
“Check Vent” light is on in the Troubleshooting Tips section.
6 |
49-3000198-1 |

Getting started
D Control Lock 
You can lock the controls to prevent any selections from being made. Or you can lock the controls after you have started a cycle. Children cannot accidentally start the dryer by touching buttons with this option selected.
To lock/unlock the dryer controls, depending on model, press and hold the Less Time and Wrinkle Care or the ecoDry and Delay Dry buttons for 3 seconds. The control lock icon will flash while locking/unlocking, stay on when locked, and turn off when unlocked.
NOTE: The Power button can still be used when the machine is locked.
E CyclesDrying |
Sensor cycles automatically determine fabric dryness. |
||
Timed cycles run for the selected time. |
|||
|
|
||
|
STEAM |
For use with larger loads than STEAM Refresh. Ideal for loads left in the dryer for an extended time. |
|
|
Dewrinkle (on |
STEAM Dewrinkle is recommended for larger loads (9-13 garments). |
|
|
some models) |
NOTE: Steam cycles are not intended for use with towels. |
|
|
|
Important - the temperature setting must be set to High and water must be turned on before |
|
|
|
running the STEAM Dewrinkle cycle. |
|
|
STEAM |
For slightly wrinkled dry garments. Significantly reduces wrinkles. After the STEAM Refresh cycle, |
|
|
Refresh (on |
the unit will beep (if Sound is selected) and display “00.” |
|
|
some models) |
STEAM Refresh is recommended for small loads (3-5 garments). |
|
|
|
NOTE: Steam cycles are not intended for use with towels. |
|
|
|
NOTE: A single extremely light fabric item may need to have an additional item included in the |
|
|
|
STEAM Refresh cycle to achieve optimum results. |
|
|
|
Important - the temperature setting must be set to High and water must be turned on before |
|
|
|
running the STEAM Refresh cycle. |
|
|
SANITIZE |
This option reduces certain types of bacteria including: Staphylococcus aureus, Pseudomonas |
|
|
|
aeruginosa and Klebsiella pneumoniae. The anti-bacterial process occurs when high heat is used |
|
|
|
during a portion of the drying cycle; cool down also will be longer to protect you from a hot garment. |
|
|
|
NOTE: Do not use this cycle on delicate fabrics. |
|
|
BULKY/ |
For large coats, bed spreads, mattress covers, sleeping bags, and similar large/bulky items such as |
|
|
Comforter |
blankets, comforters, jackets, and small rugs. |
|
|
TOWELS/ |
For most towels and linens. |
|
|
Sheets |
|
|
|
COTTONS/ |
For cottons and most linens. NOTE: ENERGY STAR® models are tested on COTTONS/Normal |
|
|
Normal |
with default settings (Dry level, Low temperature and ecoDry). |
|
|
MIXED LOAD |
For loads consisting of cottons and poly-blends. |
|
|
CASUALS/ |
For wrinkle-free, permanent press and special sports items that need extra drying care. |
|
|
ACTIVE WEAR |
|
|
|
DELICATES |
For delicate items, special-care fabrics and knits. |
|
|
QUICK DRY |
For small loads that are needed in a hurry, such as sport or school uniforms. Can also be used if the |
|
|
|
previous cycle left some items damp, such as collars or waistbands. NOTE: On some models, the time |
|
|
|
remaining in the cycle will show counting down in the display. |
|
|
JEANS |
For jeans. |
|
|
TIMED DRY |
Set the Cycle Selector at the desired drying time. |
|
|
WARM UP |
Provides 10 minutes of warming time to warm up clothes. |
|
|
AIR FLUFF |
Provides 10 minutes of tumbling time with no heat. NOTE: On models without AIR FLUFF cycle, |
|
|
|
select TIMED DRY and set Temp to No Heat. |
|
F ecoDryAvailable for BULKY/Comforter, TOWELS/Sheets, COTTONS/Normal, MIXED LOAD, JEANS, CASUALS/ ACTIVE WEAR and DELICATES. When the ecoDry button is pressed, cycle settings change to reduce the total energy consumption of the selected sensor cycle. NOTE: Cycle times will change when ecoDry is selected. The ecoDry option will default to on for COTTONS/Normal. For optimal energy savings, turn ecoDry on. For optimal drying times, turn ecoDry off. NOTE: Energy savings will vary across loads and cycles.
DRYER THE USING
49-3000198-1 |
7 |

USING THE DRYER
Getting started
G Settings
Individual settings for cycle minutes (Time), dryness level (Level) and temperature (Temp) can be set from the minimum (lowest in column) to maximum (highest in column). In general, the higher up the column, the more energy will be used. NOTE: The selected cycle set Time can be further adjusted, in one minute increments, by pressing the More Time and Less Time buttons.
Dryness Level - Selection only used for Sensor cycles. Timed cycles run for the selected time.
More Dry Use for heavy-duty or mixed type fabrics.
Dry Use for a normal dryness level suitable for most loads. This is the preferred cycle for energy savings.
Less Dry Use for lighter fabrics.
Damp For leaving items partially damp.
Temperature
High For regular to heavy cottons.
NOTE: STEAM Dewrinkle and STEAM Refresh require the High temperature setting.
Medium For synthetics, blends, delicates and items labeled permanent press.
Low For delicates, synthetics and items labeled tumble dry low.
No Heat For fluffing items without heat. For use only with the AIR FLUFF cycle.
H Wrinkle Care
Use this option to minimize the wrinkles in clothes. It provides 1 hour of no-heat tumbling after the clothes are dry. If you are using the cycle Sound and you select the Wrinkle Care option, a signal will sound at the end of the drying time and several times during the Wrinkle Care cycle. This will remind you that it is time to remove the clothes.
Damp Alert (on some models)
This option causes the dryer to beep when clothes have dried to a damp level. Remove items that you wish to hang dry. The Damp Alert will only beep when this option is selected (but the dry cycle will keep running). Removing clothes and hanging them when they are damp, can reduce the need to iron some items. The light beside the button will be lit when Damp Alert is on.
Drum Light
The drum light will turn on if, the Damp Alert button or the Sound button (depending on model) is pressed for 3 seconds, or the door is opened. It will turn off when the door is shut, the Damp Alert button or Sound button (depending on model) is pressed again for 3 seconds or after 5 minutes if the door is left open.
Delay Dry
Press the Delay Dry button to set the delay start time in 1 hour increments up to 24 hours, and then back to clear (0 hours). After selecting the delay start time, press Start and the delay time will count down the time remaining until the cycle starts. NOTE: To set the amount of delay time faster, you can press and hold the Delay Dry button.
Delay Dry for WiFi Connected Dryers
For more information see the Appliance Communication section. You have two options to set Delay Dry using your smartphone.
Option 1: Follow Delay Dry instructions. You can use the GE Appliances Laundry App to adjust the amount of time via your smartphone.
Option 2: Set your dryer to “AP” using the Delay Dry button. This allows you to use the GE Appliances Laundry App via your smartphone to start your dryer remotely at the time of your choosing. If the dryer is set to AP with no activity, it will start the dryer 24 hours later.
Sound
Use the Sound button to change the volume of the button presses and the end of cycle signal. Press the button until you reach the desired volume or off. The clothes should be removed when the end of cycle signal goes off so wrinkles do not set in.
NOTE:
•Remove garments promptly at the sound of signal. Place clothes on hangers so wrinkles will not set in.
•Use the Sound especially when drying fabrics like polyester, knits and permanent press. These fabrics should be removed so wrinkles will not set in.
I My Cycle
As the cycle selector knob is turned, the Time (timed dry), Level (dryness level) and Temp (temperature) settings change to automatic pre-set default settings. If you desire a different setting, press the appropriate button(s). Then press and hold the My Cycle button for 3 seconds and the dryer will “remember” these settings for that Knob Selection. In the future, when you turn the selector knob to that cycle, your settings will be automatically recalled. NOTE: Signal sound cannot be set for My Cycle.
8 |
49-3000198-1 |
Loading
Always follow fabric manufacturer’s care label when laundering.
Sorting and Loading Hints
|
|
|
|
|
|
|
|
|
|
|
WARNING |
- Fire Hazard |
|
|
|
|
|
|
|
|
|
|
|
|
• |
Keep flammable materials and vapors, such as |
• DO NOT dry anything that has ever had any type of oil |
||||
|
|
|
gasoline, away from dryer. |
|
on it (including cooking oils). |
|
|
|
• DO NOT dry anything that has ever had anything |
• |
Items containing foam, rubber, or plastic must be dried |
|
|||
|
|
|
flammable on it (even after washing). |
|
on a clothesline. |
|
|
|
• |
No washer can completely remove oil. |
• |
Failure to do so can result in death, explosion, or fire. |
|
||
|
|
|
|
|
|
|
|
As a general rule, if clothes are sorted properly for the washer, they are sorted properly for the dryer. Try also to sort items according to size. For example, do not dry a sheet with socks or other small items.
Do not add fabric softener sheets once the load has become warm. They may cause fabric softener stains. Bounce® Fabric Conditioner Dryer Sheets have been approved for use in this dryer when used in accordance with the manufacturer’s instructions.
Do not overload. This wastes energy and causes wrinkling.
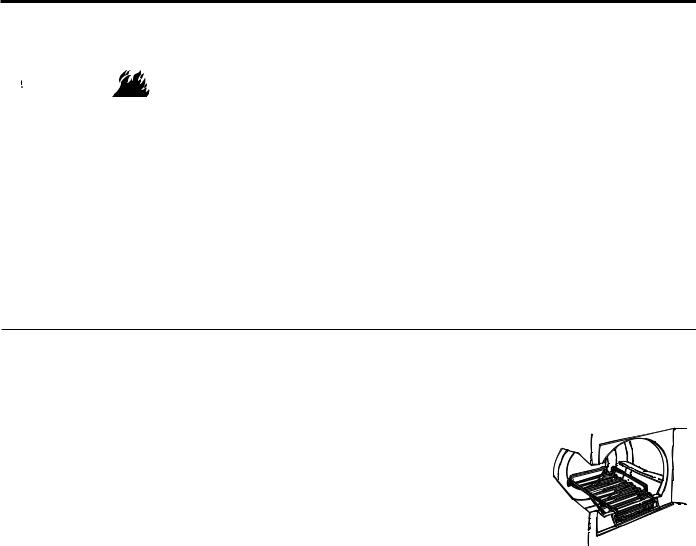
Drying Rack (on some models)
A handy drying rack may be used for drying delicate items such as washable sweaters.
To install the drying rack, hook the rack over the lint filter so the rack extends into the dryer drum.
NOTES:
• The drying rack must be used with the TIMED DRY cycle. Use with sensor cycles may
result in damp items or entended cycle times.
• Do not use this drying rack when there are other clothes in the dryer.
• If your model did not come with a drying rack, order WE01X25160 on-line at GEApplianceparts.com, 24 hours a day or by phone at 877.959.8688 during normal business hours.
LOADING
49-3000198-1 |
9 |
VENTING
Venting
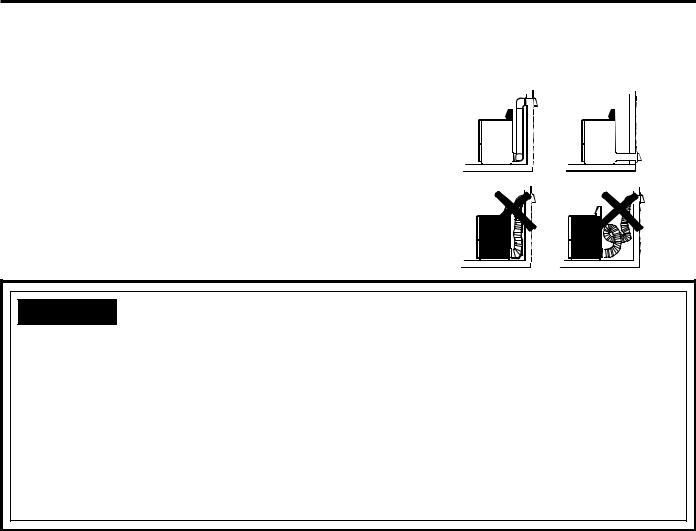
Venting the Dryer
For the best drying performance, the dryer needs to be properly vented. The dryer will use more energy and run longer if it is not vented to the specifications below. Carefully follow the details on Exhausting in the Installation Instructions.
nUse only rigid metal 4” diameter ductwork inside the dryer cabinet. Use only rigid metal or UL listed flexible metal 4” diameter ductwork for exhausting to the outside.
nDo not use plastic or other combustible ductwork. 


n Use the shortest length possible. |
|
|
|
|
|
||||
Correct |
|
||||||||
n Do not crush or collapse. |
Venting |
|
|
|
|
||||
|
|
|
|
||||||
|
|
|
|
|
|
|
|
|
|
n Avoid resting the duct on sharp objects. |
|
|
|
|
|
|
|
|
|
n Venting must conform to local building codes. |
|
|
|
|
|
|
|
|
|
|
|
|
|
|
|
|
|
|
|
|
Incorrect |
|
|
|
|
|
|
||
|
Venting |
|
|
|
|
|
|
|
|
|
|
|
|
|
|
|
|
|
|
|
|
|
|
|
|
|
|
|
|

 WARNING
 - Fire Hazard
This dryer MUST be exhausted to the outdoors.
Use only 4” rigid metal ducting for the home exhaust duct.
Use only 4” rigid metal or UL-listed dryer transition duct to connect the dryer to the home exhaust. DO NOT use a plastic vent.
DO NOT exhaust into a chimney, kitchen exhaust, gas vent, wall, ceiling, attic, crawl space, or concealed space of a building.
DO NOT install a screen in or over the exhaust duct. DO NOT install a booster fan in the exhaust duct.
DO NOT use duct longer than specified in the exhaust length table. Failure to follow these instructions can result in death or fire.
10 |
49-3000198-1 |
 Loading...