

Page 1

Contents
.®S5ETsii MgTmtmi® [•
Gas Range
Anti-rip Bracket
Appliance Registration
Care and (ileaning
Clock
Klcctronic Controls
Features
Flooring Under Range 5 Surface Cooking 8,9
Leveling
Litt-Up Cooktop
Minute Tinier
Model and Serial Numbers 2 Cookware Tips
Oven 9 Drip Pans 17
Air Adjustment 24 Flame Size 8
Baking, Baking (iuide 12, 13
Broiler Pan and Rack
Broiling, Broiling (iuide
Control Settings 10, 11
Door Removal 18
Light; Bulb Replacement
Oven Bottom Removal 18
Oven rimer 10, 11
Preheating
S, ii
2
lb-2S
10 Problem Solver 26
10
b, 7
5
17
10
15, 19
15
10, 19
1 i>
iO
Shelves
Thermi)stat Adjustment
V^ent Duct
Repair Service
Safety Instructions 2-5
Burners 17
Burner Grates
Control Settings 8
Lighting Instructions 8
Warranty Back Cover
9, 19
25
10
27
16
9
Roasting, Roasting (iuide 14
beii-caeaning Operation
Model JGSPiOGEK
GE MppHames
BFFD'^T£
zv-zz
(pi - 0? -T?
GE Answer Center®
S0G.o2S.20du
Page 2
lie hf4w% wniî.. -
IMPORTANT
Mead iMs book carefully.
It is intended to help you operate and
maintain your new range properly.
Keep it handy for answers to your
questions.
If you don’t understand something
or need more help, write (include
your phone number):
Consumer Affairs
GE Appliances
Appliance Park
Louisville, KY 40225
Write down the model and serial numbers.
You’ll find them on a label located
on the front frame behind the
storage drawer front. See pages 6
and?.
These numbers are also on the
Consumer Product Ownership
Registration Card that came with
yuui imigc. lii tiii.3
card, please write these numbers
here:
Serial Number
Use these numbers in any
correspondence or service calls
concerning your range.
FOR YOUR SAFETY
If you smell gas:
1. Open windows.
2. Don’t touch
electrical switches.*
3. Extinguish any
open flame.
4. Immediately call
your gas supplier.
•Don’t turn electric switches
on or off because sparks may
ignite the gaS.
FOR YOUR SAFETY
Do not store or use
gasoline or other
flammable vapets and
liquids in the vicinity
of this or any other
appliance.
INSTRUCTIONS
Read all instructions ^
before using this A
appliance.
EVIPOETANT ,
SAFETY NOTICE
The California Safe Drinking
Water and Toxic Enforcement
Act requires the Governor of
California to publish a list of
substances known to the state
to cause cancer and requires
businesses to warn customers
of potential exposure to such
substances.
Gas appliances can cause
minor exposure to three of these
substances, namely benzene,
formaldehyde and soot, caused
primarily by the incomplete
combustion of natural gas or LP
fuels. Properly adjusted ranges,
indicated by a bluish rather than
a yellow flame, will minimize
incomplete combustion. Exposure
to these substances can be
minimized further by venting
with an open window or using
a ventilaiion fan or hood.
When Yon Get luur Rai^e
If you received
Immediately contact the dealer (or
builder) that sold you the range.
save liliie ana mwiicy. Before you request service...
Check the Problem Solver on
page 26. It lists causes of minor
operating problems that you can
correct yourself.
® Have the installer show you
the location of the range gas
cut-off valve and how to shut
it off if necessary.
• Have your range installed
and properly grounded by a
qualified installer, in accordance
with the Installation Instructions.
Any adjustment and service should
be performed only By qualified
gas range installers or service
technicians.
Page 3
* Plug your range into a
120-¥olt grounded outlet oily.
Do not remove the roun.d
grounding prong from the piug. if
in doubt about the grounding of
the home electrical system, it is
your personal responsibility and
obligation to have an ungrounded
outlet replaced with a properly-
grounded three-prong outlet in
accordance with the National
Electrical Code. Do not use an
extension cord with this appliance.
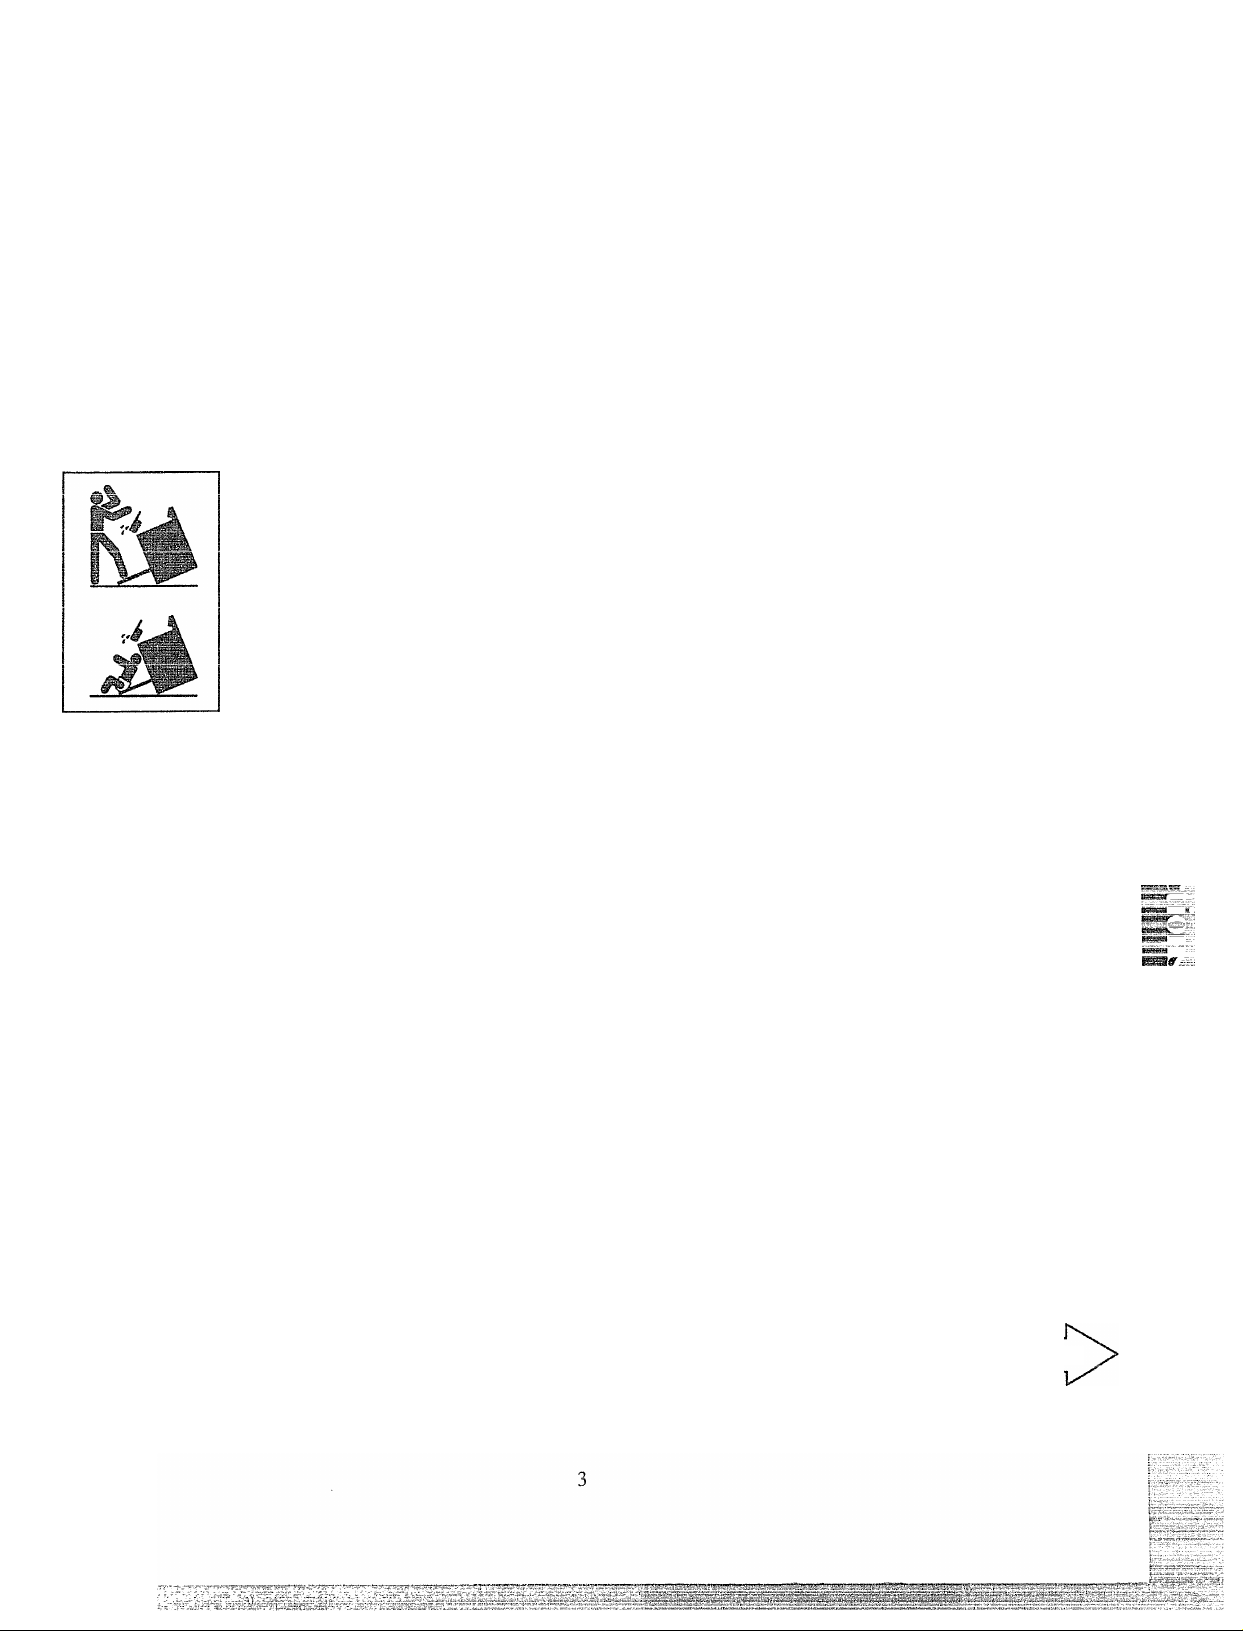
WAMWlNii—All ranges
can tip and
Injury could
result. To
prevent
accidental
tipping of the
range, attach
it to the wall
or floor by
installing the
ANTI-TIP bracket supplied. To
check if the bracket is installed
and engaged properly, remove the
drawer and inspect the rear
leveling leg. Make sure it fits
securely into the slot in the
bracket.
If you pull the range out from
the wail for any reason, make
sure the rear leg is returned to its
position in the bracket when you
push the range back.
« Se sure all packing materials
are removed from the range
before operating it, to prevent
fire or smoke damage should
the packing material ignite.
© Locate range out of kitchen
traffic path and out of drafty
locations to prevent poor air
circulation.
® Be sure уош’ range is correctly
adjusted by a qualified service
iechnlclan or installer for the
type 01 gas {Natural or Lr) on
which it is to be used. Your
range can be converted for use on
either type of gas.
© After prolonged use of a
range, high floor tempratures
may result and шагау floor
coverings will not withstand
this kind of use. Never insiall the
range over vinyl tile or linoleum
that cannot withstand such type of
use. Never install it directly over
interior kitchen carpeting.
Using ¥)nr Mange
® Don’t leave children alone or
unattended where a range is hot
or in operation. They could be
seriously burned.
© Don’t allow anyone to climb,
stand or hang on the oven door,
storage drawer or range top.
They could damage the range and
even tip it over causing severe
personal injury.
• CAUTION: ITEMS OF
INTEREST TO CHILDREN
SHOULD NOT BE STORED
IN CABINETS ABOVE A
RANGE OR ON THE
BACKSPLASH OF A RANGE-
CHILDREN CLIMBING ON
THE RANGE TO REACH
ITEMS COULD BE
SERIOUSLY INJURED.
© Let burner grates and other
surfaces cool before touching
them or leaving them where
children can reach them.
© Never wear loose flttihg or
hanging garments while using
the appliance. Flammable
material could be ignited if
brought in contact with flame or
hot oven surfaces and may cause
severe burns.
© Never use your appliance for
warming or heating the room.
Prolong^ use of the range
without adequate ventiiaiion can
be hazardous.
© Do not use water on grease
fires. Never pick up a flaming
pan. Turn off burner, then
smother flaming pan by covering
pan completely with well fitting
lid, cookie sheet or flat tray.
Flaming grease outside a pan can
be put out by covering with baking
soda or, if available, a multi
purpose dry chemical or foam type
fire extinguisher.
© Do not store flammable
materials in an oven or near
the cooktop.
© Do not let cooking grease
or other flammable materials
accumulate in or near the range.
© When cooking pork, follow
the directions exactly and always
cook the meat to an internal
temperature of at least llG-r.
This assures that, in the remote
possibility that trichina may be
present in the meat, it will be
killed and meat will be safe to eat.
Surface Cooking
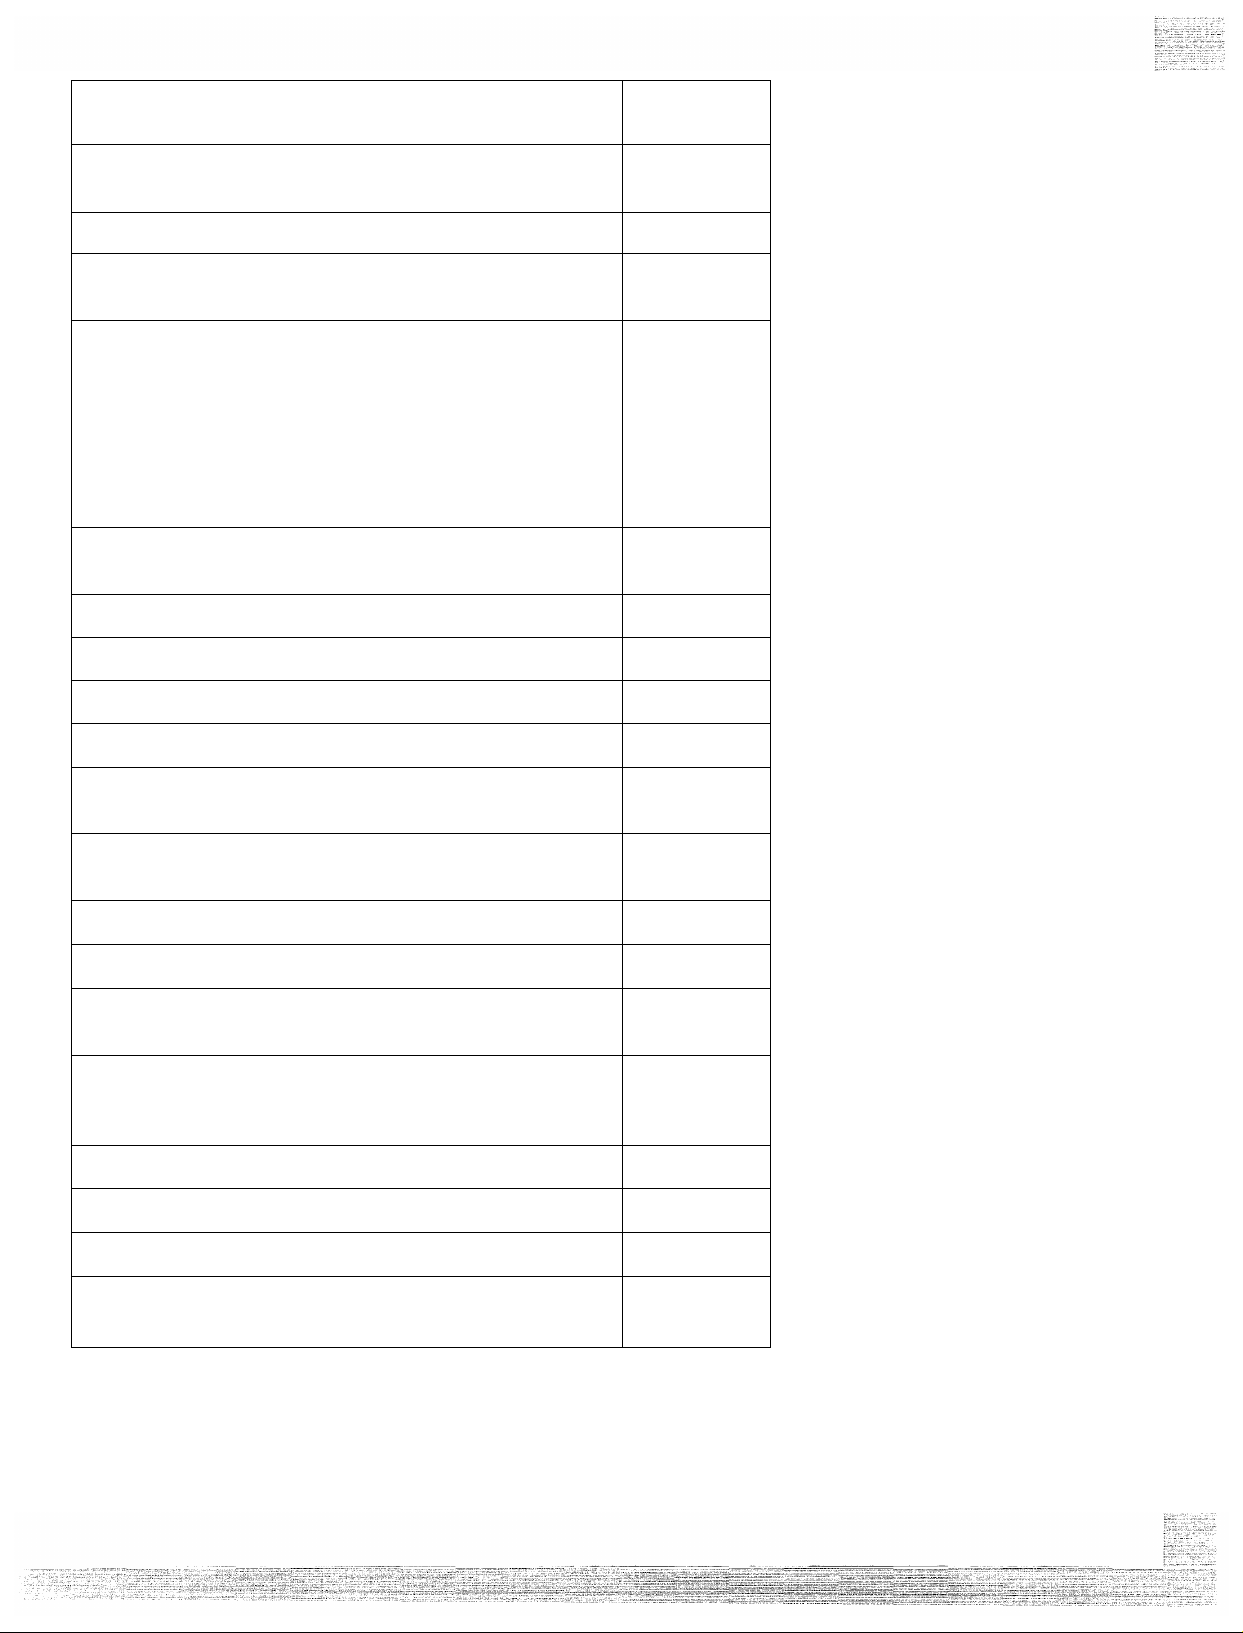
® Always use the LITE position
when Igiiiting top burnei^ and
make sure the burners have ignited.
® Never leave surface burners
unattended at HI flame settings.
Boilover causes smoking and
greasy spillovers that may catch
on fire.
@ Adjust top burner flame size
so it does not extend beyond the
edge of the cooking uteiisiL
Excessive flame is hazardous.
(continued next page)
Page 4

IMPOITANT SAFETY INSTRUCTIONS (contimicd)
Read all instriictlons before using this appliance.
® Use only dry pot holders—
moist or damp pot holders on hot
surfaces may result in burns from
of-,aam F^rv nr\i I At hnlrlArc miYii*
near open flames when lifting
utensils. Do not use a towel or other
bulky cloth in place of a |X)t holder.
® 111 iisaïusïiaÆc uic jjuasauiiiiy
of burns, ignition of flammable
materials, and spillage, turn the
cookware handles toward the side
or back of the range without
extending over adjacent burners.
® Always turn surface burner to
OFF before remoYlsg utensil.
® Carefully watch foods being
fried at HI flame setting.
© Never block the vents (air
openings) of the range. They
provide the air inlet and outlet
which is necessary for the range
to operate properly with correct
combustion.
® Do not use a wok on the
cooking surface if the wok has a
round metal ring which is
placed over the burner grate to
support the wok. This ring acts
as a heat trap which may damage
the burner grate and burner head.
Also, it may cause the burner to
WUll^ JllllO XliUJ VCitiOV
a carbon monoxide level above
that allowed by current standards,
resulting in a health hazard.
© Foods for frying should be as
dry as possible. Frost on frozen
foods or moisture on fresh foods
can cause hot fat to bubble up and
over sides of pan.
® Use least possible amount of
fat for effective shallow or deepfat frying. Filling the pan too full
of fat can cause spillovers when
food is added.
© If a combination of oils or
fats will be used in frying, stir
together berbre heating, or as
fat« mf»lt «Inwlv
........ V..« ■■ ~J-
® Always heat fat slowly, and
watch as it heats.
® Use deep fat thermometer
whenever possible to prevent
overheating fat beyond the
smoking point.
® Use nroner nan size—Avoid
~ A a A
pans that are unstable or easily
tipped. Select utensils having flat
bottoms large enough to properly
contain food avoiding boilovers
and spillovers, and large enough
to cover burner grate. This will
both save cleaning and prevent
hazardous accumulations of food,
Vi/ao\/\/ Cf^QttArinCT cnillnv/^rc
OiilW'ilV/(4V jr v/i tj|^Aaav/▼ wa
left on range can ignite. Use pans
with handles that can be easily
grasped and remain cool.
® Us0 only gluss cookware that
is recommended for use on gas
burners.
® Keep ail plastics away from
top burners.
® To avoid the possibility of a
burn, always be certain that the
controls for all burners are at
OFF position and all grates are
cool before attempting to
remove a grate.
© When flaming foods under
the hood, turn the fan off. The
fan. If operating, may spread
the flame.
© If fgiige Is located near a
window, do not use long curtains
which could blow over the top
burners and create a fire hazard.
...
______
11 yuij siiicia giS5, luiii uu uic
.-U.,
gas to the range and call a qualified
sendee technician. Never use an
open flame to locate a leak.
Baking, Broiling and
Roasting
® Do not use oven for a storage p
area, ^
© Stand away from the range
when opening the door of a hot
oven. The hot air or steam
which escapes can cause burns
to hands, face and/or eyes.
© Place oven shelves in desired
position while oven is cool.
® Pulling out shelf to the shelf
stop is a convenience in lifting
heavy foods. It is also a
пгрряиНпп naninst hums from
touching hot surfaces of the
door or oven walls.
© Don’t heat unopened food
could build up and the container
could burst causing an injury.
® Don’t use aluminum foil
anywhere in the oven except as ^
described in this book. Misuse^^
could result in a fire hazard or
damage to the range.
® Use only glass cookware that is
recommended for use in gas
ovens.
® When using cooking or
roasting bags in oven, follow
the manufacturer’s direction.
® Always remove broiler pan
from the oven as soon as you
finish broiling. Grease left in the
pan can catch fire if oven is used
without removing the grease from
the broiler pan.
® When broiling, if meat Is too
close to the fl.ame, the fat may
ignite. Trim excess fat to prevent
excessive flare-ups.
---------------------
A V**/A
lu 1.11^ A Д
Page 5
® Make sure broiler pan is in
place correctly to reduce the
ossibiliiy of grease fires.
If yoa should have a grease
é
lire 111 the broiler pan, turn off
oven, and keep oven door closed
to contain fire until it burns out.
Self-CleaEing Oven
Flooring under the
Range
Vbur range, like so many other
household items. Is heavy and can
seltle into soft floor coverings
such as cushioned vinyl or
carpeting. When moving the range
on this type of flooring, use care.
» Do not dean the door gasket
before reading special cleariliig
Inslrectloiîs Olì page 20. The
door gasket is essential for a good
seal Be careftil not to rub, damage
or move it.
® Do not use oven cleaners. No
commercial oven cleaner or oven
liner protective coating of any
kind should be used in or around
any part of the oven.
® Remove the broiler pan and
other cookware before self-
^^-îenning the oven.
^£1еап1пд Your Mange
Clean only parts listed in this
Use and Care Book.
® Keep range dean and free
of acciimnlatlons of grease or
spilloveins which may Ignite.
If ¥>u Need Service .
® Read “The Problem Solver’’
OÏI page 26 of this book.
® Don’t attempt to repair
or replace any part of your
range unless it Is specifically
recommended in this book. All
other servicing should be referred
to a qualified technician.
Do not install the range over
kitchen carpeting unless you
place an insulating pad or sheet of
1/4-inch-thick plywood between
the range and carpeting.
When the floor covering ends at the
front of the range, the area that the
range will rest on should be built up
with plywood or similar material to
the same level or higher than the
floor covering. This will allow the
range to be moved for cleaning or
servicing.
Leveling the Rai^e
Leveling legs are located on each
corner of the base of the range.
Remove the bottom drawer and you
can level the range on an uneven floor.
To remove drawer, pull drawer
out all the way, tilt up the front
and take it out. To replace drawer,
insert glides at back of drawer
beyond stop on range glides.
Lift drawer if necessary to insert
easily. Let front of drawer down,
then push in to close.
One of the rear leveling legs
will engage the ANTI-TIP bracket
(allow for some side to side
adjustment). Allow a minimum
clearance of 1/8" between the range
and the leveling leg that is to be
installed into the ANTI-TIP bracket.
л;:-:-:-
.............
■
......
Page 6
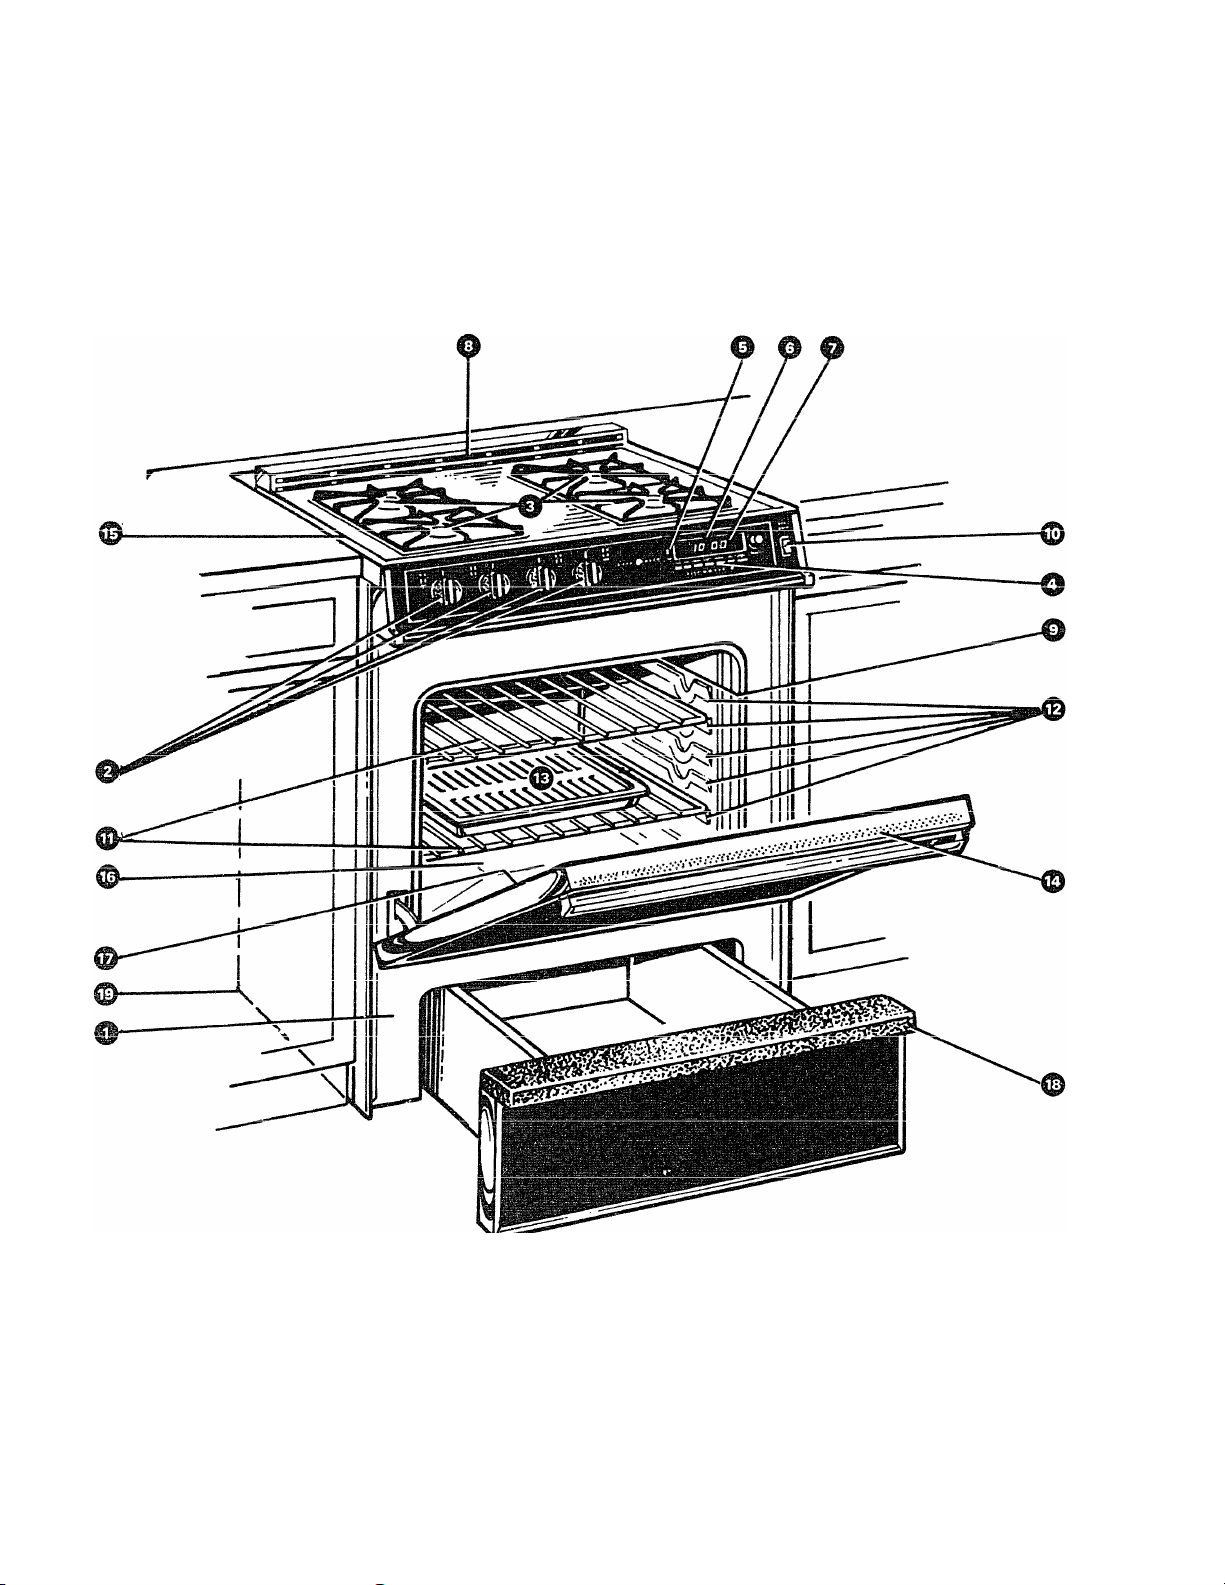
Model JGSPIOGEK with Brushed Chrome Cooktop
Page 7
Explained
I Model and Serial Numbers
(in burner box under cooktop)
^ O Qin-4^o/-'ii T5*ir*»\<ar* O
kjul luw x^viiiiwi \^\jm , i\jk % j
3 Surface Burners, Grates and Chrome
Drip Pans
Á Ü ir* ^r\ntrr\lc
~~r JU^iV,rW VA \ytXAV' V^V/IiW WiCJ
Automatic Oven Timer
rtiirnc vr*iir r\\jf>n nn anH nff fnr vnn niitomatirallv^
J^X ^A V.-T .V.. J X,
Í-'\, x< x \a
V^lVJV^Iv
-----------------------------------^---------
Minute/Seconu Timer
(lets you time any kitchen function, even when
the oven is in use)
5 OVEN CANCEL button
(push it to cancel any oven operation)
6 Electronic Disolav Panel
7 Oven “On” Indicator
8 Oven Vent
9 Oven Interior Light
J ,
2
g
8, 16, 17
in 11
* V 5 * *
11
in
X \J
1 r\
l\J
11
10
9, 10
10
10, 19
1 f\ ¡~\
__
lU VJVCII L-lglll OWIIV^U
T :„u*
(lets you turn interior oven light on and off)
-------------------»-------------------------------------11 Oven Shelves
(easily removed or repositioned on shelf supports)
12 Oven Shelf Supports
13 Broiler Pan and Rack
jxt^iii^vauiv./ v^vv-/ii M^KJKJi
(easily removed for oven cleaning)
15 Lift-Up Cooktop
(support rods hold it up to simplify
cleaning underneath)
16 Removable Oven Bottom
17 Oven Door Gasket
18 Storage Drawer
19 Anti-Tip Bracket
(see Safety Instructions)
in
A \J
-9, 19
9
15, 19
1 Q
X \J
17
18
20
23
3,5
Page 8
Surface Cooking
Aiiiomatic Igmiton
Your surface burners are lighted
by electric ignition, eliminating the
need for standing pilot lights with
constantly burning flames.
In case of a power outage, you can
light the surface burners on your
______
...lii
range wuu a iiiaieu. ouiu a iigmcu
_________
match to the burner, then turn the
knob to the LITE oosition. Use
---
_ - _ - . . . - _ . - -
extreme caution when lighting
burners this way.
Surface burners in use when an
electrical power failure occurs will
continue to operate normally.
Surface Burner Controis
Knobs that turn the surface burners
on and off are marked as to which
burners they control.
TT„ij «
To Light a Surface Burner How to Select Flame Size
The flame size on a gas burner
should match the cookware you
are using.
Push the control knob in and turn
it to LITE. You will hear a little
clicking noise—the sound of the
electric spark igniting the burner.
jrkLiX^l liiV WUliiVl luill tiiw
knob to adiust the flame size.
After Lighting a Burner
• cjneck to De sure tne Durner you
turned on is the one you want to use.
• Do not operate a burner for an
extended period of time without
____1___________^_________ 'T'U.,
cuuKwaic un me gi<iic. me inuMi
r»n thfi (TriitA mii\; r*hin withmit
V.^11 VlAW TT A VA V*
cookware to absorb the heat.
® Be sure the burners and grates are
WV.'V/A I../V1V/AW I^AUVi'V' C4.
pot holder, cleaning cloths or other
materials on them.
J_____
HanH q
NEVER LET THE FLAME
EXTEND UP THE SIDES OF THE
COOKWARE. Any flame larger than
the bottom of the cookware is wasted
and only serves to heat the handles.
When using aluminum or
aluminum-clad stainless steel
nntc iinH nfinc
siHiii<cf thft flnniA <:n
..„j.. -
,..r
the circle it makes is about 1/2 inch
smaller than the bottom of the
cookware.
When boiling, use this same flame
size—1/2 inch smaller than the
bottom of the cookware—no matter
...1—4.
wiiiii uic tuuR.wiuc la luauc^ ui. l uuua
cook just as quickly at a gentle boil
as they do at a furious rolling boil.
A high boil creates steam and cooks
away moisture, flavor and nutrition.
Avoid it except for the few cooking
processes which need a vigorous boil.
When frying or warming foods
in stainless steel, cast iron or
enamelware, keep the flame down
lower—to about 1/2 the diameter
of the pan.
When frying in glass or ceramic
cookware, lower the flame even more.
Page 9
Using Your Oven
Top-of-Range Cookware
Aiuniinuin: Medium-weight
axikwarc is rccoinmended because it
iheats quickly and evenly. Most focxis
Drown evenly in an aluminum skillet.
Mincnils ill food and water 'will siain
but will not harm aluminum. A
quick scour with a soap-filled wool
pad after each use keeps aluminum
cookware looking shiny new. Use
.saucepans with tight-fitting lids for
cooking with minimum amounts
of water.
Cast Iron: If heated slowly, most
• 1 I i-vf • oCrVr* I 11 #■ C
Enamel ware: Under some
conditions, the enamel of some
cookware may melt. Follow cookware
manufacturer’s recom.mendations
for cooking methods.
ninc-c,. TTU O fO rrlocc
1 ItWI^ ttiw iwv/ Ijpwo WJ ¿.ICiOO
cookware—those for oven use only
and those for top-of-range cooking
(saucepans, coffee and teapots).
Glass conducts heat very slowly.
Heatproof Glass Ceramic: Can
be used for either surface or oven
rooking. It conducts heat very
^slowly and cools very slowly.
r’Kiiir'l' r>r\/-»l'\»/arA Tnciniifiir'tiirf‘r’c
V^llWV^IV. VV/V/SV VT«1 V/ I Wt**I W ItAWH-*» w* kJ
directions to be sure it c^n be used
on gas ranges.
will givt; öuiiöiacic/iiv^ouiio.
Automatic Ignition
The oven burner and broil
burner on your range are lighted
by electric ignition.
To light either burner, push the
button for the desired function and
turn the SET knob until the desired
temperature is displayed. The
burner should ignite within 60
seconds.
Power outage?
The oven and broiler burners on
this range will not light in the event
nf Qn P*lAr*frirnl nnu/pr nnfiiOP
V/» wiwwvt
rin
not attempt to light them
manually with a match.
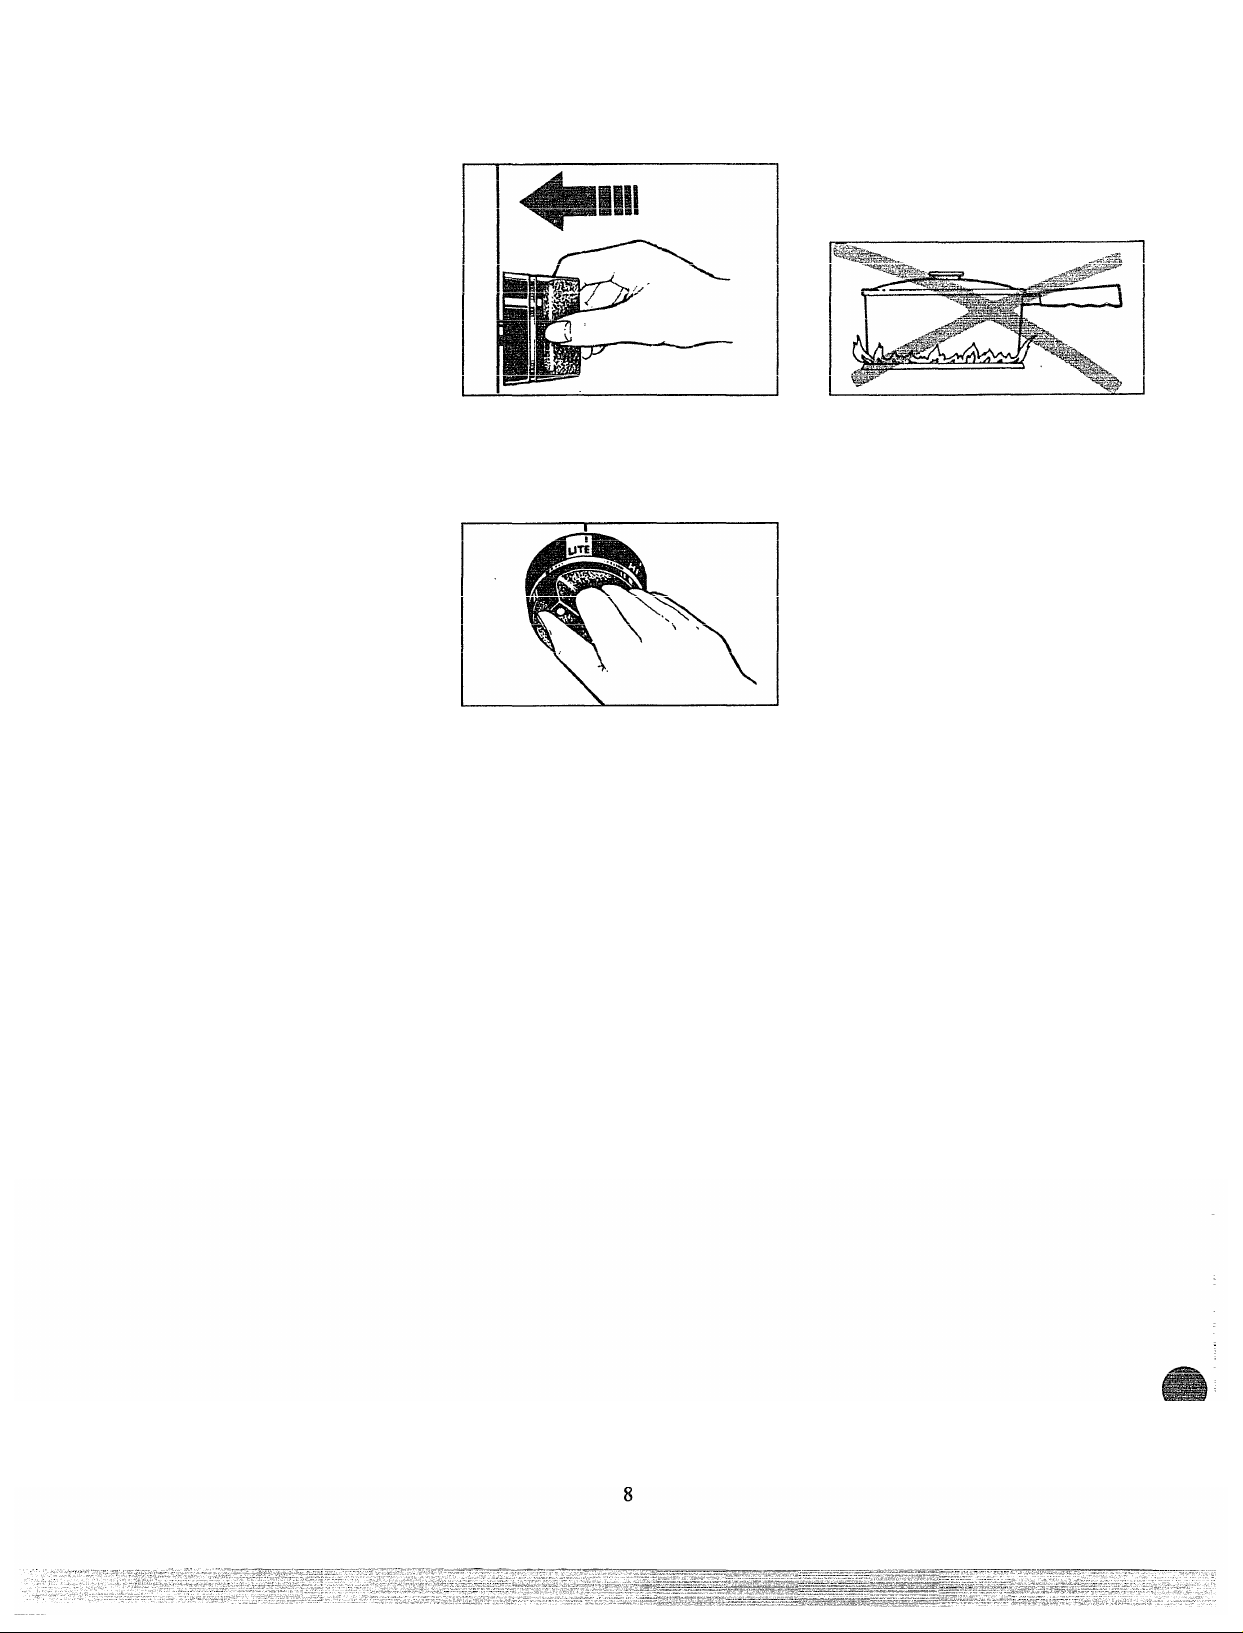
Oven Shelves
To remove the shelves from the
oven, pull them toward you, tilt
front end upward and pull them out.
To replace, place shelf on shelf
support with .stop-locks (curved
extension of shelf) facing up and
toward rear of oven. Till up front
aiiu pudti iwwaiu
/*\tr£3in
until it goes past “stop” on oven
wall. Then lower front of shelf and
push it all the way back.
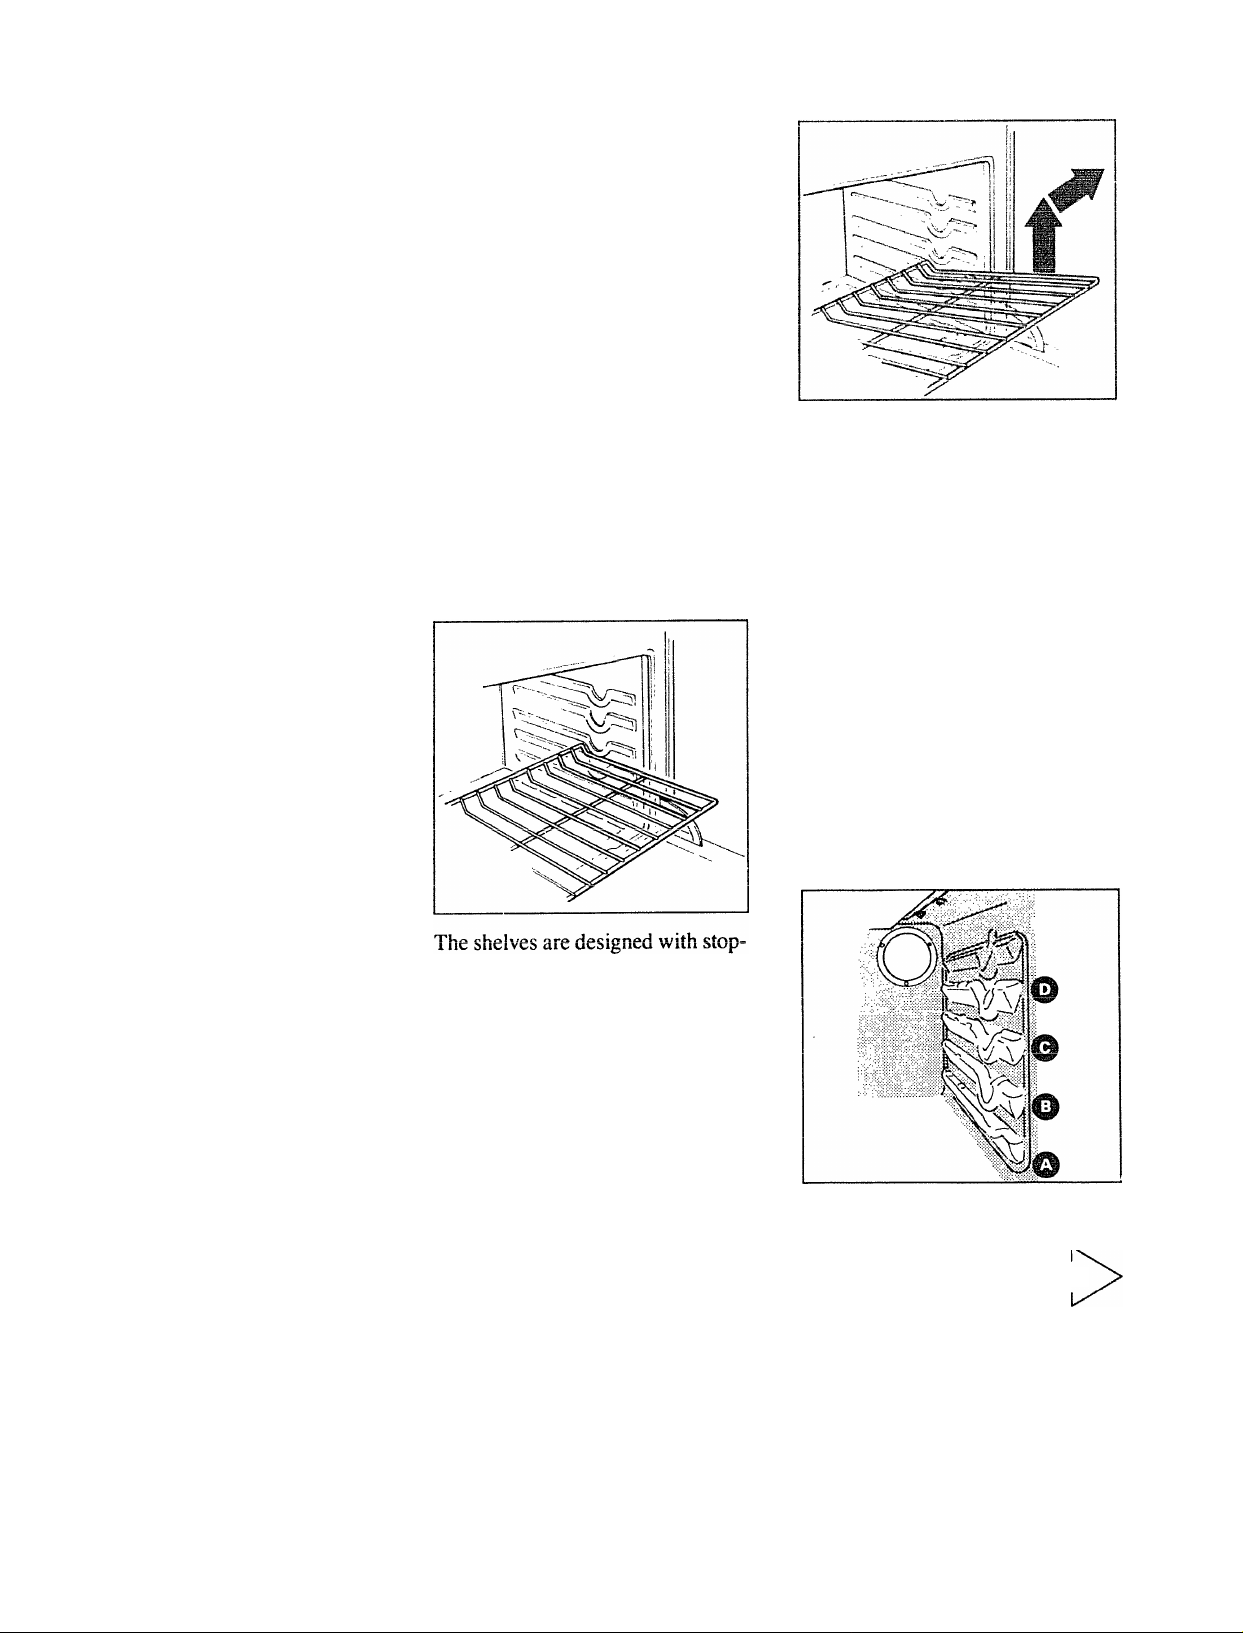
Shelf Positions
The oven has four shelf supports—
A (bottom), B, C and D (top).
Shelf positions for cooking are
suggested on Baking and Roasting
pages.
Stainless Steel: This metal alone
has poor heating properties, and is
usually combined with copper,
aluminum or other metals for
improved heat distribution.
Combination metal skillets usually
work satisfactorily if they are
used with medium heat as the
manufacturer recommends.
locks so when placed correctly on
the shelf supports, they will stop
before coming completely out of
the oven and will not tilt when you
are removing food from them or
placing food on them.
When placing cookware on a shelf,
mvll fktO oKol f* !<• tr\ tilii
JJUll lllV WUt LV/ WIV./
position. Place the cookware on
the shelf, then slide the shelf back
into the oven. This will eliminate
reaching into the hot oven.
(continued next page)
Page 10

Using ¥)ur Oven
(c-ontinued)
Oven Light
Use the switch on the eontrol panel
to turn the light on and off.
Oven Vent
Your oven is vented through ducts
at the rear of the range (see page 6).
rVr\ nrit Klni'l' Hiir>tc XA/hf»n
cooking in the oven—it is important
that the flow of hot air from the oven
and fresh air to the oven burner be
uninterrupted. Avoid touching the
_____
vein upcimig;» ui ucaiu^ :>ui
during oven or broiler operationthev may become hot .
® Vent openings and nearby
surface!? may become hois Do not
touch them.
cooktop may become hot if left
too close to the vent.
® Do not leave plastic items on
the cooktop—they may melt if
left too close to the vent.
____
___
naiiuica ui aixu paii^ vii 1.11^
Oven Moisture
As your oven heats up, the
temperature change of the air
in the oven may cause water
droplets to form on the door
glass. To prevent this, open the
oven door for the first minute
of oven heat-up to let the moist
air out.
Electronic Controls
Oven “On” Indicator
Word “ON” is displayed when
BAKE or BROIL button is energized,
goes out when CANCEL button is
pushed or when oven burner shuts
off automatically.
The oven operation is controlled
___:___
cict;uuiuKaiiy. i iic luiiuwiiig
IK, -TU.. ÍK.11,,,
instructions tell you how to operate
the electronic controls.
To Set the Clock
1. Push CLOCK button.
2. Turn SET knob to correct time
of day. Clock is now set. The clock
mudi d^l 1C/ lliw WC/i tilliw V/1
fKo firr*»0
day for accurate automatic oven
timing operations.
To Set the
Minute/Second Timer
2. Turn SET knob to desired
amount of time (up to 9 hours and
59 minutes). The Minute/Second
Timer will immediately begin to
count down.
3. When time is up, the End-of-Cycle
Tone (3 long beeps) will sound and
the display will again show the time
of day.
Note: The Minute/Second Timer is
a reminder only and will not operate
the oven.
YOU can use tne ivunuie/^econa
Timer whether or not the oven is
being used. The Minute/Second
Timer does not interfere with oven
operations.
_______
To Cancel the Timer
Push and hold TIMER button for
three seconds. This will clear the
Minute/Second Timer function.
lb Bake
1. Push BAKE button.
2. Turn SET knob until desired
iem.perature is displayed.
A one-second beep will sound
when the oven has preheated to and
stabilized at selected temperature.
"X W/k<i»n finich/^rl KaLina niich
TT xiiiioiiwva I.yc4ixaii^^
CANCEL button.
Nnfp* Tn rprall what tpmnpratnrp
you have selected while the rising
temperature is being shown, push
and hold the BAKE button. The
selected temperature will be shown
WIIJIC yuu IIUIU me DrvrVJJr uuiiuu.
u^iA DA
The actual oven temperature will
be shown after a few seconds.
You can push the CLOCK button to
display time of day without
cancelling the oven operation.
You can change the selected
temperature at any time by
pushing the BAKE button and
él I f **\ 1 *-%rv fkoi
lUI fillip lliv.^ i IVIIV/U/.
To Broil
1. Push BROIL button.
2. Turn SET knob until your
is visible in the display.
xi/i_________
WIlCll lllll^jlicu UlUlllllg, pusii uic
CANCEL button.
I I_;i;
^
_____
-------
,.u
10
Page 11

^ Auíomaíic Oven I'inier
^ The oven timer will automatically
start and stop your oven cooking or
|elf-cleaning operation for you.
For automatic oven cooking:
2. Turn SET knob to set length of
baking time.
3. Push BAKE button.
4. Turn SET knob to set desired
temperature.
When cook time is reached, the
End-of-Cycle Tone will sound and
the oven will turn off.
During automatic cooking:
® You can push the STOP TIME
button to find out when the End~of~
Cycle Tone will sound and the oven
will turn off.
® You can push the CLOCK button
todisplay time of day without
cancelling the oven operation.
^To Delay Starting an
^^utomatic Oven Operation
Caution: Never let food sit in the
oven for more than 4 hours before
cooking starts» Room temperature
is ideal for the growth of harmful
bacteria. Be sure oven light is off
because heat from the bulb will
speed bacteria growth.
Note; You can push the STOP
TIME button to find out when the
oven will turn off. Push and hold
the COOK TIME button to find out
WllWli I.I1V/ V/VX.»!! Will (.UAIl Ч/1Д.
ГЧЛ//ЛП Л1/П1 turn r\ri
If a delayed self-cleaning oven
operation is desired, see page 21.
How io Change
aPrc^ram
When a function has been
entered, you can recall what has
UUWU piV^glCUilliAWVft py'.pUOitillg .
the corresponding function
button. The messages in the
display show you which function
is currently being displayed.
W'hile the function is displayed,
you can change it with the SET
knob. You can chanee anv
------
. _ -
----
^ ^ .
programmed function at any time.
Function Error Tone (series of
very rapid beeps, 1/8-second on.
uiapittj mu* oiiwrv w,
failure code. Cancel Function Error
Tone by pushing the CANCEL
button. If the Function Error Tone
starts again (after about 15
seconds), call for service.
Disconnect the range electrical
suddIv to stoD the tone.
------
rr-J
----------
--------------r --------------
I..........................................................................................................
__
If the function error occurred ^ _
while you were programming the
Electronic Control, push the
CANCEL button and try again. ^
To Cancel the Tone... If you don’t ““
want an audible tone when you
push a button, you can eliminate
the Key Tone by pushing and
ilUlUiilg UlC UUtlWll Ulliil
a ILj Y
you hear a short beep (in
approximately two seconds). To
activate the tone again, push and
hold the CANCEL button once '
more until you hear a short beep.
Cancelling or activating the tone
should only be done when there is
no oven operation programmed.
Pushing the CANCEL button will
clear all functions except the Clock
and Minute/Second Timer.
If a delayed cooking operation
isdesiredf
1. Push COOK TIME button.
2. Set length of baking time with
SET knob.
3. Push STOP TIME button.
4. Turn SET knob to time of day
when baking should be conipleted.
Stop time must be equal to or
greater than the cook time plus the
current time of day.
5. Push BA.KE button.
6. Turn SET knob to desired
temperature.
When stop time is reached, the
wiu duuiiu auu
the oven will turn off.
Ibnes
End-of-Cycle Tone (3 long beeps—
one second on, one second off):
shows that a timed oven operation
has reached STOP TIME or that
the Minute/Second Timer has ^
counted down.
Attention Tone (series of short
beeps, 1/4-second on, 1/4-second
off, until proper response is given):
will sound if oven has only been
partially programmed. For example,.
if you have selected a cook time but
iiu win ii&ai uic^ .
Attention Tone until you select a
temperature or push CANCEL.
Notification Tone (single, one-
cernnd hpf^.nV inrHratPQ avp.ti hnc
"
---------•------------------------
Stabilized at selected temperature,
r^cy luiic (a.mgic, i/iu-sccuiiu
beep): sounds when any button is
pushed.
1
-
11
Page 12

How to Set Yoer Range
for Baking
1. Position the shelf or shelves in
the oven. If cooking on two shelves
at the same time, place shelves
about 4 inches apart and stagger
food on them.
2. Close oven door.
3. Push the BAKE button and
turn the SET knob until desired
temperature is displayed. If
preheating is desired, do not put
food in the oven until a one-second
beep sounds to tell you the oven has
stabilized at the selected baking
temperature.
4. Open door and place food in
oven on center of shelf. Allow at
least 2 inches between edge of
bakeware and oven wall or adjacent
cookware.
5. Close oven door.
^ fr*r*H fr»r Hnnp.npss at
minimum time on recipe. Cook
longer if necessary. Push CANCEL
button and remove food.
Shelf Positions
Most baking is done on the second
shelf position (B) from the bottom.
When baking three or four items,
use two shelves positioned on the
second arid fourth sets of supports
(B & D) from bottom of oven.
Bake angel food cakes on first shelf
position (A) from bottom of oven.
Baking Tips
® Follow a tested recipe and
measure the ingredients carefully.
If you are using a package mix,
follow label directions.
® If moisture is noticeable on the
front of the oven or on the glass door
• rvn rwji^ri 1ao\/A
WilCll liiai lUi AWUT W
the oven door ajar for a few minutes
or until the oven is warm.
® Do not open the oven door during
a baking operation—heat will be lost
and the baking time might need to
be extended. This could cause poor
baking results. If you must open the
door, open it partially—only 3 or 4
inches—and close it as quickly as
possible.
® Do not disturb the heat circulation
in the oven with the use of aluminum
foil. If foil is used, place a small
sheet of it , about iu by 12 inches at
the most, on a lower shelf several
inches below the food. Do not place
foil on the oven bottom.
Common Baking Problems and Fbssible Solutions
PIES
Burning around edges .
® Oven too full; avoid overcrowding.
® Edges of crust too thin.
»Incorrect baking temperature.
Bottom crust soggy and unbaked
® Allow crust and/or filling to cool
sufficiently before filling pie shell.
^ Fiuiiig muy uc luu uiiii \ji juivj.
® Filling allowed to stand in pie shell
before baking. (Fill pie shells and
bake immediately.)
® Ingredients and proper measuring
affect the quality of the crust. Use a
tested recipe and good technique.
Make sure there are no tiny holes or
tears in a bottom crust. “Patching”
a pie crust could cause soaking.
Pie BHing runs over
® Top and bottom crust not well
sealed together.
® Edges of pie crust not built up
high enough.
A 'TVki-k ■ Pilll'Tirr
lUU lllUWll 111111x5.
® Check size of pie plate.
Pastry is tough; crust not flaky
® Too much handling.
® Fat too soft or cut in too fine.
Roll dough lightly and handle as
little as possible.
CAKES ^
Cake rises higher on one side
® Batter spread unevenly in pan,
® Oven shelves not level .
® Using warped pans.
® Incorrect pan size.
Cakes cracking on top
® Oven temperature too high.
® Batter too thick, follow recipe
Or exact package directions.
® Check for proper shelf position.
® Check pan size called for in recipe.
• Improper mixing of cake.
Cake falls
® Too much shortening, sugar or
liquid.
® Check leavening agent, baking
powder or baking soda to assure
11 WOllllV'OO* XTA4AIVW •
expiration dates of packaged
ingredients.
® Cake not baked long enough or at
incorrect temperature.
* If adding Oil to a cake mix, make
certain the oil is the type and
amount specified.
Crust is hard
® Check temperature,
® Check shelf position.
Cake has soggy layer or streaks at
bottom
® Undermixing ingredients.
® Shortening too soft for proper
creaming.
* Too much liquid.
COOKIES & BISCUITS
Doughy center; heavy crust on
surface
® Check temperature.
® Check shelf position.
* Follow baking instructions
carefully as given in reliable recipe
or on convenience food package.
® Flat cookie sheets will give more
mie^rt KîiVino rivenite rinn’t nVP:rf!rnWfi
W v Wit cyUAVAXl5 XWkjv*AVw. V»- * ’ — “ — ” “ ■ ' —
foods on a baking sheet.
® Convenience foods used beyond
their expiration date.
Browning more noticeable on
one side
® Oven door not closed properly,
check gasket seal. .
® Check shelf position.
u
Page 13

Baking Guide
I. Preheating is very important
X«*. when using teinperaiures below
225°E and when baking foods such as
^^iscuits^ cookies^ cakes and other
^^astries. After pushing the BAKE
button and turning the SET knob to
the desired temperature, be sure to
wait for the one-second beep before
r>t ■ f f • **% í-y-\í-vy-|
pulliliu luv/u uiiu iiik. 4^vv.;ii.
FtM>d
Bread
Biscuits ('/2-in. thick)
ColTcc cake
Corn bread or mu I fins
Gingerbread
Mullins
Popovers
Quick loaf bread
Yeast bread (2 loavcs)
Plain rolls
C..-..II..
Cakes
(without shortening)
Angci food
Jelly roll
Sponge
____
Cakes
Bundt cakes
Cupcakes
Fruitcakes
Layer
Layer, chocolate
Cookies
Brownies
Drop
Refrigerator
Rolled or sliced
rruiis,
Other Desserts
Baked apples
Puddings, rice
aiiu cuâuiiu
Pies
Frozen
Meringue
One crust
Two crust
Pastry shell
Mi.scellaneous
Baked potatoes
LScalloped dishes
Souffles
Cookware
Shiny Cookie Sheet
Shiny Mctai Pan with
.satin-finish bottom
Cast Iron or Gla.ss Pan
Shiny Mctai Pan with
.satin-fini.sh bottom
Shiny Metal Muffin Pans
Metal or Glass Loaf Pans
.
.........
I .... m...... ! ....TD-.r...
Shiny Oblong or Muffin Pans
Chin\/ ОЫгмит /\r Miifftn Piinw
Aluminum lUDcran
Metal Jelly Roll Pan
Metal or Ceramic Pan
Metal or Ceramic Pan
Shiny Metal Muffin Pans
Mctai or Glass Loaf or
Tube Pan
Shiny Metal Pan with
.satin-finish bottom
Shiny Metal Pan with
satin-fini.sh bottom
Metal or Glass Loaf Fans
Metal or Glass Pans
Cookie Sheet
Cookie Sheet
Cookie Sheet
Glass or Metal Pans
Casserole (set in pan of hot water)
Gla.ss Cu.stard Cups or
\^aoowi wiv.
Foil Pan on Cookie Sheet
Spread to crust edges
Glass or Satin-finish Metal Pan
Glass or Satin-finish Meial Pan
Glass or Satin-finish Metal Pan
Set on Oven Shelf
Glass or Metal Pan
Glass Pan
Preheating is not necessary when
roasting or for long-time cooking of
whole meals.
Aiuminuni pans conduct heat
2.
quickly. For most conventional
baking, light, shiny finishes give test
results because they help prevent
overbrowning. For best browning
results, we recommend dull bottom
surfaces for cake pans and pie plates.
Shelf
Position.s
B,C
B, A
В
8
A. В
В
A В
A, В
R A
A. В
В
A, Б
В
В
B, C
B,C
B,C
B,C
A, B,C
Oven
Temperatures
4(Ю°-475°
400“-450°
'ÌCf\0
4(Ю°-425°
375°
350°-375°
375°-425°
375°-425°
'tSn°-T7S°
'5'TCO
'inCO
-JiJ
375°-400°
325°-350°
325°-350°
350°-375°
275°-300°
350°-375°
350°-375°
325°-350°
350°-400°
400°-425°
375°-400°
350°-400°
3()0°-350°
325°
A
Б, C
A, В
В
В
A, B,C
A, B,C
В
400°-425°
n^r*0 *4^/40
-J>JU
400°-425°
/4АЛО A'^ eo
450°
325°-4(X)“
325°-375°
300°-350°
3. Dark or non-shiny finishes, also
glass and Pyroccrani® cookware,
generally absorb heat which may
result in dry, crisp crusts. Reduce
oven heat 25“F. if lighter crusts are
desired. Rapid browning of some
foods can be achieved by preheating
cast iron cookware.
Time,
Minutes
15-20
20-40
АС
СС
20-30
45'60
45-60
45-60
10-25
20-30
10-15
45-60
45-65
20-25
20-35
25-30
25-35
10-20
6-12
7-12
30-60
30-60
50-90
45-70
1C ‘^C
45-60
12-16
60-90
30-60
30-75
Comments
Canned, refrigerated biscuits take 2 to 4
minutes less time.
Preheat cast iron pan for crisp crust.
Decrease about 5 minutes for muffin mix.
Qr 450^F for 25 minutes then 2i
350°F. for 10 to 15 minutes.
Dark metal or glass gives deepest
hrnu/nina
For thin rolls, Shelf B may be used.
For thin rolls. Shelf B mav be used.
1 wu pail ta vv/iiwiiiwiiv
Line pan with waxed paper.
Paper liners produce more moist crusts.
use ,5uu r. ana oneii d lur sitiaii ui
ir rs г
individual cakes.
If baking four layers use
5I1C1VC:> D illiu
LA.
Bar cookies from mix use same time.
Use Shelf C and increase temperature
25 to 50°F. for more browning.
RpHiirp tpmnpratnrp tn fnr larap
custard.
Cook bread or rice pudding with custard
base 80 to 90 rninutes.
Large pies use 400°F. and increase time.
'T'
_____
.;^l,l..
_____
___
lu quieKiy uiuwii lucuiiguc U5c‘tvn/ r\ lui
/4AAOtr
9 to 11 minutes.
Custard fillings require lower temperature,
longer tirne.
Increase time for large amount or size.
________,____
II
13
Page 14

Roasting
Roasting is cooking by dry heat.
Tender meat or poultry can be
roasted uncovered in your oven.
Roasting tempenitures, which
should be low and steady, keep
spattering to a minimum. When
roasting, it is not necessary to sear,
baste, cover, or add water to your
meat. Roasting is easy, just follow
Cif^r\C *
vilvov ow-pr«:?.
Step i. Position oven shelf at
second from botioni position (B)
for small size roast (3 to 5 lbs.) and
at bottom position (A) for larger
roasts.
Step 2: Check weight of roast.
Place meat fat-side-up or poultry
brea.st-siuc-up on roasting rack in a
shallow pan. The melting fat will
baste the meat. Select a pan as
close to the size of meat as possible.
(Broiler pan with rack is a good
pan for this.)
Step 3: Push BAKE button and
turn SET knob until desired
temperature is displayed. Check the
IXUajiUUg VJUlUt lA/l wo oitvi
fr\r* onH
approximate cooking times.
Step 4: iMost meats continue to
cook slightly while standing after
being removed from the oven. For
rare or medium internal doneness,
you may wish to remove meat from
the oven Just before it is done if it is
to stand 10 to 20 minutes while you
make gravy or attend to other icuxls.
If no standing is planned, cook
meat to suggested temperature.
Erozen Roasts
Frozen roasts of beef, pork,
lamb. etc., can be started without
thawing, but allow 15 to 25 minutes
per pound additional time (15
minutes per pound for roasts under
5 pounds, more time for larger
roasts).
Thaw most frozen poultry before
roasting to ensure even doneness.
Some commercial frozen poultry
can be cooked successfully without
thawing. Follow directions given
on packer’s label.
Roasting Guide
Type
Meat
Ti»nHi»r riitc rih hioh niialitv 325°
sirloin tip, rump or top round*
i omH r*.r
*
..........................
veai snouiaer, leg or luiii •
Pork loin, rib or shoulder*
Ham, pre-cooked
Ham, raw
♦For boneless rolled roasts over 6-inches
thick, add 5 to 10 minutes per lb. to times
given above.
Poultry
Chicken or Duck
Chicken pieces
Turkey
, . a.
lêîiî peinture
Oven
325° Rare:
325°
325°
325°
325°
375°
325°
Ocnoncss
Rare:
Medium:
Well Done:
Medium:
Weil Done:
Well Done:
To Warm:
Well Done:
Well Done:
Well Done:
Well Done:
Approximate Roasting Time
• n rux** ^
III |№i «
3 to 5-Ibs. .
24-33
35-39
40-45
21-25
25-30
30-35
T-/
35-45
17-20 minutes per lb. (any weight)
Under 10 lbs.
27-35
3 to 5-lbs.
35-40
30-35
10 to 15-lbs.
18-25
6 to 8-lbs.
18-22
22-29
30-35
20-23
24-28
28-33
-tn-zin I7n°-I8n'>
30-40
10 to 15-lbs.
24-27
Over 5 lbs.
30-35
Over 15 lbs.
15-20
___________
Internal
'T0mr№rat||P£
130°-140°
150°-160°
170°-185°
130°-140°
150°-160°
170°-185°
170°-180°
115°-125°
170°
185°-190°
185°-190°
In thigh:
185°-190°
14
Page 15

Broiling
Broiling is cooking food by direct
heat from above the food. Your
range is designed for waist-high
broiling. A specially designed
proiler pan and rack allows
^dripping fat to drain away from the
foods and be kept away from the
u!gu ucai ui iiic gai> name.
The"oven door should be closed
during broiling.
Kow to Broil
1. If meat has fat or gristle near the
edge, cut vertical slashes through it
about 2 inches apart, but don’t cut
into meat. We recommend that you
trim fat to prevent excessive
smoking, leaving a layer about
l/8-inch thick.
2. Arrange food on rack and
position the broiler pan on the
appropriate shelf in the oven.
Placing food closer to flame
increases exterior browning of
frirvrl Kilt olcn inr'rAdCAC cniittAnna
and the possibility of fats and meat
juices igniting.
^^3. Close ihç oven door.
’^4. Press the BROIL button and turn
the SET knob until your choice
of HI BROIL or LO BROIL is
displayed. Note: Chicken and ham
are broiled at LO BROIL in order
to cook food through without
over-browning it.
5. Turn most foods once during
cooking (the exception is thin fillets
of fish; oil one side, place that side
down on broiler rack and cook without
turning until done). Time foods for
about one-half the total cooking
time, turn food, then continue to
cook to preferred doneness.
6. Push CANCEL button.
Remove broiler pan from oven and
serve food immediately. Leave pan
outside the oven to cool.
..
)
Broiling Tips
® Use tongs to turn meat over
pierced meat loses juices.
Broiling Guide
Quantity
and/or
Food
Bacon
Ground Beef
Well Done
Beef Steaks
Rare
Medium
Well Done
Rare
Medium
well uone
Chicken (450°)
Bakery Products
Bread (Toast) or
Toaster Pastries
English Muffins
T 'TVlSIc
(6 to 8-oz. each)
Fish
Ham Slices (450°)
Precooked
Pork Chops
well L/UIIC
Medium
Well Done
Medium
Well Done
Wieners,
similar precooked
sausages,
bratwurst
««HI9
___
Lamb Chops
Thickness
'/2-lb. (about 8
tiiiii slices)
1-lb. (4 patties)
'/2
to %-in. thick
1-in. ihick
(1 to 1'/2-lbs.)
l'/2-in. thick
(2 to 2'/2-lbs.)
1 whole
(2 to 2'/2-lbs.),
split lengthwise
2-4 slices
1 pkg. (2)
2-split
2=4
1-lb. fillets Vi to
'/2-in. thick
1-in. thick
2
('/2
in.)
0
/1
about ! lb.
2 (1 in.)
about 10 to 12-oz.
2
(!'/2
in.),
about 1 lb.
1-lb. pkg. (10)
15
HI or
LO
Broil
HI
HI
HI
LO
HI D
HI
HI
LO
HI
HI
HI D
Shelf
Position
D
D
ГЧ
L/
D
D
D
D
r\
U
В
D
c
D
C
D
Q
D
D
D
C
® Steaks and chops should be at
least 1 inch thick for best broiling
results. Pan broil thinner ones.
5
8-9
0
7
12-13
13
10
15
¿.J
28-30
2- 3
3- 4
3-16
5
8
10-12
12=13
8
10
10
17
6
2nd Side
Time,
Minutes
2'/z
6-7
n
6-7
8-9
6-7
9-12
t £ 10
i u-1
0
18-20
'/
2-1
Do not
turn
over.
5
8
4-5
8-9
4-7
10
4-6
12-14
1-2
Comments
Arrange in single layer.
Space evenly. Up to 9
patties take about same
time.
Iacc
iKor* l_mr*h
cook through before
browning. Pan frying is
rccornrncndcd.
Slash fat.
Reduce times about 5 to 10
minutes per side for
cut-up chicken. Brush
each side with melted
butter. Broil with skin side
down first and broil with
door closed.
Space evenly. Place
English muffins cut-side-up
Slid
bTuSii vviiii
desired.
Cut through back of-shell,
spread open. Brush with
melted butter before and
after half time.
Handle and turn very
carefully. Brush with
lemon butter before and
during cooking if desired.
Preheat broiler to increase
browning.
Increase times 5-10
minutes per side for
1 '/2-inch thick or home
cured.
Slash fat.
Slash fat.
If desired, split sausages
in half lengthwise; cut into
5 to 6-inch pieces.
if
1st Side
Time,
Minutes
Page 16

Саге and Cleaning
Proper care and cleaning are
important so your range will give
you efficient and satisfactory
service. Follow these directions
111 wmiiig lyji u iu
assure safe and proper maintenance.
BE SURE ELECTRIC POWER
IS OFF BEFORE CLEANING
ANY PART OF THE RANGE,
Control Рйпе!
It’s a good idea to wipe the control
ncin^l r»lAan оЛаг aqaIi uca rv^fViA
WAWMAX MJIVWA V'UV'II UOW
oven. For a more thorough cleaning,
the knobs can be removed by pulling
them off the knob stems. If loiobs
are removed, do not allow water to
run down the inside surface of the
glass while cleaning. Clean with
mild soap and water, rinse with
clean water and polish dry with
a soft cloth.
Do not use abrasive cleansers,
strong liquid cleaners or oven
cleaners on the control panel—
they will damage the finish.
\Jl
tAlW
Brushed Chrome Finish
*u...
v^^icaii me uiuaiicu wiiiuiiic iwp
with warm, soapy water or an all
purpose household cleaner and
immediately dry it with a clean,
soft cloth. Take care to dry the
surface following the "grain.” To
help prevent finger marks after
cleaninp. .snread a thin film nf hahv
---------------------O’ “I
..................................
....
...............................
oil on the surface. Wipe away
excess oil with a clean, soft cloth.
A good appliance wax will help
protect this finish.
_
____
—-----------------J
Burner Grates
Porcelain enaiucleu burner graie.s
should be washed regularly and, of
course, after spillovers. Wash them
in hot, soapy water and rinse with
clean water. Dry the grates with a
cloth—don’t put them back on the
range wet. When replacing the
grates, be sure they’re seated
properly over the burners.
To get rid of burned-on food , soak
the grates in a slightly diluted liquid
cleanser or use a plastic or nylon
scouring pad.
Although they’re durable, the
grates will gradually lose their
shine, regardless of the best care
vr»ii ran oivr thrm Thi« i« Hiir ti-»
J to*
their continual exposure to high
temperatures.
Do not operate a burner for an
extended period of time without
cookware on the grate. The finish
on the grate may chip without
.......
.......................... •*’ '***^ *'■
16
%
Page 17

Range Top Burners
Drip P^ns
The holes in the burners must be
Kcpi Clean ai an nines lui jjiupci
ignition and an even, unhampered
mame.
Clean the burners routinely and
especially after bad spillovers
which could clog these holes.
Burners lift out for cleaning.
Note: A screw holds each of the
burners in place to keep them from
wobbling around during shipment.
Remove and discard the shipping
To replace burners:
L Slip the air shutter over the gas
valve orifice.
JL^uwci iiic uuiiici ct5:)cmuiy
and hook the tabs in the slots in the
burner support.
3. Be sure both tabs are in their
slots, that the burner sits level and
straight, and that the flash tube
forms a straight line from the
igniter to the burner.
Remove the grates and lift out the
chrome drip pans. Wash them in
hot, soapy water. Rinse them with
clean, hot water and polish them
dry with a cloth. Never use
abrasive cleaner or steel wool—
they’ll scratch the surface. Instead,
soak the drip pans for about 20
minutes in slightly diluted liquid
cleanser or mild solution of
ammonia and water (1/2 cup of
ammonia to one gallon of water).
After soaking, wash them in hot,
cr»imv u/ntpr Rincp with rlpan wafpr
and polish with a clean, soft cloth.
Do not attempt to clean the drip
pans in the self-cleaning oven.
When replacing drip pans, the
notch on the rear pan and the notch
on the front pan should meet in the
middle. •
Lift-Up Cooktop
Clean the area under the cooktop
often'. Built-up soil, especially
grease, may catch fire.
1. Grasp burner head and tilt it
to the right to release the two tabs
from slots in the burner support.
assembly, then pull away from the
front of the range to free the air
shutter from the gas valve orifice.
To remove burned-on food, soak
the burner in a solution of a product
used for cleaning the inside of coffee
makers. Soak the burner for 20 to
rinse off completely, scrub it with
soap and water or a mild abrasive
cleanser and a damp cloth.
Do not attempt to clean burners in
an automatic dishwasher. Loosened
food soil can clog burner holes,
and the caustic action of the
dishwasher detergent can damage
thp, hnrnp.r heads.
Before putting the burner back, dry
if fhnroiiphiv bv settine it in a warm
..
.............
............
o—J ^J --------------------------------CJ - -
oven for 30 minutes.
To make cleaning easier, the entire
cooktop may be lifted up and
suDDorted in the ud position.
Be sure all burners are turned off
r*otcinrr T'llAn
remove the grates and drip pans,
grasp the two front burner wells
and lift up. Dual support rods will
hold the cooktop up while you
clean underneath it.
After cleaning under the cooktop
with hot, mild soapy water and a
clean cloth, lower the cooktop. Be
careful not to pinch vour fingers.
17
Page 18

Care and Cieaniiw
Removable Oven Bottom
The oven bottom can be removed
to make cleaning easier after heavy
spillovers and to enable you to reach
ШС UVCIl OUI IlCI .
É
Unlock
To remove:
1. Slide the tab at the center front
of the oven bottom to the left,
2. Lift the oven bottom up and out.
To replace:
1. Slip the oven bottom into the
oven so the tabs in the rear of the
oven bottom fit into the slots in the
oven back.
2. Lower the front of the oven
bottom into place and slide the
front tab to the right to lock the
oven bottom into place.
Lock
1 he oven bottom has a porcelain
enamel finish. To make cleaning
easier, protect the oven bottom
from excessive spillovers. This is
particularly important when baking
a fruit pie or other foods with high
acid content. Hot fruit fillings or
iuuud uiai aic; aviu lu wtjiivwiii duuii
as milk, tomato or sauerkraut, and
sauces with vinegar or lemon juice,
may cause pitting and damage to
the porcelain enamel surface.
To protect the oven bottom surface,
place a piece of aluminum foil
slightly larger than the baking dish
or a small cookie sheet on a lower
shelf or under the baking dish to
catch any boilovers. It should not
completely cover the shelf as this
would cause uneven heat in the
oven. Aluminum foil should not be
placed on the oven bottom.
If a spillover does occur on the
oven bottom allow the oven to coo!
first. You can clean the bottom with
soap and water, a mild abrasive
cleanser, soap-filled abrasive pads
or use the self-clean cycle.
Lift-Off Oven Door
The oven door is removable to
make the interior more accessible
during replacement of the lamp bulb.
To remove the door, open it a few
inches to the special stop position
that will hold the door open. Grasp
firmly on each side and lift the door
straight UD and off the hinges.
--------
I' • • w* -
Note: Be careful not to place hands
between the spring hinge and the
oven door frame as the hinge could
snap back and pinch fingers.
To replace the door, make sure the
hinges are in the “out” position.
Position the slots in the bottom of
the door squarely over the hinges.
' I 'Vk T '
illCll luwci me uvui aiiKA
evenly over both hinges at the same
time. If hinges snap back against
the oven frame, pull them back out.
Page 19

Oven Shelves
Oven Light Bulb
Oven shelves may be cleaned with
a mild abrasive cleanser iollowing
iianutacturer’s directions. After
leaning, rinse the shelves with
clean water and dry with a clean
cloth.
To remove heavy, burned-on soil,
soapy metal pads may be used
following manufacturer’s directions.
After scrubbing, wash with soapy
water, rinse and drv.
Broiler P^n & Rack
After broiling, remove the broiler
rack and carefully pour off the
grease. Wash and rinse the pan and
rack in hot, soapy water.
If food has burned on, sprinkle
the rack while hot with detergent
and cover with wet paper towels or
a dish cloth. That way, burned-on
foods will soak loose while the
meal is being served.
Do not store a soiled broiler pan
and rack in the oven. Do not clean
in self-cleaning oven.
The light bulb is located in the
upper right corner of the oven.
Before replacing the bulb,
disconnect electric power to the
range at the main fuse or circuit
breaker panel or unplug the range
bulb cool completely before
removing it. Do not touch a hot
-
—^ — - - - - - - -
bulb with a damp cloth. If you
do, the bulb will break.
To remove:
• Remove the 3 screws in the lamp
cover.
• Detach lamp cover and remove
bulb.
To replace:
• Put in a new 40-watt appliance
bulb. (Note: A 40-watt appliance
bulb is smaller than a standard
40-watt household bulb.)
• Install lamp cover. Replace 3
screws and tighten, making sure
® Reconnect electrical power to
_
_
me laugc.
-----------------------------------_ -----------------
19
-----------
=
asBi
Page 20

Саге and Cleaning (continued)
Operating the Self-Cleaning Oven
Programmed Cleaning Time:
3Vz hours
Prepare the Oven Before Setting the Controls
The range must be completely cool
in order to set the self-clean cycle.
Step 1:
Remove the broiler pan, broiler
rack, all cookware and any
(Oven shelves may be left in oven.
Note; Shelves will discolor after
the self-clean cycle.)
Step 2:
Remove the oven bottom panel (see
page 18) if it is excessively soiled.
Clean it and put it back in the oven.
Too much soil on oven bottom may
cause smoking during the cleaning
cycle. The bottom must be in place
during the self-clean cycle.
Step3:
Clean spatters or soil on the oven
front frame (A), under the front
edge of the cooktop, the door liner
outside the door gasket and the
front edge of the oven cavity (about
1 " into thf* ovpn^ T Tqp Hotprapnt
and hot water with a soap-filled
steel wool pad, then rinse well with
a vinegar and water mixture. This
will help prevent a brown residue
iiuiii luiiimig wiicu luc uvcii la
heated. Buff these areas with a
dry cloth.
Do not lot шяГр.г rnn down thrniiah
---
— ^
..................
...
openings in the top of the door (B).
......
— -------------
.........
....
c^iean tne aoor gasKet tc.) using a
clean sponge to soak the soiled area
with hvdropen neroxide. Reneated
"
--------
--J
--------—----------I-------
----------------
--------1---------------
soaking may be needed depending
on the amount of soil. Frequent
cleaning will prevent excessive soil
build up. Do not rub the door
-----
FiK/arrrlocc mof^riol /лГ
^ixv> X 1 «../wxxxxuvwx icxx v/t
the gasket has an extremely low
resistance to abrasion. An intact
and well-fitting oven door gasket is
essential for energy-efficient oven
operation and good baking results.
If you notice the gasket becoming
worn, frayed or damaged in any
way or if it has become displaced
on the door, you should replace it.
Make sure the oven light bulb cover
(D) is in place.
0
■di
A. Oven Front Frame
B. Openings in Door
C. Oven Door Gasket
D. Oven Light Bulb Cover
Step 4:
Close the oven door and make
sure the oven light is off.
Chrome drip pans from the top
of your range should never be
cleaned in the self-cleanino oven.
Oven shelves may be cleaned in the
self-cleaning oven. However, they
will darken, lose their luster and
become hard to slide. Wipe the
shelf supports with cooking oil
after self-cleaning to make shelves
qIìHp mnrp pn^:ilu
Do not use commercial oven
^.icuiici a ui UVCII |Jiuicciuis m
or near the self-cleaning oven.
A combination of any of these
products plus the high clean-cycle
temperature may damage the
porcelain finish of the oven.
Important
The oven door must be closed
and all controls must be set
correctly for the clean cycle to
work properly. To help you
understand how the clean cycle
xi/z-ifL'e t-tno cforrot’ /aÍ*
WWI 14.0« (.XIW>
are noted below.
1 \^ii cpt thp pr»ntrr»lc
2. The words “CLEAN TIME’
ЯГР r^!чnlяvpr^ Turn 5sRT Wnnh
until 3:30 appears. The oven
begins to heat, the door locks
automatically and the word
“LOCK” is displayed.
If the oven door is not closed,
the word “DOOR” is displayed
and the oven beeps continuously.
Close the door, touch C.ANCEL
and begin again.
3. When the 3 Vi hour clean
cycle is over, the word
“CLEAN” goes out and the
oven begins to cool.
4. When the oven temperature
has fallen below the locking
temperature (about 20-30
-
------
-
20
“CLEAN” goes out at the end
of the clean cycle), the word
“LOCK” goes out and the
door can be opened.
Page 21

J'JU
' STOP COOK
TIMER CLOCK TIME CLEAN TIME BROIL BAKE
Set the Oven for Cleaning
The range must be completely cool
in order to set the self-clean cycle.
1. Push the CLEAN button.
direction about 1/2 turn. The display
will show “3:30!’
The words “CLEAN TIME” will
be displayed on the left. Within 20
seconds, the words “CLEAN
LOCK” will be displayed on the
Note: You can find out when the
^1^«—
____________________________________________
cycic Will uc iiiiibiicu oy
the STOP TIME button.
iii^wuiu jL/wv/rv Id uiopiayc^u
‘<r\rAr\D” ir. Al^^irxxf^A
hen you try to set a clean cycle
m
ith thè door òpen or when thè
oven temperature \s too high.
] 1
____
To Set a Delayed Start
1. Push STOP TIME button.
Turn QinT L-nr\K tim#» oTHqx/
X VAA Al JL IVAAV/«^ VV/ VIAAAW W1 VAUJT
when you wish cleaning to be
completed (must be more than
3 Vi hours later than current time
of day) .
3. Push the CLEAN button.
4i Turn SET knob in the clockwise
direction about 1/2 turn.
The words “DELAY CLEAN” will
be on in the display until the clean
cycle starts. After the clean cycle
starts, the word “CLEAN” will be
on in the display.
Note; During a delayed self-clean
operation you can find out when
thf» nvpn tiirnc nn hv niichiriCT QnH
................................................
holding the CLEAN button.
-...................VA11\«
To Stop a Clean Cycle
1. Press the CANCEL button.
2. Wait until the oven has cooled
below locking temperature (about
20-30 minutes) and the word
“LOCK” is off in the display.
You will not be able to open thè
door right away unless thè oven
temperature is at a safe level. If
yuu uaiiliut v^pv^ii L11& uuui
immediately after the word
“LOCK” goes off, wait one
minute and try again.
After Self-Cleaning
1„ When a clean cycle is finished,
the word “CLEAN” will be off in
the display.
2. Wait until the oven has cooled
below locking temperature (about
20-30 minutes) and the word
“LOCK” is off in the display.
You will not be able to open thè
door unless thè oven temperature
..
_____
Ti'
la. cu a saie icvci. ii yuu eaimui upcii
the oven door immediately after the
word “LOCK” goes off, wait about
one minute and try again.
You may notice some white ash
in the oven. Just wipe it up with
a damp cloth.
If white spots remain, remove them
with a soap-filled steel wool pad.
Be sure to rinse thoroughly with a
l/in^rrof Qnrl \I/Otikr mivtllfia TTVlOCO
▼ XAAV'^UX Ulivi TVUXWX llll/VVVlXW* X. llV/k3V/
deposits are usually a salt residue
that can not be removed by the
clean cycle.
If the oven is not clean after one
clean cycle, repeat the cycle.
____________________
i
21
(continued next page)
Page 22

Саге and Cleaning
Operating the Self-Cleaning Oven (continued)
questions ana answers
Q. if my oven clock is not
working, can I still self-clean
my oven?
A. No. Your Automatic Oven
Timer uses the range ciock to heip
start and stop your self-cleaning
wjw.w.
Q. Can Í use commercial oven
cleaners on any part of my
self-cleaning oven?
A r\ir r'/^ofmrrc
be used around any part of this
oven. If you do use them and do not
wipe the oven absolutely clean, the
residue can scar the oven surface
and damage metal parts the next
Ulll^ c^vwii i:> auiv^xiiiaLiwcijii^
cleaned.
Q. Can I clean the Woven Gasket
A. Yes, but caicfully, and only
r‘]f^an
еп/лпст#» tr» thf»
h O
11 ca
soiled area with hydrogen peroxide.
See page 20.
rv VA/hot cKrkiilrl ¥ Hr» if Avr>AccIvr»
w
▼ aBUa. kjsBvrua%«
smoking occurs during cleaning?
A. This is caused by excessive soil.
Press the CANCEL button. Open
windows to rid room of smoke.
Wait until the oven has cooled
(about 20-30 minutes) and the word
“LOCK” is off in the display. Wipe
iin the» i»vr‘i»cc cr»il ar.fl rpcpt thp
vaj^ vaiv' a www
clean cycle.
Q. Is the “crackling” sound I
hear during cleaning normal?
A. Yes. This is the sound of the metal
heating and cooling during both the
cooking and cleaning functions.
M. MM.
W
O* Should ttiere De any oaor
during the cleaning?
A. Yes, there may be a slight odor
UUllll^ lii^ lildi iv^vv wiWraiiiiigo.
r'%1 « n rvo
Failure to wipe out excessive soil
might also cause a strong odor
when cleaning.
Q. What causes the hair-like
lines on the enameled surface of
my oven?
A. This is a normal condition,
resulting from heating and cooling
during cleaning. These lines do not
affect how your oven performs.
Q. Why do I have ash left in my
oven after cleaning?
A. Some types of soil will leave
a deposit which is ash. It can be
removed with a damp sponge or
cloth.
Q. My oven shelves do not slide
easily. What is the matter?
A. After many cleanings, oven
shelves may become so clean they
do not slide easily. If you W'iSh
shelves to slide more easily,
dampen fingers with a small
amount of cooking oil and rub
lightly over sides of shelf where
they contact shelf supports.
Q. My oven shelves have become
gray after the self-clean cycle. Is
this normal?
A. Yes. After the self-clean cycle,
the shelves may lose some luster
and discolor to a deep gray color.
Page 23

I r'ART
A 1 O 110T?
IKJ COIL
^ “ . ilt i P.«i and Rack
S'
Control Knobs
Outside Glass Finish
.Metal, including
Side Trims,
Trim Strips and
RriichpH r’hmmí»
Cooktop
Porcelain Enamel
including
Oven Frame,
inside Oven Door
and Removable
Oven Bottom
Oven Gasket
® Soap and Water
• Soap-Filled Scouring Pad
® Plastic Scouring Pad
• Mi id Soap and Water
• Soap and Water
* Soap and Water
• Paper Towel
o P>r\;
• Soap and Water
® Hydrogen Peroxide
Drain fat. cool pan and rack slightly. (Do not let soiled pan and rack stand in
oven to cool.) Sprinkle detergent on rack and pan. Fill pan with warm water and
spread cloth or paper towel over rack. Let pan and rack stand for a few minutes.
Wash: scour if necessary. Rinse and drv. OPTION: Clean pan and rack in
dishwasher. DO NOT CLEAN IN SELF-CLEANING OVEN.
Puil off knobs. Wash gently blit do riot sOak. Dry and rctiirn conirois to range.
Wash all glass with cloth dampened in soapy water. Rinse and polish with a dr>'
cloth. If knobs are removed, do not allow water to run down inside surface of
glass while cleaning.
Wash, rinse, and then polish with a dry cloth. DO NOT USE steel wool,
abrasives, ammonia, acids, or commercial oven cleaners which may damage
the finish.
Avoid cleaning powders or harsh abrasives which may scratch the enamel.
If acids should spill on the range while it is hot. use a dry paper towel or cloth
to wipe up right away. When the surface has cooled, wash and rinse.
For other spills, such as fat spatterings, etc., wash with soap and water when
cooled and then rinse. Polish with a dry cloth.
Soak with hydrogen peroxide. Frequent soaking helps prevent soil build-up.
Do not rub. See self-clean section for more information.
^ Oven Liner
vr
Shelves
® Soap and Water
® Soap and Water
Cool before cleaning. Frequent wiping with mild soap and water will prolong
the time between major cleanings. Be sure to rinse thoroughly.
Shelves can be soaked in dishwasher or cleaned by hand, using soap and water.
Rinse thoroughly to remove any soap after cleaning. Shelves may also be
cleaned in self-cleaning oven, but will lose some luster and discolor.
Chrome-Plated
Drip Pans
• Soap and Water
® Stiff-Bristled Brush
® Soap-Filled Seouring Pad
(No.i-metallic)
Clean as described below or in dishwasher. DO NOT CLEAN IN SELF
CLEANING OVEN as they will discolor. Wipe all chrome drip pans after each
cooking so unnoticed spatter will not burn on next time you cook. To remove
burned-on spatters, use any or all cleaning materials mentioned. Rub ligh tly
with scouring pad to prevent scratching of the surface.
Burner Grates
.Aluminum
Surface Burners
• Soap and Water
A
____ _________
^ ouup-rmcu OL;c;uiiug rau
^
(Non-metallic)
® Solution for Cleaning
Inside of Coffee Makers
* Soap and Water
* Mild Abrasive Cleanser
® Damp Cloth
Lift out when cool. Soak 5-10 minutes if desired in warm solution of dishwasher
uCiCrgCnt. Scour With ¡Tiaícrials ¡TiCníiOncd hcFC iG rCuiOVC burncd-On fOOd
particles. DO NOT CLEAN IN SELF-CLEANING OVEN.
Wipe off burner heads. If heavy spillover occurs, remove burners from range
(see page 17). Fill a non-aluminum pan with water to cover the burner head.
Boil burner head down in a solution of hot water and product for cleaning inside
of coffee makers, such as Dip-It brand. Remove burner and rinse. Wipe away
any remaining soil with a cloth or soft brush. Drain out water and dry burners in
« -in ----------------------------------------------
a W'ailU UVCll IK JI JK J UUllUl^d IClUllUllg UlClll lU UlC M jr% jr
-----,1------------
---------- ivri ivim’ r<f cam
IN SELF-CLEANING OVEN OR IN DISHWASHER. Do not use all
purpose cleaners, ammonia, powder cleansers or oven cleaners—they can
1_________________________i
scratch or discolor aiuminum.
‘Spi!lage of marinades, fruit juices, and basting m.aterials containing acids may cause discoloration. Spillovers should be wiped up immediately, with
care being taken to not touch any hot portion of the oven. When the surface is cool, clean and rinse.
Page 24

Surface Burner Air Adjustment Shutters
An air adjustment shutter for each
surface burner regulates the flow of
air to the flame.
When the right amount of air
flows into the burner, the flame
will be steady, relatively quiet and
have approximately 3/4" sharp blue
cones. This is usually the case with
factory preset shutter settings.
With too much air, the flame will
be unsteady, possibly won’t burn all
the way around, and will be noisy,
sounding like a blowtorch.
Broil and Oven Burner Air Adjustment Shutters
¿lujuiiliiidii ic^i uiw
broil and oven burners regulate the
flow of air to the flame.
To adjust the flow of air to either
burner, loosen the Phillips head
screw and rotate the shutter to
allow more or less air into the
burner tube as needed.
With not enough air, you won’t see
any sharp blue cones in the flame,
you may see yellow tips, and soot
may accumulate on pots and pans.
The air adjustment shutters set on
the hood of the valves and are
positioned on the burner tubes by
friction fit.
To adjust the flow of air to the
burners, apply a blade-type
screwdriver against the friction-fit
shutters and push to rotate the
shutters, allowing more or less air
into the burner tubes as needed.
The air adjustment shutter for the
top (broil) burner is in the center of
the rear wall of the oven.
The shutter for the bottom (oven)
burner is near the back wall behind
the storage drawer.
The flame for the top (broil)
burner should be .steady with
approximately 1-inch blue cones
and should not extend out over the
—4--
uuiMC cugc.^.
To determine if the bottom (oven)
burner flame i.s proper, remove
the oven bottom (sec page 18) and
the burner baffle. The flame should
have 1/2" to 3/4" blue cones with no
yellow tipping. When the baffle is
back in place, the flame will resettle.
—
24
Page 25

Theniìosiat
Act inst lìieiìt
he temperature in your new range
been set correeiiy at the iaetory,
o be sure to Ibliow the recipe
inperatures and times the first few
Times yt)u bake in your new oven.
If you think thet)ven should be
hotter or cooler, you can adjust it
yourself. To decide how much to
change the temperature, .set the oven
temperature 25°F. higher or lower
than the temperature in your recipe,
then bake. The results of this tc.st
should give you an idea of how
itiUch the temperature should be
chantied.
To adjust temperature;
I. Push the BAKE button.
2. Select a temperature between
.5()()°F. and 55()Ts with the SET
knob.
3. Quickly (within two .seconds,
before the BAKE function energizes)
push and hold the BAKE button for
about 5 seconds.
The display will show number
of degrees difference between the
i^rioin'il f';if'tnrv tf‘mnf*rMtiirf‘ «soffino
-----------
---
and the current temperature setting.
If the oven temperature has never
been adju.slcd, the display will
read 00.
4. Turn the SET knob to adjust the
temperature in 5°F. steps. You can
rai.se it 35°F. or lower it 35°F A
minus sign (-) before the number
means that t.he oven will be cooler
by the displayed amount of degrees.
If the control beeps and flashes, push
the CANCEL button and start over.
5. When you have made the desired
adju.stment, push the CLOCK
button to go back to the time of day
display or to use your oven as you
would normally.
iwT_A_. 'T'l___i:__
I’Nuie; .1 ne aujusiiiicni ucsuilucu
_____
<. j__^
_
above will not change the self-clean
temoerature.
25
Page 26

Qoestions?
Use This .Problem Solver
P10BLEM
TGP BURNERS
DO N01’LIGHT
SURFACE BURNER
KNOBS WILL NOT
TURN
OVEN DOES NOT
COOK PROPERLY
POSSIBLE CAUSE AND/OR WHAT TO DO
® Make sure the electrical plug is plugged into a Ih'e, properly grounded power outiet. ^
® Gas supply not connected or not turned on.
^ Check for power outage.
® Fan silting On burner grate may be paitially blocking the free air Oovv needed for
combustion. Remove pan and try again.
® Burner holes on side of burner may be clogged. Remove and dean them.
® Burners not seated properly on burner supports. Reinstall them—see page 17.
® To turn from OFF position, push the knob in and then turn.
® Make sure thermostat capillary bulbvS (located in upper portion of oven) are securely
held by the mounting clips, are not touching oven sides, and are not coated with anything.
« Aluminum foil being used impfoperiy in oven.
® Oven vent blocked on top of range.
® Incorrect cookware being used. Check each cooking section for cookware tips.
® Qygn hQttQm nnt securely seated in position.
® Electronic Controls set incorrectly. Review pages 10 and 11.
® Check common baking, roasting and broiling problems on pages 12-15.
CLOCK AND
MINUTE/SECOND
TIMER DO NOT WORK
OVEN LIGHT DOES
NOT COME ON
OVEN WILL NOT
SELF-CLEAN
STRONG ODOR
îf yoÿ Fieed iFiore lîelp.. .call, toll free:
GE Answer Center®
fililí
consumer information service
® Make sure the electrical plug is plugged into a live, properly grounded power outlet.
© Check for power outage. i
® Bulb may be loose or burned out.
® Electrical plug must be plugged into a live power outlet.
© STOP TIME must be more than 3 Vi hours later than START TIME.
® Oven temperature is too high to set self-clean operation. Allow the range to cool to
room temperature.
® Improper air/gas ratio in oven. Adjust oven burner air shutters—see page 24.
26
i -1
V J
Page 27

If M)11 Need Servi
T(i obtain sci'N'icc. see your warranty
on the baek page ot this book.
We're proud ot our serviee and
want you to be pleased. It tor some
reason you are not happy with the
service you receive, here are three
steps to tbllow for further help,
FIRST, contact the people who
serviced your appliance. Explain
why you are not pleased. In most
cases, this will solve the problem.
NEXT, if you are still not pleased,
write all the details—including
your phone number—to:
Manager, Consumer Relations
GE Appliances
Appliance Park
L ouisvillc. Kentucky 40225
FINALLY, if your problem is still
not resolved, write:
Major Appliance
Consumer Action Panel
20 North Wacker Drive
Chicago, Illinois 60606
' - -j---------- ---
-b--
27
Page 28

YOUR GENERAL ELECTRIC RANGE
Save piwOf of original purchase date such as your sales slip or cancelled check to establish warranty period.
WHAT IS COVERED
WARRANTY
FULL ONE-YEAR WARRANTY
For one year from date of original
purchase, we will provide, free of
charge, parts and service labor
in your home to repair or replace
any part of the range that fails
because of a manufacturing defect.
This warranty is extended to
the original purchaser and any
Cl ir'i'OoHinn n\/unor fnr nrnrjiirtc
purchased for ordinary hom e use
in the 48 mainland states, Hawaii
and W ashington, D.C . in Alaska the
warranty is the sam e except that it is
LIMITED because you must pay to
ship the product to the service shop
or for the service technician’s travel
^notc tr> \ir\t tr hnmo
All warranty service will be provided
by our Factory Service Centers or
by our authorized Customer Care®
servicers during normal w orking
1 fV^UI o.
Look in the White or Yellow Pages
of vour teleohone directorv for
GEN ERAL ELECTRIC COMPANY,
GEN ERAL ELECTRIC FACTORY
ocDv/ir^c niCMCDAi Cl tznTOin
HOTPOIN T FACTORY SERVICE or
GEN ERAL ELECTRIC CUSTOMER
CAR E® SERVICE.
.vj . .V...
iro
L-UL.^!
J
WHAT IS NOT COVERED
• Service trips to your home to
teach you how to use the product.
Read your Use and Care material.
If you then have any questions
about operating the product,
please contact your dealer or our
Consumer Affairs office at the
ut;iuw, ui uctii, luii
GE Answer Center®
800,626,2000
consum er information service
• Replacement of house fuses or
resetting of circuit breakers.
• Failure of the product if it is used
for other than its intended purpose
Or used cOmmefCiaiiy.
• Dam age to product caused
by accident, fire, floods or acts
of God.
WARRANTOR IS AfOT RESPONSIBLE
FOR CONSEQUENTIAL DAMAGES.
® Imnrnnpr in.QtiîlIfltinn
If you have an installation problem ,
contact your dealer or installer.
You are responsible for providing
adequate electrical, gas, exhausting
and other connecting facilities.
Some states do not allow the exclusion or limitation of incidental or consequential damages, so the above limitation or exclusion
max/ n/^f orxnix/ frx \/m i Thie vA/arrantv/ ni\/oc uru i enooifir' lAnal ri/^hfc onrl x/^m i max/ alcrx hax/a /^thor rInHte xA/hi/^h x/arx/ frrxm ctata t/^ ctata
I I I IX./X jr JWMi • lltwr jrwu fl^ll UI IVJ y UU II lujr UIWV/ IIUVUWXIIUI 11^1 IXU VIIIIUII VUIJ IIUIII UlUXW XW WlUXU.
To knoY/ what your legal rights are in your state, consult your local or state consumer affairs office or your state’s Attorney General.
Warrantor: General Electric Company
If further help is needed concerning this warranty; write:
Manager—Consumer Affairs, GE Appliances, Louisville, KY 40225
Dwq. No. 164D1352P224
Pub. No. 49-4992
MNL107(343301)
3-J9
JGSP10GEK
 Loading...