

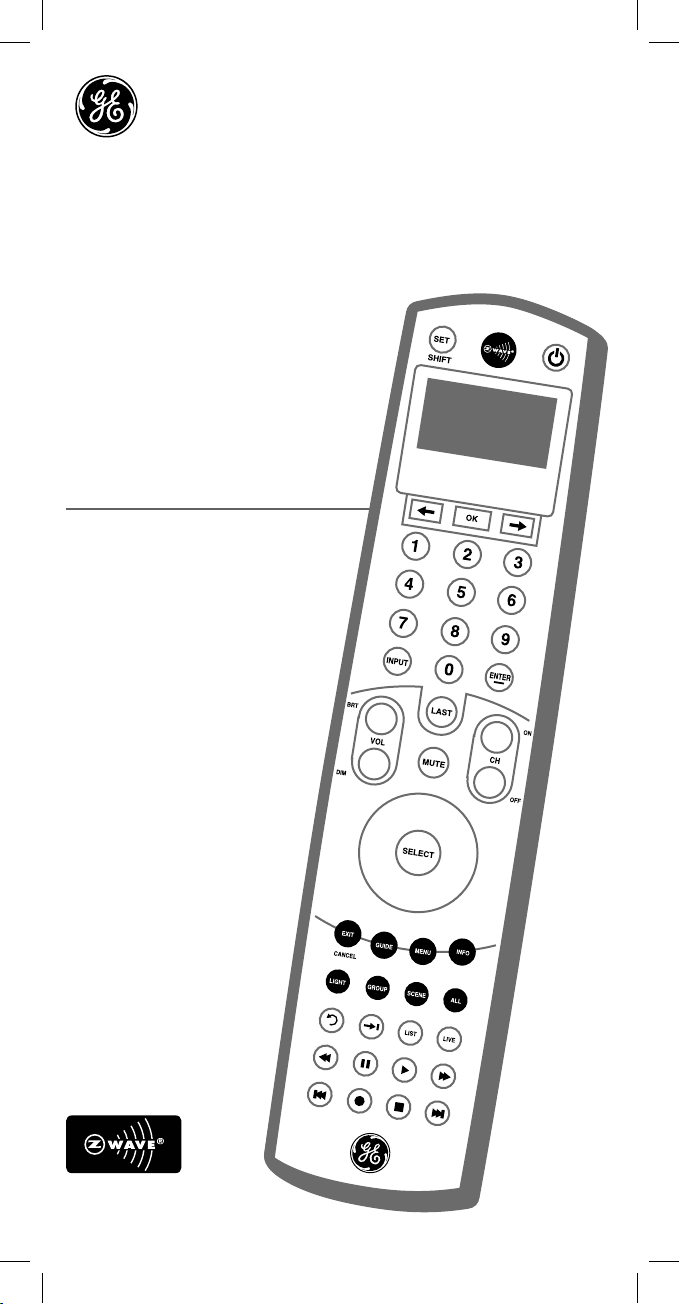
Home Theater Remote
with Z-Wave® Lighting Control
Manage your home
entertainment system and
lighting with one remote!
Controls
12
Audio/Video Devices
45608
and up to
232
Z-Wave Devices
www.easyzwave.com

Table of Contents
Audio/Video Key Chart . . . . . . . . . . . . . . . . . . . . . . . . . . . . . . . . . . . . . . . . . .4
Batteries . . . . . . . . . . . . . . . . . . . . . . . . . . . . . . . . . . . . . . . . . . . . . . . . . . . . . . . . 6
Automatic Time-Out . . . . . . . . . . . . . . . . . . . . . . . . . . . . . . . . . . . . . . . . . . . . 6
Set-Up, Initial A/V Setup . . . . . . . . . . . . . . . . . . . . . . . . . . . . . . . . . . . . . . .6-7
Advanced Functions (Audio/Video) . . . . . . . . . . . . . . . . . . . . . . . . . . . . .10
Set Volume Control (Volume Lock) . . . . . . . . . . . . . . . . . . . . . . . . . . . . . .11
Key Mover . . . . . . . . . . . . . . . . . . . . . . . . . . . . . . . . . . . . . . . . . . . . . . . . . . . . .13
Key Macros . . . . . . . . . . . . . . . . . . . . . . . . . . . . . . . . . . . . . . . . . . . . . . . . . . . .14
Learning . . . . . . . . . . . . . . . . . . . . . . . . . . . . . . . . . . . . . . . . . . . . . . . . . . . . . . .16
Setting the LCD Display’s Contrast . . . . . . . . . . . . . . . . . . . . . . . . . . . . . .18
Adjusting the LCD Timer . . . . . . . . . . . . . . . . . . . . . . . . . . . . . . . . . . . . . . . .18
Resetting the Remote . . . . . . . . . . . . . . . . . . . . . . . . . . . . . . . . . . . . . . . . . .19
Z-Wave
Z-Wave Terminology . . . . . . . . . . . . . . . . . . . . . . . . . . . . . . . . . . . . . . . . . . .21
Wireless Range . . . . . . . . . . . . . . . . . . . . . . . . . . . . . . . . . . . . . . . . . . . . . . . .22
Z-Wave Key Chart . . . . . . . . . . . . . . . . . . . . . . . . . . . . . . . . . . . . . . . . . . . . .24
Z-Wave Setup . . . . . . . . . . . . . . . . . . . . . . . . . . . . . . . . . . . . . . . . . . . . . . . . .26
Devices/Lights/Nodes . . . . . . . . . . . . . . . . . . . . . . . . . . . . . . . . . . . . . . . . . .26
Groups . . . . . . . . . . . . . . . . . . . . . . . . . . . . . . . . . . . . . . . . . . . . . . . . . . . . . . . .29
Scenes . . . . . . . . . . . . . . . . . . . . . . . . . . . . . . . . . . . . . . . . . . . . . . . . . . . . . . . .30
Labels . . . . . . . . . . . . . . . . . . . . . . . . . . . . . . . . . . . . . . . . . . . . . . . . . . . . . . . . .32
All-On and All-Off Control . . . . . . . . . . . . . . . . . . . . . . . . . . . . . . . . . . . . . .33
Events . . . . . . . . . . . . . . . . . . . . . . . . . . . . . . . . . . . . . . . . . . . . . . . . . . . . . . . . .34
Thermostats . . . . . . . . . . . . . . . . . . . . . . . . . . . . . . . . . . . . . . . . . . . . . . . . . . .35
Advanced Configuration . . . . . . . . . . . . . . . . . . . . . . . . . . . . . . . . . . . . . . .37
Creating a Secondary Controller . . . . . . . . . . . . . . . . . . . . . . . . . . . . . . . .38
Controller Swap (Transfer Primary) . . . . . . . . . . . . . . . . . . . . . . . . . . . . .40
Receiving Network and Device Information . . . . . . . . . . . . . . . . . . . . .41
Resetting Your network . . . . . . . . . . . . . . . . . . . . . . . . . . . . . . . . . . . . . . . .42
Recovering Network Information . . . . . . . . . . . . . . . . . . . . . . . . . . . . . . .42
Network Update . . . . . . . . . . . . . . . . . . . . . . . . . . . . . . . . . . . . . . . . . . . . . . .43
Interoperability with Z-Wave Devices . . . . . . . . . . . . . . . . . . . . . . . . . . .43
Warranty . . . . . . . . . . . . . . . . . . . . . . . . . . . . . . . . . . . . . . . . . . . . . . . . . . . . . .44
®
Overview . . . . . . . . . . . . . . . . . . . . . . . . . . . . . . . . . . . . . . . . . . . . .20
Setup Codes for Compatible Brands
of Audio/Video Devices . . . . . . . . . . . . . . . . . . . . . . . . . . . . . . . . . . . . . . . .45
2

Introduction
Thank you for purchasing the GE model 45608 Remote Control.
This remote allows you to control up to 12 Audio/Video devices as
well as your Z-Wave Home Lighting Control network.
A Z-Wave home control network can include up to 232 Z-Wave
enabled devices. You can control up to 18 individual Z-Wave
lights, 18 groups of lights and 18 scenes for task or mood lighting.
Groups can include up to 232 Z-Wave devices and each scene
can include up to 32 Z-Wave devices. Lights can be included in
multiple groups. Scenes can include lights from
different groups.
Key Features include:
• Easy to use LCD menu system
• Backlit LCD and keys
• Learning function for audio/video devices not in
the IR code library
• Programmable Key Macros to perform multiple functions with
the press of one button
• Volume Control Lock lets you assign volume & mute functions
to a primary device like your stereo receiver
• Key Mover allows you to copy keys around the remote control
or between A/V devices
• Timed events allow you to turn On/Off a Z-Wave light, group or
scene at a programmed time.
• Control of Z-Wave enabled thermostats for your HVAC system.
• Z-Wave Light, Group & Scene labeling
• Supports Advanced Configuration for Z-Wave devices
For best results, please read all of the instructions before
programming and using this remote. Keep this guide for
future reference.
3

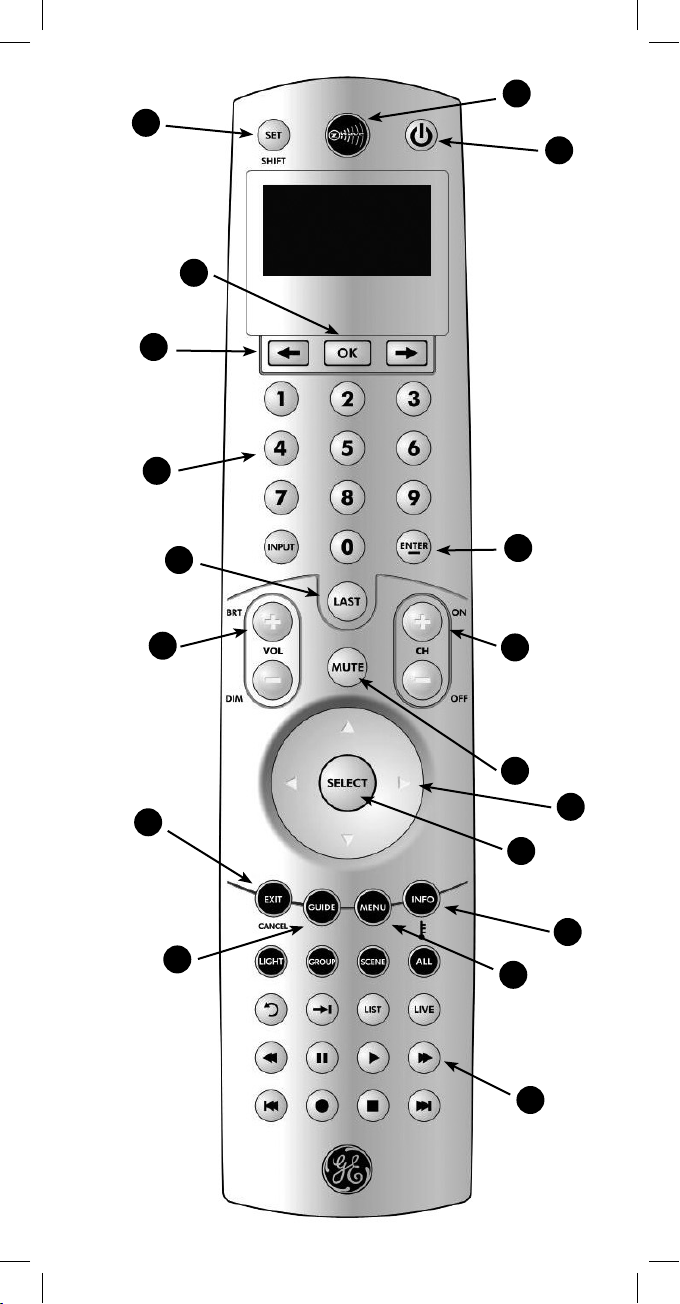
Audio/Video Key Chart
A. SET – Press & hold to enter setup mode. When in setup mode,
press & release to back up one level in the setup menu or press
& hold to cancel setup.
B. ARROWS – Scroll left or right to highlight desired menu item.
Highlighted menu item in center of display is active.
C. OK – Press & release to select highlighted menu item
D. NUMBER KEYS – Dependent upon Audio/Video device being
controlled. Examples: TV - channel selection; Receiver – input
selection
E. LAST – Selects last channel viewed
F. VOLUME UP & DOWN – Press & hold to adjust volume
G. EXIT / CANCEL – Closes program guide or device menus
H. GUIDE – Activates On-screen program guide for active video
I. Z-WAVE KEY – This key cycles the remote between Z-Wave
and A/V modes. In A/V mode, the green LED beneath the button
flashes to indicate an IR command being transmitted.
J. POWER – Turns current device On/Off. This key may be
programmed with a macro to turn multiple A/V devices on or off
with the touch of one button. A macro overrides individual
device control.
K. DASH – Used along with the number keys to enter digital TV
channels. Example: channel 4-1 or 4-2
L. MUTE – Mutes volume on currently selected device or on
primary device if Volume Control Lock is programmed
M. CHANNEL UP & DOWN – Changes channel on
active A/V device
N. CURSOR (ARROW) KEYS – Left, Right, Up & Down keys for use
in navigating on-screen Guides & Menus
O. SELECT – Press & release to select currently highlighted
on-screen Guide or Menu item
P. MENU – Device specific functions for setup.
Q. INFO – Device specific. Displays information on current video
source or program on TV screen
R. CONTROL KEYS – Device specific controls for the active
A/V device
4
I
A
J
C
B
D
E
F
G
H
K
M
L
N
O
Q
P
R
5

Batteries
Four “AAA” Alkaline batteries (not included) are required.
Battery Use and Safety
• Use only fresh batteries of the required size and
recommended type.
• Do not mix old and new batteries or different types of batteries.
• If you do not plan to use the remote for an extended period,
remove the batteries. They can leak chemicals that can destroy
electronic parts.
• Dispose of old batteries promptly and properly.
Do not burn or bury them.
To Install Batteries
1. Open the battery compartment cover (located on the back of
the remote).
2. Note the + and - polarity symbols inside the
battery compartment.
3. Insert the batteries, making sure their polarity matches the
symbols in the compartment.
4. Replace the cover.
NOTE: The LCD screen will display BATTERY LOW to indicate that
the batteries need to be replaced. The remote retains all its user
settings except for the day & time while replacing the batteries.
Battery Conservation
If any key is pressed continuously for 30 seconds the remote will
stop transmission to conserve battery life.
Automatic Time-Out
During programming, the remote will exit programming mode if
30 seconds elapses after the last key press.
If a key is pressed longer than 60 seconds while scrolling through
the menu screen, the remote will time-out.
Setup
1. Make sure the remote is in A/V mode. (Press & release the large
Z-Wave key at the top of the remote to cycle between A/V and
Z-Wave modes .)
2. Press and hold the SET key to enter setup mode.
3. Use the ARROW keys to scroll through the menus and the OK
key to select devices or actions.
6
4. When in setup mode:
• Press and release the SET key to back up one level in
the menu.
• Press and hold the SET key to exit setup mode.
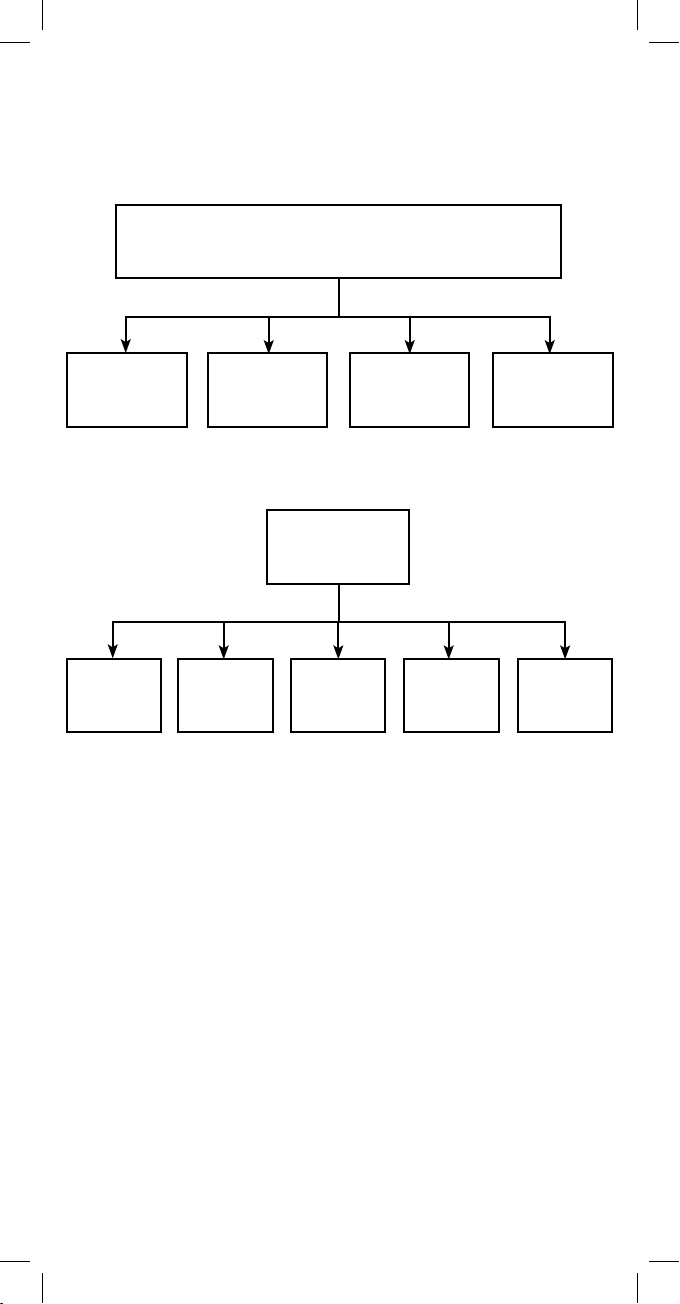
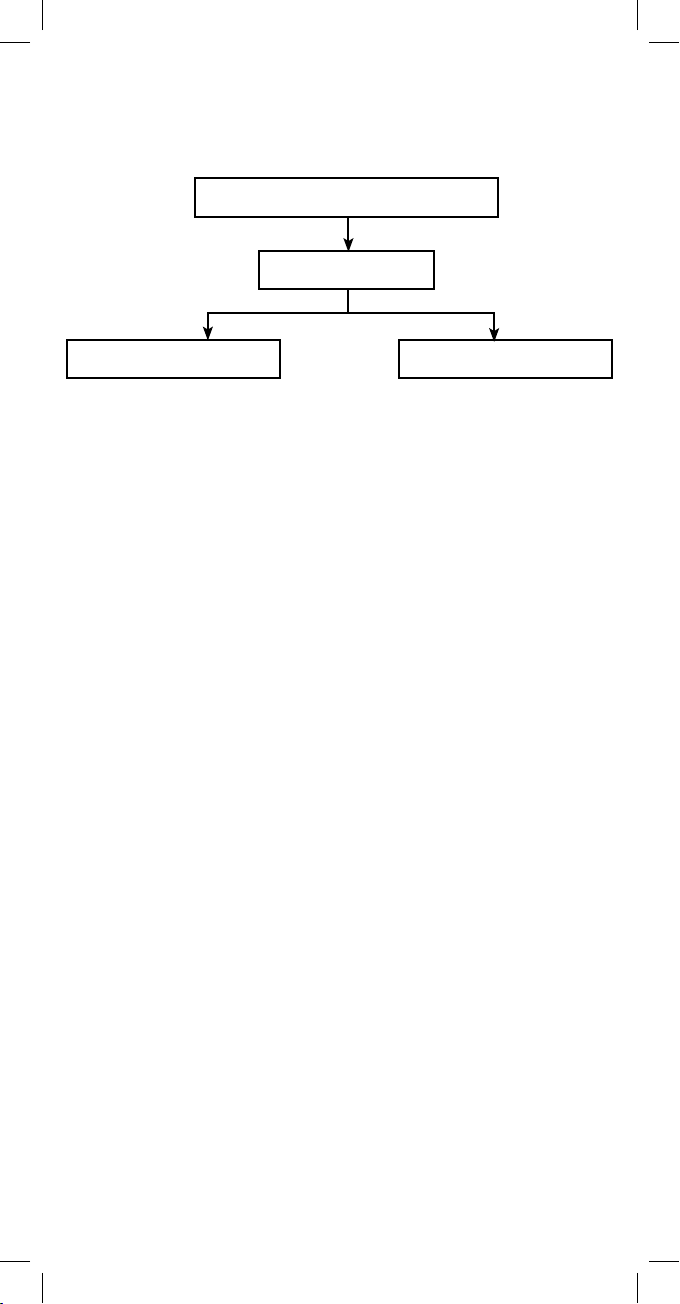
With the remote in A/V mode, press & hold the SET Key
for the following menu options
Initial Setup
Advanced
Functions
About
Z-Wave
Setup
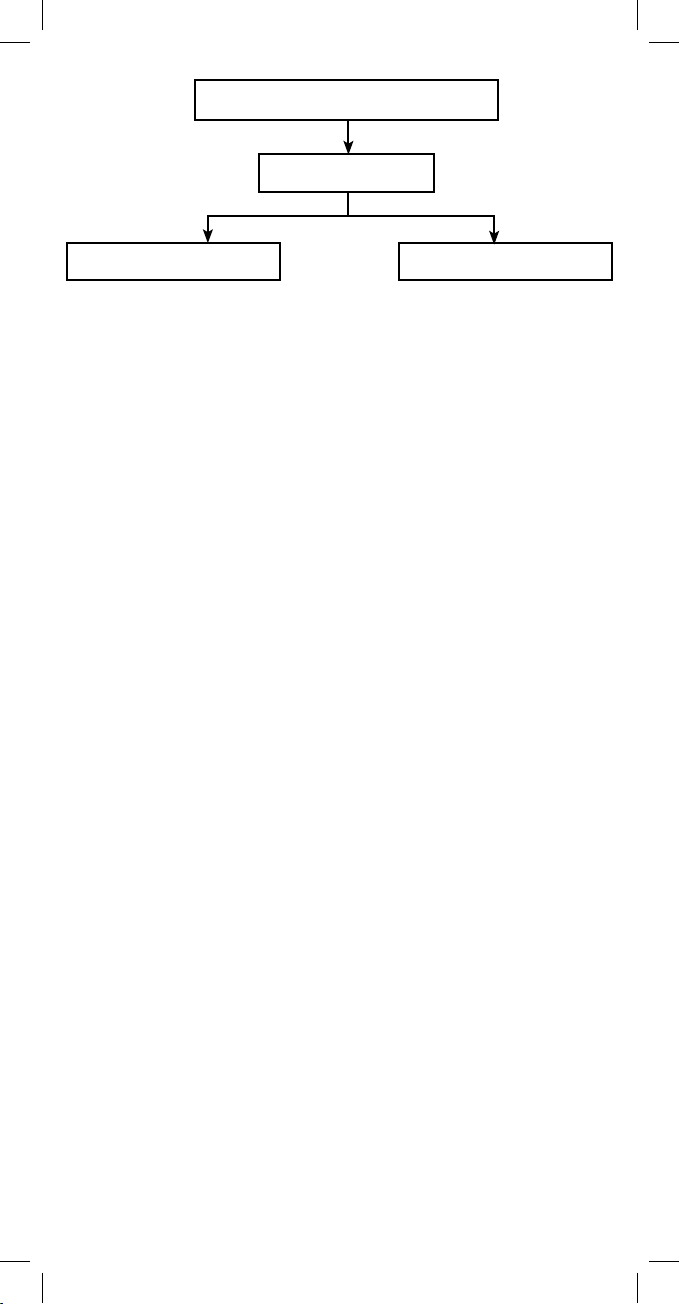
Initial Setup (Audio/Video Devices)
Initial Setup
Add
Device
Note: Most devices can be added by entering its code or searching
for its code as described in the following two sections. (Be sure the
device you wish to add is turned on before adding or searching for
its code.) You also have the option of using your device’s original
remote to teach commands to this remote. This is covered in the
“Advanced Functions” section under the “Learn Function” heading.
Adding a Device by Entering Its Code
You can add a device by manually entering its manufacturer’s
code. See “Manufacturer’s Codes” on page 45.
1. Press and hold SET until the remote displays INITIAL SETUP.
2. Press OK. The remote displays ADD DEVICE. Press OK.
3. The bottom line of the display lists RECEIVER as the first device
you can add. Press OK or use the ARROW keys to scroll to a
different device to add and then press OK.
4. Enter the four-digit code for your device. The LED blinks once
for each digit entry. It blinks twice after you have entered the
final digit.
Change
Device
Code
View
Code
Delete
Device
Replace
Device
7

NOTE: If an invalid code is entered, the LED emits one long blink,
and the LCD displays INVALID.
5. The selected device turns off if the code was successful. You
can also try pressing additional keys on the remote to test
other functions.
6. If the code you entered functions properly for all keys tested,
Press OK to save the code.
7. If the code you entered does not function properly, Press SET
one time and repeat steps 2-6, trying the next available code
from the manufacturer’s code list.
8. If none of the codes listed for your brand/type of device
function properly, you can try searching for its code (next
section) or use the “Learn Function” as described on page 16.
Adding a Device by Searching for Its Code
1. Press and hold SET until the remote displays INITIAL SETUP.
Press OK.
2. The remote displays ADD DEVICE. Press OK
3. The bottom line of the display lists RECEIVER as the first device
you can add. Press OK or use the ARROW keys to scroll left or
right, select a different device to add and then press OK.
4. The remote displays the device name on the top line and Code
Setup on the next line.
5. Use the ARROW keys to slowly scroll through the
manufacturer’s codes for your device type (i.e., Receiver).
When you have selected the correct code, the device will turn
off. If you accidentally scroll past the correct code, you can use
the other arrow key to go back.
6. Press OK to save the code.
7. If none of the codes work for your device, you are offered the
option of using the “Learn Function” (see the instructions for
learning in the “Advanced Functions” section of this manual).
Press OK to learn or SET to go back one level in the menu.
NOTE: If you cannot find the working code or brand for your
receiver, try the codes for Amplifier, and then Misc. Audio.
Scroll left or right to search for the device when the remote
displays ADD DEVICE.
8

Changing a Device Code
NOTE: All settings of the current device (Key Mover, Learning,
and all other user-programmed features) will be retained.
1. From INITIAL SETUP press OK. The remote displays ADD
DEVICE. Use the ARROW keys to scroll to CHANGE DEVICE
CODE. Press OK.
2. The remote displays the device name in the center of the 2nd
line. Use the ARROW keys to scroll to the desired device and
press OK.
3. The four digit code can be entered using the number keys or
you can use the ARROW keys to scroll through the codes for
this type of device (see “Adding a Device by Searching for its
Code” above)
4. If you manually entered the code with the number keys or
found the correct code using the search method, press OK
to save it.
5. If using the search method and none of the codes work for
your device, you are offered the option of using the “Learn
Function” (see the instructions for learning in the “Advanced
Functions” section of this manual) Press OK to learn or SET to
go back one level in the menu.
Deleting a Device
6. From INITIAL SETUP press OK. The remote displays ADD
DEVICE. Use the ARROW keys and scroll to DELETE DEVICE.
Press OK.
7. The remote displays the device name and its code (for example,
CABLE BOX 1376). Use the ARROW keys to scroll to the other
devices you have set up.
8. To delete the displayed device, press OK. The remote displays
ARE YOU SURE? IF SO PUSH OK. Press OK.
9. The remote displays the name of the deleted device (for
example, CABLE BOX 1376 Has Been Deleted).
10
.Press OK to delete another device or SET to exit.
Viewing a Programmed Device Code
1. From INITIAL SETUP press OK. The remote displays ADD
DEVICE. Use the ARROW keys to scroll to VIEW CODE and
Press OK.
2. The first line of the LCD displays the long device name of the
current device. The second line displays the abbreviated name
of the current device in the middle.
3. The third line displays the 4-digit code number (for example
0010) programmed for the current device.
9

4. Use the ARROW keys to view codes of other devices you have
set up.
5. After viewing the codes, press OK or SET to exit.
Replacing a Device
This replaces an existing device with a new device in your remote’s
programming. One example could be replacing your cable box
with a satellite receiver.
NOTE: The new device replaces and overwrites all settings of
the current device (Key Mover, Learning, and all other userprogrammed features). The one exception is with macros. The
new device code replaces the old device code within the macro.
1. From INITIAL SETUP press OK. The remote displays ADD DEVICE.
Use the ARROW keys to scroll to REPLACE DEVICE and Press OK.
2. The LCD displays REPLACE WHAT? on line 1 and the current
device type in the middle of line 2. Use the ARROW keys to scroll
to the device to replace.
3. Press OK to select the device type to replace. The LCD displays
WITH WHAT DEVICE? on line 1 and the current device (for
example, RCV) on line 2.
4. Use the ARROW keys to scroll to the new device type you want
to use.
5. When you have selected the replacement device, press OK.
6. The LCD displays the device code and its default ID. For
example, for a cable box the LCD displays CABLE BOX, CODE
SETUP, 1376. Press OK to complete the code setup and store the
new device.
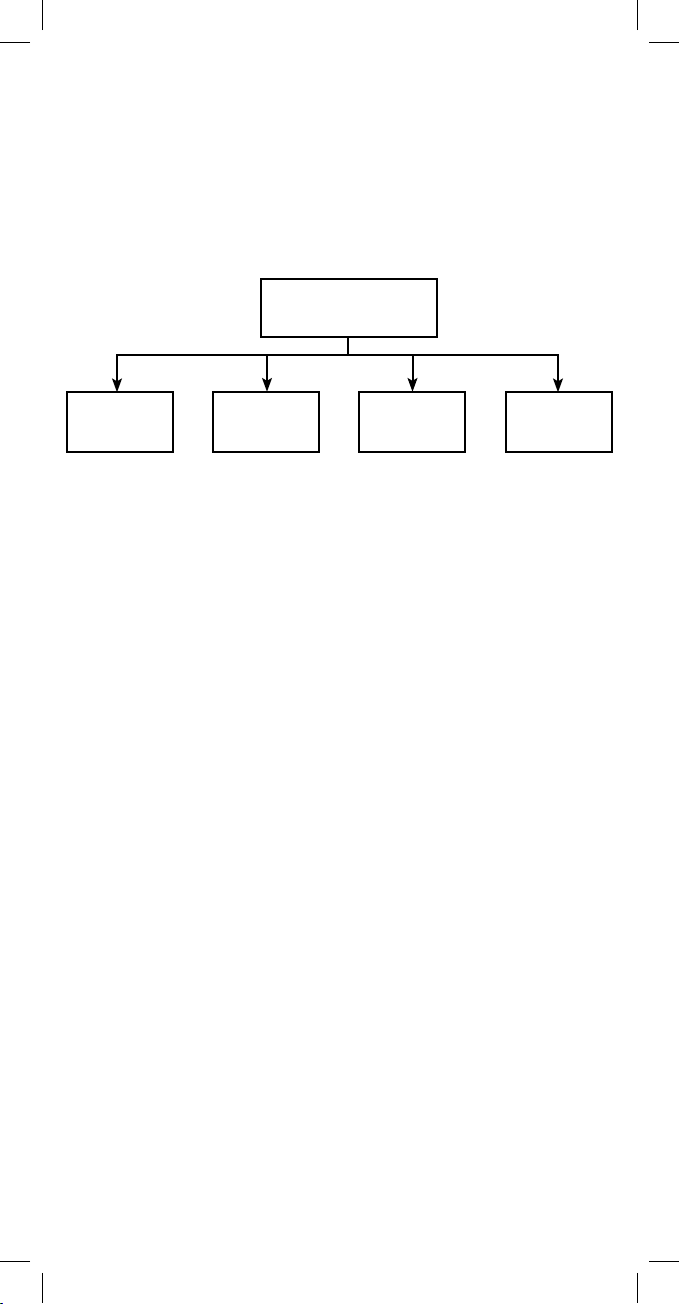
Advanced Functions (Audio/Video Devices)
Advanced Functions
Set
Clock
Remote
To Access the Advanced Functions Menu:
1. With the remote in A/V mode, press and hold the SET key to
enter setup.
2. Use the ARROW keys to scroll to “ADVANCED FUNCTIONS”
and press OK.
10
Reset
Set Volume
Control
Functions
Learn
Key
Mover
Contrast
Key
Macro
LCD
Timer
Set Clock (Day and Time Setup)
1. From ADVANCED FUNCTIONS, highlight SET CLOCK and
Press OK.
2. The screen will display the day, hour, minute and AM/PM with
the day highlighted.
a. Press the CH + or CH - key to change the day.
b. Use the right ARROW key to highlight the hour, minute and
AM/PM and use the CH keys to adjust.
3. When you’ve completed setting the time press OK; the screen
will display SET CLOCK.
4. Use the ARROW keys to highlight a different menu item or
press SET to exit setup.
NOTE: You will need to reprogram the Day & Time when the
batteries are replaced.
Set Volume Control (Volume Lock)
Volume Lock allows you to control the volume of a primary A/V
device when another A/V device is active on the remote. For example, if you use your stereo receiver for the audio while watching
TV or DVDs, you can set the remote to control the volume of your
stereo regardless of which device (TV or DVD) the remote is set
to control. By default, all your devices have independent volume
control. You can perform Individual Volume Unlock on a selected
device to set its volume control for independent operation.
Advanced Functions
Set Volume Control
Lock
Volume
Add Device to
Volume Lock
Remove Device
from Volume Lock
Locking Volume Control to Other Devices
1. From the INITIAL SETUP screen, use the ARROW keys to
highlight ADVANCED FUNCTIONS and Press OK.
2. The remote displays SET CLOCK.
3. Use the ARROW keys to scroll to SET VOLUME CONTROL and
Press OK.
11

4. The remote displays LOCK VOLUME. Press OK.
5. The remote displays USE < > TO SELECT VOLUME SOURCE
THEN PRESS OK.
6. Use the ARROW keys to select the device to be locked. The
remote displays the name of the device and its code (for
example, LOCK VOLUME TO RECEIVER 1158).
7. Press OK. The display changes to VOLUME CONTROL IS NOW
SET TO RECEIVER.
8. The display automatically changes to LOCK VOLUME after a
few seconds. Press SET to exit.
Adding a Device to Volume Lock
1. From LOCK VOLUME, use the ARROW keys to scroll to ADD
DEVICE TO VOLUME LOCK and Press OK.
2. The remote displays USE < > TO FIND DEVICE TO ADD THEN
PUSH OK. Use the ARROW keys to scroll to the device you want
to lock. The remote now displays the name of the device being
locked and the name of the locking device. For example, LOCK
TV2 TO RECEIVER.
3. Press OK. The remote now displays TV2 HAS BEEN ADDEDTO
VOLUME LOCK.
4. The display automatically changes to VOLUME LOCK after a
few seconds. Press SET to exit.
Removing a Device from Volume Lock
1. From LOCK VOLUME, use the ARROW keys to scroll to REMOVE
DEVICE FROM VOLUME LOCK and Press OK.
2. The remote displays USE < > TO SELECT FIND DEVICE TO
REMOVE THEN PUSH OK. Use the ARROW keys to select the
device to remove. The remote now displays REMOVE FROM
VOLUME LOCK and the abbreviated device name (TV2 for
example).
3. Press OK. The remote’s display changes to TV2 HAS BEEN
REMOVED FROM VOLUME LOCK.
4. The display automatically changes to REMOVE DEVICE FROM
VOLUME LOCK after a few seconds. Press OK to remove
another device from Volume Lock, or press SET to exit.
12
Key Mover
Key Mover allows you to copy keys around the remote control,
within a device, or from one device to another.
Advanced Functions
Key Mover
Add Key Mover Delete Key Mover
Copying a Key
1. From ADVANCED FUNCTIONS, use the ARROW keys to scroll
to KEY MOVER. Press OK.
2. The remote displays ADD KEY MOVER. Press OK.
3. The remote displays FIND SOURCE MODE & PUSH OK. On
the bottom line, the remote displays the source device (for
example, SATELLITE). Scroll to the source device for the key
you intend to move. Press OK.
4. The remote displays SELECT SOURCE KEY TO COPY. All keys
except SET, Arrows, and Z-Wave are available for Key Mover.
5. Press the key you wish to copy. The remote displays FIND
DESTINATION MODE & PUSH OK. Scroll to the destination
device for the key you wish to copy. Press OK.
6. The remote displays SELECT DESTINATION KEY & PUSH OK.
Any key except SET, Z-Wave, Arrows and OK is a valid
destination key. Press the destination key and then Press OK.
7. The remote displays Key Mover Saved.
8. The remote displays PUSH OK TO ADD ANOTHER PUSH SET
TO EXIT. Press OK to return to step 3 above or press SET to
exit setup.
Deleting All Copied Keys
This deletes all Key Mover keys for a single mode (device).
1. From the ADD KEY MOVER screen, scroll to DELETE KEY
MOVER. Press OK.
2. The remote displays FIND MODE PUSH OK. On the bottom line,
the device name is displayed (for example, TV).
3. Scroll to the device you wish to delete all copied keys from.
Press OK.
4. The remote displays SELECT KEY TO DELETE OR OK TO
DELETE ALL. Press OK.
13

5. The remote displays DELETING ALL PUSH OK TO CONFIRM.
Press OK.
6. The remote displays ALL MOVED KEYS DELETED PUSH OK TO
DELETE MORE. Press OK to delete keys for a different device or
SET to exit.
Deleting a Single Copied Key
1. From the ADD KEY MOVER screen, scroll to DELETE KEY
MOVER. Press OK.
2. The remote displays FIND MODE PUSH OK. On the bottom line,
the device name is displayed (for example, TV).
3. Scroll to the device you wish to delete the copied keys from.
Press OK.
4. The remote displays SELECT KEY TO DELETE OR OK TO DELETE
ALL. Press the key to delete.
5. The remote displays KEY DELETED PUSH OK TO DELETE
ANOTHER. Press OK to delete another copied key, or SET
to exit.
Key Macros
Key Macros allow the user to program a series of keystrokes to a
single button. For example, you can program a Key Macro on the
POWER button that turns on and off all of your home entertainment equipment with a single press of the POWER button. The Key
Macro function is not available in Z-Wave mode however; Z-Wave
individual light, group or scene commands can be included in
Audio/Video Key Macros. One example of this would be to change
the TV’s input to DVD, change the stereo receiver’s input to DVD,
turn on the DVD player and set room lights to low; all with one
press of the macro key.
When using a macro, the remote transmits the device commands
in sequence. The green LED (beneath the Z-Wave key) blinks once
for each transmitted command. The remote must be aimed at the
equipment during the entire macro sequence.
NOTE: Macro programming overrides the key’s original function in
all modes. However, you can access the key’s original function by
pressing and releasing SET, then the key where the macro is
assigned. The key then sends its original function, not the macro.
14
Advanced Functions
Key Macro
Add Key Macro Delete Macro
Adding a Key Macro:
1. From ADVANCED FUNCTIONS, use the ARROW keys to scroll to
KEY MACRO. Press OK.
2. The remote displays ADD KEY MACRO. Press OK.
3. The remote displays SELECT MACRO KEY. Select any key but
Set, Z-Wave, OK or Arrows (scroll left & scroll right) to store
your macro.
4. The remote displays ENTER THE MACRO SEQUENCE with the
active device highlighted in the bottom line. Use the ARROW
keys to highlight the device for each command.
5. Press the command key that you want to add to the macro.
Note: As soon as you press the first command key, the display
changes to PUSH OK FOR 3 SECONDS TO SAVE. Do not press OK
until you have finished entering all macro commands!
6. To add Z-Wave commands to your macro, press & release the
Z-Wave key to change the remote to Z-wave mode. A small “Z”
will be shown in the upper left corner of the display. Press the
desired light, group or scene mode key, the desired number
key and the On or Off (CH+ / CH-) key to add this command to
the macro. Note: The display does not change to Z-Wave mode
while doing this.
7. Press and release the Z-Wave key to return to A/V mode and
finish programming your macro.
8. When you are finished entering commands for the macro,
press and hold the OK key for three seconds to save your
macro. The remote displays MACRO SAVED and returns to the
KEY MACRO screen.
NOTE: Macros can include up to 30 commands. If you try to
enter more than 30 keys into the macro, the remote displays
MEMORY FULL.
Deleting a Key Macro
1. From ADVANCED FUNCTIONS scroll to KEY MACRO. Press OK.
2. The remote displays ADD KEY MACRO. Scroll to DELETE
MACRO. Press OK.
15
3. The remote displays SELECT MACRO KEY TO DELETE AND
PUSH OK.
4. Once you have pressed a valid macro key, the remote displays
MACRO DELETED CHOOSE ANOTHER OR OK TO EXIT.
5. Repeat steps 2–4 above until you have finished deleting key
macros. Press SET when finished to return to normal operation.
Learning
Your remote can learn approximately 50 functions from other IR
remote controls if you cannot find your device code. (The actual
number of learnable functions will vary since each IR command
requires a different amount of memory.)
NOTE: Learning can not be done in Z-Wave mode.
NOTE: Make sure your original remote controls have fresh
batteries before programming.
NOTE: You must add the device you want to learn first. If you
cannot find a code that works with your device (for example,
RECEIVER), enter a “dummy” code (any four-digit code) so that
RCV is an available device.
Advanced Functions
Learn Functions
Delete Learn KeyAdd Learn Key
1. From ADVANCED FUNCTIONS use the ARROW keys and scroll
to LEARN FUNCTIONS and press OK.
2. The remote displays ADD LEARN KEY. Press OK.
3. The remote displays FIND MODE TO LEARN AND PUSH OK.
The bottom line of the LCD displays the device type (for
example, SATELLITE). Use the ARROW keys to scroll to the
device you want the learned key associated with. Press OK.
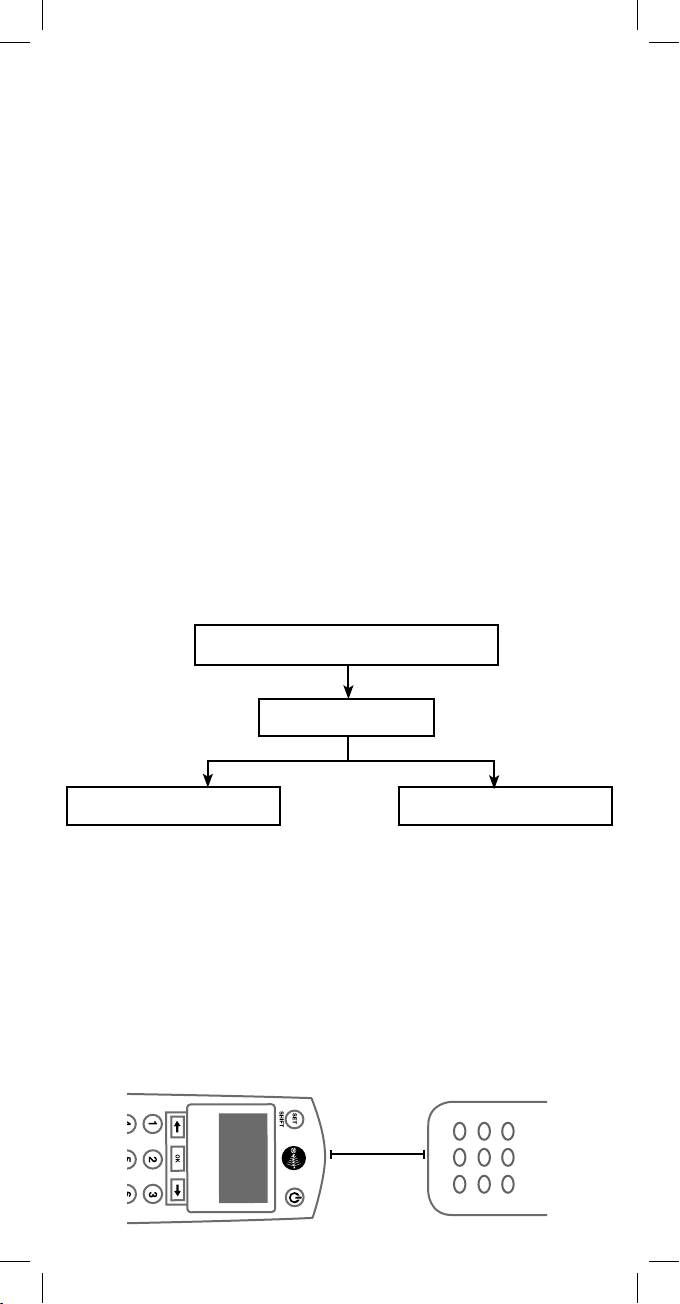
4. The remote displays ALIGN REMOTES PUSH OK. Place the two
remotes as shown in the diagram below and press OK.
2”
16

5. The remote displays SELECT THE KEY TO LEARN TO. All keys
except SET, Z-Wave, OK, or Arrows (scroll left & scroll right)
are available for learning. Press the key you want to teach the
command to.
6. The remote displays WHEN BACKLIGHT TURNS OFF PUSH
TEACHING KEY. The backlight turns off. The display reads
LEARNING NOW! PRESS TEACHING KEY. Press the teaching
key on the original remote control.
7. If Learning is successful, then display and backlight turn back
on. The remote displays SUCCESS! PUSH OK TO LEARN PUSH
SET TO EXIT.
8. Press OK to learn another key or press SET to exit Learning
mode. If you press OK, the remote returns to step 5 above and
is ready to learn another key.
NOTE: If learning fails, the display reads LEARNING FAILED PUSH
OK TO LEARN PUSH SET TO EXIT.
Possible causes for learning failure:
• Your remotes are too close to a UV source (i.e. in sun light,
or close to fluorescent lighting)
• Your remotes are too far apart.
• The teaching remote is an RF (radio frequency) remote.
Teaching remotes must be IR (infrared).
• The remotes’ IR LEDs are not aligned.
• Batteries in one or both remotes may not have a sufficient
charge
Deleting All Learned Keys
To delete all learned keys for a selected device, perform the
steps below:
1. From ADD LEARN KEY use the ARROW keys to scroll to DELETE
LEARN KEY. Press OK.
2. The remote displays SELECT MODE THEN PUSH OK. The
device name is displayed on the bottom line of the display
(for example, TV). Use the ARROW keys to cycle through the
available device types. Press OK.
3. The remote displays SELECT KEY TO DELETE OR PUSH OK TO
DELETE ALL.
4. Press OK. The remote displays DELETING ALL PUSH OK TO
CONFIRM.
5. Press OK. The remote displays ALL LEARNED KEYS DELETED.
PUSH OK TO DELETE MORE.
6. Press SET to exit
17

Deleting a Single Learned Key
To delete a single learned key, follow steps 1–3 above.
Then perform the following steps:
1. Press the key containing the learned function to be deleted. The
remote displays KEY DELETED PUSH OK TO DELETE ANOTHER.
2. Press SET to exit or OK to delete another learned key.
Advanced Functions
LCD TimerContrast
Setting the LCD Display’s Contrast
1. From ADVANCED FUNCTIONS, scroll to CONTRAST. Press OK.
2. The LCD displays CONTRAST SETUP, with 10 blocks to show
the CONTRAST setting. Use the ARROW keys to raise or lower
the setting.
3. Press OK to save.
Adjusting the LCD Timer
You can adjust the LCD timer to control how long your display runs
before it times out and goes blank. The timer can be adjusted in
increments of 10, 20, or 30 seconds.
NOTE: This does not affect backlight settings. The backlight runs
for 10 seconds on your display, and 5 seconds on your keypad.
1. From ADVANCED FUNCTIONS, scroll to LCD TIMER. Press OK.
2. The LCD displays SET TO 20 SECONDS (or the timer of the last
active setting). Use the ARROW keys to adjust the LCD Timeout period.
3. Press OK to save. The LED blinks twice and the display returns
to LCD TIMER.
18

Resetting the Remote
Advanced Functions
Reset Remote
To Reset all AV Features,
Push OK
To Reset to Factory
Setting, Push OK
Resetting All Audio/Video Features
You can reset all the remote’s programming, including Key Mover,
Key Macro, Learning, and Volume Lock, except for device codes.
To reset all programming, perform the following steps:
1. From ADVANCED FUNCTIONS, scroll to RESET REMOTE.
Press OK.
2. The remote displays TO RESET ALL AV FEATURES PUSH OK.
Press OK.
3. The remote displays PUSH OK TO CONFIRM OR SET TO
CANCEL. Press OK.
4. The remote displays RESET CONFIRMED.
Restoring Audio/Video Programming to Factory Settings
NOTE: This will remove all devices you have programmed, so use
caution when restoring factory settings.
1. From ADVANCED FUNCTIONS, scroll to RESET REMOTE.
Press OK.
2. When the remote displays TO RESET ALL AV FEATURES PUSH
OK, scroll to RESET TO FACTORY SETTING PUSH OK. Press OK.
3. The remote displays PUSH OK TO CONFIRM OR SET TO
CANCEL. Press OK.
4. The remote displays THIS CLEARS ALL EVEN CODE SETUP ARE
YOU SURE? Press OK.
5. The remote displays RESET CONFIRMED. Your remote is now
reset to its original factory programming.
19

Z-Wave Overview
Please note: The terms “Device”, “Node” and “Light” all refer to an
individual Z-Wave enabled device in your home control network
and are interchangeable within the context of these instructions.
If this remote is used as the primary controller, you must use it to
create your control network. You can use multiple remote controls
with your Z-Wave lighting control network; however, only one
remote will act as the primary controller. The primary controller
must be used to add or delete devices (lights / nodes) from your
network. All other remotes are considered secondary and can be
used to create groups and/or scenes and control your lighting
however secondary remotes cannot add or delete devices from
your control network.
NOTE: This product can be operated in one Z-Wave network with
Z-Wave certified devices from other manufacturers and/or other
applications. The different listening nodes within the network can
act as repeaters regardless of vendor.
! WARNING
RISK OF FIRE
RISK OF ELECTRICAL SHOCK
RISK OF BURNS
Not for use with Life Support Equipment!
Z-Wave enabled devices should never be used to supply power to or
control the On/Off status of medical and/or life support equipment!
Controlling Appliances:
Exercise extreme caution when using Z-Wave devices to control appliances. Operation of the Z-Wave device may be in a different room
than the controlled appliance, also an unintentional activation may
occur if the wrong button on the remote is pressed. Z-Wave devices
may automatically be powered on due to timed event programming.
Depending upon the appliance, these unattended or unintentional
operations could possibly result in a hazardous condition. For these
reasons, we recommend the following:
1. Assign Z-Wave controlled appliances to device numbers 10 – 18
on the GE remote. The likelihood of unintentionally turning on the
appliance will be reduced significantly because the “Shift” button
will need to be pressed before pressing device numbers 10-18.
2. Z-Wave devices controlling appliances should be removed from
“All” control setting. Instructions on how to do this are included in
the manual for your GE remote.
3. Do Not include Z-Wave devices in Groups or Scenes if they
control appliances.
4. Do Not use Z-Wave devices to control electric heaters or any
other appliances which may present a hazardous condition due
to unattended or unintentional or automatic power on control
20

Z-Wave Terminology
Primary Controller: This is the main device used to set up and
control your Z-Wave network. There can only be one primary
controller and it must be used to add or delete devices. A primary
controller can be a portable device like a hand-held remote, a
static controller (permanently installed & never moved), or
a Z-Wave enabled PC.
Secondary Controller: The Z-Wave network supports multiple
controllers so the consumer can use additional Z-Wave remotes
throughout the home. If the secondary controller is the same
brand and model as the primary, it will have all of the same capabilities as the primary with one exception; the secondary controller
can not be used to add or delete devices.
Home Control Network: Your controllers and every Z-Wave device
you have added with the primary controller are linked together
into a wireless network. Each device in your network has a unique
address assigned to it and cannot be activated by your neighbor’s
Z-Wave controller.
Light/Node/Device: Node is the technical term used to describe a
Z-Wave device in your home control network. Please note that the
terms “Node”, “Device” and “Light” all refer to an individual Z-Wave
enabled device and are interchangeable.
Group: Multiple Z-Wave devices can be turned ON or OFF with a
single command when they are placed into a Group. One example
would be grouping your porch light, exterior garage lights and
patio lights together so that they could all be turned ON if you hear
a strange sound in the middle of the night.
Scene: A scene lets you establish preset brightness levels for
multiple Z-Wave controlled lights and then control them with one
command. This is ideal for mood or task lighting. Scene 1 could be
the family room lights set to dim for watching TV. Scene 2 could
have the same lights set to a different brightness level for other
activities like reading or entertaining.
Event: An event is something you want to happen at a specific
time and day. This could be everyday, a specific day of the week,
Monday through Friday, Saturday & Sunday only, or a one time occurrence. Events can be set up to control an individual device,
a group or a scene.
21

Wireless Range
This device complies with the Z-Wave standard of open-air, line
of sight transmission distances of 65 feet. Actual performance
in a home depends on the number of walls between the remote
controller and the destination device, the type of construction and
the number of Z-Wave enabled devices installed in the control
network. Every Z-Wave enabled device acts as a signal repeater
and multiple devices result in more possible transmission routes
which help eliminate “RF dead-spots”.
Things to consider regarding RF range:
• Each wall or obstacle (i.e.: refrigerator, big screen TV, etc.)
between the remote and the destination device will reduce the
maximum range by approximately 25-30%.
• Brick, tile or concrete walls block more of the RF signal than
walls made of wooden studs and plasterboard (drywall).
• Wall mounted Z-Wave devices installed in metal junction boxes
will suffer a significant loss of range (approximately 20%) since
the metal box blocks a large part of the RF signal.
Effects of Home Construction on Wireless Range Between
Z-Wave Enabled Devices
Note: The distances shown in the table below are typical
examples. Actual performance in your home will vary.
From the Remote
(or repeating
Z-Wave module)
to destination
device:
Number of Walls
or Obstacles
* For Plug-in Modules or In-Wall Devices Installed in Plastic Junction Boxes
** Line of Sight / no obstructions
Type of Construction
Wood Frame w/Drywall Brick, Tile or Concrete
Plastic
J-Boxes*
0** 100’ 80’ 100’ 80’
1 70’ 56’ 60’ 48’
2 49’ 39’ 36’ 29’
3 34’ 27’ 21’ 17’
Metal
J-Boxes
Plastic
J-Boxes*
Metal
J-Boxes
Please Note: Z-Wave home control networks are designed to work
properly alongside 802.11 wireless computer networks, Bluetooth
and other 2.4GHz or 5.8GHz devices. Some baby cams, wireless
video devices and older cordless phones using the 900MHz frequency range may cause interference and limit Z-Wave functionality. Many 900MHz products have a switch to select channel “A”
or “B”. You may find that one of these channels will cause less
interference than the other.
22

Notes on Network Management
1. “Add a node, group or scene” can also be referred to as “include
a node, group or scene.” “Remove a node, group or scene” can
also be referred to as “Exclude a node, group or scene.”
2. If the screen displays FAIL during the setup or programming
process, you have pressed an invalid key or the desired action
has not been successfully completed. Please try again.
Important Notes on New Remotes
New remotes are, by default, primary remotes (controllers).
This means that a new remote can:
• Create a new control network.
• Be added to an existing network as a secondary controller.
• Be added to an existing network as the new primary
controller. In this case, the original remote is converted into
a secondary controller.
• Delete nodes from an existing control network and reset
them to their factory defaults. If devices in an existing
network are deleted by a primary controller that is not part
of that network, the entire network may suffer reliability
and control problems.
- The original remote will not be able to control those
devices even though they are still listed in its device and
routing tables.
- Devices that normally receive routed (relayed) command
signals through the deleted devices may fail to operate
as expected.
- A deleted device can be added back into the network
with that network’s primary controller, however, the
network’s controllers will indicated “failure” when
attempting to use Group, Scene or All commands
that include the deleted devices. In this situation, the
only solution is to reset (delete) every device, reset the
controllers and recreate the network.
23

Z-Wave Key Chart
A. SET – Press & hold to enter setup mode. When in setup mode,
press & release to back up one level in the setup menu or press
& hold to cancel setup.
B. SHIFT – For use in Z-Wave setup & operation modes. Press
& release to shift number key from devices 1 – 9 to 10 – 18.
C. ARROWS – scroll left or right to highlight desired menu item.
D. OK – Press & release to select highlighted menu item
E. BRT & DIM (Volume Up & Down) – Light mode only - Use AR-
ROW KEYS or number keys to select desired light (displayed in LCD)
and then press & hold to adjust brightness of Z-Wave lights (Must
be dimmable)
F. CANCEL (Exit) – Press & release to back up one menu level in ZWave programming mode or exit the Z-Wave “waiting” mode
MODE KEYS:
G. LIGHT – Use to program and/or control individual lights
H. GROUP – Use to program and/or turn multiple lights On or Off
at the same time
I. SCENE – Use to program and/or control multiple lights with
preset brightness levels.
J. ALL – Use to turn On/Off all Z-Wave lighting at the same time.
Press & release “All” key, and then the On or Off key (Channel Up
or Down)
K. Z-WAVE KEY – This key cycles the remote between Z-Wave and
A/V modes. In Z-Wave mode, the green LED beneath the button
blinks to indicate the following:
1. Twice to indicate entering programming mode or a
programming success.
2. Once (long blink) to indicate an invalid action during
programming or a programming failure.
L. NUMBER KEYS – Use to select individual lights, groups or
scenes. Press & release SHIFT to change number keys from
devices 1 – 9 to 10 – 18.
M. ON & OFF (Channel Up & Down) – Select the desired mode and
use ARROW KEYS or number keys to select desired light, group or
scene (displayed in LCD) and then press & release to turn On or Off.
Also used for All-On and All-Off functions in All mode
N. Thermostat symbol (Info Key) – Press & release to select
Z-Wave thermostat
24

K
A
B
C
E
D
L
M
N
F
G
H
J
I
25

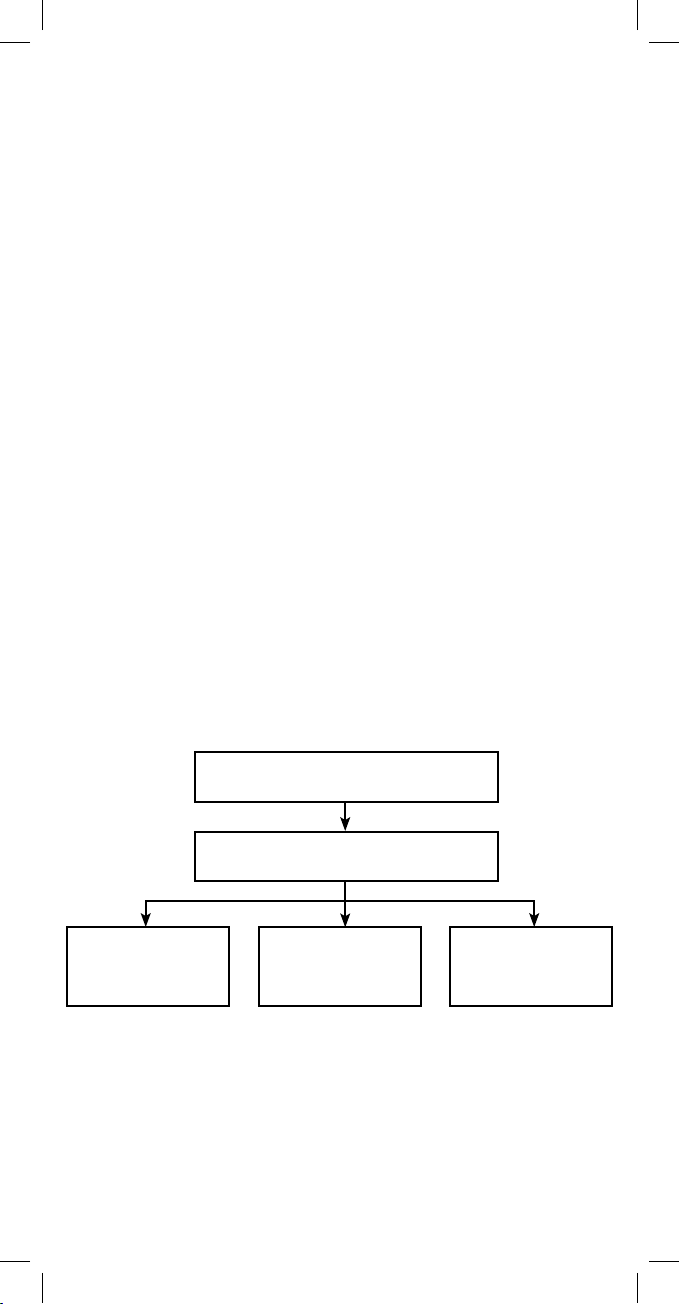
Z-Wave Setup
With the remote in Z-Wave mode, press & hold the
SET Key for the following menu options:
AboutZ-Wave
Z-Wave Setup
Light
Setup
Transfer
Group
Setup
Network Events
Scene
Setup
All
Setup
Thermostat
Advanced
Config.
Devices / Lights / Nodes
Light Setup
Add
To Network
Adding a Device (Node / Light) to the Network
In order to control the lights, they must be Z-Wave enabled and
you must first add them to your home network. There are two
ways to do this.
1. Add lights to your remote so that they can be controlled
individually using the number keys (maximum of 18). Adding
a device to your remote also adds it to your network. If the
device number you are trying to add is already associated with
another device, the previous information is lost.
Remove Delete Label
To A Key
26

2. Add devices to your home network (maximum of 232) without
assigning them to a specific number key. These devices
can only be controlled through the GROUP, SCENE or ALL
commands.
Add a device without assigning it to a specific number key
1. Enter Z-Wave setup mode. LIGHT SETUP is the default option.
2. Press OK; the screen will display ADD
3. Press OK; the screen will display TO NETWORK
4. Press OK; the letter “W” will be displayed in the upper left hand
corner and the green Z-Wave LED will begin blinking indicating
the remote is waiting to add your device.
5. Press the button on the device so that it communicates with
the remote.
6. When the screen displays SUCCESSFUL the device has been
added to your network.
7. The device can now be added to Groups and/or Scenes.
Add a device and assign it to a specific number key
1. Enter Z-Wave setup mode and highlight LIGHT SETUP
2. Press OK; the screen will display ADD
3. Press OK; the screen will display TO NETWORK
4. Press the left arrow key once; the screen will display TO A KEY
5. Press OK; the screen will display SEL DIGIT
6. Press a digit (1-9) for the device location you wish to add.
Press SET (SHIFT) and the digit (1-9) if you are adding devices 10
through 18. The screen will display the number you’ve chosen.
7. Pre s s OK; the letter “W” will be displayed in the upper left hand
corner and the Z-Wave light will begin blinking indicating the
remote is waiting to connect to your device.
8. Press the button on the device so that it communicates with
the remote.
9. When the screen displays SUCCESSFUL the device has been
added to the selected key.
10.
The device can now be added to Groups and/or Scenes.
Controlling an Individual Device (Node / Light)
You can control a light to turn on or off, or change its brightness
level. The operation of a specific device varies by product. Refer to
the manual for that device to learn its specific operation.
• In the Z-WAVE mode press the LIGHT key to put the remote
into “Individual Light Control” mode. Use the NUMBER or
ARROW keys to select the light you want to control. (Press and
release SHIFT to control lights 10 through 18.)
27

Turning a Light On or Off
• To turn a light on, press and release the CH + key for less than
one second. The screen will display ON above the selected
Light/Node.
• To turn a light off, press and release the CH - key for less than
one second. The screen will display OFF above the selected
Light/Node.
Setting a Light’s Brightness Level
• To brighten a light, press and hold the VOL + key for more than
one second. The screen will display BRIGHT UP above the
selected Light/Node. The light will continue to grow brighter
until the key is released.
• To dim a light, press and hold the VOL - key for more than one
second. The screen will display BRIGHT DOWN above the
selected Light/Node. The light will continue to grow dimmer
until the key is released.
Removing an Individual Device (Node / Light) From Your Remote
This only removes individual number key control. The device is still
part of your home control network and can be controlled through
the GROUP, SCENE and ALL commands.
1. Enter Z-Wave setup mode and highlight LIGHT SETUP
2. Press OK; the screen will display ADD
3. Press the right arrow key once; the screen will display REMOVE
4. Press OK; the screen will display SEL DIGIT
5. Press a digit (1-9) for the device location you wish to remove.
Press SHIFT and the digit (1-9) if you are removing devices 10
through 18. The screen will display the number you’ve chosen.
6. Press OK. When the screen displays SUCCESSFUL, the device
has been removed from the number key.
Deleting a Device (Node / Light) From Your Network
This completely removes the device from your home control
network and resets the device to its factory default settings.
1. Enter Z-Wave setup mode and highlight LIGHT SETUP
2. Press OK; the screen will display ADD
3. Press the right arrow key twice; the screen will display DELETE
4. Press OK; the letter “W” will be displayed in the upper left hand
corner and the Z-Wave light will begin blinking indicating the
remote is waiting to delete your device.
5. Press the button on the device so that it communicates with
the remote.
28
6. When the screen displays SUCCESSFUL, the device has been
deleted from your network and reset to its factory defaults.
Groups
You can create a collection of devices (lights / nodes) that you can
turn On or Off as a group. You can create up to a maximum of 18
groups. A group can contain up to 232 devices.
Group Setup
Add Remove Delete
Create a Group or Add a Device to a Group
1. Enter Z-Wave setup mode and highlight GROUP SETUP
2. Press OK; the screen will display ADD
3. Press OK; the screen will display SEL DIGIT
4. Press a digit (1-9) for the group you wish to add the device to.
Press SHIFT and the digit (1-9) if you are adding a device to
groups 10 through 18. The screen will display the group
you’ve chosen.
5. Press OK; the letter “W” will be displayed in the upper left hand
corner and the Z-Wave light will begin blinking indicating the
remote is waiting to connect to your device.
6. Press the button on the device so that it communicates with
the remote.
7. When the screen displays SUCCESSFUL you have successfully
added the Node/Light to a group.
8. To add additional Node/Lights to your group repeat steps 1
thru 10.
To control a Group:
1. When in Z-Wave mode press the GROUP key once to put the
remote into “GROUP Control” mode.
2. Press the digit key for the group you wish to control (1-9).
Press SHIFT and the digit (1-9) if you are controlling groups 10
through 18. The screen will display the selected Group.
• To turn a GROUP on, press and release the CH + key for
less than one second. The screen will display ON above the
selected GROUP.
Label
29

• To turn a GROUP off, press and release the CH - key for less
than one second. The screen will display OFF above the
selected GROUP.
Removing a Device (Node / Light) From a Group:
This only removes the device from a specific group. The device is
still part of your home control network and the group still exists (if
there were more than one device in it to start).
1. Enter Z-Wave setup mode and highlight GROUP SETUP
2. Press OK; the screen will display ADD
3. Press the right arrow key once; the screen will display REMOVE
4. Press OK; the screen will display SEL DIGIT
5. Press a digit (1-9) for the group you wish to remove the device
from. Press SHIFT and the digit (1-9) if you are removing a
device from groups 10 through 18. The screen will display the
group you’ve chosen.
6. Press OK; the letter “W” will be displayed in the upper left hand
corner and the Z-Wave light will begin blinking indicating the
remote is waiting to remove your device.
7. Press the button on the device so it communicates with
the remote.
8. When the screen displays SUCCESSFUL you have successfully
removed the Node/Light from the group.
Deleting a Group
This only deletes the specific group. All of the devices are still part
of your home control network.
1. Enter Z-Wave setup mode and highlight GROUP SETUP
2. Press OK; the screen will display ADD
3. Press the right arrow key twice; the screen will display DELETE
4. Press OK; the screen will display SEL DIGIT
5. Press a digit (1-9) for the group you wish to remove the device
from. Press SHIFT and the digit (1-9) if you are removing a
device from groups 10 through 18. The screen will display the
group you’ve chosen.
6. Press OK; the screen will display SUCCESSFUL to indicate the
group has been deleted.
Scenes
A scene is a single device or group of devices that can be preset to
turn on to a previously specified setting (for example, brightness
level). Scenes are ideal for task or mood lighting. You can set up
a maximum of 18 scenes, containing up to 32 devices per scene.
30
Scenes can include lights from different groups.
Scene Setup
Add
Remove Delete Label
Adding a Device (Node / Light) to a Scene
1. Enter Z-Wave setup mode and highlight SCENE SETUP
2. Press OK; the screen will display ADD
3. Press OK; the screen will display SEL DIGIT
4. Press a digit (1-9) for the scene you wish to add the device to.
Press SHIFT and the digit (1-9) if you are adding devices to
scenes 10 through 18. The screen will display the scene
you’ve chosen.
5. Press OK; the letter “W” will be displayed in the upper left hand
corner and the Z-Wave light will begin blinking indicating the
remote is waiting to connect to your device.
6. Press and release the button on the device so it communicates
with the remote.
7. When the screen displays SUCCESSFUL you have successfully
added the Node/Light to a scene. Immediately following this
the screen will display TO ADJUST LEVEL PUSH OK TO SAVE.
8. Within 30 seconds press and hold the button on the device to
adjust the brightness level. Release the button at your desired
setting, then press OK on the remote.
9. When the screen displays SUCCESSFUL you have successfully
added the Node/Light to a scene at your desired setting.
10.
To add additional Node/Lights to your scene repeat steps 1
thru 12.
To control a scene:
1. While in the Z-Wave mode press SCENE once to put the remote
in SCENE mode.
2. Press the digit key for the scene you wish to control (1-9).
Press SHIFT and the digit (1-9) if you are controlling scenes 10
through 18. The screen will display the scene you’ve chosen.
• To turn a SCENE on, press and release the CH + key for less
than one second. The screen will display ON above the
selected SCENE.
31

• To turn a SCENE off, press and release the CH - key for less
than one second. The screen will display OFF above the
selected SCENE.
Removing a Device (Node / Light) From a Scene
This only removes the device from a specific scene. The device is
still part of your home control network and the scene still exists (if
there is more than one device in the scene).
1. Enter Z-Wave setup mode and highlight
SCENE SETUP
2. Press OK; the screen will display ADD
3. Press the right arrow key once; the screen will display REMOVE.
4. Press OK; the screen will display SEL DIGIT
5. Press a digit (1-9) for the scene you wish to add the device to.
Press SHIFT and the digit (1-9) if you are adding devices to
scenes 10 through 18. The screen will display the scene you’ve
chosen.
6. Press OK; the letter “W” will be displayed in the upper left hand
corner and the Z-Wave light will begin blinking indicating the
remote is waiting to remove your device.
7. Press the button on the device so it communicates with the
remote.
8. When the screen displays SUCCESSFUL you have successfully
removed the Node/Light from the scene.
Deleting a Scene
This only deletes the specific scene. All of the devices are still part
of your home control network.
1. Enter Z-Wave setup mode and highlight SCENE SETUP
2. Press OK; the screen will display ADD
3. Press the right arrow key twice; the screen will display DELETE.
4. Press OK; the screen will display SEL DIGIT
5. Press a digit (1-9) for the scene you wish to add the device to.
Press SHIFT and the digit (1-9) if you are adding devices to
scenes 10 through 18. The screen will display the scene you’ve
chosen.
6. Press OK; the screen will display SUCCESSFUL to indicate that
the scene has been deleted.
Labels
Individual LIGHTS, GROUPS and SCENES can all be labeled to help
identify their function or location in your home. The process is the
same for all three.
32

1. Enter Z-Wave setup mode and highlight LIGHT SETUP, GROUP
SETUP or SCENE SETUP. Press OK.
2. Use the ARROW keys to scroll to LABEL.
3. Press OK; the screen will display SEL DIGIT
4. Press a digit (1-9) for the LIGHT, GROUP or SCENE you would
like to label. Press SHIFT and the digit (1-9) if you are labeling for
keys 10 through 18. The screen will display the key number in
the mode you would like to label.
5. Press OK; the screen will display the current name of the
device in the mode you’ve selected with the first letter or digit
highlighted.
a. Use the right or left ARROW KEYS to scroll right or left.
b. Press the CH + key to move the letter or number forwards.
c. Press the CH - key to move the letter or number backwards.
6. When you’ve completed labeling the device press OK; the
screen will display SUCCESSFUL.
All-On and All-Off Control
The factory default setting for GE Z-Wave lighting control devices
is to be included in All-On and All-Off control. Other brands of ZWave enabled lighting control devices may have to be manually
added to ALL control. If desired, specific devices can also be setup
to ignore the All-On and All-Off commands.
Turn all devices on or off
1. While in the Z-Wave mode press ALL once. The screen will
display ALL
2. Press the CH + key to turn all of the lights on. The display will
briefly display ON below ALL.
3. Press the CH - key to turn all of the lights off. The display will
briefly display OFF below ALL.
4. If the screen displays FAIL not all of the lights completely
received and responded to the remotes command. In this event
repeat steps 1 thru 3.
All Setup
Exclude All
On/Off
Include All
On/Off
Exclude All
On Only
Exclude All
Off Only
33

Adding or Excluding a Device To / From All Control
Menu options under ALL SETUP include EXCLUDE ALL ON OFF,
INCLUDE ALL ON OFF, EXCLUDE ALL ON ONLY and EXCLUDE ALL
OFF ONLY.
1. Enter Z-Wave setup mode and highlight ALL SETUP.
2. Press OK; the screen will display EXCLUDE ALL/ON OFF
3. Use the ARROW keys to scroll to the desired action.
4. Press OK; the letter “W” will be displayed in the upper left hand
corner and the Z-Wave light will begin blinking indicating the
remote is waiting to communicate with your device.
5. Press the button on the device so that it communicates with
the remote.
6. When the screen displays SUCCESSFUL you have successfully
completed the desired action.
Events
The GE 45608 LCD remote allows you to program automated
events such as turning on or off lights at a predetermined time
and day. An event can control an individual Light, a Group or a
Scene.
Note: Prior to programming an Event, you must set the day
and time.
Events
Add Delete All
Adding an Event
1. Enter Z-Wave setup mode and highlight EVENTS.
2. Press OK; the screen will display ADD
3. Press OK; the screen will display EVERYDAY
4. From this screen you can use the right and left arrow keys to
select the day or days you would like the event to occur. The
selections are;
a. EVERYDAY(The event will occur everyday)
b. MON – FRI (The event will occur Monday thru Friday)
c. SAT/SUN (The event will only occur on Saturday and Sunday)
d. ONETIME (The event will only occur onetime)
34
Event View

e. SUNDAY (The event will only occur on Sundays)
f. MONDAY (The event will only occur on Mondays)
g. TUESDAY (The event will only occur on Tuesdays)
h. WEDNESDAY (The event will only occur on Wednesdays)
i. THURSDAY (The event will only occur on Thursdays)
j. FRIDAY (The event will only occur on Fridays)
k. SATURDAY (The event will only occur on Saturdays)
Note: All events with the exception of “ONE TIME” will repeat on a
weekly basis until deactivated or deleted.
5. After selecting the occurrence of the event press OK; the
screen will display SEL DIGIT
6. Press a digit (1-9) for the key you wish to add the event to. Press
SHIFT and the digit (1-9) if you are adding events to keys 10
through 18. The screen will display the event you’ve chosen.
(Event 1 for example)
7. Pre s s OK; the screen shows NORMAL. Press OK for exact
timing or use the ARROW keys to change to RANDOM. The
random option activates the event up to 15 minutes before or
after the programmed time. Note: The random option is not
available for one time events.
8. Press OK; the screen will display EVENT TYPE - LIGHT 1
9. Use the ARROW keys to scroll between event types. As you
scroll the screen will display;
a. LIGHT 1 (Controls the LIGHT set to key #1)
b. GROUP 1 (Controls the GROUP set to key #1)
c. SCENE 1 (Controls the SCENE set to key #1)
10.
When you’ve scrolled to the event type you would like to
control, use the ARROW keys to select what number LIGHT,
GROUP or SCENE you would like to control.
11.
After choosing the event type and number press OK; the
screen will display the hour, minute and AM or PM with the hour
highlighted above the words ON TIME.
12.
To set the ON TIME of your event;
a. Use the right or left ARROW keys to scroll right or left.
b. Press the CH + key to move hour, minute, AM or PM forwards.
c. Press the CH - key to move the hour, minute, AM or PM
backwards.
13.
When you’ve set the ON TIME, press OK; the screen will display
the hour, minute and AM or PM with the hour highlighted above
the words OFF TIME.
35

14.
To set the OFF TIME of your event;
a. Use the right or left ARROW keys to scroll right or left.
b. Press the CH + key to move hour, minute, AM or PM forwards.
c. Press the CH - key to move the hour, minute, AM or PM
backwards.
15.
When you’ve set the OFF TIME, press OK; the screen will
display SUCCESSFUL indicating you successfully programmed
your event.
Enabling or Disabling an Individual Event:
1. Enter Z-Wave setup mode and highlight EVENTS.
2. Press OK; the screen will display ADD.
3. Use the ARROW keys to scroll to EVENT VIEW. Press OK.
4. Use the ARROW keys to select the desired event. Press OK.
5. Use the ARROW keys to select ENABLED or DISABLED. Press OK.
Enabling or Disabling All Events:
1. Enter Z-Wave setup mode and highlight EVENTS.
2. Press OK; the screen will display ADD.
3. Use the ARROW keys to scroll to ALL. Press OK.
4. Use the ARROW keys to select ALL ON or ALL OFF. Press OK.
Deleting an Event
1. Enter Z-Wave setup mode and highlight EVENTS.
2. Press OK; the screen will display ADD.
3. Use the ARROW keys to scroll to DELETE.
4. Press OK; the screen will display SEL DIGIT
5. Use the number keys to select the event to be deleted. Press OK.
6. The screen will display SUCCESSFUL to indicate that the event
has been deleted.
Thermostats
The GE 45608 LCD remote allows you to program and control
multiple Z-Wave enabled Thermostats.
Thermostat
DeleteAdd
36

Adding a Thermostat:
1. Enter Z-Wave setup mode and highlight THERMOSTAT
2. Press OK and the screen will display ADD
3. Press OK and the screen will display SETUP WAITING
4. Press the button on the thermostat’s Z-Wave interface
5. When the screen displays SUCCESS, you have successfully
added the THERMOSTAT to your remote control.
Controlling a Thermostat:
The features and functions that can be controlled vary by
manufacturer and you will need to review the user manual that
was provided to determine capabilities of your THERMOSTAT.
If supported by the thermostat, the 45608 LCD remote allows you
to check room temperature, adjust HVAC system modes (Heat,
Cool, Auto, Fan, etc.) and adjust temperature settings (SETPOINT).
Note: Your HVAC system may have to be set to “HEAT or
“COOL’” mode in order to remotely check and/or adjust the room
temperature. “AUTO” mode may not provide this function.
Deleting a Thermostat:
1. Enter Z-Wave setup mode and highlight THERMOSTAT
2. Press OK and the screen will display ADD
3. Use either ARROW keys to scroll until the screen displays
DELETE
4. Press OK and the screen will display SETUP WAITING
5. Press the button on the thermostat’s Z-Wave interface
6. When the screen displays SUCCESSFUL, you have successfully
deleted the thermostat.
Advanced Configuration
Some Z-Wave devices provide advanced
capabilities available only through the use of a
remote control like the GE 45608. One example is
the GE 45606 in-wall dimmer which allows the
end user to change whether the LED is illuminated
when the light is On or when the light is Off.
Please refer to the instructions of your Z-Wave
device for available options and specific
instructions on changing its advanced
configuration.
Adv. Config.
Parameter
Number of
Bytes
Configuration
Value
37

To Change Advanced Configuration Settings:
1. Enter Z-Wave setup mode and highlight ADV. CONFIG.
2. Press OK and screen will display PARAMETER 0
3. Use either ARROW key to scroll until the display reads the
proper parameter number (1 - 255) as indicated in the Z-Wave
device’s instructions
4. Press OK and the screen will read NUMBER OF BYTES
5. Use either ARROW key to scroll until the display reads the
proper number of bytes (1, 2 or 4) as indicated in the Z-Wave
device’s instructions
6. Press OK and the screen will display read CONFIGURATION
VALUE 1 = 0
7. Us e e i t her ARROW key to scroll until the display reads the
proper value (0 - 255) as indicated in the Z-Wave device’s
instructions
8. Press OK
9.
Press the button on the device.
10.
The screen will display SUCCESSFUL
Copying information to or from the remote control:
Create Secondary, Controller Swap and Receive are all methods
used in the process of replication.
Create Secondary Controller
A Primary controller must be used to add or delete devices from
your network; however, secondary controllers can be created to
enhance convenience (remotes in multiple locations like the
kitchen, master bedroom and family room) and functionality
(control of more than 18 individual lights, 18 groups or 18 scenes).
There are two ways to create a secondary controller. The first
way is to copy all network and device information while the
second is to copy just the network information. If the two remotes
are identical (two of the GE 45608s for example), the first method
creates an exact duplicate of all Z-Wave information including
groups, scenes, labels, etc. The second method copies only the
network and does not duplicate the groups, scenes, labels, etc.
Transfer
Create
Secondary
38
Controller
Swap
Receive

To send device and network information to a
secondary remote:
1. Enter Z-Wave setup mode and highlight TRANSFER
2. Press OK; the screen will display CREATE SECONDARY
3. Press OK; the screen will display ALL
4. Place the Secondary remote in RECEIVE mode. See the
following section on “Receiving Network and Device
Information” if the Secondary remote is a GE 45608 remote.
If the Secondary remote is a different GE model or different
brand, please refer to its instructions for details.
5. After the Secondary remote is in the RECEIVE mode press
OK on the Primary remote; the screen will display SENDING.
The Primary remote then transmits the network and device
information to the new Secondary remote.
6. Both remotes should indicate a successful completion of the
copying process.
a. The 45608’s screen will display SUCCESSFUL.
b. Other GE models or other brands will indicate success in
various ways, depending on the remote’s capabilities. Please
refer to its instructions for details.
7. Change individual devices, groups, scenes, etc. on the new
secondary remote as needed.
To send only network information to a secondary remote:
1. Enter Z-Wave setup mode and highlight TRANSFER
2. Press OK; the screen will display CREATE SECONDARY
3. Press OK; the screen will display ALL
4. Press the right arrow key once; the screen will display
NETWORK ONLY.
5. Place the Secondary remote in RECEIVE mode. See the
following section on “Receiving Network and Device
Information” if the Secondary remote is a GE 45608 remote.
If the Secondary remote is a different GE model or different
brand, please refer to its instructions for details.
6. After the Secondary remote is in the RECEIVE mode press
OK on the Primary remote; the screen will display SENDING.
The Primary remote then transmits the network and device
information to the new Secondary remote.
7. Both remotes should indicate a successful completion of the
copying process.
a. The 45608’s screen will display SUCCESSFUL.
b. Other GE models or other brands will indicate success in
various ways, depending on the remote’s capabilities.
39

Please refer to its instructions for details.
8. Change individual devices, groups, scenes, etc. on the new
secondary remote as needed.
Controller Swap (Transfer Primary)
You can transfer all of your remote’s information to another
remote, so it becomes the new Primary remote and the original
remote becomes a secondary controller. You can do this in two
ways: either transferring all information, or just transferring
network information.
Transferring all Device, Network and Primary
status to a new remote:
1. Enter Z-Wave setup mode and highlight TRANSFER
2. Press OK; the screen will display CREATE SECONDARY
3. Press the right ARROW key once; the screen will display
CONTROLLER SWAP.
4. Press OK; the screen will display ALL
5. Place the Secondary remote in RECEIVE mode. See the
following section on “Receiving Network and Device
Information” if the Secondary remote is a GE 45608 remote.
If the Secondary remote is a different GE model or different
brand, please refer to its instructions for details.
6. After the Secondary remote is in the RECEIVE mode press
OK on the Primary remote; the screen will display SENDING.
The Primary remote then transmits the network and device
information to the new Secondary remote.
7. Both remotes should indicate a successful completion of the
copying process.
a. The 45608’s screen will display SUCCESSFUL.
b. Other GE models or other brands will indicate success in
various ways, depending on the remote’s capabilities.
Please refer to its instructions for details.
Transferring only Network and Primary status to a new remote:
1. Enter Z-Wave setup mode and highlight TRANSFER
2. Press OK; the screen will display CREATE SECONDARY
3. Press the right arrow key once; the screen will display
CONTROLLER SWAP.
4. Press OK; the screen will display ALL
5. Press the right ARROW key once; the screen will display
NETWORK ONLY.
40

6. Place the Secondary remote in RECEIVE mode. See the
following section on “Receiving Network and Device
Information” if the Secondary remote is a GE 45608 remote.
If the Secondary remote is a different GE model or different
brand, please refer to its instructions for details.
7. After the Secondary remote is in the RECEIVE mode press
OK on the Primary remote; the screen will display SENDING.
The Primary remote then transmits the network and device
information to the new Secondary remote.
8. Both remotes should indicate a successful completion of the
copying process.
a. The 45608’s screen will display SUCCESSFUL.
b. Other GE models or other brands will indicate success in
various ways, depending on the remote’s capabilities.
Please refer to its instructions for details.
Receiving Network and Device Information
1. Enter Z-Wave setup mode and highlight TRANSFER
2. Press OK; the screen will display CREATE SECONDARY
3. Use the ARROW keys to scroll to RECEIVE.
4. Press OK; the screen will display RECEIVING
5. Place the Primary remote in “Transmit” mode. See the previous
section on “Creating a Secondary Controller” or “Controller
Swap” if the Primary controller is a GE 45608 remote. If the
Primary remote is a different GE model or different brand,
please refer to its instructions for details.
6. After the Primary remote is in the “Transmit” mode, press OK
on this remote; the screen will display RECEIVING. The Primary
remote then transmits the network and device information to
the new remote.
7. Both remotes should indicate a successful completion of the
copying process.
a. The 45608’s screen will display SUCCESSFUL.
b. Other GE models or other brands will indicate success in
various ways, depending on the remote’s capabilities. Please
refer to its instructions for details.
41
Network
Reset Recovery Update
Remove All
Failed Nodes
Resetting Your Network
You can reset your network to clear all device and Z-Wave
network information from the remote. This does not reset the
Z-Wave devices to their factory default. Each device still needs to
be deleted in order to reset them. Please refer to the section on
“Deleting a Device (Node/Light) from Your Network” for details.
To reset your network:
1. Enter Z-Wave setup mode and scroll to NETWORK
2. Press OK; the screen will display RESET
3. Press OK; the screen will display RESETTING
4. When the screen displays SUCCESSFUL your remote has
been reset.
5. Delete all individual devices to reset them to their factory
defaults. This step must be completed in order to use the
devices in a new network.
Recovering Network Information
This forces a re-discovery of all the devices in your network,
verifies communications between devices and rebuilds the
routing tables. The remote must be the Primary controller to
perform this function. All secondary controllers should be updated
using the “create secondary Controller” instructions after a
successful network recovery. You must have at least 2 nodes in
your network to perform a recovery.
To recover network information:
1. Enter Z-Wave setup mode and highlight NETWORK
2. Press OK; the screen will display RESET
3. Use the ARROW keys to scroll to RECOVER.
4. Press OK; the screen will display RECOVERING
5. When the screen displays SUCCESSFUL you have successfully
recovered network information and rebuilt the routing tables
42

Network Update
This function only works if you have a Static Update Controller
(SUC) in your network. An SUC is permanently installed in a specific
location and helps maintain up-to-date “neighbor lists” and routing
tables for your control network. This command sends a request
to the SUC for the current network topology and ensures that the
hand-held remote includes the latest network information.
Interoperability with Z-Wave™ Devices
A Z-Wave™ network can integrate devices of various classes, and
these devices can be made by different manufacturers. Although
every Z-Wave certified product is designed to work with all other
Z-Wave certified products, your controller must include the appropriate device classifications in order to control non-lighting Z-wave
devices. As an example, the GE 45600 basic remote is designed
only for controlling Z-Wave devices using the lighting control
classification. The GE 45601 remote with LCD readout can control
other Z-Wave certified devices like thermostats as well as lighting.
FCC NOTICE
This device complies with Part 15 of the FCC rules. Operation is
subject to the following two conditions: (1) this device may not
cause harmful interference, and (2) this device must accept any
interference received, including interference that may cause
undesired operation.
If this equipment does cause harmful interference to radio or
television reception, which can be determined by turning the
equipment off or on, the user should:
• Relocate or reorient the TV or radio antenna
• Increase the separation between the device and the receiver.
Any changes or modifications to the equipment without JASCO’s
express consent will void the user’s right to operate this equipment.
FCC ID: MG345608
Compliance with IC Rules and Regulations
IC: 6924A-45608
Jasco Products Company
Model: 45608
Object is subject to the following two conditions:
1. This device may not cause interference, and
2. This device must accept any interference, including interference
that may cause undesired operation of the device.”
43

WARRANTY
JASCO Products warrants this product to be free from
manufacturing defects for a period of two years from the
original date of consumer purchase. This warranty is limited to the
repair or replacement of this product only and does not extend to
consequential or incidental damage to other products that may be
used with this product. This warranty is in lieu of all other warranties, expressed or implied. Some states do not allow limitations
on how long an implied warranty lasts or permit the exclusion or
limitation of incidental or consequential damage, so the above
limitations may not apply to you. This warranty gives you specific
rights, and you may also have other rights which vary from state
to state. Please contact Customer Service at 800-654-8483
(option 4) between 7:30AM – 5:00PM CST or via our website
(www.jascoproducts.com) if the unit should prove defective within
the warranty period.
JASCO Products Company
10 E Memorial Rd.
Oklahoma City, OK 73114
The GE logo is a trademark of the General Electric
Company and is used under license to
Jasco Products Company LLC.
Made in China
44

Setup Codes for Compatible Brands of
Audio/Video Devices
Códigos de Programación de Audio/Video de Marcas Compatibles
For Home Automation
Frigidaire . . . . . . . . . . . . . . . . . . . . 1333
GE . . . . . . . . . . . . . . . . . . . . . . . . . . . 0240
Marmitek . . . . . . . . . . . . . . . . . . . . 0167
One For All . . . . . . . . . . . . . . . . . . . 0167
RadioShack . . . . . . . . . . . . . . . . . . 0240
Russound . . . . . . . . . . . . . . 1232, 1233
For Audio - Receiver
ADC . . . . . . . . . . . . . . . . . . . . . . . . . 0531
Aiwa . . . . . . . 1405, 0121, 1388, 1641
Alco . . . . . . . . . . . . . . . . . . . . . . . . . 1390
AMC . . . . . . . . . . . . . . . . . . . . . . . . . 1077
Anam . . . . . . . . . . . . . . . . . . 1609, 1074
Arcam . . . . . . . . . . . . . . . . . . . . . . . 1189
Audiotronic . . . . . . . . . . . . . . . . . . 1189
Audiovox . . . . . . . . . . . . . . . . . . . . 1390
B & K . . . . . . . . . . . . . . . . . . 0701, 0840
Bose . . . . . . . . . . . . . 1229, 1253, 1933
Capetronic . . . . . . . . . . . . . . . . . . . 0531
Carver . . . . . . . . . . . 1189, 0121, 1289
Curtis Mathes . . . . . . . . . . . . . . . . 0014
Denon . . . . . 1360, 0121, 1142, 1306
Emerson . . . . . . . . . . . . . . . . . . . . . 0531
Fisher. . . . . . . . . . . . . . . . . . . . . . . . 1801
Harman/Kardon . . . . . . .0110, 0891,
. . . . . . . . . . . . . . . . . . 1289, 1304, 1306
Hitachi . . . . . . . . . . . . . . . . . . . . . . 1801
Insignia . . . . . . . . . . . . . . . . . . . . . . 1077
Integra . . . . . . . . . . 0842, 1298, 1320
JBL . . . . . . . . . . . . . . . . . . . . 0110, 1306
JVC . . . . . . . . . . . . . . 1058, 1374, 1495
Kawasaki . . . . . . . . . . . . . . . . . . . . 1390
Kenwood . . . . . . . . . . . . . . 1313, 1570
KLH . . . . . . . . . . . . . . . . . . . 1390, 1428
Koss . . . . . . . . . . . . . . . . . . . . . . . . . 1366
LG . . . . . . . . . . . . . . . . . . . . . . . . . . . 1293
Magnavox . . . . . . .1189, 1269, 0531,
. . . . . . . . . . . . . . . . . . . . . . . . 1266, 1514
Marantz . . . 1189, 1269, 0891, 1289
McIntosh . . . . . . . . . . . . . . . . . . . . 1289
Micromega . . . . . . . . . . . . . . . . . . 1189
Myryad . . . . . . . . . . . . . . . . . . . . . . 1189
Nakamichi . . . . . . . . . . . . . . . . . . . 1313
Automatización del Hogar
Receptores de Audio
Security System . . . . . . . . . . . . . . 0167
Universal . . . . . . . . . . . . . . . . . . . . 0167
Universal X10 . . . . . . . . . . . . . . . . 0167
Whirlpool . . . . . . . . . . . . . . . . . . . . 1332
X10 . . . . . . . . . . . . . . . . . . . . . . . . . . 0167
Onkyo . . . . . 0842, 1298, 1320, 1531
Optimus . . . . . . . . .1023, 0014, 0121,
. . . . . . . . . . . . . . . . . . 0531, 0670, 1074
Oritron . . . . . . . . . . . . . . . . . . . . . . . 1366
Panasonic . . . . . . .1308, 1518, 1288,
. . . . . . 1316, 1548, 1633, 1763, 1764
Philips . . . . . 1189, 1269, 0891, 1266
Pioneer . . . . . . . . . .1023, 0014, 0150,
. . . . . . . . . . . . . . . . . . 0531, 0630, 1384
Polk Audio . . . . . . . . . . . . . . . . . . . 1289
Proscan . . . . . . . . . . . . . . . . . . . . . 1254
RadioShack . . . . . . . . . . . . . . . . . . 1609
RCA . . . . . . .1023, 1609, 1254, 0531,
. . . . . . . . . . . . . . . . . . 1074, 1390, 1511
Realistic . . . . . . . . . . . . . . . 1609, 0121
Rio . . . . . . . . . . . . . . . . . . . . . . . . . . 1869
Samsung . . . . . . . . 1295, 1304, 1500
Sansui . . . . . . . . . . . . . . . . . . . . . . . 1189
Sanyo . . . . . . . . . . . . . . . . . 1469, 1801
Sherwood . . . . . . . . . . . . . 1077, 1653
Sonic Blue . . . . . . . . . . . . . . . . . . . 1869
Sony . . . . . . .1058, 1441, 1258, 1759,
. . . . . . 1622, 1558, 1658, 1758, 1858
Soundesign . . . . . . . . . . . . . . . . . . 0670
Stereophonics . . . . . . . . . . . . . . . 1023
Sunfire. . . . . . . . . . . . . . . . . . . . . . . 1313
Teac . . . . . . . . . . . . . 1074, 1390, 1528
Technics . . . . . . . . . 1308, 1518, 1633
Thorens . . . . . . . . . . . . . . . . . . . . . 1189
Toshiba . . . . . . . . . . . . . . . . . . . . . . 0842
Venturer . . . . . . . . . . . . . . . . . . . . . 1390
Wards . . . . . . . . . . . . . . . . . . . . . . . 0014
Yamaha . . . . . . . . .1023, 0176, 1176,
. . . . . . . . . . . . . . . . . . 1276, 1331, 1375
Zenith . . . . . . . . . . . . . . . . . . . . . . . 1293
45

For Audio - Amplifier
Adcom . . . . . . . . . . . . . . . . . . . . . . 1100
Bel Canto Design . . . . . . . . . . . . 1583
Bose . . . . . . . . . . . . . . . . . . . . . . . . . 0674
Carver . . . . . . . . . . . . . . . . . . . . . . . 0892
Classe . . . . . . . . . . . . . . . . . . . . . . . 1461
Halcro . . . . . . . . . . . . . . . . . . . . . . . 1934
Harman/Kardon . . . . . . . . . . . . . 0892
JVC . . . . . . . . . . . . . . . . . . . . . . . . . . 0331
Left Coast . . . . . . . . . . . . . . . . . . . 0892
Lexicon . . . . . . . . . . . . . . . . . . . . . . 1802
Marantz . . . . . . . . . . . . . . . . . . . . . 0892
Amplificadores de Audio
Mark Levinson . . . . . . . . . . . . . . . 1483
McIntosh . . . . . . . . . . . . . . . . . . . . 0251
NEC . . . . . . . . . . . . . . . . . . . . . . . . . 0264
Parasound . . . . . . . . . . . . . . . . . . . 1934
Philips . . . . . . . . . . . . . . . . . . . . . . . 0892
Polk Audio . . . . . . . . . . . . . . . . . . . 0892
Primare . . . . . . . . . . . . . . . . . . . . . . 1395
Shure . . . . . . . . . . . . . . . . . . . . . . . . 0264
Sony . . . . . . . . . . . . . . . . . . . . . . . . . 1126
Victor . . . . . . . . . . . . . . . . . . . . . . . . 0331
Yamaha . . . . . . . . . . . . . . . 0354, 0133
For Audio - CD
DKK . . . . . . . . . . . . . . . . . . . . . . . . . 0000
Fisher. . . . . . . . . . . . . . . . . . . . . . . . 0000
Harman/Kardon . . . . . . . . . . . . . 0100
Inkel . . . . . . . . . . . . . . . . . . . . . . . . . 0180
Integra . . . . . . . . . . . . . . . . . . . . . . 0101
JVC . . . . . . . . . . . . . . . . . . . . . . . . . . 0072
Kenwood . . . . . . . . . . . . . . . . . . . . 0000
Marantz . . . . . . . . . . . . . . . . . . . . . 0180
Memorex . . . . . . . . . . . . . . . . . . . . 0000
Miro . . . . . . . . . . . . . . . . . . . . . . . . . 0000
Modulaire . . . . . . . . . . . . . . 0000, 0180
Onkyo . . . . . . . . . . . . . . . . . 1327, 0101
Optimus . . . . . . . . . . . . . . . . . . . . . 0000
Panasonic . . . . . . . . . . . . . 0388, 0752
Pioneer . . . . . . . . . . . . . . . . 1062, 1087
For Audio - Cassette Deck
Aiwa . . . . . . . . . . . . . . . . . . . . . . . . . 0029
Carver . . . . . . . . . . . . . . . . . . . . . . . 0029
Denon . . . . . . . . . . . . . . . . . . . . . . . 0076
Grundig . . . . . . . . . . . . . . . . . . . . . 0029
Harman/Kardon . . . . . . . 0182, 0029
JVC . . . . . . . . . . . . . . . . . . . . . . . . . . 0244
Magnavox . . . . . . . . . . . . . . . . . . . 0029
Marantz . . . . . . . . . . . . . . . . . . . . . 0029
Optimus . . . . . . . . . . . . . . . . . . . . . 0027
Reproductores de CDs
Reproductores de Audiocasete
RadioShack . . . . . . . . . . . . 0000, 0180
RCA . . . . . . . . . . . . . . . . . . . . . . . . . 1062
Realistic . . . . . . . . . . . . . . . 0000, 0180
Sansui . . . . . . . . . . . . . . . . . . . . . . . 0000
Sanyo . . . . . . . . . . . . . . . . . . . . . . . 0000
Sharp . . . . . . . . . . . . . . . . . . . . . . . . 0180
Sherwood . . . . . . . . . . . . . . . . . . . 0180
Sony . . . . . . . . . . . . .0490, 0000, 0100,
. . . . . . . . . . . . . . . . . . . . . . . . 1364, 0185
Symphonic . . . . . . . . . . . . . . . . . . 0180
Teac . . . . . . . . . . . . . . . . . . . 0490, 0180
Victor . . . . . . . . . . . . . . . . . . . . . . . . 0072
Yamaha . . . . . . . . . 0490, 0036, 1292
Yorx . . . . . . . . . . . . . . . . . . . . . . . . . 0000
Philips . . . . . . . . . . . . . . . . . . . . . . . 0029
Pioneer . . . . . . . . . . . . . . . . . . . . . . 0027
Polk Audio . . . . . . . . . . . . . . . . . . . 0029
RCA . . . . . . . . . . . . . . . . . . . . . . . . . 0027
Sansui . . . . . . . . . . . . . . . . . . . . . . . 0029
Sony . . . . . . . . . . . . . 0243, 0170, 0291
Wards . . . . . . . . . . . . . . . . . . . . . . . 0027
Yamaha . . . . . . . . . . . . . . . . . . . . . 0097
For Audio - Accessory
Aiwa . . . . . . . . . . . . . . . . . . . . . . . . . 0159
Altec Lansing . . . . . . . . . . 0607, 1056
Apple . . . . . . . . . . . . . . . . . . 1115, 1644
D-Link . . . . . . . . . . . . . . . . . . . . . . . 1522
Accesorios de Audio
46
DLO . . . . . . . . . . . . . . . . . . . . . . . . . 1155
Imerge . . . . . . . . . . . . . . . . . . . . . . 1491
iPort . . . . . . . . . . . . . . . . . . . . . . . . . 2042
Marantz . . . . . . . . . . . . . . . . . . . . . 1491

For Audio - Accessory, cont.
NaviPod . . . . . . . . . . . . . . . . . . . . . 1644
Netgear . . . . . . . . . . . . . . . . . . . . . 1785
Roku. . . . . . . . . . . . . . . . . . . . . . . . . 1828
Slim Devices . . . . . . . . . . . . . . . . . 1844
Accesorios de Audio, cont.
Sonance . . . . . . . . . . . . . . . . . . . . . 2042
Sony . . . . . . . . . . . . . . . . . . . . . . . . . 0159
SSI. . . . . . . . . . . . . . . . . . . . . . . . . . . 1522
Yamaha . . . . . . . . . . . . . . . 1809, 1810
For Cable Set Top Box
A-Mark . . . . . . . . . . . . . . . . 0008, 0144
ABC . . . . . . . . . . . . . 0237, 0003, 0008
Accuphase . . . . . . . . . . . . . . . . . . 0003
Acorn . . . . . . . . . . . . . . . . . . . . . . . . 0237
Action . . . . . . . . . . . . . . . . . . . . . . . 0237
Active . . . . . . . . . . . . . . . . . . . . . . . 0237
Archer . . . . . . . . . . . . . . . . . . . . . . . 0237
BCC . . . . . . . . . . . . . . . . . . . . . . . . . 0276
British Telecom . . . . . . . . . . . . . . 0003
Century . . . . . . . . . . . . . . . . . . . . . . 0008
Digeo . . . . . . . . . . . . . . . . . . . . . . . . 1187
Director. . . . . . . . . . . . . . . . . . . . . . 0476
Fosgate . . . . . . . . . . . . . . . . . . . . . 0276
GE . . . . . . . . . . . . . . . . . . . . . . . . . . . 0144
General Instrument . . . .0476, 0810,
. . . . . . . . . . . . . . . . . . . . . . . . 0276, 0003
Gibralter . . . . . . . . . . . . . . . . . . . . . 0003
GoldStar . . . . . . . . . . . . . . . . . . . . . 0144
Hitachi . . . . . . . . . . . . . . . . 0003, 0008
Insight . . . . . . . . . . . . . . . . . 0476, 0810
Jerrold . . . . . 0476, 0810, 0276, 0003
Memorex . . . . . . . . . . . . . . . . . . . . 0000
Mitsubishi . . . . . . . . . . . . . . . . . . . 0003
Motorola. . . . . . . . .1376, 0476, 0810,
. . . . . . . . . . . . . . . . . . . . . . . . 0276, 1187
Convertidores de Cable
Nova Vision . . . . . . . . . . . . . . . . . . 0008
Novaplex . . . . . . . . . . . . . . . . . . . . 0008
Pace . . . . . . . 1877, 0877, 0237, 0008
Panasonic . 0000, 0008, 0144, 0107
Paragon . . . . . . . . . 0000, 0008, 0525
Penney . . . . . . . . . . . . . . . . . . . . . . 0000
Philips . . . . . . . . . . . . . . . . . 1305, 0317
Pioneer . . . . 1877, 0877, 0144, 0533
Pulsar . . . . . . . . . . . . . . . . . . . . . . . 0000
Quasar . . . . . . . . . . . . . . . . . . . . . . 0000
Regal . . . . . . . . . . . . . . . . . . . . . . . . 0276
Runco . . . . . . . . . . . . . . . . . . . . . . . 0000
Samsung . . . . . . . . . . . . . . 0003, 0144
Scientific Atlanta . . . . . . .1877, 0877,
. . . . . . 0477, 0237, 0003, 0000, 0008
Sony . . . . . . . . . . . . . . . . . . . . . . . . . 1006
Sprucer . . . . . . . . . . . . . . . . . . . . . . 0144
Starcom . . . . . . . . . . . . . . . . . . . . . 0003
Supercable . . . . . . . . . . . . . . . . . . 0276
Torx . . . . . . . . . . . . . . . . . . . . . . . . . 0003
Toshiba . . . . . . . . . . . . . . . . . . . . . . 0000
United Cable . . . . . . . . . . . 0276, 0003
US Electronics . . . 0276, 0003, 0008
Videoway . . . . . . . . . . . . . . . . . . . . 0000
Zenith . . . . . . . . . . . . . . . . . 0000, 0525
For Satellite Set Top Box
Bell ExpressVu . . . . . . . . . . . . . . . 0775
Chaparral. . . . . . . . . . . . . . . . . . . . 0216
DirecTV . . . . . . . . . . . . . . . . . . . . . .1377,
0392, 0566, 0639, 1639, 1142, 0247,
0749,1749, 0724, 0819, 1856, 1076,
1392, 1442,1609, 1640
Dish Network System . .1505, 1005,
. . . . . . . . . . . . . . . . . . . . . . . . 0775, 1775
Dishpro . . . . 1505, 1005, 0775, 1775
Echostar . . . 1505, 1005, 0775, 1775
Expressvu . . . . . . . . . . . . . 0775, 1775
Receptores de Satélite
Funai . . . . . . . . . . . . . . . . . . . . . . . . 1377
GE . . . . . . . . . . . . . . . . . . . . . 0392, 0566
GOI . . . . . . . . . . . . . . . . . . . . 0775, 1775
Hitachi . . . . . . . . . . . . . . . . 0749, 0819
Houston . . . . . . . . . . . . . . . . . . . . . 0775
HTS . . . . . . . . . . . . . . . . . . . . 0775, 1775
Hughes Network Systems . . . .1142,
. . . . . . . . . . . . . . . . . . 0749, 1749, 1442
JVC . . . . . . . . . . . . . . . . . . . . 0775, 1775
Magnavox . . . . . . . . . . . . . 0724, 0722
Memorex . . . . . . . . . . . . . . . . . . . . 0724
47

For Satellite Set Top Box, cont.
Mitsubishi . . . . . . . . . . . . . . . . . . . 0749
Motorola. . . . . . . . . . . . . . . . . . . . . 0856
Optimus . . . . . . . . . . . . . . . . . . . . . 0724
Panasonic . . . . . . . . . . . . . 0247, 0701
Paysat . . . . . . . . . . . . . . . . . . . . . . . 0724
Philips . . . . .1142, 0749, 1749, 0775,
. . . . . . 0724, 0819, 1076, 0722, 1442
Pioneer . . . . . . . . . . . . . . . . 1142, 1442
Proscan . . . . . . . . . . . . . . . 0392, 0566
RadioShack . . . . . . . . . . . . 0566, 0775
RCA . . . . . . .0392, 0566, 1142, 0775,
. . . . . . . . . . . . 0855, 0143, 1392, 1442
Convertidores de Cable, cont.
Samsung . . . . . . . .1377, 1142, 1276,
. . . . . . . . . . . . . . . . . . . . . . . . 1442, 1609
SKY . . . . . . . . . . . . . . . . . . . . . . . . . . 0856
Sony . . . . . . . . . . . . . 0639, 1639, 1640
Thomson . . . . . . . . . . . . . . 0392, 0566
Tivo. . . . . . . . . . . . . . . . . . . . 1142, 1442
Toshiba . . . . . . . . . . 0749, 1749, 1285
UltimateTV . . . . . . . . . . . . 1392, 1640
Uniden . . . . . . . . . . . . . . . . 0724, 0722
Zenith . . . . . . . . . . . . . . . . . 0856, 1856
For Video - Laser Disk Player
Carver . . . . . . . . . . . . . . . . . 0064, 0194
Denon . . . . . . . . . . . . . . . . . 0059, 0172
Harman/Kardon . . . . . . . . . . . . . 0194
Magnavox . . . . . . . 0064, 0194, 0217
Marantz . . . . . . . . . . . . . . . 0064, 0194
Mitsubishi . . . . . . . . . . . . . . . . . . . 0059
NAD . . . . . . . . . . . . . . . . . . . . . . . . . 0059
Optimus . . . . . . . . . . . . . . . . . . . . . 0059
Panasonic . . . . . . . . . . . . . . . . . . . 0204
Philips . . . . . . . . . . . . . . . . . 0064, 0194
For Video - DVD
3D LAB . . . . . . . . . . . . . . . . 0503, 0539
Accurian . . . . . . . . . . . . . . . . . . . . . 0675
Akai . . . . . . . . . . . . . . . . . . . 0695, 0899
Alba . . . . . . . . . . . . . . . . . . . . . . . . . 0672
Alco . . . . . . . . . . . . . . . . . . . . . . . . . 0790
Apex Digital . . . . . . . . . . . . 0533, 0672
Audiovox . . . . . . . . . . . . . . . . . . . . 0790
Blue Parade . . . . . . . . . . . . . . . . . 0571
Blue Sky . . . . . . . . . . . . . . . . . . . . . 0695
Broksonic . . . . . . . . . . . . . . . . . . . . 0695
California Audio Labs . . . . . . . . 0490
Centrex . . . . . . . . . . . . . . . . . . . . . . 0672
Citizen . . . . . . . . . . . . . . . . . . . . . . . 0695
Clairtone . . . . . . . . . . . . . . . . . . . . 0571
Creative . . . . . . . . . . . . . . . 0503, 0539
CyberHome . . . . . . . . . . . . . . . . . . 0816
Denon . . . . . . . . . . . . . . . . . 0490, 0634
Digitrex . . . . . . . . . . . . . . . . . . . . . . 0672
Disney . . . . . . . . . . . . . . . . . . . . . . . 0675
Reproductores DVD
Reproductores Laser Disk (LD)
Pioneer . . . . . . . . . . . . . . . . . . . . . . 0059
Polk Audio . . . . . . . . . . . . . . . . . . . 0194
Quasar . . . . . . . . . . . . . . . . . . . . . . 0204
Sony . . . . . . . . . . . . . . . . . . . 0193, 0201
Technics . . . . . . . . . . . . . . . . . . . . . 0204
Theta Digital . . . . . . . . . . . . . . . . . 0194
Toshiba . . . . . . . . . . . . . . . . . . . . . . 0059
Wards . . . . . . . . . . . . . . . . . . . . . . . 0059
Yamaha . . . . . . . . . . . . . . . . . . . . . 0217
Dual . . . . . . . . . . . . . . . . . . . . . . . . . 0675
DVD2000 . . . . . . . . . . . . . . . . . . . . 0521
Emerson . . . . . . . . . . . . . . . 0591, 0675
Enterprise . . . . . . . . . . . . . . . . . . . 0591
Entivo . . . . . . . . . . . . . . . . . 0503, 0539
Funai . . . . . . . . . . . . . . . . . . . . . . . . 0675
GE . . . . . . . . . . . . . . . . . . . . . . . . . . . 0522
Go Video . . . . . . . . . . . . . . . 0573, 1075
Goodmans . . . . . . . . . . . . . . . . . . 0790
Gradiente . . . . . . . . . . . . . . . . . . . . 0490
Grundig . . . . . . . . . . . . . . . . . . . . . 0539
Hitachi . . . . . . . . . . . . . . . . 0573, 0664
Hiteker . . . . . . . . . . . . . . . . . . . . . . 0672
Integra . . . . . . . . . . . . . . . . 0571, 0627
JMB . . . . . . . . . . . . . . . . . . . . . . . . . 0695
JVC . . . . . . . . 0558, 0623, 0867, 1164
Kawasaki . . . . . . . . . . . . . . . . . . . . 0790
Kenwood . . . . . . . . . . . . . . 0490, 0534
KLH . . . . . . . . . . . . . . . . . . . . . . . . . 0790
48

For Video - DVD, cont.
Kloss . . . . . . . . . . . . . . . . . . . . . . . . 0533
Lasonic . . . . . . . . . . . . . . . . . . . . . . 0627
Lecson . . . . . . . . . . . . . . . . . . . . . . 1533
LG . . . . . . . . . . . . . . . . . . . . . . . . . . . 0591
Magnasonic . . . . . . . . . . . . . . . . . 0675
Magnavox . 0503, 0539, 0646, 0675
Marantz . . . . . . . . . 0503, 0539, 0675
McIntosh . . . . . . . . . . . . . . . . . . . . 1533
Memorex . . . . . . . . . . . . . . . . . . . . 0695
Microsoft . . . . . . . . . . . . . . . . . . . . 0522
Minato . . . . . . . . . . . . . . . . . . . . . . . 0752
Mitsubishi . . . . . . . . . . . . . 1521, 0521
Onkyo . . . . . . . . . . . . . . . . . 0503, 0627
Optimus . . . . . . . . . . . . . . . . . . . . . 0571
Palsonic . . . . . . . . . . . . . . . . . . . . . 0672
Panasonic . . . . . . .0503, 0490, 0571,
. . . . . . . . . . . . 0703, 1362, 1462, 1762
Philco . . . . . . . . . . . . . . . . . . . . . . . . 0675
Philips . . . . .0503, 0539, 0646, 0675,
. . . . . . . . . . . . . . . . . . 0854, 1260, 1354
Pioneer . . . . . . . . . . 0525, 0571, 0631
Polk Audio . . . . . . . . . . . . . . . . . . . 0539
Presidian . . . . . . . . . . . . . . . . . . . . 0675
Proceed . . . . . . . . . . . . . . . . . . . . . 0672
Proscan . . . . . . . . . . . . . . . . . . . . . 0522
RadioShack . . . . . . . . . . . . . . . . . . 0571
RCA .0522, 0571, 0790, 0822, 1132
Reproductores DVD, cont.
Realistic . . . . . . . . . . . . . . . . . . . . . 0571
Reoc . . . . . . . . . . . . . . . . . . . . . . . . . 0752
Rotel . . . . . . . . . . . . . . . . . . . . . . . . 0623
Sampo . . . . . . . . . . . . . . . . . . . . . . 0752
Samsung . . . . . . . .0490, 0573, 0820,
. . . . . . . . . . . . . . . . . . . . . . . . 0899, 1075
Sansui . . . . . . . . . . . . . . . . . . . . . . . 0695
Sanyo . . . . . . . . . . . . . . . . . 0675, 0695
Schwaiger . . . . . . . . . . . . . . . . . . . 0752
Sharp . . . . . . . . . . . . 0630, 0675, 0752
Shinsonic . . . . . . . . . . . . . . . . . . . . 0533
Sonic Blue . . . . . . . . . . . . . . . . . . . 0573
Sony . 0533, 1533, 0864, 1033, 1431
Sylvania . . . . . . . . . . . . . . . . . . . . . 0675
Symphonic . . . . . . . . . . . . . . . . . . 0675
Teac . . . . . . . . . . . . . 0571, 0790, 0809
Technics . . . . . . . . . . . . . . . 0490, 0703
Theta Digital . . . . . . . . . . . . . . . . . 0571
Thomson . . . . . . . . . . . . . . . . . . . . 0522
Toshiba . . . .0503, 0573, 0539, 0695,
. . . . . . . . . . . . . . . . . . . . . . . . 1045, 1154
Universum . . . . . . . . . . . . . . . . . . . 0591
Urban Concepts . . . . . . . 0503, 0539
Venturer . . . . . . . . . . . . . . . . . . . . . 0790
Xbox . . . . . . . . . . . . . . . . . . . . . . . . . 0522
Yamaha . . . . . . . . . 0490, 0539, 0545
Zenith . . . . . . . . . . . . . . . . . 0503, 0591
For Video - VCR
A-Mark . . . . . . . . . . . . . . . . . . . . . . 0000
ABS . . . . . . . . . . . . . . . . . . . . . . . . . . 1972
Admiral . . . . . . . . . . . . . . . . . . . . . . 0060
Adventura . . . . . . . . . . . . . . . . . . . 0000
Aiwa . . . . . . . . . . . . . . . . . . . . . . . . . 0000
Alienware . . . . . . . . . . . . . . . . . . . . 1972
American High . . . . . . . . . 0035, 0081
Amstrad . . . . . . . . . . . . . . . . . . . . . 0000
Astra . . . . . . . . . . . . . . . . . . . . . . . . 0035
Avis . . . . . . . . . . . . . . . . . . . . . . . . . 0000
Bell & Howell . . . . . . . . . . . 0035, 0000
Broksonic . . . . . . . . . . . . . . . . . . . . 1479
Canon . . . . . . . . . . . . . . . . . . . . . . . 0035
Carver . . . . . . . . . . . . . . . . . 0035, 0081
Citizen . . . . . . . . . . . . . . . . . 0035, 0000
Colortyme . . . . . . . 0060, 0035, 0045
Colt . . . . . . . . . . . . . . . . . . . . . . . . . . 0000
Reproductores VCR
Criterion . . . . . . . . . . . . . . . . . . . . . 0000
Crosley . . . . . . . . . . 0035, 0081, 0000
Curtis Mathes . . . . 0060, 0035, 0000
CyberPower . . . . . . . . . . . . . . . . . 1972
Daewoo . . . . . . . . . . . . . . . . . . . . . 0045
Dell . . . . . . . . . . . . . . . . . . . . . . . . . . 1972
Denon . . . . . . . . . . . . . . . . . 0081, 0042
DirecTV . . . . . . . . . . . . . . . . . . . . . . 0739
Dual . . . . . . . . . . . . . . . . . . . . . . . . . 0000
Dynatech . . . . . . . . . . . . . . . . . . . . 0000
Electrohome . . . . . . . . . . . 0060, 0000
Emerex . . . . . . . . . . . . . . . . . . . . . . 0032
Emerson . . . . . . . . . . . . . . . 0000, 1479
Fisher. . . . . . . . . . . . . . . . . . . . . . . . 0000
Fuji . . . . . . . . . . . . . . . . . . . . 0035, 0033
Fujitsu . . . . . . . . . . . . . . . . . . . . . . . 0000
Funai . . . . . . . . . . . . . . . . . . . . . . . . 0000
49

For Video - VCR, cont.
Garrard . . . . . . . . . . . . . . . . . . . . . . 0000
Gateway. . . . . . . . . . . . . . . . . . . . . 1972
GE . . .0060, 0035, 0000, 0807, 1060
Gemini . . . . . . . . . . . . . . . . . . . . . . 0060
Genexxa . . . . . . . . . . . . . . . . . . . . . 0000
Go Video . . . . . . . . . . . . . . . . . . . . . 0614
GoldStar . . . . . . . . . 0035, 0000, 1237
Goodmans . . . . . . . . . . . . 0081, 0000
Gradiente . . . . . . . . . . . . . . . . . . . . 0000
Granada . . . . . . . . . . . . . . . 0081, 0042
Grundig . . . . . . . . . . . . . . . . . . . . . 0081
Harley Davidson . . . . . . . . . . . . . 0000
Harman/Kardon . . . . . . . . . . . . . 0081
Hewlett Packard . . . . . . . . . . . . . 1972
HI-Q . . . . . . . . . . . . . . . . . . . 0035, 0000
Hitachi . . . .0035, 0045, 0000, 0042
Howard Computers . . . . . . . . . . 1972
HP . . . . . . . . . . . . . . . . . . . . . . . . . . . 1972
Hughes Network Systems . . . . . . . . .
. . . . . . . . . . . . . . . . . . . . . . . . 0042, 0739
Humax . . . . . . . . . . . . . . . . . . . . . . 0739
Hush . . . . . . . . . . . . . . . . . . . . . . . . 1972
Hytek . . . . . . . . . . . . . . . . . . . . . . . . 0000
iBUYPOWER . . . . . . . . . . . . . . . . . 1972
Jensen . . . . . . . . . . . . . . . . . . . . . . 0067
JVC . . . . . . . . . . . . . . . . . . . . . . . . . . 0067
Kenwood . . . . . . . . . . . . . . . . . . . . 0067
Kodak . . . . . . . . . . . . . . . . . . . . . . . 0035
KTV . . . . . . . . . . . . . . . . . . . . . . . . . . 0000
Linksys . . . . . . . . . . . . . . . . . . . . . . 1972
Lloyd’s . . . . . . . . . . . . . . . . . . . . . . . 0000
Loewe . . . . . . . . . . . . . . . . . . . . . . . 0081
Logik . . . . . . . . . . . . . . . . . . . . . . . . 0000
LXI . . . . . . . . . . . . . . . 0000, 0042, 0067
Magnasonic . . . . . . . . . . . . . . . . . 0000
Magnavox . . . . . . .0035, 0081, 0000,
. . . . . . . . . . . . . . . . . . . . . . . . 0618, 1781
Marantz . . . . . . . . . . . . . . . 0035, 0081
Matsushita . . . . . . . . . . . . 0035, 0081
Media Center PC . . . . . . . . . . . . . 1972
MEI . . . . . . . . . . . . . . . . . . . . . . . . . . 0035
Memorex . . . . . . . . 0035, 0000, 1237
MGA . . . . . . . . . . . . . . . . . . . . . . . . . 0060
Microsoft . . . . . . . . . . . . . . . . . . . . 1972
Mind . . . . . . . . . . . . . . . . . . . . . . . . . 1972
Minolta . . . . . . . . . . . . . . . . . . . . . . 0042
Reproductores VCR, cont.
Mitsubishi . . . . . . .0060, 0000, 0042,
. . . . . . . . . . . . . . . . . . . . . . . . 0067, 0807
Motorola. . . . . . . . . . . . . . . . . . . . . 0035
MTC . . . . . . . . . . . . . . . . . . . . . . . . . 0000
MTX . . . . . . . . . . . . . . . . . . . . . . . . . 0000
Multitech . . . . . . . . . . . . . . . . . . . . 0000
NEC . . . . . . . . . . . . . . . . . . . . . . . . . 0067
Niveus Media . . . . . . . . . . . . . . . . 1972
Northgate . . . . . . . . . . . . . . . . . . . 1972
Olympus . . . . . . . . . . . . . . . . . . . . . 0035
Optimus . . . . . . . . . 1062, 0035, 0000
Orion . . . . . . . . . . . . . . . . . . 0000, 1479
Panama . . . . . . . . . . . . . . . . . . . . . 0035
Panasonic . . . . . . .1062, 0035, 0000,
. . . . . . . . . . . . . . . . . . 0225, 0614, 0616
Penney . . . .0035, 0081, 0000, 0042,
. . . . . . . . . . . . . . . . . . . . . . . . 0067, 1237
Pentax . . . . . . . . . . . . . . . . . . . . . . . 0042
Philco . . . . . . . . . . . . 0035, 0081, 0000
Philips . . . . .0035, 0081, 0045, 0000,
. . . . . . . . . . . . . . . . . . 0616, 0618, 0739
Pioneer . . . . . . . . . . 0081, 0042, 0067
Polk Audio . . . . . . . . . . . . . . . . . . . 0081
Proscan . . . . . . . . . . . . . . . 0060, 1060
Protec . . . . . . . . . . . . . . . . . . . . . . . 0000
Quartz . . . . . . . . . . . . . . . . . . . . . . . 0035
Quasar . . . . . . . . . . . . . . . . . . . . . . 0035
RadioShack . . . . . . . . . . . . 0035, 0000
RCA . . . . . . .0060, 0035, 0045, 0000,
. . . . . . . . . . . . 0042, 0807, 0880, 1060
Realistic . . . . . . . . . . . . . . . 0035, 0000
ReplayTV . . . . . . . . . . . . . . 0614, 0616
Ricavision. . . . . . . . . . . . . . . . . . . . 1972
Samsung . . . . . . . .0060, 0045, 0000,
. . . . . . . . . . . . . . . . . . . . . . . . 0739, 1014
Sansui . . . . . . . . . . . 0000, 0067, 1479
Sanyo . . . . . . . . . . . . . . . . . . . . . . . 0000
Scott . . . . . . . . . . . . . . . . . . . . . . . . 0045
Sears . . . . . .0060, 0035, 0033, 0045,
. . . . . . . . . . . . 0000, 0042, 0067, 1237
Sharp . . . . . . . . . . . . 0032, 0000, 0807
Shintom . . . . . . . . . . . . . . . . . . . . . 0000
Signature . . . . . . . . 0060, 0035, 0000
Sonic Blue . . . . . . . . . . . . . 0614, 0616
Sony . . . . . . .0035, 0032, 0033, 0000,
. . . . . . . . . . . 0067, 0636, 1232, 1972
50

For Video - VCR, cont.
Soundmaster . . . . . . . . . . . . . . . . 0000
Stack 9 . . . . . . . . . . . . . . . . . . . . . . 1972
STS . . . . . . . . . . . . . . . . . . . . . . . . . . 0042
SV2000 . . . . . . . . . . . . . . . . . . . . . . 0000
SVA . . . . . . . . . . . . . . . . . . . . . . . . . . 0000
Sylvania . . . 0035, 0081, 0000, 1781
Symphonic . . . . . . . . . . . . . . . . . . 0000
Systemax . . . . . . . . . . . . . . . . . . . . 1972
Tagar Systems . . . . . . . . . . . . . . . 1972
Tandy . . . . . . . . . . . . . . . . . . . . . . . 0000
Tatung . . . . . . . . . . 0081, 0000, 0067
Teac . . . . . . . . . . . . . . . . . . . 0000, 0067
Technics . . . . . . . . . . . . . . . 0035, 0000
Teknika . . . . . . . . . . . . . . . . 0035, 0000
Thomas . . . . . . . . . . . . . . . . . . . . . 0000
Thomson . . . . . . . . . . . . . . . . . . . . 0060
Tivo. . . . . . . . 0618, 0636, 0739, 1996
Reproductores VCR, cont.
TMK . . . . . . . . . . . . . . . . . . . . . . . . . 0000
Toshiba . . . . . . . . . .0045, 0000, 0845,
. . . . . . . . . . . . . . . . . . . . . . . . 1972, 1996
Touch . . . . . . . . . . . . . . . . . . . . . . . 1972
Ultra . . . . . . . . . . . . . . . . . . . . . . . . . 0045
Vector . . . . . . . . . . . . . . . . . . . . . . . 0045
Victor . . . . . . . . . . . . . . . . . . . . . . . . 0067
Video Concepts . . . . . . . . . . . . . . 0045
Videosonic . . . . . . . . . . . . . . . . . . . 0000
Viewsonic . . . . . . . . . . . . . . . . . . . 1972
Villain . . . . . . . . . . . . . . . . . . . . . . . . 0000
Voodoo . . . . . . . . . . . . . . . . . . . . . . 1972
Wards . . . . .0060, 0035, 0081, 0033,
. . . . . . . . . . . . . . . . . . 0045, 0000, 0042
White Westinghouse . . . . . . . . . 0000
XR-1000 . . . . . . . . . . . . . . . 0035, 0000
Zenith . . . . . . . . . . . . . . . . . . 0033, 000
For Video - Accessory
ABS . . . . . . . . . . . . . . . . . . . . . . . . . . 1272
Alienware . . . . . . . . . . . . . . . . . . . . 1272
CyberPower . . . . . . . . . . . . . . . . . 1272
D-Link . . . . . . . . . . . . . . . . . . . . . . . 1554
Gateway. . . . . . . . . . . . . . . . . . . . . 1272
Hewlett Packard . . . . . . . 1272, 1267
Howard Computers . . . . . . . . . . 1272
HP . . . . . . . . . . . . . . . . . . . . . 1272, 1267
Hush . . . . . . . . . . . . . . . . . . . . . . . . 1272
iBUYPOWER . . . . . . . . . . . . . . . . . 1272
Linksys . . . . . . . . . . . . . . . . 1272, 1365
Media Center PC . . . . . . . . . . . . . 1272
Microsoft . . . . . . . . . . . . . . . . . . . . 1272
For Television
A-Mark . . . . . . . . . . . . . . . . 0047, 0054
Accuscan . . . . . . . . . . . . . . . . . . . . 0047
Action . . . . . . . . . . . . . . . . . . . . . . . 0030
Admiral . . . . . . . . . .0047, 0054, 0017,
. . . . . . . . . . . . 0051, 0093, 0463, 0180
Advent . . . . . . . . . . . . . . . . . . . . . . 0761
Adventuri . . . . . . . . . . . . . . . . . . . . 0000
Agna . . . . . . . . . . . . . . . . . . . . . . . . 0150
Aiko . . . . . . . . . . . . . . . . . . . . . . . . . 0092
Akai . . . . . . . . . . . . .0060, 0812, 0702,
. . . . . . . . . . . . . . . . . . . . . . . . 0030, 0145
Televisores
Accesorios de Video
Mind . . . . . . . . . . . . . . . . . . . . . . . . . 1272
Niveus Media . . . . . . . . . . . . . . . . 1272
Northgate . . . . . . . . . . . . . . . . . . . 1272
Ricavision. . . . . . . . . . . . . . . . . . . . 1272
Sony . . . . . . . . . . . . . 1272, 1324, 1364
Stack 9 . . . . . . . . . . . . . . . . . . . . . . 1272
Systemax . . . . . . . . . . . . . . . . . . . . 1272
Tagar Systems . . . . . . . . . . . . . . . 1272
Toshiba . . . . . . . . . . . . . . . . . . . . . . 1272
Touch . . . . . . . . . . . . . . . . . . . . . . . 1272
Viewsonic . . . . . . . . . . . . . . . . . . . 1272
Voodoo . . . . . . . . . . . . . . . . . . . . . . 1272
Alleron . . . . . . . . . . . . . . . . . . . . . . . 0030
Ambassador . . . . . . . . . . . . . . . . . 0150
America Action . . . . . . . . . . . . . . 0180
American High . . . . . . . . . 0000, 0060
Amstrad . . . . . . . . . . . . . . . . . . . . . 0171
Amtron . . . . . . . . . . . . . . . . 0000, 0180
Anam . . . . . . . . . . . . . . . . . . . . . . . . 0180
AOC . . . . . . . . . . . . . . . . . . . 0180, 0030
Apex Digital . . . . . . . . . . . . 0156, 0765
Audinac . . . . . . . . . . . . . . . . . . . . . 0180
Audiovox . . . . . . . . 0451, 0180, 0092
51

For Television, cont.
Aventura . . . . . . . . . . . . . . . . . . . . 0171
Baysonic . . . . . . . . . . . . . . . . . . . . 0180
Beaumark . . . . . . . 0017, 0178, 0030
Belcor . . . . . . . . . . . . . . . . . . . . . . . 0030
Bell & Howell . . . . . 0054, 0154, 0093
Bradford . . . . . . . . . . . . . . . . . . . . . 0180
Brockwood . . . . . . . . . . . . 0178, 0030
Broksonic . . . . . . . . 0236, 0463, 0180
Candle . . . . . . . . . . . . . . . . . . . . . . . 0030
Capehart . . 0017, 0178, 0030, 0092
Carnivale . . . . . . . . . . . . . . . . . . . . 0030
Carver . . . . . . . . . . . . . . . . . . . . . . . 0054
Celebrity . . . . . . . . . . . . . . . . . . . . . 0000
Celera . . . . . . . . . . . . . . . . . . . . . . . 0765
Changhong . . . . . . . . . . . . 0156, 0765
Cineral . . . . . . . . . . . . . . . . . 0451, 0092
Citek . . . . . . . . . . . . . . . . . . . . . . . . . 0047
Citizen . . . . .0054, 0000, 0451, 0463,
. . . . . . 0180, 0060, 0030, 0171, 0092
Clarion . . . . . . . . . . . . . . . . . . . . . . 0180
Classic . . . . . . . . . . . . . . . . . 0030, 0092
Colortyme . . . . . . .0047, 0054, 0017,
. . . . . . . . . . . . . . . . . . 0060, 0178, 0030
Commercial Solutions . . 1447, 0047
Conic . . . . . . . . . . . . . . . . . . . . . . . . 0178
Contec . . . . . . . . . . . . . . . . . . . . . . 0180
Craig . . . . . . . . . . . . . . . . . . 0180, 0171
Crosley . . . . . . . . . .0054, 0000, 0180,
. . . . . . . . . . . . . . . . . . . . . . . . 0030, 0171
Crown . . . . . . . . . . . . . . . . . 0093, 0180
Curtis Mathes . . . . . . . . . .0047, 0054,
0154, 0000, 0051, 0451, 0093, 0180,
0060, 0702, 0178, 0030, 0145, 0166,
. . . . . . . . . . . . . . . . . . . . . . . . . . . . . . 1347
CXC . . . . . . . . . . . . . . . . . . . . . . . . . 0180
Daewoo . . . . . . . . .0451, 0178, 0092,
. . . . . . . . . . . . . . . . . . . . . . . . 1756, 1755
Dayton . . . . . . . . . . . . . . . . . . . . . . 0092
Daytron . . . . . . . . . 0178, 0030, 0092
Dell . . . . . . . . . . . . . . . . . . . . . . . . . . 1178
Denon . . . . . . . . . . . . . . . . . . . . . . . 0145
Dumont . . . . . . . . . 0017, 0180, 0178
Durabrand . . . . . . .0463, 0180, 0178,
. . . . . . . . . . . . . . . . . . . . . . . . . . . . . . 0171
Dwin . . . . . . . . . . . . . . . . . . . . . . . . 0093
Dynex . . . . . . . . . . . . . . . . . . . . . . . 1463
Eaton . . . . . . . . . . . . . . . . . . . . . . . . 0060
Televisores, cont.
Electroband . . . . . . . . . . . . . . . . . 0000
Electrograph . . . . . . . . . . . . . . . . . 1755
Electrohome . . . . .0154, 0000, 0463,
. . . . . . . . . . . . . . . . . . 0150, 0178, 0030
Emerald . . . . . . . . . . . . . . . . . . . . . 0178
Emerson . . . . . . . . .0047, 0154, 0451,
0236, 0463, 0180, 0150, 0178, 0171
Envision . . . . . . . . . . . . . . . . . . . . . 0030
ESA . . . . . . . . . . . . . . . . . . . . 0812, 0171
Fisher. . . . . . . . . . . . 0054, 0154, 0000
Fortress . . . . . . . . . . . . . . . . . . . . . 0093
Fujitsu . . . . . . . . . . . . . . . . . 0683, 0809
Funai . . . . . . . . . . . . 0000, 0180, 0171
Futuretech . . . . . . . . . . . . . . . . . . . 0180
Gateway. . . . . . . . . . . . . . . 1756, 1755
GE . . . . . . . . .1447, 0047, 0000, 0051,
0451, 0060, 0178, 0030, 1347
Gemini . . . . . . . . . . . . . . . . . . . . . . 0047
Gibralter . . . . . . . . . 0017, 0000, 0030
GoldStar . . . 0047, 0054, 0178, 0030
Gradiente . . . . . . . . . . . . . . . . . . . . 0053
Grundig . . . . . . . . . . . . . . . . . . . . . 0683
Grundy . . . . . . . . . . . . . . . . . . . . . . 0180
Grunpy . . . . . . . . . . . . . . . . . . . . . . 0180
Hallmark . . . . . . . . 0236, 0180, 0178
Harley Davidson . . . . . . .0000, 0180,
. . . . . . . . . . . . . . . . . . 0060, 0178, 0030
Harman/Kardon . . . . . . . . . . . . . 0054
Harvard . . . . . . . . . . . . . . . . . . . . . 0180
Havermy . . . . . . . . . . . . . . . . . . . . 0093
Heathkit . . . . . . . . . . . . . . . . . . . . . 0017
Hello Kitty . . . . . . . . . . . . . . . . . . . 0451
Hitachi . . . .0047, 0054, 0017, 0000,
. . . . . . . . . . . . . . . . . . 0051, 1145, 0145
Ima . . . . . . . . . . . . . . 0236, 0180, 0178
Infinity . . . . . . . . . . . . . . . . . . . . . . . 0054
Insignia . . . . . . . . . . . . . . . . . . . . . . 0171
Inteq . . . . . . . . . . . . . . . . . . 0017, 0145
JBL . . . . . . . . . . . . . . . . . . . . . . . . . . 0054
JCB . . . . . . . . . . . . . . . . . . . . . . . . . . 0000
Jensen . . . . . . . . . . . . . . . . . . . . . . 0761
JIL . . . . . . . . . . . . . . . . . . . . . . . . . . . 0030
Jutan . . . . . . . . . . . . . . . . . . . . . . . . 0030
JVC . . . . . . . .0054, 0053, 0030, 0650,
. . . . . . . . . . . . . . . . . . . . . . . . 0731, 1253
Kamp . . . . . . . . . . . . . . . . . . 0017, 0180
Kawasho . . . . . . . . . . . . . . . . . . . . 0030
52

For Television, cont.
KEC . . . . . . . . . . . . . . . . . . . . 0180, 0060
Kenwood . . . . . . . . . . . . . . 0180, 0030
KLH . . . . . . . . . . . . . 0156, 0180, 0765
Kloss . . . . . . . . . . . . . . . . . . . . . . . . 0030
Konka . . . . . . . . . . . . . . . . . . . . . . . 0180
KTV . . . . . . . . . . . . . . 0463, 0180, 0030
Lark . . . . . . . . . . . . . . . . . . . . . . . . . 0154
LG . . . . . . . . .0054, 1265, 0060, 0178,
. . . . . . . . . . . . . . . . . . 0030, 0856, 1178
Lloyd’s . . . . . . . . . . . 0236, 0180, 0030
Logik . . . . . . . . . . . . . . . . . . 0236, 0180
LXI . . 0047, 0054, 0017, 0154, 0000,
0156, 0051, 0093, 0060, 0053, 0178,
. . . . . . . . . . . . . . . . . . 0030, 0171, 0166
Magnasonic . . . . .0054, 0000, 0156,
. . . . . . . . . . . . . . . . . . 0093, 0030, 0092
Magnavox . . . . . . .0047, 1454, 0054,
0154, 0000, 0250, 0051, 0180, 0060,
. . . . . . 0030, 0171, 0092, 1254, 1755
Majestic . . . . . . . . . . . . . . . . . . . . . 0017
Marantz . . . . . . . . . 1454, 0054, 0030
Matsushita . . . . . . 0250, 0051, 0650
Maxent . . . . . . . . . . . . . . . . 1756, 1755
Megatron . . . . . . . . 0047, 0178, 0145
Memorex . . . . . . . .0154, 0463, 0180,
. . . . . . . . . . . . . . . . . . 0150, 0178, 0030
MGA . . . . . . . . . . . . . 0150, 0178, 0030
MGN Technology . . . . . . . . . . . . 0178
Micro Genius . . . . . . . . . . . . . . . . . 0150
Midland. . . . . . . . . . 0047, 0017, 0051
Mitsubishi .0154, 0093, 1250, 0150,
. . . . . . . . . . . . . . . . . . 0178, 0030, 0836
Motorola. . . 0054, 0051, 0093, 0150
MTC . . . . . . . 0180, 0060, 0030, 0092
Multitech . . . . . . . . . . . . . . . . . . . . 0180
NAD . . . . . . . 0156, 0178, 0166, 1156
NEC . . . . . . . 0047, 0178, 0030, 1704
NetTV . . . . . . . . . . . . . . . . . . . . . . . 1755
Nikko . . . . . . . . . . . . 0178, 0030, 0092
Nikkodo . . . . . . . . . 0178, 0030, 0092
Nishi . . . . . . . . . . . . . . . . . . . . . . . . . 0030
NTC . . . . . . . . . . . . . . . . . . . . . . . . . 0092
Nyon . . . . . . . . . . . . . . . . . . . . . . . . 0000
Onwa . . . . . . . . . . . . . . . . . . . . . . . . 0180
Optimus . . .0154, 0250, 0093, 0180,
. . . . . . 0150, 0178, 0030, 0166, 0650
Optonica . . . . . . . . . . . . . . . . . . . . 0093
Televisores, cont.
Orion . . . . . .0017, 0236, 0463, 0180,
. . . . . . . . . . . . . . . . . . . . . . . . 0178, 1463
Pace . . . . . . . . . . . . . . . . . . . . . . . . . 0092
Panasonic . . . . . . .0054, 0000, 0156,
. . . . . . 0250, 0051, 0236, 0030, 0650
Paxonic . . . . . . . . . . . . . . . . 0060, 0030
PCE . . . . . . . . . . . . . . . . . . . . 0156, 0060
Penney . . . .0047, 0000, 0156, 0250,
. . . . . . 0051, 0060, 0178, 0030, 1347
Philco . . . . . . 0054, 0463, 0030, 0145
Philips . . . . .1454, 0054, 0030, 0171,
. . . . . . . . . . . . . . . . . . . . . . . . 0690, 1254
Pilot . . . . . . . 0051, 0060, 0178, 0030
Pioneer . . . . . . . . . . . . . . . . 0166, 0679
Polaroid . . . . . . . . . . . . . . . . . . . . . 0765
Portland . . . . . . . . . . . . . . . 0451, 0092
Precision. . . . . . . . . . . . . . . 0236, 0180
Prima . . . . . . . . . . . . . . . . . . . . . . . . 0761
Prism . . . . . . . . . . . . . . . . . . 0250, 0051
Proscan . . . . . . . . . 1447, 0047, 1347
Proton . . . . . . . . . . . . . . . . . . . . . . . 0178
Pulsar . . . . . . . . . . . . . . . . . 0017, 0092
Pulser . . . . . . . . . . . . . . . . . 0178, 0092
Quartz . . . . . . . . . . . . . . . . . 0150, 0178
Quasar . . . . . . . . . . 0250, 0051, 0650
Rabbit . . . . . . . . . . . . . . . . . . . . . . . 0047
RadioShack . . . . . .0047, 0154, 0180,
. . . . . . . . . . . . . . . . . . 0150, 0178, 0030
RCA . . . . . . .1447, 0047, 0054, 0000,
0051, 0093, 0178, 0090, 0679, 1047,
. . . . . . . . . . . . . . . . . . . . . . . . 1347, 1547
Realistic . . .0047, 0154, 0180, 0150,
. . . . . . . . . . . . . . . . . . . . . . . . 0178, 0030
Runco . . . . . . . . . . . 0017, 0060, 0030
Sampo . . . . 0047, 0030, 1756, 1755
Samsung . .0047, 0054, 0017, 0154,
0060, 0812, 0702, 0178, 0030, 1060
Sanky . . . . . . . . . . . . . . . . . 0060, 0030
Sansui . . . . . . . . . . . 0463, 0060, 0030
Sanyo . . . . .0047, 0054, 0154, 0000,
Sanyo . . . . . . . . . . . 0463, 0171, 1755
Saville . . . . . . . . . . . . . . . . . . . . . . . 0060
Scotch . . . . . . . . . . . . . . . . . . . . . . . 0178
Scott . . . . . . 0236, 0180, 0178, 0030
Sears . . . . . .0047, 0054, 0017, 0154,
0000, 0156, 0051, 0093, 0060, 0053,
. . . . . . . . . . . . 0178, 0030, 0171, 0166
Sharp . . . . . . . . . . . . 0054, 0093, 0180
53

For Television, cont.
Sheng Chia . . . . . . . . . . . . . . . . . . 0093
Shivaki. . . . . . . . . . . . . . . . . . . . . . . 0178
Siemens . . . . . . . . . . . . . . . . . . . . . 0145
Signature . . . . . . . . 0047, 0093, 0030
Simpson . . . . . . . . . . . . . . . 0178, 0030
Singer . . . . . . . . . . . . . . . . . 0060, 0092
Solar Drape . . . . . . . . . . . . . . . . . . 0000
Sony . . . . . . .0017, 0154, 1100, 0000,
. . . . . . . . . . . . . . . . . . . . . . . . 0150, 0053
Soundesign . . . . . . . . . . . . 0180, 0178
Spectravision . . . . . . . . . . 0156, 0178
Squareview . . . . . . . . . . . . . . . . . . 0171
SR2000 . . . . . . . . . . . . . . . . 0154, 0171
SSS . . . . . . . . . . . . . . . . . . . . . . . . . . 0180
Starlite . . . . . . . . . . . . . . . . . 0236, 0180
Superscan . . . . . . . . . . . . . . . . . . . 0093
Supreme . . . . . . . . . . . . . . . . . . . . 0000
SV2000 . . . . . . . . . . . . . . . . . . . . . . 0054
Sylvania . . .0047, 0054, 0154, 0000,
. . . . . . 0051, 0178, 0030, 0171, 0092
Symphonic 0000, 0180, 0178, 0171
Tandy . . . . . . . . . . . . . . . . . . . . . . . 0093
Tatung . . . . . . . . . . 0000, 0051, 1756
Teac . . . . . . . . . . . . . . . . . . . . . . . . . 0154
Technics . . . . . . . . . 0054, 0250, 0051
Technovox . . . . . . . . . . . . . . . . . . . 0030
Techwood . . . . . . . 0250, 0051, 0060
Teknika . . . .0054, 0463, 0180, 0150,
. . . . . . . . . . . . . . . . . . 0060, 0178, 0092
Telecolor. . . . . . . . . . . . . . . . . . . . . 0017
Telefunken . . . . . . . . . . . . . . . . . . . 0702
Thomas . . . . . . . . . . . . . . . 0047, 0178
Thomson . . . . . . . . . . . . . . 1447, 0047
TMK . . . . . . . . . . . . . 0236, 0180, 0178
Televisores, cont.
TNCi . . . . . . . . . . . . . . . . . . . . . . . . . 0017
Tocom . . . . . . . . . . . . . . . . . . . . . . . 0156
Toshiba . . . .0154, 1256, 0156, 0150,
1265, 0060, 1145, 0145, 0166, 0650,
. . . . . . . . . . . . 0845, 1156, 1656, 1704
Totevision . . . . . . . . . . . . . . . . . . . 0051
Toyomenka . . . . . . . . . . . . . . . . . . 0178
Truetone. . . . . . . . . . . . . . . 0250, 0051
TVS . . . . . . . . . . . . . . . . . . . . . . . . . . 0463
Ultra . . . . . . . . . . . . . . . . . . . . . . . . . 0092
Universal . . . . . . . . . . . . . . . . . . . . 0047
V . . . . . . . . . . . . . . . . 1756, 0885, 1755
Vector Research . . . . . . . . . . . . . 0030
Victor . . . . . . . . . . . . . . . . . . . . . . . . 0053
Vidikron . . . . . . . . . . . . . . . . . . . . . 0054
Vidtech . . . . . . . . . . . . . . . . . . . . . . 0178
Viewsonic . . . . . . . . . . . . . 0885, 1755
Viking . . . . . . . . . . . . . . . . . . . . . . . 0060
Vizio . . 1756, 0885, 1755, 0178, 1265
Wards . . . . .0047, 0054, 0017, 0154,
0000, 0051, 0093, 0236, 0178, 0030,
. . . . . . . . . . . . . . . . . . . . . . . . 0166, 1156
Waycon . . . . . . . . . . . . . . . . . . . . . 0156
Welton . . . . . . . . . . . . . . . . . . . . . . 0178
Westinghouse . . . 0000, 0451, 0885
White Westinghouse . . . 0451, 0236,
. . . . . . . . . . . . . . . . . . . . . . . . . . . . . . 0463
World. . . . . . 0451, 0236, 0463, 0180
XR-1000 . . . . . . . . . 0154, 0180, 0171
Yamaha . . . . . . . . . . . . . . . . . . . . . 0030
Yorx . . . . . . . . . . . . . . . . . . . . . . . . . 0030
Zenith . . . . .0047, 0017, 0000, 0093,
0463, 1265, 0812, 0178, 0030, 1145,
. . . . . . . . . . . . . . . . . . 0145, 0171, 0092
54
 Loading...