

Page 1
9800 Martel Road
Lenoir City, TN 37772
P
A
V
8
P
A
V
8
0
0
High-fidelity Audio-Video
In-Flight Entertainment System
With DVD/MP3/CD Player
and Radio Receiver
STC-PMA
Document P/N 200-800-0101
Revision 5
February 2004
Installation and Operation Manual
In certified aircraft, warranty is not valid unless this product is installed by an
Authorized PS Engineering dealer.
PS Engineering, Inc. 2004 ©
Copyright Notice
Any reproduction or retransmittal of this publication, or any portion thereof, without the expressed written permission of PS Engineering, Inc. is strictly prohibited. For further information contact the Publications Manager at PS Engineering, Inc., 9800 Martel
Road, Lenoir City, TN 37772. Phone (865) 988-9800.
Page 2

Table of Contents
SECTION I GENERAL INFORMATION........................................................................ 1-1
1.1 INTRODUCTION........................................................................................................... 1-1
1.2 SCOPE ............................................................................................................................. 1-1
1.3 EQUIPMENT DESCRIPTION ..................................................................................... 1-1
1.4 APPROVAL BASIS (PENDING) ..................................................................................... 1-1
1.5 SPECIFICATIONS......................................................................................................... 1-2
1.6 EQUIPMENT SUPPLIED ............................................................................................. 1-3
OPTIONAL EQUIPMENT............................................................................................................. 1-4
PVA802 INSTALLATION KIT (250-802-0100) .......................................................................... 1-4
1.7 EQUIPMENT REQUIRED BUT NOT SUPPLIED .................................................... 1-4
1.8 APPROVED AUDIO SYSTEMS................................................................................... 1-5
1.9 LICENSE REQUIREMENTS ....................................................................................... 1-5
SECTION II - INSTALLATION........................................................................................ 2-1
2.1 GENERAL INFORMATION ........................................................................................ 2-1
2.1.1 SCOPE ...........................................................................................................................2-1
2.2 UNPACKING AND PRELIMINARY INSPECTION................................................................ 2-1
2.3 EQUIPMENT INSTALLATION PROCEDURES .................................................................... 2-1
2.3.1 COOLING REQUIREMENTS .............................................................................................. 2-1
2.3.2 MOUNTING REQUIREMENTS........................................................................................... 2-1
2.3.3 MOUNTING RACK INSTALLATION .................................................................................. 2-2
2.3.4 CONNECTOR ASSEMBLY ................................................................................................ 2-3
2.4 CABLE HARNESS WIRING ............................................................................................... 2-4
2.4.1 NOISE ............................................................................................................................. 2-4
2.4.2 POWER............................................................................................................................ 2-5
2.4.3 BACKLIGHTING .............................................................................................................. 2-5
2.4.4 ANTENNA ....................................................................................................................... 2-5
2.4.5 AUX ENTERTAINMENT AUDIO AND AUX ENABLE........................................................ 2-6
2.5 UNIT INSTALLATION........................................................................................................ 2-6
2.6 PVT801 DISPLAY INSTALLATION: ................................................................................. 2-6
2.7 OPTIONAL PVA802 VIDEO DISTRIBUTION AMPLIFIER INSTALLATION .................. 2-6
2.8 INTERNAL ADJUSTMENTS ............................................................................................... 2-7
2.9 POST INSTALLATION CHECKOUT ................................................................................... 2-7
2.9.1 SYSTEM CHECKOUT ....................................................................................................... 2-7
2.10 FINAL INSPECTION......................................................................................................... 2-8
SECTION III OPERATION ............................................................................................... 3-1
3.1 SCOPE ............................................................................................................................. 3-1
3.2 OPERATING CONTROLS................................................................................................... 3-1
3.2.1 POWER/VOLUME CONTROL (1) ...................................................................................... 3-1
3.2.2 ▲
3.2.3 ►
3.2.4 THE ►► BUTTON (4) ................................................................................................... 3-2
3.2.5 THE MODE KNOB (5)...................................................................................................... 3-2
3.2.6 THE ◄◄ BUTTON (6) .................................................................................................... 3-2
3.3 DISPLAY OPERATION....................................................................................................... 3-3
3.4 REMOTE OPERATION ...................................................................................................... 3-4
STOP/EJECT BUTTON (2) .......................................................................................... 3-1
PLAY/PAUSE BUTTON (3)......................................................................................... 3-1
Page 3

PS Engineering
PAV80 Series IFE System
Installation and Operator’s Manual
3.5 DISPLAY DIMMING (7) ..................................................................................................... 3-5
SECTION IV- WARRANTY AND SERVICE.................................................................. 4-1
4.1 WARRANTY ...................................................................................................................... 4-1
4.2 FACTORY SERVICE .......................................................................................................... 4-1
APPENDIX A – MP3 CREATION ..................................................................................A
5.1 CREATING MP3S FROM AN AUDIO CD..............................................................................A
APPENDIX B – INSTALLATION DRAWINGS ......................................................... B
APPENDIX C CONNECTOR INTERCONNECT..............................................................C
7.1 SINGLE DISPLAY SYSTEM...................................................................................................C
APPENDIX D- STC INFORMATION AND INSTRUCTIONS FOR CONTINUING
AIRWORTHINESS ....................................................................................................................D
8.1 INSTRUCTIONS FOR FAA FORM 337, PAV80S..................................................................D
8.2 INSTRUCTIONS FOR CONTINUING AIRWORTHINESS, PAV80S ........................................D
8.3 MASTER DRAWING LIST ....................................................................................................D
APPENDIX E RTCA DO160D/EUROCAE ED-14D ENVIRONMENTAL
QUALIFICATION FORM.........................................................................................................D
Table of Figures
Figure 2-2 Avionics Mounting Rails (Typical) ........................................................................................... 2-2
Figure 2-3 Completed panel opening (Typical) .......................................................................................... 2-3
Figure 2-4 Completed panel installation ..................................................................................................... 2-3
Figure 2-5 -Tray Assembly ......................................................................................................................... 2-4
Figure 2-8 View of typical PVA802 Installation ........................................................................................ 2-7
Figure 3-1 Front Panel Controls.................................................................................................................. 3-1
Figure 3-3- Remote Control (not to scale) .................................................................................................. 3-4
Figure 6-1 Panel Location Drawing (Typical) 120-800-8801........................................................................B
Figure 6-2 PAV80 Installation Diagram (Typical) 120-800-2488.................................................................C
Figure 6-3 Tray Installation Drawing, 002-973-0430 ....................................................................................D
Figure 6-4 Display connector layout .............................................................................................................. E
Figure 6-5 - PVT801 Monitor Dimension Details ......................................................................................... E
Figure 6-6 PVT801 Mounting Tray Dimensions (if used)............................................................................. F
Figure 6-7 Circuit breaker installation drawing 120-800-8802 (typical) .......................................................G
Figure 6-8 PVA802 Video Distribution Amplifier Installation (Dwg. 120-802-0100) .................................H
Figure 6-9 PVA802 Connector viewed from cable side ................................................................................H
Rev Date Change
1 1st Release
2 Sept 03 STC Release
3 Nov 03 Remove installation angle restriction
4 Jan 04 Add information on portable display mount
5 Feb 04 Add restriction to use ONLY PS Displays on display power
200-800-0101 Page ii Rev. 5 Feb. 2004
Page 4

PS Engineering
PAV80 Series IFE System
Installation and Operator’s Manual
Section I GENERAL INFORMATION
1.1 INTRODUCTION
Quality cockpit and cabin entertainment has long been an elusive dream in general aviation. From marginal
performance to unapproved parts, pilots couldn’t enjoy the same entertainment in their aircraft as they
could in the family car.
The PAV80-Series represents such a product. This system combines a Digital Versatile Disc (DVD) player
with CD and MP3 capability with an AM/FM radio for ultimate in-flight entertainment capability.
Before installing and/or using this product, please read this manual completely. This will ensure that you
will take full advantage of all the advanced features in the PAV80.
1.2 SCOPE
This manual provides detailed installation and operation instructions for the PS Engineering PAV80-series
of IFE Systems. This includes the following units:
Model Part Number Description
PAV80 050-800-0100 Integrated DVD-IFE System with CD/MP3/AM/FM
PAV80 050-800-0200 European Version Tuner
PVT801 050-801-0100 5.6” LCD Video Display
Remote 051-803-0150 IR Remote Control
PVA802 050-802-0100 Remote Video Distribution Amplifier
Where the functions are identical to all units, it will be referred to herein as a PAV80. Otherwise, the applicable units will be specified.
1.3 EQUIPMENT DESCRIPTION
The PAV80 System is a single panel mounted unit that contains a DVD player with MP3 media capability
and an AM/FM radio receiver. It also contains a high-fidelity stereo amplifier to provide the entertainment
output to the aircraft audio system. A single LCD monitor (PVT801) is included in the system. Up to four
external video displays can provide visual entertainment to the passengers, with the optional video distribution amplifier (PVA802).
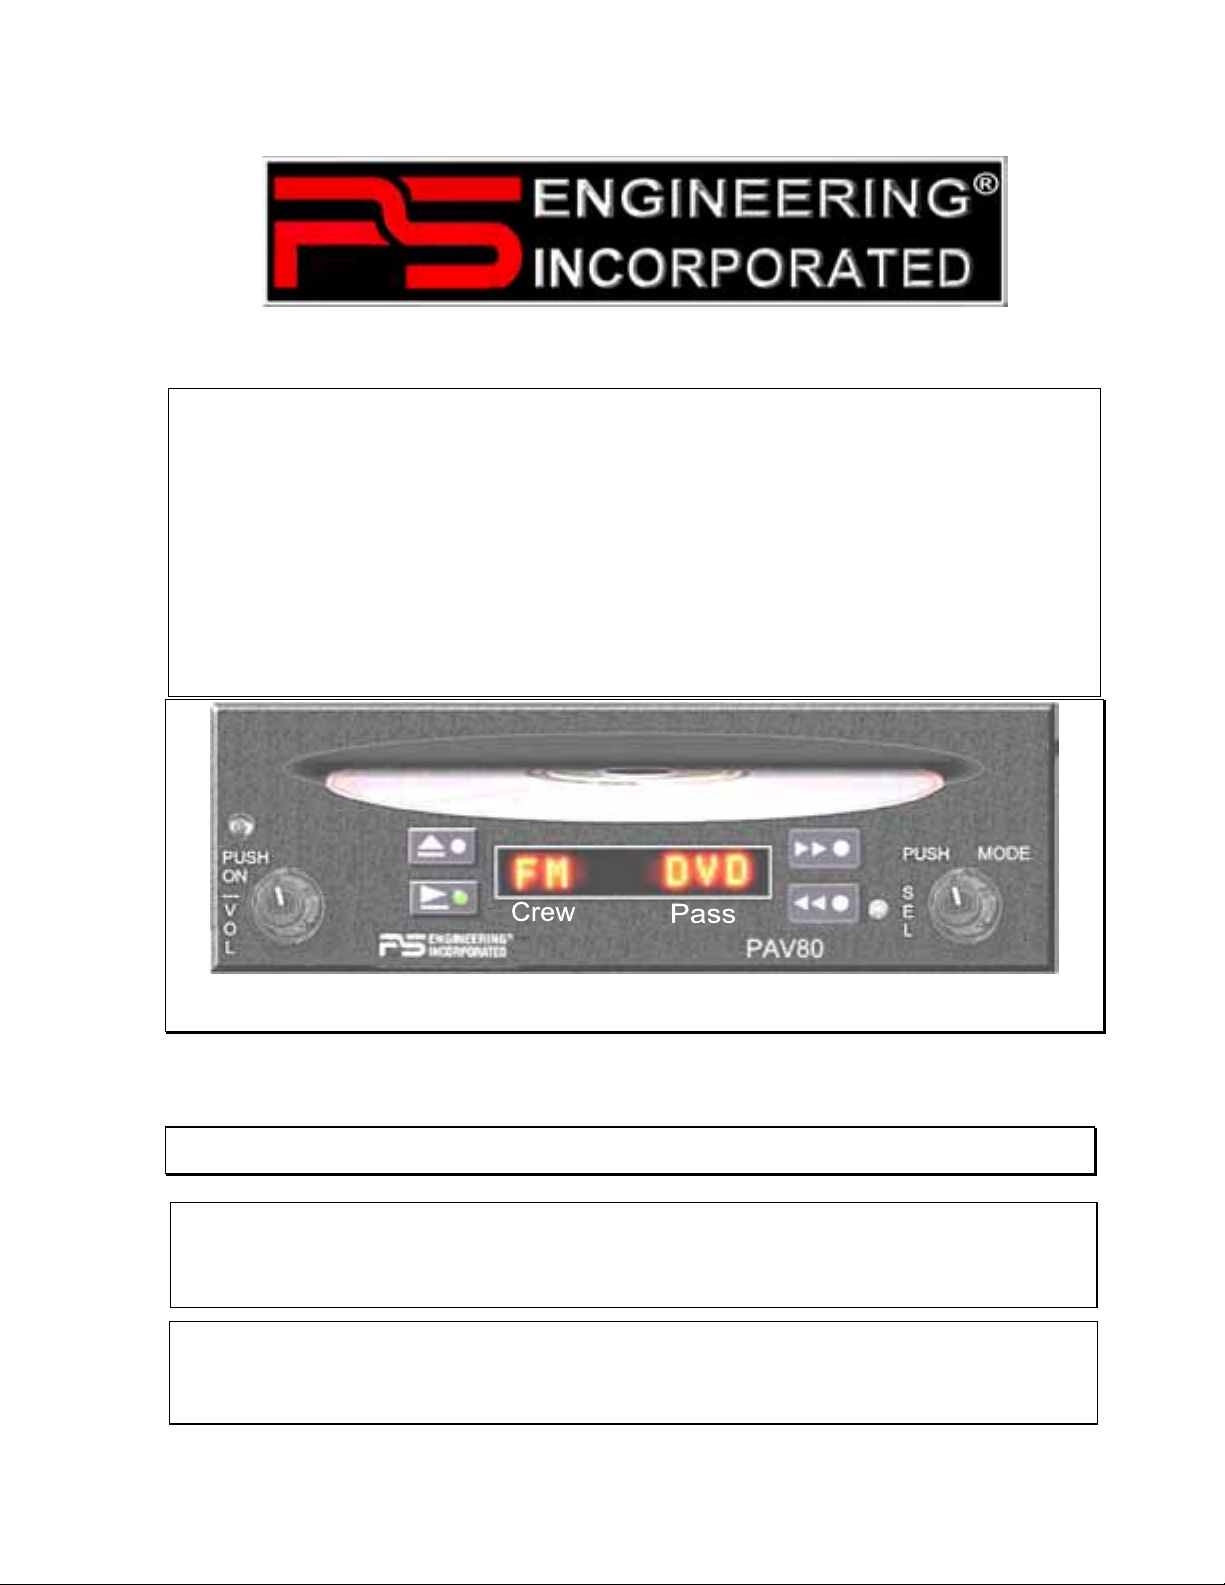
An 8-digit LED display provides information about the systems modes and media in use. A remote control
is used for passenger control over the system.
1.4 APPROVAL BASIS
The PAV80 is FAA approved FAA-STC SA02707AT and manufactured under PMA. PQ1336CE.
All systems comply with relevant portions of EUROCAE ED-14D/DO-160D (Environmental Conditions
and Test Procedures for Airborne Equipment), ED12B/DO-178B (Software Considerations for Airborne
Equipment) and ED- 18/DO-214 (Audio Systems Characteristics and Minimum Operational Performance
Standards for Aircraft Audio Systems).
STC SAAT can be used as a basis for approval in other aircraft provided the generic installation manual,
Document Number 200-800-0002 or later approved revision, is followed.
Advisory Circulars AC43.13-1B Acceptable Methods, Techniques, and Practices - Aircraft Inspection and
Repair, and 43.13-2A - Acceptable Methods, Techniques, And Practices - Aircraft Alterations are to be
used to resolve any issues not specifically addressed by the Installation Manual. Instructions for Continuing Airworthiness (ICA) are provided in the supplied data.
200-800-0101 Page 1-1 Rev. 5 Feb. 2004
Page 5

PS Engineering
PAV80 Series IFE System
Installation and Operator’s Manual
Operation is subject to the following conditions:
This device may not cause harmful interference.
This device must accept any interference received, including interference that may cause undesired operation.
1.5 SPECIFICATIONS
PAV80 Panel Unit
FAA-PMA COMPLIANCE
RELATED DOCUMENTS: RTCA/DO-214
RTCA/DO-160D
RTCA/DO-178B (Level E)
RTCA DO-254 (Level E)
SAE AS8034
ENVIRONMENTAL Qualifications: B1BABRSXXXXXXZBBBXXMXXXXXXX
Temperature Range:
Operating:
Storage:
-15º C to 55ºC
-40º C to 85ºC
Altitude: Up to 25,000 feet in a non-pressurized area of the cockpit.
DIMENSIONS: Height: 2.0 in. (5.1 cm) Width: 6.25 in. (15.9 cm)
Depth: 7.7 in. (19.8 cm)
WEIGHT (With Rack & Connectors): 2.8 lb. (1.27 kg)
POWER REQUIREMENTS (Including Internal Lighting):
Voltage: 11 to 33 VDC
Maximum Current:
PAV80 Unit w/1 display
3 Amp (Externally protected by a 5 Amp circuit pull-type
breaker.)
Typical operating current:
Lighting Current
2A
5 mA
Audio Specifications
Output Impedance:
150 - 1000 Ω
Audio Output: 38 mW each channel, no clipping <1% THD
Distortion: <1% THD
Music Freq. Response, 3 dB: 14 Hz –22 kHz
Video Specifications
NTSC Composite Video Signal Output
S-video available
Radio Tuning
North America AM: 530 – 1710 kHz, 10 kHz steps
FM: 87.7 – 107.9 MHz, 200 kHz steps
European (--0200) AM: 531 - 1602kHz, 9kHz steps
FM: 87.5 - 107.9MHz, 100kHz steps
200-800-0101 Page 1-2 Rev. 5 Feb. 2004
Page 6

PS Engineering
PAV80 Series IFE System
Installation and Operator’s Manual
PVT801 Video Terminal Unit
FAA-TSO COMPLIANCE
APPLICABLE DOCUMENTS: SAE AS8034
RTCA/DO-160D
RTCA/DO-178B (Level E)
RTCA DO-254 (Level E)
ENVIRONMENTAL Qualifications: B4BABSXXXXXXZBBBAUHXXX
Temperature Range:
Operating:
Storage:
-0º C to 40ºC
-20º C to 85ºC
Altitude: Up to 25,000 feet in a non-pressurized area of the cockpit.
DIMENSIONS:
5.98” W x 4.28” H X 1.20” D
(152x 108 x 30.5mm)
Screen size 5.6” diagonal
WEIGHT:
Input
1.33 lbs (500g)
Composite NTSC, PAL
POWER REQUIREMENTS (Including Internal Lighting):
Voltage:
Supplied by panel unit
Maximum Current:
Typical operating current:
REMOTE
DIMENSIONS:
Weight
Power
2.375” W x 3.80” H X 0.25” D
(60 x 93 x 6.4 mm)
1.0 oz. (28.4 gm)
3 VDC, 1 ea. CR2025 battery
PVA802 Video Distribution Amplifier
ENVIRONMENTAL Qualifications: B1CABSXXXXXXZBBBAUHXXX
Temperature Range:
Operating:
Storage:
-0º C to 40ºC
-20º C to 85ºC
Altitude: Up to 25,000 feet in a non-pressurized area of the cockpit.
DIMENSIONS: 1.25" H x 4.00" W x 5.50" D
(32 x 102 x 140 mm)
WEIGHT
Input
Output
0.6 lbs (0.25 kg)
1 ea Composite NTSC, PAL
Control input
4 ea. Composite NTSC, PAL
4 ea. 12 VDC conditioned power @ 1A
POWER REQUIREMENTS
Voltage:
Maximum Current:
10-30 VDC
4 A max (5A pull type breaker required)
1.6 EQUIPMENT SUPPLIED
PAV80 Single Display System 1 ea. of the following units:
200-800-0101 Page 1-3 Rev. 5 Feb. 2004
Page 7
PS Engineering
PAV80 Series IFE System
Installation and Operator’s Manual
Model Part Number Description
PAV80 050-800-0100 DVD-IFE System with AM/FM CD MP3
PVT801 050-801-0100 LCD Video Display, 5.5-inch
Remote 051-803-0150 Infrared remote control
PAV80 Installation Kit: 250-800-0001 as shown
Part Number Description Quantity
430-730-0020 Tray 1
430-730-0025 Tray/connector shield 1
120-425-4402 44 Pin Connector Key 4/5 1
425-001-0002 Gold Plated Crimp Pins 30
475-440-0007 4-40x7/16" Phil-Pan w/Nylon Patch 2
475-630-0002 6-32 Clip Nut 6
202-800-0101 Pilots Guide 1
510-730-0001 Passive AM/FM Antenna 1
PVT801 Installation Kit: 250-801-0001 as shown
Part Number Description Quantity
550-005-2522 5-Pin DIN Jack 1
425-800-2511 Display Cable 1
Optional Equipment
Model Part Number Description
PVA802 050-802-0100 Video/Power Distribution Amplifier
Installation Kit 250-802-0100 PVA802 Installation Kit
PVT801 050-801-0100 LCD Video Display, 5.5 –inch
Mounting Bracket 430-800-1362 Portable display Mounting Bracket
PVA802 Installation Kit (250-802-0100)
Part Number Description Quantity
425-025-0006 25 pin Sub-d female connector
675-025-0001 Connector hood
475-002-0002 Thumbscrews
1
1
2
1.7 EQUIPMENT REQUIRED BUT NOT SUPPLIED
a) Circuit Breaker, PULL TYPE: 5 amp as required (1 ea. for PAV80, 1 ea. For PVA802, if used)
b) Aircraft Audio System (See section 1.8 for approved system list)
c) Interconnect Wiring
d) Coax, MIL-C-17/RG179 Quantity, as Required, PS Part No 800-000-0179
200-800-0101 Page 1-4 Rev. 5 Feb. 2004
Page 8

PS Engineering
PAV80 Series IFE System
Installation and Operator’s Manual
1.8 APPROVED AUDIO SYSTEMS
This is a list of audio system that the PAV80 should interface with adequately.
Approved Audio Systems, PAV80
Certified interface is approved only for audio systems that are FAA-TSO approved.
Make Model Part Number
PS Engineering
PM1000II 11920,11922
PM3000 11931, 11932
PMA6000-Series 6000 (all)
PMA7000-Series 7000 (all)
PCD7100 11950, 11951
PMA4000 11942
PAC24 050-240-(all)
SL10-Series 430-6060-XX GARMIN AT
SL15-Series 430-6065-XX
Bendix/King KMA28 066-01176-0101
GARMIN International GMA340 010-00152-XX
1.9 LICENSE REQUIREMENTS
North America- None
International Customers may need to check with appropriate governing bodies before using the system.
200-800-0101 Page 1-5 Rev. 5 Feb. 2004
Page 9

Installation and Operator’s Manual
Section II - Installation
2.1 GENERAL INFORMATION
2.1.1 SCOPE
PS Engineering
PAV80 Series IFE System
These sections provide detailed installation and interconnect instructions for the PAV80
In-Flight Enter-
tainment System with integrated Digital Versatile Disc (DVD) Player and AM/FM radio receiver.
Please read this manual carefully before beginning any installation to prevent damage and post-installation
problems. Installation of this equipment requires special tools and knowledge.
NOTE:
An appropriately rated Certified Aircraft Repair Station must install
this equipment in accordance with applicable regulations. PS Engi-
neering, Incorporated warranty is not valid unless the equipment is
installed by an authorized PS Engineering, Incorporated dealer. Fail-
ure to follow any of the installation instructions, or installation by a
non-certified individual or agency will void the warranty, and may re-
sult in an unairworthy installation.
2.2 Unpacking and Preliminary Inspection
Use care when unpacking the equipment. Inspect the units and parts supplied for visible signs of shipping
damage. Examine the unit for loose or broken buttons, bent knobs, etc. Verify the correct quantity of components supplied with the list in Section 1.6 (B). If any claim is to be made, save the shipping material and
contact the freight carrier. Do NOT return units damaged in shipping to PS Engineering. If the unit or an
accessory shows any sign of external shipping damage, contact PS Engineering to arrange for a replacement. Under no circumstances attempt to install a damaged unit in an aircraft. Equipment returned to PS
Engineering for any other reason should be shipped in the original PS Engineering packaging, or other
UPS approved packaging.
2.3 Equipment Installation Procedures
2.3.1 Cooling Requirements
Forced air-cooling of the PAV80 is not required. However, the unit should be kept away from heat producing sources (i.e. defrost or heater ducts, dropping resistors, heat producing avionics) without adequate cooling air provided.
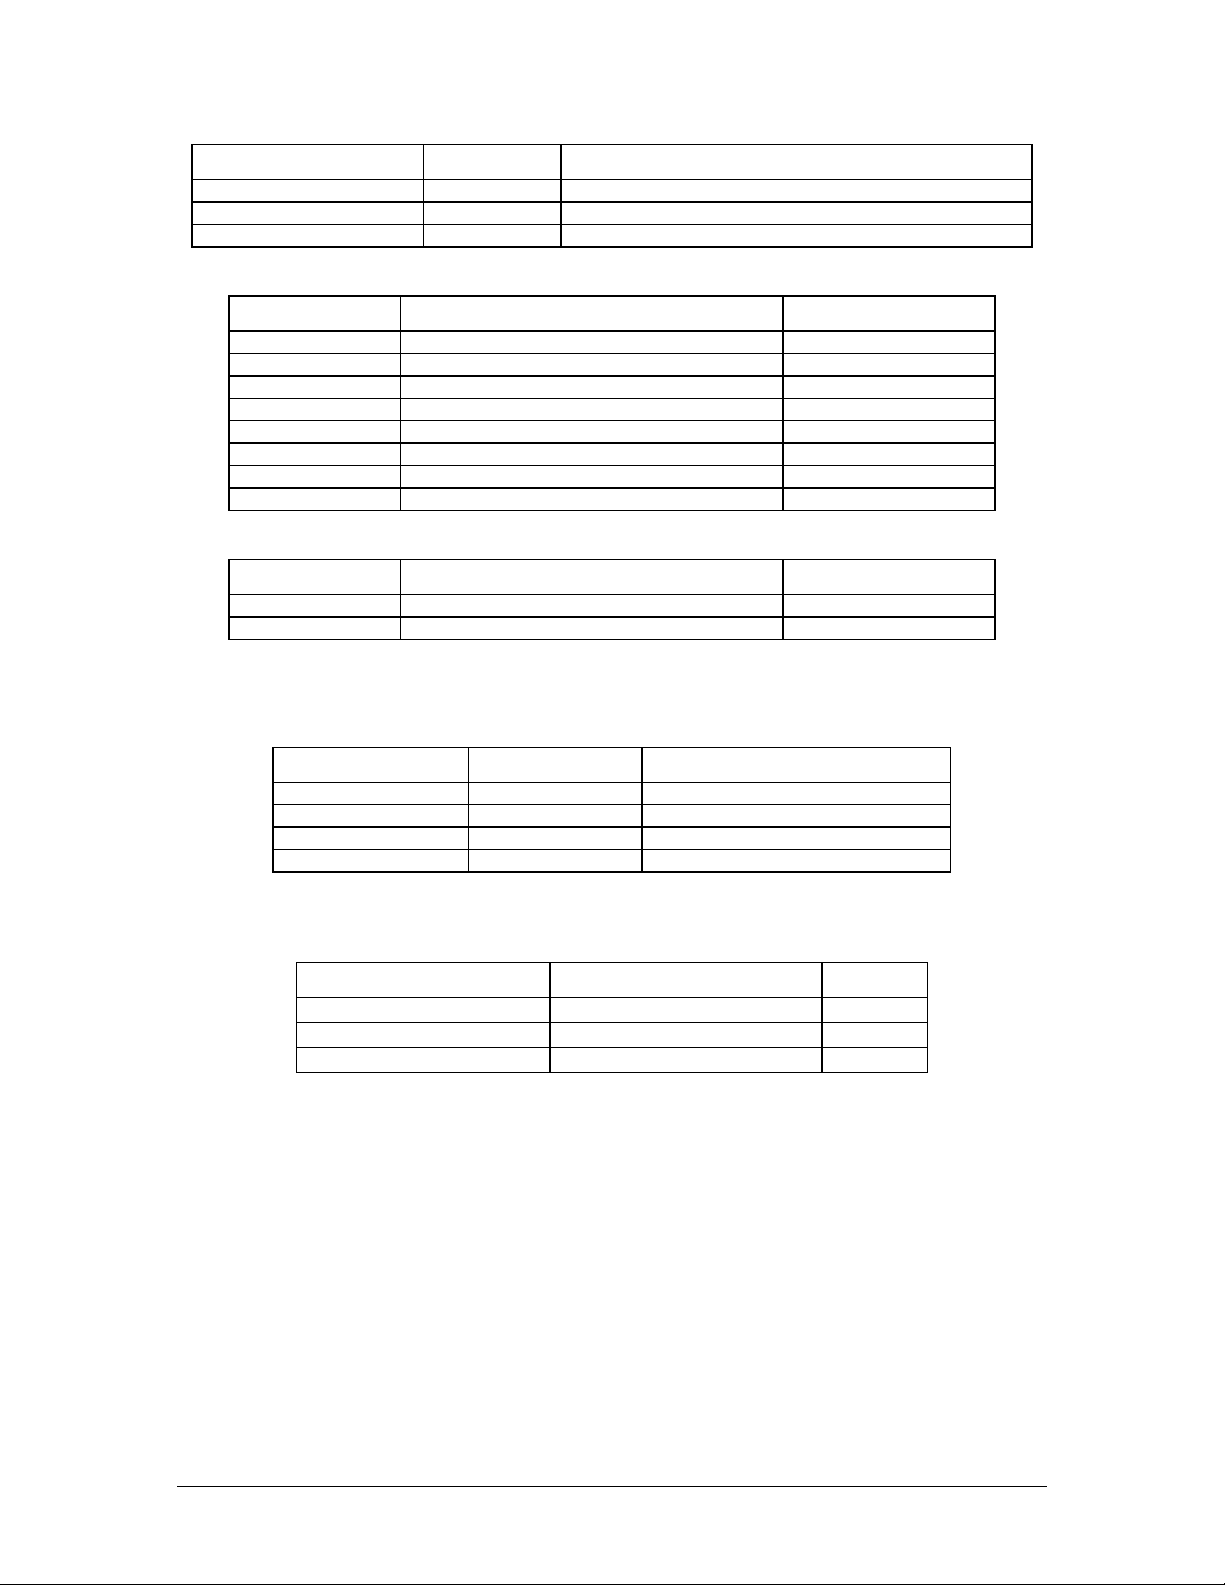
2.3.2 Mounting Requirements
The PAV80 must be rigidly mounted to the instrument panel or other structure of the aircraft structure and
within view and reach of the persons wishing access. Installation must comply with FAA Advisory Circular AC 43.13-2A (or later revision). The unit may be mounted in any area where adequate clearance for the
unit and associated wiring bundle exist.
The unit may be installed in any orientation.
Avoid installing the PAV80 close to high current devices or systems with high-voltage, pulse type outputs,
such as DME or transponders.
200-800-0101 Page 2-1 Rev 2 Sept. 2003
Page 10
PS Engineering
PAV80 Series IFE System
Installation and Operator’s Manual
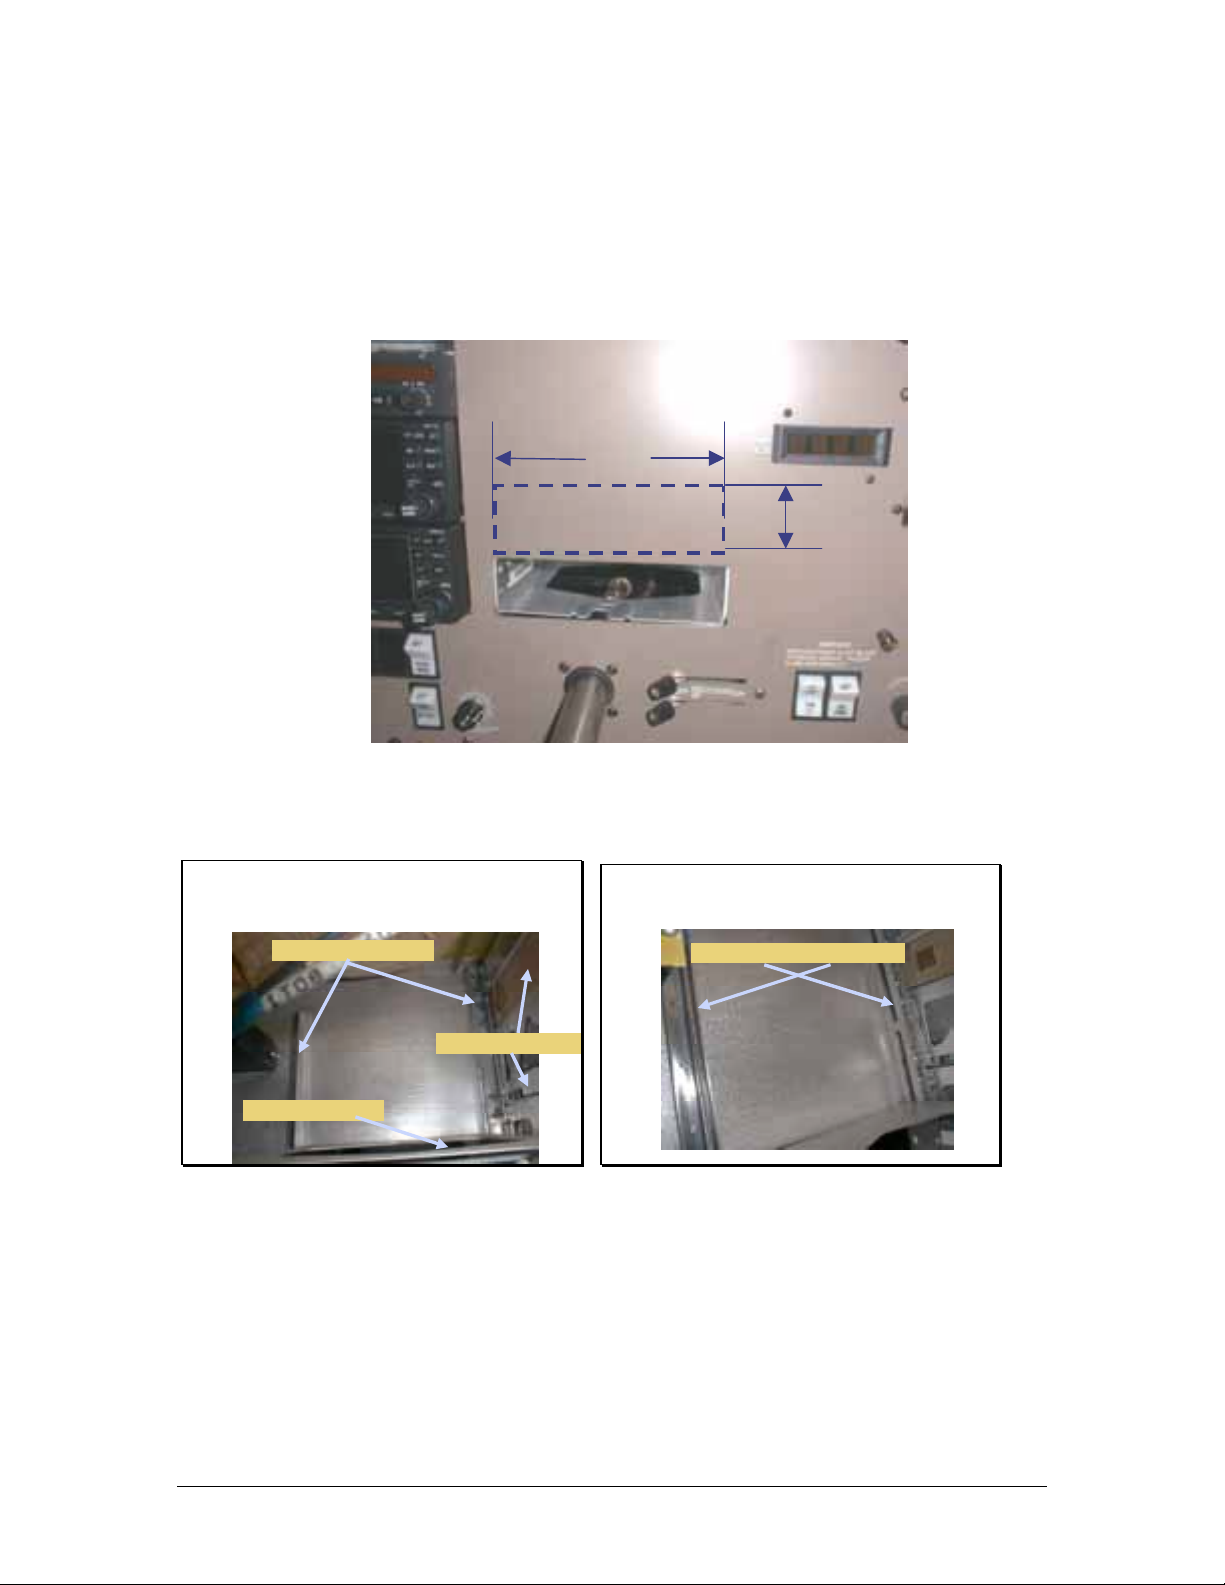
2.3.3 Mounting Rack Installation
Remove the unit from the mounting tray by unscrewing the 3/32" hex-head screw that is near the left edge
of the unit. Carefully slide the unit free of the tray. Set the unit aside in a safe location until needed. Install
the tray using six FHP 6-32 x ½" screws. The unit must be supported at front and rear of the mounting tray.
See Appendix B.
6.31”
2.00”
Figure 2-1 Typical Tray Installation Location
The tray mounting can be made in any area that exists for adding additional avionics. Instrument panel
mounting is accomplished in accordance with AC 43.13-2A, Chapter 2.
Existing Structure (from behind
panel)
Avi onics Mounting Rai ls
Center Avionics Stack
Exi sting Tr ansponder
Figure 2-2 Avionics Mounting Rails (Typical)
Factory Avionics Location
Factory Avionics Mounting Rails
200-800-0101 Page 2-2 Rev 2 Sept. 2003
Page 11
PAV80 Series IFE System
Installation and Operator’s Manual
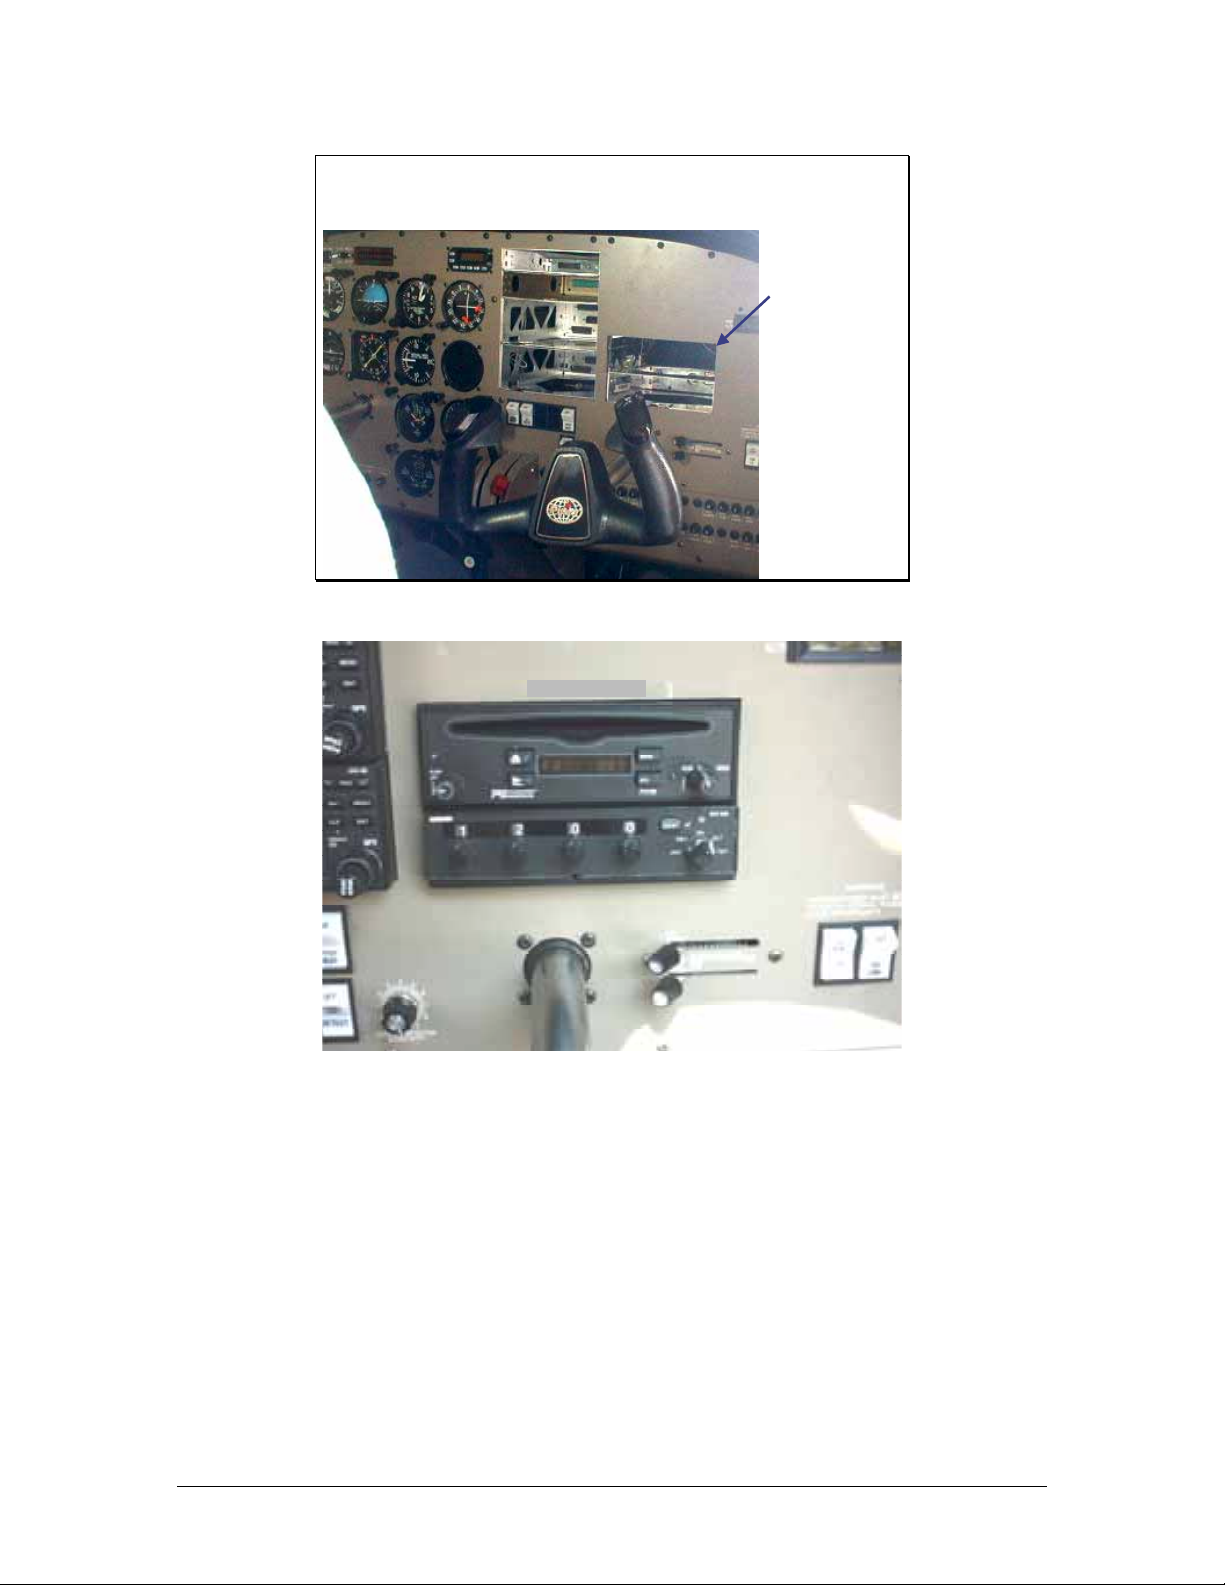
Panel Opening
Figure 2-3 Completed panel opening (Typical)
PS Engineering
Saw and
file used to
remove
existing
instrument
panel from
this
location
Figure 2-4 Completed panel installation
2.3.4 Connector Assembly
The unit connector mates directly with the circuit boards in the PAV80. The connector (part number 120425-4402 is a Molex crimp-type, and requires the use of a Molex hand crimp tool, EDP P/N 11-01-0203,
CR6115B (or equiv.). The connector is mounted to the unit tray with 2 ea. #4-40 screws, from the inside
of the tray.
After installing the connector, install the connector shield on the back of the tray with 2 ea #4-40 screws,
washers and nuts.
Ensure that proper strain relief and chafing precautions are made during wiring and installation of the tray
and shield.
200-800-0101 Page 2-3 Rev 2 Sept. 2003
Page 12

PS Engineering
PAV80 Series IFE System
Installation and Operator’s Manual
475-632-0007
Screw (x2)
Washer 475-632-0001
Nut 475-632-0005
120-425-4402
y
a
r
t
f
A
o
t
n
o
r
F
B
475-440-0007 (2 plcs)
Screws
Connector
C
Rear
of tray
430-730-0025
Tray Shield
Figure 2-5 -Tray Assembly
2.4 Cable Harness Wiring
Referring to the wiring diagrams contained in the Appendix, assemble a wiring harness as required for the
installation. All wires must be MIL-SPEC in accordance with current regulations. Two- and threeconductor shielded wire must be used where indicated, and be MIL-C-27500 or equivalent specification.
Proper stripping, shielding, crimping and soldering technique must be used at all times. It is imperative that
correct wire be used.
Video Cable wiring shall be 75 Ω coax, MIL-C-17/094, RG179, or equivalent. Because of the small size,
we recommend soldering the small conductors from the RG179 coax to provide good contact.
Refer to FAA Advisory Circular 43.13-1B and 2A for more information. Failure to use correct techniques
may result in improper operation, electrical noise or unit failure. Damage caused by improper installation
will void the PS Engineering warranty. PS Engineering can provide a custom made harness, visit www.psengineering.com for more information.
2.4.1 Noise
Due to the variety and the high power of radio equipment often found in today's general aviation aircraft,
there is a potential for both radiated and conducted noise interference.
The PAV80 power supply is specifically designed to reduce conducted electrical noise on the aircraft
power bus by at least 50dB. Although this is a large amount of attenuation, it may not eliminate all noise,
particularly if the amplitude of noise is very high. There must be at least 12 VDC present at the connector
pin 21, of the PAV80 for the power supply to work in its designed regulation. Otherwise, it cannot adequately attenuate power line noise. Shielding can reduce or prevent radiated noise (i.e., beacon, electric
gyros, switching power supplies, etc.) However, installation combinations can occur where interference is
possible. The PAV80 was designed in a RFI hardened chassis and has internal Electromagnetic Interference (EMI) filters on all inputs and outputs.
Ground loop noise occurs when there are two or more ground paths for the same signal (i.e., airframe and
ground return wire). Large cyclic loads such as strobes, inverters, etc., can inject noise signals onto the
airframe that are detected by the audio system. Follow the wiring diagram very carefully to help ensure a
minimum of ground loop potential. Use only Mil Spec shielded wires (MIL-C-275000, or better).
200-800-0101 Page 2-4 Rev 2 Sept. 2003
Page 13

PS Engineering
PAV80 Series IFE System
Installation and Operator’s Manual
2.4.2 Power
The PAV80-Series units are compatible with both 14 and 28
Volt DC systems. A five (5) Amp PULL-TYPE breaker is
required. Power and ground wires must be a twisted
#18
AWG pair. Connect airframe power ground to Pin 22 only.
If the Video Distribution Amplifier (PVA802) is used, a
second circuit breaker (5 A) must be installed. Power must be
connected to the P802, pin 13 only.
NOTE: The PVA80 can power ONE (1) PVT801. Do not
connect more than ONE display, and do NOT connect any
other type of display to the PAV80 display power pin.
DAMAGE WILL RESULT.
Figure 2-6 Circuit breaker location
(Typical)
See Appendix B for typical circuit breaker layout.
2.4.3 Backlighting
Connect the 14 V dimmer control to pin 1, the 28 V dimmer to pin A, as required. The display is adjusted
for ambient light conditions by the connection to the aircraft dimmer bus. If the radio light dimmer is
turned all the way off, the display will be at full intensity.
2.4.4 Antenna
The passive AM/FM antenna, part number 510-730-0001 (included) can be mounted wherever convenient
inside the cockpit, as long as it is in a window. Verify that the antenna is not an impediment to crew vision
outside the cockpit when installed,
For optimum performance, it should be near the windshield. Clean the mounting surface with appropriate
means (glass cleaner, etc), and apply adhesive (supplied with antenna). Route the antenna cable along edge
Figure 2-7 Antenna Installation
to the glareshield, and then connect to the PAV80 connector. Avoid running the antenna cable near highcurrent carrying wires, such as windshield heat, etc.
The antenna cable center conductor is connected to Pin 2, braid is connected to pin B.
Some installers may desire an external antenna. PS Engineering recommends a Comant CI-222-L, installed
in accordance with AC43.13-1A, Chapter 3.
200-800-0101 Page 2-5 Rev 2 Sept. 2003
Page 14

PS Engineering
PAV80 Series IFE System
Installation and Operator’s Manual
2.4.5 Aux Entertainment Audio and AUX Enable
Besides the disc and AM/FM, the PAV80 has the ability to act as a switching control for an additional entertainment input, both audio and video.
The audio input is Pin 7 (R), Pin H (L) with respect to Pin F (ground).
The video input is Pin 17 (with respect to Pin U)
2.5 Unit Installation
To install the PAV80, gently slide the unit into the mounting rack until the hold-down screw is engaged.
While applying gentle pressure to the face of the unit, tighten the 3/32" hex-head in the unit until it is secure. DO NOT OVER TIGHTEN.
Warning: Do not over-tighten the lock down screw while installing the unit in tray.
Internal damage will result.
2.6 PVT801 Display Installation:
The PVT801 is designed to be portable. Install display connectors in a location convenient to the user. The
supplied cable from installed connector to the display is six feet (6’).
Install the 5-pin display connector (550-005-2522) in a location convenient to the user, perhaps close to the
passenger headphone jacks.
A Velcro-strap display case is available from PS Engineering, 1-800-427-2376. In addition, a portable
mounting bracket, PS PN 430-800-1362, is available that can hold the PVA801 with double sided tape.
Figure 2-8 Portable mounting bracket with PVA801 attached
2.7 OPTIONAL PVA802 Video Distribution Amplifier Installation
The PVA802 Distribution amplifier is a remote mounted unit that provides 12 VDC power and composite
video to multiple displays. This should be mounted as close to the display connectors as practical.
200-800-0101 Page 2-6 Rev 2 Sept. 2003
Page 15

PS Engineering
PAV80 Series IFE System
Installation and Operator’s Manual
Connect the PVA802 to a 5-amp PULL TYPE circuit breaker. The unit connector is a crimp type, however,
we recommend soldering the small
conductors from the RG179 coax.
NOTE: This unit can become warm when
fully loaded, and should not be mounted
where an occupant may have inadvertent
contact with it.
The PVA802 should be mounted in
accordance with AC43.13-2A, for remote
mounted equipment that does not require
shock mounting (Chapter 2, Section 24(b)). This
also includes any supporting structure that may be fabricated, in
Figure 2-8 PVA802 Dist. Amp Circuit
breaker location (Typical)
accordance with Chapter 2, Sections 25 and 26.
Figure 2-9 View of typical PVA802 Installation
2.8 Internal Adjustments
None
2.9 Post Installation Checkout
After wiring is complete, verify power is ONLY on pins 21 and Y of the connector, and airframe ground
on bottom connector pin 22. Failure to do so will cause serious internal damage and void PS Engineering's
warranty.
2.9.1 System Checkout
1. Insert disc, and verify that the player accepts the disk with about ½ of the diameter in the unit. The
player should pull the disk smoothly and drop into place.
2. Apply power to the display unit.
3. Verify that the display unit has either the movie opening (if DVD) or the blue background with track
information (Music CD or MP3)
4. Verify that all Disc modes operate.
5. Push the “Eject” button and verify that the disc is ejected within about 10 seconds.
6. Verify radio operation on AM and FM
7. Verify that aux audio/video is presented to the output (if connected).
8. Evaluate the audio interface to be certain that the IFE audio is muted during intercom and radio communication.
a. If muting override is provided, evaluate the switch location and verify operation.
200-800-0101 Page 2-7 Rev 2 Sept. 2003
Page 16

PS Engineering
PAV80 Series IFE System
Installation and Operator’s Manual
b. Evaluate the audio performance
c. Evaluate the audio level to verify that the music is adequate under flight conditions.
d. Evaluate the muting system to demonstrate that the music will be adequately muted if de-
sired, by radio and intercom.
e. Evaluate the muting override control if equipped.
9. Evaluate failure remediation from crewmember location
a. Turn unit off
b. Locate and pull unit circuit breaker
c. With the disc playing, with minimum volume, listen to the following audio sources (as
equipped), adjusted to normal listening level:
i. Comm 1, comm. 2, comm 3, HF
ii. Nav 1, Nav 2
iii. ADF (1 and 2)
iv. DME (1 and 2)
v. Marker
vi. Any other audio sources
10. Select FM Mode, and repeat step 6, listening for interference on the aircraft audio sources. Pay
particular attention to the frequencies listed in table.
FM COM
107.3 118.000
107.5 118.200
107.7 118.400
107.9 118.600
FM/COM Cross Reference
11. Select AM Mode, and repeat step 6, listening for interference on the aircraft audio sources.
12. Select COM 1 for transmit. Tune COM 1 to 118.00, and the PAV80 to 107.3 MHz. Transmit a test
count and evaluate the unit display and audio output for inconsistencies
13. Repeat step 10 for COM 2, and other transmitters.
a. Tune Nav 1 to local station and perform a standard VOT test in accordance with 14 CFR 91.171.
b. Note the indicated VOR bearing on both systems.
c. Turn the PAV80 on and off, and observe any change in the VOR indication that could be attrib-
uted to the PAV80.
2.10 Final Inspection
Verify that the wiring is bundled away from all controls and no part of the installation interferes with aircraft control operation. Move all controls through their full range while examining the installation to see
that no mechanical interference exists. Verify that the cables are secured to the aircraft structure in accordance with good practices, with adequate strain relief. Ensure that there are no kinks or sharp bends in the
cables and coaxial cables. Verify that the cables are not exposed to any sharp edges or rough surfaces, and
that all contact points are protected from abrasion.
Complete logbook entry, FAA Form 337, weight and balance computation and other documentation as
required. Sample text for FAA Form 337 and instructions for continuing airworthiness can be found in
Appendix F.
Return completed warranty registration application to PS Engineering.
200-800-0101 Page 2-8 Rev 2 Sept. 2003
Page 17

PS Engineering
PAV80
Installation and Operator’s Manual
Section III OPERATION
GENERAL INFORMATION
3.1 SCOPE
This section describes the operation of the PAV80 In-Flight Entertainment system.
Operating controls consist of two rotary knobs with push-push switches, and four buttons.
Figure 3-1 Front Panel Controls
3.2 Operating Controls
The single-disk player is designed for simple operation. The Disc player will begin to play automatically
when a MUSIC
If a DVD is inserted, the unit will wait for menu instructions.
3.2.1 Power/Volume Control (1)
The PAV80 system is turned on and off by pushing the volume (left hand) knob. A short press will activate, and deactivate the unit.
The left knob is also the volume control, with 30 steps. The knob controls the volume of the primary output. To modify the volume of the SECONDARY output, press the volume knob for more than 2 seconds.
The secondary output indication (right side of window) will blink, and you can now adjust the secondary
output volume.
If the knob is not active for more than 5 seconds, the volume control reverts to the primary state.
The four push buttons are used to perform different functions. The function will depend on the mode of the
primary audio output, as displayed on the left side of the display (P).
3.2.2
In disc mode, the Stop/Eject button will stop the disc. Hold for 3 seconds to eject the disc.
In AM/FM mode, this will scan up to the next strong radio station.
Disc is inserted. The disc will play through in order, and then stop at the end.
▲ Stop/Eject Button (2)
3.2.3
In disc mode, pressing the play/pause button momentarily will pause the player. Press again to resume
play.
In AM/FM mode, this will scan down to the next strong radio station.
200-800-0101 Page 3-1 Rev. 5 Feb. 2004
► Play/Pause Button (3)
Page 18

PS Engineering
Installation and Operator’s Manual
PAV80
3.2.4 The ►► Button (4)
In disc mode, a short press of this button will advance to the next track. A longer press will put the disc
into fast forward mode. Press the play/pause button to resume normal play
In AM/FM mode, this button scans up the frequency band.
3.2.5 The Mode Knob (5)
In the Disc mode, the knob will advance (CW) or decrease (CCW) the track.
In AM or FM radio mode, this knob can be used to tune the radio directly.
This knob is also used to select the operational mode. Press the knob once to change the primary mode.
The left hand LCD display will blink to indicate that the mode can be changed. Turn the knob to change
the mode. Here are the mode selections:
DSK – DVD/MP3/CD mode
FM – FM tuner mode
AM – AM tuner mode
AUX – Auxiliary Audio/Video mode
AXA– Auxiliary Audio Only mode
OFF – Output is disabled
Press the knob again and the right hand side of the display (P) will blink to indicate that the secondary
mode can be changed. The knob must be pressed a third time to lock in the mode selection.
3.2.6 The ◄◄ Button (6)
In disc mode, a short press of this button will advance to the previous track. A longer press will put the disc
into rewind mode. Press the play/pause button to resume normal play
In AM/FM mode, this button scans down the frequency band.
200-800-0101 Page 3-2 Rev. 5 Feb. 2004
Page 19

N
▲ short press
PS Engineering
PAV80
Installation and Operator’s Manual
Table 1-PAV80 Functions
Action Disc Result Radio Result
Stop
▲ long press
► short press
►► short press
►► long press
◄◄ short press
◄◄ long press
DATA knob CW
DATA knob CCW
DATA knob Push
Table 2- Button Functions
3.3 Display Operation
The display terminal, PVT801, has the following controls available:
1. Menu: Activates menu function
2. Scroll up: Select menu function
3. Scroll down: Select menu function
4. On/Off and Mode Selector
Eject (also in AUX)
Play / Pause
ext track
Fast forward Increase frequency
Previous track Decrease frequency
Rewind Decrease frequency
Select next track Increase radio frequency
Select previous track Decrease radio frequency
Select operation mode
Figure 3-2 Display Terminal Controls
200-800-0101 Page 3-3 Rev. 5 Feb. 2004
Page 20

NOT FOR PILOT VIEWING
PS Engineering
Installation and Operator’s Manual
3.4 Remote Operation
The remote supplied is used to control various functions of the secondary audio output.
PAV80
Trac k S elec tion
Disc Control
PAV80 IFE SY STEM
T
1
R
A
C
4
K
7
NEXT
D
I
PREV STOP
S
C
EJEC T
2 3
5 6
8 9
0
PLAY
MENU
FF
REW
PAUSE
ENT ER
UP
DOWN
LEFT
RIGHT
VOL
UP
VOL
DN
M
E
N
U
M
V
O
L
U
E
Men u Selec tion
Volume Control
Figure 3-3- Remote Control (not to scale)
The remote uses a 3V CR2025 battery. When the remote becomes weak, replace the battery, through the
cover on the bottom.
200-800-0101 Page 3-4 Rev. 5 Feb. 2004
Page 21

PS Engineering
Installation and Operator’s Manual
PAV80
3.5 Display Dimming
The display can be adjusted for ambient light conditions by the connection to the aircraft dimmer bus.
At minimum bus voltage (or no lighting present) the display is set at maximum.
200-800-0101 Page 3-5 Rev. 5 Feb. 2004
Page 22

PS Engineering
Installation and Operator’s Manual
PAV80
Section IV- Warranty and Service
4.1 Warranty
In order for the factory warranty to be valid, the installations in a certified aircraft must be accomplished by
an FAA-certified avionics shop and authorized PS Engineering dealer. If the unit is being installed by a
non-certified individual in an experimental aircraft, a factory-made harness must be used for the warranty
to be valid.
PS Engineering, Inc. warrants this product to be free from defect in material and workmanship for a period
of one (1) year from the date of installation as recorded in aircraft logbook and/or on FAA Form 337
ing the twelve (12) months, PS Engineering, Inc., at its option, will send a replacement unit
at our expense
if the unit should be determined to be defective after consultation with a factory technician.
All transportation charges for returning the defective units are the responsibility of the purchaser. All domestic transportation charges for returning the exchange or repaired unit to the purchaser will be borne by
PS Engineering, Inc. The risk of loss or damage to the product is borne by the party making the shipment,
unless the purchaser requests a specific method of shipment. In this case, the purchaser assumes the risk of
loss.
This warranty is not transferable. Any implied warranties expire at the expiration date of this warranty. PS
Engineering SHALL NOT BE LIABLE FOR INCIDENTAL OR CONSEQUENTIAL DAMAGES. This
warranty does not cover a defect that has resulted from improper handling, storage or preservation, or unreasonable use or maintenance as determined by us. This warranty is void if there is any attempt to dissemble this product without factory authorization. This warranty gives you specific legal rights, and you may
also have other rights, which may vary from state to state. Some states do not allow the exclusion of limitation of incidental or consequential damages, so the above limitation or exclusions may not apply to you.
. Dur-
All items repaired or replaced under this warranty are warranted for the remainder of the original warranty
period. PS Engineering, Inc. reserves the rights to make modifications or improvements to the product
without obligation to perform like modifications or improvements to previously manufactured products.
4.2 Factory Service
The unit is covered by a one-year limited warranty. See warranty information. Call PS Engineering, Inc. at
(865) 988-9800 before you return the unit. This will allow the service technician to provide any other suggestions for identifying the problem and recommend possible solutions.
After discussing the problem with the technician and you obtain a Return Authorization Number, ship
product to:
PS Engineering, Inc.
Attn: Service Department
9800 Martel Rd
Lenoir City, TN 37772
(865) 988-9800 FAX (865) 988-6619
Email: support@ps-engineering.com
NOTE: PS Engineering will not be responsible for any units shipped in the U. S. Mail.
Units received without either a Return Authorization or a contact telephone number will be refused
and returned to the sender.
200-800-0101 Page 4-1 Rev. 5 Feb. 2004
Page 23

PS Engineering
Installation and Operator’s Manual
Appendix A – MP3 Creation
5.1 Creating MP3s from an Audio CD
PAV80
1. Start MusicMatch JukeBox.(www.musicmatch.com
) Press the recorder button, which is the
small red dot located in the top right corner. This will open the recorder window located at
the bottom of the screen.
2. Insert an audio CD into the CD drive. MusicMatch will automatically read the disc and display the contents in the recorder window. Press the REFRESH button to check the Internet
database for CD information, such as artist, song title, or album. If this information is available, it will automatically be updated in the file.
3. Select Options->Recorder->Format and select either MP3 or MP3PRO format. You may also
set the MP3 file quality under the Options->Recorder->Quality menu.
4. Select the tracks to be copied to MusicMatch by checking the box next to the desired track.
Press the record button in the lower left corner when complete
5. MusicMatch will then convert the files from the audio CD to MP3 and display them in the
Music Library box located in the middle of the screen
6. To edit the MP3 information, select a file in the Music Library and press the TAG button in
the top right corner of the Music Library box. This will display the MP3 tagged information
screen. Select the General tab to show the information that can be modified for the PAV80.
7. The PAV80 can display song name, artist, album, and filename. This corresponds to the
Track title, Artist, Album, and Track Filename fields shown on the screen. Each of these
fields can be modified to the user’s preference. Note: The PAV80 is limited to displaying up
to 22 characters in each of these fields. Click on the appropriate field to modify the track title,
artist, or album. To modify the filename, select the Rename Files button in the lower left corner. Click on the field labeled New File Name and press OK to change the file name. Press
the Apply and OK buttons to update the information
200-800-0101 Appendix A Rev. 5 Feb. 2004
Page 24

PS Engineering
PAV80
Installation and Operator’s Manual
Appendix B – Installation Drawings
New Installation
XPNDR
PAV80 Unit
2
DATE
03-20-2003
07-11-2003GLP1 Add Caution Placard
08-14-2003
BY
GLP
GLP2 Remove Caution Placard from this location
9800 Martel Road
REVISIONS
DESCRIPTION
NEW RELEASE
0
REV
MATERIAL
REV
Lenoir City, Tn 37772
(865) 988-9800
INCORPORATED
ENGINEERING
TITLE
1 OF 1
SHEET
120-800-8801
DRAWING NUMBER
CAGE CODE
PAV80 Panel Location
NONE
A
SIZE
SCALE
DATE
03-20-2003
03-21-2003RSH
GLP
NAME
ACTIVITY
DRAWN BY:
APPROVAL:
CHECKED BY:
AUTOPILOT
AUDIO PANEL
NAV/COM
PIPER PN 101271-013
COPILOT'S
PANEL ASSY.
Viewed from front
Figure 6-1 Panel Location Drawing (Typical) 120-800-8801
200-800-0101 Appendix B Rev. 5 Feb. 2004
Page 25

PS Engineering
PAV80
Installation and Operator’s Manual
Instrument Panel
FS 59.9
NOTE:
Install wire bundle and cable clamps as required IAW AC43.13-1B:
Section 8, WIRING INSTALLATION INSPECTION REQUIREMENTS
Section 9, ENVIRONMENTAL PROTECTION AND INSPECTION
Section 11, CLAMPING
Clean antenna area with solution approved by aircraft manufacturer.
Use 3M Self-adhesive tape (supplied ) to secure antenna to windshield.
Verify that vision is not obscured from any crew position.
Existing
bundle
Existing
Audio Panel
PLAN VIEW
PAV80
PVA802
Video Monitor Cable
Distrib. Amp
Video Monitor Cable
Power to Circuit Breaker
(Note 1)
FS 76.5
Top of windshield
H
Antenna
Video Distribution Cable
DRAWN BY:
CHECKED BY:
APPROVAL:
GLP
MSS
3-21-2003
3-20-2003
SCALE
A
SIZE
NONE
CAGE CODE
DRAWING NUMBER
120-800-2488
SHEET
1 OF 1
1
REV
Intercom Jacks (existing)
Video Jack (new)
Typical, 1 each side
ACTIVITY
MATERIAL
REV
0
Located PVA8021 GLP 7-11-03
NEW RELEASE
NAME
DATE
TITLE
PAV80 Installation Diagram
DESCRIPTION
REVISIONS
ENGINEERING
INCORPORATED
-----
-----
ECO
9800 Martel Road
(865) 988-9800
Lenoir City, Tn 37772
GLP 3-20-2003
BY
Power to Circuit Breaker
(Note 1)
DATE
1415 16 1718
1920 21 22102324
12345
6789
11122513
PAV80
Video Cable
Antenna Coax
(Note 1)
1211 109
4321
13
Antenna
ELEV VIEW
From Copilot Side
Audio Wiring to
Audio Panel
(Note 1)
Figure 6-2 PAV80 Installation Diagram (Typical) 120-800-2488
200-800-0101 Appendix B Rev. 5 Feb. 2004
Page 26

PS Engineering
PAV80
Installation and Operator’s Manual
6.25
1.97
Existing Avionics
Mounting Rails
(see detail A)
Detail A
A
B & C
#6-32 Screws
475-632-0012 (6 plcs)
120-425-4402
Connector
Front of tray
0.92 in
0.32 in
475-440-0007 (2 plcs)
A
B
Screws
0.32 in
5.57 in
7.71 in
Figure 6-3 Tray Installation Drawing, 002-973-0430
Connector viewed from the rear
Clipnuts
475-630-0002 (6 plcs)
C
Tray Shield
A
B & C
475-632-0007 (2 plcs)
Screws
Rear
of tray
A
Washer 475-632-0001
& Nut 475-632-0005
2221201918171615141312111098765432A1
J1
ZYXWVUTSRPNMLKJHFEDCB
Connector viewed from the FRONT of unit tray
Connector Key
22 21 20 19 18 17 16 15 14 13 12 11 10 9 8 7 6 5 4 3 2A1
J1
ZYXWVUT SR PNMLK JH FEDCB
Connector Orientation, PAV80
200-800-0101 Appendix B Rev. 5 Feb. 2004
Page 27

PVT801 Display Interface
View from solder cup
1
45
Figure 6-4 Display connector layout
PS Engineering
Installation and Operator’s Manual
PAV80
1= Video Ground
2= Display Power
3= Power Ground
3
4= Video Signal
5= No Connection
2
4.28 in
3.03 in
2.99 in
5.98 in
BACK
0.25 in
Mounting Slot
1.20 in
1.00 in
LEFT
Connector
Exit
1.38 in
0.2 in
Figure 6-5 - PVT801 Monitor Dimension Details
200-800-0101 Appendix B Rev. 5 Feb. 2004
Page 28

Ø0.185 in (4 plcs)
PS Engineering
PAV80
Installation and Operator’s Manual
VIEWED FROM REAR
5.10
3.40
Cable Exit
6.1 in
6.83 in
Figure 6-6 PVT801 Mounting Tray Dimensions (if used)
0.9 in
1.76 in
4.5 in
5.13 in
0.57 in
Figure 6-7 Portable bracket drawing (430-800-1362, not to scale)
200-800-0101 Appendix B Rev. 5 Feb. 2004
Page 29

PS Engineering
PAV80
Installation and Operator’s Manual
1
9800 Martel Road
(865) 988-9800
Lenoir City, Tn 37772
ENGINEERING
INCORPORATED
REVISIONS
IFE Breaker Location
TITLE
DATE
NAME
ACTIVITY
MATERIAL
REV
1 OF 1
SHEET
120-800-8802
DRAWING NUMBER
CAGE CODE
NONE
SIZE
A
SCALE
07-09-03
RSH 07-09-03
GLP
DRAWN BY:
CHECKED BY:
APPROVAL:
DATE
BY
GLP 07-09-03
ECO
-----
5
17
16
7.5
15
Breaker Added
for PVA802 ONLY
10
5
14
5
34
5
33
5
32
5
31
-----
DESCRIPTION
NEW RELEASE
0
REV
13
12
11
109
8255
76
5223
5
5
VID DIS
29
5
28
5
27IFE
5
2423
Breaker Added
was ADF
4
5
3
3
2
5
1
70
21
20
18 19
Figure 6-8 Circuit breaker installation drawing 120-800-8802 (typical)
200-800-0101 Appendix B Rev. 5 Feb. 2004
Page 30

PS Engineering
PAV80
Installation and Operator’s Manual
5.470
4.725
Ø0.136 (4 plcs)
3.5004.000
Figure 6-9 PVA802 Video Distribution Amplifier Installation (Dwg. 120-802-0100)
54321
1817161514
C
/
N
C
/
N
Video Input Signal
Video Input Low
t
r
u
e
p
w
t
o
u
d
o
P
n
O
L
u
4
o
t
o
r
e
u
y
g
d
p
a
i
l
t
r
p
u
V
e
s
i
O
4
w
D
o
o
#
e
P
d
i
3
V
y
a
l
p
s
i
D
r
e
t
r
u
e
w
p
o
w
t
d
o
o
P
L
3
t
u
y
p
a
l
t
p
u
s
i
O
D
o
e
d
i
V
o
P
u
n
L
u
O
2
t
o
r
u
y
o
g
p
a
e
l
t
d
r
p
i
u
e
s
V
i
O
w
D
2
o
o
#
e
P
d
i
2
V
y
a
l
p
s
i
D
Figure 6-10 PVA802 Connector viewed from cable side
1.250
13
10
9876
22212019
r
t
e
u
p
w
t
o
u
P
O
d
1
n
o
u
y
e
o
a
d
r
l
i
g
p
V
s
r
i
3
e
D
#
w
o
P
1
y
a
l
p
s
i
D
1211
25
2423
C
t
/
)
N
C
D
V
d
3
n
3
u
-
o
1
r
1
g
(
r
r
e
e
w
w
o
o
P
P
4
y
a
l
p
s
i
D
)
C
D
V
3
3
1
1
(
r
e
w
o
P
A/C Power ground
u
p
t
u
N
o
O
L
O
o
t
e
e
u
t
d
p
o
i
t
u
V
m
e
O
1
R
#
o
e
d
i
V
200-800-0101 Appendix B Rev. 5 Feb. 2004
Page 31

Appendix C Connector Interconnect
7.1 Single Display System
PAV80 Connector
PS Engineering
PAV80
Installation and Operator’s Manual
21
Y
22
Z
1
A
2
B
C
3
6
D
4
F
7
H
17
U
14- 28 VDC Aircraft Power (5 A Breaker)
Aircraft Ground
14 V Dimmer
28 V Dimmer
Antenna Input
Antenna Ground
Primary Audio Out (L)
Primary Audio Out (R)
Audio Lo
Shield Ground
Secondary Entertainment Output (L)
Secondary Entertainment Output (R)
Secondary Entertainment Lo
AUX Audio Input (R)
AUX Audio Input (L)
AUX Audio Lo
AUX Video Composite Input Hi
AUX Video Composite Input L0
NOTE 3
Antenna
(supplied)
Entertainment Output
connected to
audio panel or intercom
Entertainment Output
connected to secondary input
audio panel or intercom
NOTE 4
2
1
4
1
2
3
NOTE 4
NOTE 5
7/09/03
7/16/03
2/6/04
7/15/03
DATE
TITLE:
A
DATE:
Display Cable
(supplied)
Video Interface
5-pin DIN
GLPAdd Note 6
GLPDis.Conn.
By
SHEET OF
APR
REV
18
V
19
W
11
M
12
N
13
P
Notes:
Video Composite Output Hi
Video Composite Output Lo
Display Power (Note 6)
Power Ground
S-Video Chroma
S-Video Luma
S-Video Sync
1. All audio wiring must be MIL 22750 or 27500
24 AWG minumum..
2. Power and Ground #18AWG Mil-Spec Tefzel minimum.
Lighting #22 AWG minimum.
3. Circuit breaker must be PULL TYPE
4. Video cables must be RG-179/U MIL-C17
5. S-Video is available for other monitors
REV Change
DWN
DATE
CKD
DATE
APR
DATE
6. Display power for ONE PVT801 display ONLY
200-800-0101 Appendix C Rev. 5 Feb. 2004
PVT801
Video Terminal
PVT801 Interface
View from solder cup
1
4
3
5
2
1= Video Ground
2= Display Power
3= Power Ground
4= Video Signal
5= No Connection
Page 32

PS Engineering
PAV80
Installation and Operator’s Manual
Multiple Display System Wiring
l
a
n
i
5
m
r
e
E
1
T
T
0
o
8
O
e
T
N
d
i
V
1
P
V
#
e
l
b
a
)
C
d
e
y
i
l
a
l
p
p
p
s
u
i
s
D
(
412
3
t
u
p
n
i
y
r
m
t
a
o
u
d
c
p
r
n
t
e
o
u
t
c
n
O
i
e
r
s
m
t
o
u
c
p
r
t
e
u
t
n
O
i
r
t
o
n
o
l
t
e
e
d
m
n
e
n
a
i
t
c
p
a
t
e
r
o
i
n
e
t
d
n
n
u
o
E
c
a
t
n
o
t
e
d
m
e
n
t
i
c
a
t
e
r
n
e
t
n
n
o
c
E
tput (L)
utput (R)
o
l
e
n
a
p
o
i
d
u
a
4
E
T
O
N
e
t
i
s
o
p
o
e
m
d
o
i
V
C
22
2
PVA80
r
d
e
n
u
w
o
o
r
p
g
e
e
t
t
o
o
m
m
e
e
R
R
92110
121325
2
15
23
ower
ainment Ou
ainment Lo
rtainment O
io Out (R)
io Out (L)
dio Lo
rimary Aud
Primary Aud
P
C36
Au
r
o
t
c
e
n
n
o
C
0
8
V
A
P
Z
2
22
Y
21
B
A
1
ld Ground
Shie
dary Entert
dary Entert
ondary Ente
Sec
Secon
Secon
D4F
7
H
utput Lo
Output Hi
C Aircraft P
N
4
omposite O
E
T
Composite
O
N
Video
18
17
U
Remote O
Video C
L
V
14- 28 VD
l
a
n
i
5
m
r
E
e
T
1
T
0
O
o
8
N
e
T
d
V
i
P
V
e
l
b
a
C
y
a
l
p
s
i
D
412
4
E
T
O
N
r
e
e
w
t
i
o
s
p
o
e
p
o
t
e
o
m
d
o
i
m
C
V
e
R
8
20
ote Ground
Rem
)
5 A Breaker
(
3
#
)
d
e
i
l
p
p
u
s
(
3
d
n
u
o
r
g
e
t
o
m
e
R
7
19
4
E
T
O
N
412
Composite
Video
6185
l
a
n
i
m
r
e
1
T
0
o
8
e
T
d
V
i
2
P
V
#
e
l
b
a
)
C
d
e
y
i
l
a
l
p
p
p
s
u
i
s
D
(
3
er
Remote pow
Remote ground
17
0
0
5
7
2
r
o
0
5
7
2
2
L
I
M
e
b
t
s
u
m
g
n
i
r
i
w
o
i
d
u
a
l
l
A
.
1
l
a
n
i
m
r
e
1
T
0
o
8
e
T
d
V
i
P
V
e
l
b
a
C
y
a
l
p
s
i
D
412
4
E
T
O
N
eo
Composite
Vid
4
16
.
m
u
m
i
n
i
m
l
e
z
f
e
7
T
1
c
C
-
e
L
p
I
E
S
P
M
-
l
i
Y
U
T
/
M
9
.
L
7
G
L
m
1
-
u
U
W
A
P
G
m
i
8
R
e
n
i
1
b
e
.
#
.
t
m
b
s
d
t
m
G
u
n
s
u
u
u
m
W
m
o
r
r
m
A
u
e
n
G
s
2
i
k
e
2
a
d
l
m
#
e
n
b
r
a
a
G
g
b
c
r
n
t
i
i
W
e
t
o
u
A
h
w
e
c
g
r
o
d
i
4
i
i
L
P
2
V
C
.
.
.
4
3
2
P
4
L
G
#
3
3
0
0
/
/
5
0
1
2
/
/
7
8
g
n
)
d
e
i
l
p
p
u
s
(
n
o
i
i
r
t
i
u
y
W
b
a
i
l
r
p
t
A
s
s
i
i
V
P
D
D
2
3
mote ground
Remote power
Re
3
24
)
.
c
t
e
,
d
n
o
c
e
s
2
,
#
s
r
,
t
o
t
s
i
r
i
n
f
o
1
m
#
(
4
r
e
n
d
a
r
h
t
o
l
s
a
s
c
i
e
l
r
b
g
n
m
i
t
u
c
n
e
n
n
i
n
e
o
c
c
a
f
n
r
e
e
t
h
n
i
W
.
5
P
8
8
4
2
N
R
P
A
P
L
y
B
G
E
T
A
D
e
g
n
a
h
C
V
N
E
1
W
R
D
F
REV
y
O
a
l
p
s
i
T
D
E
-
i
t
E
l
u
H
S
M
,
g
n
i
r
i
W
0
8
V
A
P
:
E
L
T
I
A
T
DATE:
3
3
0
/
0
/
6
9
1
/
/
7
7
E
E
E
T
D
T
R
T
A
K
A
P
A
D
A
C
D
D
Notes:
ker)
Aircraft Ground
r (5 A Brea
NOTE 3
ircraft Powe
- 28 VDC A
14
er
4 V Dimmer
1
28 V Dimm
)
Antenna
(supplied
d
n
t
u
u
o
p
r
n
I
G
a
a
n
n
n
n
e
e
t
t
n
n
A
A
put (R)
X Audio In
AU
put Low
Input (L)
X Audio In
AUX Audio
AU
put L0
Input Hi
omposite In
Composite
UX Video C
AUX Video
A
200-800-0101 Appendix C Rev. 5 Feb. 2004
Page 33

PS Engineering
Installation and Operator’s Manual
PAV80
Appendix D- STC information and instructions for continuing airworthiness
8.1 Instructions for FAA Form 337, PAV80s
The STC was developed using an Approved Model List (AML). One method of airworthiness approval is through an
FAA Form 337, Major Repair and Alteration (Airframe, Powerplant, Propeller, or Appliance) In the case of the
PAV80, you may use the following text as a guide.
This unit is installed in accordance with FAA-STC SA02707AT, which specifically references the installation manual.
Installed IFE System, PS Engineering PAV80, part number 050-800-01XX) in ( location )
stalled per AC43.13-2, Chapter 2, paragraph 23 (Instrument Panel Mounting). Installed per PS Engineering
Installation Operators Manual p/n 200-800-(0101), revision (), dated ( ).
Interface to existing aircraft radios in accordance with installation manual and in compliance with practices
listed in AC43.13-2, Chapter 2. All wires are Mil-Spec 22759 or 27500. Connection to aircraft dimmer bus is
____________________. Power is supplied to the unit through a __A circuit breaker (type and part number
and total electrical load does not exceed
Aircraft equipment list, weights and balance amended. Compass compensation checked. A copy of the operation instructions, contained in PS Engineering document 200-800-( ), revision ( ), dated ( ), is placed in the
aircraft records. All work accomplished listed on Work Order .
% of the electrical system capacity with the PAV80 added.
8.2 Instructions for Continuing Airworthiness, PAV80s
at station . In-
),
Sample ICA Checklist for PS Engineering PAV80s:
Section Item Information
1 Introduction Installation of In-Flight Entertainment system.
2 Description Installation as described in manufacturer’s installation manual referenced on
FAA Form 337, including interface with other avionics audio as required.
3 Controls See installation and operator’s guide referenced on FAA Form 337.
4 Servicing None Required
5 Maintenance Instructions On Condition, no special instructions
6 Troubleshooting In the event of a unit problem, place the unit into “off,” “fail-safe” and/or
“emergency” mode. This allows pilot communications using aircraft radios.
Follow checkout instructions in the installation manual referenced on the FAA
Form 337. For a specific unit fault, contact the manufacturer at (865) 988-9800
for special instructions.
7 Removal and replacement informa-
tion
8 Diagrams Not applicable
9 Special Inspection Requirements Not Applicable
10 Protective Treatments Not Applicable
11 Structural Data Not Applicable
12 Special Tools None
13 Not Applicable Not Applicable
14 Recommended Overhaul Periods None
15 Airworthiness Limitations Not Applicable
16 Revision To be determined by installer
Removal: Using a 3/32” Allen-head wrench, carefully unscrew the locking
screw located in the center of the unit. While turning the wrench CCW, gently
pull on the EDGES of the bezel until the unit is free from the mounting tray.
Installation:
while applying slight pressure to the edges of the bezel. Do not over tighten!
Engage the locking screw at the back. Turn the locking screw CW,
200-800-0101 Appendix D Rev. 5, Feb. 2004
Page 34

PS Engineering
Installation and Operator’s Manual
PAV80
8.3 Master Drawing List
The following drawings are contained on the FAA-Approved Master Drawing List, Document Number
002-800-1000:
Title In this manual Part Number Revision Date
Installation Manual X 002-800-0101 2 Sept. 2003
Installation Wiring X 120-800-0000 1 15 July 2003
Tray Installation Drawing X 120-800-0430 3 09 July 2003
PAV80 Installation Diagram X 120-800-2488 New 11 July 2003
PAV80 Panel Location X 120-800-8801 2 14 Aug 2003
PAV80 Breaker Location X 120-800-8802 New 09 July 2003
Multiple Display Wiring X 120-800-0100 1 15 July 2003
PVA802 Dist. Amp Installation X 120-802-0100 New 11 July 2003
Users Guide 202-800-0101 New July-2003
Flight Manual Supplement July 11, 2003
* or later revision
8.4 Use of Approved Model List
STC SA02707AT was issued for the installation of the PAV80 entertainment system in one make/model
airplane. However, other makes and models are readily adaptable to this approved data since the PAV80
installation is non-required equipment that does not interrelate or affect any aircraft required system. The
PAV80 has been qualified under RTCA DO-160D for environmental performance in any of type aircraft
when mounted in the avionics section of the airframe.
STC can be used as a basis for approval in those airplanes listed in the Approved Model List (AML, Document Number 002-800-1080) provided the generic installation manual, Document Number 200-800-0101
September 2003 or later approved revision, is followed.
Advisory Circulars AC43.13-1B Acceptable Methods, Techniques, and Practices - Aircraft Inspection and
Repair, and 43.13-2A - Acceptable Methods, Techniques, And Practices - Aircraft Alterations are to be
used to resolve any issues not specifically addressed by the Installation Manual. Instructions for Continuing Airworthiness (ICA) are provided in the supplied data.
200-800-0101 Appendix D Rev. 5, Feb. 2004
Page 35

PS Engineering
Installation and Operator’s Manual
PAV80
200-800-0101 Appendix D Rev. 5, Feb. 2004
Page 36

PS Engineering
Installation and Operator’s Manual
PAV80
Appendix E RTCA DO160D/EUROCAE ED-14D Environmental
Qualification Form
Part Number: 050-800-(-xxx)
Manufacturer: PS Engineering Incorporated 9800 Martel Road Lenoir City TN 37772
Conditions Section Conducted Tests
Temperature and Altitude
Low Temperature
High Temperature
In-flight Loss of Cooling
Altitude
Decompression
Overpressure
4.0
4.5.1
4.5.2
4.5.4
4.6.1
4.6.2
4.6.3
Temperature variation 5.2 Equipment tested to Category C
Humidity 6.0 Equipment tested to Category A
Shock 7.0 Equipment tested to Operational test only
Operational 7.2
Crash Safety 7.3
Vibration 8.0 Equipment tested to Category S
Explosion 9.0 Category X, not tested
Waterproofness 10.0 Category X, not tested
Fluids Susceptibility 11.0 Category X, not tested
Sand and Dust 12.0 Category X, not tested
Fungus 13.0 Category X, not tested
Salt Spray 14.0 Category X, not tested
Magnetic Effect 15.0 Equipment tested to Category Z
Power input 16.0 Equipment tested to Category B
Voltage Spike 17.0 Equipment tested to Category B
Audio Frequency Susceptibil-
18.0 Equipment tested to Category B
ity
Induced Frequency Suscepti-
19.0 Category X, not tested
bility
Radio Frequency Susceptibil-
20.0 Category X, not tested
ity
Radio Frequency Emission 21.0 Equipment tested to Category H
Lightning Induced Transient
22.0 Category X not tested
Susceptibility
Lightning Direct Effects 23.0 Category X not tested
Icing 24.0 Category X, not tested
Electrostatic Discharge 25.0 Category X, not tested
Other Tests Passed FM Emissions testing in accordance
Equipment tested to CAT B1
-55° C Storage, -20°C Low Operating
+85°C Storage, +50°C High Operating
Not Applicable, no cooling required
25,000’ unpressurized
Not Applicable
Not Applicable
Equipment tested Category B
with CFR 47, Part 15.109.
200-800-0101 Appendix E Rev. 5 Feb. 2004
 Loading...