

Page 1
© 1998 RSE Holdings, Inc. Package Design and Summary:
© 1998 RSE Holdings, Inc. Red Storm Entertainment is a
trademark of Jack Ryan Enterprises Ltd. and Larry Bond.
Tom Clancy’s Rainbow Six is a trademark of Red Storm
Entertainment, Inc. All rights reserved. Other brand names
are trademarks or registered trademarks.
TTTToooommmm CCCCllllaaaannnnccccyyyy’’’’ssss
RR
RR
AAAAIIIINNNNBBBBOOOOWWWW SSSSIIIIXX
XX
Page 2

The New World Order ................................................................................1
Overview .................................................................................................2
Quick Start ..............................................................................................3
Game Menus............................................................................................7
Single Player Menu ........................................................................8
Multiplayer Menu............................................................................11
Training .........................................................................................11
Options.........................................................................................16
Planning Phase.......................................................................................18
Briefing.........................................................................................19
Intel.............................................................................................20
Roster Selection............................................................................21
Kit................................................................................................27
Team Assignment ..........................................................................31
Planning ......................................................................................32
Recon ...........................................................................33
Plotting Movement .........................................................35
The Waypoint Control Bar ...............................................36
Map Controls .................................................................36
Other Commands............................................................37
Tactical Behaviors .............................................38
Go Codes ......................................................................38
Rules Engagement .........................................................39
Special Actions..............................................................42
Execute........................................................................................43
Action Phase .........................................................................................44
Cinema Window ...........................................................................45
Map Window................................................................................45
Character Display .........................................................................46
Team Display................................................................................47
Fire & Movement...........................................................................47
Dynamic Team Control ...................................................................51
Ending the Mission .......................................................................53
RR
RR
eeeedddd SSSSttttoooorrrrmmmm EEEEnnnntttteeeerrrrttttaaaaiiiinnnnmmmmeeeennnntt
tt
Technical Support...................................................................................53
Contact us on the Web .................................................................54
Contact us by Email......................................................................54
Contact us by Phone ....................................................................54
Contact us by Standard Mail .........................................................55
Appendix A: Multiplayer Mode.................................................................55
Join Game ...................................................................................56
Create Game ................................................................................56
Session Options.............................................................57
Player Options ...............................................................58
Manual Join .................................................................................59
Server Info ...................................................................................59
Mplayer .......................................................................................60
Glossary................................................................................................63
Credits...................................................................................................67
TTTToooommmm CCCCllllaaaannnnccccyyyy’’’’ssss
RR
RR
AAAAIIIINNNNBBBBOOOOWWWW SSSSIIIIXX
XX
Page 3

available to smaller groups of determined individuals, political
instability increases. To proactively combat this trend and protect
their national security interests at home and abroad, the nations of
the world have invested years of training and billions of dollars
into developing counterterrorism expertise. The British Special Air
Service (SAS) and the U.S. Navy’s SEAL Team Six are perhaps the
most publicized of these units, but virtually every nation now has
some force capable of performing counterterrorist operations to
varying degrees.
Rainbow Six is a game developed in honor of the brave men and
women who guard the back doors of governments around the
world, standing ever ready in the shadows to meet whatever threat
may present itself. Although this is a work of fiction, and no such
internationally wielded counterterrorism unit is currently recognized
by the nations of the world, cooperation and cross training
between each of the existing special operations units is not only
common, it is highly encouraged. Consequently, the reality of this
gaming environment is not as far removed from our own as some
might hope.
OOOOvvvveeeerrrrvvvviiiieeeeww
ww
Rainbow Six places you in tactical command of a roster of the
leading counterterrorist operatives in the world. Each time a mission is called, you must review the briefing materials and select
which members of this roster will form the team for that operation
based on their skill sets and availability for the mission. During the
Planning Phase for the operation, you will also review the blueprints for the structure to be assaulted, assess all known intelligence about terrorist strength, armament and locations, as well
as hostage locations (where known), and develop a scheme of
maneuver for your team. Once you are satisfied with the plan, you
execute the assault. During the assault (the Action phase), you
will only directly control the actions of the team leader. All other
operatives will follow the plan precisely! If the leader is killed, you
will immediately assume control of the second in command, and
so forth. The mission continues until either all of the objectives
are accomplished or the team has been killed or incapacitated.
TTTToooommmm CCCCllllaaaannnnccccyyyy’’’’ssss
RR
RR
AAAAIIIINNNNBBBBOOOOWWWW SSSSIIIIXX
XX
2
TTTThhhheeee NNNNeeeeww
ww
WW
WWoooorrrrlllldddd OOOOrrrrddddeeeerrrr
Though some believe terrorism to be a cancerous growth unique to
twentieth century politics, the reality is much deeper. Terrorism is
simply the modern moniker for certain aspects of unconventional
warfare that have existed throughout recorded history. Tactics now
attributed to “Terrorism” have always been attractive to vocal, violent factions attempting to coerce others to adopt their social,
political or religious platforms. Such tactics include the ambush of
troops legally occupying a province or territory, the kidnapping of
important dignitaries or other individuals to be held hostage and
even the assassination of such individuals. The emphasis on the
word “legal” in the preceding sentence is important if we are to
understand the continuing influence terrorism will hold in the next
millenium. Consider the FBI’s definition for terrorism:
“Terrorism is the unlawful use of force or violence against
persons or property to intimidate or coerce a government, the
civilian population, or any segment thereof, in furtherance of
political or social objectives.”
If one removes the first four words of the definition and replaces
them with “War is the lawful...” one comes very close to General
Carl Von Clauswitz’s dictum that “War is nothing but the continuation of policy with other means.” When diplomacy fails, governments have the option of lawfully applying force to further their
political and social objectives. Groups and individuals do not have
this “right” and are therefore branded “Terrorists,” though one’s
point of view certainly impacts how readily that term is applied
instead of “Patriots.” We certainly revere the courage our forefathers demonstrated in breaking away from mother England and
forming a new nation, but doubtless their actions were viewed in a
much less favorable light by the legal government of the “colonies”
some two hundred and twenty-two years ago.
Today, we celebrate peace initiatives that portend to bring some
degree of stability to regions that have long been plagued by
terrorist activity like Northern Ireland and the Middle East.
Nevertheless, there are many other nations where terrorism and its
state-sponsored equivalent actively influence the world all of us
live in. As weapons of mass destruction become increasingly
RR
RR
eeeedddd SSSSttttoooorrrrmmmm EEEEnnnntttteeeerrrrttttaaaaiiiinnnnmmmmeeeennnntt
tt
1
Page 4

satisfied that you “know the enemy” sufficiently to complete the
mission at an acceptable level of risk, click on the right arrow
next to the title bar to proceed to the
Roster
screen. You will
be asked if you want to accept the default setup and plan for this
mission. For the purposes of this quick start, say “no” and walk
through the screens manually using the following paragraphs
as guidance.
The Roster screen contains a wealth of information about the individual skill sets of each team member. Long term success
depends on your ability to select the right team members for each
assignment based on the nature of the problem faced and shepherd those team members through each mission safely such that
they will be available for future tasking. To learn more about the
impact of the attributes listed on the Roster screen, consult the
Planning Phase section of the manual. For now, in the interest of
expediency, scroll down through the list until you find Ding Chavez.
While his name is highlighted, click the “Add” button. Next, highlight the first assault specialist on the roster then click the “Add”
button six more times to fill out the current team roster. You will
notice that the pictures of these specialists appear on the team
roster list in the upper left corner of the screen as you do so. You
can click on the team roster at any point to highlight a team member and see their statistics displayed in detail in the center window. When the team roster is full, click on the right arrow again
to proceed to the
Kit
screen.
Each team member comes equipped with a default “Kit” based on
his or her particular specialty. For example, demolitions specialists
will be armed with breaching charges to blast locked doors and
windows to get the teams inside the structure being assaulted.
They will also have heavy body armor, a shotgun for room clearing,
and a sidearm for backup. Now click on one of the other team
members with an assault specialty to view that default Kit. You
may click on the arrows next to each item in any member’s kit to
view all of the other possible choices for that equipment slot. Later
on, you will occasionally need to customize Kits to provide redundancy of equipment between team members to ensure certain mission objectives can be accomplished regardless of casualties but,
for now, we will accept the default kits for all of the team mem-
TTTToooommmm CCCCllllaaaannnnccccyyyy’’’’ssss
RR
RR
AAAAIIIINNNNBBBBOOOOWWWW SSSSIIIIXX
XX
4
If you fail to complete a mission, or manually quit before the objectives are accomplished, you automatically return to the planning
phase to attempt it again. Each group of mission objectives
MUST
be accomplished before you can continue to the next assignment,
but you can retry a mission any number of times without penalty.
QQQQuuuuiiiicccckkkk SSSSttttaaaarrrrtt
tt
Rainbow Six is a complex simulation of real world anti-terrorist
team tactical operations. As such, we highly recommend that you
become familiar with this manual and complete the tutorial series
before going operational for campaign play. Nevertheless, we recognize that some players prefer to jump right into the game, then
attend to the details of proper preparation after they have been
sufficiently humbled. If you are not one of these players, proceed
to the
Game Menus
section below to begin learning more about
the interface. Otherwise, clean your weapons and suit up, it’s time
to take out some bad guys!
After the opening sequence (which can be skipped by pressing the
ESC key), you will be at the
Main Menu
screen. Select “Single
Player,” then “New” to begin a new campaign. When you are
prompted for a difficulty level, select “Recruit.” The first mission,
Operation Steel Wind, will load and the next screen you will see is
the
Briefing
Screen. This is the first screen accessed in each
mission and it contains the mission objectives for the team. When
you are comfortable with these objectives, click on the arrow to
the right of the Briefing Screen title bar to proceed to the
Intel
Screen. You will notice right and left arrows on either side of the
title bar for each of the screens we will access during the Planning
Phase. You may use these to navigate back and forth between all
of these screens as much as you desire to refine your plan and
team assignments prior to actually clicking on “Execute” to begin
the Action Phase of the mission.
The Intelligence Screen contains vital information on the terrorists,
hostages and the current crisis that you have been activated to
resolve. This information comes from a variety of sources. Ignore it
at your own risk. Click on the various sources on the left side of
the screen to review what each has to offer. When you are
RR
RR
eeeedddd SSSSttttoooorrrrmmmm EEEEnnnntttteeeerrrrttttaaaaiiiinnnnmmmmeeeennnntt
tt
3
Page 5

prompt. Click on Execute to proceed to the Action Phase of
the mission.
You will find yourself outside the Embassy near the front door.
You are Ding Chavez, in command of the Blue fire team. Use your
mouse to pan the view around and see all of the other members
of both fire teams in the starting positions you assigned them.
Consult the “Keyboard and Mouse Controls” ready reference card
(printed separately from this manual for easy access during game
play) to learn how to move and shoot. Move past the steps up to
the main doors of the building and proceed to the corner. Look
around again and you will see that the other members of your fire
team are following you in “snake” formation and that each of them
is automatically covering their own arc of fire within the formation.
You will also notice that the Red fire team has not moved. This is
because you did not assign them any orders during the Planning
Phase. Don’t concern yourself with them for now. Consider them a
“reserve” unit in the event the Blue fire team doesn’t survive the
coming minutes, which is likely.
You will also notice that, as you move, the targeting reticle in the
center of your screen grows larger, then reduces in size again
when you stop. This reflects the increased difficulty of shooting
accurately while on the move. The character’s skill level, wounds
and fatigue also affect the size of the reticle.
Continue to the side door of the embassy. Your mission is to
assault the embassy and rescue the ambassador, who is besieged
and hiding on the second floor of the building. When you are at the
side door, consult your ready reference card and use the “manipulate environment” key to open the door. Run forward and clear the
first room using the mouse to look around the space and line up
the targeting reticle, followed by the left mouse button to fire. Don’t
make the mistake of shooting any terrorist only once, to “Double
Tap” everyone is standard operating procedure (SOP). Conversely,
remain mindful that the default setting is full automatic. You are
spraying bullets as long as the left mouse button is depressed,
so practice short controlled bursts to conserve ammunition.
If Ding goes down, which is quite apparent when the ceiling
becomes the dominant view, you will automatically have control of
TTTToooommmm CCCCllllaaaannnnccccyyyy’’’’ssss
RR
RR
AAAAIIIINNNNBBBBOOOOWWWW SSSSIIIIXX
XX
6
bers. Click on the arrow to the right of the title bar to continue to
the
Team Assignment
screen.
The Team Assignment screen is where you assign members from
the active roster to individual fire teams. You may have up to four
separate fire teams for the assault and each fire team can hold up
to four members from the total pool of eight. In other words, you
could create Blue and Red fire teams for this mission, and assign
four members to each (which is what we will do in a moment), or
you could designate four two-man fire teams. These are the two
most common configurations because it is rarely a good idea to
send in a team member without backup, but one man fire teams
are allowed if desired.
Click on Ding Chavez to make him the active team member. Click
on the “Blue” arrow to assign him to command that fire team.
Highlight the remaining team members one at a time and assign
them to the remaining slots in Blue and Red fire teams in any
order you wish. When both teams are full, click on the right arrow
by the Team Select title bar to proceed to the
Planning
screen.
The Planning interface is the heart of the mission preparation
process. It is an extremely detailed tool that you must become
intimately familiar with before proceeding into campaign play in
earnest. For the purposes of this Quick Start, however, we will
essentially skip this entire screen except for determination of the
starting points for the two fire teams. You will notice that the Blue
fire team is currently active by default. You will also notice a white
area on the blueprint in the planning window. The initial point for
all fire teams must begin within a designated white area (on some
maps, there may be more than one). Left click once in this white
area. A blue triangle will appear where the Blue fire team will start
the mission. Now click on the “Red” button to make that fire team
the currently active unit. Left click anywhere within the white area
again to designate the starting point for the Red fire team. Now
click on the right arrow next to the Planning title bar. You proceed
to the
Execute
screen where your mission plan is summarized.
To actually begin the mission, you must click the right arrow next
to the title bar again. If you are not ready to proceed, simply use
the left arrow keys to cycle as far back in the planning process as
you like to change your selections, then cycle forward again to the
RR
RR
eeeedddd SSSSttttoooorrrrmmmm EEEEnnnntttteeeerrrrttttaaaaiiiinnnnmmmmeeeennnntt
tt
5
Page 6
■■ Options takes you to the Options screen.
■■ Quit exits the game via the credits.
Single Player Menu
The Single Player menu is where most of you will begin your
careers in counter-terrorism. Several additional functions and submenus flow from this screen including New, Delete, Continue,
Backtrack, Practice Mission, View Mission Results and Options.
Each of these is described in the subheads below.
Figure 2: The Single
Player menu. The
Campaign list window displays all
active campaigns
and their associated
difficulty levels. The
Mission List window
displays only completed missions for
the selected active
campaign.
New
The first time that you play Rainbow Six, you will notice that the
Campaign and Mission List windows on the Single Player Menu
are empty. Select the “New” option to begin your first campaign. A
dialogue box appears prompting you to enter a name for the campaign. Type in any name up to eight characters long and hit Enter.
Then left click on Recruit, Veteran or Elite to set the difficulty level
for the campaign. The general impact of each difficulty setting is
explained below. Consult the new campaign screen to determine if
additional criterion have been established prior to deploying your
unit. When you are satisfied with your choices, click OK to proceed to the planning phase for the first mission.
TTTToooommmm CCCCllllaaaannnnccccyyyy’’’’ssss
RR
RR
AAAAIIIINNNNBBBBOOOOWWWW SSSSIIIIXX
XX
8
the second member of the fire team, provided that he is not
already incapacitated or dead. Remember that the other team
members are not simply standing by as “extra lives” for the player;
they are moving and fighting just as a real fire team would. As
such, they might be taking casualties as well as inflicting them.
If the entire Blue fire team is incapacitated, your perspective automatically shifts to the Red fire team leader. Re-enter the building
and try to get through the remainder of the mission. Remember
that the terrorists are well aware of your presence by now, so be
prepared.
Have fun! See you back here after your butt gets kicked.
GGGGaaaamm
mmeeee
MM
MMeeeennnnuuuussss
This section documents all of the choices available to you up to
the point that you select a mission. Once you select a mission,
you proceed to the Planning Phase, which is covered extensively
in the next section of the manual. The first screen you encounter is
the Main Menu.
Figure 1: The Main
Menu is fairly intuitive, just left mouse
click on a selection
to proceed to the
associated area or
subordinate screen.
■■ Single Player takes you to the Single Player Menu.
■■ Multiplayer takes you to the Multiplayer Menu.
■■ Training takes you to the tutorial menu.
RR
RR
eeeedddd SSSSttttoooorrrrmmmm EEEEnnnntttteeeerrrrttttaaaaiiiinnnnmmmmeeeennnntt
tt
7
Page 7

mission began. If the mission is successful, regardless of your
casualties, the program autosaves the results to the campaign file.
Consequently, if you want to replay the mission to improve your
performance, you need to use the Backtrack function. Here is how
it works.
Highlight the applicable campaign. Highlight the mission prior to
the one with the results you wish to change. Click on Backtrack.
This brings up the same dialogue box you see when creating a
new campaign (see above). In essence, that is exactly what you
are doing. This simply accepts the ending conditions of the mission you highlighted as the starting conditions for the new campaign. As before, you must enter a name for the campaign, but you
cannot alter the difficulty setting for any campaign created via the
Backtrack command.
Practice Mission
This selection allows you to ‘practice’ missions that have already
been completed to further hone your skills for future assignments.
For practice missions, all teammates are present with full health
and no fatigue. You cannot elect to practice uncompleted missions
at any time. Normal game flow is disrupted when you are practicing. If you fail a practice mission, you return to the planning
phase as normal. If you successfully complete a mission, after
viewing the Mission Results screen, you return to the
Single
Player Menu
.
View Mission Results
Select this option to review the End State of any completed mission within a campaign. This command is most useful when you
have multiple campaigns and you are looking for an optimum
place to use the Backtrack command. For a complete breakdown
of the type of information displayed on a Mission Results screen,
consult the “Debrief” heading under the Action Phase section of
the manual.
TTTToooommmm CCCCllllaaaannnnccccyyyy’’’’ssss
RR
RR
AAAAIIIINNNNBBBBOOOOWWWW SSSSIIIIXX
XX
10
■■ Recruit: Mission success depends on accomplishment of the
primary objective. Other factors are irrelevant.
■■ Veteran: You must complete both the primary and secondary
objectives to proceed to the next mission.
■■ Elite: Your team’s performance is evaluated against the high
standards of conduct applied to real world special operations. It isn’t sufficient simply to accomplish the mission
objectives. You must also do so with minimum acceptable
losses, maintain good fire discipline and execute the assault
plan with precise timing.
Delete
If you choose “Delete,” the program will delete the highlighted
campaign and all of the missions associated with it. Before any
campaign is actually deleted, you will be prompted to ensure that
this is what you intend to do. You cannot delete individual missions within a campaign as their beginning and ending conditions
are either influenced by or themselves influence the previous or
upcoming mission respectively. Instead, if you want to replay a
successful mission to improve your performance for campaign
purposes, use the “Backtrack” function described below.
Continue
The Campaign List Window shows all campaigns that are currently
active, and the Mission List shows completed missions within the
highlighted campaign. The first campaign on the alphabetically
organized list is highlighted by default. If you scroll down and click
on a different campaign you will note that the contents of the mission list window changes accordingly. When you have the desired
campaign highlighted, click on “Continue” to proceed directly to the
Planning Phase of the next operation in the campaign.
Backtrack
When characters are wounded or die during a Rainbow Six mission, their status isn’t updated as such on the permanent roster
unless the mission is successful. If the mission is a failure, you
can re-start it immediately with everything as it was before the
RR
RR
eeeedddd SSSSttttoooorrrrmmmm EEEEnnnntttteeeerrrrttttaaaaiiiinnnnmmmmeeeennnntt
tt
9
Page 8
Don’t fall into the trap of failing to practice between missions once
you have “gone operational” in a campaign. Real world hostage
rescue teams spend thousands of hours practicing Close Quarter
Combat (CQB) skills in mock “Kill Houses,” refining their marksmanship on the gun range and working out to stay in peak physical condition. These years of dedication and determination pay off
in full during a few short moments of intense life or death combat,
which is all the action that most of team members will actually
see over the course of an entire career (when you consider that
the average CQB engagement is over in five minutes or less).
The training objectives for each course of instruction are described
below. These objectives are based on “Lessons Learned” by many
“operators” who preceded you. Pay close attention to detail
and get as much from each lesson as you can. Once you have
exhausted all of the training potential of these exercises, don’t
forget that you can also practice any mission profile you have
previously completed by selecting that option from the Single
Player menu.
Obstacle Course
When most people think of an obstacle course, they attribute a
negative connotation to the term. That is why the Marine Corps
and other services have re-labeled these mainstays of military
training as “confidence” courses. Building confidence is really
what this level of training is all about. Herein, your objectives are
to practice tactical movement; using obstacles for cover and concealment, running across open areas swiftly, climbing over
obstructing terrain, shifting from a walk to a crouch and back
again, sidestepping to cover your firing arc, and learning to shift
between first and third person points of view while completing the
course. Consult the ready reference card for specific commands for
each of these actions. Most of you will find that the optimum control configuration for Rainbow Six is to use the keyboard for movement and the mouse to control your point of view. If you are
already accustomed to a different configuration, however, you can
go to the
Options
menu (see below) to re-map the commands to
suit your individual playing style.
TTTToooommmm CCCCllllaaaannnnccccyyyy’’’’ssss
RR
RR
AAAAIIIINNNNBBBBOOOOWWWW SSSSIIIIXX
XX
12
Options
This takes you to the same Options screen available from the Main
Menu. See the appropriate heading below for a description of the
functions provided via the Options menu.
Multiplayer Menu
The Rainbow Six multiplayer modes and options are documented
in Appendix A of this manual.
Trai ning
We have created several training missions to help you become
familiar with commonly performed actions within the game. Prior to
embarking on a full-fledged campaign, it would be a good idea to
spend some time perfecting your skills in these mission profiles.
Figure 3: Maximize
every training opportunity you have.
Remember, the
more you sweat in
peacetime, the less
you bleed in war!
Scroll through the list of training missions and either left click or
use the Tab, Arrow and Enter keys to select a course of instruction. The courses are designed to be taken in sequence to help
you progress from rudimentary fire and movement skills to
advanced tactical planning. Nevertheless, you are not penalized for
taking them in any order desired and you may also repeat them as
often as you like.
RR
RR
eeeedddd SSSSttttoooorrrrmmmm EEEEnnnntttteeeerrrrttttaaaaiiiinnnnmmmmeeeennnntt
tt
11
Page 9

Constant Reticle Modifiers
Constant reticle modifiers affect the base or current size by a constant percentage as long as the state or action causing the modifier is in effect. Running, for example, affects the base size by a
set amount as long as the character is running. Being wounded
also affects the base size by a set amount. Constant reticle modifiers include:
Movement
—The faster a character moves the larger the
reticle modifier. This reflects the difficulty in firing on
the move.
Stance Change
—changing from standing to crouching or
rotatIng in place momentarily increases the size of the
reticle. It is possible to rotate very slowly without changing
the reticle size.
Fatigue Level
—High fatigue levels globally increase the
fundamental size of the reticle. This also effects how
quickly the reticle shrinks back to its baseline size when
the character stops to take careful and deliberate aim.
Health Level
—Wounds affect the base reticle size. The
more wounded you are, the larger the reticle.
Pulsed Reticle Modifiers
Pulsed reticle modifiers have a one-time, pulsed effect on the current size of the reticle. Examples including firing a weapon and
seeing a flash-bang. Pulsed Reticle Modifiers include:
Firing
—Firing a round causes the reticle to increase slightly
in size. This reflects the inherent difficulty in firing multiple
rounds accurately.
Taking Hits
—Being physically hit by anything, be it a round,
shrapnel, or a physical blow, momentarily increases the
size of the reticle proportionally to the size of the hit.
Distraction Devices
—Observing a distraction device
(flashbang) causes a large increase in reticle size.
TTTToooommmm CCCCllllaaaannnnccccyyyy’’’’ssss
RR
RR
AAAAIIIINNNNBBBBOOOOWWWW SSSSIIIIXX
XX
14
Gun Range
Experienced operators will tell you that your weapon must become
a natural extension of your arm. Where you point, you hit. The only
way to develop this level of intimacy with the firearms of your
choice is to spend a lot of time at the Gun Range. Here, you can
practice with every weapon in the Rainbow Six armory at short,
medium and long ranges. This course of instruction is not conducted under simulated combat conditions. As such, you should
take your time and try to achieve the highest possible accuracy
rating. Become comfortable swapping magazines, and also shifting
between your primary and backup weapon rapidly.
The targeting reticle indicates the general aiming point for the
selected weapon. The word ‘general’ was carefully chosen, for
your only assurance is that when you fire, your bullet will hit
somewhere in the area defined by the reticle. The reason this is
important is that the reticle is a variable size—it is larger for someone who is a bad shot and smaller for someone who is skilled.
Also, the reticle changes size dynamically during the course of the
action phase depending on a number of factors like movement
speed, exertion level, and health status.
Tar geting Reticle Variables
The fundamental size of the reticle is determined by the skill of the
character and is used as a baseline for all further modifications. A
reticle cannot become smaller than this baseline size, but it can
become quite larger when modified by quasi-permanent factors
such as the fatigue and wound level. The current size of the reticle
is modified by a number of factors that can be broken into two
types: constant and pulsed.
RR
RR
eeeedddd SSSSttttoooorrrrmmmm EEEEnnnntttteeeerrrrttttaaaaiiiinnnnmmmmeeeennnntt
tt
13
Page 10

Kill House Office
This is a complex training problem involving a much larger structure and more complicated interior floor plan than previously
attempted. The objective of this lesson is to develop advanced
planning techniques and the ability to coordinate multiple entry
teams through the proper use of “go codes.”
Kill House 2 Story
This is it, the graduation exercise! It’s time to put everything you’ve
learned up to this point to the test in a multi-level structure. Devise
an assault plan that coordinates widely dispersed assault fire
teams such that they simultaneously breach on both floors and
take it to the terrorists before they have time to react. You will
find this to be a very challenging, crowded environment. Be
exceptionally vigilant to avoid “Blue on Blue” (i.e.: friendly fire)
engagements.
When you have completed this sequence of scenarios, you are
first class certified in HRT and CQB and you are ready to go operational. More advanced scenarios are included for those players
who seek to maximize their skill sets before deployment.
Options
The Options menu is where you can customize Rainbow Six’s
audio and video display levels for maximum performance with your
existing computer configuration. You can also toggle sound FX,
music and radio chatter on or off from this screen.
TTTToooommmm CCCCllllaaaannnnccccyyyy’’’’ssss
RR
RR
AAAAIIIINNNNBBBBOOOOWWWW SSSSIIIIXX
XX
16
Environmental Distractions
—Hearing cries of distress
on the radio, seeing a buddy go down, seeing a hostage
executed, hearing an alarm go off, and so forth.
Demo Course
Even electronics experts need basic demolitions training to use
flashbangs and grenades properly. This module gives you plenty of
practice in both overhand and underhand tossing techniques and
familiarizes you with the proper placement and detonation of
breaching charges.
City Street
This is a “Hogan’s Alley” style target range with moving, pop up
targets similar to those employed at the FBI Academy in Quantico,
Virginia. You will need to advance down the street, clearing
“enemy” targets as they appear. The objective is to develop a feel
for how much your firing accuracy is affected while moving. You
are expected to make proper use of cover and concealment at all
times. Because stealth is a factor, you will also be issued a
silenced weapon for the duration of this exercise.
Kill House Single
This is a “no-brainer” breach into a single room structure. The
emphasis of this training module is to teach you basic room clearing techniques. You will be working with a teammate for this exercise. Together, you must enter the room, discern any hostile targets from any non-hostile targets (i.e.: hostages) which might be
present. You must then engage and successfully neutralize the
threat without sustaining casualties.
Kill House Double
This training scenario builds on the fundamentals learned in the
previous lesson. Because two rooms must be cleared of hostile
targets, slightly more complex planning is required. It’s just a small
incremental increase in difficulty to properly prepare you for the
final two training missions.
RR
RR
eeeedddd SSSSttttoooorrrrmmmm EEEEnnnntttteeeerrrrttttaaaaiiiinnnnmmmmeeeennnntt
tt
15
Page 11
different control scheme, feel free to modify Rainbow Six to
accommodate your particular playing style.
Multiplayer options affect the manner in which two or more people
can connect online to play Rainbow Six cooperatively or competitively. For a complete rundown of multiplayer modes and options,
see Appendix A.
PPPPllllaaaannnnnnnniiiinnnngggg PPPPhhhhaaaassssee
ee
When you begin a new campaign, or each new mission within an
existing campaign, your first task is to proceed through the
Planning Phase. The planning phase is where you prepare for the
upcoming mission by:
■■ Receiving the mission briefing
■■ Reviewing all available intelligence sources
■■ Selecting up to eight operatives from the team roster to par-
ticipate in the mission
■■ Selecting the equipment those team members will use
■■ Splitting the mission roster into fire teams
■■ Preparing a detailed fire and movement plan for each fire
team
These operations do not have to be completed in any particular
order. Feel free to hop from mode to mode while in the planning
phase-you can make a plan, then select your team, for example.
Or you can select a team first, then make a plan, and then equip
them. You get the idea. Each of these modes is fully described
under the appropriate subhead below. Alternately, you can elect to
use the default plan immediately after finishing the intelligence
briefing. On the first four missions, these plans are fairly intricate.
Subsequently, you are only provided with the insertion points for
each assault element.
When you have specified the easy difficulty setting for the planning phase, a default team is pre-loaded for you. The Team
Window depicts which team members have been selected for the
TTTToooommmm CCCCllllaaaannnnccccyyyy’’’’ssss
RR
RR
AAAAIIIINNNNBBBBOOOOWWWW SSSSIIIIXX
XX
18
Figure 4: The
Options menu is
accessible from
virtually every
other menu screen
before you enter
the planning phase
of a mission.
The Brightness adjustment impacts the light level displayed only
during the Action Phase. If the planning screens appear dim, check
the control settings on your monitor. The Resolution controls configure Rainbow Six to run at an optimum frame rate for your com-
puter. If you are already at the lowest resolution setting and you
are still experiencing sluggish performance during the Action
Phase, refer to the ready reference card to learn how to reduce the
size of the display window and improve frame rate considerably.
Force Software, Auto-Targeting and Gore are all on/off toggles. If
you have a hardware 3D accelerator, Rainbow Six will automatically take advantage of it. If you prefer to force the program to use
software acceleration routines instead, make sure this option is
on. Auto-Targeting simplifies the game considerably. It is off by
default but, if you are dying too frequently to suit your tastes, consider turning it on for a time until you become more proficient at
quickly acquiring targets whenever you enter a room. With Gore
on, expect realistic blood spray, not Mortal Kombat torrents that
would make even Monty Python laugh. With Gore off, it’s like
watching an old Western movie. The bad guys just fall down when
they get shot, without any visible indication of the bullet hit(s).
The next selection on this menu is “Keyboard Controls.” If you are
inexperienced with this type of utility, we recommend that you
remain with the default control configuration. If you are a veteran
of this type of game however, and are already intimate with a
RR
RR
eeeedddd SSSSttttoooorrrrmmmm EEEEnnnntttteeeerrrrttttaaaaiiiinnnnmmmmeeeennnntt
tt
17
Page 12
are comfortable with your mission orders, click on the right arrow
next to the title bar to proceed to your intelligence briefing.
Don’t worry about committing all of these details to memory now.
If you need to review this information again, such as when you are
the
Planning
screen viewing the blueprints of the structure, all
you need to do is click on the left arrow next to the title bar of
each screen several times to cycle back to the briefing screen.
All of the planning phase screens can be navigated in this fashion
and nothing in the plan is finalized until you click on the “Execute”
order on the last screen.
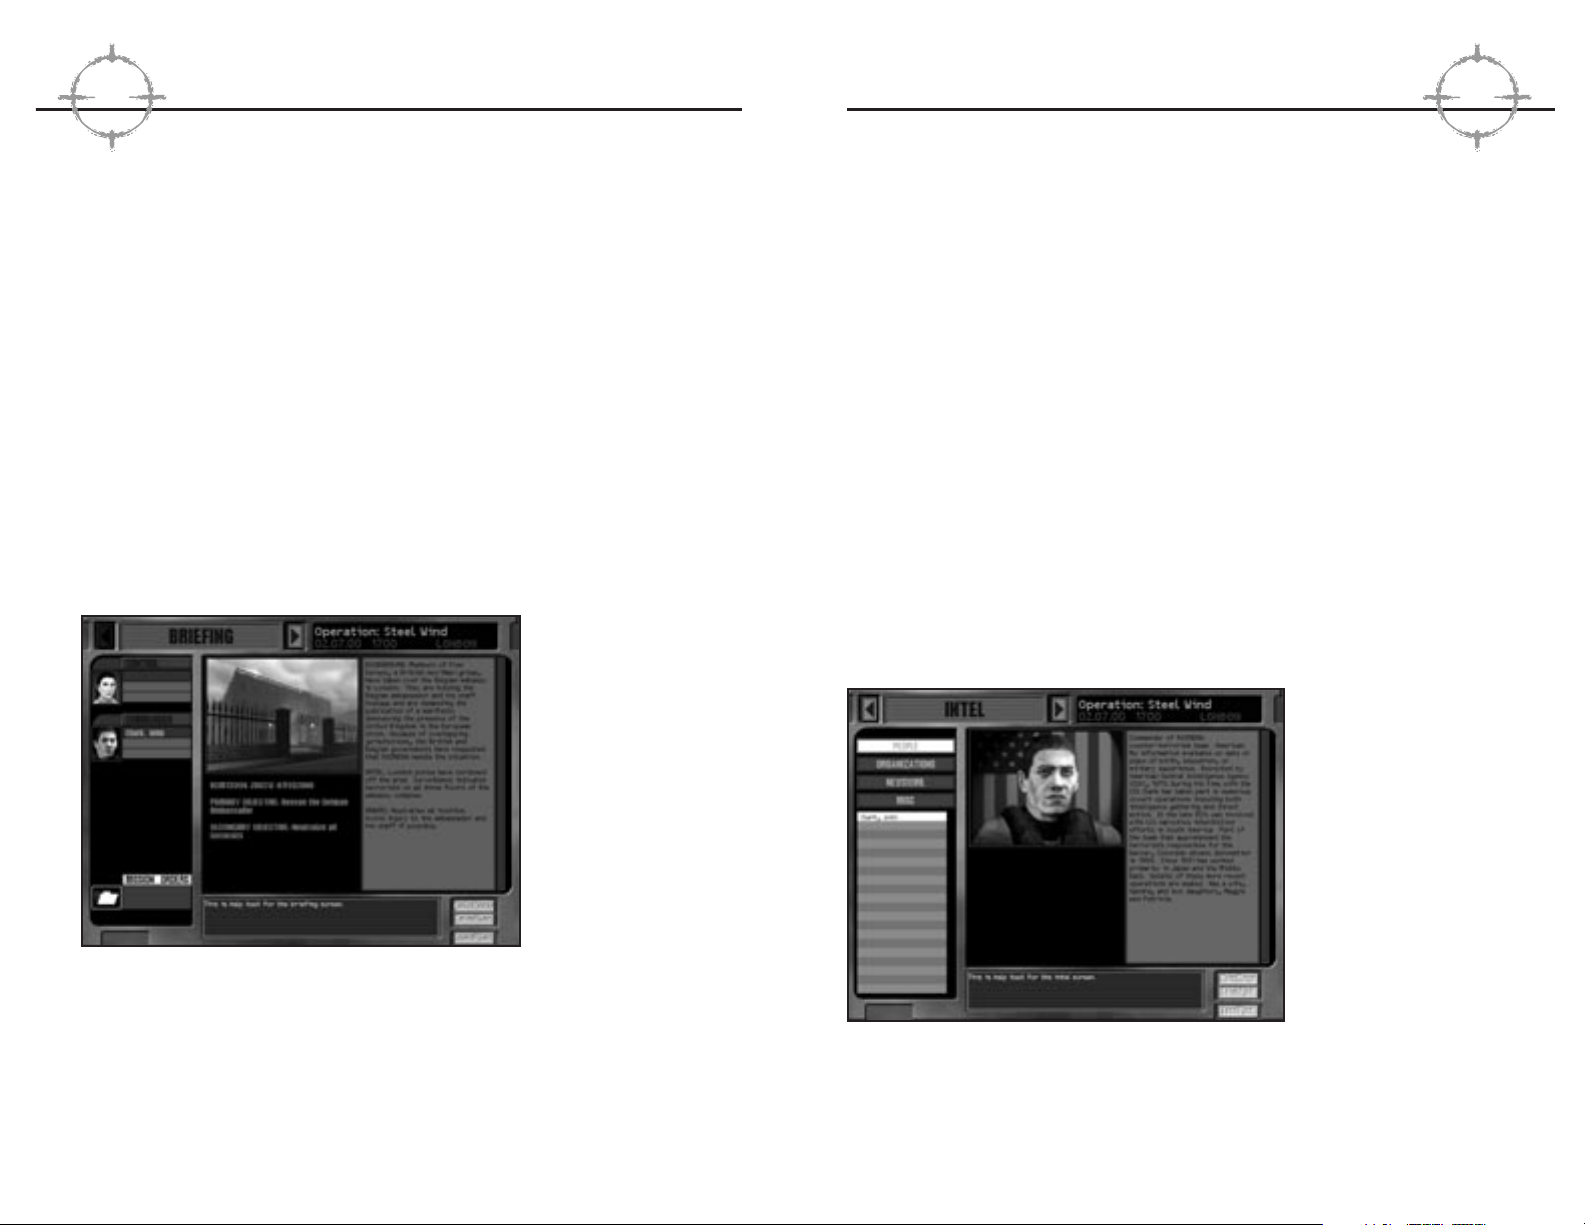
Intel
The Intel screen grants you remote access to Control’s database.
The database is organized in alphabetical order, separated by category. These categories are people, Organizations, Newswire and
Miscellaneous. Clicking on an individual entry displays graphics
and/or a text entry for that item in the content window. If an entry
is a new one for the current mission, it will initially appear highlighted.
Figure 6. Access to
the Intel database is
on a “need to know”
basis, regardless of
your level of clearance. Consequently,
many entries won’t
appear on the Intel
screen until you have
received an assignment for which
knowledge of them is
essential.
The Intel database is not available during the action phase, so
make sure that you take the time to learn everything you might
possibly need for the mission during the planning phase. When
TTTToooommmm CCCCllllaaaannnnccccyyyy’’’’ssss
RR
RR
AAAAIIIINNNNBBBBOOOOWWWW SSSSIIIIXX
XX
20
current mission, their kits, and the plan they are assigned to, and
who is the leader for each plan-group. These reflect the best
choices based on available personnel and equipment, although you
may still edit these if you wish.
Briefing
The briefing sequence will give you an overview of the basic political and tactical situation that you have been deployed to contend
with. Rainbow Six Control and the “Mission Orders” will be your
primary briefing sources. John Clark, a senior operative with considerable experience, is also onboard to offer you advice on the
specific nuances you should be concerned about on each mission.
Periodically, there will be other subject matter experts called in to
lend their expertise. Simply click on their portrait on the left side of
the briefing screen to hear what they have to offer. Remember that
these advisors are simply that, nothing they say relieves you of
ultimate responsibility as the mission commander.
Figure 5: The level of
difficulty you specify
for the campaign
alters which mission
objectives are displayed on the
Briefing screen.
In addition to the written and audio briefing material, you are also
shown some pictures of the interior of the space. Pay close attention to the arrangement of the furniture and other structural details
that might affect the traffic pattern of your assault plan, or be likely
areas of concealment for “Tangos” (i.e.: terrorists). Note the light
levels of the space as well. If a lot of shadows and dark areas are
present, be ready to use your night vision gear (NVG). When you
RR
RR
eeeedddd SSSSttttoooorrrrmmmm EEEEnnnntttteeeerrrrttttaaaaiiiinnnnmmmmeeeennnntt
tt
19
Page 13

Bio
—name, nationality, specialty, date of birth, height and weight,
other identifying features.
Readiness
—displayed underneath the character picture. Each
member on the roster is in one of the five following availability
states:
Ready
—the member is capable of being used on this mission
and suffers no adverse modifiers to their skill sets.
Fatigued
—the operative is available for tasking, but their per-
formance could suffer because they haven’t had sufficient “down
time” between missions. See “Health” below for more details.
Wounded
—the member is still recovering from wounds received
on previous missions. They are not incapacitated, so they can go
on the mission if you really need them, but expect severely
degraded performance. See “Health” below to see how seriously
“old war wounds” might influence a character.
Incapacitated
—the individual is incapacitated and cannot be
selected for the current mission. Once they have had some time
in the hospital, their status will upgrade to wounded or ready. All
team members recover at the same rate, so the time differential
between two given missions is the deciding factor on how much
a member’s physical condition can improve before taking on additional tasking.
KIA
—killed in action. This team member is dead and they cannot
be “restored” for the duration of the current campaign. When a
character is KIA, a replacement is assigned to the team roster.
These replacements are never as skilled or experienced as the
original team members are, so you will find it more difficult to finish the campaign with them.
Stats
—displays a list of five profile traits and five specialty
skills, with a numerical rating for each on a scale of 100. The profile statistics are aggression, leadership, self-control, stamina, and
teamwork. To learn how these factors influence mission performance, see “Profile Traits” below. The specialty skills are demolitions, electronics, firearms, grenades and stealth. Character skills
directly impact the decisions you must make during both planning
TTTToooommmm CCCCllllaaaannnnccccyyyy’’’’ssss
RR
RR
AAAAIIIINNNNBBBBOOOOWWWW SSSSIIIIXX
XX
22
you are ready to proceed to the next step, the
Roster
Selection
screen, click on the right arrow next to the title bar in
the top center of the screen.
Roster Selection
This interface screen is used to view character dossiers and
assign team members from the pool to the active duty roster for
the current mission. The maximum team size for any given mission
is eight (although you can attempt the mission with fewer personnel if you wish), and this is reflected by the eight team member
slots in the upper left corner of the screen. The lower left corner of
the screen contains a scrollable list of the entire pool of Rainbow
Six operatives, arranged in alphabetical order. Selecting a team
member displays their dossier in the content window.
Figure 7. Some team
members are preassigned for particular missions—they
must go on the mission and cannot be
removed from the
team window.
When you see a profile you like, click “Add” to move the member
from the pool to the active duty list. If you click “Remove,” you will
return whomever’s portrait is currently highlighted on the active
duty list to the team “pool” for later assignment. You cannot accidentally remove someone from the pool.
Each dossier contains the following information:
Picture
—a head shot of the team member
RR
RR
eeeedddd SSSSttttoooorrrrmmmm EEEEnnnntttteeeerrrrttttaaaaiiiinnnnmmmmeeeennnntt
tt
21
Page 14

movement, the equipment carried, and the surface being walked
on. Each profile trait is discussed immediately below.
Self Control
—Determines how prone a non-player character
(NPC) is to ‘snapping’ under stress. In game terms, a team
member with high self-control is likely to remain calm and in
control regardless of the situation, while one with a low selfcontrol is likely to ‘snap’ or panic at the first signs of trouble.
Aggression dictates how the team member responds once they
have snapped.
Aggression
—Determines the basic nature of the NPC—are
they aggressive or passive? In game terms, this only comes
into play directly when a character snaps. If the character has a
low aggression rating, they are likely to panic and run or freeze.
If they are highly aggressive, they are more likely to use
extreme force when under pressure, perhaps even to the detriment of any hostages nearby. When the character is ‘under control’ and responding to the normal stress of the mission, aggression ratings cause slight variations in standard operating procedures (SOP), which are discussed in greater under “Planning”
below. Note that aggression and self-control are used by nonplayer controlled characters only. When you control a character,
your actions replace those stats completely. AI-controlled characters assault, panic, seek cover, and take other related tactical
actions based entirely upon these stats.
Leadership
—A team leader with high leadership ratings posi-
tively affects the teamwork and self-control stats of the team
members assigned under their command. Conversely, one with
low leadership ratings negatively affects these stats for
assigned personnel. These modifiers take affect regardless of
whether the team leader is player or computer controlled (as
when two four person teams are assaulting the same building
in a single player scenario).
Stamina
—Stamina affects how many wounds can be sus-
tained before a character is incapacitated. It also effects the
likelihood that they will get fatigued after a mission is completed. See “Health” below for a table of stamina ratings versus
incapacitation levels.
TTTToooommmm CCCCllllaaaannnnccccyyyy’’’’ssss
RR
RR
AAAAIIIINNNNBBBBOOOOWWWW SSSSIIIIXX
XX
24
and execution of the mission. See “Specialty Skills” below for
more details.
History
—a description of the team member’s past tours of duty
and other background information that might prove useful when
making team assignments and deciding how two or more team
members might work together.
Medical
—displays the state of three important elements: health,
fatigue, and availability. These states can change throughout the
course of the game, so it’s incumbent upon you to pay attention to
your troops! For additional information, see “Health” below.
Profile Traits
All stats are either a skill (see “Specialty Skills” below) or part of
the character’s profile. Skills are learned, while stats under the
profile group are a mixture of learned and inherent—they are the
kinds of stats that would be determined by a battery of tests, both
psychological and physical.
All profile characteristics range from 1-100, with 100 being the best.
All characters use these stats, whether they’re a team member,
hostage, or terrorist. Each stat is presented on the dossier screen
via a numerical rating and two bar graphs. The numerical rating is
fixed; it is the maximum value of the trait for that character. It also
determines the actual length of the bar associated with that characteristic. The current stat value, which is represented by a bar of
a different color, changes depending on wounds and fatigue. When
a character is at full health, the two bars are indistinguishable.
When he or she has been wounded or is fatigued, the current values will be markedly lower than the maximum ratings. For a complete understanding of how these modifiers affect performance,
see “Health” below.
The manner in which the game engine uses these statistics may
not be intuitively obvious or apparent until you have played the
game for some time. Rest assured, however, that these attributes
are far more than RPG style “chrome.” For example, the amount of
noise a character makes while moving is determined by the stealth
characteristic, the footwear they’re wearing, the speed of
RR
RR
eeeedddd SSSSttttoooorrrrmmmm EEEEnnnntttteeeerrrrttttaaaaiiiinnnnmmmmeeeennnntt
tt
23
Page 15

(such as being shot at). More information is provided in the
action phase of this manual.
Grenades
—Determines the size and time constant of the
targeting reticle for thrown weapons, like flashbangs and
grenades. Note that the targeting reticle for thrown weapons
indicates the initial direction that the grenade will be thrown,
not the final point of impact.
Stealth
—Determines how much noise the character makes
while moving. Low stealth means that the character will make
noise even while walking slowly on a normally quiet surface,
while a high stealth means move they can move silently and
quickly across noisy terrain. Note that many other factors will
roll into the total amount of noise made by the character. These
differences are transmitted with variable volume and are quite
noticeable in both single and multiplayer mode.
Health
A character’s health determines whether or not they are available
for any given mission, and also what modifiers are in place (if any)
due to fatigue or wounds. Fatigue checks are made against the
character’s stamina rating. Once fatigue has been determined
to exist, all character stats suffer a fixed 10% penalty. Wound
modifiers, on the other hand, vary depending on the characteristic
being influenced.
Further, If a team member goes on a mission when they are
wounded, they automatically receive one additional wound at the
end of the mission. The number of wounds a team member can
take before becoming incapacitated is based upon the member’s
maximum stamina rating, not their current stamina. Incapacitation
levels can also be modified based on how alert the target is at the
time the engagement occurs. As the aggressors, team members
are always alert, so they receive the capacity to sustain one more
wound than they could normally handle based on stamina rating
alone. This is a reflection of the beneficial affects of adrenaline
and the body’s other neurotransmitters in “fight or flight” mode.
Tangos enjoy these benefits as well, provided that you are foolish
enough to alert them. Instead, construct your assault plans for
TTTToooommmm CCCCllllaaaannnnccccyyyy’’’’ssss
RR
RR
AAAAIIIINNNNBBBBOOOOWWWW SSSSIIIIXX
XX
26
RR
RR
eeeedddd SSSSttttoooorrrrmmmm EEEEnnnntttteeeerrrrttttaaaaiiiinnnnmmmmeeeennnntt
tt
25
Teamwork
—Determines how well the character cooperates
with other team members. A character with low teamwork
ability will use their individual AI routines to determine their
actions, regardless of the presence or absence of team members. A character with a high teamwork will wait for other team
members before entering rooms, support team members properly with covering fire, and use good team based room entry
and clearing techniques.
Specialty Skills
The important thing to note about the following statistics is that
they affect every character equally-whether or not they are computer controlled. You must work within the limitations of the individual you have chosen as team leader throughout the action
phase, or execution of the mission.
Demolitions
—Determines the speed with which a team
member places a demo charge. A low demolitions skill means it
will take longer, a high skill means it will go extremely fast. It
also affects the speed that it takes to disarm a bomb as well as
how many blasts it takes a character to complete “shotgun
breaching” of a door lock.
Electronics
—Determines the speed with which a team
member can manipulate electronics, such as placing bugs,
video splicing, picking locks or bypassing security systems.
A low electronics skill means it will take longer, a high skill
means it will go extremely fast.
Firearms
—Determines the size of the targeting reticle for all
firearms. A low accuracy rating means a huge targeting reticle
that never gets very small, while a high accuracy means the
targeting reticle is small regardless of other factors and gets
almost cross-hair sized under the best conditions. This rating
also determines how fast the targeting reticule changes. Low
firearms skill means that the targeting reticle shrinks to its minimum size slowly, while a high firearms means it snaps quickly
to its minimum size (to reflect taking careful and deliberate aim
while remaining stationary). The firearms skill also determines
how long it takes a character to respond to new information
Page 16

(underwear, coveralls, gloves, socks, and balaclava). Each team
member usually wears some sort of head protection, though this
hampers hearing somewhat and may be discarded for particularly
stealthy missions. Ear protection is always worn, in the form of an
earplug in one ear, and a radio in the other. Eye protection is
always worn—ski-type goggles with a tactical display for day missions and night vision goggles for low-light conditions.
Standard body protection covers the chest only and consists of
medium body armor capable of stopping all pistol and sub-gun
rounds. Heavier armor covers more area (usually the groin) or protects against rifle rounds by adding ceramic plates to the chest.
The standard footwear is rubber-soled, soft-leather, lace-up boots.
For outdoor missions, a heavier boot may be worn. Each team
member wears radio gear: micro boom mike with a single earplug.
Each team member’s basic biological functions are monitored
remotely using non-invasive contact patches. Team members carry
water in thin backpacks with a sip-tube.
That’s real world. On the Rainbow Six Kit screen, each team member has four inventory slots: primary weapon, secondary weapon,
and special slots one and two. The primary weapon is one of the
following: MP5, MP5SD, MP5K, Tactical 12-gauge shotgun, CAR-15,
M-16. The secondary weapon is one of the following: 9mm, 9mm
suppressed, .40, .40 suppressed, .45, .45 suppressed. The following things can be carried in the special slots:
Heartbeat Monitor
—heartbeat monitor (motion sensor)
Demolitions kit
—adds to demolitions skill when
disarming bombs
Electronics kit
—adds to electronics skill
Lockpick kit
—reduces the time required to pick locks
Frag grenades
—standard fragmentation grenades
Flashbang grenades
—used to stun opponents with a
bright flash and bang.
Door charges
—used to blow open doors.
TTTToooommmm CCCCllllaaaannnnccccyyyy’’’’ssss
RR
RR
AAAAIIIINNNNBBBBOOOOWWWW SSSSIIIIXX
XX
28
maximum stealthiness. If you succeed in surprising the terrorists,
they suffer a further degradation to the maximum number of
wounds they can receive before becoming incapacitated.
Kit
Once you have selected all of the members of your team, its time
to equip them for the mission. This function is accomplished on
the “Kit” screen. Each specialty has a corresponding default kit
associated with it, but you can further customize these kits by
altering the primary or secondary weapons, or any of the ancillary
equipment as well. To see what the default “Demolitions” kit is,
simply left click on the portrait a demolitions specialist on the
team to view his kit. Do the same for Assault, Recon and
Electronics specialties now. Later in this section, we will give you
examples of some other “specialty” kits you can create by manually altering the primary and secondary weapons slots, as well as
the two optional slots and the uniform.
Figure 8. Simply
click on any of the
kit items to receive a
short description of
the kit item in
the bottom left
text window.
In the real world, each team member carries a primary weapon
(usually a submachine gun), a backup weapon (usually a pistol),
a number of flashbangs, and possibly a number of other types of
grenades (frag). Each team member carries a number of spare
magazines dependent, usually 3-5. Each team member is covered
from head to foot in fire retardant clothing—often several layers
RR
RR
eeeedddd SSSSttttoooorrrrmmmm EEEEnnnntttteeeerrrrttttaaaaiiiinnnnmmmmeeeennnntt
tt
27
Page 17

caliber. It is still ineffective against high velocity bullets, like
5.56mm rounds from the CAR-15 or M-16 assault rifles.
Location/Type Equipment
Uniform HRT or Camo Medium (depending on
terrain in the area of operations)
Primary Weapon MP5SD (9mm)
Secondary Weapon HK .40 USP
Slot One Extra Primary Magazine
Slot Two Flashbangs
The Entry Kit
This is the basic kit for breachers (team members responsible for
blowing open doors and walls). It includes heavy armor, which is
effective against most small arms fire including rifle calibers up to
7.62mm. The primary weapon is a short-barreled entry shotgun,
with a pistol (any caliber) as backup. Typically, each breacher carries a frame charge for initial breaching, and an additional charge
for any interior doors or other obstacles that might prove to be
problematic later on. Alternately, the breacher can carry additional
flashbangs and grenades in lieu of the second demolitions charge.
Location/Type Equipment
Uniform HRT or Camo Heavy (depending on terrain
in the area of operations)
Primary Weapon Benelli 12 gauge tactical shotgun
Backup Weapon HK .45 USP
Slot One Door Charge
Slot Two Door Charge
The Backup/Heavy Weapons Kit
When things go wrong, the team may require additional firepower
to help salvage the situation. When properly equipped, a heavy
TTTToooommmm CCCCllllaaaannnnccccyyyy’’’’ssss
RR
RR
AAAAIIIINNNNBBBBOOOOWWWW SSSSIIIIXX
XX
30
Extra magazines
—these can be for the primary or
secondary weapon.
Additionally, kits can be set up based on the individual’s function
within the team fireplan. The following suggested kit variants can
be manually set up for either single player campaign use or to
create specialists for multiplayer use (see Appendix A for multiplayer functionality).
The Scout Kit
The basic scout kit sacrifices everything in favor of being quiet and
stealthy. The less you carry, the less noise you make. It is the kit
of choice for recon and surveillance. Light body armor is 100%
effective against shotgun pellets and light caliber pistol rounds.
It is marginally effective against higher caliber pistol rounds (like
.45 caliber ball ammo) and completely ineffective against rifle
cartridges.
Location/Type Equipment
Uniform HRT or Camo Light, depending on terrain in
the area of operations
Primary Weapon MP5SD, Silenced Assault SMG
Secondary Weapon Pistol (9mm or .40) w/optional silencer
Slot One Frag Grenade (optional, to dissaude
pursuit if discovered)
Slot Two Empty
The Assault Kit
This is the basic kit for anti-terrorist teams around the world. The
composition of this kit assumes that you will be conducting a
deliberate assault on a defended terrorist enclave or barricaded
hostage situation. Tactical mobility and the swift application of firepower is of paramount concern, so some compromises have been
made in personal protective armor. Medium body armor is 100%
effective against shotgun blasts and all pistol rounds regardless of
RR
RR
eeeedddd SSSSttttoooorrrrmmmm EEEEnnnntttteeeerrrrttttaaaaiiiinnnnmmmmeeeennnntt
tt
29
Page 18

TTTToooommmm CCCCllllaaaannnnccccyyyy’’’’ssss
RR
RR
AAAAIIIINNNNBBBBOOOOWWWW SSSSIIIIXX
XX
32
RR
RR
eeeedddd SSSSttttoooorrrrmmmm EEEEnnnntttteeeerrrrttttaaaaiiiinnnnmmmmeeeennnntt
tt
31
weapons specialist can provide just that tactical edge-the primary
weapon is a carbine or assault rifle. The primary responsibility of
the heavy weapons specialist is to lay down cover and suppression fire to protect the activities of the remainder of the team. As
such, silenced weapons are inappropriate. Also, since the specialist is drawing maximum attention to himself, he should be well
protected from return fire as well.
Location/Type Equipment
Uniform HRT or Camo Heavy (depending on the
terrain in the area of operations)
Primary Weapon Car-15 (interior use)or M-16(exterior
assault)
Backup Weapon .45 Pistol
Slot One Extra Primary Magazine
Slot Two Frag Grenades
Team Assignment
The Team Assignment screen is where you assign members from
the active roster to individual fire teams. You may have up to four
separate fire teams for the assault and each fire team can hold up
to four members from the total pool of eight. In other words, you
could create Blue and Red fire teams for this mission, and assign
four members to each (which is what we will do in a moment), or
you could designate four two-man fire teams. These are the two
most common configurations because it is rarely a good idea to
send in a team member without backup, but one man fire teams
are allowed if desired.
Figure 9. The commander of each fire
team should have
strong leadership
skills, or the mission objectives
assigned to that
team might be in
jeapordy.
To assign a member, first click on his portrait on the left, then click
on one of the colored arrows to assign him to the fire team associated with that color (presuming that there are open slots remaining
to be filled). The first team member assigned to each color is automatically assigned command of that fire team. If you want to
change who is in command of a given fire team, first you must add
the “leader to be” to the fire team, then you must click on the
associated “Promote” button while that characters portrait is highlighted. Once the fire teams are divided to your satisfaction, click
on the right arrow by the Team Select title bar to proceed to the
Planning
screen.
Planning
The British SAS motto is “Who Dares Wins.” Once they became
heavily involved in counterterrorist and hostage rescue missions,
the SAS came up with a corollary to that motto for those kinds of
missions: “Who Plans Wins.” This is the mode where you actually
construct the entry and assault plan for your team. Each plan consists of pairs of paths and waypoints. Teams move along straight
paths using a particular set of Rules of Engagement (ROE), to waypoints where they can change direction, perform actions, or wait
for go-codes. Plans may be extremely simple: one team, minimal
number of waypoints with only one set of ROE, or complex:
Page 19

of sniper/observer posts, the placement of spike mikes and fiber
optic cameras, even through the use of millimeter wave radar that
renders exterior walls essentially invisible to the scanning source.
Since the focus of Rainbow Six is on the assault itself, not intelligence gathering responsibilities, these types of operations have
been simulated for you. To determine what intelligence they have
gathered, you need to access the Recon tab on the Plan screen.
Left click on the tab and you will notice that the bottom left display
changes to show four radio buttons: Hostages, Terrorists,
Landmarks and Legend. Select Hostages. You will notice that the
blueprint of the structure in the main display moves to center on
the first known hostage location. If the icon is clear and distinct, it
means that it is an exact location based on perfect intelligence. If
there is a degree of uncertainty about the precise location, the icon
will indicate that clearly. That means that the last known location
of that hostage was somewhere in that room. They may still be
there, or they might have been moved. Use the arrows to cycle forward and backward through all known hostage locations. Terrorist
locations are handled in exactly the same fashion.
The difficulty level you specified for the campaign determines the
accuracy of reporting for both terrorist and hostage locations.
At the lowest level, you enjoy near perfect intelligence. All of
the hostage locations will be exact, as will the locations of all
stationary terrorists guarding hostages or other specific areas
of the building. Some terrorists may still be roaming, however,
and the locating data on them will become less precise after the
mission begins.
Now click on the Landmark button and begin cycling through these
items as well. Landmarks are structural features that will help to
orient the team once they have entered the space. Some examples
would be “Main Foyer” or “Ambassador’s Bedroom.” They can also
be locations that are important to the specific mission such as
“telephone,” if you need to place a bug at that location or “bomb,”
if there is a device present that you will need to disarm.
Legend also contains structural features, but these are the ones
that specifically affect the traffic pattern of the team once they
have entered the space, such as ladders, stairs, windows and
TTTToooommmm CCCCllllaaaannnnccccyyyy’’’’ssss
RR
RR
AAAAIIIINNNNBBBBOOOOWWWW SSSSIIIIXX
XX
34
RR
RR
eeeedddd SSSSttttoooorrrrmmmm EEEEnnnntttteeeerrrrttttaaaaiiiinnnnmmmmeeeennnntt
tt
33
multiple teams with complex paths, numerous ROE changes and
lots of special actions and go-codes attached to waypoints.
Figure 10. Default
plans are available
for the first four missions of the campaign. After that, if
you do not specify a
plan before executing the mission, all
of your fire teams
will simply begin
somewhere in the
insertion zone without further orders, as
was done in the
Quick Start instructions at the beginning of this manual.
Creation of a plan involves three major things: review of all available reconnaissance data, determination of the path each fire team
will take throughout the space and determination of what actions
will be taken at specific points along that path. The first of these
is handled by the “Recon” submenu, which is accessed by clicking
on the Recon tab in the lower left corner of the Plan screen. See
the subhead immediately following this one for details. We shall
deal with the commands associated with constructing and modifying the path under the “Plotting Movement” subhead, which immediately follows “Recon.” The tactical interface, which includes
rules of engagement, the use of go codes and other similar interface functions are handled under the subhead “Tactical Behaviors.”
Recon
Prior to any deliberate assault, real world hostage rescue teams
(HRT’s) will have amassed as much locating data as possible on
hostage and terrorist locations within the structure through the use
Page 20

If you continue to left click on the map the waypoint counter will
advance and a new path will be drawn from the previous point to
the new point each time. Remember, when the plan is executed,
the team will advance through the points sequentially. If you
wanted to place a new waypoint between two existing points,
thereby modifying the path between those points, you cannot simply left click between them. Instead, you must first select the waypoint immediately prior to the path you wish to modify. To select a
waypoint, you must either right click on it or use the Waypoint
Control Bar (see below) to advance to that point. Now you can left
click to place a new point anywhere between the selected point
and the point that had followed it prior to this action. The existing
path will disappear and new paths will be drawn from the new
point to each of the previously placed points. The sequential numbering of the waypoints for the entire path is updated accordingly.
The Waypoint Control Bar
This box, which is located next to the map controls, provides you
with an alternate method of cycling through the waypoints you
have assigned. Highlight whichever path you wish to view and
click on the right arrow to cycle forward one waypoint at a time.
The left arrow cycles back one waypoint at a time. The “play”
takes you to the last waypoint in the plan. The “Rewind” arrow
returns you to the first point in the plan, the insertion point. All of
the standard editing functions are accessible at any point along
the plan, as previously discussed, but this toolbar also has
“delete” and “delete all” buttons to simplify large scale corrections
to an existing path.
Map Controls
Sometimes, you will want to “think ahead” before you actually get
down to brass tacks plotting tactical movement. Use the map controls to go anywhere in the structure without actually plotting a
path to do so. The +/- zoom controls make it simple to step back
and look at the blueprint for an entire level at once, or zoom in to
keep a tight focus on team movement through a crowded space.
TTTToooommmm CCCCllllaaaannnnccccyyyy’’’’ssss
RR
RR
AAAAIIIINNNNBBBBOOOOWWWW SSSSIIIIXX
XX
36
doors. In the case of the latter two, they may be locked or
unlocked. Team members don’t need a “key” to get anywhere as
everyone is trained to overcome such obstacles. As such, locked
doors become more a nuisance to complicate the timing of the
assault rather than a true impediment to movement. The amount of
time a team is delayed by a locked door is determined by the manner in which they choose to deal with it. These options are presented in detail under “Tactical Behavior” below.
Now that you have familiarized yourself with the specifics of the
tactical situation, it’s time to develop an assault plan to deal with
them. In actuality, you will become accustomed to assigning tactical behaviors concurrent with plotting movement through the
space but, for purposes of illustration herein, we will segregate
the two functions.
Plotting Movement
Begin by clicking on one of the color-coded fire team symbols in
the upper left corner of the Plan screen. Let’s use Blue for the purpose of this example. You will notice that the team list changes to
the appropriate members. Now, left click anywhere within the
white insertion zone on the blueprint displayed in the main window. A blue triangle appears and the waypoint counter changes
to “one.” Any time you left click anywhere on the map, you place
a waypoint for whichever fire team is currently active.
The first point for any fire team must be plotted in the insertion
zone, although there may be more than one possible insertion
zone for some missions. To see if there are multiple insertion
zones, click on the arrows next the “Levels” icon on the map display toolbar to view each of the levels of the structure. Left click
again on a blank part of the map window to add a waypoint at that
location. This new waypoint has a path connecting it to the previous waypoint (which is the insertion point in this example) and the
waypoint counter advances to “two.” Normally, you would now
specify the actions associated with that waypoint such as the
ROE, special actions and any go codes assigned, but we are skipping those details for now (see “Tactical Behavior” below). Also,
you will note that clicking on a ladder or stairway automatically
changes the main display to the next level of the structure.
RR
RR
eeeedddd SSSSttttoooorrrrmmmm EEEEnnnntttteeeerrrrttttaaaaiiiinnnnmmmmeeeennnntt
tt
35
Page 21

Tactical Behaviors
All of the possible tactical behaviors that can be assigned to the
team are governed by your selections on the Orders menu. Click
on the Orders tab in the lower left center of the screen to open this
menu now. You will see three sections within this menu: Wait for
Go Code, Rules of Engagement and Special Action.
Go Codes
Go codes are an artificial means of controlling the timing and execution of multiple fire teams. By default, each waypoint is
assigned “no go-code” unless you specify otherwise. In the
absence of go codes, each team will execute their fire and movement plan from start to finish without pausing. Granted, they might
be waiting in an area while someone is picking a lock or performing some other action which requires time, but they will otherwise
be on the move completing the actions you have assigned them
regardless of what point the other fire teams are at in their respective plans.
If you assign a go code to a waypoint, the team will pause once
they reach that waypoint until you issue the appropriate go code
during the action phase. While paused, the team will still defend
itself and engage any targets of opportunity that happen into their
line of fire, but they won’t continue with the remainder of their plan
until you issue the go code. To assign a go code to a point, select
the waypoint then use the Go Code pull down menu to select go
code alpha, bravo, charlie or delta.
What a go code does is act like a gate for units waiting on it. The
team must have progressed to that point in the plan where they
are waiting for the code before your issuance of the code during
the action phase impacts their behavior. Otherwise, the gate
closes again. Because these windows of opportunity are so short,
you can use the same go code (alpha, bravo etc) multiple times
without penalty (provided you can keep track of things). Here is
how it works.
Consider a plan where you have assigned go code alpha to the
last waypoint on the first floor of a structure and also the last
TTTToooommmm CCCCllllaaaannnnccccyyyy’’’’ssss
RR
RR
AAAAIIIINNNNBBBBOOOOWWWW SSSSIIIIXX
XX
38
Figure 11. The display
is fixed in a 3/4 top
down perspective,
but you can rotate
the blueprint with
the circular arrows
and use the compass arrows to move
the map. Click in the
center of the compass to center the
map on the selected
waypoint.
Use the up and down arrows next to the level indicator to shift the
view between floors. While you are doing so, don’t limit your thinking to breaching and ingress routes. You should also be considering where to establish “safe zones” and how you will egress and
extract the hostages.
Other Commands
There are several other functions located on the right side of
the map toolbar: Display, Save and Load. Each of these functions
as follows:
Display
—Click on these to show or hide the paths of each
fire team so that you can focus your attention on one segment of the overall plan. By default, the map will display all
of the paths, so you must use this control to limit the view.
Save Plan
—Click this to bring up the save plan dialogue
box. The ‘plan’ consists of everything in the planning phase,
from kit and team assignments to the actual plans themselves. After you have saved, you are returned to the planning screen. You must click on the right arrow next to the
Plan screen title bar to proceed to the Execute screen.
Load Plan
—Click to bring up the load plan dialogue box to
recall any plans you have previously made for this mission.
RR
RR
eeeedddd SSSSttttoooorrrrmmmm EEEEnnnntttteeeerrrrttttaaaaiiiinnnnmmmmeeeennnntt
tt
37
Page 22

likelihood of inadvertently shooting a hostage and also of “friendly
fire” casualties to other team members increases considerably.
With speed set at the desired level, let’s return our attention to the
four mode selections under the ROE submenu. These are:
Clear
—the primary goal of the team is to clear the area of
hostiles
Engage
—the primary goal of the team is to move through the
space while engaging targets of opportunity
Advance
—the primary goal of the team is to move through
the space without engaging the enemy
Escort
—the team escorts hostages as they move.
Each of these modes is analyzed more closely in the next series
of subheads. First, however, you need to understand that, for the
fire team you personally control, team members always follow the
movement lead of the team leader, regardless of speed or ROE settings. If you start running, for example, the team will follow your
lead and keep up without further instruction.
Clear
You want to assign the Clear ROE to waypoints immediately preceding the doorway of a potentially hostile area. That way, once
the team moves through the portal, they will proactively fan out to
aggressively clear all four corners of the room of any potential terrorists before reforming at the center of the room and proceeding
to their next waypoint (providing the room is physically large
enough for them to do so).
If clear orders are given for extremely small spaces, like closets,
they are essentially ignored and the team leader will attempt to
engage any targets seen when the door is opened without actually
entering the room. If clear orders are specified in a space that is
too large, such as outdoors, then the team will default to “Engage”
behavior (see below).
If the team unexpectedly encounters any hostages while there are
in clear mode, they will tell the hostages to get down and stay
TTTToooommmm CCCCllllaaaannnnccccyyyy’’’’ssss
RR
RR
AAAAIIIINNNNBBBBOOOOWWWW SSSSIIIIXX
XX
40
waypoint on the second floor of a structure. If you have four
shooter pairs clearing the first floor of the structure and only two
of them have completed their paths on that level when you issue
go code alpha, only those two teams will proceed to the second
floor. Once the others get to their final points on the first floor, they
will wait for go code alpha (i.e.: they don’t know that the one you
have already issued applies to them). If you say go code alpha
again, they will continue on their path. As the mission commander,
you are ultimately responsible for keeping track of the big picture
and not letting any of your fire teams get this far “off plan” in
terms of timing and coordination. You can have 15 go code alphas
if you want, or always use alpha for Blue fire team, bravo for Gold
fire team and so forth. You can make the most complex plan ever
devised or you can follow the “Kiss” principle and keep it simple.
The choices are yours, but so is the responsibility.
Rules of Engagement
The team always follows their current Rules of Engagement. The
rules of engagement determine how each team executes their particular plan, by varying five chief factors: the team formation, how
the team treats targets, the movement speed, the acceptable combat risk, and the certainty with which the team identifies hostages
and terrorists before firing. You control these factors by selecting
the Mode the fire team will use at that point in the path, as well as
the Speed they will employ. Let’s talk about the latter first.
There are three speed settings: Blitz, Standard and Safety. In simplest terms, you can think of blitz as “run,” standard as “walk
deliberately” and safety as “creep cautiously.” There is a bit more
to it than that, however.
The speed setting also determines the level of risk that team
members consider “acceptable.” At the safety setting, each team
member will be taking deliberate aim and making sure of every
target before they squeeze off a round. This is the certainly the
safest mode for the hostages, but there are some situations where
it means that a terrorist using a hostage as a shield might have
an extra second to get off the first shot at the team. At standard
speed, which is the default setting, there is a better balance
between hostage safety and team security. At blitz speed, the
RR
RR
eeeedddd SSSSttttoooorrrrmmmm EEEEnnnntttteeeerrrrttttaaaaiiiinnnnmmmmeeeennnntt
tt
39
Page 23

waypoints in between). Be advised, it generally isn’t a good idea
to take your hostages “along for the ride” in hostile territory. After
all, they don’t have the benefit of your body armor. You generally
want to make sure that the egress route to the extraction point is
clear before you bring the hostages out.
Special Actions
Special actions can be assigned to waypoints using this pull down
sub menu of the Orders tab. Click on the waypoint you wish to edit
and pull down the menu to see what actions are available. Not all
actions are available at every point. The three most common special actions are Blow Door, Flashbang Room and Frag Room.
These can only be assigned if the waypoint you wish to edit is
close to a window or door, whether it is locked or unlocked.
If you ask a team to go through a locked door and do not specify
the use of a door charge, the team will breach the door using one
of these methods in descending priority:
Shotgun
—if one of the team members has a shotgun, they
will shoot the door lock until it opens, then they will enter
the room.
Lockpick
—if no one on the team has a shotgun, they
will pick the lock. If one of the team members is both
skilled in electronics and has an electronics kit in their
inventory, then this process will take very little time. If not,
they will still get the door open but it might take considerably longer to do so.
For additional information on breaching, see the appropriate subhead under the Action Phase section of the manual.
If Flashbang Room is specified, the team will toss a flashbang
grenade into the room after the door is opened and before they
actually enter the room. Flashbang grenades generally do not damage any hostages or terrorists in the room. Their sole purpose is to
blind and momentarily distract whoever might be in the room so as
to provide the team a momentary engagement advantage. If you
are using a door charge to breach the room, it is unnecessary to
TTTToooommmm CCCCllllaaaannnnccccyyyy’’’’ssss
RR
RR
AAAAIIIINNNNBBBBOOOOWWWW SSSSIIIIXX
XX
42
put, which they will do. The team will remain more concerned with
taking out Tangos than dealing with hostages, so don’t worry
about remote teams losing their focus. You can order those teams
back to escort the hostages out later.
Engage
This is the default mode for all tactical movement. The team is in a
staggered snake formation and moving deliberately to the next
waypoint. They will engage all targets within their line of sight but
they will not pursue fleeing targets or get bogged down in prolonged firefights. This mode offers the best balance between
defensive and offensive posture for any given fire team, but you
should still shift to clear mode when crossing transition points
(like doors and windows) to new spaces.
Advance
A fire team with orders to advance will do that almost to the exclusion of all other activity. Targets that are not directly impeding the
intended path of travel are ignored, and the team won’t even pause
to return fire when they are engaged. The will kill any terrorists
directly in their path, but they are otherwise committed to only one
thing, getting to the next waypoint. As such, advance mode should
generally be reserved for paths that must cross large, open areas
that are virtually indefensible by the team anyway. Examples of
such paths might be through courtyards and open embassy foyers
with overhanging balconies or other hideouts for enemy snipers.
Note: Heartbeat sensors are only used when the team has
advance orders. Remember, heartbeat sensors are inventory items
that must be equipped.
Escort
Hostages will only respond to teams with Escort mode on. When
teams in any other mode come through their space, the hostages
will simply stay put. When you are ready to extricate them, send
a team into their space with escort orders. The hostages will then
follow the team to every waypoint thereafter until they reach
the extraction point (provided escort mode is active for all the
RR
RR
eeeedddd SSSSttttoooorrrrmmmm EEEEnnnntttteeeerrrrttttaaaaiiiinnnnmmmmeeeennnntt
tt
41
Page 24

Figure 12. The
Execute Screen is a
summary overview
of your assault plan.
It is also where you
click on the team
you wish to command when the
mission begins.
Saving your plan is always a good idea. If you have done it right,
the chances are that you have invested a considerable amount of
time and effort refining the plan. But you are also about to learn
one of the harsh realities of CQB - few plans survive initial contact
with the enemy. As such, you will probably find yourself returning
more than once to refine the plan further because of something
you discovered in the actual execution of the mission. That is a
luxury that the real world teams don’t enjoy, so you shouldn’t take
it for granted.
When you are ready to rock, click on the right arrow by the
Execute title bar to continue to the action phase of the mission.
Good luck!
AAAAccccttttiiiioooonnnn PPPPhhhhaaaassssee
ee
The action phase is where you execute the plan developed in the
planning phase. It begins with the insertion of the team and ends
with the success, failure or abortion of the mission. The action
phase does not use a point and click interface. Rather, it uses
either a keyboard or a keyboard/mouse control scheme similar to
many first person games. The specifics of these controls are provided on the separately printed ready reference.
You begin each action phase controlling the leader of the team. If
more than one team is being used on the mission, you may jump
TTTToooommmm CCCCllllaaaannnnccccyyyy’’’’ssss
RR
RR
AAAAIIIINNNNBBBBOOOOWWWW SSSSIIIIXX
XX
44
specify a flashbang as well. The detonation of the door charge will
have the same tactical effect.
If Frag Room is specified, the team will toss a fragmentation
grenade into the room after the door is opened and before they
actually enter the room. Naturally, this is extremely hazardous to
all of the occupants of the room, including hostages, so use this
order judiciously.
Other special actions are mission specific and they will appear on
the menu when appropriate. Two examples of these types of
actions would be “place bug,” when you are executing a covert
intelligence gathering mission and “disarm bomb,” when it is
necessary to render an explosive device “safe” as part of a series
of mission objectives. These special actions are only available
when the waypoint is placed close to the object affected by
the command.
Note: If you want the team that you are controlling to perform any
of the actions, you must plan them here. Pre-planned actions are
all actions specified in the special actions sub menu. If the plan
specifies a flashbang to be thrown through a door, the team will
perform this action when you reach that door without further intervention on your part. If you don’t plot it in the planning phase, you
must perform the action or it won’t be performed.
Execute
When you are satisfied with all of the individual elements of the
plan you have constructed, make sure you save it before moving to
the execution phase. Click save on the map toolbar. After the save
routine has finished, click on the right arrow next to the title bar for
the Plan screen and you will proceed to the Execute screen.
RR
RR
eeeedddd SSSSttttoooorrrrmmmm EEEEnnnntttteeeerrrrttttaaaaiiiinnnnmmmmeeeennnntt
tt
43
Page 25

simplified path and waypoint scheme. In barricaded hostage situations, the area is assumed to be ringed with remote heartbeat sensors, so the location of all terrorists and hostages are displayed
on the map with absolute certainty. In all other situations, the
team will have to equip someone with a portable heartbeat sensor.
As noted elsewhere, these inventory items are only good for a
short distance around the user and are only accessed by AI teams
when they are under the “advance” ROE.
When you are in command of such a team, and your character has
the heartbeat sensor, you can toggle it to be the currently active
“weapon” (see ready reference card for details). Once you do so, if
you “trigger” the sensor like you would a weapon, the scan of the
sensor focuses down into a long narrow cone. You lose detection
capability everywhere except where the sensor is pointed, but you
can detect contacts at considerably longer ranges in the direction
you are pointing.
Character Display
This window contains four team member slots with pictures,
names, and heartbeat enunciators, along with the inventory display. If there are less than four team members on this particular
fire team, the other displays will be blank. This graphically displays the status of the player’s character along with the up to
three other members of the player’s team. For each team member
the display consists of a thumbnail picture, a name, and a heartbeat widget. The heartbeat widget has four states indicating the
health of the team member:
Healthy
—indicated by a green colored slot and a functioning
heartbeat. The heartbeat changes according to the level of
exertion of the team member.
Wounded
—indicated by a yellow slot and a functioning
heartbeat.
Incapacitated
—indicated by a orange slot and a barely
functioning heartbeat.
Dead
—indicated by a red slot and a flat-lined heartbeat.
TTTToooommmm CCCCllllaaaannnnccccyyyy’’’’ssss
RR
RR
AAAAIIIINNNNBBBBOOOOWWWW SSSSIIIIXX
XX
46
between team leaders at will. Non-team leaders are never controlled—the only way they can be controlled is if the leader dies
and they assume command based on seniority. The action phase
ends when the mission objectives are accomplished, failed or
the last team member dies and there are no more team leads
to control.
Figure 13: Once the
mission begins, all
action takes place
on this screen.
Cinema Window
This window displays the view from the perspective of the character that you are currently controlling. If you shift between team
leaders, the view will shift accordingly. You may play the game in
either first or third person view. Third person view is a good choice
for large spaces and exteriors because you have improved situational awareness. First person view is best for close quarters interior engagements because it makes targeting easier. See the ready
reference card for how to switch between the two modes. See the
Gun Range heading under the Training section of the manual to
learn about all of the variables that affect the targeting reticle.
Map Window
The map displays the positions of team members, terrorists and
hostages that can be seen by any team member. The map window
also displays the plan of the team under your command, using a
RR
RR
eeeedddd SSSSttttoooorrrrmmmm EEEEnnnntttteeeerrrrttttaaaaiiiinnnnmmmmeeeennnntt
tt
45
Page 26

Movement speed is toggled using the right mouse button or the
appropriate keyboard counterpart listed on the ready reference
card. Holding this modifier key down switches the movement
speed from walk to run. Continuous movement is accomplished by
holding the desired movement key down for as long as you wish
to move. Movement stops after the movement key is released. You
character may be controlled using two basic control schemes: keyboard only and mouse-look, which uses a combination of mouse
and keyboard. You can also modify either control scheme to match
one with which you are already intimate based on other game play
experiences. The current inventory item is toggled using the ‘tab’
key. When using mouse-look, clicking the left mouse button activates inventory items. Mouse-look Controls are the default method
of controlling the team leader. In this scheme, the mouse determines the direction that you are looking as displayed in the cinema window of the action interface; hence the name mouse-look.
Vertical Movement
In addition, you may navigate vertical surfaces in a number
of ways:
Climb up/down stairs
Climb up/down some objects
Climb up/down ladder
In general, vertical movement is accomplished by using the environment action key (as specified on the ready reference card)
while standing in front of a vertical object. For example, Press
action while in front of a ladder and you move onto the ladder. You
must be facing the ladder for this to work. While on a ladder, press
action again to push off the ladder—you let go and fall off to the
rear. While on the ladder, moving forward makes you move up and
backward makes you move down. You may not sidestep off a ladder. You are also prohibited from using inventory objects or manipulating the environment while on a ladder.
Press the environment action key while in front of a vertical object
to jump or climb on top of it. You will automatically put away their
weapon to accomplish this task if necessary. There is no action
TTTToooommmm CCCCllllaaaannnnccccyyyy’’’’ssss
RR
RR
AAAAIIIINNNNBBBBOOOOWWWW SSSSIIIIXX
XX
48
The Character Display Window also displays the currently
selected inventory item for the player’s character. This inventory
window contains information about remaining ammunition and/or
magazines as well as the weapon’s setting (single shot, full auto)
if any.
Team Display
This has four slots, one for each potential fire team that could be
used on a mission. Each slot contains the following information:
the team’s current status, and one health ‘dot’ for each team member. The team’s status indicates what they are currently doing, e.g.
moving, waiting for go-code, firefight, disarming bomb, and so
forth. The health dot changes color depending on the health of the
team member. When a member is healthy, their dot is green. If
they are wounded, their dot is yellow. If they are incapacitated,
their dot is orange. If their dot is red, they are dead.
Fire & Movement
The success or failure of Close Quarter Battle (CQB) tactics relies
on properly executed fire & movement, just as it does with larger
unit actions. Regardless of the method of insertion, the team
maneuvers through the game environments on foot. Further, team
members are restricted to the types of movement most commonly
used by SWAT and HRT-type teams, i.e. no jumping over pits or
full speed running because the number one concern for team members at all times is maintaining control over their weapon. They
must be able to respond to a threat from any direction as quickly
and efficiently as possible. Two basic stances are used: crouched
and upright. Pressing the crouch key causes you to stop movement and crouch. From a crouch, you may rotate in place-no running hunched over. From an upright stance, you may:
Move forward at one of two movement speeds
Move backward at one of two movement speeds
Rotate in place
Sidestep to the left or right at one of two speeds
RR
RR
eeeedddd SSSSttttoooorrrrmmmm EEEEnnnntttteeeerrrrttttaaaaiiiinnnnmmmmeeeennnntt
tt
47
Page 27

inventory item’ key or mouse button to pull the pin and start drawing back your arm to throw the grenade. The longer the key is
held, the stronger the throw will be. The grenade is released upon
mouse-up/key up.
Two types of throwing are possible, underhand and overhand. The
type of throw is determined by the length of time the fire key is
held—a quick tap throws the grenade underhand while a key down
of 1+ seconds results in an overhand throw. You can see the difference on the power bar. The longer the key is depressed, the more
the bar fills up. Practice lobbing grenades in Training (see above)
to get a feel for it. Grenade skill determines the base size of the
targeting reticle as well as the time constant as described in the
targeting reticle section.
Doors
You may open and close doors by hitting the action key while facing a door within arms reach. If the door is locked, you will be
notified that you are picking the lock. If you stop holding the environment action key down any time before the door is opened, you
stop picking the lock.
For the purposes of this game, door breaching describes the action
of going through any door, whether it is locked or not. Whenever a
path is drawn through a door, that door must be breached, whether
it is done with explosives, a shotgun, a lockpick, or simply opening the door. In general, if a door charge is specified in the planning interface, it is used to go through the door regardless of
whether it is locked or not. If a door charge is not specified, then
the method of entry is, in order of preference: simple opening
(unlocked), shotgun (locked), lockpick (locked).
Door Charges
To manually place a door charge, toggle to the desired explosive to
place it in hand. Toggle to a different inventory item to put it away
unused. Click the ‘activate inventory item’ key or mouse button to
place the explosive on the surface within arms length indicated by
the targeting reticle. Explosives may only be placed on doors. Note
that this is not instantaneous—it will take some time depending on
TTTToooommmm CCCCllllaaaannnnccccyyyy’’’’ssss
RR
RR
AAAAIIIINNNNBBBBOOOOWWWW SSSSIIIIXX
XX
50
for jumping off an object. If you walk off an object you simply fall
until you hit the ground. If it is a short distance, you will land
safely and recover. If it is a long distance, you will become incapacitated or dead.
Interacting with Objects
You can interact with the environment by using inventory items
(inventory actions) and by manipulating objects (environment
actions). The basic kit contains inventory items like weapons,
grenades, breaching charges and surveillance gear. Learning to
access these items routinely and quickly is imperative if you wish
to survive. You must also learn to manipulate objects like doors
and switches.
Firearms
Toggle to the desired weapon to place it in hand. Click the ‘activate
inventory item’ key (as specified on the ready reference card) or
mouse button to fire the weapon. Automatic weapons will continue
to fire as long as the button is held down. You need to be very
cognizant of this and practice firing short controlled bursts to conserve ammo. The Gun Range is a good place to master this technique. If you don’t do this, you might find yourself unarmed at the
worst possible time.
Click the reload key, as noted on the ready reference card to
reload. Remain cognizant of your ammo use and reload whenever
there is a pause in the action and the current magazine is more
than 2/3’s depleted. You do not lose these rounds. If all of your
other magazines are empty, you can reload this partial magazine
later in the game.
Grenades & Flashbangs
The player character may throw grenades of either type (fragmentation or flashbang) at any time. Grenades thrown by the player’s
computer controlled teammates may are thrown only when specified in the planning phase. To manually throw a grenade, toggle to
the desired grenade or flashbang to place it in hand. Toggle to a
different inventory item to put it away unused. Click the ‘activate
RR
RR
eeeedddd SSSSttttoooorrrrmmmm EEEEnnnntttteeeerrrrttttaaaaiiiinnnnmmmmeeeennnntt
tt
49
Page 28

fire teams (see ready reference card for details) and issuing hold
orders to each squad. These orders remain in affect until you jump
back into each fire team and release it by pressing the “Hold” key
a second time.
The other major method of altering a plan on the fly is by changing
the ROE modes (see the Plan screen, above) of the various fire
teams. To change the ROE of any team, you must first be in command of it. Jump to the team whose plan you wish to modify and
then cycle through the ROE modes (see ready reference card for
details) until you reach the desired setting. This is the method you
would need to employ, for example, if your primary hostage escort
team got killed before they reached the hostages and you needed
to put another fire team in “Escort” ROE to take the hostages out of
the building.
Another example of when dynamic team control might be necessary concerns how Rainbow Six models stress. All of the team
members, hostages and terrorists are individuals who handle
stress to varying degrees of success. Your team members are
highly conditioned to stress, so it takes quite a lot to put them off
their game plan, it does happen occasionally, particularly when the
team has sustained heavy losses. Team members might go off
plan, return to their insertion points or react in other non-characteristic ways. Hostages, and especially terrorists, are far more unpredictable. Some of the latter are highly trained professionals,
almost on par with your team, but most fall somewhere well below
that. When Tangos get stressed, they are liable to do anything
from beginning to massacre hostages to running at team members
trying to surrender. The bottom line is that, no matter how tightly
you exercise control, events will still sometimes seem quite out of
control.
Real-time Communication
In multi-player mode, you have other command and control
options. By pressing ‘t’ activates the typing bar in the action interface. Once ‘t’ is pressed, you can type, then press ‘enter’ or
‘return’ to send the typed message. Check the ready reference
card for the real time voice functions. Sounds are recorded as long
as you hold the key down. Sound is broadcast like a single-chan-
TTTToooommmm CCCCllllaaaannnnccccyyyy’’’’ssss
RR
RR
AAAAIIIINNNNBBBBOOOOWWWW SSSSIIIIXX
XX
52
the character’s demolitions skill. Experts can place charges in 1-2
seconds, while novices can take 30+ seconds.
Click the ‘activate inventory item’ key a second time to detonate
the explosive. Note that you can place an explosive, switch to a
different inventory item, then switch back to the explosive and detonate it. This means that each team member can only place one
explosive at a time. The demolition skill determines the time
required to properly place the charge.
Surveillance Gear
On some missions, you will be required to place a wiretap or
some other form of electronic surveillance device. To accomplish
this action, you must be standing in front of the object (such as
a telephone) that is the target for the action. Then simply click on
the environment action key (see ready reference card) to place
the bug.
Switches/Levers
Switches and levers are activated by hitting the action key while
standing within arms reach of the switch or lever. Switches and
levers will always be either dormant or activated.
Dynamic Team Control
As team leader, you can alter the behavior of the currently controlled team in a number of ways after the mission has begun, provided you wish to do so. The “Hold” key (see the ready reference
card) tells the other members your fire team (other teams are not
affected) to stop where they are and wait for further orders. You
can then go off on your own to attend to whatever detail you wish
and your team will wait in a defensive posture where you left them
until you return. To release them from “Hold” orders, you press the
“Hold” key a second time. If you are within visual range when the
hold order is released, the team will move to form up on your position. If you are not within visual range, you will have to move back
to them to pick them up.
Additionally, if you see a plan falling apart quickly, you can regain
some control of the situation by quickly jumping between all the
RR
RR
eeeedddd SSSSttttoooorrrrmmmm EEEEnnnntttteeeerrrrttttaaaaiiiinnnnmmmmeeeennnntt
tt
51
Page 29

■■ Amount of RAM
■■ CD-ROM drive
■■ Specific Sound and Video card
■■ Operating system
■■ Specific type of modem you are using (for problems involving
multiplayer gaming)
Contact us on the Web:
Our website contains the most up-to-date Technical Support information available. We keep the Support pages updated daily so
please check here first for solutions to your problems.
http://www.redstorm.com/gamershq/support.html
Contact us by Email:
If you don’t have access to the World Wide Web, you can email
our Support Department directly at Support@redstorm.com. E-mail
support can take 24-72 hours depending on the volume of messages.
Contact us by Phone:
This number is for technical assistance only. Hints and tips will
not be given our over the Technical Support line. When calling our
Technical Support line please make sure you are in front of your
computer and have all the necessary information on hand.
(919) 460-9778
Our Support representatives are available to help you Monday Friday from 9 a.m. - 6 p.m. (Eastern Standard Time)
Red Storm Entertainment’s Tip Line
All the hints, tricks, and cheats! Under 18, please have your
parents’ permission. Touchtone phones only.
1-900-288-2583 (Clue). $.95/min
TTTToooommmm CCCCllllaaaannnnccccyyyy’’’’ssss
RR
RR
AAAAIIIINNNNBBBBOOOOWWWW SSSSIIIIXX
XX
54
nel radio—you can’t broadcast when someone else is using the
channel.
Ending the Mission
If you wish to abort the mission at any time, hit the ESC key. You
will be prompted to ensure that this is what you want to do before
you actually exit or restart the mission. If the mission is either a
success or failure, it will end automatically with a summary of the
mission results. There are team results and individual results.
Click on each individual’s portrait to see how well they performed
on the mission.
If you are not satisfied with any aspect of the team’s performance,
do not accept the mission results. Choose to replay the mission
from this screen. If you are happy with the mission results, accept
them. You must accept a successful mission result before you can
proceed to the next mission. But once you do accept a mission
result, all aspects of it (casualties to the team, etc.) are permanently saved to the current campaign. The only way to go back
and change those results subsequently is to use the Backtrack
command to create a new branching campaign (see Single Player
menu, above).
TTTTeeeecccchhhhnnnniiiiccccaaaallll SSSSuuuuppppppppoooorrrrtt
tt
Before contacting Technical Support please consult the readme.txt
file as it contains the answers to some of the more frequently
asked questions and may provide an easy solution to your problem. Please make sure that your computer meets the minimum
system requirements before contacting us as our Support representatives can not help customers whose computers do not meet
the minimum requirements. Whenever you contact Technical
Support please make sure you include the following information:
■■ Complete Product Title (including version number)
■■ Exact error message reported (if any) and a brief description
of the problem
■■ Processor speed and manufacturer
RR
RR
eeeedddd SSSSttttoooorrrrmmmm EEEEnnnntttteeeerrrrttttaaaaiiiinnnnmmmmeeeennnntt
tt
53
Page 30

Check the Redstorm website, http://www.redstorm.com and on
MPlayer for new modes of multiplayer Rainbow Six as they
become available. When you select Multiplayer from the
Main
Menu
, you go the following screen:
Figure 14. The
Multiplayer Menu.
Join existing games
on a LAN, the
Internet or MPlayer,
or host your own
server.
Join Game
When you click this option, the Server list will display all games
offered locally. To find out what type of game is being offered,
check the Server Info (see below) before joining the game. If a
game is already full, the join option will be grayed out. Continue
cycling through the list until you find the type of game you wish to
play with openings for additional players. When you do, click to
join then specify your player options (see the appropriate subhead
under Create Game below). Hit “t” to begin chatting with other
players that are currently logged onto the server. Your game will
begin shortly.
Create Game
Use this option to configure and host a new game for other players
to join. Even if you are not planning on hosting a game soon, you
should still become familiar with the contents of this section.
Although everything except the player options will be pre-set
by whomever configures the server, understanding what those
TTTToooommmm CCCCllllaaaannnnccccyyyy’’’’ssss
RR
RR
AAAAIIIINNNNBBBBOOOOWWWW SSSSIIIIXX
XX
56
Contact us by Standard Mail:
Red Storm Entertainment
2000 Aerial Center, Suite 110
Morrisville, NC 27560
Attn: Customer Support
AAAAppppppppeeeennnnddddiiiixxxx AAAA:::: MM
MMuuuullllttttiiiippppllllaaaayyyyeeeerrrr
MM
MMooooddddeeee
There are two basic modes of multiplayer Rainbow Six, Adversarial
and Cooperative. In Cooperative games, up to eight people can join
together to play any single player mission in multiplayer mode.
Team objectives are determined by the difficulty setting of the mission, which is set by whomever configured the server to host the
game (see Create Game below). Players get to chose the character
they wish to play from the existing Rainbow Six roster on a first
come, first serve basis (in other words, you can’t have eight
clones of Ding Chavez).
There are currently five variants of Adversarial Rainbow Six. All of
them involve team on team training exercises to hone CQB skills.
You do not have the option of taking the side of the terrorists. The
current adversarial modes are:
Stronghold
—one team defends a “base” area on the map,
the other attacks.
Double Stronghold
—both sides must defend their base
and capture the enemy base.
Survival
—the last man standing wins.
Team Survival
—the first team to eliminate the other side
completely wins.
Double Bluff
—each side begins with one hostage. The
object is to capture the other team’s hostage and extricate him
to your base while precluding the enemy from doing the same
to yours. If any team member kills a hostage, the team loses.
RR
RR
eeeedddd SSSSttttoooorrrrmmmm EEEEnnnntttteeeerrrrttttaaaaiiiinnnnmmmmeeeennnntt
tt
55
Page 31

Full Team
—if this option is selected, then computer players
will automatically be assigned to fill any open slots after all
human players have logged in to bring the assault team to
its full strength of eight players.
When configuring for cooperative mode, each human player will
get to select which member of the Rainbow Six roster they wish
to play then equip that character using the Player Options
(see below).
If an adversarial game is chosen, the next step is to specify the
Game variant (from the aforementioned list of options), the map
that will be used (from a drop down menu of choices) and the
game length before the mission times out. Below these choices,
you will see four radio buttons: Show Enemies, Auto Targeting,
Random Maps and Random Teams. These function as follows:
Show Enemies
—determines whether or not everyone
appears on the heartbeat sensor map display.
Auto-Targeting
—determines whether or not this feature
will be enabled for the current mission.
Random Map
—if this is selected, then the map choice
specified above is disabled. A random map will be
specified instead.
Random Team
—overrides individual team choices and
randomly assigns both human and computer players to
either alpha or bravo teams for adversarial play.
Player Options
Each player can specify their name, sex and specialty from this
menu. The four specialties are Assault, Recon, Demolitions and
Electronics. Additionally, they use the other drop down menus in
this window to equip their character in the same fashion that they
would do on the Kit screen in single player mode. Players specify
their uniform, primary weapon, secondary weapon (backup) and up
to two other items to complete their Kit. The latter items are the
same as those offered for Slots One and Two on the Kit screen
(ie: extra magazines for either weapon, flashbangs, fragmentation
grenades, door charges and so forth).
TTTToooommmm CCCCllllaaaannnnccccyyyy’’’’ssss
RR
RR
AAAAIIIINNNNBBBBOOOOWWWW SSSSIIIIXX
XX
58
configuration options will help you interpret the information displayed on the Server Info screen before joining any game.
Figure 15. The
Multiplayer Sessions
screen displays all
of the possible
configuration options
for Rainbow Six
online play.
The Communications Interface and the Connected Players list mirror those displayed on other screens in the multiplayer interface.
Note that the connected players list has three buttons underneath
the window: Alpha, Bravo and None. These are for adversarial
Rainbow Six only. If a team variant of that mode is specified in the
Session Options by whomever is hosting the game, then all players must eventually choose either Alpha or Bravo teams before the
game begins. In Survival mode, all players would select “None”
and remain unaffiliated.
Session Options
Specify the game type: adversarial or cooperative, which changes
the remainder of the session options window. For cooperative
mode, you will specify the mission to be played from a drop down
menu of available scenarios and also the difficulty setting for the
mission. You will also determine the “Backup Option” for the mission. Backup options determine the mix of computer and human
players. The choices are:
No Backup
—all human players.
Partner
—with four or less human players, choose partner
and each player will be assigned a computer controlled
partner to back them up.
RR
RR
eeeedddd SSSSttttoooorrrrmmmm EEEEnnnntttteeeerrrrttttaaaaiiiinnnnmmmmeeeennnntt
tt
57
Page 32

Once you have joined a game, you can use the chat interface to
select opposing teams for an adversarial mission or coordinate
your assault plan for a cooperative mission.
Mplayer
WHAT IS MPLAYER.COM?
Mplayer.com is the #1 multiplayer game service on the Internet.
Playing Rainbow Six on mplayer.com means that a player in a
remote location can challenge other players in remote locations,
and they’ll play in real time—like they’re all sitting in the same
room. Mplayer.com offers hundreds of innovative features, including real-time voice—chat that lets you verbally taunt your opponents and praise your teammates. When you sign up for
mplayer.com you’re joining a friendly online community where
you can participate in regular tournaments, contests, and special
events.
PRICING
Mplayer.com is FREE—there are no charges or monthly fees to
play Rainbow Six on mplayer.com.
SO HOW DO I GET STARTED?
Installing mplayer.com is simple. Just follow these easy steps and
you’re on your way to the excitement of online multiplayer gaming!
1. There are several ways to install mplayer.com from
Rainbow Six:
From the game CD-ROM Autorun Menu:
—select the option to Play on mplayer.com
From the Windows 95 Start Menu:
—select this game and the option to Play on mplayer.com
TTTToooommmm CCCCllllaaaannnnccccyyyy’’’’ssss
RR
RR
AAAAIIIINNNNBBBBOOOOWWWW SSSSIIIIXX
XX
60
When all of the players have joined and the host is satisfied
with all of the game settings, click Start Mission to launch the
Action Phase.
Manual Join
This option is for advanced users only. You must know the IP
address of the remote server that you wish to play on. If you do,
select manual join then type in the IP address. When you hit
return, you will be connected to the server. Input your player
options (as discussed under the player options subhead of the
Create Game heading above) and start chatting with other players
on the server while you wait for the game to begin.
Server Info
If you select Server Info, you will be shown a summary screen
for the highlighted server that shows you the parameters of the
game being offered and also what players are currently connected
to the server.
Figure 16. Check out
the “Connected
Players” list to find
your friends online.
RR
RR
eeeedddd SSSSttttoooorrrrmmmm EEEEnnnntttteeeerrrrttttaaaaiiiinnnnmmmmeeeennnntt
tt
59
Page 33

CUSTOMER SUPPORT
Mplayer.com has a staff of highly trained Technical Support
representatives waiting to answer any questions or solve any
problems you can throw at ‘em. If you’re having trouble installing
mplayer.com, contact a Technical Support representative by emailing support@mplayer.com or by calling (650) 429-3100 between
the hours of 3 p.m. and 10 p.m. (PST), seven days a week.
For more information about mplayer.com visit their Web site at
www.mplayer.com.
TECHNICAL INFO
You need the following PC configuration to install our software and
play games on mplayer.com:
System Requirements:
• Windows 95
• Pentium processor
•8 MB RAM (16 MB recommended)
• 14.4 KBPS or faster modem (28.8 KBPS or higher recommended)
• Internet access*
• Web browser
*AOL, CompuServe, and Prodigy do not yet support adequate
TCP/IP connections for FAST gameplay. Low latency games,
including turn-based or role-playing games, however, can be
played.
Mplayer is a registered trademark of Mpath Interactive, Inc.
The Mplayer logo and Mplayer.com are trademarks of Mpath
Interactive, Inc.
TTTToooommmm CCCCllllaaaannnnccccyyyy’’’’ssss
RR
RR
AAAAIIIINNNNBBBBOOOOWWWW SSSSIIIIXX
XX
62
From Inside the Game:
—select the option to Play on mplayer.com from the
multiplayer menu
From the Program folder:
—click on the icon to Play on mplayer.com
2. This will start the mplayer.com installer which will:
—check for mplayer.com — if you don’t have it, we’ll install everything you need! Just follow the easy install instructions at the
prompts. During the process, you’ll set up a mplayer.com account
and select your mplayer.com member name and password.
3. After installing mplayer.com, your Web browser will launch and
connect you to the mplayer.com game page:
—Make sure your game CD-ROM is in the disk drive.
—Now click on ‘Play Now’ to log onto mplayer.com and head to
the Lobby of your game.
—Before entering the game’s Lobby, we’ll automatically down-
load any additional files you might need to make the game
playable on mplayer.com.
4. Now you are in your game’s Lobby on mplayer.com. Chat with
other players by typing your message and pressing Enter. To
enter a Game Room, double-click on a green Room icon. If
you want to create a new Game Room, click on the Create
Room button.
5. Almost there!
If you enter an existing Game Room, Click on the ‘Ready to Play?’
button or, if you create a Room, wait for players, then click on the
‘Launch Game’ button.
6. Have fun playing on mplayer.com!
RR
RR
eeeedddd SSSSttttoooorrrrmmmm EEEEnnnntttteeeerrrrttttaaaaiiiinnnnmmmmeeeennnntt
tt
61
Page 34

CQB
—Close Quarters Battle. High speed engagements at extremely
short range, generally in an urban setting.
CT
—Counterterrorism
DAT/P
—Deliberate Assault Team/Plan. An assault plan which uses
a cautious, stealthy approach and is coordinated to inflict maximum surprise and maximum damage to the terrorists in the first
minute of an assault. Everything is precisely orchestrated and the
team will generally have had time to conduct several full scale
rehearsals in mock ups of the structure to be assaulted. The
opposite of this is the EAT/P.
Delta
—Short for Delta Force, the Special Forces hostage rescue /
CT unit.
EAT/P
—Emergency Action Team/Plan. These are hasty responses
to situations which do not allow for full planning and multiple
rehearsals. Essentially, the team develops a rudimentary course of
action and relies on their considerable expertise to manage unforeseen circumstances after they enter the space. You can’t really
simulate an EAP in single player mode, because you can only control one fire team at a time, but you can in multiplayer mode. Try it,
it’s fun!
EP
—Entry point. Usually followed by a numerical designator such
as EP-1 (the back door), EP-3 (the ventalation ducting on the roof)
and so forth.
EXP
—Exit point. Used to designate where you intend to extract the
team and the hostages. In complex plans, there can be several
EXPs. As with EPs, they are distinguished from one another by
numerical designators.
FAP
—Final assault point. The actual assault positions each fire
team takes immediately prior to commencing the assault. These
can be the insertion points, as specified in the planning interface,
provided they are close enough to the structure, but generally it is
best to move all of the teams next to their respective EPs and
assign a go code to those points. That way, everyone is at their
FAP positions when you issue the go code and they breach and
enter the building simultaneously.
TTTToooommmm CCCCllllaaaannnnccccyyyy’’’’ssss
RR
RR
AAAAIIIINNNNBBBBOOOOWWWW SSSSIIIIXX
XX
64
GGGGlllloooossssssssaaaarrrryy
yy
1 SFOD
(1st Special Forces Operational Detachment Delta)—The
official name of the US Army’s Delta Force, an elite counterterrorist
and hostage rescue unit.
ACP
—Adminstrative Command Post. One of two command
posts during a typical hostage rescue mission. This one handles
logistics, the press and all non-tactical management functions for
the onscene commander. See also TCP.
AFSOC
—U.S. Air Force Special Operations Command
AO
—Area of Operations. The AO for each fire team is defined by
the path that you plot for them during the planning phase.
AOR
—Area of Responsibility. For the fire team as a whole, the
AOR equates to the AO, but individuals within the fire team will
have AORs which correspond to their position within the fireteam.
For example, the number two man in a snake might be assigned a
120 degree firing arc from dead ahead in the direction of travel to
30 degrees beyond the right flank. This is his AOR for tactical purposes and it moves with him, oriented on the same axis as the formation, for the duration of the mission.
Bingo
—means that a bomb has been located.
Breach
—to forcibly enter a space, either through the use of a
door charge, by blasting the lock away with a shotgun or defeating
the lock with a lockpick/electronics kit.
CA
—Compromised Authority. Basically, this is when the barricaded
“suspects” get tipped as to the timing of your assault, as happened at Waco. In Rainbow Six, you retain the initial element of
surprise but, if your assault plan gets bogged down, the back half
is more difficult to accomplish because the surviving terrorists are
well alerted to your presence and intentions.
CIA
—Central Intelligence Agency.
Clear
—status report that a room is clear. Clear and covering
means the room is clear and there is a hostage present in
the room.
RR
RR
eeeedddd SSSSttttoooorrrrmmmm EEEEnnnntttteeeerrrrttttaaaaiiiinnnnmmmmeeeennnntt
tt
63
Page 35

Snake
—A tactical formation of four to six officers moving in a
tight column formation. In Rainbow Six, the maximum size of a
snake is four team members. They will stack outside of doors then
burst through almost as one man to clear the adjoining room (provided you specified the proper ROE during the planning phase).
Suppressed
—a weapon with a silencer attached. Suppressed
weapons usually have “SD” following their nomenclature. For
example, the MP-5SD is a suppressed version of the MP-5.
Tango
—terrorist
TCP
—Tactical Command Post. Where the HRT’s assimilate intelli-
gence and conduct mission planning functions.
TTTToooommmm CCCCllllaaaannnnccccyyyy’’’’ssss
RR
RR
AAAAIIIINNNNBBBBOOOOWWWW SSSSIIIIXX
XX
66
HE
—high explosive
HRT
—Hostage Rescue Team (US Federal Bureau of Investigation)
HRU
—Hostage Rescue Unit
LCC
—The postion of last cover and concealment before the team is
potentially exposed to enemy fire.
MOE
—Method of entry. See also “Breach.”
Murphy
—this means that something has gone seriously wrong,
such as a team member dropping a fragmentation grenade in
proximity to hostages.
NSA
—National Security Agency
NSW
—Naval Special Warfare
NSWG
—Naval Special Warfare Groups
NVG
—Night Vision Goggles
OP
—Observation post. In real world HRT ops, several snipers
would be positioned in OPs from the time the crisis breaks until it
is resolved. These troops report everything they witness of interest
to the TCP to aid in development of the tactical picture. In Rainbow
Six, you access the OP information via the Recon tab on the Plan
screen.
OP SEC
—Operational Security. Maintaining a tight reign on your
intentions until it is time to execute the plan. See also “CA.”
Precious Cargo
—codeword for a VIP hostage.
ROE
—Rules of Engagement. Also refered to as “Standard
Operating Procedures” or SOP by civilian law enforcement agencies. Essentially, these are the guidelines for the use of deadly
force and the tactical assault plan for the engagement.
SAS
—Special Air Service. Great Britain’s elite counterterrorist unit.
SEAL
—Short for SEa Air Land – the operating environments (and
name) of the US Navy’s elite maritime commandos. Seal Team Six
is the primary CT/HRT unit within the Seals, but all teams have
trained in CQB tactics.
RR
RR
eeeedddd SSSSttttoooorrrrmmmm EEEEnnnntttteeeerrrrttttaaaaiiiinnnnmmmmeeeennnntt
tt
65
Page 36

QA Analyst
Brian Davis
Additional Art
Doug Oglesby
Additional Programming
Garner Halloran
Rick Towson, Virtus Corp.
EXTERNAL DEVLEOPMENT PERSONNEL
Soundelux
Sound Design and Music by Soundelux Media Labs
Composer: Bill Brown
Sound Design Supervisor: R. Dutch Hill
Voice-over Producer: Bryan Bowen
Casting Director: Carole Rugier
Field Recordist and Sound Designer: Peter Zinda
Field Recordist: Martin Lopez
Asset Manager: Bobbie Halliday
Librarian: Robert McCarty
Executive Producer: Jeff Eisner
Performers
John Brightling Robert Sampson
John Clark Douglas Rye
Catherine Winston Michele Colins
Narrator Carole Rugier
Anne Lang Dani Thompson
Motion Capture Performers
Chris Shepard & Gene Zink, Heckler & Koch
Linda Clem, Berkeley Police Dept.
TTTToooommmm CCCCllllaaaannnnccccyyyy’’’’ssss
RR
RR
AAAAIIIINNNNBBBBOOOOWWWW SSSSIIIIXX
XX
68
CCCCRRRREEEEDDDDIIIITTTTSS
SS
DEVELOPMENT TEAM
Producer
Carl Schnurr
Designers
Carl Schnurr & Brian Upton
Lead Engineers
Brian Upton
Peter McMurry
Engineers
Erik Erikson
Clark Gibson
Philip Hebert
Robert Hunt
Todd Lewis
Greg Stelmack
David Weinstein
Lead Artist
Jonathan Peedin
Artists
Tim Alexander
Eric Armstrong
Steve Cotton
Thomas DeVries
John Sonedecker
RR
RR
eeeedddd SSSSttttoooorrrrmmmm EEEEnnnntttteeeerrrrttttaaaaiiiinnnnmmmmeeeennnntt
tt
67
Page 37

Financial Controller
Caroline Campbell
Director, Product Development
Robert Leingang
Executive Producer
Juan Benito
QA Manager
Todd Ingram
Support Staff
Paul D'Agostino, Systems Adminstrator
Meg Bachman, Receptionist
Wendy Beasley, Public Relations
Jonathan Corum, Accountant
Michelle Hamrick, Accounting Specialist
Mur Lafferty, Webmistress
SPECIAL THANKS
Bob Taubert
Rich Harrison
The fine folks at Heckler & Koch, USA.
All those in the Special Forces and Law Enforcement community who
gave their time and energy to this project.
Team Special Thanks
Doug, Nancy and Eva Alexander
Lavonda, Kendall, & LiL Eric
Brian Bandy
Jason (Kildare) Brow
Momma Ben Brow
Herb, Catherine, & Jeff Cotton
Ty & the Doobster
Tawny "Where's the E3 beefcake?" Erikson
TTTToooommmm CCCCllllaaaannnnccccyyyy’’’’ssss
RR
RR
AAAAIIIINNNNBBBBOOOOWWWW SSSSIIIIXX
XX
70
Testers
Sean Bryant
Derek L. Earwood
Robbie Edwards
Jeremy Gailor
Patrick Hanson
Michael Havazelet
Camille Klein
Alexander E. Risher
"The Voice in Software"
Voxware, Inc.
Princeton,
Uses Smacker Video Technology. Copyright (c) 1994 - 1996 by RAD
Game Tools, Inc.
RRRREEEEDDDD SSSSTTTTOOOORRRRMM
MM EEEENNNNTTTTEEEERRRRTTTTAAAAIIIINNNN
MM
MMEEEENNNNTTTT
Chairman
Tom Clancy
CEO and President
Doug Littlejohns
VP, Sales & Marketing
Dick Wnuk
VP, Creative Design
Steve Reid
VP, Engineering
Brian Upton
RR
RR
eeeedddd SSSSttttoooorrrrmmmm EEEEnnnntttteeeerrrrttttaaaaiiiinnnnmmmmeeeennnntt
tt
69
Page 38

Carl "Mr. Geometry" Erikson
Karen Everitt
Bill Gibson
William & Dorris Gibson
Robert D. Guy
Sharon, Phil, Michelle Hebert
Heather Isley
Meridith Lewis
Tony Martinez
Michelle McMurry
Paul McMurry
Tracey Peedin
Carla & Aurora Schnurr
Laurie Sonedecker
Emma Shackleford
Diana Stelmack
Lassie & Maxie
Elizabeth and Sam Upton
Kathy Weinstein
The Eyrie Regulars
Diet Coke
Manhattan Deli
Michaelangelo's
Papa John's
The Members of the R6 Forum
The makers of Atomic Bomberman
And most importantly, all the support staff at RSE
Advertising design thanks to Jeff Poe, Nevermore Studios
RR
RR
eeeedddd SSSSttttoooorrrrmmmm EEEEnnnntttteeeerrrrttttaaaaiiiinnnnmmmmeeeennnntt
tt
71
 Loading...