

Page 1
Ref: 814449
R6L_Man_PC_UK 12/01/06 13:39 Page I
Page 2

© 2005 Red Storm Entertainment. All Rights Reserved. Rainbow Six, Rainbow Six Lockdown, Red Storm and the Red Storm logo are trademarks of Red Storm Entertainment
in the US and/or other countries. Ubisoft, the Soldier Icon and the Ubisoft logo are trademarks of Ubisoft Entertainment in the US and/or other countries. Red Storm
Entertainment, Inc. is a Ubisoft Entertainment company.
WARNING:
READ BEFORE PLAYING
A very small percentage of individuals may experience epileptic fits when exposed to
certain light patterns or flashing lights. Exposure to certain patterns or backgrounds
on a computer screen, or while playing video games, may induce an epileptic fit in
these individuals. Certain conditions may induce previously undetected epileptic
symptoms even in persons who have no history of prior fits or epilepsy.
If you, or anyone in your family, have an epileptic condition, consult your doctor prior
to playing.
If you experience any of the following symptoms while playing a video or computer
game - dizziness, altered vision, eye or muscle twitches, loss of awareness, disorientation, any involuntary movement, or convulsions - IMMEDIATELY discontinue use
and consult your doctor before resuming play.
Take Tom Clancy’s Rainbow Six Lockdown
™
to the next level!
Join the growing Tom Clancy’s Rainbow Six Lockdown
™
community and get access to:
• Exclusive content and information
• Great competitions and prizes
• Privileged offers: collectors items, limited editions…
• Exclusive hints and tips
• Meet new friends on the forums and get all the help you need!
Join us now at www.rainbowsixgame.com!
The PEGI age rating system:
Age Rating categories:
Les catégories
de tranche d’âge:
Content Descriptors:
Description du contenu:
For further information about the Pan European Game Information
(PEGI) rating system please visit:
Pour de plus amples informations concernant l’évaluation du système
d’information de jeu Pan Européen (PEGI), vous pouvez consulter:
Para obtener más información sobre el sistema de calificación de
juegos (PEGI), por favor visite:
Per ulteriori informazioni sul sistema europeo di valutazione delle
informazioni del gioco (PEGI) vi preghiamo di visitare:
Für weitere Informationen über das europäische Spiel-Informationen
Bewertungs-System (PEGI) besuchen Sie bitte:
http://www.pegi.info
™
BAD LANGUAGE
LA FAMILIARITÉ
DE LANGAGE
DISCRIMINATION
LA DISCRIMINATION
DRUGS
LES
DROGUES
FEAR
LA PEUR
SEXUAL CONTENT
LE CONTENU
SEXUEL
VIOLENCE
LA
VIOLENCE
Note: There are some local variations!
Note: Il peut y avoir quelques variations en fonction du pays!
R6L_Man_PC_UK 12/01/06 13:39 Page III
Page 3

1
TABLE OF CONTENTS
GETTING STARTED . . . . . . . . . . . . . . . . . . . . . . . . . . . . . 2
Minimum Specifications . . . . . . . . . . . . . . . . . . . . . . . . . . . . . . . . . . . . . . . . . . . . 2
Installing Lockdown . . . . . . . . . . . . . . . . . . . . . . . . . . . . . . . . . . . . . . . . . . . . . . . 2
Uninstalling Lockdown . . . . . . . . . . . . . . . . . . . . . . . . . . . . . . . . . . . . . . . . . . . . . 2
SCENARIO . . . . . . . . . . . . . . . . . . . . . . . . . . . . . . . . . . . 3
MAIN MENU . . . . . . . . . . . . . . . . . . . . . . . . . . . . . . . . . . 3
Options . . . . . . . . . . . . . . . . . . . . . . . . . . . . . . . . . . . . . . . . . . . . . . . . . . . . . . . . . 4
Load Game . . . . . . . . . . . . . . . . . . . . . . . . . . . . . . . . . . . . . . . . . . . . . . . . . . . . . . 4
THE ACTION PHASE . . . . . . . . . . . . . . . . . . . . . . . . . . . . 4
Game Controls . . . . . . . . . . . . . . . . . . . . . . . . . . . . . . . . . . . . . . . . . . . . . . . . . . . 4
The HUD . . . . . . . . . . . . . . . . . . . . . . . . . . . . . . . . . . . . . . . . . . . . . . . . . . . . . . . . 5
Moving and Shooting . . . . . . . . . . . . . . . . . . . . . . . . . . . . . . . . . . . . . . . . . . . . . . 7
Pausing the Action . . . . . . . . . . . . . . . . . . . . . . . . . . . . . . . . . . . . . . . . . . . . . . . . 9
Saving and Loading in Game . . . . . . . . . . . . . . . . . . . . . . . . . . . . . . . . . . . . . . . . 9
After Action Review . . . . . . . . . . . . . . . . . . . . . . . . . . . . . . . . . . . . . . . . . . . . . . 10
SINGLE-PLAYER GAME. . . . . . . . . . . . . . . . . . . . . . . . . . 10
Mission Setup. . . . . . . . . . . . . . . . . . . . . . . . . . . . . . . . . . . . . . . . . . . . . . . . . . . 10
The Campaign. . . . . . . . . . . . . . . . . . . . . . . . . . . . . . . . . . . . . . . . . . . . . . . . . . . 11
Briefing . . . . . . . . . . . . . . . . . . . . . . . . . . . . . . . . . . . . . . . . . . . . . . . . . . . . . . . . 11
Team Outfitting . . . . . . . . . . . . . . . . . . . . . . . . . . . . . . . . . . . . . . . . . . . . . . . . . . 11
MULTIPLAYER GAME . . . . . . . . . . . . . . . . . . . . . . . . . . . 12
Custom your character . . . . . . . . . . . . . . . . . . . . . . . . . . . . . . . . . . . . . . . . . . . . 12
Start a multiplayer session . . . . . . . . . . . . . . . . . . . . . . . . . . . . . . . . . . . . . . . . . 12
Creating a Game . . . . . . . . . . . . . . . . . . . . . . . . . . . . . . . . . . . . . . . . . . . . . . . . . 12
Joining a Game. . . . . . . . . . . . . . . . . . . . . . . . . . . . . . . . . . . . . . . . . . . . . . . . . . 13
Team Outfitting . . . . . . . . . . . . . . . . . . . . . . . . . . . . . . . . . . . . . . . . . . . . . . . . . . 14
Scoreboard . . . . . . . . . . . . . . . . . . . . . . . . . . . . . . . . . . . . . . . . . . . . . . . . . . . . . 15
Multiplayer Action. . . . . . . . . . . . . . . . . . . . . . . . . . . . . . . . . . . . . . . . . . . . . . . . 15
WIN UBISOFT GAME . . . . . . . . . . . . . . . . . . . . . . . . . . . 16
TECHNICAL SUPPORT . . . . . . . . . . . . . . . . . . . . . . . . . . 17
WARRANTY . . . . . . . . . . . . . . . . . . . . . . . . . . . . . . . . . . 18
R6L_Man_PC_UK 12/01/06 13:40 Page 1
Page 4

2
GETTING STARTED
MINIMUM SPECIFICATIONS
In order to play Tom Clancy's Rainbow Six Lockdown™ on your computer, your PC
must meet the following minimum specifications:
Computer: Pentium 4 processor 1.5GHz+ (or AMD equivalent)
Memory: 512 MB RAM
Operating System: Windows 2000/XP
Video Card: 64 MB AGP or PCI-Express DirectX9 video card that supports pixel
shaders and vertex shaders
Sound Card: DirectX9-compatible sound card
Monitor: Monitor capable of 1024x768 resolution at 60Hz
DVD-ROM Drive: 4x (8x recommended)
HD Space: 7 GB
Multiplayer: Broadband with 64 kbps upstream ( 128 kbps recommended )
INSTALLING LOCKDOWN
1- Start your computer’s operating system.
2- Insert the Tom Clancy's Rainbow Six Lockdown™ disc into your CD-ROM or DVD-ROM
drive. The Autorun Menu should appear. If it does not appear, call up My Computer
from your desktop, and then double-click on the icon that corresponds to the drive
the Tom Clancy's Rainbow Six Lockdown™ disc is in.
3- Click the Install Tom Clancy's Rainbow Six Lockdown™ button. The installation routine
walks you through each step. Once you have created a directory for Tom Clancy's
Rainbow Six Lockdown™, the game installs to your hard drive automatically. The
game will ask if you want to install DirectX 9.0. If you already have a version that
is 9.0 or higher, click no. If not, select yes to install DirectX. If you are unsure, click
yes and the DirectX installer performs its own verification.
4- After you’ve finished the installation, you can select Tom Clancy's Rainbow Six
Lockdown™ from your computer’s Programs list or from the icon on your desktop.
UNINSTALLING LOCKDOWN
To uninstall Tom Clancy's Rainbow Six Lockdown™:
1- Start the operating system on your computer.
2- Insert the Tom Clancy's Rainbow Six Lockdown™ disc into your CD-ROM or DVD-ROM drive.
3- When the menu appears, click the Uninstall Tom Clancy's Rainbow Six
Lockdown™ button. You’ll be asked if you really want to uninstall the game. To
continue, click yes and follow the prompts. If you uninstall Tom Clancy's Rainbow
Six Lockdown™, any previously saved campaigns or games remain on your hard
drive unless you choose to delete them.
You can also uninstall Tom Clancy's Rainbow Six Lockdown™ by using the
Add/Remove Programs control panel in Windows.
R6L_Man_PC_UK 12/01/06 13:40 Page 2
Page 5
SCENARIO
Under cover of an attempted coup in South Africa, a well-armed band of terrorists has
seized an engineered virus called Legion. Developed illegally, Legion is the ultimate
weapon of terror, a man-made plague that strikes quickly and leaves no survivors.
With the terrorists’ intentions and target unknown, elite counter-terror organisation Rainbow
must find the terrorists, uncover their target, and stop them before Legion is turned loose.
The Squad
You play Domingo “Ding” Chavez, one of Rainbow’s team leaders. You command up
to three fellow Rainbow operatives on each mission. The squad is chosen for you
before the mission starts, making certain that you have the best team possible for each
operation. During the course of the campaign, you’ll work with field operatives skilled
in assault, recon, demolitions and electronics.
Unless the mission objectives say otherwise, you can lose your entire squad and still
complete a mission successfully. As Chavez, you possess the skills of any member of
your squad.
The Virus
The terrorists who have stolen Legion have successfully weaponised it. This means
that as you advance through the game, you’ll encounter enemies who may have virus
weapons on-hand. Exposure is 100% fatal.
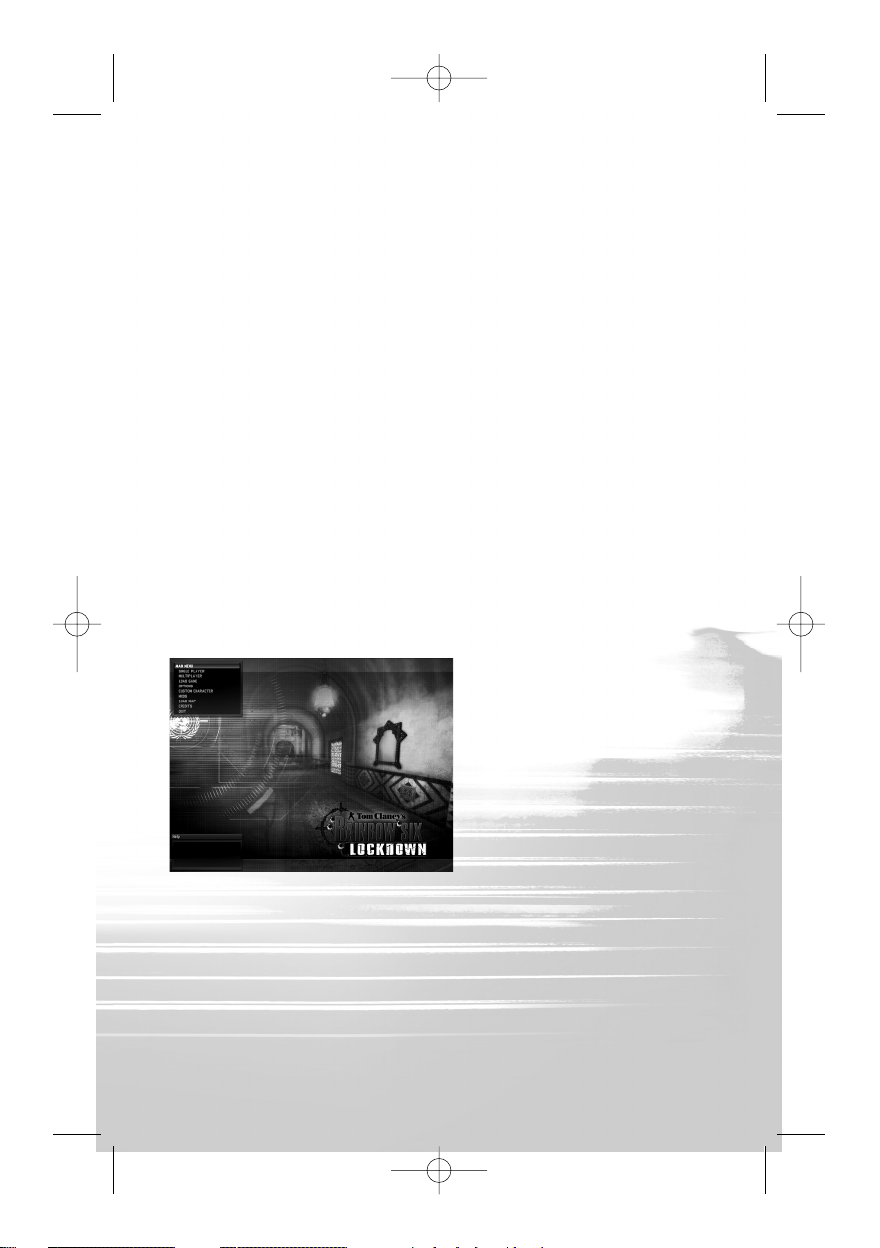
MAIN MENU
Select one of the menu choices in the
upper left corner by moving your
mouse over the item you want, and
click the left mouse button. The
choices available from the Main
Menu are:
• Single Player – Take on Tom
Clancy's Rainbow Six Lockdown™
solo. Includes the campaign and
quick mission gameplay types.
• Multiplayer – Create or join a game
with other players.
• Load Game – Resume a previously
saved game.
• Options – Set the game options to personalise, and optimise your play experience.
• Custom Character – Create the character you’ll be using in Multiplayer mode.
• Mods – Use “modded” content.
• Credits – See who created Lockdown.
• Quit – Close Tom Clancy's Rainbow Six Lockdown™ and return to the Desktop.
The Help text box is displayed in the lower left corner of the screen. Whenever you
move the mouse over a screen element in the menu system, text explaining what that
item is or does appears here.
3
R6L_Man_PC_UK 12/01/06 13:40 Page 3
Page 6
OPTIONS
The Options Screen allows you to customise your play experience. This screen has five
tabs, each of which corresponds to one set of options. Click on a tab to prompt these
option choices.
When you’re finished setting your options, click on Apply Changes. This applies the
new settings. If you don’t like them, click Restore Defaults to return everything to the
original settings.
LOAD GAME
Load Game allows you to load or delete a saved game. You can also load or delete
games through the in-game Pause Menu.
Selecting Load Game takes you to the saved game list. Select a saved game by clicking
on it. If you choose to load the game, you’ll start where the action left off when you
saved. Click on Load Game, and the selected game loads immediately.
THE ACTION PHASE
The Action Phase is where you move, shoot, interact with the world and play the game.
Screen elements called the HUD (Heads-Up Display) give you information about the world.
GAME CONTROLS
4
Function Key
Move Forward
W
Move Back
S
Strafe Right
D
Strafe Left
A
Peek Right
E
Peek Left
Q
Fire
LEFT MOUSE
Function Key
Zoom
RIGHT MOUSE
Run
SHIFT
Always Run
CAPS LOCK
Use Item
CTRL
Change Stance
X
Rate of Fire
F
Go Code
G
R6L_Man_PC_UK 12/01/06 13:40 Page 4
Page 7
THE HUD
Your onscreen HUD feeds you information about the game world as you move through
it. It tells you about your weapon, your squad mates, and your character.
Stance Indicator
A box is displayed in the lower right corner. It shows your character’s current stance.
Upright lets you move faster, but makes you a bigger target. Crouching slows you
down, but gives you better cover and aim. Toggle between stances by hitting the X key.
Rate of Fire and Ammunition
Below the Stance Indicator is your Rate of Fire (ROF). This indicates how many rounds
are fired from your weapon when you squeeze the trigger:
• Single Shot - one bullet fired
• Three Round Burst - three bullets fired
• Full Auto - keep going until you empty the magazine.
Pressing the Rate of Fire key (defaults to F) cycles between them.
Beneath the ROF is your current ammo count. The bright bar indicates how many
rounds are left in the current magazine. When it’s gone, the magazine is empty and
you need to reload.
Down and to the left is the Item Indicator, which indicates which gear item is currently
equipped, and how many are left.
Health Indicator
Your Health Indicator is displayed in the lower right corner of the screen. Three bars
indicate you’re in perfect health, while being wounded removes bars from your health
status.
5
Function Key
Night Vision
V
Special Vision
B
Reload
R
Advanced Orders
T
Action/Issue
SPACE
Command
Fluid Door Open
Mouse Wheel Up
Fluid Door Close
Mouse WheelDown
Sniper Weapon Zoom
Mouse Wheel
Steady Sniper Weapon
SPACE
Toggle Weapons
1
Toggle Items
2
Rules of Engagement
3
Team Hold/Follow
4
Hostage Hold/Follow
5
All Hold/Follow
6
Function Key
Decrease Bomb Timer
-
Increase Bomb Timer
=
Quick Save
F5
Quick Load
F8
In-Game Menu
ESC
Enable Chat
ENT
Push to Talk
M
Global Chat
Y
Team Chat
U
Whisper Chat
I
Whisper Reply
O
Chat Macro 1
7
Chat Macro 2
8
Chat Macro 3
9
Chat Macro 4
0
R6L_Man_PC_UK 12/01/06 13:40 Page 5
Page 8

Squad Indicator
Your Squad Indicator ins displayed in the lower left corner. This indicates the current
health status of your squad members. Below that is the current order they’re following. You can tell them to advance, hold, and perform more complex operations.
Next to this is your squad’s current RoE, or Rules of Engagement, Indicator. This
informs the squad whether to move in Assault mode (fire on targets at will) or Recon
mode (stealth approach). Toggle by pressing the RoE key (defaults to 3).
Reticule
The reticule appears in the centre of the screen. It serves several functions. First of all,
it shows where you’re aiming. The pips around the edge of the reticule show the current spread of fire if you pull the trigger. The longer you aim at a target, the closer the
pips move and the more accurate your shot is. Moving or changing stance adjusts
your aim and causes the pips to move out again.
Its second function is to give orders or interact with the world. When the reticule is
over an object that you or your team can interact with, a message indicating the type
of action you can perform pops up. To perform the action, press the Action key
(defaults to Space Bar)
Contextual Order
At the bottom centre of the screen is the current Contextual Order you can give your
squad. This defaults to Move, but when you place it over doors, cameras, and other
items you can interact with, the new order appears.
Virus Indicator
This icon appears onscreen when you get near a source of the Legion virus. The closer you get, the more solid the icon becomes.
Hostage Indicator
Some missions call for you to rescue hostages and lead them to safety. When you’ve
secured a hostage, this indicator appears onscreen. It remains while the hostage is
with you, and shows whether the hostage is holding position or following.
Radar
Radar is active onscreen when you’re using the motion sensor. Enemies, hostages and
team members appear as blips on the radar screen.
Battery Bar
This appears when you use the
motion sensor. It tells you how much
time you have left before the device is
out of power.
6
R6L_Man_PC_UK 12/01/06 13:40 Page 6
Page 9

Opening Doors
Either you or your squad can open doors in Lockdown. To open a door, walk up to it
with the reticule over it and press the Action key. If the door is locked, you have several
options. Small icons show the location of the lock and hinges. Shoot these out to open
the door. You can use a hammer or breaching charge to blast through the door. Or,
you can toss a grenade at the door and stand back.
Enemies can also fuse doors shut with a lock & hinge fuser kit. A small icon with a
padlock indicates that the door is fused shut. A fused door must be cut open manually
or breached by an explosion. To cut through a fused door, stand directly in front of it
and hold down the Action key until it is open.
You can use your mouse wheel to open a door partway, just enough to peek or toss a
grenade in.
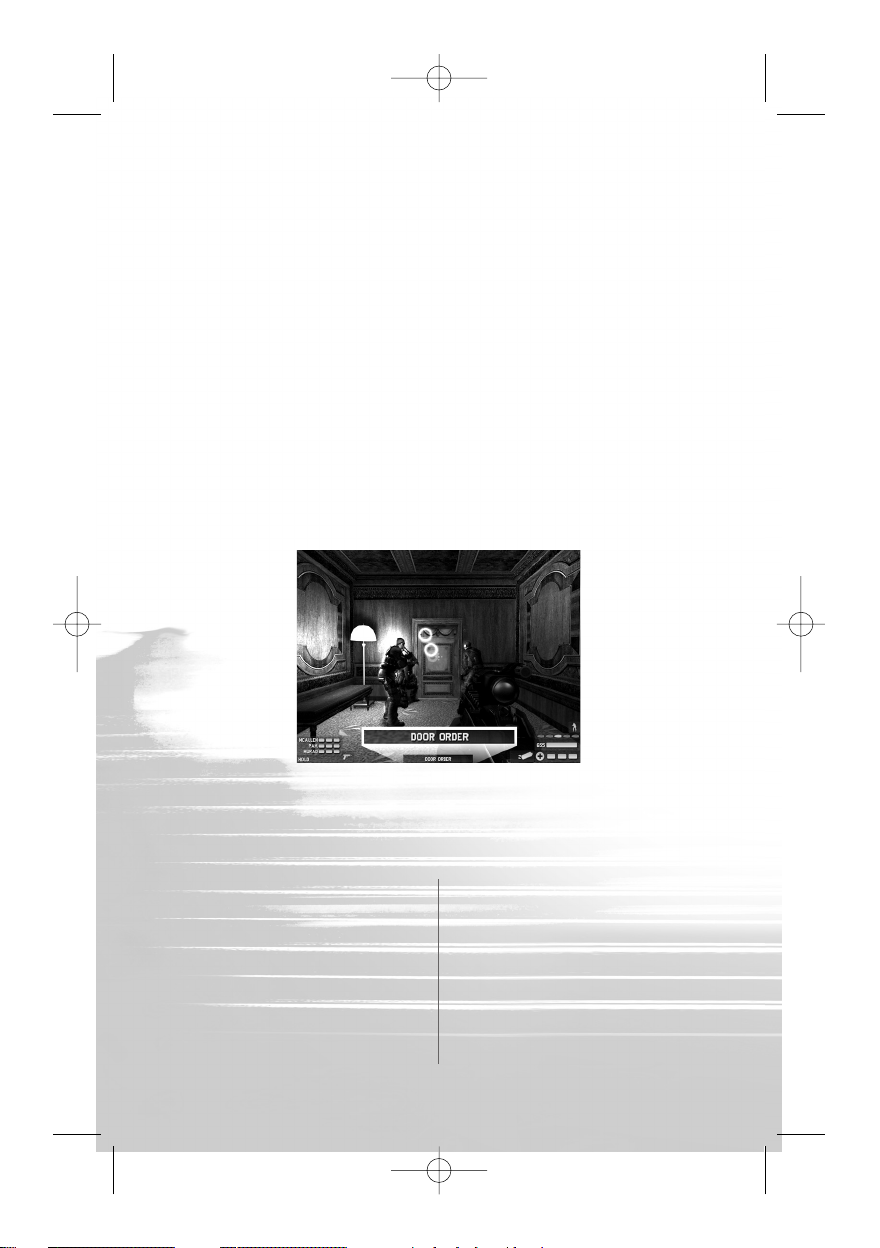
To have your team open a door for you, move the reticule over the door and wait for
the Door Order message to come up at the bottom of the screen. Press the Action
key. This brings up a list of available options that detail how they’re getting through
the door.
Once you have selected the way you want your team to breach the door, a list of
actions to perform after they open it appears. You can always cancel an order by
selecting Cancel.
Once you’ve given the order, the team waits for a Go Code. Give the Go Code by
pressing the Go Code key (defaults to G). You can cancel the action by hitting
the Action key.
MOVING AND SHOOTING
The core of gameplay in Lockdown is movement and combat. In order to advance, you
need to move through the levels and take out enemies. To move, use the Movement
keys (defaults to W, A, S and D). These let you move forward and backward, and from
side to side. Press and hold a movement key to move in that direction. If you want to
move faster, press and hold the Run key (defaults to Shift) while moving.
Peeking
Your mouse controls where you look. You can also peek left and right (defaults to Q
and E). This lets you look out from behind cover without exposing yourself completely.
Opening Fire
To fire your current weapon, press the Fire button (defaults to left mouse button).
Move the reticule over an enemy and open fire to down him.
You can reload your current weapon by pressing the Reload button (defaults to R).
This fills up your current magazine. You cannot fire while reloading.
Weapons Switching
You can have one weapon and one gear item equipped at a time. You can switch
between weapons and items. To swap between your Primary and Secondary weapons,
press the Weapon Swap key (defaults to 1). To swap between your items, press the
Item Swap key (defaults to 2).
7
R6L_Man_PC_UK 12/01/06 13:40 Page 7
Page 10

Throwing Grenades
To throw a grenade, press and hold
the Use Item key (defaults to Control)
while a grenade is equipped. The arc
of your throw appears onscreen.
Adjust your aim with the mouse, and
then release the Use Item key to
throw it. Be warned – grenades do
bounce back if they hit something,
and you can be killed by friendly fire.
Zoom
To get a better shot at an enemy a long way off, you can zoom in on them. Pressing
the Zoom key (defaults to right mouse button) lets you look through the iron sights of
your weapon or aiming attachment. To exit zoom, press the Zoom key again.
With a sniper rifle, you can adjust your level of zoom by using the analogue zoom setting (defaults to mouse wheel).
Vision Modes
Team Rainbow has two additional
vision modes.
Night Vision amplifies available light,
making the darkest tunnels seem
bright as day. To toggle Night Vision
on and off, press the Night Vision key
(defaults to V).
The motion sensor lets you see
movement visible at close range. This
is very handy for tracking hidden ene-
mies – even through walls. To toggle
this off and on, press the Special Vision key (defaults to B). The motion sensor has a
limited battery life.
Interaction and Giving Orders
To give an order, move the reticule over the object you want the team to interact with
and press the Action key. The available order appears in the bottom centre of your
HUD. If you want to interact with the item (door, computer, camera, etc.), walk up to
it and press the Action key when the appropriate Contextual Order appears.
Waypoints
Move to is a basic order you can give your team. Pick a spot in the world and order
them to go there. To do this, move the reticule over the spot you want them to advance
to. Press the Action key and a spinning Rainbow icon appears. Your teammates immediately start moving to that waypoint.
Movement Orders
You can control the movement of your team or any hostage you’re leading to safety.
Hold tells them to remain where they are. Follow tells them to follow you as you move.
8
R6L_Man_PC_UK 12/01/06 13:41 Page 8
Page 11

• Toggle Rainbow Hold/Follow – defaults to 4
• Toggle Hostage Hold/Follow – defaults to 5
• Toggle All Hold/Follow – defaults to 6
PAUSING THE ACTION
You can always pause the action by pressing the Pause button (defaults to Esc). This
brings up the in-game menu, which allows you to change options, save or load games,
and perform other actions.
When you pause the game, the current scoreboard of your progress appears. In addition to the mission details, your squad’s mission statistics appear.
The Pause Menu is displayed in the upper left corner. This provides you with several choices:
• Scoreboard – Displays the current mission stats and settings
• Options – Lets you change game options. Some options cannot be changed mid-mission.
• Resume Game – Takes you back to the action.
• Save Game – Saves the current game.
• Load Game – Loads a saved game. This ends your current game and starts the
saved one.
• Quit Game – Closes Lockdown and takes you back to the desktop.
SAVING AND LOADING IN GAME
You can save and load as many games of Tom Clancy's Rainbow Six Lockdown™ as
you want. This allows you to try the campaign with different tactics, experiment, or
just fall back and regroup if the mission you’re on proves too tough.
Quick Save
In Tom Clancy's Rainbow Six Lockdown™, you can save anytime in action by pressing
the Quick Save key (defaults to F5). This takes a snapshot of the action. Every time
you do a Quick Save, however, the previous one is overwritten, so if you want to save
a game and come back to it, you’re better off doing a full save.
You can also load your Quick Saved game by pressing the Quick Load key (defaults to
F8). This ends your current game and loads up your Quick Save.
Saving a Game
To save a game, prompt the Pause Menu and select Save Game. This takes you to the
Save Game Screen.
Loading a Saved Game
To load a game, prompt the Pause Menu and select Load Game. This takes you to the
Load Game Screen. A list of available games is displayed. Click on the one that you
want to select, and then click on Load Game.
Autosave
Each time you complete a section of a mission, the game will automatically save your
progress, overwriting the previous autosave in the process. This autosave records
only your most recent progress.
9
R6L_Man_PC_UK 12/01/06 13:41 Page 9
Page 12

AFTER ACTION REVIEW
Win or lose, after the mission you
receive an After Action Review (AAR).
The AAR evaluates how you and your
squad performed.
In the AAR Screen, several options
are available in the upper left corner
menu box. They include:
• AAR – View the AAR Screen.
• Options – Go to the Game Options
Screen.
• Load Game – Loads a saved game.
• Load Last Save – Lets you load the most recent save you made. This is useful for
continuing missions where you’ve made a lot of progress and don’t want to start all over.
• Replay – Try the same mission over again.
• Continue – Return to the Mission Selection Screen. You can change your equipment
to try the same mission again, select a different mission, or change the game type.
SINGLE-PLAYER GAME
Single Player lets you take on the world of Lockdown, with or without your AI squad
to back you up. Here you can play through the campaign, select from numerous game
types, or tackle individual missions.
In the top left corner of any Single Player Screen is a box showing the various steps
required to start a single player game. To access any one of those steps, click on it.
MISSION SETUP
At the top of the Mission Setup Screen is a dropdown list of game types, with a list of
available maps below it. Not all maps are available for all game types. To select a game
type, click on the arrow next to the dropdown, and then click on the game type you
want. The available game types are:
• Campaign Mission – Play the missions campaign-style, with story-based objectives
and enemies.
• Terrorist Hunt – Move through the level taking out tangos. Wipe them all out to
win the mission.
• Reverse Terrorist Hunt – Take on the Terrorist Hunt game type from a new direction.
• Lone Wolf – No squad mates – this time it’s personal.
• Training – Practice your weapon skills at the target range.
To the right of the game type list are a few options, depending on game type.
When you’ve set the options you want, select the mission of your choice by clicking
on it.
10
R6L_Man_PC_UK 12/01/06 13:41 Page 10
Page 13

THE CAMPAIGN
The campaign is the continuing series of 16 missions that forms the core of the game.
Once you successfully complete a campaign mission, it becomes available to be
played again at any time, and the next mission is unlocked.
BRIEFING
Some mission types give you a mission briefing. This gives you information on the
level, your enemies, and your objectives.
To access a mission briefing, click on Briefing in the box in the upper left corner of the
screen. To watch the Briefing again, click on the Replay button. To keep going, click
on Team Outfitting in the upper left-hand corner.
TEAM OUTFITTING
Team Outfitting is where you give
your Rainbow operatives the gear
they’re going to use in the field.
On the left is a series of boxes, one
for each team member. These display
the character’s name and current
load-out. To change a character’s
load-out, click on the box. This acti-
vates the selected character.
To the right of the list is the character
portrait. Any changes you make
appear here instantly. Below the portrait is a dropdown list of uniform choices for the mission.
To the right of the portrait are the equipment slots. At the top is the character’s Primary
Weapon. Click to activate. Once a slot is active, you can browse through the list of
choices on the right side of the screen. Click on one of these choices to select it. Below
the Primary Weapon is the slot for an add-on attachment for the weapon. Not all
weapons can use all attachments.
Below the Primary Weapon is the Secondary Weapon. This is usually a pistol or shotgun. Some Secondary Weapons can have attachments as well. Below that are the two
Equipment slots. These can be filled with grenades, breaching charges, hammers, and
other tools of the trade.
You can save your favourite load-out so it’s quickly loaded the next time you play. To
save a load-out, simply click the Save button at the bottom of the screen. Give your
load-out a name and it is saved for you to use whenever you want. When you’re happy
with your team’s load-out and ready to go, click Start to begin the mission.
11
R6L_Man_PC_UK 12/01/06 13:41 Page 11
Page 14

MULTIPLAYER GAME
CUSTOM YOUR CHARACTER
To create your own character, select
Custom Character from the Main
Menu. Custom Character lets you
create unique Rainbow squad mem-
bers or mercenaries to play in multi-
player combat. You can create as
many characters as you want.
Your character’s appearance is visible
in a window on the left side of the
screen. You can edit your custom
character’s body and face. The char-
acter’s name is displayed at the top of
the screen. Click in the box to type in
a unique name under which you’ll save that character.
To save the current character, click on Save Changes.
START A MULTIPLAYER SESSION
To start a multiplayer session, select Multiplayer from the Main Menu. Choose whether
you’ll be playing on a Local Area Network, or online through Ubi.com. If you choose
Ubi.com, you’ll be asked to log in; if you pick LAN, you’ll go straight to the Multiplayer
Screen.
CREATING A GAME
Creating a game allows you to set up
the game parameters and details, and
invite others in to play. There are two
tabs on the Create Game Screen, one
for Game Settings and one for Map
List. Each lets you spec out certain
aspects of your game.
Game Settings
At the top of the Game Settings tab is a space for the Game Name. Click on the space
and type in the name that you want to give your game. This is what appears when it
shows up on other players’ lists of available sessions. Below the name is a space for
Password. If you input a password, the game requires it from every player who tries
to join. To create a password, click in the box and type the password that you want.
12
R6L_Man_PC_UK 12/01/06 13:41 Page 12
Page 15

On the left-hand side of the screen is a pull-down list of game types. To choose one,
click on the arrow, and then click on the game type that you want to set up. The available game types are:
• Team Adversarial – Team-based play. It’s Rainbow versus mercenaries in a battle to the death.
• Rivalry – Team-based play. Accumulate points by completing team objectives.
The team with the most points wins.
• Retrieval – Team-based play. Bring back the most flags to your base and win.
• Free for All – It’s every operative for himself.
• Co-op Mission – Tackle campaign missions with human squad members, not AI.
• Terrorist Hunt – Work cooperatively with other players to clear terrorists out of a level.
Different game types have different options available. You have the option to choose
Normal or Reverse play for Terrorist Hunt, and you can set the difficulty to Normal or
Challenge on cooperative game types.
Map List
The Map List tab lets you pick the
maps you want to use in your game.
To the left is a list of available maps
for the currently selected game type.
If you want to use a map, select it by
clicking on it. Then, click the Add Map
button to add the map to the Game
Session Maps window on the right.
Choosing no map means that a new
map will be randomly selected each
round.
JOINING A GAME
The Join Game Screen is where you
search for active games and select
one to join. There are two tabs on the
Join Game Screen, Search and
Filters. You can switch back and forth
between them by clicking on the tab
name.
Search
The Search tab shows the current list
of games available. To select an indi-
vidual game from the list, click on it.
The game’s statistics appear to the
left. You can scroll through the list of games. If you don’t see any games you want to
join, clicking the Refresh List button searches again.
If you do find a game you want to join, select it by clicking on it. Then click on the Join
Game button.
13
R6L_Man_PC_UK 12/01/06 13:41 Page 13
Page 16

Filters
The Filters tab lets you put search parameters in place so the list of available games
more closely matches what you want.
Once you’ve put your filters in place, click on the Search tab and click Refresh List.
This prompts a list of games that matches your criteria.
The Ready Lobby
Once you join a game, you are taken to the Ready Lobby. It indicates the current game
status. If you join a game in progress, you’ll wait here until the current round is over.
If you’ve joined a team-based game, you’ll find both teams’ rosters listed, and you’ll
automatically be assigned to one. The two teams are Rainbow and Mercenaries. Each
team’s roster is visible. To switch teams, click on the Switch Teams button. This
moves you back and forth between teams if the server has turned off auto-teams. If
there are no teams, a complete player list appears instead.
When you’re ready to go, click on the Ready button to inform the host. If you decide
you’re not ready after all, then click on the Not Ready button. When everyone in the
game has clicked Ready, the game automatically starts. The host can also start the
game manually by clicking on Launch Game, so it’s a good idea to gear up fast.
At the bottom of the screen is the chat window. This lets you trade messages with
other players. To chat, press the Enter key and type your message. Press Enter again
to send it.
Kick Player
Only the host can use this button. It removes the currently selected player from the
game.
Switch Character Set
This button is only available in the Free for All Ready Lobby. It allows you to switch
between Mercenary and Rainbow character sets to choose the one you want to play
in-game.
TEAM OUTFITTING
Before you go into action, make sure that you have the appropriate gear. To do this,
click on Team Outfitting in the upper left corner menu. On the left is a list of character
classes you can choose to play. Each class has its bonuses and drawbacks, as well as
unique equipment it can use:
• Assault – Well balanced combat expert. Can use attachments and Heavy Machine Guns
• Sniper – Deadly from a distance, but a low rate of fire and can’t use weapon
attachments
• Recon – Lightly armoured but moves fast and is hard to detect with Night Vision
• Demo – Slow and can’t use attachments, but is good with explosives – disarming
them and using them
Below the character class list is a drop-down list of available models. There are three
categories: Rainbow, Mercenaries and Custom. Rainbow lets you play a Rainbow
squad member. Mercenaries allow you to pick from a list of heavily armed and trained
mercs, and Custom is the list of characters you have created.
Once you’ve selected the character type, click on the model you want to use. It appears
14
R6L_Man_PC_UK 12/01/06 13:41 Page 14
Page 17

onscreen in the character window.
You equip your character the same way you do in single player mode. Once you’re fin-
ished, you can click on Ready Game to wait in the Lobby.
SCOREBOARD
After each round, you’ll go to a
Scoreboard. It lists out the stats for
the round that just finished, as well as
the current match status. Different
stats appear depending on game
type, including kills, hits, hit percent-
age and the winner of the round.
The Scoreboard then cycles to the
Ready Lobby or to the next round.
MULTIPLAYER ACTION
Respawning
When Respawn is activated in a game, you can choose where you come back into the
world. Cycle through the available respawn points until the timer hits zero and forces
you into the world. You can also respawn before the timer expires by pressing the
spacebar.
Multiplayer Equipment
Some equipment is restricted to one side or the other in team-based play. The
Rainbow-only equipment:
• Flash Grenades – Creates an intensely bright explosion that blinds anyone in the
blast radius.
• White Phosphorous Grenades – A combination antipersonnel and flash weapon,
it ignites targets within the blast radius.
• Breaching Charge – This explosive charge can blow through a locked or fused
door, taking out someone standing on the other side.
• Flash Mine – Proximity-triggered, it works as a high-powered flash grenade but
is placed on the ground.
• C4 Satchel Charge – Small explosive charges that detonate from an adjustable
timer.
• Motion Sensor – Available as a vision mode, it shows enemies as blips on a radar
screen and allows Rainbow to see movement through walls.
Mercenary-only equipment:
• Smoke Grenades – These emit a cloud of smoke, obscuring vision and countering flash grenades.
• Virus Grenades – Loaded with Legion, these produce a lethal virus cloud.
• Door Fuser – It allows the mercenary to fuse the door shut.
15
R6L_Man_PC_UK 12/01/06 13:41 Page 15
Page 18

• Claymore – A defensive weapon, it is an antipersonnel mine. When triggered, it
produces a lethal 180 degree arc of fire. Claymores are set off by a hand switch,
but can also be detonated by explosions or fire.
• Laser Trip Mine – An unpleasant, lethal surprise triggered by someone interrupting the laser beam. Move fast after you place one or risk setting it off yourself.
• Surveillance PDA – This allows a mercenary to cycle through the views from any
of the active surveillance cameras on the level. A virus canister is placed near each
camera. Press Spacebar while looking through a camera to release it.
Both teams can use Frag Grenades and Night Vision. In addition, members of each
team can interact with surveillance cameras in the levels. Rainbow members can disable them while mercenaries can re-enable them.
16
WIN UBISOFT GAMES
For a chance to win Ubisoft games simply register your product now on
http://registrationcontest.ubi.com
By registering you will also benefit from:
• Access to exclusive content
• The latest information on Ubisoft games
• Free online technical support
• E-shop promotions and discounts
Competition is free of charge. No purchase necessary. For full terms and conditions
visit http://registrationcontest.ubi.com
- Closing date for registrations: 10/27/2005 to 10/29/2006.
- Full regulations available free of charge by writing to UBISOFT EMEA, Grand jeu/concours E-Registration
- 28, rue Armand Carrel, 93108 Montreuil-sous-Bois Cedex, France; or available at the following address:
http://registrationcontest.ubi.com.
- Awards: 10 video games to be won every week. 520 games in all, with a total retail value of 31 200 euros
(10 games to be won every week for a year) and unit retail value of 60 euros (inc.VAT) (art L 121-37 Ccons.).
R6L_Man_PC_UK 12/01/06 13:41 Page 16
Page 19

TECHNICAL SUPPORT
NEW: To serve you better, Ubisoft is now providing full ONLINE support, to solve your
gaming problems quickly and efficiently.
Simply go to http://www.ubi.com/uk and visit the Ubisoft Frequently Asked Questions first!
By visiting our FAQ database, you can find exactly the same answers that are available
to you by calling or sending web-mail to our support representatives. This service is
free and available 24/7!
If for any reason you do not find the answer to your question, you can click on the Ask a
question link in the FAQ to send us a web-mail, ensuring that we get all the important
information on your system and your problem so we can answer correctly the first time.
Make sure to include all information on your system, your problem, and the game you
are playing.
If you do not have internet access, Our support representatives can assist you from
8:00 am until 10:00pm daily (excluding Bank Holidays) on Telephone: 0905 – 482 - 0109
Calls cost 30p per minute. Please be at your system when calling Ubisoft for support.
Australian technical support
Technical Support Info Hotline
1902 262 102
(calls are charged at $1.98 per minute including GST. Higher from public and mobile phones).
HINTS & TIPS
Looking for cheats to go up to the next level? Call our 24 hour automated Hints line:
0906 – 646 – 8477. Calls cost £1.00 per minute. Please ask permission from the person who pays the phone bill before making the call.
17
R6L_Man_PC_UK 12/01/06 13:41 Page 17
Page 20

WARRANTY
Ubisoft guarantees to the original purchaser of this computer software product that
the compact disc (CD)/cartridge supplied with this product shall not show any default
during a normal use period of ninety (90) days from the invoiced date of purchase. In
the first instance please return the faulty product to the point of purchase together with
your valid receipt. If for any reason this is not possible, (and it is within 90 days of the
purchase date), then the faulty compact discs/cartridges should be returned to Ubisoft
at the below address, along with a dated receipt, location of purchase, a statement
describing the fault, and all original packaging.
Address for returns:
Customer Support, Ubisoft,
Chantrey Court, Minorca Road,
Weybridge, Surrey, KT13 3DU
Where a CD key is required to access on-line game play, this cannot be reproduced or
replaced. It is the responsibility of the original purchaser to keep this CD key secure.
Lost, stolen or damaged CD keys cannot be replaced.
18
R6L_Man_PC_UK 12/01/06 13:41 Page 18
Page 21

19
R6L_Man_PC_UK 12/01/06 13:41 Page 19
Page 22

20
R6L_Man_PC_UK 12/01/06 13:41 Page 20
 Loading...