

Page 1
THIS MEANS
THIS MEANS
C
D
-
R
O
M
C
D
-
R
O
M
Page 2
THE TECHNICAL STUFF
For This Means War to work, there are a few things your computer
h a v e .
• The processor has to be a 4 8 6 or better. Basically, any computer with
“4 8 6” or “Pentium” in its name should do just fine. The system speed
should be at least 3 3 MHz (megahertz). However, for best play, we
recommend a system speed of at least 6 6 M H z .
• You must have a CD-ROM drive. The drive must be running with
MSCDEX (the Microsoft CD-ROM Extension) version 2.2 3 or newer.
• You must have a version of DOS (Disk Operating System) numbered 5.0
or higher. Almost all 4 8 6 and Pentium computers include DOS in the
standard software package.
• You must have Windows version 3.1 or higher installed on your
c o m p u t e r .
i
Page 3
• There must be at least 8 Mb (megabytes) of RAM installed in
your computer.
• There also must be at least 6 1 4 4 Kb (6,2 9 1,4 5 6 bytes) of free EMS
(expanded) memory. To find out whether you have enough, type
m e m / c at any DOS prompt and press [ E n t e r ]. Somewhere in the mess
of information that pops up will be a line that tells you how much free
EMS you have.
• Since the installation program will copy parts of This Means War
onto your hard disk, you must have some empty storage space on your
hard drive. The Windows File Manager notes how much free space you
have, or you can find out by typing d i rat any DOS prompt and pressing
[ E n t e r ]. One of the last things listed will be how much hard drive space
you have free. (Sometimes, the space is listed in bytes. It can help to
know that 1,0 4 8,5 7 6 bytes make a megabyte.)
Disk Size: 0-128 Mb 128-256 Mb 256-512 Mb 512 Mb-1 Gb 1-2 Gb 2-4 Gb
Ty p i c a l 3 1 3 2 3 3 3 6 4 1 5 3
M i n i m u m 1 4 1 5 1 5 1 7 2 1 3 0
• The graphics must be SVGA quality or better. We strongly advise that
you play the game in 2 5 6 colour, 6 4 0 x 4 8 0 m o d e .
• You must have a mouse attached to your computer in order to play this
game. The mouse driver must be MS Mouse version 9.1 or higher, or
something fully compatible with this.
If you think you have all of these, but still have a problem running the
game, please contact Sold Out Customer Support for assistance.
THE TECHNICAL STUFF
Page 4

CONFLICTS WITH OTHER PROGRAMS
If you run This Means War at the same time as other programs are
running, there could be weird problems. (Don’t worry, nothing
This Means War does can damage your computer; the problems we’re
talking about are the game not working correctly.) To help avoid this,
we’ve listed the known conflicts here. Please note that this list includes
only the possible problems we about. Since no test procedure can
ever be totally complete, you may run into undiscovered problems. Please
consult with Customer Service if you do.
This game has n o t been fully tested under Microsoft Windows 9 5.
Therefore, we suggest that you not use it with Windows 9 5.
We strongly recommend that you not have any Terminate-and-Stay-
Resident programs (TSRs) loaded into memory when playing
This Means War, except for memory managers. Not only will TSRs
decrease the amount of free memory available, thus slowing the game, but
weird things could happen. The manuals that came with your computer
should tell you how to remove any TSRs.
We also recommend that you not have any other applications open
while playing This Means War.
iii
Page 5

CUSTOMER SERVICES
If you experience difficulty with the game, you might need some help
from MPS Customer Services. As we receive many calls every day, we will
be able to deal with your inquiry more efficiently (and more quickly) if you
have the following information handy when you call:
• The correct name and version number of the game.
• The type of computer you are using— the brand, type of processor
(e.g. “Pentium”), and speed.
• The numbers of your versions of DOS and Windows.
• How much free Conventional, Extended (EMS), and Expanded (XMS)
memory you have.
• The exact error message reported (if any).
• The version and make of your mouse driver.
It is also handy to be near your computer when you call.
THE TECHNICAL STUFF
Page 6

INSTALLING AND PLAYING
Before you can play This Means War, the installation program
must copy some files onto your hard disk. To have it do so, follow
these instructions:
• Turn on your computer. The Microsoft CD-ROM Extension should load
when the computer starts up. (If you have problems installing, this
extension may not be loaded. Check your computer manuals for
instructions on making it load itself.)
• If your computer is set up so that Windows does not start
automatically, start up Windows.
• Open the CD-ROM drive, place the This Means War CD in there, and
close the drive.
• In the Windows File Manager, double-click on the file s e t u p . e x e o n
the CD-ROM. (If you’re using Windows 9 5, the installation begins
automatically.) You’ll have a chance to change your mind, then you’ll
have a couple of decisions to make.
• You decide the name of the directory into which the game is installed.
Leave the default or click on Change Directory to enter a different
path and name. When you’re satisfied, click C o n t i n u e to go on.
• Next, you must decide how much of the game you want installed on
your hard drive and how much you want to remain on the CD-ROM.
There are three options:
The T y p i c a l installation takes up the most hard drive space, but
ensures that the game will run most quickly. In addition, after the first
time you start the game, you can remove the game CD from your drive.
(In fact, you can put in a music CD, and the game music will be replaced
by selections from that CD!)
Using the C o m p l e t e / C u s t o m option, you can choose exactly which
parts of the game are installed on your hard disk. The more you install,
the faster the game plays, but the more disk space is taken up. You will
also need to keep the CD-ROM in the drive while you play.
v
Page 7

The M i n i m u m takes up the least space. If you use this, however,
you must keep the CD-ROM in your drive at all times while playing, and
the game will run a bit slower.
• When the installation program has finished copying files, you must
decide in which Windows Program Group you want the game icon to
appear. Choose a name from the list or leave the default, then
click C o n t i n u e.
The latest information on last minute updates to the game is contained
in the R e a d m e file. For your convenience, the text of this file is displayed
immediately after the installation is complete. (If you need to read it
again, you can do so with any text viewing utility. Just open the file
r e a d m e . t x t on the CD-ROM.)
TO START PLAYING:
• Make sure that the This Means War CD-ROM is in its drive. (That is,
unless you chose the T y p i c a l installation option and have played at
least once before. Even in this case, however, if there is no CD in the
drive, there will be no game music.)
• If Windows is not already active, start up Windows.
• Make sure that no other applications are running.
• Double click on the This Means War i c o n .
Have fun!
THE TECHNICAL STUFF
Page 8

MICROPROSE ON-LINE SERVICES
Bulletin Boards
MicroProse UK +44 (0) 1454 327083 (14,400 baud)
+44 (0) 1454 327084 (14,400 baud)
MicroProse Germany +49 (0) 5241 946484 (28,800 baud)
MicroProse USA +1 410-785-1841 (28,800 baud)
Spectrum HoloByte +1 510-522-8909 (14,400 baud)
C o m p u s e r v e
MicroProse Europe Mailbox 7 1 3 3 3 , 3 1 4
MicroProse Germany Mailbox 7 4 7 7 7 , 3 3 2 6
MicroProse USA Mailbox 7 6 0 0 4 , 2 2 2 3
Spectrum HoloByte Mailbox 7 6 0 0 4 , 2 1 4 4
MicroProse and Spectrum HoloByte also have Public Forums and Library
areas for comments, questions and files. We can be found in Game
Publishers Forum "B" (GO GAMBPUB)
D e l p h i - I n t e r n e t
MicroProse Europe operates a complete forum for our users where
patches, updates, demos and product information may be downloaded.
This area may be found on UK Delphi.
MicroProse USA forum US-DELPHI, GAME SIG
MicroProse Europe forum UK-DELPHI, FEATURED FORUMS, MICROPROSE
MicroProse USA Mailbox M I C R O P R O S E 3
MicroProse Europe Mailbox M P S _ E U R O P E
F i d o n e t
MicroProse Conference Node 1: 2617/107
G e n i e
Scorpia RT, Keyword: " S c o r p i a "
MicroProse USA address M I C R O P R O S E
MicroProse Europe address M P S . U K
I n t e r n e t
E - M a i l MicroProse Europe 7 1 3 3 3 . 3 1 4 @ c o m p u s e r v e . c o m
MicroProse Germany 7 4 7 7 7 . 3 3 2 6 @ c o m p u s e r v e . c o m
MicroProse USA 7 6 0 0 4 . 2 2 2 3 @ c o m p u s e r v e . c o m
Spectrum HoloByte 7 6 0 0 4 . 2 1 4 4 @ c o m p u s e r v e . c o m
F T P: The MicroProse FTP site features a complete library of the latest
updates, demos and product information.
Site address: f t p . m i c r o p r o s e . c o m
World-Wide-Web: Entry to our WWW home pages can be achieved by
accessing http://www.microprose.com from your Web Browser
s o f t w a r e .
vii
Page 9

SOLD OUT CUSTOMER SERVICES
United Kingdom
T e l e p h o n e : +44 (0) 171 721 8767 (0900-1730) GMT/BST)
Fax: +44 (0) 171 721 7453 (0900-1730) GMT/BST)
Monday to Friday
Unit 308, The Chandlery, 50 Westminster Bridge Road, London SE1 1 7QY.
The Ridge, Chipping Sodbury, Bristol BS17 6BN, UK.
Tel: 01454 893900
MADE IN THE UK
MP191236T/SR
Page 10
THIS MEANS WAR
™
MicroProse
The Ridge, Chipping Sodbury, Bristol BS17 6BN, UK.
Tel: 01454 893900
©1995 MicroProse Software, Inc.
This book may not be reproduced in whole or in part, by mimeograph or photocopy or any other means without
permission, with the exception of quoting brief passages for the purpose of reviews.
MADE IN THE UK
MP191236MANR
Page 11
TABLE OF CONTENTS
CREDITS . . . . . . . . . . . . . . . . . . . . . . . . . . . . . . . . . . . . . . . . . . . . . . . . . . . . . . iii,iv
INTRODUCTION . . . . . . . . . . . . . . . . . . . . . . . . . . . . . . . . . . . . . . . . . . . . . . . . . . . . 1
TUTORIAL . . . . . . . . . . . . . . . . . . . . . . . . . . . . . . . . . . . . . . . . . . . . . . . . . . . . . . . 5
INTERFACE . . . . . . . . . . . . . . . . . . . . . . . . . . . . . . . . . . . . . . . . . . . . . . . . . . . . . . . 9
10
11
13
13
13
19
24
24
COMBAT . . . . . . . . . . . . . . . . . . . . . . . . . . . . . . . . . . . . . . . . . . . . . . . . . . . . . . . 26
26
27
28
30
UNITS. . . . . . . . . . . . . . . . . . . . . . . . . . . . . . . . . . . . . . . . . . . . . . . . . . . . . . . . . 31
31
32
33
35
40
YOUR ALLIES . . . . . . . . . . . . . . . . . . . . . . . . . . . . . . . . . . . . . . . . . . . . . . . . . . . . 46
46
47
48
49
YOUR OPPONENTS . . . . . . . . . . . . . . . . . . . . . . . . . . . . . . . . . . . . . . . . . . . . . . . . . 50
50
51
52
53
53
APPENDIX . . . . . . . . . . . . . . . . . . . . . . . . . . . . . . . . . . . . . . . . . . . . . . . . . . . . . . 54
9
THIS MEANS WAR
Page 12
CREDITS
Doug Kaufman
Jeff Johannigman
Jeff Dee
Ellen Guon
Benjamin Ellinger
Jonah Ellinger
Stephen Beeman
Susan Hustace
Steven Ray Austin,
Greg Burrow, Dr. Cat,
Michael J. Crossmire,
Cody A. Davis, Jeff Dee, John Funk,
Jodi Hickcox, ‘Manda,
George Purdy
George Sanger, Dave Govett,
Joe McDermott, Kevin Phelan
Tracy Goudie
John Gillies
Tracy Goudie
Naomi Anise
Steve Austin
Cody A. Davis
Corel Professional Photos
Expert Software, Inc.
Todd Wolfson
Katherine Lawrence
‘ M a n d a
Taylor Gibler
Dennis Bleier
Michael Silverstone
Cannon Pritchard
iii
Page 13
Beth Kaufman
Ellen Guon
Lewis Sims
Jamie Bard
Teresa Avallone, Jeff Dee, ‘Manda,
Dave Govett, Joe McDermott,
Kevin Phelan, and George Sanger
Ted Paulsen, Lisa Smith
M. Christine Manley
John Possidente
Christopher Nisseley
Cesar Novoa
Bill Krauss
Lindsay Riehl
Teresa Avallone
Ron Evans
Sean Owens
Don Emmel, Tammy Talbott
Mike Prendergast,
Mike Richardson, Frank Brown,
Robbie Motai
Geoff Gessner, Dan Walker,
Darren Brown, Vaughn Thomas
Sean Owens
Dave Ellis
Special Thanks to
Colonel Kamndowsky &
Camp Mabry of Austin, Texas
system technology provided by Illusion Machines Incorporated.
Windows sound drivers supplied by John Miles of Miles Design.
THIS MEANS WAR
Page 14

INTRODUCTION
“Turning and turning in the widening gyre
The falcon cannot hear the falconer;
Things fall apart; the center cannot hold;
Mere anarchy is loosed upon the world,
The blood-dimmed tide is loosed, and everywhere
The ceremony of innocence is drowned;
The best lack all conviction, while the worst
Are full of passionate intensity”
n the last years of the twentieth century, lifestyles reached a climax
of avarice and greed. Governments became entangled in economic
I
competition against super-conglomerates. Entire nations defaulted
on loans, causing banks to falter worldwide. People rushed to withdraw
their life savings, dealing severe financial damage to the remaining banks.
Just as had happened in 1 9 2 9, the world was plunged into a time of want,
imbalance, and desperation.
Most companies went bankrupt, but the mightiest amongst them were
merely reduced from mega-powerful corporations to major companies.
One such firm, M.R., Inc., bought Microfirm, once the most promising
computer game manufacturer. As is typical in such takeovers, the top
executives of Microfirm were fired and replaced by administrators sworn
to uphold the new policies. Sheldon Hawkins II, founder and former CEO
of Microfirm, was so distraught at the loss of his company that he tried to
commit suicide. He was committed to a mental institution. M.R., Inc.
continued to thrive as the need for escapism grew.
Two years ago, a new game was released by a brand new manufacturer
called Mad Rabbit Software. The game “Snark Hunter” first appeared on
various networks and on-line services, with the first level as a free sample.
No one knew anything about the game’s creator save that this creative
genius went by the name “Shadowhawk”. The demo spread
like wildfire to every college and university campus throughout the world.
1
Page 15

Within six months of ’s commercial release, everyone was
playing the game and it was on every home computer, office computer,
and notebook; there was even a special version for hand-held computers.
The multi-player version was introduced via satellite to all the cable and
telephone systems. Everybody loved .
On Monday morning, March 1 5, at 1 2:0 1 A M, the world was set back one
hundred fifty years. The computers that had run heating and air
conditioning, yielded stock prices, printed term papers, and given the
populace relief from stress died. At first, no one knew what was
happening. American and European satellites confirmed that Japan had
suffered a nationwide power outage. When the Smolensk nuclear reactor
melted down, the world panicked.
Trying desperately to contact countries inside the spreading blackout,
Europeans and Americans worked frantically to comprehend the situation.
Was the source of the devastation from Asia or another continent, from
outer space, or from inside the planet’s core? No one knew.
The enigmatic answer first emerged in a radio message from Germany
to England: “Unknown (ssh)rus attache(sshzz) to computers program. Shut
down all(sshzz... shzhzz...)” It was too late; Germany and the rest of
Eastern Europe fell to the blackout that was rapidly covering the world. It
was the computers; they were the source of the problem. The remaining
nations quickly debugged all computer programs, finding nothing wrong.
When England finally succumbed, the two American continents shut down
all nuclear reactors and declared martial law.
THIS MEANS WAR
Page 16
A very few small regions managed to retain the power and
conveniences of modern living. There were mass migrations to these
areas, which were not equipped to support the sudden population
explosion. Mass transport ground to a halt, and food became scarce.
Famine overtook both the darkened major cities and the tech-possessing
enclaves. Violence followed.
Survivors of the violence formed into groups centred around cunning,
charismatic, and powerful individuals. The search for food evolved into a
search for weapons and technology. At first, it was only to protect against
looters, but eventually weapons once again became a means to
acquire power.
Universities with their own backup power sources and isolated
computers had found the source of the mayhem. It was .
Expertly hidden computer viruses with specific purposes and the ability to
spontaneously mutate to avoid detection had brought the world to its
knees. Efforts to locate went into high gear. Strangely, no
trace of could be found. She, he, or they seemed to
never have existed.
Rumours about began to circulate, originating with the
Riot Tribes that ravaged the countryside. had supposedly
returned, this time with an army and the power to take over the world. No
one knew who, where, or what was, but occasionally a
straggler would be found stumbling across the countryside babbling about
UFOs, humans with eyes like cats that could see in the dark, and other
such strangeness.
3
Page 17
A few months ago, General Noah Adams rallied the remnants of the US,
Canadian, Mexican, and Nicaraguan military under a single banner. By
using his charisma and the theories of history’s top commanding officers,
General Adams welded his troops into a single fighting force. One day,
General Adams’ Aide de Camp shows up on your doorstep, introduces
herself as Major Cassandra Clark, and tells you that your are needed. She
has the papers ready to push through your promotion to Colonel; all you
need to do is pack.
SPECIAL NOTE:
THIS MEANS WAR
Page 18
TUTORIAL
elcome to This Means War, a combat simulation in which
you, a soldier of the Free World Alliance forces, fight for the
W
fought over precious food supplies, a world where power matters more
than morals, a world where only the strong survive.
To start this tutorial, click on the START GAME button found in the Main
Menu. After Major Clarke gives you a briefing of the current situation, a
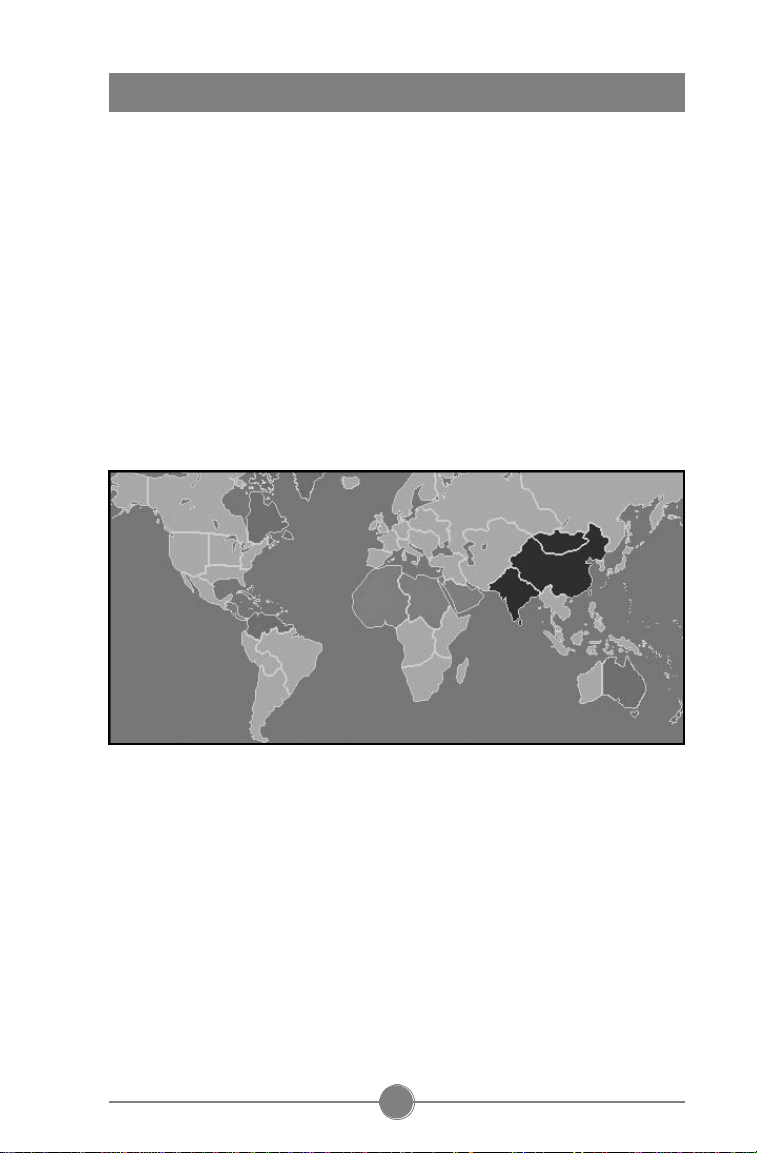
geopolitical map appears. This map outlines areas owned by the FWA and all
other groups in their organisational colours. After each victory, the area that
you fought for changes to orange, the colour of the FWA. Your enemies,
however, are also trying to expand their territories, so don’t be surprised
when an area that was previously neutral comes under enemy ownership.
fate of a world gone insane. It is a world where battles are
When you are finished looking at the map, click anywhere on the screen
to get to the battle. The game starts paused, giving you a chance to look at
your forces. Right now, your forces consist of two Light Infantry units and
one Battle Bike. Also, you have a Steel Mill, two Oil Wells, a Command
Centre, and a Farm. Finally, you have a Barracks from which you can
create more Light Infantry units or Engineers. It’s a good thing, too,
because you’re going to need a larger force if you plan to protect your
complex from invasion.
5
Page 19
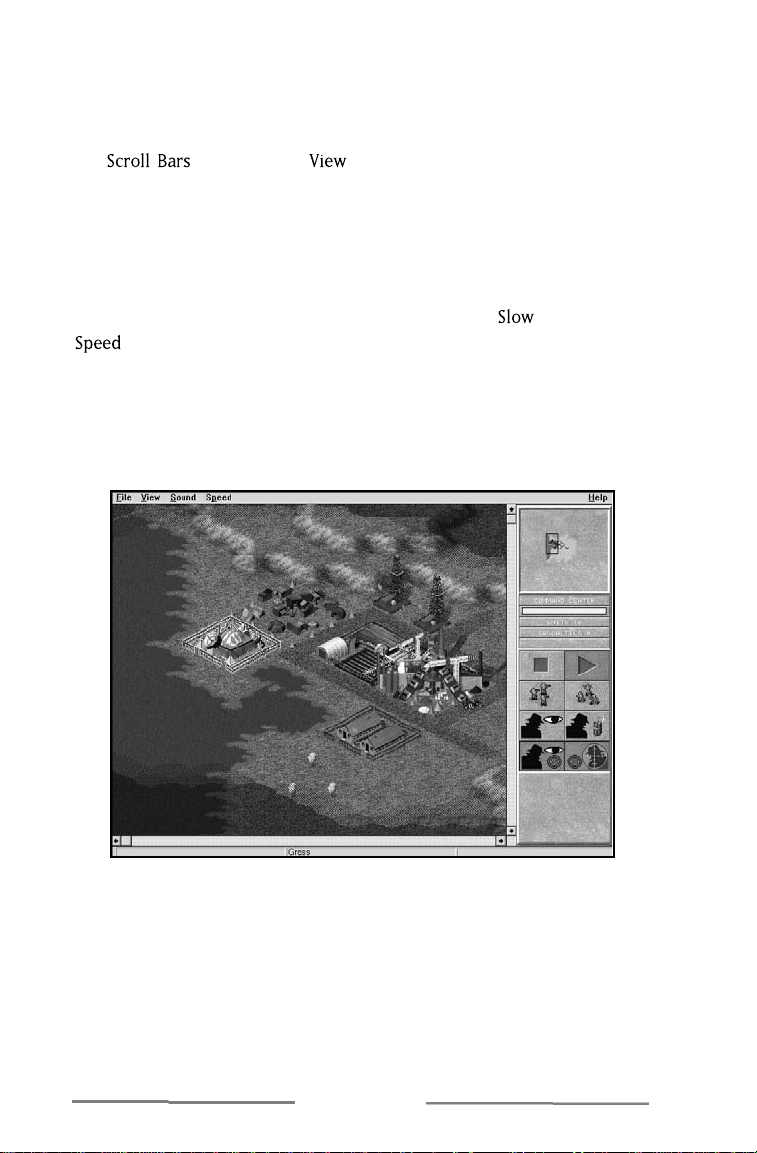
Before we continue the game, get used to moving the map around with
the arrow cursor. Do this by right dragging towards the Battle Screen
border. If you would prefer to move the map by using scroll bars, click on
the option in the menu. Just as in any other Windows
application, the horizontal scroll bar moves the map view left and right
and the vertical scroll bar moves the map up and down.
Now, click on the different structures that you see. Notice that each
structure has a specific toolbar. For a description of each button inside
that toolbar, refer to the section on Basic Toolbar Information and Orders.
After you have examined each toolbar, click on the option in the
menu. This starts the game at a slow pace. As soon as possible, click
and drag on the Command Centre up and to the right, until the red square
that appears turns green. After it turns green, release the mouse button.
You have just built your first Tent City. Seconds later, you will see your
Tent City grow into luxurious houses.
By this time, your soldiers have spotted enemy troops coming from the
east. Before they charge to intercept, click on one of your Light Infantry.
In its toolbar, click on the Stop button. Do the same for the other Light
Infantry Unit.
THIS MEANS WAR
Page 20

Setting the Light Infantry units to Stop makes the units hold their
positions. When an enemy unit comes into range, the Light Infantry units
will fire but maintain their position.
Now, click on the Barracks structure. When the toolbar appears, click
on the bottom button. From the unit menu, click on Light Infantry. Next,
click on the Quota button until a two rows of tanks appear inside of the
button. Finally, you’re going to have to set the Barracks on go by clicking
on the Go button and attack by pressing the Attack button. You have just
ordered your Barracks to produce Light Infantry units indefinitely.
When the new Light Infantry unit appears, click on it to view its
toolbar. In a unit toolbar, you can see the amount of damage that the unit
has taken (noted by the colour bar) and the amount of kills that the unit
has (noted by the skulls). Obviously, your new unit has no damage and no
kills. Click and drag on the Light Infantry unit to an enemy unit. When the
cursor turns into a crosshair, release the mouse button. Your Light
Infantry attacks the enemy unit. Notice that the target for the Light
Infantry unit is outlined in red. This designates that unit as a target. As
each new Light Infantry unit appears, click and drag on that unit to a
target, just as you did with the first unit. Now, watch the fire fight.
Eventually, you’re going to have enough units to overcome the enemy
opposition. When that happens, you’re going to have to hunt for the
enemy complex and destroy their Command Centre. To send your troops
out, click on a unit and drag it to the east. Once you reach a point far
enough away from your complex, release the mouse button. Notice that a
small white oval appears over the place in which you just released the
mouse button. This signifies that point as the unit’s destination. Move all
of your units in the same manner.
After a little time, your units find the enemy complex and start to
attack it. Continually send new troops in the direction of the enemy
complex to help in its destruction. After your troops find the enemy
Command Centre, order them to destroy it by clicking on a Light Infantry
unit and dragging that unit to the enemy’s Command Centre. Once the
Command Centre is destroyed, you win.
7
Page 21

As an overview, here are some suggestions you should keep in mind
each time you play This Means War.
• Always make sure you have enough population and food to support
your military. Do this by clicking on any population centre that you
own. Look at its toolbar. If you don’t have enough population to
support your military, it becomes harder to create more units.
• Always leave a defensive force behind to protect your complex. Just
because you are on the verge of victory doesn’t mean you can’t
still lose.
• Lastly, a note from Sun Tzu, an ancient Chinese philosopher whose
works on war still apply today. “In general, the strategy for
employing the military is this: If your strength is ten times theirs,
surround them; if five, then attack them; if double, then divide your
forces. If you are equal in strength, engage them. If fewer,
circumvent. If outmatched, avoid them.”
THIS MEANS WAR
Page 22

INTERFACE
Every game of This Means War starts at the Main Menu. Here, you can:
• Start a New Game,
• Load an old game,
• View the I n t r o d u c t i o n,
• Change the Settings o r
• Exit.
o start a New Game, click on the START GAME button. To load an
old game, click on the LOAD GAME button. You must then select the
T
file name of your saved game. If you wish to see the introduction,
click on the PLAY INTRO button. To leave the game, click on the
EXIT button.
9
Page 23

In order to receive instructions from Major Clarke, you are equipped with
the Deetronics CMU 7 0 0 0 video link transceiver. It uses an encrypted
satellite up-link system to relay messages from Command H.Q. to the unit
itself. It allows for both voice and video information. Through this piece of
equipment, Major Clarke is able to send you your orders and
intelligence information with a low probability of enemy interception.
Feel safe that the information she gives you comes from her intelligence
operatives and not from enemy infiltrators. Sometimes, however, your
enemies might be able to break through the encrypted codes to relay
a message.
When you first receive a message from Major Clarke, she gives you a
briefing of the current situation at home and the mission you’ve been
assigned. Listen to her instructions carefully. After her briefing, a colour
coded map representing the current geopolitical boundaries appears.
With each victory, another country enters into the Free World Alliance.
THIS MEANS WAR
Page 24

After you finish with the briefing, your view switches to the Battle Screen.
Here, you move your units, give them orders, and find out information
about your enemy. On the right side of the Battle Screen is the Unit
Toolbar. Along the top row of the Battle Screen are your menu options.
These are File, View, Sound, Speed, and Help. Within each of these menus
is a list of options.
F i l e
By clicking on the Surrender option, you end the mission
without completing it. You then return to the Main Menu.
To save the game that you are playing, click on the
Save option.
To save the game under a different game name, click on the
Save As option. When the Save As window appears, type in
the new name of the saved game. When you’re finished,
click on the Save button.
To quit the game and return to the Program Manager, click
on the Exit option.
11
Page 25

V i e w
To toggle the Unit Toolbar on and off, click on the Toolbar
option in the Settings Menu.
To toggle the Status Bar on and off, use the Status Bar option
in the Settings Menu.
To toggle the Scroll Bar on and off, click on the Scrollbars
option in the Settings Menu.
To toggle the Map Tips on and off, use the Map Tips option.
When the Map Tips are on, a small box appears, naming
any object that the cursor is over in the Settings Menu.
To toggle the shading on and off, click on the Shading
option in the Settings Menu. Turning the shading on
delineates the outer limit of units’ visual ranges.
To toggle the Button Tips on and off, use the Button Tips
option in the Settings menu. With Button Tips on, a small
box tells you the name of the button that the cursor is over.
To toggle the CMU (the Mission Briefing Screen) on and off,
click on the CMU option in the Settings Menu.
By clicking on the Properties option, you can view what
type of units you have, the type of units your army has
killed, the speed of the game, the type of song that plays,
and the level of sound that the effects and the music play.
To view the world geo-political map, click on the World
Map option.
To view your score, click on Score option. Your score consists
of the amount of time that you have played in the mission, the
total kills your troops have, and the total kills your enemy has.
To view a hint, use the Hint option. When you use this
option, Major Clarke gives you more information on the
enemy via the CMU video link.
S o u n d
To increase or decrease the music level, click on the Music
Level option and select the appropriate volume.
To increase or decrease the sound effects level, click on the
SFX Level option and select the appropriate volume.
THIS MEANS WAR
Page 26

S p e e d
To pause game play at any time, you can use the Pause
option. You can still issue orders and assign tasks while the
game is paused.
To play at a slow speed, click on the Slow option.
To play at the normal speed, click on the Normal option.
To play at a fast speed, click on the Fast option.
The Status Bar is the horizontal bar on the bottom of the screen.
Whenever you place the arrow over a unit, information about that unit
appears in the Status Bar. You can see the Unit Name, the rank of the unit,
Hit points or Damage Level, and what that unit is building along with the
amount of minerals it needs to complete the task.
To move the view on the Battle Screen, click on the Map Window in the
upper-right hand corner of the screen. By clicking on a specific section of
the Map Window, you move the Battle Screen to that point. In this way,
you can quickly give orders to your soldiers all across the battlefield.
13
Page 27

Whenever you want to give commands to your personnel, vehicles, or
buildings, use the Toolbar or right click on the unit. The Toolbar contains
general information about that unit and the commands it can accept.
Below is a list of all the basic orders available in This Means War.
BASIC INFORMATION
The type of unit (i.e., Light Infantry, Heavy Tank, Steel Mill, etc...).
The Hit Point Bar gives you a graphical representation of the remaining
hit points of the unit in question. If the bar is green, the unit has more
than two-thirds of its total hit points remaining. If the bar is yellow, the
unit has more than one-third but less than two-thirds of its total hit
points remaining. If the bar is red, the unit has less than one-third of
its total hit points remaining. To see the actual number of points left
for a unit on your side, move the cursor over the unit on the Battlefield
Screen. The number of hit points appears on the Status Bar. To see the
amount of damage done to an enemy unit, move the arrow over the
unit. It is either Undamaged, Damaged, or Badly Damaged. Damaged
units have more than one-half of their hit points remaining, whereas
Badly Damaged units have less than one-half remaining.
If the unit has a weapon that it can fire, this gives you the amount of
time that the unit takes to reload its weapon before it can fire again.
If a unit can carry minerals, this gives you the number of minerals the
unit is currently carrying.
If the unit can build something, this gives you information about what
it is currently building.
THIS MEANS WAR
Page 28

If the unit is building something, this bar gives you information about
how many more minerals it needs to finish.
This gives you the unit’s rank. The higher the rank of a unit, the more
accurate they fire and the harder they are to hit. Also, higher ranked
troops are able to lead more units in a formation.
This gives you the efficiency percentage of the unit. Efficiency affects
the amount of resources and time needed by the unit to complete its
task (minerals for Engineers, food for people, etc...). After completing
construction, this number goes up by one.
Units that provide energy, population, or food have a Material Bar.
The Material Bar consists of two bars, one on the right and one on the
left. The bar on the right is the total amount of materials available.
The bar on the left is the amount of materials required. If the bar on
the left is greater than the bar on the right, production and movement
slow. If the required materials far outweigh the materials available,
you might have to build another structure that can produce the
required material. For more on structures, refer to the Units section.
This tells you the number of kills the unit has so far. A white skull
represents one kill, a red skull equals five, and a blue skull represents
ten kills. Kills give credit towards the possibility of promotion in the
field. Promoted troops fire more accurately and are more difficult
to hit.
If the unit can carry infantry, this tells you how many infantry units it
is carrying.
15
Page 29

BASIC ORDERS
By clicking on this button, you order a unit to seek
to attack and destroy nearby targets.
This button is only available for engineers and
construction vehicles. Once you click on this button,
the unit begins building at a designated position.
Clicking on this button stops the unit from attacking
until it is otherwise specifically told to attack.
This button is only available for units that are
grouped together. Click on the button and the
Formation window appears. For more on formations,
refer to Groups in the Combat section.
This button is only available for units that
can build. By clicking on this button, you
determine what unit is going to be built.
This button is only available in the Dump Truck
toolbar. After you click on this button, the Dump Truck
starts to lay a dirt road as it approaches a specified
point. Once it uses all of its minerals, the Dump
Truck returns to a friendly mine, reloads, and
continues laying a dirt road.
THIS MEANS WAR
Page 30

This button is only available for units in a formation
or units that are carrying artillery or infantry. By
clicking on this button, you order those units to
disband or drop their units.
Click this button to allow units to follow your orders.
Clicking on this button orders the unit to attack its
target until either that target or the unit is destroyed.
This button is only available on the Dump Truck
toolbar. When you click on this button, the Dump
Truck seeks out nearby friendly mines to acquire
minerals. It then moves to a friendly Steel Mill
unless it is also in a Road Mode.
This button is only available on the Dump Truck
toolbar. By clicking on this button, you order the
Dump Truck to start to lay a paved road as it
approaches a specified point. Once it uses all of its
minerals, the Dump Truck returns to a friendly
mine, reloads, and continues paving the road.
This button is only available for units that build.
Clicking on this button to change the unit’s building
quota to None, Single, Low, or High. A None quota
causes the unit to cease building. A Single quota
causes the unit to build only one. A Low quota
causes the unit to build five units. A High quota sets
the unit to build continuously.
17
Page 31

By clicking on this button, you order the unit to
move away from all nearby threats.
This button is only available for units that build. By
clicking on this button, you change the speed at
which the unit builds. The faster you want
something built, the more minerals it costs.
Clicking on this button causes a unit to stop moving and
producing. However, it does not stop the unit from
attacking enemy units within weapon range.
THIS MEANS WAR
Page 32

There are certain orders only available to specific units. Although these
orders aren’t necessary to win the game, they might prove helpful to you
during battle.
ADVANCED INFORMATION
This number appears only in the Command Centre toolbar. It gives
you the number of units on your side.
This number also only appears in the Command Centre toolbar. It
gives you the number of units killed on your side.
This number only appears in the Command Centre toolbar. It gives
you the total number of enemy units killed. The number of kills is
represented by coloured skulls. A white skull symbolises one kill. Red
skulls equal five, and blue skulls represent ten.
This number only appears in the Airfield toolbar. It gives you the
number of fighters currently in your hangar.
This number only appears in the Airfield toolbar. It gives you the
number of jets currently in your hangar.
This number only appears in the Airfield toolbar. It gives you the
number of bombers currently in your hangar.
19
Page 33

ADVANCED ORDERS
This button is only available in the Research Facility
toolbar. By clicking on this button, you order the
research facility to work primarily on armour research.
This button is only available in the Aircraft toolbar.
Click on the button to change the aircraft’s altitude
to Low, Medium, or High. A higher altitude can be
beneficial, because the aircraft can view a larger
amount of area. However, this also allows other
units to see the aircraft from farther away.
This button is only available in the Command Centre
toolbar. By clicking on this button, you determine
your chances of catching enemy spies. For more
information on counterintelligence, refer to Spying
in the Combat section.
This button is only available in the Scout and Scout
Bike toolbars. By clicking on this button, you order
the scout to illuminate a designated tile. This is
generally used as a guide for artillery fire.
This button is only available in the Research Facility
toolbar. By clicking on this button, you assign the
Research Facility to primarily work on engine
r e s e a r c h .
THIS MEANS WAR
Page 34

This button is only available in the Command Centre
toolbar. By clicking on this button, you tell your spies
to gather information about the enemy. You can use
this information to persuade enemy units to leave
their side and join yours. For more about gathering
information, refer to Spying in the Combat section.
This button is only available in the Command Centre
toolbar. By clicking on this button, you determine
the odds of your spies succeeding in their missions.
For more on intelligence spending, refer to Spying
in the Combat section.
This button is only available in the Missile Silo
toolbar. By clicking on this button, you launch an
ICBM toward the enemy Command Centre.
This button is only available in the Missile Silo
toolbar. By clicking on this button, you launch a
rocket with a spy satellite payload. Satellites
increase the chance of your units spotting other
enemy units.
This button is only available in the Research Facility
toolbar. By clicking on this button, you assign the
Research Facility to work primarily on munitions
r e s e a r c h .
This button is only available in the Airfield toolbar.
When you click on this button, the Airfield moves one
bomber onto the runway, preparing it to accept orders.
21
Page 35

This button is only available in the Airfield toolbar.
When you click on this button, the Airfield moves one
fighter onto the runway, preparing it to accept orders.
This button is only available in the Airfield toolbar.
When you click on this button, the Airfield moves one jet
onto the runway, preparing it to accept orders.
This button is only available in the Research Facility
toolbar. By clicking on this button, you assign the
Research Facility to primarily work on production
r e s e a r c h .
This button is only available in the Supply Depot
toolbar. By clicking on this button, you cause
nearby damaged buildings to undergo repair.
This button is only available in the Supply Depot
toolbar. By clicking on this button, you cause
nearby mobile units to undergo repair.
This button is only available in the Command Centre
toolbar. By clicking on this button, you order your
spies to sabotage and destroy enemy units. For
more information about sabotage, refer to Spying in
the Combat section.
THIS MEANS WAR
Page 36

This button is only available in the Airfield toolbar. By
clicking on this button, you order all remaining bombers
in your airfield to launch continuously.
This button is only available in the Airfield toolbar. By
clicking on this button, you order all remaining fighters
in your airfield to launch continuously.
This button is only available in the Airfield toolbar. By
clicking on this button, you order all remaining jets in
your airfield to launch continuously.
This button is only available in the Scout and Scout
Bike toolbar. By clicking on this button, you tell the
scout to follow a nearby target.
This button is only available in the Barracks toolbar.
It allows you to upgrade the rank of any nearby
units. Once the promotion becomes available, click
and drag to the unit you want assigned to be an
officer. When you do this, the unit gains all of the
advantages of its new rank.
23
Page 37

To activate a unit that has the ability to move, click on it. Once it
becomes active, its toolbar appears. Click and drag that unit to its new
position. When you release the mouse button, a small white oval appears
over the point where the unit will end its movement.
Sometimes obstructions — enemy units and the like — prevent a unit
from reaching its specified point. If a unit cannot reach the point that you
want it to because of an obstruction, it will approach as close as possible.
Once the unit can reach the destination, it will continue moving.
After you have activated a unit, click on the proper order in its toolbar.
In some instances, you have to give the unit a target in order for it to
successfully complete its order. In that case, click and drag the unit to the
target, then release the mouse button. Below are three examples of giving
orders to a unit.
1
I want my barracks to produce a unit of Light Infantry. I click on the
barracks in the Battle screen, then I click on the b u t t o n
found in the toolbar. From the list, I click on Light Infantry. Next, I
click on the Go button. Now, I click on the button to set the
quota at which the barracks builds the unit. Since I only want one unit
of Light Infantry, I click on the button until I reach Single Quota. With
these orders, the barracks starts to produce a Light Infantry unit.
THIS MEANS WAR
Page 38

2
I want my newly created Light Infantry unit to attack an enemy Light
Infantry unit that has strayed too far into my complex. First, I click on
my Light Infantry unit to activate it, then I click and drag the cursor
from my Light Infantry unit to the enemy unit I want to destroy. As
soon as the arrow cursor goes over the enemy unit, the cursor changes
into a crosshair. I then release the mouse button to target the unit. My
Light Infantry then moves towards the enemy unit and attacks it.
3
I want my Engineer unit to build a Gun Turret next to one of my roads.
First, I activate the Engineer by clicking on it. Second, I click on the
button in the Engineer toolbar. From the list that
appears, I click on Gun Turret. Next, I click on the b u t t o n .
Then, I click and drag the arrow cursor from the Engineer to the place
I want the Gun Turret built. When the flag goes over an area that can
accept the Gun Turret, a green square appears. When I reach the area
in which I want the Gun Turret, I release the mouse button and a
square of cones appears. This labels the area as a site for
construction. The Engineer unit moves to this site and starts building.
25
Page 39

COMBAT
henever you start a game of This Means War, you send
troops into battle. This means that in order to achieve victory,
W
manoeuvring your troops into positions where you can rain down fire, you
can win. But before you send that Light Infantry unit up against that
enemy Heavy Tank across the way, you have to know if you stand a chance
of winning— and if so, how much of a chance.
you must conquer your enemies through combat. By
The amount of damage a unit will inflict depends on the type of
weapon it uses and the target unit’s armour. A unit can do serious damage
or barely scratch its target. The damage chart in the Appendix gives you
the average amount of damage a weapon can cause against a specific level
of armour. However, some units have weapons that are capable of
punching through armour or damaging several units at the same time. If a
unit has a weapon code of A P attached to its damage number, the weapon
is armour piercing. Whenever that unit strikes a target with that weapon,
the target armour is halved for determining damage.
THIS MEANS WAR
Page 40

If a unit has a weapon code of E X attached to its damage number, the
weapon is considered explosive, striking all units inside the explosion.
Even units away from the explosion can receive damage from
flying debris, so be careful to keep all of your units away from a
targeted explosion.
If a unit has a weapon code of I attached to its damage number, then
the weapon is fired indirectly. This means that the weapon can fire in an
arc, over terrain and buildings.
Finally, if a unit has a weapon code such as 3 x 1 5 or 2 x 3 0, that unit
has multiple weapons equal to the first number in the weapon code. Each
of these weapons fires simultaneously. Thus, a unit with a weapon code of
3 x 1 5 has three weapons that fire at the same time, giving the target a
triple punch.
The number in a weapon code is the average amount of damage that
the unit can cause to an unarmoured target.
A unit’s movement is affected by the terrain through which it is moving.
Consult the Appendix for the chart that gives you the multiplier to a unit‘s
movement in terms of specific terrain types.
27
Page 41

When you want multiple units to do something as a group, you can
either group them or “mass select” them. To mass select units, click on a
point away from those units and drag over the units you’re selecting.
When the square surrounds the units, release the mouse button. Notice
that all the selected units are outlined. Now, you can give them all the
same orders. Click on any one of the outlined units and give it orders. As
soon as you do, all the selected units receive the same orders. Click on a
unit not a member of the mass selection to return to normal selection.
To form a group, click on a unit you want in the group and drag to
another unit that you want included. When you release the mouse button,
one of the units becomes the active unit (outlined in white). The others are
blue (same or lower rank), and the leader is blinking. Repeat this until all
the units you want are in the group.
To give the entire group orders, simply give them to the leader. If you
want a specific member of a group to do something different than the rest,
simply click on that unit and give it orders (this removes it from the group).
To return a unit to a group, click on that unit. Now, click on the Change
Formation button in the unit’s toolbar. Note that all units near the leader
in groups led by a ranked unit (e.g., Lieutenant, Captain) gain attack and
defense bonuses. However, once a unit leaves the leader’s vicinity, that
unit’s bonuses are lost.
THIS MEANS WAR
Page 42

Units in formation are more effective than their scattered
counterparts, as they can concentrate firepower. To put a group in
formation, click on the leader, then on the Change Formation button. The
Formation screen appears. There are eight different formations from
which to choose; seven are detailed below. The last, Standard, keeps the
units near each other, but in no specific formation.
Units in a Row walk side by side.
Units in a Double Row walk side by side, one row behind
the other.
Units in a Column walk one in front of the other.
Units in a Double Column walk one in front of the other, in
two side-by-side columns.
Units in a Scoop walk in a position 4 5 degrees away from
each other, with the point in the rear.
Units in an Inverted Scoop walk a position 4 5 degrees away
from each other, with the point ahead.
Units in a Square walk in a formation where each side of the
formation has an equal number of units (i.e., 4 x 4, 3 x 3,
1 0 x 1 0, etc...).
29
Page 43

If you want to change the facing of the formation, click on the desired
direction arrow. To change a specific unit’s position inside a formation,
click on the desired unit to activate it. Click on the Change Formation
button and then on the Change Position button. When you are ready to
disband a formation, click on the Disband button in the leader’s toolbar.
One final note about Formations. Normally, there can only be six units
in any one formation. However, if the formation is led by a ranked unit
(e.g. Lieutenant, Captain) there can be more than six. If there is a
Lieutenant then there can be eight units in the formation. If there’s a
Captain, then ten, if a Major, twelve, a Colonel, fifteen, and a General can
lead twenty units in the formation. There can only be one leader in any
formation so the numbers are not cumulative.
On spying, Sun Tzu says “... as for armies you want to strike, the cities
you want to attack, and the men you want to kill, you must first know the
names of the defensive commander, his assistants, staff, door guards, and
attendants. You must have spies search out and learn them all.” When
fighting a war, you have to consider that your enemies are trying to
undermine your authority, reap dissension in your ranks and sabotage
your supply lines. Naturally, you’d like to do the same to them, while at
the same time protecting yourself from enemy infiltrators. To send spies
out, to either sway enemy units to your side or to sabotage them, you need
to spend resources. The more resources you spend, the greater your
chance of success. To do this, go to the Command Centre toolbar. Click on
the Intelligence Spending button to set the amount of minerals you want
to spend per second.
Now, click on either the Gather Information button or the Sabotage
button to set the type of spy. By gathering information, you are able to
sway units to your side. By using sabotage, you are able to damage and
destroy enemy units. This includes personnel, vehicles, and structures.
Naturally, your enemies are trying to do the same thing to you, so you
might want to spend some resources in counterintelligence. To do this,
click on the Counter Intelligence button in the Command Centre toolbar.
As with Intelligence Spending, the more minerals you spend per allotment,
the greater your chance of stopping enemy infiltrators. A one dollar
allotment approximates ten minerals. Two approximates twenty and three
approximates forty.
THIS MEANS WAR
Page 44

UNITS
nits are personnel, vehicles, and structures that you and your
enemies use to destroy each other. Each unit has a specific
U
units these functions that you find victory over you enemies and form
alliances with other lands for the FWA.
function. It is through understanding and appropriately assigning
As you advance through This Means War, your scientists discover better
means of production, improved military designs, and better infantry
training. After your scientists perfect these advancements, you will be
able to use these new technologies in your fight for freedom.
When you are able to build a Supply Depot, you can repair structures
and vehicles. Up until that point, your structures and vehicles cannot
get repaired.
Click on either the Repair Building or Vehicle buttons to repair units. If
you want to repair a specific unit, click and drag the Supply Depot to the
unit you want to repair. There is one drawback to the Supply Depot. It can
only repair vehicle and structural damage, not personnel damage.
Personnel, however, repair themselves after a time of rest.
31
Page 45

Once you are able to build a Research Centre, you can spend minerals
on developing advancements that help increase productivity and the
speed, arms, and armour of your units. This new level of technology only
affects units produced after the research breakthrough. Unfortunately, the
advances a Research Centre brings do not carry over to your next mission.
THIS MEANS WAR
Page 46

COMMAND CENTRE
Command Centres are the primary objective in each engagement. In
order to win a battle, you must destroy the enemy Command Centre or all
enemy structures if there is no enemy Command Centre. Command
Centres are also the areas where you give orders to your spies, find out
how many units you have in the battle, how many casualties you have
suffered, and how many kills you have inflicted upon the enemy.
. . . . . . . . . 2 5 0 . . . . . . . . . . . 1 2
RESEARCH CENTRE
Research Centres are areas where your scientists test and develop new
armour, weapon, engine, and production designs.
. . . . . . . . . 2 5 0 . . . . . . . . . . . 1 0
SUPPLY DEPOT
Supply Depots are structures that repair and rebuild units that have
suffered damage through combat.
. . . . . . . . . 2 5 0 . . . . . . . . . . . . 6
33
Page 47

AIRFIELD
Airfields are structures that store aircraft when they are not on a
combat mission. In order to have air units, you must have an Airfield to
store them in. The only unit that does not need an Airfield is a helicopter.
. . . . . . . . . 2 5 0 . . . . . . . . . . . . 6
POPULATION CENTRES
In order to produce units, you must have a population willing to work
for you. The size of your population determines your rate of production.
Without the necessary amount of population, it will be more difficult to
produce any more units. If necessary, you can increase the amount of
population by moving a group to another location to set up a Tent City. To
do this, click and drag from a Population Centre to where you want the
Tent City to appear, then release. You can only build a Tent City next to a
road that you own.
If you don’t have any Population Centre to start with, click and drag the
Command Centre to a suitable spot for a Tent City. As time passes, your Tent
City grows in population. It then expands to become a Trailer Park. After
that, it can expand to Houses, then Apartments, and finally to Skyscrapers.
. . . . . . . 1,0 0 0 . . . . . . . . . . 5 0
. . . . . . . . . . . . 2
. . . . . . . 2,0 0 0 . . . . . . . . . 1 0 0
. . . . . . . . . . . . 4
. . . . . . . 5,0 0 0 . . . . . . . . . 1 5 0
. . . . . . . . . . . . 6
. . . . . . 1 0,0 0 0 . . . . . . . . . 2 0 0
. . . . . . . . . . . . 8
. . . . . . 2 5,0 0 0 . . . . . . . . . 2 5 0
. . . . . . . . . . . 1 0
THIS MEANS WAR
Page 48

FOOD SOURCES
Food is needed to keep your populace happy. If they are not happy,
production goes down significantly. Each citizen requires one unit of food.
Thus a Tent City of one thousand people needs one thousand units of food
to keep them happy. If that food is not supplied, production goes down.
Terrain effects the amount of food that each source can generate. Consult
the Appendix for the chart that gives you the multiplier for food
production in terms of specific terrain types.
. . . 5,0 0 0 . . . . . . . . . 1 0 0
. . . . . . . . . . . . 4
. . 1 0,0 0 0 . . . . . . . . . 1 5 0
. . . . . . . . . . . . 6
MINERAL SOURCES
Minerals are needed to make structures, personnel, and vehicles.
Without minerals, your operations are limited to the amount of units you
have on hand. So, be very careful about protecting your mineral sources.
A Steel Mill is a structure in which all of your minerals are stored for
later use.
. . . . . . . . . 2 5 0 . . . . . . . . . . . . 6
A Mine is a structure that gathers mineral ore from the area on which
it is built. A Mine can only be built on an area rich in mineral
resources denoted by a red ‘x’ on the Battlefield Screen.
. . . . . . . . . 2 5 0 . . . . . . . . . . . . 8
35
Page 49

ENERGY SOURCES
Each vehicle and structure that you own needs energy in order to work
properly. There are three different energy sources that appear in
This Means War. Terrain affects the amount of energy that each source
can produce. Consult the Appendix for the chart with the multiplier for
production levels in terms of terrain types.
. . . 1 0 0 . . . . . . . . . . . . 6
. . . . . . . . . 1 0 0
. . . 1 0 0 . . . . . . . . . . . . 4
. . . . . . . . . . 5 0
. . . 1 0 0 . . . . . . . . . . . . 2
. . . . . . . . . . 3 0
FACTORIES
Factories are the only structures that can build personnel and
vehicle units.
Barracks produce personnel units.
. . . . . . . . . 2 5 0 . . . . . . . . . . . . 6
A Low Tech Factory produces vehicle units at a very slow rate. Its
starting Efficiency Rating is 7 5 p e r c e n t .
. . . . . . . . . 2 5 0 . . . . . . . . . . . . 8
A Mid Tech Factory produces vehicle units at a faster rate than the
Low Tech Factory, but is still slower than the High Tech Factory. Its
starting Efficiency Rating is 1 0 0 p e r c e n t .
. . . . . . . . . 2 5 0 . . . . . . . . . . . . 8
THIS MEANS WAR
Page 50

A High Tech Factory produces vehicle units fastest. Its starting
Efficiency Rating is 1 2 5 p e r c e n t .
. . . . . . . . . 2 5 0 . . . . . . . . . . . . 8
MISCELLANEOUS STRUCTURES
A Bunker provides cover for personnel during enemy attacks. In order
to kill personnel located inside a Bunker, enemy units must destroy
the Bunker first. To get personnel inside a Bunker, click and drag the
personnel unit to the Bunker.
. . . . . . . . . 1 0 0 . . . . . . . . . . . 1 0
A Gun Turret consists of a mechanised gun surrounded by armour.
Gun Turrets often surround vital military installations.
. . . . . . . . . 4 . . . . . . . . . 1 0 0
. . . . . . . . . . . 1 5 . . . . . 1 5
. . . . . . . . 1 0
Radar installations extend the range of sight in the surrounding area.
Oftentimes, radar placed in key areas can give advanced warnings of
massing enemy troops.
. . . . . . . . 1 5 . . . . . . . . . . 5 0
. . . . . . . . . . . . 6
Walls surround military complexes in order to protect vital
s t r u c t u r e s .
. . . . . . . . . 2 0 0 . . . . . . . . . . . 2 5
37
Page 51

GROUND TROOPS
Scouts are lightly armoured and unarmed. Mainly used to shadow
enemy units to find their home base, Scout units are vulnerable to
open attack.
. . . . . . . . . 8 . . . . . . . . . . . . 1 5
. . . . . . . . . . . . 2 . . . . . . . . . . 8
Engineers are personnel who can build structures. Also, engineers can
remove rubble and sparse trees. To remove rubble and trees, move to
Engineer to the area. The Engineer automatically cleans the tile. They
are unarmed and carry only a minimal amount of armour. Their starting
Efficiency Rating is 7 5 p e r c e n t .
. . . . . . . . . . . . . 6 . . . . . . . . . . . . 1
. . . . . . . . . . 8
THIS MEANS WAR
Page 52

Lightly armoured for fast movement, Light Infantry are excellent for
assaulting civilian buildings or delaying enemy vehicles. However,
they are incapable of damaging heavily armoured units.
. . . . . . . . . 4 . . . . . . . . . . . . 1 5
. . . . . . . . . . 8 . . . . . . . . . . . 4
. . . . . 4 . . . . . . . . 3
Standard infantry throughout most of This Means War, the Heavy
Infantry boasts a quick reload time. When in large numbers, a group
of Heavy Infantry can wreak havoc on any enemy units.
. . . . . . . . . 4 . . . . . . . . . . . . 1 2
. . . . . . . . . . 8 . . . . . . . . . . . . 5
. . . . . . 5 . . . . . . . . . 2
Equipped with hand-held weapons with armour piercing rounds,
Bazooka personnel are normally used to soften heavily armoured
targets. With a slow reload time, Bazooka personnel are often killed
after their first or second salvo. Also, Bazooka personnel are
practically useless inside tight quarters, so they are poor
against structures.
. . . . . . . . . 4 . . . . . . . . . . . . 1 2
. . . . . . . . . . 8 . . . . . . . . . . . . 4
. . . . 6A P . . . . . . . . . 8
Mortar personnel are able to fire their weapons without actually
having a line of sight. By keeping obstacles in their path and using
observers for targeting information, Mortars can heavily damage
enemy units. However, their slow reload time provides only a few
shots before the Mortar becomes vulnerable to attack.
. . . . . . . . . 4 . . . . . . . . . . . . 1 2
. . . . . . . . . . 8 . . . . . . . . . . . . 4
. . . . 8E X . . . . . . . . 1 2
39
Page 53

Trained for engagements, Marines are the best personnel available.
Marines use small, hand-held armour piercing weapons that reload
very quickly. Combine this with their armour and hit point values,
Marines can prove a valuable piece of any combat force.
. . . . . . . . . 4 . . . . . . . . . . . . 1 2
. . . . . . . . . . 1 2 . . . . . . . . . . . . 6
. . . . 6A P . . . . . . . . . 4
GROUND VEHICLES
Stripped down for nearly silent running, the Scout Bike has no armour
to speak of and no offensive capability. However, it is faster than
anything on the ground except for the highly advanced Light
Hovercraft. The Scout Bike is the best choice for finding out where the
enemy is located. Keeping a few of these patrolling the area around
your Command Centre is an effective way to avoid surprise.
. . . . . . . . . 6 . . . . . . . . . . . . 6 0
. . . . . . . . . . 8 . . . . . . . . . . . . 2
The Battle Bike is the perfect choice for a fast, offensive response. It
can hold back advancing enemy foot soldiers until your infantry
arrives. However, like the Light Infantry, the Battle Bike is useless
against anything more powerful than an Armoured Personnel Carrier,
merely serving as a roadblock for tanks until it is destroyed.
. . . . . . . . . 4 . . . . . . . . . . . . 5 0
. . . . . . . . . . 1 2 . . . . . . . . . . . . 4
. . . . . . 4 . . . . . . . . . 4
Generally used to transport materials from mines to steel mills, this
truck can also lay dirt and pave roads. It has a storage capacity of
4 0 0 m i n e r a l s .
. . . . . . . . . 4 . . . . . . . . . . . . 3 0
. . . . . . . . . . 2 5 . . . . . . . . . . . . 5
THIS MEANS WAR
Page 54

The Military Truck can carry up to six passengers and can tow artillery
pieces. Unfortunately, it has no weapons with which to defend itself.
. . . . . . . . . 4 . . . . . . . . . . . . 4 0
. . . . . . . . . . 2 5 . . . . . . . . . . . . 5
Construction Vehicles are able to manoeuvre\ large amounts of
construction materials, shortening the time needed to complete
structures. However, the Construction Vehicle is unable to negotiate
hills, thus reducing its effectiveness in hilly terrain. Its starting
Efficiency Rating is 1 0 0 p e r c e n t .
. . . . . . . . . 2 . . . . . . . . . . . . 2 0
. . . . . . . . . . 3 0 . . . . . . . . . . . . 6
Able to carry one passenger and one artillery piece, the Jeep has
provided the standard transportation throughout several conflicts.
Combined with its speed and its effectiveness as a weapon, the Jeep
makes for a great scout in times of need.
. . . . . . . . . 4 . . . . . . . . . . . . 5 0
. . . . . . . . . . 1 5 . . . . . . . . . . . . 4
. . . . . . 6 . . . . . . . . . 8
The Rapid Assault Vehicle, or RAV for short, does exactly as its name
implies, it rapidly assaults targets. Boasting quick reload time with
solid weapon damage, the RAV can take on any infantry target.
Anything with heavier armour, however, proves to be too much for
the RAV.
. . . . . . . . . 4 . . . . . . . . . . . . 4 0
. . . . . . . . . . 2 0 . . . . . . . . . . . . 8
. . . . . . 8 . . . . . . . . . 5
41
Page 55

ARMOURED GROUND VEHICLES
Able to carry up to six passengers, the Armoured Personnel Carrier is
the only choice when it comes to moving infantry into a heavy fire
zone fast. It’s definitely a plus in manoeuvring your field guns away
from an enemy advance.
. . . . . . . . . 4 . . . . . . . . . . . . 4 0
. . . . . . . . . . 3 0 . . . . . . . . . . . 1 0
. . . . . . 8 . . . . . . . . 1 0
Using pre-catastrophe designs, the Light Tank has a standard 1 0 0m m
turreted cannon. Combine this with decent armour and fast speed,
the Light Tank wipes out personnel. The Light Tank uses tracks instead
of wheels to move through terrain, so it sometimes gets bogged down
in soft surfaces.
. . . . . . . . . 4 . . . . . . . . . . . . 4 0
. . . . . . . . . . 4 0 . . . . . . . . . . . 1 5
. . . . . 1 5 . . . . . . . . 1 0
Improving on the Light Tank designs, Medium Tank manufacturers
applied the concept of break-away armour. Whenever a round strikes
the tank, armour designs deflect the round and break away. Other
improvements include a heavier cannon and a stronger hull.
. . . . . . . . . 4 . . . . . . . . . . . . 3 0
. . . . . . . . . . 5 0 . . . . . . . . . . . 2 0
. . . . . 2 0 . . . . . . . . 1 0
The ultimate design in tracked armour, the Heavy Tank boasts two
7 5mm cannons that fire simultaneously, a stronger hull and an
improved armour design.
. . . . . . . . . 4 . . . . . . . . . . . . 3 0
. . . . . . . . . . 6 0 . . . . . . . . . . . 2 5
. . 2 x 1 5 . . . . . . . . 1 2
THIS MEANS WAR
Page 56

Using two missile arrays with active terminal guidance, the missile
tank provides serious firepower with amazing range. However, its
slow reload time makes it vulnerable to counterattacks.
. . . . . . . . . 4 . . . . . . . . . . . . 3 0
. . . . . . . . . . 3 0 . . . . . . . . . . . 1 2
. . 2 x 1 5 . . . . . . . . 1 2
HOVER VEHICLES
Hovercrafts create an air or magnetic cushion that allows them to ride
above terrain surfaces. However, it is impossible for the hovercraft to
negotiate hilly areas, thus limiting its usefulness. The Light Hovercraft
is the fastest ground vehicle available in This Means War. It fires
three simultaneous armour piercing rounds, punching through all but
the heaviest armour.
. . . . . . . . . 5 . . . . . . . . . . . . 6 0
. . . . . . . . . . 3 0 . . . . . . . . . . . 1 2
. 3 x 5A P . . . . . . . . . 8
Switching off the three armour piercing guns, the Heavy Hovercraft
takes on a larger cannon and stronger armour, but loses in speed and
reload time.
. . . . . . . . . 5 . . . . . . . . . . . . 4 0
. . . . . . . . . . 5 0 . . . . . . . . . . . 2 0
. . . 1 5A P . . . . . . . . 1 2
43
Page 57

ARTILLERY
As the name implies, Towed Artillery relies on another vehicle (such
as a Military Truck or Jeep) for movement, and can move no faster
than the unit pulling it. It can only be fired from a stationary position.
. . . . . . . . . 4 . . . . . . . . . . . . . 0
. . . . . . . . . . 3 0 . . . . . . . . . . . . 8
. . . 3 0E X . . . . . . . . 6 0
Mobile Artillery units are able to fire their weapons and move to
another location before enemy units can return fire. However, they
cannot fire while moving. This is their only drawback.
. . . . . . . . . 4 . . . . . . . . . . . . 2 0
. . . . . . . . . . 2 5 . . . . . . . . . . . . 8
. . . 2 5E X . . . . . . . . 5 0
Like Towed Artillery, an AA Gun also relies on another vehicle (such
as a Military Truck or Jeep) for movement, and can move no faster
than the unit pulling it. It can only be fired from a stationary position,
and is the most lightly armoured artillery unit.
. . . . . . . . . 4 . . . . . . . . . . . . . 0
. . . . . . . . . . 2 0 . . . . . . . . . . . . 4
. . . . 6E X . . . . . . . . . 2
A Rocket Launcher is a tracked weapons platform that uses a large
warhead rocket to destroy targets. With its long reload time, the
Rocket Launcher tends to be a primary target for enemy units after its
first salvo.
. . . . . . . . . 4 . . . . . . . . . . . . 2 0
. . . . . . . . . . 2 5 . . . . . . . . . . . . 8
. . . 5 0E X . . . . . . . 1 2 5
THIS MEANS WAR
Page 58

AIR SUPPORT
Using a propeller to keep itself aloft, the fighter primarily acts to clear
paths for Bombers.
. . . . . . . . . 4 . . . . . . . . . . . 1 2 5
. . . . . . . . . . 3 0 . . . . . . . . . . . . 8
. . . 2 x 6 . . . . . . . . . 5
With its fast speed and moderate firepower, the Jet can strafe enemy
units and get beyond their range of attack before they can return fire.
. . . . . . . . . 4 . . . . . . . . . . . 2 5 0
. . . . . . . . . . 2 0 . . . . . . . . . . . . 8
. . 2 x 1 0 . . . . . . . . 1 0
Used to attack enemy installations, Bombers fly into enemy airspace,
deliver their weapons, and escape from the area before any enemy
retaliation. They cannot fight against other aircraft, and therefore
rely on fighter and jet support.
. . . . . . . . . 4 . . . . . . . . . . . 1 2 5
. . . . . . . . . . 4 0 . . . . . . . . . . . 1 2
. . . 6 0E X . . . . . . . 2 5 0
Helicopters have the unique ability to hover — that is, to be airborne
and stationary.
. . . . . . . . . 4 . . . . . . . . . . . . 8 0
. . . . . . . . . . 2 0 . . . . . . . . . . . . 4
. . . 2 x 6 . . . . . . . . . 5
45
Page 59

YOUR ALLIES
In his late fifties, General Adams is the
product of the revised West Point — with its
emphasis on psychology, public relations,
and communication skills, along with the
usual military history, strategy, and tactics.
Though Adams was trained to command
in peace-time, when “Snark Hunter”
appeared and society’s infrastructure broke
down, he immediately stepped into the
breach and served as an advisor to the
United Nations’ task force dealing with
the situation.
A few months ago, General Adams rallied the remnants of the United
Nations Forces (including the United States, Canada, Mexico, and
Nicaragua) under a single banner. Using his charisma and the theories of
history’s top commanding officers, he has welded them into a single
fighting force — the Free World Alliance.
Although he is a brilliant strategist and charismatic leader, he needs
others more experienced in military tactics to command in battle. As your
former instructor from your days as a student at West Point, he knew he
could rely on you as commander of the FWA Overseas Operations theatre.
THIS MEANS WAR
Page 60

A hero of previous wars, Colonel
McCormick was a United States Air Force
General when disaster wiped away the
boundaries of the country he served. Wellknown for his leadership ability, he was
General Adams’ logical choice for
commander of the FWA North American
Operations theatre, despite his rather
eccentric views.
Colonel McCormick is convinced that the
fall of the Soviet Union was merely a ruse by
the Communist Conspiracy to make the
United States drop its guard and reduce its defense spending. Furthermore,
Colonel McCormick blames diplomats for America’s deterioration. He feels
that if they had identified “Snark Hunter” as the Commie threat he knew it
was and declared martial law immediately, there would have been no
need for the Free World Alliance. Obsessed with the grandeur of the
former United States, Colonel McCormick is determined to reclaim
American territory, no matter what the cost. It isn’t too hard to see why
he earned the nickname “Major Victory” in the Second Korean War.
His radical ideas aside, Colonel McCormick does have a lifetime of
military training to draw upon, and knows how to take advantage of all
available assets. Given his poor regard for diplomacy, his emphasis is on
charging ahead with rapid deployment — especially with tanks, much like
Rommel or Patton. Colonel McCormick feels that economics are for wimps
and doesn’t care much for them, allowing only that they are a necessary
evil to provide supplies for his troops.
47
Page 61

Although relatively young, Major Clarke
is a West Point graduate with combat
experience. She distinguished herself as a
Lieutenant in the U.S. Army (XO to the then
Captain Adams) during the Second Korean
War and as a Captain in Army Intelligence
during the Peruvian Police Action. She
knows her strengths and weaknesses.
As General Adams’ aide de camp, Major
Clarke is very protective of the General and
is suspicious of the General’s unconditional
trust in you. However, the General believes
that the Major will come around once you have proven yourself worthy of
your command.
Whatever her opinions of your abilities, Major Clarke is a specialist in
intelligence gathering and is your primary source of information about
what’s going on in the outside world. Her information is rarely complete,
but usually accurate.
THIS MEANS WAR
Page 62

Known by both lovers and enemies as
Countess Nasty, Anastasia imagines herself
the classic femme fatale. She possesses the
tactical brilliance of Rommel and the
personal habits of an alley cat. The Countess
has always been fascinated with powerful
men, and makes it quite clear that she
would much prefer to be allied to the
winning side.
Descended from a long line of pampered
aristocrats, Countess Romanov is arrogant
and vain, preferring a life of luxury adorned
with the trappings of war. Deeply insecure, the Countess has molded
herself into the fiercest, strongest leader she can be. Ruthless and driven,
she concentrates her forces into line-breaking blitzkrieg charges, designed
to penetrate deep into enemy territory. With a large peasantry and an
educated middle class to draw upon, her forces are only limited by
construction and training time. Anything and everything that could be
useful in a military campaign, she has. The Countess’ territories include
what were once Scandinavia, Russia, Poland, and the Balkans. Positioned
in the heart of Europe, Countess Romanov is a valuable FWA ally with the
best of Russian psychology — the same fight-to-the-death intensity that
saved Leningrad in W.W.II and the willingness to fulfil a scorched-earth
campaign rather than let the enemy take her territory. Her colour is pink
on the Geo-Political map.
49
Page 63

YOUR OPPONENTS
Crocodile Ghandi is the spiritual and
corporeal leader of the Australian-based
Church of Universal Siblinghood.
Intentionally and carefully non-sexist, this
establishment draws followers with a
promise of peace, love, and understanding
guaranteed by the Crystals of Power, said to
be given to Ghandi by alien visitors.
In truth, Ghandi grew up in a commune
and discovered an un-hippy-like love of
power over others. As founder of the
Church of Universal Siblinghood, he has
become an absolute dictator of ancient biblical proportions, controlling
the lives (and deaths) of his people, his “family.”
Ghandi appears content to squat in his highly defensible, luxurious
blockhouse and rely on a strong defense — using his army, weaponry,
mine fields, and anything else he can acquire. He rarely goes on the
offensive unless personally insulted — or someone else has something he
w a n t s . Considered a prophet, Ghandi will eat well while his people
starve, if necessary. His colour is green on the Geo-Political map.
THIS MEANS WAR
Page 64

Mondo Khan epitomises the rejection of
technology and embodies the belief in
personal strength. He does not want to rule
the world; he has no other long-term goal.
Mondo Khan believes as Genghis Khan
believed “The greatest happiness is to
vanquish your enemies, to chase them
before you, to rob them of their wealth, to
see those dear to them bathed in tears,
to clasp to your bosom their wives
and daughters.”
Mondo Khan’s army is strictly a mobile
force, flowing across what were formerly Siberia, China, Mongolia, India,
and Southeast Asia. He has no centralised base. Khan possesses only lowlevel technology and wins by sheer force of numbers. His emphasis is on
rapid movement, using only the few special, high-tech weapons his forces
capture. Mondo Khan knows how to live off the land, how to scavenge
what he needs, and how to conquer nature. He takes all that he finds:
food, minerals, and all finished materials. His colour is red on the GeoPolitical map.
51
Page 65

Imagining herself as the reincarnation of
Napoleon I, Napolienne believes that a
unified world is logical and right.
Rather than let the world fall to the
barbarians, she’ll claim their territories one
by one, being careful to avoid Napoleon’s
mistakes in Russia — one opponent at a
time, not the enemy the weather. She is
a benevolent dictator at heart, with only
the best intentions for her people, but on a
long-term, not a short-term basis.
Wearing the uniforms of Napoleon she
“liberated” from various European museums (a poor fit), Napolienne might
be easily dismissed as a mental case. However, she has studied military
tactics and strategy and knows much about Napoleon’s methods.
Moreover, Napolienne learned from her namesake that supply lines are
essential, and therefore insists on treating her troops well — food is a
priority, as is good equipment. She places her emphasis on troops,
mobility, and brilliant leadership. She also uses air power and spies
whenever possible to understand her opponent.
Napolienne’s command centre is a chateau in what was France. The
entire structure is well planned and designed for maximum efficiency and
livability. Smaller cities radiate out in a circle from her “Town Centre” with
farmland between them and factories nearby. Barracks are located near
factories and power sources for best defense. Always keeping her longterm goals in mind, Napolienne maintains a fine balance between
production of enough food, energy, and minerals to keep her people and
her troops well supplied. Her colour is purple on the Geo-Political map.
THIS MEANS WAR
Page 66

Shadowhawk is probably just
a myth that sprang out of the
chaos surrounding the Snark
Hunter-induced crash. Saviour in
one story, demon in another, this
legendary figure is said to be waiting to forge worldwide peace out of the
rubble. Other tales name Shadowhawk as the architect of humanity’s
current sorrows. What’s true? Since no one has ever seen this person, it
could be all of the above — or none. It’s anyone’s guess. Shadowhawk’s
colour is black on the Geo-Political map.
His past history unknown, rumours
abound that Sheik Omar is a former British
officer who stayed out too long in the
Middle Eastern sun. Although his territory
houses ancient stores of chemical and
biological weapons, supplies are running
out and he needs a power base to prevent
his people from becoming economic slaves
to the world’s industrialists. Omar began his
jihad to gain fame and respect, but his
motivation quickly changed to winning,
regardless of the cost in lives.
Sheik Omar boasts of superior forces, but manoeuvres recklessly. He
buys the fastest and best technology he can afford, but fails to devote the
amount of time needed to properly train his people in their use. The
Sheik’s emphasis is on the noisiest, biggest, and most obvious weaponry
available. His intelligence gathering is mostly via the Net, and therefore
ineffective. His colour is yellow on the Geo-Political map.
53
Page 67

APPENDIX
THIS MEANS WAR
Page 68

55
Page 69

THIS MEANS WAR
 Loading...