

Page 1
™
Page 2

TABLE OF CONTENTS
GETTING STARTED . . . . . . . . . .4
Download Free Sacrifice Maps . . . . . . .4
I. THE GODS . . . . . . . . . . . . . . .5
Prologue . . . . . . . . . . . . . . . . . . . . . . .5
The Book of Charnel . . . . . . . . . . . . . .6
The Book of James . . . . . . . . . . . . . . .12
The Book of Persephone . . . . . . . . . .19
The Book of Pyro . . . . . . . . . . . . . . . .27
The Book of Stratos . . . . . . . . . . . . . .33
II. SACRIFICE MENUS AND
OPTIONS . . . . . . . . . . . . . . . . .40
A. The Main Menu . . . . . . . . . . . . . . .42
Single Player Game . . . . . . . . . . . . . . . . . . . . . . .44
Load Game . . . . . . . . . . . . . . . . . . . . . . . . . . . . .46
Multiplayer Game . . . . . . . . . . . . . . . . . . . . . . . .48
Options Menu . . . . . . . . . . . . . . . . . . . . . . . . . . .49
B. Options . . . . . . . . . . . . . . . . . . . . .50
Graphics Options . . . . . . . . . . . . . . . . . . . . . . . . .50
Sound Options . . . . . . . . . . . . . . . . . . . . . . . . . . .52
Keyboard Options . . . . . . . . . . . . . . . . . . . . . . . . .52
Miscellaneous Options . . . . . . . . . . . . . . . . . . . . .53
System Information Screen . . . . . . . . . . . . . . . . . .54
INTERPLAY ENTERTAINMENT CORP.
1.
Page 3

2.
III. THE GAME OF SACRIFICE . . .55
A. Creating a Character . . . . . . . . . . .55
The Character Roster . . . . . . . . . . . . . . . . . . . . . .55
Multiplayer . . . . . . . . . . . . . . . . . . . . . . . . . . . . .55
Single Player . . . . . . . . . . . . . . . . . . . . . . . . . . . .56
B. The Game Lobby Screen and Game
Settings Menu . . . . . . . . . . . . . . . . . .56
Selecting A Map . . . . . . . . . . . . . . . . . . . . . . . . . .56
Game Types . . . . . . . . . . . . . . . . . . . . . . . . . . . . .57
Game Settings . . . . . . . . . . . . . . . . . . . . . . . . . . .59
C. Joining or Creating A Multiplayer
Game . . . . . . . . . . . . . . . . . . . . . . . . . 61
D. The In-Game Screen . . . . . . . . . . .62
Unit Selection Pane . . . . . . . . . . . . . . . . . . . . . . .62
Soul Counter . . . . . . . . . . . . . . . . . . . . . . . . . . . .63
Mana Bar . . . . . . . . . . . . . . . . . . . . . . . . . . . . . .63
Life Bar . . . . . . . . . . . . . . . . . . . . . . . . . . . . . . . .63
Mini-Map . . . . . . . . . . . . . . . . . . . . . . . . . . . . . .64
Spell Tabs . . . . . . . . . . . . . . . . . . . . . . . . . . . . . .65
E. The Pause Menu . . . . . . . . . . . . . .66
Mission Objectives . . . . . . . . . . . . . . . . . . . . . . . . 66
Speech History . . . . . . . . . . . . . . . . . . . . . . . . . . .66
Save Game . . . . . . . . . . . . . . . . . . . . . . . . . . . . . .66
Load Game . . . . . . . . . . . . . . . . . . . . . . . . . . . . .67
Options . . . . . . . . . . . . . . . . . . . . . . . . . . . . . . . .67
Surrender . . . . . . . . . . . . . . . . . . . . . . . . . . . . . . . 67
Resume Game . . . . . . . . . . . . . . . . . . . . . . . . . . . .67
F. Sacrifice Game Mechanics . . . . . . .67
Basic Movement . . . . . . . . . . . . . . . . . . . . . . . . . .68
Camera Control . . . . . . . . . . . . . . . . . . . . . . . . . .68
SACRIFICE
Page 4

Summoning Creatures . . . . . . . . . . . . . . . . . . . . . .68
Commanding Your Creatures . . . . . . . . . . . . . . . . .69
Group Selection . . . . . . . . . . . . . . . . . . . . . . . . . .69
The X Menu . . . . . . . . . . . . . . . . . . . . . . . . . . . . . 70
Formations . . . . . . . . . . . . . . . . . . . . . . . . . . . . . .71
Adding and Removing Units From Groups . . . . . . . 73
Commands Using the Mini-Map . . . . . . . . . . . . . .73
Using Special Abilities . . . . . . . . . . . . . . . . . . . . .74
Mana . . . . . . . . . . . . . . . . . . . . . . . . . . . . . . . . .74
Altar . . . . . . . . . . . . . . . . . . . . . . . . . . . . . . . . . .75
Mana Fountain . . . . . . . . . . . . . . . . . . . . . . . . . .75
Manalith . . . . . . . . . . . . . . . . . . . . . . . . . . . . . . .76
Manahoar . . . . . . . . . . . . . . . . . . . . . . . . . . . . . .76
Shrines . . . . . . . . . . . . . . . . . . . . . . . . . . . . . . . .77
Casting Spells . . . . . . . . . . . . . . . . . . . . . . . . . . .77
Creature Health, Mana and Unit Color . . . . . . . . .78
All About Souls . . . . . . . . . . . . . . . . . . . . . . . . . .80
The Locals . . . . . . . . . . . . . . . . . . . . . . . . . . . . . .81
Guardians . . . . . . . . . . . . . . . . . . . . . . . . . . . . . .81
Altars . . . . . . . . . . . . . . . . . . . . . . . . . . . . . . . . .82
Desecrating an Altar . . . . . . . . . . . . . . . . . . . . . . .83
Teleportation . . . . . . . . . . . . . . . . . . . . . . . . . . . .83
Quick Saving and Quick Loading . . . . . . . . . . . . .84
IV. HINTS AND TIPS . . . . . . . .84
V. SCAPEX LEVEL DESIGN
INFORMATION . . . . . . . . . . . . .87
VI. SACRIFICE CREDITS . . . .116
INTERPLAY ENTERTAINMENT CORP.
3.
Page 5

GETTING STARTED
Installation of Sacrifice
Place the Sacrifice CD into your CD-ROM drive. If your
computer is AutoPlay capable, a Sacrifice menu will
automatically appear on the screen. Select "Install Sacrifice" from
the list of choices to start the installation program. Follow the
on-screen instructions to install Sacrifice on your system. After
the game is successfully installed, a Sacrifice shortcut will be
added to your Start menu.
If your system is not AutoPlay capable, open the "My Computer"
icon on your desktop, then select the drive letter that represents
your CD-ROM drive. Double click on the "Setup" icon and
continue as above.
Installation of Direct X 7.0a
Sacrifice requires Direct X 7.0a in order to run properly. If you
are not running Direct X 7.0a on your system, then it can be
installed directly off the Sacrifice CD. Insert the Sacrifice CD
into your CD-ROM drive. If your computer is AutoPlay capable,
select "Install Direct X 7.0a" from the list of choices that will
automatically appear on the screen. If your system is not
AutoPlay capable, open the "My Computer" icon on your
desktop, then select the letter that represents your CD-ROM
drive. Double click on the folder marked "DirectX7." Then
double click "Dxsetup.Exe" from the icons that will appear. The
setup program will launch.
Download Free Sacrifice Maps
Interplay and Shiny Entertainment thank you for purchasing
Sacrifice. It is our hope that this product provides you with
hours of exciting and challenging game play.
To further enhance your Sacrifice experience, be sure to explore
<http://www.sacrifice.interplaygames.com>. Here you'll find
free downloadable maps submitted by Sacrifice players from all
over the world.
Registration is free, and members will be allowed to submit as
many maps as they wish. All members have the ability to grade
user submitted maps, and the best are eligible to receive exciting
prizes.
Welcome to the Sacrifice Community!
4.
SACRIFICE
Page 6

I. THE GODS
PROLOGUE
"Being an excerpt from the Book of
the Fyllid"
In the beginning there was the Creator. Where there was naught
but the cold void, the Creator gave of his flesh, and thus was all
matter born. Where all was dark, the Creator spread his arms
and gave light, thus was born the stars, the moon, and the sun.
Where there was naught but silence and loneliness, the Creator
did spill his blood, causing the very beginnings of life.
This life manifested in a multitude of forms, from the ancient
behemoths of Thryhring to our own people, the Fyllid. In those
times we were the chosen of the creator, the keepers of the lesser
beasts and defenders of all the realms. As befit our role as his
primary servants, the creator gifted us with power. The power to
shape the world, the very trees, the land, the beasts, even the
untouchable essence of the elements was granted us. Our people
grew heady with the gift of power, and some of us turned our
face from the creator. The gift became corrupted, used for
forbidden experimentation and malicious purpose.
It was then that the Fallen One, he whose name must not be
spoken, tore asunder the earth. In the land of Golgotha,
profaning and defying the very laws of nature, the Fallen One
opened a permanent gateway from this world to the demonic
realms of the nether. The strain of opening this unnatural portal
took its toll upon the world and the earth began to shatter. The
Fyllid and all of creation watched in stunned silence as the
benevolent Creator warred with the Demons of the nether, but
the forces of hell proved too much for even he. A cry of
unspeakable anguish broke the silence and echoed in
the minds of his children as the creator was forever banished
from this existence. None of his children heard the cry so loudly
as the Fyllid, for it was one of our own that had ultimately
betrayed and murdered our master. Most were driven mad and
hurled themselves from one of the newly formed floating islands
or sat useless, gibbering and moaning.
For a time the Fyllid wandered these new realms seeking signs of
our former master. What was discovered was the stuff of
nightmares. The creatures of the land began to warp and twist,
INTERPLAY ENTERTAINMENT CORP.
5.
Page 7

the very land was changing. The home realm of the Fyllid, known
as Elysium, grew lush and green, seeming to welcome us, even
after the horrible betrayal of the Creator. So too did the other
lands twist, the high reaches of Empyria grew cold and desolate;
the lush, sweltering lands of Helios erupted with liquid hot
magma while the arid Glebe grew even more rocky and barren.
Most terrible of all were the blasted lands of Dys, which lay near
Golgotha. These lands grew pestilent and the very earth rotted.
Five new Gods appeared to take the place of the Creator. Of the
five it was our Lady Persephone who took us in. Grateful were
we that any God would accept us into their fold and ever since
we have served our Lady faithfully. We stand guard against the
enemies of our Lady. We are ever vigilant, for it is the Fyllid who
know intimately the price of failure.
-Athelas
THE BOOK OF CHARNEL
I am Charnel, God of Strife, Lord of Slaughter, Master of Death.
Where there is pain, I am there. Where there is suffering, I
flourish. Where there is joy… yes, well, one could hardly have joy
without another’s suffering, no?
I am called a villain, but mine is a doctrine reflected in the
unspoken truths behind all other philosophies. Recognize that
truth, my child: Strife is the single element most essential to
meaning and existence. Without conflict, without struggle, all of
creation might as well be so many unmoving, unfeeling stones.
Without me to hate, who would have cause to call themselves
holy or just? Oh, only a fool would seek contentment in peace
and tranquility.
Come see, come see. I hold dominion over the lands of Stygia,
which coil with serpentine grace, engulfing the holdings of my
foes. Vile and putrid ground, formed of the flesh of the dead,
running with rivers of blood, plagued by swarming vermin--ah, it
gives me chills whenever I think of it. Here you will find obsidian
gateways to demonic realms, an especial treat for unwitting
guests. Witness also the cruel prisons wherein are tortured those
rare souls among my enemies who are worthy of such attention,
and perhaps a random assortment of others to keep the cells
occupied. Oh, but do not overlook the mockeries called villages,
populated by mindless zombies--you really must appreciate their
simplicity--whose greatest ambition is to toil and die in my
6.
SACRIFICE
Page 8
service. Well now, those of low ambition deserve what they
get, no?
But I believe you know this, and that is what has brought you to
me. If you possess both the hunger and the courage to embrace
it, you may yet prove worthy of greatness. And if not, to strive
and to fail... to be cast down into an eternal torment worthy of
your failure. Ah. I almost envy your mortality.
Envision success. Envision only success. A morose attitude is
most unbecoming in a servant of death. Now then, allow me to
share with you something of the powers which will be yours to
command, assuming you earn a place in my hierarchy, and
assuming Acheron or one of my other servants does not strike
you down out of jealousy...
or cruelty.
Necromancy
Under my guidance, you will have the opportunity to learn the
black art of necromancy. Be warned, wielding necromantic magic
is no simple task, for my way is not one of blind, clumsy force.
You must balance open destruction with more subtle devices.
Above all, my servant, you must understand that everything has a
cost. Learning to balance these costs, learning to use your pain as
a weapon, lies at the heart of necromancy.
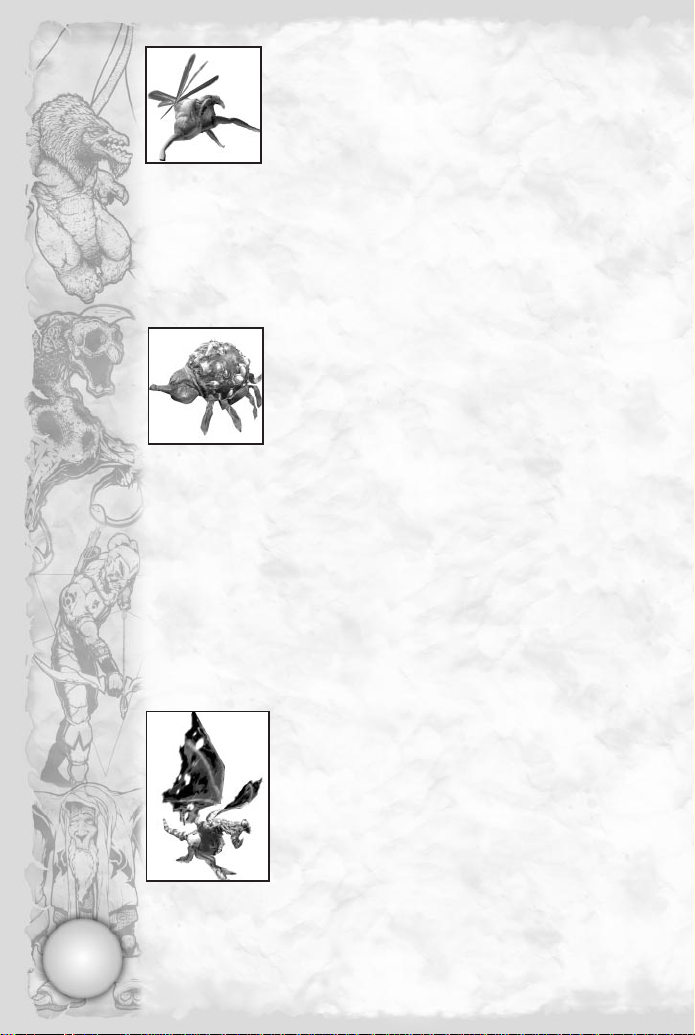
Insect Swarm First, however, you will learn to inflict
pain. It will be a simple matter to summon a ravening
Insect Swarm to harry and wound your foes. Damage
done by this swarm will heal you.
Spell Summary – Swarms of bloodsucking insects shot at a foe.
Protective Swarm As your control over the lesser
creatures advances, you will learn to summon a
Protective Swarm, which will absorb damage intended
for you and deal injury to any foes foolish enough to come within
it’s reach. Again, any damage they do will heal you.
Spell Summary – A protective shield of swarming insects that
damages any enemies foolish enough to come into contact
with it.
Slime Your next lesson will be simple and undeniable:
Corruption, in magic as in life, stems from fouling what
was once pristine and pure. Using this spell you can
cause the air over you enemies to foul, emanating forth a ball of
INTERPLAY ENTERTAINMENT CORP.
7.
Page 9
putrid slime. Anyone coated with this slime will be slowed, more
susceptible to damage and less capable of inflicting harm
upon you.
Spell Summary – A ball of viscous goo that covers an enemy
from head to toe, slowing its movements to a crawl and reducing
its stats.
Animate Dead Your devotion to necromancy will
eventually grant you the ability to animate corpses on
the battlefield, so that your minions will rise up even as
your foes strike them down.
Spell Summary – Restores life to your dead units by targeting
their soul.
Demonic Rift The next barrier for you to pass through
separates our world from the demon realm. Even a small
Demonic Rift will unleash great carnage. It’s the perfect
spell to support your creatures in a melee - the demons
unleashed will only attack your foes.
Spell Summary – Rips a hole in the earth through which evil
spirits rise to attack.
Wailing Wall Then you will learn to awaken the spirits
of the damned, who will rise up to form a barrier of
misery and sorrow. Any who pass through the Wailing
Wall will be slowed to a crawl and stripped of their energy.
Archers will be unable to attack, melee attackers unlikely to
reach you before they die.
Spell Summary – A wall of pulsating, tormented souls that saps
the life and mana from enemies who pass through it.
Plague Along with these new powers over demons and
the dead, you will gain greater mastery over the forces
of disease. In time, you will learn to unleash a terrible
and deadly Plague over a wide swath of land.
Spell Summary – A dark cloud that rains gobs of disease over a
section of land.
There are, of course, still greater powers that you may someday
possess, but you must have patience. In time, all will be revealed.
For now, you would do well to learn something of the creatures
that will be under your command. For as enticing as casting
spells is, a Necromancer must also learn to lead an army
into battle.
8.
SACRIFICE
Page 10
Minions
My minions are drawn from a myriad of sources: the pestilent,
the corrupt, the dead and the demonic. Well, perhaps not as
diverse a group as other gods, but it suffices. Be aware that none
of my creatures heal themselves normally, but all of them are
capable of restoring their health by harming others. And thus,
their pleasure is born of pain. You see, my commitment to such
principles is not in word alone. Also note the character
summaries beneath my descriptions. Passive abilities come into
play automatically when the creature attacks or moves. Special
abilities however require mana and have to be activated by you in
order to take effect! Not all of my minions possess special
abilities. A final point I should like to impress upon you is that all
ranged units require mana to attack in their normal fashion
Scythe The bony Scythe, armed with razor sharp
blades atop its head, is a masterpiece of
destruction. These swift, whirling, skull-faced
horrors mercilessly rend the flesh from their
victims with such pure delight, well, one can
hardly be surprised by their incessant cackles of
malignant joy. Scythes feed off the creatures they butcher,
regenerating health with every attack.
Unit Type: Melee
Passive Abilities: Replenishes life when attacking.
Special Ability: None
Fallen The Fallen are, how do you say, corrupted
versions of beings first formed by that simpleton
James. They possess only a skeletal frame and
rotting flesh, but this in turn attracts swarms of
insects, which they can then send forth to attack
their foes. Beautifully conceived efficiency, if I do
say so myself. Further, the Fallen may adopt the
form of a corpse, and while in this guise, restore
lost health. Quite ironic, wouldn't you agree?
Unit Type: Ranged
Passive Abilities: Replenishes life when attacking
Special Ability: Play Dead – While playing dead, its life will
quickly regenerate (The only Charnel unit to heal naturally
without having to harm an enemy creature).
INTERPLAY ENTERTAINMENT CORP.
9.
Page 11
Locust A bloated and far more insidious version
of the sort of winged menace once found in the
fens of Abaddon, the Locust was the first of my
creations. Though the eons have passed and the
fens are no more, the Locust lives on, relentless,
sucking the lifeblood and mana out of its victims.
Of my minions, the Locust most of all gains power through
dealing damage.
Unit Type: Air
Passive Abilities: Replenishes life and mana when attacking,
drains life and mana from targets.
Special Ability: None
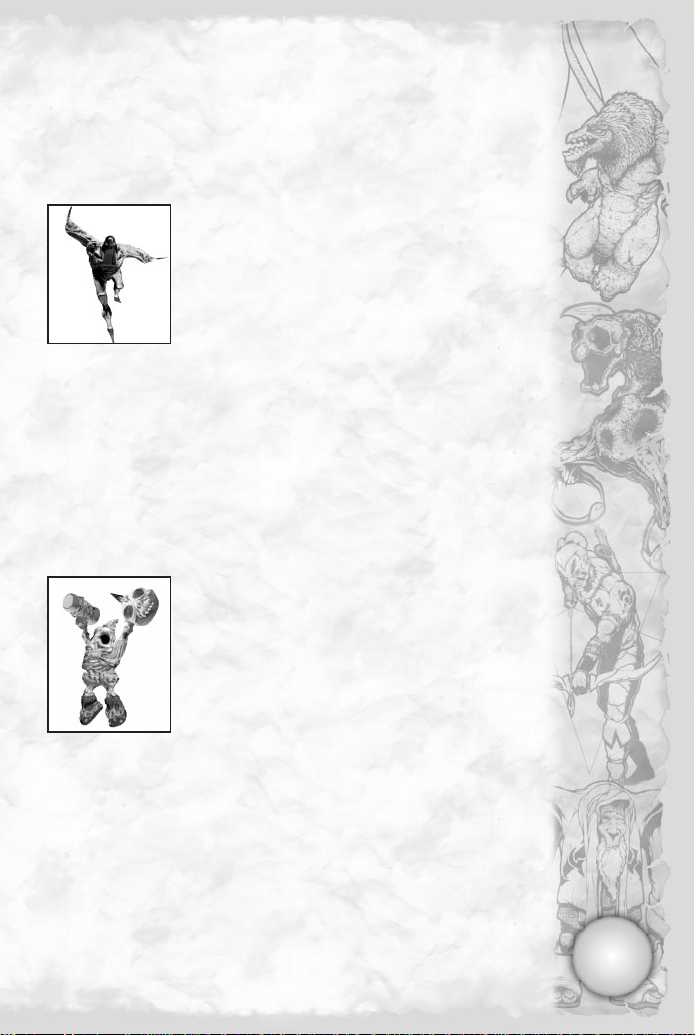
Necryl If it were not so large, you might expect
to find the Necryl creeping under a rock. It is
unctuous, scaly, oozing, many-legged, and
generally disgusting, but do not be deceived: its
repulsive appearance is only a bonus. Its true
value lies in its ability to spread disease. A set of
glands and bladders under its pestilent little proboscis allows it to
project a stream of infectious bile, conferring a most ruinous
and contagious disease on contact.
Unit Type: Ranged
Passive Abilities: Replenishes life when attacking, disease cloud
poisons its target and prevents it from healing and replenishing
mana. This disease cloud also makes victims susceptible to taking
more damage. Be warned, as a diseased creature passes on the
affliction to anyone it comes into contact with, your troops
included!
Special Ability: None
Blight Carrion beasts have always held a
special place in my heart, the Blight most of all.
Its ragged little wings and numerous open sores
are a testament to how thoroughly inured to
pain and hardship is this flying storehouse of
parasitic misery. In its jaws and belly, it carries a
deadly cargo of Blightmites... thousands of little
parasites which feast on its flesh and on the
flesh of its victims. There are few sights more
satisfying than watching Blightmites raining down onto Druids or
10.
SACRIFICE
Page 12
other such creatures who are incapable of attacking the Blight
while it's in the air.
Unit Type: Air
Passive Abilities: Regenerates life when attacking.
Special Ability: Blightmites – Slows down enemy units via
parasitic infection.
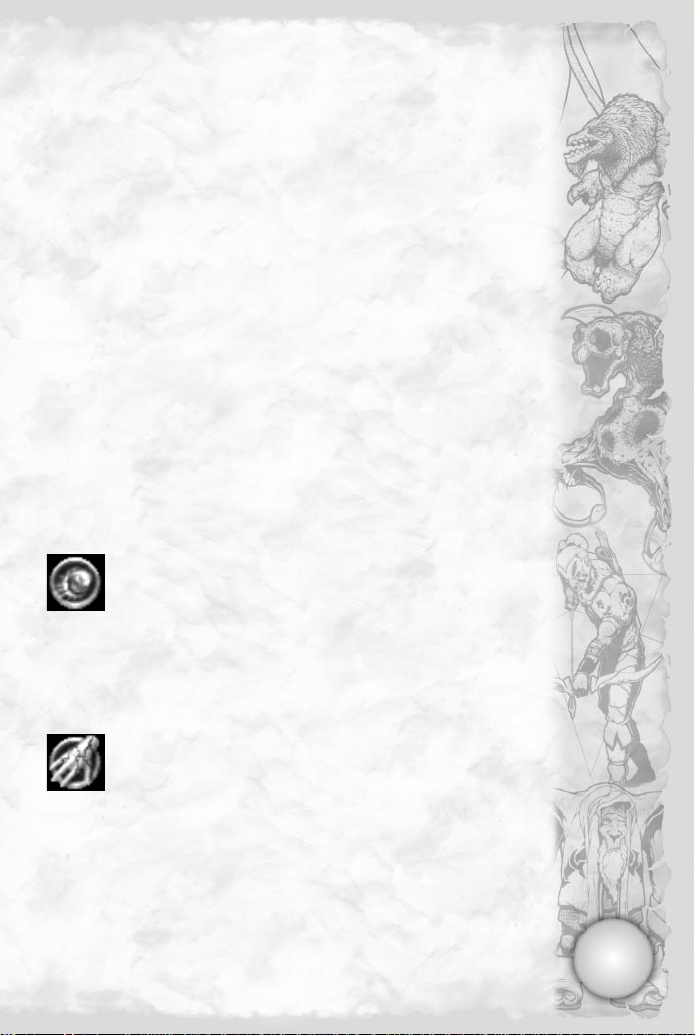
Netherfiend Oh yes, the demonic Netherfiend.
Since the Demon Gate of Golgotha has been
declared off-limits to any god, there are fewer of
them around these days. Those few who are in
my service are delightful creatures capable of
defeating most foes quite easily in single
combat. Netherfiends are mighty creatures
comprised of taut muscle and sinew, and their hunger for souls is
even more exquisite. Each soul that they devour adds to their
strength, their ferocity and... lethal beauty.
Unit Type: Melee
Passive Abilities: None
Special Ability: Devour- By activating this ability, a Netherfiend
is able to consume a blue soul of a fallen comrade on the
battlefield. Doing so will increase its attack power and resistance
to damage.
Deadeye Ever since Persephone brought those
pesky Gnomes, with their incessant tinkering
and generally meddlesome disposition, into this
world, I have known that with the proper
inducement they would make fine servants of
slaughter and mayhem. Only recently have my
efforts in this regard succeeded in producing the
Deadeyes. Like their cowardly, living cousins,
Deadeyes prefer combat at a distance. To this end, they
developed an extremely accurate weapon capable of firing a
highly lethal poisonous needle, which not only does damage but
debilitates its victim as well. These weapons are slow to fire and
no replacement for massed of the Fallen, but you will find the
use of a few of them highly efficacious.
Unit Type: Ranged
INTERPLAY ENTERTAINMENT CORP.
11.
Page 13

Passive Abilities: Replenishes life when attacking, poisons its
victims, making them less accurate. Also prevents the target’s
regeneration of life and mana.
Special Ability: None
Abomination Not even I can tell you the origin
of Abominations, but it is clear they are a
perversion of nature far beyond any need for
improvement by myself. Tall and gruesome, the
Abomination reaches into its own body, pulling
forth a quivering mass of corrosive blood and
intestine (I think) for use in long-range
bombardment. It is no wonder they are not very accurate, but
that is of little consequence. Their projectiles splatter on impact,
affecting a wide area and, while in the air, trail deadly drippings
of corrosive blood. It's poetry, I tell you.
Unit Type: Ranged
Passive Abilities: Regenerates life when attacking. Thrown blood
and intestine damages all enemies between itself and the
assigned target. When its thrown intestines strike the final target,
all enemy units in the surrounding area will take damage.
Special Ability: None
There are greater wonders which I have not yet disclosed to you,
for you are not yet ready. It is no surprise to see you are repelled
and attracted at once, but which of these impulses will master
you? Consider carefully, for a bargain struck with Charnel is
eternal, and even death will be no escape.
12.
THE BOOK OF JAMES
I am James, God of Earth. You know, rocks and soil and stuff.
Some nice gems too. It’s not all brown and gray you know.
Just… mostly.
I would never claim to be the most exciting of gods, but I ain’t
here to entertain folks. I’m here to protect ‘em and to guide ‘em.
I’ll tell you straight up, if it’s peace and quiet you want, I’m your
deity. Why should folks be questing for anything? Or go looking
for trouble? Or stick their noses is other folks business? Or
always muck about trying to change the world? This is the world.
Feel it solid beneath your feet. I don’t see as there’s much need
for change at all.
That’s the attitude folks’ take in the Glebe. They look after
SACRIFICE
Page 14
themselves and don’t much get in each other’s business. A
fellow’s farm is his castle, if you take my meaning. It’s a place of
tranquility and prosperity. I see to both of ‘em, and the people
are glad for it. Now don’t get me wrong: I’m not saying there’s no
room in the Glebe for someone to be great or to stand out or to
do amazing things. What I’m saying is that nobody’s gonna tell
you what it means to be great. You get to decide that for
yourself. I, for one, think this attitude is more likely than not to
bring out the best in folks… and it causes a whole rock-load less
headaches in the meantime.
Tramping about with some other god, you’ll never be as safe as
you would be in the Glebe, with the earth to shield you and
provide for all your needs. The truth of it is, if you want to reach
great heights, my granite’s the best foundation to build on. It
don’t matter what you bring or where you want to go. I got room
for it here, and I’ll do my best to see that you get everything
what’s coming to you. That’s a simple promise from a simple god.
It’s even written in stone, if you like.
Geomancy
If you want to help me out, you’d best learn a thing or two about
geomancy. That’s a fancy name for earth-type magic, which is just
my kind of thing. As you learn more about it, it’ll prolly be just
your kind of thing too.
Rock What could be simpler? You take a big Rock and
cast it at something you mean to knock down or smash
up. I know folks what do this the old-fashioned way,
more power to ‘em. But a geomancer can do bigger and better
rocks--even when there’s none handy--and don’t risk straining his
back nearly so much.
Spell Summary – Hurls a giant rock through the air to strike a
selected target.
Skin of Stone I do believe you oughta protect
yourself, and there’s no defense quite like a Skin of
Stone. There ain’t too many things what’ll hurt you when
you use this spell, and it don’t even slow you down any or hinder
your spell-casting none. You may be wondering how somebody
with skin made of stone can be nimble enough for all them fancy
hand gestures and the like. Well, duh. It’s magic.
Spell Summary –Encases you in a shielding layer of stone.
INTERPLAY ENTERTAINMENT CORP.
13.
Page 15
Soul Mole When the occasion for a fracas arises, you
ain’t alone out there on the battlefield (Or in life, but I
won’t preach at you). If you’re a decent type at all, the
Yeomen of the Glebe will be anxious to fight by your side. That’s
when you need the Soul Mole. When one of your fellows bites
the dust, you use the ole mole to grab up his soul from a
distance. That way, you don’t get hit by whatever did him in.
Spell Summary – Summons a burrowing creature that travels to
blue souls on the battlefield so that you don’t have to retrieve
them. (They’ll come to you!) A soul mole will also knock over any
units in its way, stunning them temporarily. Once a soul has been
retrieved by a mole, it will be blue to everybody! Beware of other
wizards stealing the mole’s soul out from under you.
Erupt Sometimes, the direct approach ain’t the best
way to win a fight. When the odds are stacked against
you, a well-placed earthquake can be just the thing to
shake things up. Erupt builds up pressure under the ground and
releases it in a sudden blast, sending big old shockwaves
radiating out. If you want to maim, stun, displace and otherwise
distress a cluster of enemy troops, it’s not a bad way to go. Not a
bad way to go at all.
Spell Summary – Ground rises up, then smashes back down,
sending out a shockwave that temporarily stuns foes.
Halo of Earth So many rocks, so little time. Another
way to deal with a big group of unfriendly fellows is to
surround yourself with a Halo of Earth. Not a ring of
lots of little stones, but a big ring of big stones. You set ‘em
spinning above you, and they go off flying when a proper target
comes nearby. Mix that up with some of them other abilities we
already talked about and nobody’ll want to be on your bad side.
Spell Summary – A swarm of rocks that hovers over you,
automatically firing when an enemy unit comes within range.
Wall of Spikes There comes a point when the enemy is
scared. A Wall of Spikes is a great way to keep them
from going anywhere. I mean, these things hurt a lot if
they get you and the wall extends pretty darn far. I don’t want to
get too strategically complicated on you, but there’s also times
when you’re not quite ready to face the other guy. Wall of
Spikes again.
14.
SACRIFICE
Page 16

Spell Summary – A wall of stalagmites that rises out of the earth
to block and stab your enemies. All enemies that attempt to pass
through will be slowed and take damage.
Bombardment Despite the power of my geomancers,
there are still those who aren’t content to leave the
Glebe in peace. Well, when you meet a fellow that dense,
I say the best thing for it is rocks, rocks, and more rocks. That’s
exactly what Bombardment is. Right out of the ground near you,
up into the air and down, down, down on the heads that most
need a little rattling. If that don’t learn ‘em, well, you can always
try it again.
Spell Summary – Mortar fire that shoots rocks into the air for
the purpose of raining hurt over a wide spanse of terrain. The
bombardment will deform the landscape as well, due to its
sheer power!
Of course, that ain’t all there is to geomancy, but that oughta be
enough to give you the general idea, so I figure it’s time to tell
you a little something about the kind of fellas who’ll help you
protect the Glebe.
Yeomen of the Glebe
The folks that live in the Glebe are all hardy, stalwart types. You
may have heard they’re none too swift. Well, that’s true of how
quick they are on their feet, but don’t take that to mean they
ain’t quick on the uptake. No, a smart fella learns to take
advantage of his environs and that’s what the Yeomen of the
Glebe do… so mostly, they’ve learned special things to do with
rocks. Also note the character summaries beneath my
descriptions. Passive abilities come into play automatically when
the creature attacks or moves. Special abilities however require
mana and have to be activated by you in order to take effect! Not
all of my yeomen possess special abilities ya know. Finally, all
yeomen who fire ranged attacks require mana to attack normally.
So if they be doin’ nuthin, ten-to-one they’re out of mana!
INTERPLAY ENTERTAINMENT CORP.
15.
Page 17
Trogg It is common knowledge that the Troggs
are simple, cave-dwelling folk. It is also common
knowledge that they don’t talk much and aren’t
skilled at much but thumping other folks upside
the head. This is one of them cases when
common knowledge ain’t all it’s cracked up to
be. It is true that the Troggs live underground,
and true that they ain’t much enamored of the
common tongue, sticking when they can to their
own babble. That means other folks don’t know
what they say. That don’t mean they’ve got nothing smart to say.
Below the earth, they build the most amazing altars and idols
and such. They perform elaborate rituals which must account for
their near immunity to spells. Let other folks think it’s cause
they’re too dumb to know they oughta be hurt. You’ll know
better. And so will they.
Unit Type: Melee
Passive Abilities: Immune to Magical Damage
Special Ability: None
Earthfling In the Elder Days, the Earthflings
arose from the spirit of the soil. Rocky, grainy,
sandy, soft. A little bit of everything went into
these fellows, and they’ve haven’t forgotten it.
As the Earthflings say, "You’ve gotta know where
you come from to know where you’re going." So
they can draw soil up from the ground they’re
standing on and send it a-flying outta their
mouths, but that ain’t all. They can change their
whole bodies into one big rock what’s nigh invulnerable. That’s
staying in touch with your roots, that is.
Unit Type: Ranged
Passive Abilities: None
Special Ability: Rockform – Turns an Earthfling into a large
boulder, making it nearly immune to damage.
16.
SACRIFICE
Page 18
Gargoyle If you’ve ever heard a real good
sculptor speak, he’ll tell you the statue’s already
in the stone. All he’s gotta do is chop away the
parts that aren’t it. That’s pretty much how it is
with Gargoyles. Sometimes, a rock don’t care
that it’s made o’ stone: it’s just gotta fly. Well, as
I said before, I’m not one to judge a body’s
dream. More power to ‘em I say. But it’s hard
work for a rock to learn to fly, so if you meet one, don’t be
surprise if it’s a bit of a crusty curmudgeon, if you take my
meaning. And once they’ve learned to go flitting about regular
like, they want to stay airborne as much as possible. So even
though they’ve got some mean-looking teeth, don’t expect them
to go biting anybody. No, they prefer to stay aloft and spray
down a shower of stones. Whatever works, I say.
Unit Type: Air
Passive Abilities: Rock attacks from the air do area damage.
Special Ability: None
Basilisk The fearsome legends you prolly heard
about Basilisks are greatly exaggerated. They are
creatures of middling size and no great physical
attributes or mental acuities. But you can’t
blame folks for not checking ‘em over too
closely, cause it is true that they can turn a body
to stone with a single gaze. The transformation is only temporary,
mind you, but that don’t bother the Basilisk. He can always do it
again.
Unit Type: Ranged
Passive Abilities: Attack turns enemy units to stone, rendering
them immobile and useless for a limited time. However, a side
effect is that petrified enemy units are harder to damage.
Special Ability: None
Taurock Some folks will tell you that the
Taurock is a big bull (or bear) of a creature
what’s covered its hide with rocks. Others’ll say
it’s a pile of rocks that’ve learned to run about.
Hardly matters which is the truth, does it? The
fact is the ole four-legger is tough as a rock and strong as a bear
(or bull). Just try getting in one’s way if you want to see what I
mean.
INTERPLAY ENTERTAINMENT CORP.
17.
Page 19
18.
Unit Type: Melee
Passive Abilities: As it takes damage, its defenses increase.
Therefore the more it takes damage the harder it is to kill.
Special Ability: None
Boulderdash In the badlands, prey is scarce,
but rocks aren’t too hard to come by. The
Boulderdash is one badlands predator what’s
learned to make the most of its surroundings.
As you might expect, it can shoot out these
rocks, and the things hit hard enough to kill lots of critters
outright. Smack! Just like that. But that ain’t all. A Boulderdash
shoots out three rocks at a time in a narrow spread. Yeah, they’ve
even got a little saying about it: "Two birds with one stone is
good fortune, but three stones with one shot is good tactics." Not
exactly poetry, but it gets the point across. Same goes for the
Boulderdash.
Unit Type: Ranged
Passive Abilities: Boulderdash shot splits into three parts,
making it possible to hit multiple enemies at once. (Or to do
triple damage to one large target.)
Special Ability: None
There are a few more creatures—ancient, rocky, and none too
common—who you may have a chance to command. But that’s a
ways off and I’ll teach you about those if and when you’re ready.
Well then, if you think the Glebe is the place for you, I’ll help
you get settled in. I’m sure you won’t regret it.
Ikarus You’ve heard me say that I like the
world the way it is. That don’t mean I got a
problem with folks what got the spirit of
invention. Good ole honest ingenuity is
something to be used, if it’s what comes natural
to you. Just ask the inventor of the Ikarus. He
took some fellows, strapped wings on their arms and taught them
to fly.
Nowadays we got a whole society of fellows with homemade
wings. They gotta carry lots of glue on ‘em, in case them flappers
start coming apart, so they’ve gotten good at dropping this glue
on enemies and mucking up their movement. But when it gets
down to a brawl, it ain’t about tricks up their wings. They like to
get right in there with the fisticuffs, where they put their upper
SACRIFICE
Page 20
body strength to good use. Yep, folks used to laugh about my
flying men. Not no more. Not one bit.
Unit Type: Air
Passive Abilities: None
Special Ability: Stickbomb – Slows enemy units down with
thick glue.
Flummox Flummox, of course, is just what we
call a battle-trained lummox here in the Glebe. I
mean, I seen the usefulness of the mountain
lummox, same as Stratos and Pyro, but here’s
the difference: I didn’t see no need to get all
fancy like they done. No, I let mine stick to flinging rocks. It
don’t sound like much, but I think it’s often best just to let folks
stick with what comes natural to ‘em. Believe me, they’re a lot
happier than their counterparts in Pyroborea and Empyrea.
Unit Type: Ranged
Passive Abilities: Rock attacks cause earth tremors around the
target. All units in the area are temporarily stunned. Useful for
interrupting spell casting.
Special Ability: None
THE BOOK OF PERSEPHONE
We are the essence of life. Throughout the ages, We have been
known by many names and in many forms. In this time and this
place, it must suffice that we are Persephone. And in that name
shall you find the Great Healer, who mends the ills of the flesh
and cleanses the blemishes of the soul. And you shall come to
know We have always stood beside you, in forms more familiar:
The beauty and purity of the maiden is Our reflection. The
comforting bosom of the mother flows from Us. The wisdom of
the matriarch is but a shadow of Our own. Yea, We are the very
essence of life.
Our vision is one of peace. Our path, of mercy. We see--as you
must also--how those who do not follow Us have been deceived
or corrupted by the forces of wickedness. Thus, in their
weakness, have they been lured into an existence of treachery
and debasement. We weep for them, knowing there is no greater
sin against oneself than the failure to believe in one's own worth.
And there is no greater sin against Us than the failure to stand
by Our side in righteousness.
INTERPLAY ENTERTAINMENT CORP.
19.
Page 21

Learn from their failure and do not fear to seek the greatness
within yourself. For even as We are justice, you, as Our servant,
must strive to be justice incarnate. So shall you find within
yourself a greater good and greater might than would even have
touched your dreams ere now. We promise that in the pursuit of
justice shall you find peace within yourself.
Lo, and behold, even as Our teachings grant inner harmony, Our
realms are a paragon of outer tranquility. Our lands are the
rolling, verdant plains and sweet, sheltering forests of Elysium.
These are the most resplendent and glorious realms in all the
world, and Our creatures the most joyous and content. For all
who follow Us, whether of mean birth or noble nature, share in
the blessings of Our grace, and thus are the mighty instructed in
Our love of humility. Indeed, the devout Fyllid, who provide
Druids and Rangers to tend our sacred groves, hold themselves
not above the beasts of the field or the simple peasants who each
day glory in Our divine mercy.
What, then, shall be your role, in Our grand design? Dare you
choose to be a hero, to be an agent of justice? Or shall you fade
into the obscurity, self-loathing and emptiness of a life
unfulfilled? 'Tis common enough, if you seek an excuse for
mediocrity. Innumerable are the souls who shrink from the call of
destiny and shirk the mantle of greatness. Can you not see how
meager and lowly are the forces which drive them astray? Fear,
doubt, sloth, temerity. Are any of these a worthy match for that
which you strive to be... that which you can and should be? We
shall guide you down the true path if you so desire, and you shall
possess power overwhelming, and Our covenant with you shall
be as simple and strong as it is pure:
Love Us and We shall requite your love a hundred-fold.
Defy Us and that day you shall surely die.
The choice is yours.
20.
SACRIFICE
Page 22

Mysticism
As a defender of Elysium, you shall be granted insights into the
primal forces of life and nature. Much of what you learn shall
grant you powers of protection and healing, but it is not the role
of a mystic to award mercy and succor without discretion. For as
you shall see in Us, compassion may hold dominion over the
heart, but wisdom must temper the hand.
Wrath By now you must realize that justice cannot
tolerate injustice. The iniquitous will claim this
intolerance is a sign that We are no different than they.
Your first lesson shall be to observe how truly different they are
from Us, for when touched by the spirit of your righteous
judgment, the wicked convulse in pain, burned by the searing
heat of your holy Wrath.
Spell Summary – A blast of energy that tracks and strikes its
target with deadly force.
Ethereal Form Next, you shall study the limits of your
own nature. For, in seeking the holiness in yourself, you
shall learn to step beyond the constraints of the material
world. When you attain Ethereal Form, no blows may harm you,
no spells may confound you, and yet you shall find your ability to
cast spells and command your army lessened not at all.
Spell Summary –The caster becomes a ghost, immune to attack.
You may, however lose mana if attacked by mana draining spells
or creatures.
Grasping Vines As your inner perfection grows, you will
find the forces of nature eager to aid you. In its simplest
incarnation, a tangle of Grasping Vines may be sent to
reach out from the earth and hold fast a single foe. So long as the
vines hold, you will find him at your mercy.
Spell Summary – Targets an enemy and holds it in place for a
limited time.
Rainbow The Rainbow is a more sublime union of the
natural and the divine. It is the symbol of Our promise
to bring justice and peace to all who devote themselves
to Us. Any who have faith in its transcendent beneficence will be
aided in their hour of need. The Rainbow will arch from believer
to believer, mending their wounds and restoring their spirit.
Spell Summary – A healing spell that travels from unit to unit.
INTERPLAY ENTERTAINMENT CORP.
21.
Page 23
Rain of Frogs As you have seen, much of your training
shall be in curative and defensive abilities, but there is
also a dark side to nature--a roaring, seething fury ready
to strike out at those who profane Us. Once you are ready, We
shall teach you something of this and unlock for you the secrets
of calling forth a vengeful Rain of Frogs. True, it does not sound
very dreadful, and true there are no great legends of the
overthrow of evil to an amphibian deluge, but rest assured it is
not for lack of power, but only because none who face the
torrent of croaking judgment survive to tell the tale. (Be aware
that frogs, being the simple-minded creatures that they are, will
not be able to tell friend from foe. Get your units out of range
before casting, lest they croak. Pardon the pun.)
Spell Summary - Small frogs rain to the ground and chase enemy
creatures. The frogs leap on them first to slow them down, then
explode causing damage.
Healing Aura To preserve the well-being of the faithful,
you cannot be content to react to the harm others inflict.
To this end, you shall learn to temporarily imbue your
creatures with a touch of the divine. A creature so enchanted will
radiate a Healing Aura, mending the wounds of true believers
around it.
Spell Summary – Healing aura that emanates from a unit to heal
others within range.
Vinewall In time, a mighty Wall of Vines shall be yours
to command. Stretching forth across the landscape,
these suddenly sprouting tendrils are capable of
entangling entire legions of your heretical foes.
Spell Summary – Long wall of grasping vines that
ensnares enemies.
Of the ways of Mysticism, that is all We shall tell you, but you
may be certain that there are mysteries holier still. Yet it shall
serve better to leave this talk of spellcraft, and learn something
of those living and breathing forces which Our mystics
command, a collection of creatures We call "the Faithful."
22.
SACRIFICE
Page 24
The Faithful
All who benefit from the blessings of Elysium are more than
willing to aid in its defense. None must be forced into service.
None must be offered recompense for their sacrifice. Thus,
though many of our creatures are neither militant nor violent by
nature, We have been able to choose those best suited to warfare
to serve in Our armies. Unlike the heretical minions of Our foes,
all of the faithful regenerate health, even in the midst of battle.
Also note the character summaries beneath my descriptions.
Passive abilities come into play automatically when the creature
attacks or moves. Special abilities however require mana and
have to be activated by you in order to take effect! Not all of my
faithful possess special abilities. I should tell you however that all
of my ranged units require mana to attack normally.
Druid In time of peace, Druids perform many
sacred roles in Fyllid society, from the tending of
sacred groves to the keeping of lore. In time of
war, they form the heart of Our fighting force.
Druids wield no weapons other than their fists,
but can use words of protection to create a
shield around themselves, protecting them
from harm.
Unit Type: Melee
Passive Abilities: None
Special Ability: Lifeshield – Creates a full body shield that
reduces damage taken in battle.
Ranger Recruited from among the Fyllid, the
Ranger holds sway over the darker heart of the
forest. Using a bow skillfully crafted from the
precious trees of the Daven Forest, each Ranger
strives to attain perfection as a hunter and as a
warrior, for they have taken as their creed the
most martial aspects of Our teaching, and do
not shrink from the tireless pursuit of personal
greatness.
Of their arts, none is more unique than their mastery of tracking.
At your direction, a Ranger will scry the location of the nearest
enemy. Using a group of Rangers, you will find you can uncover
the hiding places of all your rivals.
Unit Type: Ranged
INTERPLAY ENTERTAINMENT CORP.
23.
Page 25
Passive Abilities: None
Special Ability: Divine Sight – Shows where enemy units are
located, even when hidden or far into the distance.
Shrike Among Our creatures, the most pure
are the simple songbirds. The Shrike, 'tis true, is
one of these, but its gift is neither so simple nor
so harmless as would be expected of such a
creature: The minions of darkness cannot bear
the purity of the Shrike's song, which wounds
them as surely as a Ranger's arrow. The druids, in seeing their
fragile nature, have taught them the Lifeshield ability, which they
can use to protect themselves from ranged damage.
Unit Type: Air
Passive Abilities: Sonic attack knocks down targets, stunning
them. Good for interrupting enemy spell casting.
Special Ability: Lifeshield – Creates a shield that reduces
damage taken in battle.
Scarab In the depths of the forest are a great
many creatures no outsider has ever seen. A few
of these, such as the Scarab, are called forth
when the need for them is great. Something like
a spider but far larger, the mystical Scarab spins
a web, but hers is not a web for catching prey,
but a web of healing. Treat her well and she will serve you well.
Unit Type: Ranged
Passive Abilities: Shoots a healing beam at your wounded
creatures in order to heal them. Scarabs are a supportive unit not
meant for attack.
Special Ability: None
Troll Feared for their destructive might and
regenerative abilities--which render them
nearly impervious to harm and less capable
of understanding the pain others feel--Trolls
can be both fearsome and savage. Indeed, of
old, many of Our other followers warred
against the Trolls and suffered from their raids. But one day,
Athelas the Druid besought Us to grant them the gift of speech
and thereafter taught them of Our name and instructed them in
24.
SACRIFICE
Page 26
Our worship. Thus did the Trolls come to live in harmony with all
the Faithful and become for us the bulwark of Our armies.
Unit Type: Melee
Passive Abilities: Trolls regenerate life extremely quickly.
Special Ability: None
Gnome It is clear to you, no doubt, that We
seek out righteous souls from other worlds to
serve us as Mystics. It is even so that you
have been taken into Our presence. Long
ago, We brought an entire race--the Gnomes-
-from another world. Such a thing is not
often to be done, for the balances of nature must be respected,
and even now there are times the crafty tinkers do test the limits
of Our infinite mercy. Yet they are dear to Us, though not born
of Us, and serve well in Our armies. They wield mighty Hand
Cannons of their own invention, which, though slow firing, are
very powerful, and make these otherwise timid creatures quite
effective at defending Our justice.
Unit Type: Ranged
Passive Abilities: Shots strike their target instantly when fired.
Allows for a greater chance of hitting moving targets.
Special Ability: None
Gremlin In the first age, all of Our followers
were simple creatures. Some of the Fyllid
from that age now serve Us as Druids and
Rangers, and We would enhance the abilities
and intellect of a great many other creatures.
The first intelligent race We bore were the
Gremlins. They were raised up to serve Us as
messengers, and as not all come willingly
when called to Our judgment, the Gremlins have learned to
ensnare and draw to them those who resist Our summons. They
are not schooled in the ways of war, but you may find their
talents useful for dividing Our foes or holding them in check.
Unit Type: Air
Passive Abilities: None
Special Ability: Web Pull – Ensnares an enemy in a sticky web,
allowing it to be dragged towards the Gremlin. A useful method
INTERPLAY ENTERTAINMENT CORP.
25.
Page 27
for trapping enemy wizards and pulling them away from the blue
souls they desperately need on the battlefield.
Mutant As Great Mother, We accept even the
most bedraggled and undeserving under Our
wing, teaching them to find the greatness within
themselves. In the Mutants you shall doubtless
find the most clear example of this principle.
These are truly wretched creatures, beset by a
grievous malady, by which their own bodies
seem to war with themselves. Although this ill seems their
greatest weakness, We have turned it to their advantage. Under
Our care, they have learned to endure the pain of this loathsome
affliction and rend from within their bodies the sprouting polyps
in which its agents are concentrated. The diseased and hideous
polyps may then be used as devastating projectile weapons
which the Mutants throw across great distances, striking fear in
the hearts of those who might otherwise abuse these
miserable creatures.
Unit Type: Ranged
Passive Abilities: While dying, a mutant’s body will shower
healing energy upon all your forces in the surrounding area.
Healing doesn’t apply to enemy units of course. Thrown Polyps
have area damage.
Special Ability: None
Of the Faithful, these We have disclosed to you are not the most
wondrous. Yet, if you have heard any of what We have said, you
need hear nothing more. What greater powers We command
matter not, for even the least of Our creations possesses the
potential for greatness. So also it is with you. Accept the wisdom
of Our insight and be yourself the wiser. Know that you need no
other spells or servants, no powers beyond the openness of your
heart. It is time to cast aside all fear and doubt and set out to
face your destiny, secure in the shelter of Our love.
26.
SACRIFICE
Page 28

THE BOOK OF PYRO
I am Pyro. God of Fire. They will tell you I am the god of
Destruction and Chaos, but that is not entirely true. Pyro is the
spark of imagination and the engine of industry. Pyro is the
bringer of knowledge and the bearer of light.
Why do they slander me? Fear and jealousy. I expose their
deficiencies. Persephone demands order. What is wrong with
order, you say? Nothing, except when it really means fearfully
clinging to the past and never taking the steps necessary to
improve the world around you. Order cannot be allowed to stop
Progress. Charnel promises everyone strife. He glories in it, or so
he pretends. The truth is Charnel is afraid. He never builds
anything because what if it doesn’t work? If he loses a battle, he
says, "What does it matter? My creatures were already dead."
Cowardice! Then there is Stratos. Stratos is more craven than
Charnel--if that is possible. At least Charnel pretends to stand
for something. Stratos hides behind a veneer of neutrality and a
supposedly noble love of the truth. Pity him most of all; for his
lies are innumerable and he believes them all. And as for the god
of earth… don’t get me started on him.
They are jealous of what Pyro has wrought: The great furnaces of
Pyroborea burn day and night, channeling the souls and life
blood of my slaves into the creation of ever more powerful
machines. Machines to make machines. Machines to fix
machines. Machines to design machines. The slaves are only fuel,
you see. Oh, I make no denials about its brutality, but you will
come to appreciate brutality. Not the random mayhem of
Charnel or the false justice of Persephone. No, the brutality of
the crucible. Honest. Purifying. Inescapable.
There is an odor here, acrid and sulfurous. The medley of burning
flesh and metal. How sweet is that aroma! Some call it pain and
chaos, but it is progress plain and simple. I know you are not yet
ready to appreciate it. I know it is frightening. You must burn
away those parts of yourself that cannot love the smell of
progress. Burn them utterly and savor the stench. All my
followers do. It makes them strong. It makes them make me
strong. If Pyro did not bring them progress, they would cast him
aside and find a new god. That is as it should be.
INTERPLAY ENTERTAINMENT CORP.
27.
Page 29
Sorcery
Fire. The words do not exist to describe the beauty and the
power of fire. Pyro would invent words to do the job, but this is
unnecessary. Fire is already the best form of its own expression.
Why be a poet of words, when you can be a poet of fire? That is
what Pyro says. And that is why you will want to be a sorcerer,
an artist with the flame.
Fireball Simple. Direct. Generate a large ball of heat
and molten rock, and send it at your foes. There’s
nothing quite like a good Fireball.
Spell Summary – Ball of fire that causes significant damage.
Fireform Here is a bit of the wisdom of Pyro.
Remember it well: The best defense is a dead opponent.
Fireform protects you by burning anyone who dares
come near you. If they’re dead, they can’t attack, can they?
Spell Summary – A shield of flame that burns any enemies it
touches. Deal damage by running through a group of enemies,
setting them alight!
Rings of Fire Patience is an important element of the
discipline of sorcery. You must realize that not every foe
can be slain outright with a single blast of flame.
Encircle opponents such as these with Rings of Fire, which
continuously burn health bit by bit. Only the hardiest of
creatures have any hope of surviving this spell.
Spell Summary – Envelops an enemy in a pulsating ring of flame,
slowly burning it to death. While enveloped in the rings of fire,
the victim will be slowed considerably.
Dragonfire Dragons are celebrated in the lore and
legends of this world and many others. They are revered.
They are worshipped. They are feared. What rubbish!
Dragons get hungry. Dragons get greedy. Dragons die. What you
really want is the dragon’s fire. Who cares about the lizard? A
good sorcerer can summon Dragonfire with no snake at all and
use it to smite several foes, one after the other.
Spell Summary – A flying dragon of pure fire is summoned forth,
that strikes a number of targets before burning itself out.
28.
SACRIFICE
Page 30
Explosion The name "Explosion" is a bit of an
understatement. It is more like a ring of half a dozen
explosions, each delivering copious amounts of
incendiary and concussive damage. Even the stoutest of creatures
are sent careening through the air. Try this spell against low-level
creatures who have been guardianed to a Manalith. That’s
good fun.
Spell Summary – Ignites a targeted area with a flurry of
small explosions. Creatures that are flung off cliffs will be lost,
along with their souls.
Fire Wall We find that as a sorcerer grows in power, the
cowardice of his enemy grows as well. A well-placed Wall
of Fire can be just what you need to discourage the
enemy from running away. It is also very useful for dispersing a
line of enemy attackers.
Spell Summary – A long wall of flame that burns any who
attempt to run through.
Rain of Fire Rain of Fire is a storm of fireballs directly
out of the heavens. Persephone talks of being in tune
with nature, and Stratos speaks of mastery of the
elements, but tell me: Don’t you think they would teach their
wizards to rain down a shower of burning death if they could? If
you’ve seen a Rain of Fire devastate a throng of enemy warriors
just once, you know the answer to that.
Spell Summary – A shower of fiery meteors will rain havoc over a
targeted area.
Pyro could describe even more powerful spells, but some powers
are so mighty you must see them to believe them. Stick around
and you will see them all. I promise you that. Whether you join
me or not, one way or another, the day will come that you see the
full destructive fury of Pyro unleashed. Take that however
you like.
But enough of spells. To be a good sorcerer, you must also learn
to employ the creatures of Pyroborea to wreak havoc for you.
INTERPLAY ENTERTAINMENT CORP.
29.
Page 31

Proles of Pyro
As is only sensible, Pyro has not relied on the natural abilities of
his creatures, instead making every effort to enhance their
military effectiveness. What better way to do this than granting
them the ability to set their opponents on fire? Not very subtle, I
know. But subtlety is overrated. Their destructive capabilities are
so great, in fact, that an unskilled sorcerer will find his creatures
are their own worst enemies. Also note the character summaries
beneath my descriptions. Passive abilities come into play
automatically when the creature attacks or moves. Special
abilities however require mana and have to be activated by you
in order to take effect! Not all of my disciples possess special
abilities. My ranged units require mana to fire, so make sure
they’re fully pumped before sending them into a heated scrap.
After all, wouldn’t want them to sputter out!
Cog The lowliest of my slaves is the mindless
Cog. Unfortunately, its heat energy is entirely
used up in powering its deadly spinning
bludgeons; so it is one of the few proles that
does not burn its victims. That is, up until it is
destroyed. You use them as fodder and then,
whenever your enemies destroy one, it erupts in a searing steam
blast, scalding anything near it.
Unit Type: Melee
Passive Abilities: Upon its death, it releases steam, causing area
damage. (Careful, this will damage nearby friendly units!)
Special Ability: None
Flame Minion Back when the God of Earth
still had an inkling of where he might find a
shred of good sense, he sent me a tribe of
Earthflings. Payment for favors I had done for
him. Flame Minions are the result. They are
quick on their feet and can shoot little fireballs
out of their mouths. They’re very good at taking down enemy
flying creatures, and they can give themselves a temporary speed
boost to escape more powerful enemies. Not that I approve of
that kind of thing.
Unit Type: Ranged
Passive Abilities: None
30.
SACRIFICE
Page 32

Special Ability: Run Away – Don’t confuse this ability with
retreating. Run Away charges your flame minions up to speeds
greater than even your level one wizard spell can bring about.
The perfect ability for quick attacks or any other strategy you
can devise.
Spitfire Spitfires talk big, but they aren’t very
tough. Don’t let them fool you. They can’t take
much damage, and the cone of fire they project
strikes a wide area but doesn’t do that much
damage. So used one at a time, they aren’t all
that effective. No, you fly a group of them in.
Then all that fiery breath adds up and probably hits several
enemies at once. Good stuff.
Unit Type: Air
Passive Abilities: Area damage when breathing fire on targets.
Special Ability: None
Tickferno My engineers tried several
experiments trying to make a Tickferno that
could shoot out a stream of flame, but the
weak, little things kept setting themselves on
fire. We had to settle for the current ones,
which can blast a line of targets with a powerful
heat ray that saps strength and wipes out energy. We’ve started a
program of extermination, but they breed fast, so there are still
plenty available if you can find a use for them.
Unit Type: Ranged
Passive Abilities: Attacks take away large amounts of mana but
little health. Perfect for draining magical targets.
Special Ability: None
Firefist What do you get when you take a big,
savage brute, put burners on its forearms, and
attach fuel tanks around its body? Even
distribution of weight is one thing, but more
importantly, something you might call instant
devastation. Pyro calls it a Firefist. More than
that, Pyro doesn’t care to say.
Unit Type: Melee
Passive Abilities: As it takes damage, it deals out more damage.
Special Ability: None
INTERPLAY ENTERTAINMENT CORP.
31.
Page 33

Pyromaniac It is difficult to believe any selfrespecting gnome would worship Persephone.
They claim to have an interest in building and
inventing things, but there they are making
sacrifices to the Goddess of Antiquities. It can
only be that they’re afraid. By staying in those rustic environs,
they ensure that they know more than everyone else about the
only kinds of things that matter: things. Well, don’t despair.
There are some who show more sense than that. They are very
devoted to my cause, even abandoning their old, trusty handcannons to arm themselves with rocket launchers. They are so
enthusiastic about Pyro’s principles, they call themselves
Pyromaniacs.
Unit Type: Ranged
Passive Abilities: Attack instantly hits enemies, setting them
alight. While on fire, enemy units lose health at a significant rate.
Special Ability: None
Pyrodactyl Don’t think that the proles can do
nothing but set the enemy on fire. As important
as this is, Pyro does recognize the need for
diversity. Hence, the Pyrodactyl, which can
swoop in on your foes and spray them with a
coat of oil. This oil often blinds its victims
temporarily, but, most importantly, it makes them even more
susceptible to being set on fire.
Unit Type: Air
Passive Abilities: None
Special Ability: Viscous Oil – This attack blinds enemy units and
makes them more flammable to fire attacks. They provide the oil,
you provide the match! Blinded units will lose their given orders
and will remain useless until the blindness passes.
Bombard Maybe you’ve seen a lummox before?
Big, slow, not too bright, but they can carry a
large load and are pretty good at throwing
things with their tails. Stratos has some
throwing imploding "storm crystals" and calls
them Flurries. And he claims to be smart. Ha! I
fixed mine to toss bombs. True, these
Bombards, as I call them, are none too accurate
32.
SACRIFICE
Page 34

but that hardly matters when the explosions start. Explosions
beat implosions any day in my book.
Unit Type: Ranged
Passive Abilities: Sets targets alight over a wide area, causing
burn damage as long as they’re aflame.
Special Ability: None
That is not the end of the forces of Pyroborea, but why say more?
Clearly Pyro’s forces are the most powerful. If you don’t
understand that by now, Pyro has no use for you.
THE BOOK OF STRATOS
I am Stratos, God of Air and Supreme Lord of the Heavens. I am
the bringer of storms. The mover of the firmament. Ah, let's do
be honest, shall we? In any halfway-civilized world, I would be
the only god.
My true form is too divine for mortal eyes to bear, but I find that
lacking physical representation, I am too abstract for mortal
comprehension. Some even have the temerity to believe me to be
an unthinking elemental force. Au contraire. I am as cerebral as I
am celestial. All of which I present as a simple explanation for
the form in which you now observe me. Sleek, refined and
dignified. A form nearly worthy of my perfection.
Speaking of which: It is not merely mastery of the heavens and
all things godlike that lead me to this claim of superior divinity.
(Although, if I may momentarily digress, I am master of the
celestial and the elemental, the transcendental and the temporal,
the meteorological and the epistemological, to name but a few of
my areas of expertise.) No, such simple braggadocio does not
speak to the quintessential nature of me. It is merely the plainest
of facts that I am smarter, cleverer, and more insightful than all
the other gods combined.
Look at my creations if you are in need of further evidence:
Empyrea is, literally and figuratively, the loftiest of all realms. Its
inhabitants more talented than any other’s. The great libraries
that hold the chronicles of our time are to be found in Empyrea.
(If I may be candid, I am not certain many of the other gods’
followers even know how to read.) Sacrosanct peaks onto which
no mortal foot has tread: Also in Empyrea. (There are places in
Dys where mortals do not go, to be sure, but it is for lack of
INTERPLAY ENTERTAINMENT CORP.
33.
Page 35

interest, not ability.) From the fantastical to the fearsome, the
elusive to the erudite, Empyrea—much as her lord—reigns
supreme.
Elementalism
Many are the names which one might properly apply to the
disciplines that are studied by my wizards: theurgy, thaumaturgy,
sophistry, and so on, ad infinitum, but the preferred term is
Elementalism. True, it does not include any of that crude firestarting or rock-tossing that some arcane (or should I say
"inane") scholars associate with the Elements, but let us leave
that to the lesser wizards (and lesser gods). Mastery over air and
frost and storms is far superior.
Lightning Simple and direct, a single blast of Lightning
can do grievous injury to a greater enemy or strike down
a lesser creature outright. The lightning will arc directly
from you to your target; so it is advisable to ensure that none of
your creatures are in the path.
Spell Summary –A painful blast of electricity. Shocking,
positively shocking.
Air Shield By surrounding yourself with an Air Shield
of small but very powerful swirling winds, you can
mitigate much of the damage enemy creatures seek to
inflict upon you.
Spell Summary – A mini-tornado that offers shielding properties.
Freeze Freeze causes a temporary condensation of frost
around your target, rendering him completely immobile.
The effect passes very quickly (and ends immediately if
the subject is attacked), but is quicker still to cast and can be
most effective at interrupting an enemy wizard’s spells.
Spell Summary – Encases enemies in a block of ice.
Chain Lightning As you grow more powerful, you will
learn to cast forth Chain Lightning, which strikes your
initial target and then several more. This is a very potent
ability, but it must be used with some discretion: If there are no
other targets your creatures or even you may suffer a blast
or two.
Spell Summary – A blast of electrical force that spreads to
multiple enemies at once.
34.
SACRIFICE
Page 36

Soul Wind Even the best of wizards has a creature die
every now and again. This is especially true of
Elementalists, whose servants are often quite swift but
admittedly less hardy that some others’. When the souls of your
fallen creatures litter a still-active battlefield, you may use Soul
Wind to reclaim them without putting yourself in harm’s way.
Spell Summary – Mini-tornado that fetches and brings a blue
soul back to you. While seeking the soul out, it shoots lightning
at enemies. A soul possessed by the Soul Wind is up for grabs by
anyone, so be cautious of people attempting to steal!
Frozen Ground When you create an area of Frozen
Ground, any creatures within it are temporarily
immobilized. As with freeze, this effect ends for each
subject if it is attacked, but combined with a judicious
deployment of your creatures, Frozen Ground can be
devastating.
Spell Summary – Freezes an area of ground and all creatures
on it.
Fence To defeat your enemies you must learn to divide
and conquer, fight the battles you can win and avoid the
battles you cannot. One of your best tools in this regard
is the Fence spell, which summons, for a time, a line of glittering
orbs. Potent lightning flashes course between the orbs, striking
any foolish enough to pass near them.
Spell Summary – Wall of electrified orbs that strikes any units
with lightning upon approach.
You are impressed, of course, but if you believe those spells are
all I have to offer, you are sadly mistaken. True mastery of
Elementalism will bring powers even grander and more aweinspiring. Nonetheless, as I have sufficiently elucidated the
general character and spirit of my magic, I shall stop there and
now turn to enlightening you with a brief treatise on the
creatures whom you will have the privilege to command as one of
my chosen wizards.
INTERPLAY ENTERTAINMENT CORP.
35.
Page 37

Servants of Stratos
Though the realm of Empyrea is not as populous as Elysium or
the Glebe, its denizens (through the guidance of my superior
intellect) form a nonpareil fighting force. Without a doubt my
servants are the most talented of all creatures, gifted with
cunning abilities which may turn the tide of battle in your favor.
Cunning, of course, is not always a good match for brute
strength, but rest assured the superior speed of my servants
should allow you to control where and when the battle is staged.
Also note the character summaries beneath my descriptions.
Passive abilities come into play automatically when the creature
attacks or moves. Special abilities however require mana and
have to be activated by you in order to take effect! Not all of my
servants possess special abilities. My ranged servants do require
mana to attack normally, so make sure they’re fully charged
before sending them into a conflict.
Frostwolf In the first days, the Frostwolves
were slaves to Persephone’s "circles of life."
They were simple predators, swift of foot and
sharp of fang, traveling in small packs. Always
in a desperate search for sustenance. Always in
fear of the great mountain Yeti. Helplessly
subject to the cruel vicissitudes of
ecological cycles.
Had it been up to the Goddess, they would never have arisen
from this pitiful state of barbarity, but I intervened. I taught
them to use their minds and free themselves of primitive
superstitions. Their unmatched swiftness is still their greatest
asset, but—having learned the fashioning and wielding of
knives—they are quite deadly as well.
Unit Type: Melee
Passive Abilities: None
Special Ability: Run Away – Not to be confused with retreating!
This ability speeds up your Frostwolves to an alarming rate.
Utilize the extra speed to strategic advantage!
36.
SACRIFICE
Page 38

Sylph There have always been tales of the
elusive mountain nymphs—mystical creatures of
immense beauty, finding comfort in the solitude
of the high peaks of Empyrea. Many are the
men who have died atop the frozen heights
when seeking to catch a Sylph for a bride.
As you would expect, there is some truth behind the tales that
inspire such folly, but the secret of the Sylph is not where she
hides, it is how she hides. For you see, a Sylph can remain
unseen in plain sight so long as she does nothing to harm you. In
battle, they are invaluable, appearing suddenly to loose a flight of
arrows and then fading once more into the mist.
Unit Type: Ranged
Passive Abilities: None
Special Ability: Stealth – Can make itself nearly invisible. When
in this state it cannot be targeted by spells or missile attacks,
even if seen by the enemy. Must reappear when attacking.
Brainiac When unencumbered by the artificial
constraints of the body, the power of the mind
is an amazing thing. Though the Brainiac does
(technically speaking) possess a body, it is of far
less substance (if you will) than his mind.
Using his modest wings to keep him aloft and
out of the fray, a Brainiac focuses his mental
energies against an opponent in an irresistible psychic attack. In
addition to traumatizing the subject so thoroughly that it
physically suffers all the damage it imagines, this attack will often
briefly debilitate the subject, causing it to fall to the ground
helpless. Sheer genius.
Unit Type: Air
Passive Abilities: Knocks enemies down by the use of
psychokenesis, causing a target to be stunned as well as
wounded. Perfect for interrupting an enemy wizard’s
spell casting.
Special Ability: None
INTERPLAY ENTERTAINMENT CORP.
37.
Page 39

Vortick Not all of my creations possess great
intelligence. However, this is not a problem
because one of the (many) qualities of my
genius is the insight to make the most of what
natural abilities a creature does have. For the
longest time, the simple-minded "tick" was a hapless herbivore
which rapidly sucked air through a series of chambers in its
carapace to make a frightful din and scare predators away.
Typical Persephone rot.
Calling it a "Vortick," I modified its thoraxial carapace to channel
the air into a swirling vortex—much more powerful and minus
the unpleasant sounds. (Allow me to digress briefly, for I believe
you are wondering if this "vortex" has influenced the name of the
vortick. An excellent deduction. I would have expected no less of
you.) The vortex casts its victims into the air and subverts any
attempts they might make to attack.
Unit Type: Ranged
Passive Abilities: Creates a vortex to lift enemy units into the
air. This causes some initial damage, followed up by the damage
caused by the subsequent dropping of the victims back to
the ground.
Special Ability: None
Squall I was so pleased by the unmitigated
success of the Vortick, I began immediate work
on the high mountain birds of prey called
"squawks." (That’s what the frostwulves called
them, at any rate.) Again, rather than all that
unpleasant sonic drivel, I re-fashioned its body
to project an immensely powerful (gale force) blast of air. Initial
experiments were disastrous, I do not mind telling you, until I
removed their wings. Anchored on the ground, they were much,
much more effective, knocking their subjects back instead of
themselves. And thus the Squall was born.
Unit Type: Ranged
Passive Abilities: Gale force knocks targets back when hit.
Special Ability: None
38.
SACRIFICE
Page 40

Storm Giant In the elder days, before the
hegemony of the five gods, great titans ruled the
world. We obviously exterminated the great
majority of them. It’s very difficult to get the
undivided worship of a group of villagers when
the Fire Giant up the road demands offerings in
exchange for not burning the village down.
Of these titans, only the Storm Giants survive in any great
numbers. Ever the diplomat, I was able to come to an
accommodation with their leader, Lord Surtur, and to this day
they wear these very handsome masks in tribute to me. In
addition to being big and strong, they are especially useful to
an Elementalist.
Unit Type: Melee
Passive Abilities: A storm giant’s passive abilities are activated
via its special ability, "Call Lightning." When struck by lightning,
a Storm Giant gets enhanced statistics, despite taking some
initial electrical damage this powering-up also causes the giant to
spew electricity in all directions.
Special Ability: Call Lightning – This ability calls down the
lightning bolt from the heavens to activate the Giant’s passive
"power-up" ability.
Seraph Persephone does not talk about this
(because it shames her and she’s got an
unhealthy preoccupation with meaningless
concepts such as honor), but those gremlins she
uses as messengers are not really the complete
species that she represents them as.
You see, during the War of Purification (as the druid scholars call
it—War of Persephone’s Tantrum might be more accurate), not
all of her creatures bought into the whole "wisdom and justice of
our crusade" blather she was trying to pawn off on them. A great
number of her messengers used their embassies to other lands as
an opportunity to defect. These are ancestors of the Seraphim
who serve me now. Like their gremlin counterparts, they fly and
are able to ensnare a single victim, pulling it toward them.
Unit Type: Air
Passive Abilities: None
INTERPLAY ENTERTAINMENT CORP.
39.
Page 41

Special Ability: Cage Pull – Causes the Seraph to snare an
enemy in a cage of pure energy. While ensnared, an enemy
creature can be pulled towards the Seraph.
Flurry It’s a cruel world out there. Rarely does
one see creatures of different species in close
cooperation. (I am not talking about those graft
jobs Pyro does, either.) But it is a beautiful
thing when it happens. What we call a Flurry is
actually two creatures: an apprentice
elementalist riding atop a cerulean lummox.
The lummox, of course, is a lumbering but docile mountain
creature whose only defense is tossing things with its adept
prehensile tail. To give them something better to toss, the young
elementalists are taught the transmutation of ice into Storm
Crystals, which create a powerful vacuum upon impact—a
damaging implosion, instead of an explosion. Though not terribly
accurate, the Flurry can rain down a devastating barrage of
storm crystals from a great distance.
Unit Type: Ranged
Passive Abilities: Vacuum shot sucks enemy units towards the
point of impact.
Special Ability: None
As wondrous and sublime as are the creatures I have just
described, they pale by comparison with those few I have not
mentioned. As you can see, everything I touch becomes far
better than ever it was or might have been without my influence.
I do hope you realize that, after you have entered into my
service, the same shall be true of you.
40.
II. SACRIFICE MENUS AND
OPTIONS
Whew! I'm so glad those blowhard gods finally quit talking! It’s
as if the laurels atop their heads (or between their ears) give
them some divine right to Babylon, and on, and on. I must mock
subtly initiate, lest I get a lightning bolt in the behind.
Now that I’ve got that off my chest, allow me to introduce
myself. I am Zyzyx, your practical helper and (dare I say) friend
in the world of Sacrifice. You shall see me as the familiar that's
always hovering about, ready to aid you with advice at the drop
of a hat. Presently it's my sworn duty to sort out some of the
SACRIFICE
Page 42

more mundane aspects of the Sacrifice gaming experience for
you, so that you can slip more easily into the boots of a conjurer.
While the information that I shall relay to you now has nothing to
do with gods, wizards, creatures, conjuring or fighting (unless
you're having it out with your operating system), it’s important to
understand. I heartily recommend that you keep this portion of
the manual marked for the occasional spot reference.
So without further ado, let’s learn more about Sacrifice’s menus,
options and game mechanics, shall we? After all, if any harm
should come to you, I should never forgive myself!
INTERPLAY ENTERTAINMENT CORP.
41.
Page 43

42.
A. THE MAIN MENU
Single Player Campaign
Have your fellow wizards abandoned you? It could be that they
are off relaxing somewhere, thoroughly engrossed in a tome of
forgotten lore. Either that or they’ve all been banished. No
matter. You will be pleased to know that Sacrifice comes
complete with a large Single Player campaign to keep you busy.
This campaign’s challenging enough to make a Storm Giant weak
in the knees, and is a good way to test your skill before heading
into the multiplayer realm. Simply click on the "Single Player"
button in the main menu and you're off to experience the
campaign on your own terms.
Multiplayer Game
The gods of Sacrifice are enlisting new wizards everyday, and no
doubt you'll want to pit yourself against some of them. If you feel
strong enough for the challenge of multi-mage combat, click the
"Multiplayer" button. Play against a remote opponent over the
Internet, take on a friend or associate via LAN, or play against a
few computer-controlled wizards.
Load Game
If you wish to continue a previously saved game, click on the
"Load Game" button to access the game-loading screen. Choose
the saved game you'd like to continue from the list displayed.
You’ll soon find yourself where you left off, for better or for
worse! Use a degree of caution when saving and loading your
character’s position during the single player campaign. Loading a
save game will overwrite the character’s current position in the
SACRIFICE
Page 44

single-player campaign with the position in the save file. Loading
and saving data for a specific character will not effect any other
characters you might have.
Options Menu
Click the "Options" button to open up Sacrifice's options menu.
Here the game's graphics, sound, keyboard and network options
can be tweaked to meet any wizard's preferences. You can also
access the system information screen from this menu, designed
for people who might be experiencing hardware or software
issues.
Quit
All good things must come to an end, regardless of whether
you've just completed a portion of the single player campaign or
humbled a fellow spell caster in multiplayer. (Don’t feel too bad,
the demons of the pit shall make him welcome.) Click quit to
close the portal to the world of Sacrifice and return to the world
of Windows. There you'll be free to consort with other wizards of
the corporate and the social kind – until your next adventure!
Now let’s look at what you’ll find in each of these menus in
greater detail.
INTERPLAY ENTERTAINMENT CORP.
43.
Page 45

44.
SINGLE PLAYER GAME MENU
Tutorials
Do you find yourself challenged in the magical arts, lacking
savoir-faire in the prestidigitation department? If so, then
Sacrifice’s tutorial section is for you. Choose a tutorial to
experience Wizardry 101 on the lush, sprawling campus of Magic
U. (Situated amidst the ivy covered trees and forests of
Elysium!) After completing the three available tutorial missions
you will understand just about all there is to know about being a
top practitioner of the arcane arts. Don't expect to wear a
mortarboard at graduation, pointy wizard hats have become
standard issue!
Tutorial 1
In this tutorial you'll discover that there's a lot more to moving
around in the world of Sacrifice than meets the eye. (It's not as
simple as point, click and go, you know.) Select this tutorial to
learn about wizard movement (hither, thither and yon?), basic
spell casting (sim-sim-salabim isn't on the list), and basic
creature commands. You will find that professor Zyzyx will be
with you every step of the way. Which reminds me, don’t be
tardy.
Tutorial 2
Possessing leadership skill isn't in the genes; it's acquired
through hard work and practice. If you want people to follow
you, you must set a powerful example. (Charnel will tell you that
fear and intimidation is best to keep folks in line, but just ignore
him.) Tutorial 2 teaches how to command creatures during
SACRIFICE
Page 46

battle, and how to keep an eye on their life force and mana.
There’s also a nifty little lesson regarding Sacrifice’s user-friendly
X menu.
Tutorial 3
Call this tutorial, "Arcanum 201 – An Introduction to Spells and
Sacrificing." Besides being the final tutorial, it's where you'll learn
about advanced spell casting techniques. You'll find out what an
altar is and how to keep it safe. Desecration of enemy altars is
also a part of the curriculum. How does one desecrate an altar
you ask? By sacrificing of course! If you ever hope to win, it’s the
skill to be mastered.
Sacrifice Campaign
Plunge headfirst into the mystical world of Sacrifice by clicking
on the campaign button. It’s a perfect way to meet the gods and
to experience an epic adventure one episode at a time. What does
Pyro have in store for the verdant pastures of Elysium? What’s
behind the quarreling of the gods? Find out over the course of
this story-driven interactive adventure!
Scenario
Clicking here will allow you to play missions created using
Sacrifice’s Scapex level editor. The Scapex editor is included with
the game. Missions downloaded from the Internet, created using
Scapex, can also be accessed and played by clicking this button.
Cancel
Did you mean to choose "Multiplayer" but hit "Single Player"
instead? Don’t be embarrassed wizard, it happens to the best of
us. Simply select "Cancel" to return to the main menu. Here you
can start afresh with your navigation through the game’s modes,
options and scenarios.
INTERPLAY ENTERTAINMENT CORP.
45.
Page 47

LOAD GAME MENU
Save File Display
This convenient window reveals a list of previously saved
adventures. Select one by clicking on its name with the mouse,
then click "Load Game" to play. Or, just double click on the game
name to load it and continue playing.
Description
This window shows the contents of the saved game that you
selected. Detailed in the window are the wizard’s name, map
name and type of saved game you picked.
Cancel
Clicking here takes you back to the main menu – no harm, no
foul.
Delete Game
If the battle simply cannot be won, if the field is strewn with the
corrupted souls of your slain minions, then perhaps it is time to
strike the whole dark episode into oblivion. Click here and the
game you wish to delete will pass on into the netherworld. (Sigh.
If it were only this easy to rid us of Charnel!)
46.
SACRIFICE
Page 48

Load Game
Conjures up a game file that you choose under the "Save File
Display" for play. Pick up the adventure where you left off, and
replay your scenario if things didn’t turn out as you’d hoped the
first time around.
Loading a save game will overwrite the character’s current
position in the single-player campaign with the position in the
save file. Loading and saving data for a specific character will not
effect any other characters you might have.
INTERPLAY ENTERTAINMENT CORP.
47.
Page 49

MULTIPLAYER GAME MENU
Local Game
The "Local Game" option is for those wizards who don’t really
wish to play alone. By clicking this button, you can play a single
player game against one or more of the computer’s artificially
intelligent wizards. Take heed initiate, for while they may only be
of the mage clan known as the "AI," they will wipe you from the
face of the realms given half a chance!
Local Area Network Game (LAN)
This option allows you to create a local area network game, or to
join a LAN game in progress. Please note that if your computer
is not connected to a local area network, you will not be able to
choose this option. Players should make sure that the IPX
protocol has been successfully installed under windows.
Internet
Select "Internet" to take your Sacrifice skills worldwide! Pit
yourself against other wizards hailing from all parts of the globe!
The Internet’s a wonderful thing, no?
Cancel
Returns you to the main menu without having made any
selections. The perfect choice for self-conscious wizards who
don’t feel up to a challenge with sentient beings!
48.
SACRIFICE
Page 50

OPTIONS MENU
Graphics Options
Click here to adjust Sacrifice’s video resolution and 3D settings.
Higher resolutions depend largely on your system’s specifications
and 3D capability. Thus not all options may be available to you.
If a problem running the game should arise, especially with a
specific configuration, Sacrifice will issue a warning that you may
choose to ignore. (At your own peril, I might add!)
Sound Options
Click here to adjust the game’s sound options and volume levels.
This menu shows the sound card and driver in use. Sound effects
volume and music volume can be tweaked here using the
available slider bars. After all, some people are all about the
effects, some go just for music. As for me? I’m a familiar who
leans towards the default settings.
Keyboard Options
Ah, variety is the spice of life! Of course James would beg to
differ, but then he never leaves his earthy abode to know what
variety is. Click here to change Sacrifice’s keyboard controls and
bindings to match your playing tastes. It’s total freedom, initiate.
Miscellaneous
This is where you go to adjust mouse settings, clicking speed and
other game factors such as friendly fire and pop-up tips.
INTERPLAY ENTERTAINMENT CORP.
49.
Page 51

System Information
Click here to see Sacrifice’s interactive troubleshooting screen.
Go here to see your system specifications, and for
troubleshooting Sacrifice should the need ever arise.
B. OPTIONS
Graphics Options
Resolution
This window allows you to change and view the video modes
available to Sacrifice. The higher the resolution, the more
demands on your system.
Use Detail Textures
Click here to turn detail textures on or off.
Use Light Maps
Click here to turn light maps on or off. The light maps determine
how far back lighting effects appear in the distance. It’s a matter
of personal taste, and won’t affect performance.
Use Multitexture
Click here to turn multitexturing on or off. Having multitexture
turned on greatly enhances the detail of the terrain by pixel
enhancement.
Triple Buffering
Click here to turn triple buffering on or off. Clicking this option
on allows for smoother framerates at the expense of video
memory.
Widgets
Click here to turn widgets on or off on the 3D landscape.
Widgets are the little decorative things you see on the terrain,
such as blades and tufts of grass. Turning widgets off improves
the performance, but takes away some of the beauty of the
environment.
Blood Stains
Click here to turn blood stains, that splatter all over the
landscape, on or off.
50.
SACRIFICE
Page 52

Explosion Scars
Click here to turn landscape explosion scars on or off.
Disable Fogging
Click here to turn fog effects on or off. This pertains to visual fog
seen in the environment and has nothing to do with the minimap. Don’t confuse this fog with "Fog-of-War."
Disable Texture Strips
Activating this feature disables one of the more advanced
features of direct 3D that may give some video cards problems.
Character Texture Resolution
This slider allows you to change the texture resolution of the
creatures and wizards in Sacrifice. Higher resolutions make the
level of character detail sharper and more refined. This takes up
more VRAM that your machine might not be able to spare, so
keep this in mind before selecting a high level of resolution.
Max Scars
This slider allows you to adjust the maximum number of scars
that will be displayed on the landscape during battle. Scars on
the landscape are patches of blood, or black charred areas caused
by explosions and spell casting. By reducing the maximum
number of scars displayed on the landscape at once, this frees up
more memory, allowing for an even smoother framerate.
Target Framerate
This slider allows you to change the target framerate in the game.
By adjusting the framerate you can find the best balance between
level of detail and frames per second on your machine. The
recommended and default setting is 20 frames per second. This
allows for high playability with a high polygon count.
(Note: Setting at 20 fps does not limit performance to 20 fps)
Gamma Correction
This allows you to adjust your video card’s gamma correction in
the game. If your screen is too dark or too light, adjusting the
gamma correction is the solution.
INTERPLAY ENTERTAINMENT CORP.
51.
Page 53

Texture Filter Mode
This button allows you to adjust the texture filter mode from
point, bilinear, or trilinear. Point texture filtering offers low
quality textures with high machine performance. Trilinear texture
filtering offers the highest quality textures with lower machine
performance. Bilinear is a mix of the two.
Texture Resolution
Changes that resolution of all textures not on the characters. You
must exit to windows and restart the game for this feature to
take effect.
Sound Options
Current Provider
This window shows the current sound driver being used
by Sacrifice.
Provider
Shows and allows you to change Sacrifice’s sound driver
and mode.
Sound Volume
This setting allows you to change the volume of Sacrifice’s
sound effects.
Music Volume
This slider allows you to change the volume of Sacrifice’s
background music.
52.
Keyboard Options
Control Keys
This window allows you to view and change the keys that are
used to move yourself around in the game. To change the control
keys, click on the key you want to change with the left mouse
button. Then press the new key you want to bind. Repeat this
procedure with as many keys as you’d like.
Command Bindings
This window allows you to view and change the keys associated
with spell casting, making formations and all other activities not
related to movement. To change a command key binding, click
on the command you wish to change with the left mouse button.
SACRIFICE
Page 54

Then press the new key you want to bind. You will also find it a
simple matter to bind command keys while in game. To bind a
key while playing, first move your cursor over the icon of the
command you wish to bind. Hold the "Ctrl" key plus the "Shift"
key and the desired key that is to be your hotkey. (Make sure
your cursor is still over the icon of the desired command while
pressing the keys.) The selected command should instantly take
place when your chosen key is hit.
Add New Binding
Click here to add a new key binding not on the command list.
Select the type of command you want you bind in the left hand
window. Then select the specific command under that category
on the right hand side. Finally, press the key you want to bind to
the command.
Reset To Default
The perfect choice for when you’ve botched things up completely!
Removes all new key bindings and restores the game controls
back to their original settings.
Miscellaneous Options
The options under this menu deal with those little aesthetic
extras that make playing Sacrifice all the more enjoyable. Tweak
your mouse speed, clicking speed, or mouse wheel controls. You
can even toggle the pop-up gameplay tips and friendly fire on or
off. Zyzyx, that’s who.
INTERPLAY ENTERTAINMENT CORP.
53.
Page 55

System Information Screen
Computers, having been made by mortal men, are prone to act
up on occasion. Sacrifice’s System Information Screen will tell
you if there’s any problem your computer might have running the
game. Such problems will be displayed in the box marked
"Compatibility." Sacrifice, after identifying a problem, can
attempt to rectify the issue. The most common problem Sacrifice
will identify is that your personally chosen settings exceed the
capabilities of your hardware. If you choose to have Sacrifice
auto-fix this problem, the game will calculate and adjust your
settings for the best performance possible on your PC. If you
continue to experience problems running Sacrifice, make sure
your computer meets all of the minimum system requirements
marked on the game box. If all else fails, consult the technical
support section at the end of this manual.
54.
SACRIFICE
Page 56

III. THE GAME OF SACRIFICE
A. CREATING A CHARACTER
The Character Roster
I, Zyzyx, am pleased to inform you that Sacrifice is a game with
character. The five gods, their ideologies and separate agendas
will quickly immerse you into a world overflowing with mystery
and magic. Before setting foot into the realms, I suggest creating
a character. To assist you in character creation there are over 13
different wizard models to choose from. There’s also a nearly
infinite amount of names that you can give them, your
imagination’s the limit. You will be prompted to either create or
choose an existing character each time you select the Single
Player Campaign or a Multiplayer game.
Multiplayer:
When on this character roster screen, selecting "New Character"
takes you to a place where you can scroll back and forth through
the wizard models. A graphical representation of each will be
presented before your eyes. Once you’ve found the wizard you
want, you can use the text bar at the top to manipulate its default
name or to create one from scratch. When you’re finished, click
"Create" to create the wizard. You’ll see that the new character
has now been added to the character roster.
Single Player:
In the single player campaign you will assume the role of Eldred,
a powerful wizard. Since the single player campaign is his story,
INTERPLAY ENTERTAINMENT CORP.
55.
Page 57

56.
he is the only selectable character in this mode.
When you’re done creating and naming wizards, click your
mouse on the wizard that you wish to play as. Now click on
"Select Character" to continue on to the game. Selecting cancel
will return you to the main menu without selecting a wizard.
B. THE GAME LOBBY SCREEN
AND GAME SETTINGS MENU
The game lobby screen appears whenever you decide to play a
local, LAN or Internet game of Sacrifice. It serves as the place
where players log in, select their patron god and decide upon a
map for play. Once gathered in the lobby, wizards can choose to
team up or compete against each other. The upper left hand
portion of the screen shows the open slots (shaped like rings)
that players fill upon logging into the game. The player rings
reveal a person’s slot number, player type and team affiliation.
The buttons to the right of the rings provide each player’s
character name and chosen god. Note that the player slots can
be closed to narrow down the maximum number of players, or to
add computer players into the mix. Please note that if you’re
playing Sacrifice’s single-player campaign, you will not be
brought to this screen.
The large box on the lower left of the screen is for chat. Players
who have logged in can type messages back and forth. The upper
right hand portion of the "Game Lobby" screen shows the
current map selected for the game. It will always be blank until
the game creator selects a map for play.
Once enough players have logged in and you’re ready to go,
you’ll need to choose a map on which to play on. There are
multiple options for gameplay that you can adjust as well. Click
on the "Game Settings" tab in the lower right hand corner of the
screen to make your selections. You cannot start the game
without selecting a map using the "Game Settings" menu. Below
is a detailed description of all the choices the "Game Settings"
menu offers.
Selecting A Map
In the world of Sacrifice, there are five lands, all wondrous in
their own sort of way. There’s Elysium, with its lush forests,
tranquil waters and verdant fields. Conversely there’s Dys, a
domain of the damned where blood, charred lava crust and death
holds dominion over all. The Glebe is a mountainous and earthly
SACRIFICE
Page 58

domain filled to the brim with...rocks. Pyroborea is a land of fire,
forever scarred and altered by the march of technological
progress. Finally there’s Empyrea, the sky domain where graceful
winged creatures soar over idyllic valleys and vistas.
These dominions all have unique topographies on which to do
battle, and there are plenty of maps included with Sacrifice that
make the most of them. For example, the map entitled "Close
Combat" is a small, cramped battle arena designed to maximize
the casualty rate. The "Valley of the Dead" consists of a tight land
bridge situated in the midst of hell, where taking and holding it is
the only means to victory. To add a little flavor to your
multiplayer gaming experience, try "Gladiator," a map that
features tough bosses in the center of the playing field. They’ll
pick a fight with anyone!
The "Select Map" window displays the entire catalog of maps you
can play in the game. Scroll down the list, check out the maps,
and have fun trying each of them out. The number of wizards
allowed on each map is listed in parentheses next to the map’s
name. You will not be able to start a game if the number of
players in the lobby exceeds the maximum number of players
next to a map.
Game Types
I am sure you know this wizard, but I shall tell you nonetheless.
Everything in life, no matter how enjoyable gets stale from time
to time. You’ll be pleased to know that Sacrifice offers four
variations of gameplay to ensure that there’s always something
new to try. Each type of gameplay offers its own style of play and
INTERPLAY ENTERTAINMENT CORP.
57.
Page 59

objective. I will now offer you descriptions of the game types, so
that you will know what it is you’ll be getting yourself into!
Skirmish
This game variation is Sacrifice’s take on "Last Man Standing."
(Wizards taking the place of men!) It’s a winner-take-all game of
domination and subjugation; the player who desecrates all of his
opponent’s altars wins the game.
Slaughter
Well now, the name of the game kind of gives it away, eh? In this
game type, competing wizards must aspire to racking up a high
body count. The player who reaches the winning number of
creature kills first is the victor. Clever deployment of forces and
the timely application of healing spells will make all the
difference in this game of kill or be killed. The number of kills
needed to win can be adjusted when this type of game is chosen.
Soul Harvest
Persephone, Pyro, Charnel, James and Stratos are constantly
struggling to be top deity of the realms. This never-ending thirst
for supremacy gives rise to their need for more and more loyal
subjects. It’s not unusual therefore for them to ask their wizards
to go on a little soul-harvesting sojourn now and again. In this
game type the first wizard to harvest a set number of souls wins.
Not only is it necessary to be good with spells and creature
deployment, it’s more vital to deploy brigades of Sac-Doctors.
Protecting them as they go about delivering souls back to your
altar is also vital in this variation. As in slaughter, the target
number of souls needed to win can be adjusted when "Soul
Harvest" is chosen from the "Game Settings" menu.
Domination
While soul harvesting is a great way to get Sacrifice’s powerful
creatures under your control, scooping up every Manalith in
sight is essential to get a monopoly on raw, magical power!
Domination is a fast-paced game of “capture-the Manalith.” The
first wizard to control a set number of Manaliths is the winner.
Players determine this winning number before the match begins.
Keep in mind that the more Manaliths you control, the faster
you replenish mana (with the right number of Manahoars of
course).
58.
SACRIFICE
Page 60

Game Settings
These game settings can be applied to a multiplayer game of
Sacrifice. Below you’ll find a description for each. Not only do
they add even more variation to the game experience, they serve
to speed up or slow down the game’s pacing as well.
Random Altar
Selecting this box will randomly start each wizard at a different
altar on the map. (All altars on the maps are in fixed positions,
this option just mixes up who starts where.)
Always Gib
When playing Sacrifice, you will notice that when creatures die,
they expose their souls for conversion and collection. By selecting
this box, you will ensure that all enemy creatures will "gib,"
(splatter into gory kibble) instead of just falling down lifeless.
This little variation makes various levels fun to play again and
again, as souls won’t have to be converted. Gibs only yield blue
souls! The perfect choice for those in a bloodthirsty mood
looking for a fast game!
Collect Allied Spirits
Clicking this option will allow you to collect the souls of your
allies without having to convert them. (Perfect for team play!)
This makes the game flow more quickly, enabling players with
time constraints to possibly squeeze more games in. The realm’s
Sac-Doctors are overworked as it is, so try this style of play and
give them a break!
Starting Spirits
This slider allows you to set the number of spirits each wizard
receives at the start of a game. The more spirits you start with,
the easier it is to get moving with a bunch of creatures and
Manahoars. The fewer souls everyone start with, the more it
forces people into quick combat in a quest for souls. Depending
on the style of the game you like best, set the spirit
value accordingly.
INTERPLAY ENTERTAINMENT CORP.
59.
Page 61

Minimum Level
This slider sets each player’s experience level at the start of each
game. Start off as a neophyte conjurer or make a splash on the
scene as a sorcerer. Note that starting at higher levels gives
players access to more powerful spells and creatures right off
the bat!
Maximum Level
Adjusting this slider acts as an "experience cap," that is, it sets
the maximum experience level each player can reach during the
game. This function can level the playing field between
experienced and beginning players. In Sacrifice, players can
reach a level of 9, but no higher.
Gib Chance
Tweaking this setting allows you to set how often each player will
be able to gib enemy creatures. The higher the setting, the more
frequent a gib will occur. (Also, the more blue souls you can
instantly collect as bonuses!) Setting the slider to 100% (4.00)
will ensure that nobody is spared from a good splattering!
XP Rate
This slider allows wizards to set the rate at which all players in
the game gain experience. A higher value equates to a more
rapid rate of leveling up. A lower value, especially a value less
than one, really slows down the rate of leveling up in a game.
60.
SACRIFICE
Page 62

C. JOINING OR CREATING A
MULTIPLAYER GAME
List of games
After you’ve decided to jump into a LAN game or a game on
the Internet, you will see a screen that shows the current games
being played and created. This screen shows itself
immediately after you have chosen your wizard from the
"Character Roster" screen.
Join
Clicking on this button allows you to join a selected game while
it is in progress.
Create Game
Selecting this button allows you to create a Sacrifice game that
others will be able to see and join.
Cancel
Going here returns you to the multiplayer menu.
INTERPLAY ENTERTAINMENT CORP.
61.
Page 63

D. THE IN-GAME SCREEN
Now that we’ve covered the dry stuff, we can move on to talking
about the gameplay. So pay attention wizard, as these lessons
will prove the most valuable to you.
The first of these lessons deals with the "In-Game Screen,"
namely the screen you see at all times while playing Sacrifice. If I
don’t teach you about the In-Game Screen, the gods should
surely think me mad for sending you out into the field
unprepared! This information can mean the difference between
life and death, so let us tarry no further. One of the most
important parts of the "In-Game Screen" is the USP, or Unit
Selection Pane.
Unit Selection Pane
The Unit Selection Pane appears as two rows of 6
rings enclosed in a box on the left hand side of
your screen. It shows up to 12 creatures (one
creature per ring) that you’ve selected at a time
for movement. If you look closely you will also
see that there’s a single ring on the right hand
side of the box. This ring displays a creature’s
special ability. For example, if you select one
Druid, or a group of 12 of them, you would click
the special ability icon to activate their life
shields. Not all creatures have special abilities,
but if they do, an icon will appear in this special
circle, ready to be activated at your command. If
a group is comprised of heterogeneous units, then the special
62.
SACRIFICE
Page 64

ability of the highest ranking unit will be displayed in the special
ability circle.
Soul Counter (A)
The Soul Counter is to the left of your
mana and health bars in the shape of
a hovering blue soul. The number in
the center of the counter displays how
many souls you have available for
A
creatures requires two or more. If the counter reads zero, you
will have to collect more souls or convert others before you can
summon more creatures.
creature summoning. Summoning
small creatures requires one soul,
while summoning really large
Mana Bar (B)
The Mana Bar is found in the upper
right hand corner of the screen,
located right of the Soul Counter. A
glowing band of aqua, this Mana Bar
shows how much mana you have
B
drop below 25% of your total allotment, you will receive the
warning, "Your mana is low." Tapping into Manaliths and using
Manahoars effectively greatly improves the refresh rate of your
mana supply. A final thing to remember is that each time your
wizard levels up in the course of game, your maximum mana
capacity is increased. The better you get, the more mana you will
have to spend.
remaining for casting spells. If the bar
is full, you have 100% of your mana at
your fingertips. If your mana should
Life Bar (C)
Adjacent to the Mana Bar, the red
Life Bar shows how much more
damage you can sustain before you
are killed. Speaking as your friend
dear wizard, I urge you to keep an eye
on it at all times, especially during the
C
heat of battle. If your life should ever
reach zero you will die and change
into spectral form. As a specter you will only be able to give
orders to your troops. You will NOT be able to cast spells or
INTERPLAY ENTERTAINMENT CORP.
63.
Page 65

collect souls. If you should die, I urge you to return to a
Manalith, mana fountain or your altar. (Manaliths are the best
means of replenishing your mana supply, altars the worst.) At
one of these locations your mana will start to recharge. When
you have replenished 25% of your mana bar, your life bar will fill
completely. When this occurs you will be resurrected, turning
into physical form once again. If your altar should ever become
desecrated, the death you will suffer will become permanent! So
protect your altar with your life, because if it’s gone, your God
will not be able to save you.
Mini-Map
This is a round diagram found in the
lower right hand corner of the game
screen. It gives you a bird’s eye view of
where you are and where you can go in
the surrounding area. Places you have
yet to venture are blackened out, ready
for you to explore (this phenomenon
is known as the "fog-of-war").
Sometimes the need will arise to see a larger or smaller portion
of the map. This is accomplished by zooming the map in and out.
Zoom in by clicking and holding down the middle mouse button
on the map, and dragging up or down. If your mouse isn’t
equipped with a middle button, hold the control (ctrl) key down,
click the left mouse button on the map and drag up or down.
Lots of information about your surroundings can be gleaned
from the mini-map. You will appear as an oblong white shape
directly in the middle. I, Zyzyx, will sometimes appear as a green
dot if you zoom in on the area around you.
Other creatures will appear on the mini-map as dots too, colored
according to their team affiliation. You can get information on
just about anything on the mini-map by placing your cursor over
it. When off the map your creatures and buildings will appear
around the edge of the mini-map as small grey arrows. These
arrows indicate the direction you will need to travel in order to
reach them. This is useful for knowing where your altar and
Manaliths are located. These arrows will flash in case your
buildings are being attacked. If so, simply select the teleport
spell and click on the arrow that’s flashing. You’ll be taken to the
building under attack in time to defend it!
64.
SACRIFICE
Page 66

The map always orients itself in the direction that you are facing,
so when you turn, it rotates in a complementary fashion.
It’s possible to teleport all over the map by invoking the teleport
spell and clicking on the building that you’d like to warp to (you
can only teleport to a structure that’s yours). This is very helpful
if the tide of combat is turning against you and you want to
regroup somewhere peaceful. Your altar perhaps? There will also
be times when you will need to teleport back to your Manaliths
or altar for defensive purposes. The ring shaped structure on the
mini-map shows the exact location of your altar, and your
Manaliths will appear as colored spheres. Shrines are indicated
by "plus" symbols.
You can also use the mini-map to issue orders and select troops,
but I will get to that much later.
Spell Tabs
The spell tabs are a wizard’s first (and last) line of offense and
defense. They are found in the lower left hand corner of the game
screen. There are 3 kinds of spell tabs.
Creature Spell Tab: The first tab, located on the left,
is for creature creation. Every wizard starts off with a
Manahoar spell. The other starting creatures available
for summoning will vary depending on your patron god (or
goddess, all apologies Persephone).
Combat and Healing Spell Tab: The middle tab is for
spells having to do with fighting and staying alive. You’ll
find a speed up spell, attack spell (such as fireball or
wrath) and a healing spell. Other spells will be acquired through
experience. The gods, knowing of your growing power, shall pass
this knowledge unto you when you level up.
Structure Spell Tab: The tab at the extreme right is for
structure spells, which deal mainly with the buildings
within Sacrifice (Altars and Manaliths). You can also find
the conversion spell listed under this tab when you wish to
convert a slain enemy’s soul. At the beginning of a game, you will
find spells for Manalith creation, guardian, conversion,
desecration and teleportation ready for use. Others spells will be
acquired when you level up.
INTERPLAY ENTERTAINMENT CORP.
65.
Page 67

E. THE PAUSE MENU
The pause menu is called up when the escape key is pressed
during a game. Calling up the pause menu freezes the game,
making it a perfect way to take a bathroom break. Wizards,
despite their immense power, are extremely prone to the call of
nature. Some wizards think this is a side effect of too much
mana absorption, but I think the root of the problem can be
traced back to Pyro’s immense breweries. To him, beer is on a
par with progress. Here’s what you can find when you pull up the
pause menu:
Mission Objectives
Clicking on this tab displays the key tasks that must be
performed in order to complete the current mission you are on.
For example, if Charnel orders you to produce over 12 fallen to
complete the mission, you will see this order listed in the
Mission Objectives box. A handy tool if you are stuck about
what it is you should be doing.
66.
Speech History
In case you get distracted in the course of an adventure and miss
some of the dialogue or plot, simply call up the speech history
by hitting escape to recap the text you missed! This feature only
recaps the dialogue up to your game’s present point, so don’t
expect it to give away what happens next!
Save Game
Simply click here to save your game at anytime.
SACRIFICE
Page 68

Load Game
Click here to load a game at any time. Perfect for slinking out of
those disastrous episodes you’d care to forget. Loading a save
game will overwrite the character’s current position in the singleplayer campaign with the position in the save file. Loading and
saving data for a specific character will not effect any other
characters you might have.
Options
Click here in order to quickly adjust graphical detail, texturing,
mouse speed, texture framerates, gamma correction, and sound
and music volume.
Surrender
If your back’s against the wall, when all seems lost and the
corpses of your creatures lie strewn and heaped all around you,
it’s time to surrender. Click here to resign and live to fight
another day (or stay and be banished to the nether regions where
you’ll be chained to some rock, crows eternally pecking at your
liver). If you surrender during the single player campaign, the
choice to restart your mission from the beginning will be
presented to you.
Resume Game
Takes the game out of pause mode. But then again you knew that
already initiate. . . I hope?
F. SACRIFICE GAME MECHANICS
After all that’s been said about the game’s many options and
menus, your old friend Zyzyx has not forgotten you. Nay, I am
here and ready to continue on to the final part of your training.
The gods have ensured that Sacrifice’s game mechanics are
straightforward and easily mastered. Henceforth I shall describe
how to move, cast spells and just about do everything else in the
game, so that you may at long last get on with adventuring.
Keep in mind that all this information can be practically applied
by going through each of the three tutorial missions located
under the "Single Player" menu. I recommend completing them
before jumping directly into combat. Of course, if you’re one who
learns best by losing. . .
INTERPLAY ENTERTAINMENT CORP.
67.
Page 69

Basic Movement
Basic movement in Sacrifice couldn’t be easier to describe, o
mystic one. To run forward, press and hold the "W" key. To run
backwards, press and hold the "S" key. Pressing and holding "A"
will turn you left, while pressing and holding "D" will rotate you
to the right.
So simple, you’d think there was a catch!
Camera Control
Know thy divine gifts wizard, one of them being camera control.
The gods have blessed you with the ability to take yourself out of
your own body and see extreme close ups or aerial views of the
gaming action.
Zooming with Sacrifice’s camera while playing can be achieved in
one of three ways. The first is the mousewheel. Spin the wheel
up or down to zoom in or out. If your mouse has no wheel, then
pressing the + and – keys will work nicely (plus key to zoom in,
minus to zoom out). Finally, you can zoom in or out by moving
the cursor to the extreme top or bottom of the screen. Looking
left or right can be accomplished by moving your cursor to the
extreme left or right side of the screen. Look in any direction by
holding down the middle mouse button (or mousewheel) and
dragging the mouse where you want to focus the camera (if you
do not have a middle button, simply hold down the Ctrl key and
use the left mouse button instead).
Summoning Creatures
A general is only as good as the troops that carry out his orders,
and so it goes for wizards. To win at Sacrifice, armies of
creatures must be summoned and deployed with skill and
precision. The right troops at the right time can mean the
difference between a wizard’s victory or defeat.
When starting a game, you find yourself alone or with a small
complement of creatures. In order to begin creating an army you
must first be sure that you are getting enough mana. To this end
you should do two things - create a Manalith and summon a
Manahoar. First, locate a mana fountain and cast the Manalith
spell on it. After it’s built, open the Creature spell tab and cast
the "Summon Manahoar" spell by left clicking on it. In a few
seconds a Manahoar will be summoned by your side. Notice that
68.
SACRIFICE
Page 70

when you summon a creature it is automatically added to the
"Unit Selection Pane," ready to be controlled.
Now, with a good source of mana, you can summon as many
creatures as you have souls. Practice summoning a few more
times, selecting some of the other available creatures from your
Creature Spell tab.
Any creatures summoned will follow and guard you by default
unless given other orders.
Commanding Your Creatures
Now that you’ve got a few creatures summoned, let’s boss them
around a bit. First select one of your creatures by clicking on it.
Now right click on a place you’d like them to move to. Practice
moving a little bit more. Know that when you right click to issue
a creature an order, the creature will perform a default action.
This means that it will try to do the sensible thing based on the
current situation.
You now know that when you right click anywhere on the
ground, you will tell a selected creature (or group) to move there.
If you select a creature and then right click on another friendly
creature, the first creature will guard the second. This applies to
a group of creatures as well. In fact, a good way to have a large
group of heterogeneous creatures move at the same rate is to
have the quicker ones guard the slower ones. Right clicking on an
enemy creature or building will cause your selected creature or
creatures to attack the target.
A series of consecutive commands can be issued all at once. Let’s
say for example that you wanted a creature to run around a
boulder in a complete circle. You would give this one order as a
chain of smaller orders by marking a series of waypoints.
When a series of orders are given as waypoints, they will execute
in the order that they are given, one after another. To issue
waypoint orders, hold down the shift key and then click a series
of tasks. Both right-click orders, and orders issued via the X
menu (such as formation, special ability and attack) can be given
as waypoints.
Group Selection
In Sacrifice, wizards don’t attack with one puny unit at a time.
They attack en masse! After all, nothing instills fear in the enemy
more than a huge rampaging horde about to bear down on them.
INTERPLAY ENTERTAINMENT CORP.
69.
Page 71

To select multiple creatures to form a group, hold down the left
mouse button and drag the mouse over all units you wish to be
included. If you double click on any creature with the left mouse
button you will notice that the action selected all units of the
same species in the immediate area (this can also be
accomplished by clicking your middle mouse button if you have
one). This is an easy way to separate different kinds of troops
quickly in case they get mixed up. Keep in mind that these
actions can be done on both the main screen and mini-map.
Numbers can also be assigned to creature groups. When you
have a group made that you’d like to assign a number to, select
it. Then hold down the Ctrl key and hit the number 1 key on
your keyboard. You should hear yourself declaring that they are
now group 1. You can assign numbers to a maximum of 9
groups. Group 10 will be comprised of any 12 creatures not yet
in a group (summoning creatures puts them in group 10 by
default unless they are assigned to another group). To create the
first 9 groups, use the number keys 1-9, following the above
procedure.
The X-Menu
70.
You will notice wizard, that if you right click anywhere on the
game screen an X menu will appear. If you keep the right mouse
button depressed, you can traverse this X menu by moving up,
down, left or right. Moving in all four directions opens up a
variety of commands you can quick select. Below the commands
are listed in detail. The other commands available via the X menu
deal with putting your units in formation. These formations are
described in the following section.
SACRIFICE
Page 72

Change Camera
Selecting this command zooms the camera in and out
through the default camera positions.
Use Creature Ability
Selecting this command activates your chosen creature’s
selected ability. (Your selected creature must possess
such an ability for this to work.)
Guard
First, select the creatures you want to do the guarding.
Next, select guard from the X menu. A "Guard Cursor"
will appear. Finally left click this cursor on the unit or
units you wish to be guarded. You may also click on an area of
ground you’d like your creatures to defend.
Retreat
Only use this command in case of extreme emergency.
By selecting retreat from the X menu, ALL non-guardian
units will fall back to guard you.
Attack
First, select the creatures you want to do the fighting.
Next, select attack from the X menu. An "Attack Cursor"
will appear. Finally, left click this cursor on the creatures
or structure you wish to attack. Or, click on an area of ground
and your creatures will attack any enemy units they come across
on the way there.
Go To
First, select the units you wish to move. Next, bring up
the X menu over the exact location you wish to move the
unit or units to. Select the "Go To" command. Your units
should automatically move to the desired location.
Formations
You may have noticed that your troops will gather in a straight
line by default whenever they reach a destination. They will
continue this default line formation until you issue them new
formation orders.
INTERPLAY ENTERTAINMENT CORP.
71.
Page 73

72.
Changing the formation of your creatures is as easy as pulling up
the X menu. Hold down the right mouse button over a creature
you wish to give a command to. Without letting go of the button,
and after you see the X menu appear, move up, down, left or
right to see some available formations. Let go of the right mouse
button after you choose your desired formation.
After selecting a new formation, you should hear yourself shout
out the order to your troops. They will not take on their new
formation until they are given their next order. As a final note,
your troops will continue to use a given formation until ordered
to use another.
Below is a complete list of the formations in Sacrifice and their
various uses:
Circle Formation The circle formation is perfect for
when you want your troops to guard a specific creature,
or even yourself. Units will surround the individual they
are assigned to defend, preventing other units (hopefully) from
getting through. To assign creatures a character to defend, right
click on the unit you want protected after issuing the circle
formation order.
Phalanx Formation This formation commands units to
move in a small, tightly knit group. Being a good way to
bash through enemy lines, it’s also the perfect formation
for your Manahoars. Summon a few, select phalanx formation
and right click on yourself. They should follow you around and
stay out of your way (wouldn’t want to trip over them now
would we?).
Semi-Circle Formation The semi-circle formation
arranges your troops in a crescent, shielding the units
directly behind them. A semi-circle of melee troops
backed up by a line of ranged units is a formidable combination.
While the enemy tangles with your infantry, your ranged units
are free to attack at their leisure.
Line Formation The line formation is the default
formation that all units travel in until you issue them a
new formation order. In line formation, units stand
shoulder to shoulder, turning to face any threat when attacked.
Wedge Formation Here are the basics of wedge
formation: approach a fellow wizard from the rear and
give his underwear a hearty upward yank. Ahem. Well,
not really. Seriously, when troops move in wedge formation they
SACRIFICE
Page 74

travel in the shape of an arrowhead. This "V" shape is useful for
attacking creatures on your left and right flank simultaneously.
This formation conversely serves to defend your left and
right flanks.
Skirmish Formation Skirmish formation is perfect for
when you wish to send a mass of creatures into battle.
When lined up in skirmish formation, creatures will line
up to resemble an "M." The spaces between the forward and rear
flank of skirmish troops allow your creatures to deal damage over
a wider surface area.
Adding And Removing Units From
Groups
If a group is short of a few units, follow this procedure to add
more units into the group. Select the extra units that you’d like
to place, pressing shift plus the group number you’d like to add
them to. You can also shift click on a unit icon in the USP to
remove an individual from the selection. Just click on him and
tell him to take his act elsewhere!
Commands Using The Mini-Map
The mini-map is an extremely useful gift from the gods, as it
allows you to see enemy units and to issue commands to your
troops beyond your line of sight.
With this section, I will teach you how to issue commands to
units using the mini-map alone. To select a unit on the mini-map,
click on it using the "Eye" icon that will appear above it. Simply
move the cursor over the unit and it will change into an eye.
After selecting the unit, it can be told to move anywhere on the
mini-map. Right click the mini-map where you want the selected
unit to move.
You will find that left clicking on the mini-map and dragging will
produce a red box. To select multiple units to command, left click
and drag the box around the units you wish to move. Then right
click, on the mini-map, where you want them to go.
Attacking using the mini-map is performed in the same fashion.
Select the unit you wish to control on the mini-map, and then
right click on the unit you wish to attack. You can also select the
unit you want to use, right click and without releasing the button,
choose attack from the X menu that will appear. Then left click
the attack cursor on the units you wish to attack.
INTERPLAY ENTERTAINMENT CORP.
73.
Page 75

Getting creatures into an attack formation using the mini-map is
carried out exactly like attacking. Right click and hold on the
desired unit or units you wish to put into formation, select the
desired formation from the X menu and release the button. They
will then take the shape of your chosen formation.
Using Special Abilities
In Sacrifice, wizards are not the only beings
who possess magical powers or special
abilities! Nay. In fact, most of the creatures
under your command have some mystic arts
or devious talents tucked up their sleeves. A
creature with a special ability can be easily
spotted because it will reveal its mana bar
when clicked on. All creature special abilities
require mana to use.
To use a creature’s special ability, select it and look for the icon
that will appear to the right of the unit selection pane located on
the left side of the screen. It will appear in the single ring next to
the double row of rings. Click on the icon to activate the ability.
Mana
Mana is found in abundance throughout the lands of Sacrifice.
This proliferation of magical energy came into being when the
land ripped apart after the fall of the Creator. This is all ancient
history, so I won’t harp on it. Just remember that mana fountains
are readily available, waiting for you to tap them. Mana is the
sole source of a wizard’s power, and must be managed effectively
if you hope to be triumphant in your conquests.
74.
SACRIFICE
Page 76

Mana can be drawn from a variety of sources:
Altar
Your altar serves as your home base, and will recharge mana at a
slow rate. If you want to get mana more quickly, I highly
recommend seeking out a mana fountain or Manalith instead!
Mana Fountain
A mana fountain is a giant hole in the ground that spouts magical
energy into the atmosphere directly above it. Wizards who seek
to replenish their exhausted mana bars only have to stand close
to the plume to charge up. A mana fountain recharges mana at a
more rapid rate than an altar, and in its natural state can be used
by all.
INTERPLAY ENTERTAINMENT CORP.
75.
Page 77

Manalith
A Manalith is a structure erected by a wizard who
wishes to claim all of a fountain’s mana for his own
personal use. Once a Manalith is constructed atop
a mana fountain, rival wizards cannot draw mana
from it, not even if they are surrounded by
Manahoars. If an enemy wizard really wishes to
draw from the fountain, he must first destroy the
Manalith. You must therefore protect your
Manaliths at all costs! Please note that Manaliths
and mana fountains replenish mana at an
equal rate.
Manahoar
Manahoars are creatures that were designed by
the gods to assist their faithful wizards with
portable sources of mana. Realizing that wizards
could not tap mana when far away from a
fountain or Manalith, Manahoars were the
instant solution. They are short, rotund beings
with stubby legs and large, flapping ears. Their
most distinctive characteristic (besides the fact that they have no
arms) is a crystal dome embedded deep into their craniums. This
dome maintains a psychic link with the Manaliths created by
their owners. By remotely sucking up the mana through this link
into their bodies, they are able to channel it outwards through
the cranial dome to a recipient. Thus, mana is supplied to
wizards at just about any location imaginable. Wizards who lose
their Manahoars in battle often retreat, for they cannot fight with
a cut supply line.
Know that a single Manahoar is a weaker source of mana than a
Manalith, but summoning several often makes up for this lack of
power. Be cautious not to become too much of a Manahoar
junkie, as a soul used to create one could be used to create a
fighting creature instead.
76.
SACRIFICE
Page 78

Shrines
Third level wizards have the option to
construct a shrine on top of a mana
fountain instead of a Manalith. A shrine
serves as an outpost where Sac-Doctors
can purify souls quickly, without having to
run back to your altar. In addition to being
a place for soul conversion, a shrine
recharges a wizard’s mana at an altar’s rate.
Therefore build shrines only in key places,
as building too many of them will cut down
your number of Manaliths significantly.
Casting Spells
Tis’ true you’re a wizard, but do you know how to unleash your
power? This section will make all as it should be, assuring you
your place as one of the realm’s most powerful mages.
In the lower left hand corner of the game screen are the spell
tabs. (See the Spell Tabs Listing under "In-Game" Screens for
more information.) Below the tabs will appear a row of icons
representing the spells contained within the currently opened
spell tab.
Left clicking on a tab will ensure that the spell book is open.
For demonstration purposes, let’s look at the "General" spell tab,
being the one in the middle. Open it and you should see three
spell icons on the bottom row (Speed Up, An Attack Spell,
Heal). Hold the cursor over an icon to obtain information about
that particular spell. If the icon is dimmed, it means that you
don’t have enough mana to select it. Next to the name of the
spell you highlight will appear two numbers. The number on the
left is how much mana is required to cast the spell. The number
on the right is how much mana you have left in your total
mana supply.
You can select the spell you wish to cast from the spell list by left
clicking on its icon. As an example, choose "Speed-Up" by left
clicking on its icon and your cursor should immediately change
into a targeting cursor. Move the cursor over yourself and left
click. The spell will take effect and you can now run at
breakneck speed!
INTERPLAY ENTERTAINMENT CORP.
77.
Page 79

To use an attack spell such as wrath or fireball, left click on the
icon to select the spell, then place the targeting cursor over your
intended target. Left click again to unleash the spell.
For structural spells, such as constructing a Manalith, left click
the icon to select the spell, then left click on the Mana Fountain
you wish to build on. A Manalith will be built before your eyes!
(You must be standing very close to mana fountain to cast a
manalith specll).
Since the spells "Speed-Up" and "Heal" are common to all
wizards, let’s take an in-depth look at them:
Speed-Up
By casting this spell, the caster will be able to reduce
the effects of gravity upon his own body, allowing for
springy steps and an incredible lightness of being.
Wizards can traverse great distances quickly, cutting traveling
times by half. This spell has a multitude of practical uses, such as
fleeing a battle or hastening to defend a nearby group of
creatures with your presence. Casting the spell on a creature has
the same effect.
Heal
By invoking the heal spell, wizards summon forth the
most divine of magical energies with which to cure their
wounds. Torn flesh, broken bones and shredded sinew is
repaired before the caster’s eyes. Perfect for boosting a low
health bar or for saving a favorite creature. A creature targeted
for healing will regain its life over a short period of time as
opposed to all at once.
78.
Creature Health, Mana, and Unit
Color
When you select a character, you will notice two colored bars and
a triangle floating over it. The triangle represents unit color,
while the two colored bars represent health and mana. It is
possible that a creature will not have a mana bar. This simply
means that the creature has no special abilities.
SACRIFICE
Page 80

Mana Bar (A): This bar, colored blue,
A
indicates how much mana (or magical
force) the creature has remaining. This mana is
used up when a creature summons forth its
special ability. A druid for example will use half of
his mana when using his lifeshield ability.
Creature mana can be recharged by placing them
near a Manalith or one of your Manahoars. Ranged creatures
require mana to fire, so even the most healthy Ranger will not do
anything if his mana bar is at zero. Make sure all ranged troops
have plenty of mana before sending them into fight.
Health Bar (B): This bar, colored red,
B
indicates how healthy or injured the
selected creature is. The shorter the bar, the
closer the creature is to death.
Unit Color (C): In the midst of a melee,
C
it helps to know who’s on whose side.
That’s where the concept of unit color comes into
play. In one game you and your troops might
make up the white team, while the enemy team is
red. Team colors will be assigned by the computer
at the start of each game. In Campaign mode
your color will always be white.
Unit Color helps to locate enemy units on the mini-map. Use this
to your advantage for setting up advanced defenses or for
planning your attacks.
INTERPLAY ENTERTAINMENT CORP.
79.
Page 81

All About Souls
In Sacrifice, you’re going to need souls if you ever hope to
summon creatures to fight for you. The cost for summoning one
creature is one soul, except in the case of larger beasties. They
require two souls or more to summon! Before you trample off
and grab any soul in sight, let me fill you in on the two types of
souls in Sacrifice:
Blue Souls – These souls are pure and share the same
faith that you have in your patron god. Blue souls can
be collected instantly by simply walking near (or over)
them. A wise wizard, after seeing his creatures die,
will attempt to collect as many blue souls as possible
before fleeing a battle. Leaving them behind dooms them to
conversion by enemy hands. In essence, your own creatures’
souls will be turned against you!
Red Souls – Red souls are unclean, corrupted souls
left behind by slain enemies. Their red glow comes
from their heretical belief in the ideology of a god
other than your own (or they could believe in your
chosen god, but belong to a rival wizard).
In order to harvest these red souls, you must first cast
"Conversion." By casting this spell, you are summoning forth a
Sacrifice-Doctor (or Sac-Doctor for short) to come claim it.
After sucking up the soul into a giant hypodermic, the SacDoctor resurrects the slain creature and runs it all the way back
to your altar for purification. After the ritual is over, the soul will
automatically be added to your Soul Counter for instant use. (Be
warned, for if one of your Sac-Doctors is killed while
transporting a soul, the creature in tow will be resurrected!)
80.
SACRIFICE
Page 82

The Locals
In the course of your adventures you will meet many
interesting creatures. Some are powerful uniques,
others have something extremely important to say.
Your cursor will change to look like a mouth when
placed over such a being. When you see them, simply
walk over to them and they’ll begin to speak.
You should also know that the realms of Persephone,
Pyro, Charnel, Stratos and James are inhabited by
peaceful peasants or zombies (is there a difference?).
In Multiplayer don’t hesitate to blast them into
oblivion in order to collect their precious souls. On
the other hand, if they have something important to
say, or they are essential to the mission, keep
them alive.
Guardians
The gods might be able to be everywhere at once, but mere
wizards cannot. Therefore, your Manaliths are highly susceptible
to attack if there’s nobody left behind to guard them.
The Guardian spell forms a symbiotic link between the
Manalith and any creature chosen to be its guardian.
After casting the spell, a beam of red energy will bind
the creature to the Manalith. The tethered creature will only be
able to travel in the immediate vicinity of the structure, but in
return will be granted enhanced statistics such as enhanced
missile and magic defense, better health and mana regeneration,
and more powerful attacks. Guardians are not invincible, and are
INTERPLAY ENTERTAINMENT CORP.
81.
Page 83

very susceptible to melee attacks. I suggest that you create at
least three or four guardians per Manalith for a strong defense!
(There is no limit as to how many guardians you can have on
a structure. Note: that any creatures guardianed to a Manalith
will lose any special ability they may possess.)
A Manalith being guarded will have enhanced defenses. If the
building itself takes damage, the damage will be distributed
amongst all of the creatures connected to it. All guardian
creatures must be killed off before the Manalith can be
destroyed. In all, it’s a very powerful spell, and if used properly it
can turn the tide of battle.
Altars
In the world of Sacrifice there are grand structures known as
altars, used by the gods to maintain communication with the
mortals who serve them. All the altars in Sacrifice are easily
recognizable, having a giant ring of stone sitting atop intricately
carved pillars. At the center of each altar is a dais which sends a
beam of mana into the heavens. Via this beam, a wizard can
communicate with his patron god. This beam also has a dual
function as a mana fountain and soul purifier. The altars of
Elysium are mostly peaceful places, covered with ivy and lush
vegetation. The altars of Dys are quite the opposite, their giant
rings and pillars bristling with razor sharp thorns. Regardless of
form, the functions of all altars are the same.
In Sacrifice, each wizard will get an altar to maintain a link to
their chosen god. You should know that this link must be severed
if they are to be killed off for good.
82.
SACRIFICE
Page 84

Desecrating An Altar
As I taught you before, as long as your altar is standing
you will have immortality. If you wish to rid yourself of a
rival wizard, then you must sever his link to immortality
by desecrating his altar. If the desecration is successful, you will
sever his link with his god and his death and banishment will be
imminent. If someone should desecrate yours, you will be lost
forever and your game will end. Prevent this at all costs!
Here’s how to desecrate: First, approach an
enemy altar with one of your summoned
creatures. When in close proximity, cast the
desecration spell upon the creature and the
desecration ritual will begin (it takes a moment to
kick in, as a Sac-Doctor must be summoned to
perform the ritual). When successful, your Sac-Doctors will start
to circle the altar. As long as the desecration ritual stays in
motion, the wizard who you are targeting will take damage from
deadly magical energy. This energy onslaught takes away a
wizard’s health, mana and experience points. If he should die
from these repeated attacks, his altar is destroyed and his game
is over. As long as the targeted wizard is still alive, he can
attempt to interrupt your desecration. So until his altar crumbles,
be on the lookout for a counterattack!
In the case your altar is being desecrated, launch your first level
attack spell at one of the enemy Sac-Doctors. The desecration
will be interrupted and you will be saved. Only one of the doctors
needs to be killed for the desecration to stop. Melee creatures
cannot interrupt desecrations due to a barrier of magical energy
that will keep them out. A missile attack or magical spells are the
only thing that can get through to save your skin.
When you desecrate all enemy altars and kill off all enemy
wizards, you shall be victorious!
Teleportation
In Sacrifice, the ability to rush back to your altar in case
of an emergency is essential. To teleport back to your
altar simply click on the teleport spell icon, then click on
your altar’s icon on the mini-map. You can only teleport next to
structures that you own, so don’t think that you can jump
anywhere you like!
Any nearby creatures will be teleported with you to the
INTERPLAY ENTERTAINMENT CORP.
83.
Page 85

chosen location.
Quick Saving And Quick Loading
My final lesson, before I send you out into the world, regards
quick saving and quick loading a game of Sacrifice. These
commands can be given at any point during a game. To quickly
save your game at any time, without having to call up a menu,
simply press F2. Your game will be saved. To quick load this
saved game at any time, press F4. Loading a save game will
overwrite the character’s current position in the single-player
campaign with the position in the save file. Loading and saving
data for a specific character will not effect any other characters
you might have.
IV. HINTS AND TIPS
This section is intended to inform you a bit more about the
intricacies of playing Sacrifice. Here you will find suggestions on
how to control units and manage mana more effectively. There
are even tips on getting yourself out of a pinch. It is hoped that
by reading these you will appreciate the true depth of the game,
becoming a well-rounded player in the process.
This section has been divided into six sections:
1. Manahoar Tips
2. Creature Management Strategies
3. Mana Tips
4. Structure Tips
5. Soul Advice
6. General Tips
84.
Manahoar Tips
What to do with the guys who spout Mana!
1. After summoning your desired number of Manahoars, order
them into phalanx formation and tell them to guard you. This
keeps them out of harm’s way, and keeps them from blocking
your line of vision.
2. If at any time during the game you find yourself low on mana
with a large number of souls, summon more Manahoars. This will
increase the rate at which your mana recharges. Now you can
summon creatures more quickly.
SACRIFICE
Page 86

3. After killing an enemy wizard in the heat of battle, watch his
Manahoars to see where he is retreating. If you pursue and kill
the Manahoars, this will set him back significantly!
4. Only make as many Manahoars as necessary. They cost one
soul each, and sometimes it is better to have one more creature
around to attack or defend!
Creature Management Strategies
Me Troll. Me ugly. Me thump you skull. You no head. Now I
beautiful.
1. Sacrifice’s creatures adhere to the rules of "rock, paper,
scissors" when on the battlefield. Flying creatures counter melee
troops, which have no air attack. Ranged troops counter flyers.
Melee troops counter ranged troops.
2. Ranged creatures such as Rangers, Flame Minions and Sylphs
need mana to fight. They will feed off your Manahoars or when
next to your Manalith or mana fountain.
3. Convert enemy souls as quickly as you can, without having to
bring your creatures into harm’s way. One acquired soul plus one
creature loss equals a gain of zero.
4. Cast speed up or heal on your creatures to enhance their
performance and longevity.
5. Note that when multiple units that have special abilities are
grouped together, the ability for the highest-ranking unit will
appear in the Unit Selection Pane.
6. The Guardian Spell is very important to utilize, but use it
wisely. If you guardian your creatures to varied places, your ranks
will be spread thin. Concentrate on an optimal spot on which to
concentrate your guardians.
7. If Ambassador Buta (or any other opponent) is kicking the
@#!%& out of your creatures in battle, don’t settle for a total
rout. Instead, select the retreat option from the cross menu. This
causes all your units to fall back at once in order to guard you.
INTERPLAY ENTERTAINMENT CORP.
85.
Page 87

86.
Mana Tips
Spark, Crackle, Fizz-Fizz, oh what bliss. . . to have mana.
1. Two Manaliths minimum are needed in order to cast many
expensive spells (such as convert), without having to wait too
long for your mana to recharge between spells.
2. If you are killed, you can use any mana source (except enemy
manaliths) to resurrect yourself. Your Manahoars, altar,
Manaliths or any mana fountains are all means for resurrection.
Structure Tips
What goes up, will come down. If you’re careless.
1. When your altar is being desecrated, there’s no time to be lost.
Use your teleport spell to return to your altar in a hurry. Click
the teleport spell, then target your altar on the mini-map. The
mini-map is also perfect for teleporting to locations that are outof-view.
2. Be sure to guard your altar when fighting against an enemy
wizard. An unguarded altar is an invitation for desecration.
Desecration will not only kill you if left uninterrupted, it will cost
you experience and time as well.
3. You can only teleport in the vicinity of one of your own
structures. Try to construct Manaliths in key locations to
facilitate jumping to key areas.
Soul Advice
For a ghost of a chance at winning, souls are the sole way
to go!
1. The indigenous creatures that dwell on each map (peasants,
zombies, farmers) are souls waiting to be converted. A painless
way to get more creatures fast. Such creatures will run away only
when near their village. Once on the outskirts of town, they will
cower and wait to be sacrificed.
2. Keep an eye out for creatures that "gib." Gibbing completely
destroys a creature’s body and yields a blue soul that any wizard
may take.
3. The more souls a creature has, the more damage it will do to
the enemy wizard when used in a desecration.
4. Cast "speed up" on your Sac-Doctors to help them bring
enemy souls to your altar more quickly.
SACRIFICE
Page 88

General Tips
General tips for armchair adepts.
1. Simplicity is bliss. Your first level damage spell is the best way
to interrupt a desecration taking place at your altar.
2. Keep your wizard out of battle as much as you possibly can.
Stay at the outskirts of a fray, offering support to your troops via
spells and summoning reinforcements.
3. In Sacrifice, death is not the end. If your wizard is killed,
regroup your creatures, jump back into the battle wisely and you
may win the field after all.
4. To get a heterogeneous group of creatures all moving at the
same speed, have the faster creatures guard the slower ones.
V. SCAPEX LEVEL DESIGN
INFORMATION
Scapex is Shiny Entertainment’s single and multiplayer level
editor and landscape creation toolkit for Sacrifice. It easily allows
any end user to edit or create complete scenarios and landscapes,
without the need for any programming experience.
I. Getting Started
1. How to generate a simple landscape:
1. Launch Scapex.exe
2. Select from FILE menu NEW. And the NEW SCENARIO
dialogue will appear.
3. Type in <any name> into CHOOSE A NAME
4. Check GENERATE FRACTAL MAP
5. CHOOSE STEEPNESS (0-flat 4-mountainous) SELECT
1 (bumpy)
6. CHOOSE INITIAL SIZE 256x256
7. CHOOSE TILESET JAMES_A
8. Click on OK
Scapex will pause for about 5-10 seconds before bringing up a
dialogue box showing you the landscape generation in progress.
INTERPLAY ENTERTAINMENT CORP.
87.
Page 89

2. How to move around and view the
landscape:
To move around you will need to use your mouse and cursor keys
together for maximum freedom and ease.
3. Rotating the landscape
Using your mouse hold down the Right Mouse Button over the
window and move the mouse around. You will be able to look all
around, and up & down.
4. Moving around.
Using the W.A.S.D. keys or Cursor Keys, you can easily fly
wherever you want in 3D space.
Up Cursor Key – Forward in the direction you are facing
i.e. if you are pointing up, you will gain altitude when you fly
forward.
Down Cursor Key – Backwards
Left/Right Cursor Keys – Rotate (Yaw)
N.B. If you have a 3-button wheeled mouse, you can use the
wheel to move forward and backwards instead of the cursor keys.
Some users may find this slower, since there is no acceleration
in movement.
5. Hyper-Jump
To quickly JUMP to any visible point on the landscape, hold your
mouse over the place you want to jump to, and press TAB
Fly around until you feel comfortable with the controls.
88.
How To Edit The Topography:
Press Control-W to turn on wire frame.
You will see that the landscape uses a grid of vertices. Each
vertex connects to every neighboring vertex, making up a total of
8 triangular faces. This allows us to generate smooth and rough
landscape details with ease. Also you may notice that toward the
distance the faces appear larger. That’s because they are. The
dynamic level of detail works all the time, even within Scapex.
For the meantime, ignore it. Oh, and turn off the wire-frame
mode. It makes it easier to see without it.
SACRIFICE
Page 90

1. Raising and lowering the terrain
Select from the View rollout, BRUSH BAR. - A floating tool bar
containing brush sizes and brush falloff will appear.
Select from the main Toolbar the icon with the little green
landscape and an up arrow (raise Lower Landscape)
Move your mouse over the landscape…
As you move your mouse around the landscape you will notice a
blue patch that contours the landscape as you move around. This
is your brush.
Adjust Brush Thickness on the floating toolbar to 24.
Adjust Brush Falloff to 1
Select Shape - Circle
Ignore Density (that’s for another tool)
Choose a point on the landscape and while holding the left
mouse button move the mouse up & down. This raises or lowers
that piece of land. When you let go of the left mouse button, the
landscape is then set to that height.
You can repeat this, as many times as you like to get desired
height and slope.
Try out different brush shapes, sizes and falloff settings.
Falloff works as an influence to the surrounding faces. The
higher the falloff setting, then the softer the influence is towards
the edge of the brush. Try it! Perfect for canyons at low
falloff settings.
Press Control-L to update light map and Striation (Landscape
striation depends on the highest and lowest points on the
landscape.
If you make a mistake you can step back using multiple control-z
(Undo). N.B. Undo doesn’t always work well on certain changes;
so don’t rely on this feature too much. Save your work frequently.
2. Smoothing and flattening the terrain
Smoothing allows us to take rugged terrain and smooth out all
the edges to create undulating rolling hills where craggy
mountains once stood. Used sparingly it can help to accentuate
mountaintops and sides with smooth valleys and rugged peaks.
Flattening allows us to apply a uniform height to an area.
INTERPLAY ENTERTAINMENT CORP.
89.
Page 91

1. Select Level Landscape Icon (the green/black landscape
one with the downwards green arrow)
The brush tool size and falloff can be adjusted in the same
way as the raise and lower terrain brush.
Smoothing
2. Try dragging the mouse while holding down the left
button. You will notice that the terrain smoothens out. Press
Control-L to update the light-map and shadow-map and see
your changes more clearly on your newly deformed
landscape.
Flattening
3. Do the same actions, but this time, also hold down the
Shift key. This will level the terrain at that height. If you drag
the mouse around, while continuing to hold down the left
mouse button, then ALL the terrain it touches will level to
this height.
This is particularly useful for cutting canyons through
mountains or creating plateaus. Its primary use is to create a
flat area for ALL altars to stand on. N.B. Altars must have
all 4 pillars levels, but we’ll cover this a little later on in
this manual.
3. Creating edges and islands
The edging tool allows us to easily create islands and fill in holes
from the basic square map.
Select the edge tool from the tool bar (the green/blue landscape
icon). Select a size and brush shape. N.B. The edge tool does not
support falloff.
4. Making holes and edges
1. Drag the brush around using the mouse and holding
down the left mouse button. Holes will start to appear
according your brush shape and size.
You should now create an edge around the whole map. This
may take some time if using a small brush, so use a large
brush size and edit any fine details with a smaller size.
2. Cut a hole of size 24 in the center of the island.
90.
SACRIFICE
Page 92

5. Filling in the gaps.
1. Select brush size 8
2. This time drag the mouse around over the center hole
while holding the left mouse button and holding the shift
key. The ground should start to reappear.
Practice cutting holes and filling them back in again. In a few
minutes you’ll have the hang of it.
N.B. When you create "empty areas’ in Scapex, the terrain details
remain invisible to the game. However, Scapex remembers and
stores their height details, making it easier to replace or fill in
gaps and holes without having to adjust their height to fit the
surrounding scenery.
As a by-product of this, this "invisible detail" also effects the
striation (those lines that hug the landscape at different levels.
E.g. If a mountain is created higher than all the surrounding
scenery, then the striation will stretch out to the top of it. If this
mountain is then "hidden", then the striation is not effected. This
is a clever way to stretch out the striation by creating hidden
landscape details.
Sometimes, you’ll notice strange spikes or sharp slithers in the
ground close to edges. Just make sure the hole is filled properly,
and smoothed in the case spikes appear.
Laying Down Textures (Using the
Tile sets)
1. Brief Introduction
Each tile set (1 per god) contains all the textures for general
texturing of your islands. This is split up into several tile groups
(rock, sand etc.,) and these groups contain up to 12 textures,
which are variations on the set. Each variation, within the group,
tiles seamlessly with each other.
• Each texture covers one grid square, the equivalent in real
world scale of 10 meters by 10 meters.
• In order to make the different tile groups blend with each
other, join groups are created, however these are hidden
from the user, as joining is performed automatically.
• NOT ALL groups can be joined to each other. This is not
ideal, however, the permutations in creating every group
joining with every other could run into the hundreds and the
INTERPLAY ENTERTAINMENT CORP.
91.
Page 93

92.
game just couldn’t handle that many textures. For example,
if you place ‘sand’ on top of ‘cracked earth’ these two have a
join set. However, if you place ‘sand’ on top ‘fossils’, these
two don’t. The quickest indication is simply in trying them
out. Most groups will blend with the primary group…in the
case of James, that set is ‘cracked earth’. Some are designed
to sit on top of others, e.g. salt on sand. Salt wouldn’t work
in any case if it were forced to match all the sets…it would
look
too strange.
• When you place a texture, it will automatically blend (or
not) with the other group, so you don’t have to worry either
way. If they don’t blend, DON’T use them next to
each other.
• If the blend is disjointed, then the tiles are trying to blend
with an already blended tile, and you can remedy this by
simply spacing it out a little further. N.B remember Undo is
always available.
2. Getting Started with texturing
Go to the window rollout and select New Tile set Toolbar. A
floating window will appear listing ALL of the available textures
for that tile set.
In this example (assuming you are still on a JAMES A tileset)
you will see 7 texture groups.
Salt, Sand, Cracked Earth, Grass, Rock, Scrub and Fossils
You can select the group, and a random texture will be picked
every time you place that group onto the landscape, or you can
expand the group and select the specific variation you need.
You will also notice, that when the landscape is first generated,
the land is textured. This is based on several factors that are predefined for quick generation. This doesn’t always work or suit,
and depends on the height variations and size of the generated
land. But in many cases, this generated tiling is always a good
starting ground for editing, to suit the look and feel you desire.
1. Start by selecting Cracked earth
2. Set your brush size to 8 and choose CIRCLE brush
shape (if you don’t already have a brush window go to VIEW
– brush bar and a new floating window will appear)
3. Select the brush Icon from the main tool bar
SACRIFICE
Page 94

4. Using the mouse paint onto the landscape by holding
down or clicking the left mouse button.
5. Using different brush sizes, cover the whole landscape in
this cracked earth texture group. (Zoom-out using the wheel
mouse or down cursor key to gain some height.
6. Select Tile group Grass
7. Paint on top of cracked earth. You will notice the two
groups blend.
Practice doing this with different texture groups and individual
tiles within the groups until you feel you have the hang of it, and
can see which tiles work with which others. Future revisions will
show this much clearer. In the meantime an appendix to this
document contains details of all the join groups for your
reference.
3. Light Map Painting
The light map feature allows you tint the individual tiles on the
landscape with subtle or not so subtle color. It works by
removing color.
1. Select VIEW – Light Bar. A floating window will appear
with RGB sliders.
2. Select the Light Map icon from the main tool bar (the one
that looks like 4 colored crayons/pens in a row). You may
want to open up a brush bar window also if you closed the
last one.
3. Adjust the RGB values to 255,0,0. You will notice your
brush in the scene changes color to match the selected RGB
value.
4. Paint away!!!! Adjust the colors, brush falloff and brush
size for different effects.
The light maps primary use is for adding extra detail, contrast
and color to the world. It can be used to accentuate edges, add
features, simulate reflective light, and blend textures for greater
variation. Used creatively it can produce some very dramatic
results.
Try painting some cloud shadows, or darkening the whole land
and placing bright white spots for sunbeam effects. Tint the
island edges for greater contrast, or run cracks through your
land. Paths and streams, even crop circle effects are all possible.
INTERPLAY ENTERTAINMENT CORP.
93.
Page 95

Placing objects and structures onto the landscape.
4. Scars
Scars are laid onto the landscape as a result of an explosion,
bloodletting or spell aftermaths. Scapex allows you to place these
same scars prior to a mission to add substance to your story. A
dead creature with a trail of blood leading away from the body at
the start of a mission can guide the player towards a focal point.
N.B. Scars are controlled by a buffer, so be warned. Every time a
new scar is laid down in the heat of battle etc, the buffer gets
fuller. Once the buffer is full scars, will automatically start to
disappear in the order they where placed. So if you have some
scars far into the map, the chances are they may be gone by the
time you reach there, so try and plan ahead if you do intend to
use them.
1. Select the Scar Brush Icon from the main tool bar. (The
one with the 3 diagonal lines)
2. Select from the WINDOW rollout – New Scar toolbar
3. Select Blood Spot
4. Start painting using the left mouse button
5. Environment Settings
Select Scenario – Environment Properties
This little dialogue of tricks contains all the settings for the
environment. Here you can set:
1. Sun color
2. Ambient/shadow color
3. Fog color
4. Fog distances
5. Sun angle and position
6. Specular lighting values
7. Sky alpha data.
With the exception of the sun’s direction, everything here is
pretty self-explanatory containing RGB values or
percentage/strength values. As for the sun, experiment!!!!
94.
SACRIFICE
Page 96

Adding Structures, Objects and
Creatures
1. Placing a structure
Structures of course, flesh out and add depth and detail to the
landscape. Some structures are fundamental to game play and are
necessary for a level to start properly. i.e. without any altars the
level won’t run. Others help focus events in the story line. Most
are used for decoration and defensive barriers.
1. Before placing a structure, clear an area that is just
textured using "Cracked Earth". Make it about 12x12.
2. From the main toolbar select the Item icon (the one the
has the hand holding the crosshair). An item toolbar window
will appear.
3. Select Neutral from the Item toolbar rollout. (Details of
side assignments are covered later in this document. For now
we’ll just concentrate on adding structures, creatures and
objects to the world)
4. Select Structure group. (Double click to expand the
group). A complete list of all the available structures
is visible.
5. Select Altar
6. Left click at the center of the cleared area. This will place
an altar. You’ll notice that it also places textured tiles around
the base of the structure. These are known as the BASE
TILES. You may also notice that the structure and its tiles
snap to the tiles grid (control-w to see this clearer). This is
necessary for the base tiles to match the landscape tiles and
the structure to match the base tiles.
N.B. Not all structures have base tiles. Those that don’t can be
placed anywhere. Those that do, snap to the tiles grid.
Experiment with placing different objects in the list structure list.
2. Rotating Structures
All structures can be rotated using the two rotation icons on
the Main Toolbar (they are clockwise and anticlockwise arrows).
N.B. Some of the structures that contain base tiles or multiple
parts cannot be, or at the very least it is not recommended, that
INTERPLAY ENTERTAINMENT CORP.
95.
Page 97

they should be rotated. Some structures like trees for example,
usually rotate very well.
3. Placing a Creature
You can place a creature anywhere on the landscape. Their
properties and scripts are best defined in the "Setting Up
Scenarios" part of this document.
4. Adding Widgets
These little objects are only drawn to the foreground of the
landscape from your camera view. Since they are only drawn
close to the camera, it is possible to lay down hundreds even
thousands of these widgets, having them clustered and scattered
throughout the land to add extra variation and detail with little
overhead to the processor.
They are extremely low detailed 3d polygon objects (from 1 to 15
polygons), however, too many clustered in any one spot may
cause slow down on slower video cards and machines, so its best
to keep them lightly scattered until you have tested the level.
1. Select Widget Brush Icon form main tool bar. (The little
hand with the yellow sparkle tip)
2. Select the WINDOW rollout – New Widget Toolbar. This
will bring up a floating window containing all the widgets for
this tileset (god)
3. The brush bar will now contain a set of sliders to adjust
the Thickness, Falloff and Density.
4. Adjust Thickness to 12, Falloff 1, Density 0.25
5. Select Shrub 1 from the Widget tool bar
6. Left click on mouse to drop a cluster of widgets of
that type.
Experiment with different falloff settings, thickness and density,
and of course different widgets.
96.
SACRIFICE
Page 98

Keys
Move/Fly Cursor Keys & W, A, S, D
Update Light map Control-L
Wireframe on/off Control-W
Sky On-Off Control-K
Mouse Left Button Draw/ Place/ Select
Mouse Button Right Rotate Landscape
II. SETTING UP SCENARIOS
Overview
Once you have built a level in Scapex you may want to add
cinematics and other dramatic events. This is accomplished by
using the built in "trigger" system. Through judicious use of the
triggers in Scapex the player can build their own complex
missions complete with changing objectives, cinematics, and
customizable AI. These missions can then be strung together to
form a custom campaign.
1. The Basics
A trigger is composed of three basic elements. The first element
applicable sides, the second conditions, and the final actions.
is
When creating a trigger the first element that you need to set is
which sides that the trigger applies to (for more info on sides see
Side Properties.) In general, a trigger should apply to only one
side. Applying a trigger to multiple sides can result in some
unusual behaviors. Please note the following with regards to
triggers applying to multiple sides:
• In a trigger's action list, the actions are applied to ntts only
on the side the trigger is applied to. The condition list
however can check ntts on any side.
• For each side a trigger is applied to, it is applied to that
side once. Specific ntts referred to in any trigger of course
belong to only one side.
• Be careful to never reference a variable or mission
objective in a trigger that applies to multiple sides, as
variables and mission objects are global and there will be a
conflict as the multiple sides execute that trigger multiple
times.
INTERPLAY ENTERTAINMENT CORP.
97.
Page 99

98.
• If there are specific ntts referred to in a trigger that applies
to multiple sides, one or more sides will not have those ntts.
When a trigger references a specific ntt in a way that
assumes that it is there, it ignores that particular action and
goes on with the next action.
• The best way to guard against referenced non-side
creatures in a trigger is to put the condition "current-side
commands ntt" in the condition list.
• Note that rescuable creatures present an additional
problem: they can be rescued at any point in the evaluation
of the various sides' trigger condition and at any point in the
execution of the actions so you can never be sure that the
trigger will only execute for the proper side. The solution
here is to not order rescuable creatures in triggers, but to
"rescue" normal creatures manually with triggers.
After deciding which sides a trigger applies to, one or more
conditions must be set. Conditions determine when a trigger is
activated. A trigger may have more than one condition but
remember that all of the conditions must be met for the trigger
to activate. For a list of individual conditions and their
explanations see the section marked Conditions.
Now that you have set your triggers conditions it is time to set
its actions. This is the real meat of the trigger system, where you
can accomplish tasks as diverse as issuing orders to setting ingame variables. A trigger can result in multiple actions that will
be executed in the order they appear in the actions list. Also note
that an action will wait for the previous action to resolve itself
before starting. For more specific information see the
Actions section.
Each trigger will run one time, once all of its conditions are met.
To get a trigger to run multiple times you can uncheck the "run
once" box located in the bottom left corner of the action list
dialogue. This will cause the trigger to run every time its
conditions are met.
2. Conditions
Conditions are used to determine when the actions in a trigger
will be activated. Text noted in blue refers to a field that is user
definable. For example when you see the phrase side-spec in
blue, it means that you can define a specific side for that
condition. A few general notes about some of the terms and
concepts used by individual conditions.
SACRIFICE
Page 100

Game time:
• Game units are in 1/60th's of a "game second"
• Game time is not real time necessarily, but it tries to be. If
the game ever has multiple speeds then it will vary greatly.
Locations:
• Conditions and orders typically can reference ntt types at
locations.
• Locations can be markers, structures, or creatures. When
referenced as a region (order all creatures at location order)
the location is a conditional region. When referenced as a
location then the specific location is used.
• If the location is a marker, the range and shape of the
conditional region is determined in Scapex by setting
properties on the marker object itself.
• If the location is a creature, then the conditional region is
anywhere within 5 meters of the creature.
• If the location is a structure, then the conditional region is
anywhere within 20 meters of the structure.
Always - This condition will be met as soon as the level starts
regardless of any other factors.
If side-spec commands entities – This condition checks whether
a user defined side controls a specific creature, type of creature
or number of creatures.
If side-spec commands entities at location - This condition
checks whether a user-defined side controls a specific creature,
type of creature or number of creatures at a user defined
location.
If side-spec commands entities within quantity meters of ntt This condition checks whether a user defined side controls a
specific creature, type of creature or number of creatures
within a definable number of meters of the defined creature
or structure.
If side-spec does not command entities - This condition checks
whether a user defined side does not control a specific creature,
type of creature or number of creatures.
If side-spec does not command entities at location - This
condition checks whether a user-defined side does not control a
INTERPLAY ENTERTAINMENT CORP.
99.
 Loading...