

Page 1

Page 2
IT’S NO JOKE 2
INSTALLING 4
PROJECT: SNOWBLIND
™
STARTING THE GAME 5
DEFAULT CONTROLS 5
GETTING INTO THE GAME 8
GAME SCREEN 10
INVENTORY 12
WEAPONS 13
BIO-AUGMENTATIONS 15
THE SNOWBLIND EFFECT 16
VITAL TASKS 16
HACKING 17
REPUBLIC SECURITY SYSTEMS 17
VEHICLES 17
COLLECTIBLES 18
SAVING GAME DATA 19
PAUSE MENU 19
ONLINE PLAY 20
ONLINE MULTIPLAYER GAMES 22
HOSTING A GAME 25
LOCAL AREA NETWORK 25
MULTIPLAYER GAMES
FRIENDS LIST 26
STATS 27
CLANS 28
EPILEPSY WARNING
A very small percentage of individuals may experience
epileptic seizures when exposed to certain light patterns
or flashing lights. Exposure to certain patterns or
backgrounds on a television screen or while playing
video games may induce an epileptic seizure in these
individuals. Certain conditions may induce previously
undetected epileptic symptoms even in persons who
have no history of prior seizures or epilepsy. If you,
or anyone in your family, have an epileptic condition,
consult your physician prior to playing. If you
experience any of the following while playing a video
game—dizziness, altered vision, eye or muscle twitches,
loss of awareness, disorientation, any involuntary
movement, or convulsions—IMMEDIATELY discontinue
use and consult a physician before resuming play.
PRECAUTIONS TO TAKE DURING USE
• This game disc is intended for use exclusively
on Windows
®
-based systems with the minimum
configurations specified on the system requirements
of the game purchased.
• Do not sit too close to the screen. Sit a good distance
away from the monitor, as far away as the length
of the cable allows.
• Avoid playing if you are tired or have not had much
sleep.
• Make sure that the room in which you are playing is
well lit.
• Rest for at least 10 to 15 minutes per hour while
playing a video game.
HANDLING YOUR GAME DISC
• Avoid bending the disc. Do not touch, smudge
or scratch its surface.
• Do not leave the disc in direct sunlight or near
a radiator or other source of heat.
• Take occasional rest breaks during extended play.
• Always store the disc in its protective case.
ESRB RATING
This product has been rated by the Entertainment
Software Rating Board. For information about the ESRB
rating, or to comment about the appropriateness of the
rating, please contact the ESRB at www.esrb.com.
Be sure to check the PROJECT: SNOWBLIND Readme file
for important updates about the game.
CONTENTS
Page 3
3
2
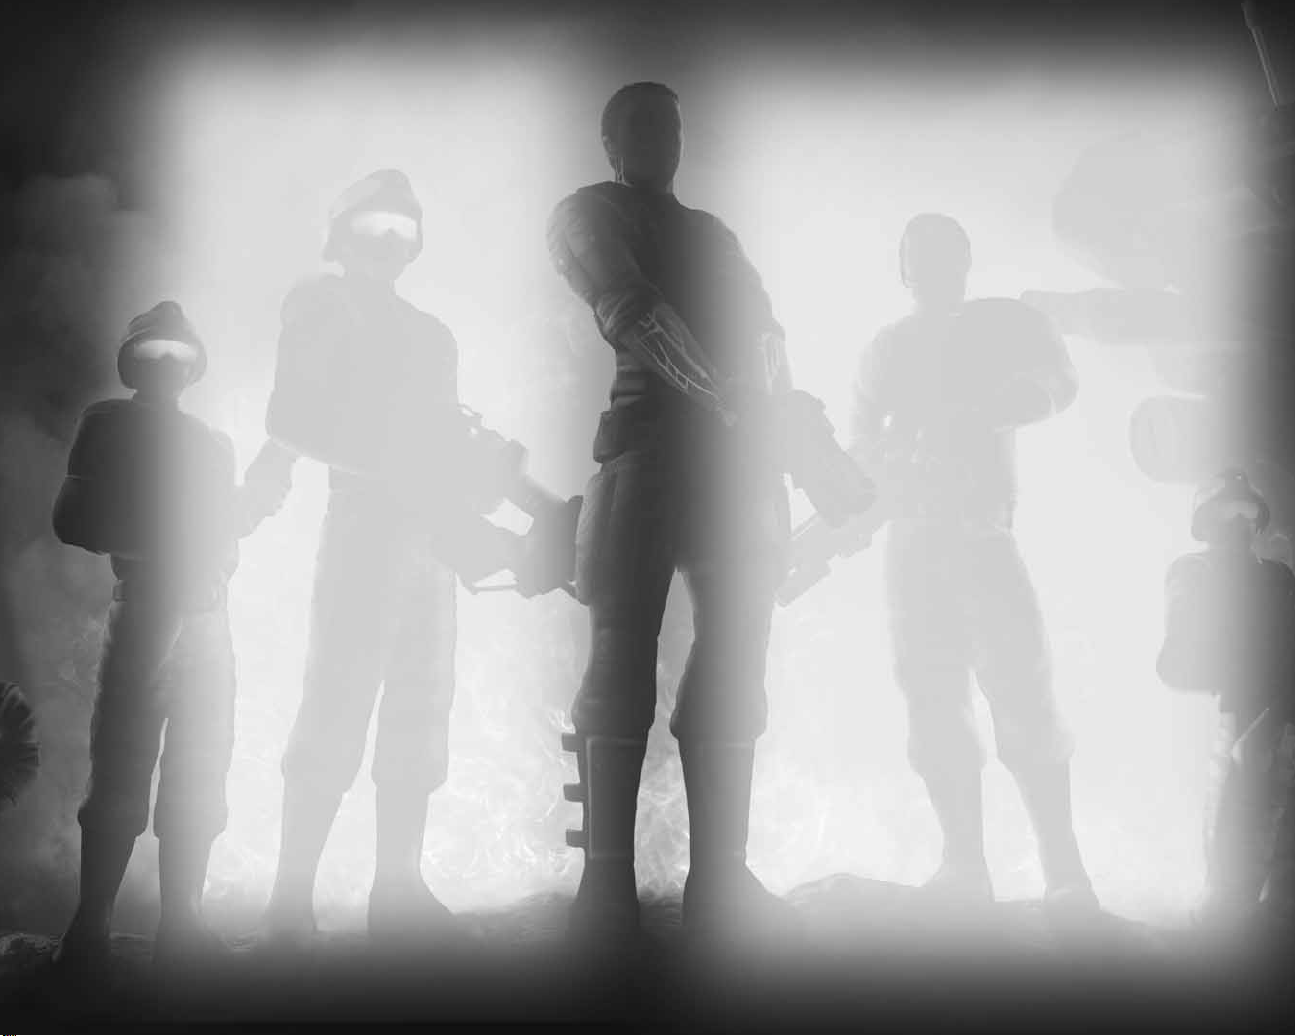
Liberty Coalition Army 2nd Lieutenant Nathan Frost has
been transformed. There was that last searing blast from
the bomb, an excruciating gurney ride into the surgery
unit — Frost wondering if he even had a face left —
some strange talk about BP, pulse and … scarecrows?
Now he is alert, standing, disoriented a little,but
stronger than before.A sense of extreme power is
coursing through him and he sees apprehension
in the eyes of all who pass.
Frost has been transformed into the prototype.
He is the first-born in a top secret program to create
a bio-augmented super-soldier.
Now that joke about a one-man army is true...
IT’S NO JOKE...
Page 4
4
5
MENU CONTROLS
Pause Menu ESC key (P key to pause game)
Select menu item
1/2
cursor keys
Change setting
4/3
cursor keys
Confirm selection ENTER key or SPACEBAR
Cancel/Back to previous menu ESC key or BACKSPACE
STARTING THE GAME
DEFAULT CONTROLS
Once the game is installed and you are ready to play, click the
Play
button
on the Launch Panel to start the game.
To begin playing the game at a later time, insert the DVD into the CD/DVD-ROM
drive. After a few seconds, the
PROJECT: SNOWBLIND
™
Autorun program will appear
via the AutoPlay feature.
L Click the
Run
button to start the game.
– or –
L Select
Start –>All Programs –>Eidos –>Project Snowblind –>Project Snowblind.
To leave the game, click the
Exit
button.
INVENTORY CONTROLS
Show/Hide inventory hold/release TAB key
Cycle through primary weapons mouse wheel
Cycle through secondary weapons E key
Cycle through bio-augmentations Q key
Note: You can also cycle through items,using the same controls, with the inventory
closed.
To install
PROJECT: SNOWBLIND
™
, insert the game DVD into your
CD/DVD-ROM drive. After a few seconds, the Launch Panel will
appear. (If the Launch Panel does not appear when you insert
the DVD,double-click the
My Computer
icon, then double-click
the CD/DVD-ROM icon to display the Launch Panel.)
This program will guide you through the installation process
via onscreen prompts.
– or –
L Click the
Start
button.
L Choose
Run
from the pop-up menu.
L Type
d:\setup
in the box provided (d:designates your
CD/DVD-ROM drive letter).
L Click the
OK
button to begin the install program.
L When prompted, select the path and directory on your hard
drive where you want to install the game.The default is
C:\Program Files\Project Snowblind
. If you like, you can
change this to your preferred location.
Click the
Readme
button to view important information about
PROJECT: SNOWBLIND
™
.
UNINSTALLING
To uninstall
PROJECT: SNOWBLIND
™
, from your desktop select
Start –>All Programs –>Eidos –>Project Snowblind –>Project
Uninstall.
When prompted, click
Yes
to remove
PROJECT:
SNOWBLIND
™
from your computer.
AUTOSAVE
Your PC will automatically save any personal records you
achieve.You can then view your records in the
Personal Records
section in the
Options
screen.
INSTALLING
PROJECT: SNOWBLIND
Page 5
6
7
ON FOOT CONTROLS
Move forward or back W or S key
Look/Aim roll mouse
Close info display SPACEBAR
Fire primary weapon/Throw held object/ LEFT mouse button
Charge Kinetic Kicker (hold)
Alt Fire (primary weapon)/Pull object RIGHT mouse button
Strafe left, right A, D key
Use secondary weapon/Quick detonate SHIFT key
grenade after throwing/Activate riot wall
Select primary weapon 1-9, 10, 11 1-9, 0 (zero),
– (minus) key
Cycle through primary weapons mouse wheel
Cycle through secondary weapons E key
Cycle through bio-augmentations Q key
Punch/Melee attack CTRL key
Use/Cancel selected bio-augmentation ALT key
Crouch C key
Reload primary weapon/Talk/Interact R key
with object/Open unlocked door/Climb
or descend ladder/Pick up/Drop
Jump SPACEBAR
Precision aim/Close look Z key
(primary weapon)
Toggle Navigational Display mode F key
IN VEHICLE CONTROLS
Enter/Exit vehicle R key
Steer A or D key
Drive forward W key
Brake/Reverse S key
Fire primary weapon (if equipped)/Car horn LEFT mouse button
Fire secondary weapon (if equipped) RIGHT mouse button
Turret control roll mouse
OGRE CONTROLS
Move Ogre legs W, S keys
Rotate Ogre body/Aim weapons roll mouse
Fire machine gun LEFT mouse button
Fire rockets RIGHT mouse button
SINGLE PLAYER HACKING CONTROLS
Fire icepick into panel/Open hack panel LEFT mouse button
Select option from hacked panel display
1/2
cursor keys
Execute selected option SPACEBAR or ENTER key
Aim/Control gun turret roll mouse
Fire gun turret LEFT mouse button
Pan surveillance camera roll mouse
Exit hacked panel display R key
MULTIPLAYER HACKING CONTROLS
Select hack tool/execute hack R key
EMPLACEMENT CONTROLS
Use/Exit emplacement R key
Fire emplacement LEFT mouse button
Emplacement control/Aim roll mouse
Page 6

8
9
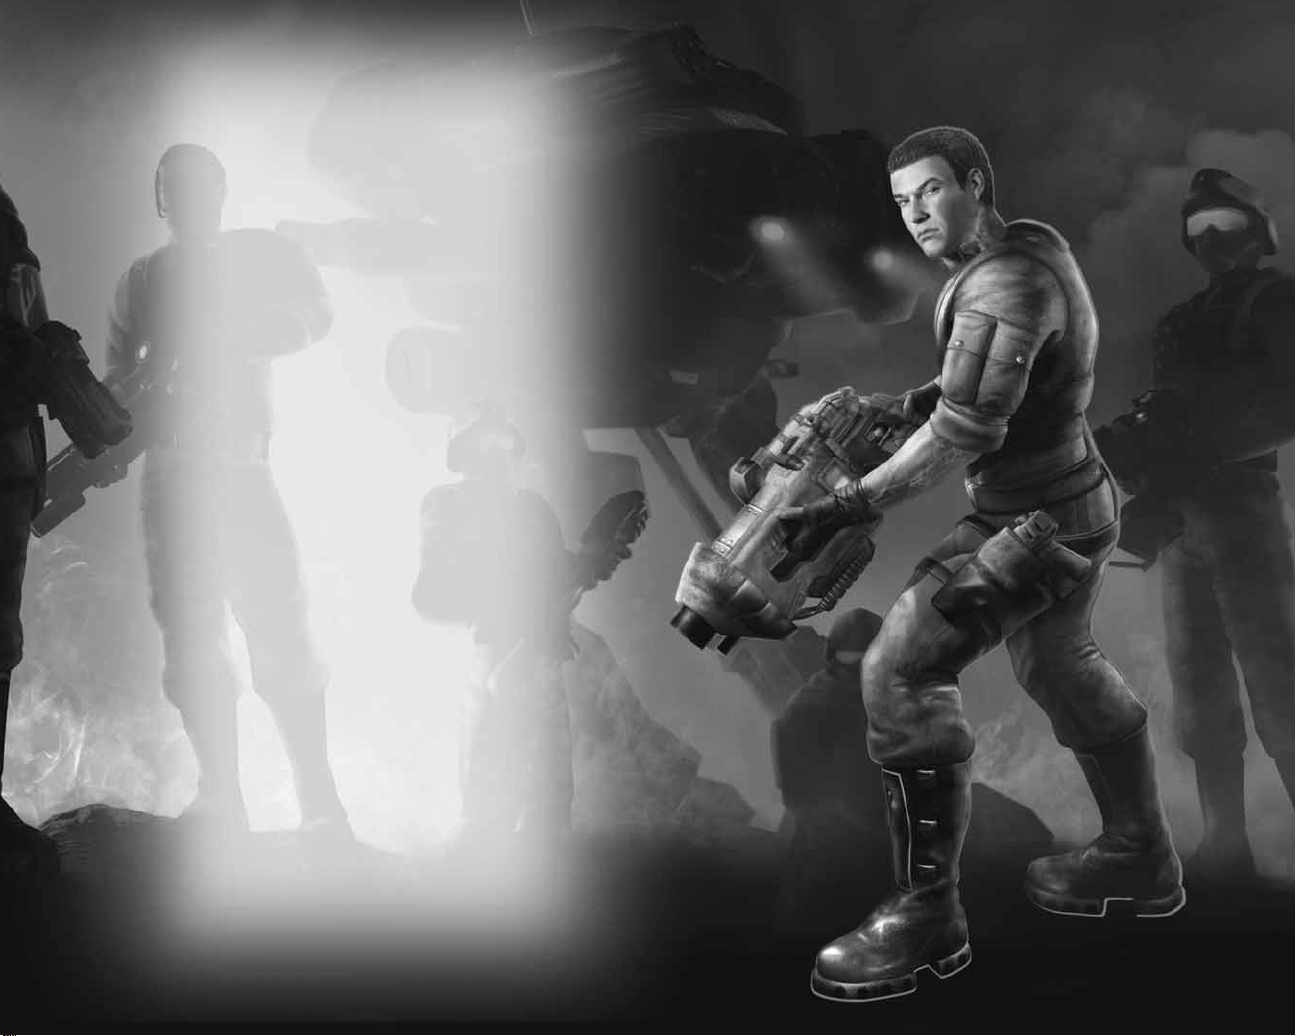
WHO ARE YOU?
You are Nathan Frost, a bio-enhanced super soldier. In addition to weapons
expertise with firearms and explosives, you can use specialized bio-augmentations.
These bio-augmentations were surgically hard-wired into your body.You now have
lethal combat skills never before seen on the battlefield.
But there is a tactical downside.You are vulnerable to EMP (Electro Magnetic Pulse),
which can disrupt your onboard electronics and render you momentarily or
permanently helpless. Your bio-augmentations begin to fail and you become
snowblind until your systems recover.
MISSIONS
You must complete missions as issued by Coalition Command. In every mission
you must complete all primary objectives (objectives are added as the mission
proceeds), protect yourself and protect your men.You will undertake two different
mission types:
L
Firefight missions
that are all-out urban warfare.
L
Stealth missions
where you attempt to infiltrate key areas before attacking
the objective. Discovery in this type of mission makes the mission much tougher.
MISSION OBJECTIVES
Your orders are assigned as mission objectives.
L Mission objectives appear as yellow circles on the Radar. (See page 10.)
L Press the ENTER key to see primary and secondary objectives (on the Pause
screen) during play.
L Press the F key to toggle Navigational Display mode,which marks the direction
to the next objective.
L Coalition Command will be in contact via radio with objective updates
and intel.
GETTING INTO THE GAME
MAIN MENU
The Main Menu appears after
you power-up the game. Use
the menu controls to select
the following options:
SINGLE PLAYER Fight through
the hell of an
urban civil
war.You will
fight alone or lead a coalition squad,
depending on the mission.
MULTIPLAYER Play online with up to 15 other Internet players
(16 players total).
MULTIPLAYER Play over a Local Area Network (LAN).
LOCAL NETWORK
PROFILE
The Profile screen appears after you select a game mode.
Create a profile before you start playing
PROJECT: SNOWBLIND
™
.
The profile contains your save game files, option selections
and online identity.
To create a profile:
L On the Profile screen, select an unused profile.
L To optionally enter a new name,select
Rename Profile
and enter the new name.
L Select
New Game to start a new game.
You will be
prompted to save the profile when you begin play.
Page 7

10
11
RADAR/COMPASS L
Single Player
— Shows enemy locations (red blips), fr iendly
locations (green blips), neutral bot/unarmed human locations
(white blips) and mission objectives (yellow circles).The solid
arrow around the radar represents
North
on the compass.
When an alarm is activated the radar flashes red.
L
Multiplayer
— Shows Ammo Station (light blue blips) and First
Aid Stations (green blips). Walk up to these and press the R key
to load up on ammo or replenish health. During Capture
the Flag games, also shows flag positions (large red or blue
blips), flags in transit (team colors) and mission objectives
(yellow blips).
PRIMARY WEAPON The primary weapon you currently hold.
AMMO REMAINING Large number indica tes rounds remaining in clip or magazine of
your selected weapon. Small number indica tes total rounds you
have. Empty the weapon and you auto reload. Manually reload
by pressing the R key.
SECONDARY WEAPON The secondary weapon you currently hold. Throw it by pressing
the SHIFT key. Press the SHIFT key again to detonate/ activate the
weapon after throwing it. The weapon’s name and number
remaining appear next to its icon.
SELECTED The bio-augmentation you will use when you press the ALT key.
BIO-AUGMENTATION
AUGMENTATION METER Shows the bio-augmentation energy consumption during use of a
skill. When the reserve runs out, the skill terminates and the reserve
recharges to optimum if you have enough bio-energy. Audio alerts
tell you both when the reserve is optimum and when it is
approaching zero.
RETICLE Use the reticle to aim a weapon:
L The reticle turns red when over a hostile.
L It turns green when over a friendly.
L Watch the Ammo Gauge Circle to see ammo remaining
before you need to reload.
L With some primar y weapons , hold the LEFT mouse button and
watch the charge level in the reticle to insure max power
before releasing the button to fire the shot.
CROUCHED ICON When you press the C key to crouch, this icon appears. You move
slowly in this position but present a smaller target. Press the C key
again to stand upright; you’re now able to move faster.
GAME SCREEN
1 Health Level
2 Bio-energy Levels
3 Radar/Compass
Reticle
4 Crouched Icon
5 Augmentation Meter
6 Selected Bio-augmentation
7 Secondary Weapon
8 Ammo Remaining
9 Primary Weapon
4 56 7 8 9
1
2
3
GAME SCREEN INDICATORS
HEALTH LEVEL Each time you take a hit, the red decreases
in the meter.When you get to a critical
state the meter flashes white
and an alarm sounds.
BIO-ENERGY LEVELS This blue meter powers your bio-
augmentations. Hatch marks indicate
the amount of energy required to activate
the selected bio-augmentation. Using
bio-augmentations depletes the meter.
Page 8

A briefing appears when you acquire a weapon. Study this to understand
the weapon’s full capabilities.
PRIMARY WEAPONS
BASIC PRIMARY WEAPONS
These are your three basic primary
weapons. You will find more awesome
firepower as you progress
through battle.
PISTOL Silenced close-range weapon perfect for stealth.
CARBINE Standard military issue automatic rifle, highly effective during firefights.
SHOTGUN Lethal weapon for close combat.
AIM & FIRE
Roll the mouse to aim your weapon and press the LEFT mouse button to fire (press
and hold for automatic weapons).
L The reticle turns red when aimed at an enemy. It projects a red pointer if you’ve
taken damage from that enemy.
L The reticle turns green when positioned over a friendly.
PRECISION AIM
Press the Z key to toggle zoom in/out.
L The sniper rifle has 2x and 4x scope magnification.
L The weapon automatically disengages from precision aim when reloading.
ALT FIRE
Primary weapons have an alternate fire mode. To use it, press the RIGHT mouse
button.
NOTE: Check the weapon briefing when you acquire the weapon to view special
alt-fire characteristics. You can also see weapon use details by selecting the weapon
in inventory.
SPECIAL TOOLS
These special non-weapon tools also reside in the primary weapons inventory:
KINETIC KICKER Tool used to push or pull objects, and to collect ammo or other
collectible items. (See page 16.)
ICEPICK Hack tool for several types of electronic equipment.(See page 17.)
12
13
The inventory has three categories:
Primary Weapons,
Secondary Weapons
and
Bio-augmentations
. All inventory items
must be acquired.
When you have items in inventory:
L Press and hold the TAB key to display the inventory.
L While holding the TAB key, roll the mouse and use the Q
and E keys to select a category and item.You can select
multiple items at the same time.
L Release the TAB key to equip the selected item(s).
You can also make selections without opening the inventory.
While in-game (with the inventory closed):
L Select primary weapon 1-9, 10 or 11 by pressing the 1-9,
0 (zero) or – (minus) key.
L Roll the mouse to cycle through primary weapons .
L Press the E key to cycle through secondary weapons,
or press the F1–F6 keys to cycle through secondary
weapons 1–6.
L Press the Q key to cycle through bio-augmentations,
or press the Y, U, I, O and P keys to cycle through
bio-augmentations 1–5.
INVENTORY
WEAPONS
Primary Weapons
Secondary Weapons
Bio-augmentations
Page 9

14
15
SECONDARY WEAPONS
To use the selected secondary weapon,
press the SHIFT key.
THROW/AIM
When using a grenade or riot wall, roll
the mouse to aim your throw, then press
the SHIFT key to throw.
NOTE: Learn to judge the trajectory of a thrown weapon
and raise your aim to compensate for the distance you need
to throw.
DETONATE/TRIGGER
All secondary weapons except nano boost explode or deploy
using built-in timers, but you can manually detonate at will
by tapping the SHIFT key a second time after throwing.
GRENADE TYPES
FRAG The explosion sends metal fragments in every direction. Good
anti-personnel weapon for multiple enemies in a cluster.Can
be dodged by target.
EMP Electromagnetic pulse damages or disables electronic
circuitry.Use against sentr y bots , auto turrets or to disable
shield units carried by soldiers.
FLSH Flash-bang stun grenades explode with blinding light and
concussion. They are non-lethal. Use to esca pe a deadly
situation or shock enemies as you attack.
GAS Unleash a lethal cloud of poisonous gas.
SPDR Mini spiderbots deploy to track down and open fire on enemy
forces. Deploy a couple of these to watch your back or even
the odds during a firefight.
Bio-augmentations are the special
combat capabilities that were
surgically implanted during your
transformation. They draw power
from your bio-energy.
Press the ALT key to invoke the
equipped bio-augmentation. The Reserve gauge begins to discharge as you use
the power. When the gauge empties or you press the ALT key again, the bioaugmentation terminates and you return to normal.
ENHANCED VISION Enhanced vision causes all enemies and cloaked mines to stand
out from their environment. It makes dark areas brighter for easier
navigation, and allows you to see enemies through walls.
CLOAK Walk undetected within inches of the enemy. This bio-
augmentation disengages if you open fire with a primary
or secondary weapon.
REFLEX BOOST This slows the perception of time, allowing you to react more
quickly to enemy actions.
ELECTRICAL STORM Discharge a potentially fatal high-voltage electrical jolt in front
of you.
BALLISTIC SHIELD This protective force field surrounds you and absorbs the damage
of attacks. As it absorbs attack, your augmentation meter drains
from the effects of the attack and time.
BIO-AUGMENTATIONS
SPECIAL TOOL
This special non-weapon tool also resides in the secondary weapons inventory:
NANO BOOST This device will completely heal you, recharge your bio-energy,rescue you
from the brink of death and reverse the Snowblind effect.
RIOT WALL Thrown device that unfolds into a temporary barrier you can use as cover.
Deploy this force field to create a protected position anywhere on the
battlefield.
Page 10

16
17
THE SNOWBLIND
EFFECT
HACKING
Perform your hacking skills on electronic equipment using the icepick
(from the primary weapons inventory). You can hack:
L Security panels.
L Computer panels.
L All types of auto turrets.
L All types of bots.
NOTE: The Ogre is not hackable. It is a vehicle piloted by a human.
HOW TO HACK
With the icepick equipped, point and shoot at an electronic object. Once the
icepick deploys by unfolding with an audible clack, you are ready to execute
the hack:
L Point at the hacked security panel and press the LEFT mouse button to bring up
the Hack Panel options. Use the cursor keys to select an option. Press the
SPACEBAR to execute the selected option.Press the R key to cancel the Hack
Panel options display.
L Hacked security panels can be re-accessed (by pressing the RIGHT mouse
button).
L If you are attacked while performing a hack, the hacking process stops.
L A misfired icepick is reusable (successfully fired icepicks are spent).To recover
a misfired icepick, move within pickup range and press the RIGHT mouse button
to return it to your inventory.
REPUBLIC SECURITY SYSTEMS
You will encounter auto turrets,secur ity cameras and trip lines set by the enemy.
Some of these systems are activated when the enemy presses an alarm switch.You
can override certain systems from panels. Turrets and cameras can be disabled,
destroyed or turned against the enemy by using your hacking skills.
VEHICLES
Use Phoenixes, Hydras, Titans and Ogres to move quickly or attack the opposition.
Hydras, Titans and Ogres give you massive firepower. Even though a Phoenix may
be unarmed, you can use it as a ramming weapon.
IMPORTANT: The turret part of the vehicle moves independently from the body.
For example, when you move the Ogre’s upper body to aim the guns (roll mouse),
the legs remain pointed in the direction you are walking (W, S keys).
Your bio-augmentations depend on electronics that are
vulnerable to Electro Magnetic Pulse (EMP) attack. When an EMP
is launched or some other electronic interference occurs, your
vision fills with a white static as the pulse overwhelms your bioaugmentation systems. You will lose some or all bio-energy.
L Use a nano boost to overcome the Snowblind effect.
VITAL TASKS
EVALUATING OBJECTS, ALLIES
AND ENEMIES
Point your reticle at an object or soldier (friendly or enemy).
A gauge appears displaying the object’s type and destructibility,
or the soldier’s health level, name and rank. You now have the
option to interact with the object or talk to the friendly (in most
cases) by pressing the R key.
MOVING OBJECTS
You can move some objects.
L Some objects can be picked up/dropped by pointing
at them and pressing the R key.
L While holding an object, you can tap the LEFT mouse button
to throw it.
L Walk into the object to attempt to push it in the direction you
want it to go.
L You can use the Kinetic Kicker to push certain objects. Target
an object with the kicker, press and hold the LEFT mouse
button to charge the kicker, then release the button to push
the object. (To pull, use the RIGHT mouse button.)
Page 11

18
19
SAVING GAME DATA
COLLECTIBLES
To pick up a collectible (health,bio-energy, ammo), walk over it.
L You can also point at it and press the R key to collect it.
(If this doesn’t work, move closer and try again.)
L Use the Kinetic Kicker (from the primary weapons inventory)
to pull the collectible toward you.
WEAPONS AND AMMO
Most human enemies will drop the weapons they are carrying
when defeated, and you can collect these. Find additional
weapons, cartridges , shells, rockets, mines and energy cells
scattered around the area or contained in supply crates.
Destroy supply crates by shooting or punching them to get
the collectible inside.
HEALTH
L Pick up a
health pack
for instant first aid. Available in large
and small dosages.
L Pick up a
health upgrade implant
to increase your
maximum health level.
NANO BOOST
The nano boost is a total treatment. Its benefits include:
L Restoring full health and bio-energy.
L Reversing the Snowblind effect.
L Resurrecting you if used when dying.
ENERGY CELL
Ammo used by the H.E.R.F. gun and rail laser.The H.E.R.F.gun
also has a reserve energy clip.
BIOCELL
L Pick up
bioenergy cell
to restore your bio-energy meter.
Available in large and small sizes.
L Pick up a
bioenergy upgrade
to increase
the capacity of your bio-energy meter.
ICEPICK
Necessary for performing hack attacks.
You can save your game by:
L Selecting
Yes
when prompted at the completion
of a key objective,to bring up the Save Game
screen.
L Using
save points
found in out-of-the-way rooms.
Look for the Save Point icon on doors that lead to
a save point. Pass through the doors, approach
the save point and press the RIGHT mouse button
to bring up the Save Game screen.
On the Save Game screen, press the
4/3 cursor
keys to select the profile you want, press the
1/2 cur sor keys to select a data file
within that profile to save to, and then press the ENTER key. When prompted
to overwrite the current file, select
Yes
and press the ENTER key.
NOTE: Selecting
YES
will overwrite older data in a save file. Once you overwrite data,
it cannot be restored.
PAUSE MENU
Press the ESC key to open the Pause Menu.From here you can view both primary
and secondary objective assignments and status, load a saved game, and change
game options.
RESUME GAME Resume your current game.
LOAD GAME Load save game data to continue the game from the point
where it was saved.
OPTIONS Adjust various game settings, including:
L
Controls
— Select a control scheme.
L
Invert V ertical Axis
— Toggle the camera view on (inverted)
or off (normal).
L
Look Sensitivity
— Adjust the camera response time.
L
Volume
— Adjust the volume of SFX (sound effects) and Music.
L
Brightness
— Adjust the brightness of your computer screen.
L
Subtitles
— Turn the game subtitles on/off.
L
Dolby Pro Logic II
— Toggle Dolby Pro Logic II surround sound on/off.
(Connect your computer to a sound system with Dolby Pro Logic II
or Dolby Pro Logic IIx decoding to experience the excitement of
surround sound.)
QUIT Return to the Main Menu.
Page 12

20
21
The online portion of this game is subject to the terms and
conditions under the User Agreement located within the game.
A full copy of the User Agreement is available at:
www.eidos.com/online
ONLINE SYSTEM REQUIREMENTS
Up to 16 players can battle online or over a Local Area Network.
In order to play
PROJECT: SNOWBLIND
™
online, you need:
L Broadband Internet connection or Local Area Network (LAN).
PATCHES
During login, you may be prompted to download a patch. You
must download the patch in order to play
PROJECT:
SNOWBLIND
™
online.
CREATING AN ACCOUNT
In order to play online you must create an account that contains
an online name and password. Once you save your data,
you only need to select
LOGIN
the next time you play. (See
page 21.)
ONLINE PLAY
GET CONNECTED & CREATE AN ACCOUNT
1. On the Main Menu, select
Multiplayer Internet
and press the ENTER key.
2 Select a network configuration to connect to the Internet.
3. Read and accept the Online Agreement.You must accept the terms of the
Online Agreement to play online.
4. Create an online account. In order to play online you must create an account
that contains an online user name and password.
4a.The first time you see the Select Profile screen, select
Create Online Account.
Then enter an online name (of four or more characters), password, password
confirmation, and email address.
4b.Select
Yes
or Noin response to the series of requests, and finally select
Continue.
4c.Enter your gender,bir th date, country and ZIP code, and select
Create
Online Account.
If no other person has the user name you created, a new
account profile is created. Read the warning and select
Yes.
NOTE: Be sure to remember or write down your password.Eidos Inc. Customer
Service may not be able to retrieve lost passwords.
5. You will be prompted to save your account profile (which includes your
password). Select
Yes
and you will only have to select
Login
to connect the next
time you play.
LOBBY MENU
FIND GAMES Select this to view the active games and start playing.
HOST GAME Create an online game according to your own parameters.
FRIENDS Search for active games that include your friends.
CLANS View the Clan Homepage.
STATS View game play stats for yourself and other online players.
Page 13

22
STAGING SCREEN
The Staging screen
appears after you select
or create a game. You
enter the game from this
screen and return to it
at the end of play.
Before starting play,
use this screen to:
L Change option settings including control settings.
L Change your class (see below) and switch teams.
L View the screen names and team affiliations of other players.
L View scores and see the game type set by the host.
CLASS & LOADOUT
On the Staging screen, you can select the class (type of fighter)
you want to be. Each fighter class uses different primar y
weapons, secondary weapons and bio-augmentations . For
example, the Sniper class carries a sniper rifle as the primary
weapon, while the Scout class carries a shotgun. You can select
a new class when you respawn or pause play. The change will
take place the next time you respawn.
ONLINE/LAN GAME TYPES
ONLINE MODES
DEATHMATCH Destroy all opponents. At the end of play, the player
with most kills wins.
HUNTER The hunter is an invisible stalker who tracks down
and kills other players. The hunter has more health
than the other players, all weapons and bioaugmentations, permanent invisibility,and does more
damage. Become the hunter by finding the hunter
token placed somewhere on the battlefield.If you
are killed while the hunter,you drop the token. Player
with the most points at the end of the match wins.
ONLINE MULTIPLAYER
GAMES
TEAM MODES
TEAM DEATHMATCH Destroy the opposing team.At the end of play, the team
with most kills wins.
CAPTURE THE FLAG Each team has its own colored flag located within a defensible
base. Fight your way to the enemy flag and take possession of it
to win. You can recapture your own team flag and return it to your
base.You must have your own flag at your base when capturing
the enemy flag to score. Use flag icons at the lower left of the
screen to check flag status:
L When you have the enemy flag, an opposition flag icon
appears over your team icon.
L When a flag is in transit, its icon pulses and a yellow circle
with the team color appears on the radar.
FAST FLAG CAPTURE Bring your opponents’ flag to your base to score. Your flag does
not have to be at your base in order for you to score.
TACTICAL ASSAULT Defend your team’s generator and destroy the opposition’s
generator after disabling their generator shields. To disable the
shields, hack into the opposition nodes (only the forward node is
vulnerable). First team to destroy the opposition generator wins.
L Nodes appear on the radar and are linked in sequential order
from one base to the next.
ASSAULT Defend your team’s generator while working to destroy the
opposition’s generator.First team to destroy the opposition
generator wins.
DEMOLITION Team play. Find a bomb at a spawn point and transport it to
designated targets inside the opposition base. Disarm a bomb on
your own base by approaching it and pressing the R key.The
bomb is on an auto timer.When it blows, the base is destroyed,
the round ends and the opposition gets a point. At the end
of play,the team with the most points wins.
Check the bomb icon at the lower left of the screen to see
which team has the bomb.
L
Red
is the Republic.
L
Blue
is the Coalition
L
White
means no team has the bomb.
Once defused, the bomb timer resets. In this game, use the R key
to hack.
QUICK DEMOLITION Same as
Demolition
except that the bomb timer only pauses
when defused; it does not reset.
23
Page 14

24
25
MULTIPLAYER HEALTH & AMMO STATIONS
During multiplayer games, find health stations to regain
maximum health, and ammo stations to reload all weapons.
Approach a station and press the R key to use it.Both types of
stations appear on your radar when they are within range.
L
Health stations
are indicated by a green blip.
L
Ammo stations
are indicated by a light blue blip.
HACKING DURING MULTIPLAYER GAMES
Use the hack tool to control doors, nodes and bombs. All players
carry the hack tool in the weapons inventory; this tool doesn’t
need ammo. Point to a hackable object or device and press
the R key to switch from your current weapon to the hack tool (if
it’s not already selected). Press the R key again to execute the
hack.
L To disable the force field that guards opposition team doors,
hack the switch next to the door.
L Diffuse the Bomb. In Quick Demolition, hack the Generator
under the bomb to turn off its timer and snatch the bomb.
L Take control of enemy nodes during Tactical Assault games.
RESULTS SCREEN
The Results screen appears at the end of a game. It shows the
performance for each player and team by:
L Player points.
L Number of kills.
L Number of times a player died.
To host a game, access the Host menu, set the specifics for your game, and select
Start Game.
Host menu options are:
SELECT A MAP Choose an environment for your game.
GAME OPTIONS Set specific game parameters:
SERVER NAME By default the server name is your screen name.
GAME TYPE Choose a game type. (See page 23.)
ARMS RACE MOD Players take the loadout (including weapons and bio-
augmentations) of their victims’ class. Players keep these added
items until they are killed or the game ends.
GAME LOADOUT Designate the loadout for all players joining your game. Select
All
to allow players to select their own class and loadout.
(See page 22.)
TIME LIMIT Set the game time limit from 5 minutes to infinity.
SCORE LIMIT The game ends when a player reaches the score limit you set
here.
MAX PLAYERS You can allow up to 15 other players (16 players total) to join
your game.
FRIENDLY FIRE When set to
On,
you can accidentally kill a teammate.
HOSTING A GAME
Local Area Network (LAN) gameplay is the same as the online game with the
following requirements:
L One player must host the LAN game.
LOCAL AREA NETWORK
MULTIPLAYER GAMES
Page 15

26
27
From the Lobby, select
Browse Friends List
to view a list of
established friends, pending friend requests , and invitations from
friends. From here, you can see the online status of established
friends and join a friend's active
PROJECT: SNOWBLIND
™
game.
You can have a maximum of 100 established friends, pending
friend requests, and friend invites combined. Delete outdated
friends to make room for more.
ADDING FRIENDS
Select
Send New Friend Request
to add someone as your friend.
Enter the player’s name (do not include a clan tag).A
Friend
Invitations
icon will appear next to the player’s name. Once the
friend accepts your invitation, the icon will change to the
Established Friends
icon.
ACCEPTING FRIENDS’ REQUESTS
To accept a friend request, select
Browse Friends List
, select the
name of the player who sent the request (identified by the
Pending Friend Requests
icon) and accept the offer.Once you
accept, the icon will change to the
Established Friends
icon. To
permanently block Friend Requests from another player,select
Block Friends Request
on a pending invitation. This cancels the
pending invitation and blocks any future requests.
IN-GAME PLAYERS OPTIONS
While in-game, select the
Players
option, then select
Send/Cancel Friend Req.
to send quick invitations to active
players in the game plus the last ten users you’ve encountered.
This also allows you to add them as friends.
FRIENDS LIST
Use the Statistics Menu to view various details about yourself,your friends, and your
clan.Viewable stats include the Kill-Death Ratio, Wins , Losses, and overall score
(calculated from various statistics).
Visit http://www.projectsnowblind.com/stats for more detailed statistics.
L View any player’s statistics by selecting
Player
and entering the player's name.
The player's name will be displayed between the seven immediately higherscoring and seven immediately lower-scoring players.
L To view the top tier players in
PROJECT: SNOWBLIND
™
, select
Top 15.
Select
Friends
to view the best 15 players in your Friends List.
L If you have joined a clan,select
Clan
to view the top 15 players in your clan
and see who's the MVP!
STATS
Page 16

28
Create a clan and invite others to join or answer the invitation to
join a clan. Clan members have ranks (Leader,Officer, Soldier)
that have different privileges. Leaders and Officers can recruit
and kick out players. The Leader can promote and demote
Officers and Soldiers. The Leader can also designate a new
Leader.
CREATING YOUR CLAN
On the Online Lobby screen, select
Clans
to open the Clan
Homepage. Select
Create Clan
and create a clan nickname
from one to three characters. Then create your clan’s full name
from four to 20 characters.
INVITING OTHERS TO JOIN YOUR CLAN
Select
Invitations
and
Recruit
to ask other players to join your
clan by using their screen names.View your recruiting efforts or
cancel an invitation by selecting
Sent Invites
, selecting a player,
and selecting
Yes
to confirm the retraction.
ACCEPTING AN INVITATION TO JOIN A CLAN
If you have been invited to join a clan,the ! icon appears next
to the Clans option on the Online Lobby screen. To accept the
invitation, select
Clans,
then
Invitations
and then
Invitations
again to enter the field of invitations. Select the invitation you
want to accept, press the ENTER key and select
Yes
to accept
the invitation. To let everyone know you are not accepting
invitations to join a clan, select
Toggle Status
. Change your mind
by selecting it again.
POSTING NOTICES TO CLAN MEMBERS
The Leader and Officers can select
Notices
and write up to four
messages to all clan members. Other clan members can read
the postings by selecting
Notices
when they see the !icon next
to the
Notices
option.
VIEWING CLAN DETAILS
L View your clan ranking on the Clan Lobby screen, and select
Member List
to see the online status of all clan members.
CLANS
NOTE: OUR SUPPORT AGENTS DO NOT HAVE AND WILL NOT GIVE GAME
HINTS, STRATEGIES OR CODES.
PRODUCT RETURN PROCEDURE
In the event our support agents determine that your game disc is defective,
you will need to forward material directly to us. Please include a brief letter
explaining what is enclosed and why you are sending it to us. The agent you
speak with will give you an authorization number that must be included and
you will need to include a daytime phone number so that we can contact you
if necessary. Any materials not containing this authorization number will be
returned to you unprocessed and unopened.
Your postage-paid package should be sent to the following address:
Eidos, Inc. Customer Services
RMA# (include your authorization number here)
651 Brannan Street, Suite 400
San Francisco, CA 94107
EIDOS, INC., LIMITED WARRANTY
Eidos, Inc., warrants to you, the original purchaser of this disc, that for a period
of ninety (90) days from the date of your purchase, this disc shall be free from
defects in materials and workmanship. If, at any time during the applicable
ninety (90) day warranty period you determine that this limited warranty has
been breached, Eidos, Inc., agrees, in its sole option, to repair or replace, free of
charge, any such disc, provided the disc is returned postage-paid to the Eidos,
Inc., Factory Service Center and a proof of date of purchase is included. This
limited warranty is not applicable to normal wear and tear and shall be void
with respect to any defects that arise from disc abuse, unreasonable use,
mistreatment or neglect. This disc is sold “as is” without any warranties
of any kind, express or implied, including implied warranties of merchantability
or fitness for a particular purpose, other than the limited warranty expressly
stated above.
No other claims arising out of your purchase and use of this disc shall be
binding on or obligate Eidos, Inc., in any manner. Eidos, Inc., will not be liable
to you for any losses or damages incurred for any reason as a result of your
use of this disc, including, but not limited to, any special, incidental, or
consequential damages resulting from your possession, use or malfunction
of this disc.
This limited warranty states the entire obligation of Eidos, Inc., with respect
to the purchase of your disc. If any part of this limited warranty is determined
to be void or illegal, the remainder shall remain in full force and effect.
Register Your Game at
www.eidos.com
 Loading...