

Page 1
©2001 Pyro Studios. Published by Eidos Interactive. Developed by Pyro Studios. Commandos 2: Men of Courage is a trademark of Pyro
Studios. The Pyro logo is a trademark of Pyro Studio. Eidos, Eidos Interactive, and the Eidos Interactive logo are registered trademarks of
Eidos Interactive, Inc. All rights reserved. The ratings icon is a registered trademark of the Interactive Digital Software Association.
®
All new 3D engine: rotate the environment 360
degrees, move seamlessly in/out of buildings,
submarines, planes and under water, and zoom
in/out of the environment
Interact like never before with the environment:
steal enemy uniforms and weapons, climb poles,
swing from cables, swim, utilize vehicles, and
climb in/out of buildings
Control nine commandos: including a green beret, sniper, demolitions expert,
seductress, thief, and even a dog
Authentic WWII scenarios: 10 missions spanning 9 different environments in
night and day with realistic weather effects
Multiplayer: Go to war in a cooperative multiplayer mode
From the heart of the Third Reich to the most remote islands
in the South Pacific, command Sergeant "Tiny" McHale and
his elite group of gritty soldiers and utilize their combined
expertise to venture deep into enemy territory in an attempt
to change the
course of WWII.
INSTRUCTION BOOKLET
PEDENPUS03
Page 2

• Click on Start
• Click on Run
• Type dxdiag
• Click on OK
• Click on the Save Information button and save the file to your computer.
• When you call our Technical Support line either have this file open or have a printed
copy. If you send an e-mail query you may attach the file to the e-mail.
• What error message(s), if any, you have had.
• How the game is currently configured.
NOTE: OUR SUPPORT AGENTS DO NOT HAVE AND WILL NOT GIVE GAME HINTS
STRATEGIES OR CODES
Product Return Procedure:
In the event our support agents determine that your game disk is defective, you will need
to forward material directly to us, please include a brief letter explaining what is enclosed
and why you are sending it to us. The agent you speak with will give you a authorization
number that must be included and you will need to include a daytime phone number so
that we may contact you if necessary. Any materials not containing this authorization
number will be returned to you unprocessed and unopened. Your postage paid package
should be sent to the following address:
Eidos Interactive Customer Services
651 Brannan Street, suite 400
San Francisco, CA 94107
RMA# (include your authorization number here)
Warranty Policy
If our technicians determine that the product storage medium is found to be defective with
ninety (90) days of original purchase (as described in Eidos Interactive’s Limited Warranty
and unless otherwise provided by applicable law) Eidos Interactive will replace the item,
free of charge, to the original purchaser, if the item is accompanied by the original dated
sales receipt, packaging and RMA#. If you do not have the original receipt or the warranty
period has expired. Eidos Interactive will replace the disk for a nominal fee.
Note: You are responsible for postage for your game to our service center.
Lost in the Abyss?
Call the EIDOS Interactive Hint Line
U.S.: 1-900-77EIDOS (773-4367)
Canada: 1900-64EIDOS (6434367)
Cost of call: $0.99/minute.
Must be 18 years of age or have parent’s premission
Touch-tone phone required.
Please Register your game at:
www.eidosregistration.com
19
EEPPIILLEEPPSSYY WWAARRNNIINNGG
Please read before using this video game or allowing your children to use it.
Some people are susceptible to epileptic seizures or loss of consciousness
when exposed to certain flashing lights or light patterns in everyday life. Such
people may have a seizure while watching certain monitor images or playing
certain video games. This may happen even if the person has no medical history
of epilepsy or has never had any epileptic seizures. If you or anyone in your
family has ever had symptoms related to epilepsy (seizures or loss of
consciousness) when exposed to flashing lights, consult your doctor prior to
playing. We advise that parents should monitor the use of video games by their
children. If you or your child experience any of the following symptoms:
dizziness, blurred vision, eye or muscle twitches, loss of consciousness,
disorientation, any involuntary movement or convulsion, while playing a video
game, IMMEDIATELY discontinue use and consult your doctor.
PPRREECCAAUUTTIIOONNSS TTOO TTAAKKEE DDUURRIINNGG UUSSEE
• Do not stand too close to the screen. Sit a good distance away from the
monitor, as far away as the length of the cable allows.
• Avoid playing if you are tired or have not had much sleep.
• Make sure that the room in which you are playing is well lit.
• Rest for at least 10 to 15 minutes per hour while playing a video game.
IINNSSTTAALLLLAATTIIOONN
Quit all applications and close all windows on your desktop. Place the Project
Eden CD in your CD-ROM drive. Upon closing your drive the Project Eden
installation menu will appear. If AutoPlay is disabled the menu will not appear, to
manually access the installation menu follow these simple instructions: Doubleclick on the ‘My Computer’ icon on your desktop, and then double-click on the
CD-ROM icon that appears in the newly opened window. Finally double-click
‘autorun.exe’ to open the installation menu.
From this point please follow the on-screen prompts to guide you through the
installation process.
At the completion of Installation you will be presented with the options to: Launch
the game, quit without playing the game or read the Readme text file. Refer to the
Readme file for updates, manual alterations and troubleshooting.
2
Page 3

CCOONNTTEENNTTSS
INTRODUCTION 4
UPA PROFILES 5
GETTING STARTED 6
MULTIPL AYER GAMES 7
CONFIGURATION MENU 8
PLAYING THE GAME 9
GAME INTERFACE 11
RESOURCE MENU 12
SYSTEM MENU 12
EQUIPMENT 13
SWITCHING BETWEEN 15
UPA TEAM MEMBERS
CREDITS 17
WARRANTY 18
CUSTOMER SUPPORT 19
3
Page 4
CCRREEDDIITTSS
Core Design
Programming:
Gavin Rummery
Phil Callaghan
Duncan Hopkins
Additional programming:
Neil Duffin
Graphic Artists & level design:
Heather Gibson, Neil Boyd
Caroline Evans, John Lilley
FMV / Cut scene sequences:
Peter Barnard
Human animation & models:
Stuart Atkinson
Enemy animation & models:
Joss Charmet
Additional artwork:
Mark Donald,Damon Godley
Script and Original concept:
Gavin Rummery
Music and SFX:
Martin Iveson
Producer and button pusher UK:
Andy Watt
Voice-over casting & production:
All in the Game Ltd.
QA:
Dave Ward, Nick Connelly, Hayos Fatunmbi
Paul Field, Benjamin Twose, Stuart Abrahart
Richard Apperley
Special thanks:
Mike Schmitt
Executive Producers:
Jeremy Heath-Smith, Adrian Smith
17
Eidos Interactive
Producer:
Mike Schmitt
QA Manager:
Brian King
Test Lead:
Beau Teora
Assistant Lead:
Colby McCracken
Testers:
Ryan Natale, Alex Strayer
Stephen Cavoretto, Jeffrey Lowe
Matt Ranalli, Andy Tully
Brian Falls, Jesse Andrews
Compatibility:
Chris Lovenguth
VP Product Development:
Nick Earl
VP Marketing:
Paul Baldwin
Marketing Director:
Sean Amann
Product Manager:
Matt Gorman
PR Manager:
Michelle Seebach
PR Specialist:
Kjell Vistad
Special Thanks:
Rob Dyer, Dave Cox,
Mike Kelly, Michael Minson,
Greg Wu, Kevin Weston,
Christian Chatterjee,
Kim Pendleton, Li Shen,
Frankie Palmer, Randy Stukes,
and Kevin Gill.
IINNTTRROODDUUCCTTIIOONN
Due to severe overpopulation, the planet Earth’ s diameter is increasing with the growth
of towering mega-cities, each inhabited by millions of humans. Buildings are growing
ever-upwards, interconnected with a thick web of roads, walkways and service
channels. In these giant human hives, only the affluent may feel the rays of the sun and
breathe the cleaner air.
Descending thousands of feet through the echelons, conditions steadily decline to slum
level. The inhabitants of these squalid areas barely glimpse the murky sunlight that
filters through the dense infrastructure above. And below the
slums lie even more repugnant conditions… an underworld
occupied by criminals, cultists, the wretched and
deranged. Assumed derelict, the very lowest of these areas
is visited only by structural engineering teams
when foundations require strengthening - in
order to accommodate yet further
elevations.
These Cities are Policed by the UPA
(Urban Protection Agency), one such
team is called in to investigate
problems at the ‘Real Meat’ factory, in
which all the equipment has started to
simultaneously malfunction. T echnicians
sent to repair the machinery have
gone missing without explanation…
Here begins The UPA’s sinister
trail of inquiry…
4
Page 5
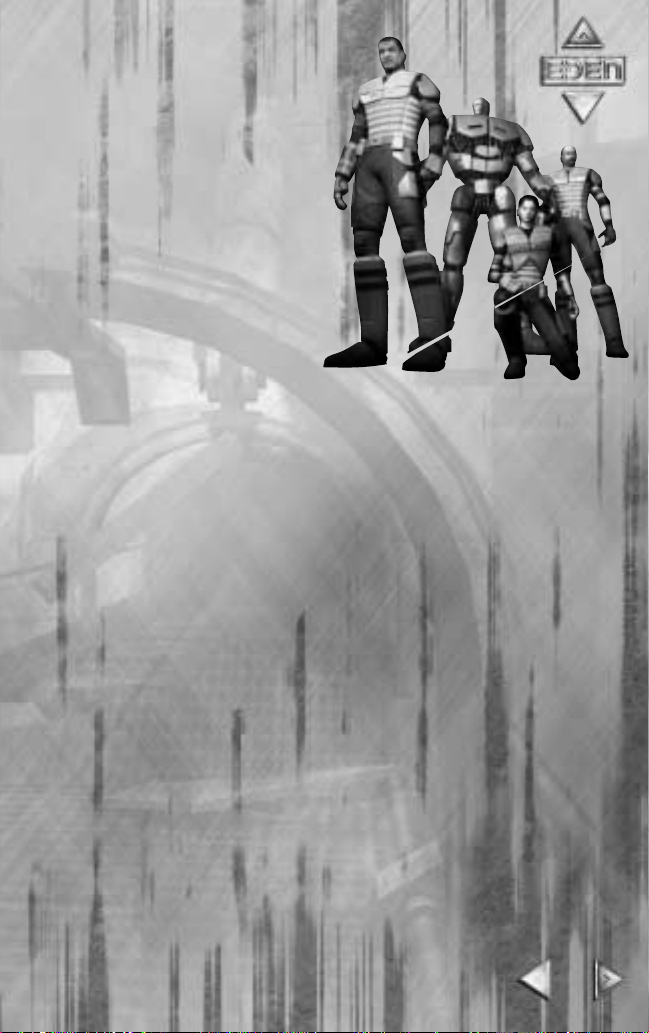
UUPPAA PPRROOFFIILLEESS
Carter – 36 year old male. UPA Squad
Leader. Has plenty of experience and has
worked his way up through the UPA
ranks to his present position. Takes his
job and position seriously. Not looking
forward to ‘retirement’ to a desk job at 40
as is standard in the UPA. Serious, incommand and in-control.
Minoko – 20 year old female. UPA Tech
Division. An orphan who was taken onto
the UPA youth training program at 9
after showing high levels of aptitude
with computers her ability to hack into almost any system was
noticed by the UPA as a skill that would benefit their organization. She has trained
ever since, and became a full UPA operative at 17 – the youngest age possible.
Limited in-the-field experience; has only been working with Carter and his team for
1 year. Young, cheerful and optimistic.
Andre– 32 year old male. UPA Engineering Division. A skilled engineer with a natural
ability to understand and repair mechanical and electrical systems. Joined the UP A
at 25 looking for excitement after growing restless in his previous job as a SkyLift
engineer. Considered by his superiors to have a slight attitude problem, but still
expected to fill Carter’s shoes when he ‘retires’.
Amber – 27 year old female. UPA Cyborg Division. Suffered horrific injuries in a
Skyway accident at the age of 19 and chose to become one of the ‘Metal Heads’ of
the UPA rather than have normal human-cyborg reconstructive surgery. Has
become increasingly withdrawn and machine-like as the years have gone by as
seems to happen with members of the Cyborg Division. When she does speak it is
quiet, calm and morose. She is capable of operating in hazardous environments.
Control – 48 year old male. UPA Control. Retired field operative who has taken up
position as the 5th member of Carter’s 4 man squad. Although the Control for a
team often varies depending on the mission, he and Carter have worked together
many times before. Experienced and serious – Carter’s future.
5
Page 6

SSWWIITTCCHHIINNGG BBEETTWWEEEENN UUPPAA
TTEEAAMM MMEEMMBBEERRSS
There are three ways of switching between team members:
QUICK KEYS:
Directly switch team members as follows: Carter 1, Minoko 2, Andre 3, Amber 4. Scroll
through team members using P or O.
RESOURCE MENU:
Click on the icon of the desired team member within the Status bar to transfer control.
IN GAME:
Use either Quick keys – as described above, alternatively when passing the Action Cursor
over another character their name will appear on screen and a status box around their
person, clicking the Action button will transfer control to that Team member. Unless
weapon is drawn.
USING AND ACTIVATING ITEMS IN THE GAME WORLD
Whenever an object in the game world can be interacted with, a Target Box will appear
around it as you move the Targeting Cursor near it. The action you can perform will be
displayed at the bottom of the screen. Pressing Action will perform that action.
REGEN POINTS
These points are where team members are regenerated should their health bar deplete
to zero. As a team member walks past a Regen Point they will be automatically tagged,
this then becomes that particular characters regeneration point. If follow me mode is
activated then the other team members under your order will have the same Regen Point
set. Regen Points can also be used to recharge your health. As you stand by the unit you
will notice a blue energy field surrounding you; remain within the field for recharge to take
place.
RECHARGE POINTS
At various points in the level the team will discover Recharge Points. These points when
activated will recharge your currently held weaponry.
15
GGEETTTTIINNGG SSTTAARRTTEEDD
Following installation launch the game and a short introductory sequence will play, when
this is completed you will be presented with the MAIN MENU, your options here are as
follows:
START MENU
Here the following options are available:
START Select to display MAIN MENU (Single player)
MULTIPLAYER Select to display MULTIPLAYER MENU
CONFIGURE Select to display CONFIGURATION MENU
QUIT Select to quit to OS
NEW GAME Select to commence new single player game
LOAD GAME Select to display the list of previously Saved Games, click on the
game you wish to load and the game will restart from the save point
SELECT LEVEL Select to display list of unlocked levels that can be played at any time
BACK Returns you to the MAIN MENU
6
Page 7

MMUULLTTIIPPLLAAYYEERR GGAAMMEESS
CONNECTING VIA THE INTERNET
There are two methods to play Project Eden over the Internet, either using GameSpy
or directly using TCP/IP.
GameSpy – Visit the GameSpy website at www.gamespyarcade.com and follow their
instructions to play Project Eden across the Internet.
Internet TCP/IP – To play using TCP/IP you need one person to set up a server and
then everyone else must connect to it.
Setting Up A Server– Select Multiplayer then Internet TCP/IP . At the bottom of the next
screen you will see This Address, which is the TCP/IP address of your computer. Note
this down as you will need to inform the other players of your address before they will
be able to connect to your game. Please note that it is best not to disconnect from
the Internet to inform your friends by telephone, as your TCP/IP address may change
when you reconnect.
Click Accept and then Create Game. You can then either elect to start a new game
from the first level, start playing from a previous saved game, or select a specific
multiplayer level. If you select the final option you will be presented with a list of levels,
their type (see below), and the maximum number of players the level will accept. The
different types of game on offered are:
Normal co-operative levels from the normal game.
Death Match free for all.
Team the players are split into 2 teams and must capture the opposing team’s flag.
Rover Race players each control a Rover, and race around a track.
Select the level and you will then be presented with the Server Settings screen. From
here you can select how many players you wish to allow, the name of your game,
whether people can join after the game starts, and whether to use a high or low speed
data transfer. Note that high-speed servers should only be selected if all players are
connected to the Internet by something faster than a modem.
When you are ready , click Accept to start the server . If you have chosen to allow people
to join after the game starts then the game will start immediately. Otherwise, you will
go to a waiting screen where you can see which other player have joined, and click
Start Game when you are ready .
Joining a Server – Select Multiplayer then Inter net TCP/IP. On the next screen, enter
7
Page 8

the TCP/IP address of the server into one of the slots and then click Accept. On the next
13
EEQQUUIIPPMMEENNTT
WEAPONS
Each character will start the game with at least a standard issue Pulse Gun. At various
points later in the game the team members will be given access to extra weapons and
enhanced modes of operation for existing weapons.
All UPA weapons ar e equipped with sensors preventing ‘friendly fir e’; these sensors will
prevent the firing of all UPA weapons at UPA members and civilians (Unless you are
playing in death match mode).
WEAPON ENERGY
All weapons use WEAPON ENERGY to fire. Generally, the mor e effective a weapon is the
more energy it will use. Weapon energy can be recharged by standing at a UPA
Recharge Point and holding Action. In addition, UPA Energy Cells can be collected and
stored until needed. If a character’s weapon energy runs out and an Energy Cell is
available, it is automatically used to recharge that character’ s energy. Alternatively, they
can be manually used via the Resource Menu.
PULSE GUN
Rapid setting
– continuous firing whilst the Action button is held.
Charge setting – hold the Action button to charge and then release to fire a single shot
which is more powerful than the rapid fire.
DISC GUN
Normal setting – launches an explosive disc.
Bounce setting – whilst holding the Action button a laser guide allows you to view the
bounce pattern of the explosive disc prior to launch.
EXTRACTOR
Extractor mode – use this mode to extract energy from your enemies into your weapon
energy. If your weapon energy is full the excess will be directed to generating extra
energy cells in your inventory later use. Extracting all the energy from a creature will kill it.
Blast Mode – this mode does not extract energy from the enemy but blasts it back at
them. This mode uses up weapon energy in the standard way. If there are any other
enemies nearby, the blast beam will spread up to three more times and affect these
enemies also.
screen, wait until the server name appears at the top of the screen and then click on it to
connect and join the game.
Connecting via a Local Area Network (LAN) – Select Multiplayer then choose either Internet
TCP/IP or IPX depending on your LAN. One player should set up a server and the others
join it as described above in the Internet TCP/IP section. The only difference is that on a
LAN you do not need to worry about TCP/IP addresses to join – the game will find the
server automatically.
CCOONNFFIIGGUURRAATTIIOONN MMEENNUU
Within this Menu you are able to configure the following settings:
CONTROLS
Selecting this option will allow you to define your own keys. Click on the current key once,
then press the desired key , the indication should now display the correct key. Click Save
settings when you have completed configuration to return to the CONFIGURATION
MENU.
GRAPHICS
Selecting this option allows you to customize your graphical set-up. Project Eden will
automatically select what it regards to be the optimal set-up for your PC but this section
will allow you to override if desired.
SOUND
The same principles apply as above.
PLAYER SETTINGS
Here you can add your own name – for display in Deathmatch scoreboard.
8
Page 9

PPLLAAYYIINNGG TTHHEE GGAAMMEE
SINGLE PLAYER
Once the game begins your default character will be Carter, Team Leader of the
UPA squad. You’ll receive your first audible mission briefing from Control, so listen
carefully. Mission briefings are also displayed as text on-screen. Within the single
player game you are able to switch between all four characters.
MULTIPL AYER CO-OPERATIVE
When joining or starting a Multiplayer game character selection is automatic and
decided by the network server. You will only be able to switch between characters
in game whilst they are not been used by another player.
MULTIPL AYER DEATHMATCH
When joining or starting a Deathmatch game the same principles apply as above to
character selection, no character switching is available in this mode though.
MMUULLTTIIPPLLAAYYEERR DDEEAATTHHMMAATTCCHH
RREEFFEERREENNCCEE DDEEFFAAUULLTT KKEEYYSS
Side Step Right Right Cursor Key
Side Step Left Left Cursor Key
Jog Forward Up Cursor Key
Tur n and jog Backward Down Cursor Key
Walk (in conjunction with Cursor Keys) Num Pad 0
Duck Right CTRL
Resource Menu (toggle on/off) Mouse 2
Action Mouse 1
Talk (Multiplayer) F1
Team Talk (Multiplayer) F2
Toggle view (1st & 3rd person) F3
9
Page 10

11
GGAAMMEE IINNTTEERRFFAACCEE
Use the mouse to move the Action Cursor, this will dictate the focal point
of your character and interact with the environment.
Within the standard game window your currently selected character heath and
weapon status is displayed. Any characters within communicable range will also have
their icon and current health status displayed onscreen. If any other character is under
a ‘follow me order’ a small icon will be displayed next to the game characters icon.
Also displayed on screen is the current characters proximity radar, this shows any
enemy, team member or mission objectives within range.
All transmissions received from Control will result in a flashing ‘i’ symbol appearing
onscreen. To access the information switch to the Resource Menu and click on the ‘i’
symbol in the Data Log.
DATA LOG
Accessing the data log displays the following information:
Objectives select to display current mission objectives. Completed tasks will
have a tick by them, cancelled tasks a cross and uncompleted
tasks have no icon.
Interviews this option allows you to review any previously carried out witness
statements and interviews.
Mail all communications with Control are stored here.
Information select this option for on-screen help.
Currently selected
team member
Currently selected weaponHealth Energy Bar
Weapon Mode
Weapon Energy Bar
Data receipt
Action Cursor
Proximity Radar
Team members
within range
Follow Me mode
active
Select Carter 1
Select Minoko 2
Select Andre 3
Select Amber 4
Next Character >
Previous Character <
All Follow Me (Order) Return
Quick Save F7
Quick Load F8
Dual Pulse Gun 5
Disk Gun 6
Time Shock 7
Extractor 8
Pipe bomb 9
Rocket 0
Next Weapon =
Previous Weapon -
Next Weapon Mode Right Bracket
Previous Weapon Mode
Torch
Mouse X Speed
Mouse Y Speed Set using Right and Left Cursor Keys
Mouse Y Invert Click to toggle between Disabled (default) and
Joystick Click to toggle between Disabled (default) and
ESC System Menu
Left Bracket
T
Set using Right and Left Cursor Keys
Enabled
Enabled
10
Page 11

GGAAMMEE IINNTTEERRFFAACCEE
Use the mouse to move the Action Cursor, this will dictate the focal point
of your character and interact with the environment.
Within the standard game window your currently selected character heath and
weapon status is displayed. Any characters within communicable range will also have
their icon and current health status displayed onscreen. If any other character is under
a ‘follow me order’ a small icon will be displayed next to the game characters icon.
Also displayed on screen is the current characters proximity radar, this shows any
enemy, team member or mission objectives within range.
All transmissions received from Control will result in a flashing ‘i’ symbol appearing
onscreen. To access the information switch to the Resource Menu and click on the ‘i’
symbol in the Data Log.
Currently selected
team member
Data receipt
DATA LOG
Currently selected weaponHealth Energy Bar
Action Cursor
Weapon Energy Bar
Weapon Mode
Team members
within range
Follow Me mode
active
Proximity Radar
Accessing the data log displays the following information:
Objectives select to display current mission objectives. Completed tasks will
have a tick by them, cancelled tasks a cross and uncompleted
tasks have no icon.
Interviews this option allows you to review any previously carried out witness
statements and interviews.
Mail all communications with Control are stored here.
Information select this option for on-screen help.
11
Page 12

RREESSOOUURRCCEE MMEENNUU
9
PPLLAAYYIINNGG TTHHEE GGAAMMEE
SINGLE PLAYER
Once the game begins your default character will be Carter, Team Leader of the
UPA squad. You’ll receive your first audible mission briefing from Control, so listen
carefully. Mission briefings are also displayed as text on-screen. Within the single
player game you are able to switch between all four characters.
MULTIPL AYER CO-OPERATIVE
When joining or starting a Multiplayer game character selection is automatic and
decided by the network server. You will only be able to switch between characters
in game whilst they are not been used by another player.
MULTIPL AYER DEATHMATCH
When joining or starting a Deathmatch game the same principles apply as above to
character selection, no character switching is available in this mode though.
MMUULLTTIIPPLLAAYYEERR DDEEAATTHHMMAATTCCHH
RREEFFEERREENNCCEE DDEEFFAAUULLTT KKEEYYSS
Side Step Right Right Cursor Key
Side Step Left Left Cursor Key
Jog Forward Up Cursor Key
Tur n and jog Backward Down Cursor Key
Walk (in conjunction with Cursor Keys) Num Pad 0
Duck Right CTRL
Resource Menu (toggle on/off) Mouse 2
Action Mouse 1
Talk (Multiplayer) F1
Team Talk (Multiplayer) F2
Toggle view (1st & 3rd person) F3
Activate the Resource Menu to carry out a number of actions:
Select item from inventory, including the activation of the Rover, Flycam and Sentry Gun.
Give the ‘Follow Me’ order to whichever team members are within range. For example, if all
three other UPA members are in range and you wish for all of them to follow you simply
click on ‘Follow Me’, if only certain members are required click on their individual icon. In
either case any team member who receives the ‘Follow Me’ order will display an icon in their
status bar. To give the ‘follow me’ order to all members within range during standard
gameplay use Return.
Select weapon and weapon
mode, see weapon descriptions.
You may also select an alternative
character by clicking on their icon
within the status bar.
Items that are collectable will be
distinguishable by the appearance
of a border that will appear around
them; placing the action cursor
over the item and clicking on it will
pick it up and place it into your
inventory. The item may be selected for use via the Resource Menu.
SSYYSSTTEEMM MMEENNUU
Pressing the Escape key during gameplay will display the System Menu, this menu allows
the following operations:
Configuration Allows customization of Graphics / Sound / controls set-ups, refer to
Configuration Menu text for a more detailed description
Save Select to save your current game
Load Select to display Saved games, choose and select a previously
saved game to Load
Quit Select to quit to Start Menu.
12
Page 13

EEQQUUIIPPMMEENNTT
WEAPONS
Each character will start the game with at least a standard issue Pulse Gun. At various
points later in the game the team members will be given access to extra weapons and
enhanced modes of operation for existing weapons.
All UPA weapons ar e equipped with sensors preventing ‘friendly fir e’; these sensors will
prevent the firing of all UPA weapons at UPA members and civilians (Unless you are
playing in death match mode).
WEAPON ENERGY
All weapons use WEAPON ENERGY to fire. Generally, the mor e effective a weapon is the
more energy it will use. Weapon energy can be recharged by standing at a UPA
Recharge Point and holding Action. In addition, UPA Energy Cells can be collected and
stored until needed. If a character’s weapon energy runs out and an Energy Cell is
available, it is automatically used to recharge that character’ s energy. Alternatively, they
can be manually used via the Resource Menu.
PULSE GUN
Rapid setting
Charge setting – hold the Action button to charge and then release to fire a single shot
which is more powerful than the rapid fire.
DISC GUN
Normal setting – launches an explosive disc.
– continuous firing whilst the Action button is held.
Bounce setting – whilst holding the Action button a laser guide allows you to view the
bounce pattern of the explosive disc prior to launch.
EXTRACTOR
Extractor mode – use this mode to extract energy from your enemies into your weapon
energy. If your weapon energy is full the excess will be directed to generating extra
energy cells in your inventory later use. Extracting all the energy from a creature will kill it.
Blast Mode – this mode does not extract energy from the enemy but blasts it back at
them. This mode uses up weapon energy in the standard way. If there are any other
enemies nearby, the blast beam will spread up to three more times and affect these
enemies also.
13
Page 14

7
MMUULLTTIIPPLLAAYYEERR GGAAMMEESS
CONNECTING VIA THE INTERNET
There are two methods to play Project Eden over the Internet, either using GameSpy
or directly using TCP/IP.
GameSpy – Visit the GameSpy website at www.gamespyarcade.com and follow their
instructions to play Project Eden across the Internet.
Internet TCP/IP – To play using TCP/IP you need one person to set up a server and
then everyone else must connect to it.
Setting Up A Server– Select Multiplayer then Internet TCP/IP . At the bottom of the next
screen you will see This Address, which is the TCP/IP address of your computer. Note
this down as you will need to inform the other players of your address before they will
be able to connect to your game. Please note that it is best not to disconnect from
the Internet to inform your friends by telephone, as your TCP/IP address may change
when you reconnect.
Click Accept and then Create Game. You can then either elect to start a new game
from the first level, start playing from a previous saved game, or select a specific
multiplayer level. If you select the final option you will be presented with a list of levels,
their type (see below), and the maximum number of players the level will accept. The
different types of game on offered are:
Normal co-operative levels from the normal game.
Death Match free for all.
Team the players are split into 2 teams and must capture the opposing team’s flag.
Rover Race players each control a Rover, and race around a track.
Select the level and you will then be presented with the Server Settings screen. From
here you can select how many players you wish to allow, the name of your game,
whether people can join after the game starts, and whether to use a high or low speed
data transfer. Note that high-speed servers should only be selected if all players are
connected to the Internet by something faster than a modem.
When you are ready , click Accept to start the server . If you have chosen to allow people
to join after the game starts then the game will start immediately. Otherwise, you will
go to a waiting screen where you can see which other player have joined, and click
Start Game when you are ready .
Joining a Server – Select Multiplayer then Inter net TCP/IP. On the next screen, enter
TIME SHOCK
A hi-tech UPA weapon that fires an energy field disrupting time around them, used to
stun particularly tough enemies. Choose from the two different modes:
Beam Mode – effects only one enemy at a time, fire the beam directly at the enemy.
Area Effect Mode – the weapon will fire a small projectile and the first thing hit by the
projectile will become the center of the area effect. Any living creature inside this area
will have its time frame slowed down. This weapon uses a large amount of weapon
energy.
PIPE BOMB
Contact mode – explode on contact with person or environment.
Proximity mode – explode when an enemy is detected nearby.
MISSILE LAUNCHER (AMBER ONLY)
Missile mode
Homing Missiles – Capable of launching a total of four homing missiles at one time, each
one having its own target. Acquiring targets – Press and hold the fire button, now move
your crosshairs over each enemy you wish to target (up to four). Now release your fire
button and for every target you have a missile will be fired towards it.
SENTRY GUN
Static gun emplacements that can be placed by the player and either directly controlled or
left to auto-fire.
TOOLS
ROVER
Mini Vehicle with limited firepower that can be used to access areas the team cannot
reach in order to activate switches or collect small items.
FL YCAM
Mini camera the team can remotely fly into areas in order to scout territory. Can also
operate some switches.
OMNI-TOOL (ANDRE ONLY)
UPA tool used to fix equipment that can be r epaired. Selected automatically when Andre
clicks on a broken piece of equipment.
– fires missile in the direction Amber is facing
14
Page 15

SSWWIITTCCHHIINNGG BBEETTWWEEEENN UUPPAA
TTEEAAMM MMEEMMBBEERRSS
There are three ways of switching between team members:
QUICK KEYS:
Directly switch team members as follows: Carter 1, Minoko 2, Andre 3, Amber 4. Scroll
through team members using P or O.
RESOURCE MENU:
Click on the icon of the desired team member within the Status bar to transfer control.
IN GAME:
Use either Quick keys – as described above, alternatively when passing the Action Cursor
over another character their name will appear on screen and a status box around their
person, clicking the Action button will transfer control to that Team member. Unless
weapon is drawn.
USING AND ACTIVATING ITEMS IN THE GAME WORLD
Whenever an object in the game world can be interacted with, a Target Box will appear
around it as you move the Targeting Cursor near it. The action you can perform will be
displayed at the bottom of the screen. Pressing Action will perform that action.
REGEN POINTS
These points are where team members are regenerated should their health bar deplete
to zero. As a team member walks past a Regen Point they will be automatically tagged,
this then becomes that particular characters regeneration point. If follow me mode is
activated then the other team members under your order will have the same Regen Point
set. Regen Points can also be used to recharge your health. As you stand by the unit you
will notice a blue energy field surrounding you; remain within the field for recharge to take
place.
RECHARGE POINTS
At various points in the level the team will discover Recharge Points. These points when
activated will recharge your currently held weaponry.
15
Page 16

5
UUPPAA PPRROOFFIILLEESS
Carter – 36 year old male. UPA Squad
Leader. Has plenty of experience and has
worked his way up through the UPA
ranks to his present position. Takes his
job and position seriously. Not looking
forward to ‘retirement’ to a desk job at 40
as is standard in the UPA. Serious, in-
command and in-control.
Minoko – 20 year old female. UPA Tech
Division. An orphan who was taken onto
the UPA youth training program at 9
after showing high levels of aptitude
with computers her ability to hack into almost any system was
noticed by the UPA as a skill that would benefit their organization. She has trained
ever since, and became a full UPA operative at 17 – the youngest age possible.
Limited in-the-field experience; has only been working with Carter and his team for
1 year. Young, cheerful and optimistic.
Andre– 32 year old male. UPA Engineering Division. A skilled engineer with a natural
ability to understand and repair mechanical and electrical systems. Joined the UP A
at 25 looking for excitement after growing restless in his previous job as a SkyLift
engineer. Considered by his superiors to have a slight attitude problem, but still
expected to fill Carter’s shoes when he ‘retires’.
Amber – 27 year old female. UPA Cyborg Division. Suffered horrific injuries in a
Skyway accident at the age of 19 and chose to become one of the ‘Metal Heads’ of
the UPA rather than have normal human-cyborg reconstructive surgery. Has
become increasingly withdrawn and machine-like as the years have gone by as
seems to happen with members of the Cyborg Division. When she does speak it is
quiet, calm and morose. She is capable of operating in hazardous environments.
Control – 48 year old male. UPA Control. Retired field operative who has taken up
position as the 5th member of Carter’s 4 man squad. Although the Control for a
team often varies depending on the mission, he and Carter have worked together
many times before. Experienced and serious – Carter’s future.
USING SWITCHES
Throughout the game the team will need to operate switches, these are used by positioning
a team member in front of the switch placing the Action Cursor over the switch and clicking
the Action button. In some cases a prolonged holding of the switch maybe required, this is
achieved by holding the Action button and without releasing it activating the Resource
Menu by pressing the right mouse button, at which point the character holding the switch
is locked into position until you reselect him and move him away from the switch.
REPAIRING ITEMS
Andre is your engineer and as such will be called upon from time to time to try and repair
various systems. To successfully repair an item you must place your cursor over the
repair bar, clicking and holding the action button will initiate the bar slider, releasing the
action button will cause the slider to stop. If the slider stops within the blue zone one
repair point will be added, the number of repair points will be displayed at the base of the
screen. If you stop the slider in the red zone one repair point will be lost. Once the
required number of repair points is gained the system will again be able to work normally .
DOWNLOADING INFORMATION
At certain points of the game Minoko will be called upon to download information from
the various computer terminals located throughout the city. Many of these terminals are
fitted with ‘time-out’ security features and only a specialized skilled operative like Minoko
will be able to open the codes before the terminals lock and reset themselves. To crack
each phase of the terminal code position the cursor over the relevant spinal clicking once
when the indicator enters the red zone, completing the code successfully will enable
download to commence. Either missing the red zone or running out of time will result in
the terminal resetting and you will need to try again.
SAVE GAME
You are able to Save your game either by accessing the System Menu in game by
pressing the Escape key and selecting Save Game, or by using the Quick Save key which
is F7.
LOAD GAME
Y ou can Load your previously saved game at the Start Menu by selecting Load Game, at
the System Menu in game again selecting Load Game, or by using the Quick Load key
which is F8.
Please note that using the Quick Load key will automatically Load the last Save Game file
whereas if you select the Load Game option through either the Start or System Menus
you will be able to choose which Save Game file to Load.
16
Page 17

CCRREEDDIITTSS
Core Design
Eidos Interactive
Programming:
Gavin Rummery
Phil Callaghan
Duncan Hopkins
Additional programming:
Neil Duffin
Graphic Artists & level design:
Heather Gibson, Neil Boyd
Caroline Evans, John Lilley
FMV / Cut scene sequences:
Peter Barnard
Human animation & models:
Stuart Atkinson
Enemy animation & models:
Joss Charmet
Additional artwork:
Mark Donald,Damon Godley
Script and Original concept:
Gavin Rummery
Music and SFX:
Martin Iveson
Producer and button pusher UK:
Andy Watt
Voice-over casting & production:
All in the Game Ltd.
QA:
Dave Ward, Nick Connelly, Hayos Fatunmbi
Paul Field, Benjamin Twose, Stuart Abrahart
Richard Apperley
Special thanks:
Mike Schmitt
Executive Producers:
Jeremy Heath-Smith, Adrian Smith
Producer:
Mike Schmitt
QA Manager:
Brian King
Test Lead:
Beau Teora
Assistant Lead:
Colby McCracken
Testers:
Ryan Natale, Alex Strayer
Stephen Cavoretto, Jeffrey Lowe
Matt Ranalli, Andy Tully
Brian Falls, Jesse Andrews
Compatibility:
Chris Lovenguth
VP Product Development:
Nick Earl
VP Marketing:
Paul Baldwin
Marketing Director:
Sean Amann
Product Manager:
Matt Gorman
PR Manager:
Michelle Seebach
PR Specialist:
Kjell Vistad
Special Thanks:
Rob Dyer, Dave Cox,
Mike Kelly, Michael Minson,
Greg Wu, Kevin Weston,
Christian Chatterjee,
Kim Pendleton, Li Shen,
Frankie Palmer, Randy Stukes,
and Kevin Gill.
17
Page 18

CONTACTING TECH SUPPORT:
3
CCOONNTTEENNTTSS
INTRODUCTION 4
UPA PROFILES 5
GETTING STARTED 6
MULTIPL AYER GAMES 7
CONFIGURATION MENU 8
PLAYING THE GAME 9
GAME INTERFACE 11
RESOURCE MENU 12
SYSTEM MENU 12
EQUIPMENT 13
SWITCHING BETWEEN 15
UPA TEAM MEMBERS
CREDITS 17
WARRANTY 18
CUSTOMER SUPPORT 19
If you have a technical problem with the game, our Support Department is here to help. Our
web site contains up-to-date information on the most common difficulties with our products;
this information is the same as that used by our support agents. If you are unable to find the
information you need on our web site, please feel free to contact us via e-mail, fax, telephone
or letter. (When contacting us via email or fax, please ensure to put the game title in the
subject of your message)
Assistance Via the World Wide Web:
The fastest way to answer most questions is by visiting our online support. You may find the
latest support information for Gangster 2 at
http://www.eidosinteractive.com/support/index.html. Our support FAQ’s are available 24-7 for
your convenience. These pages are updated frequently and have the same information that
our support techs will use to answer your question if you call or e-mail us. The answers to
about 90% of the questions we are asked can be found there, so it really is worth the time to
take a look!
The second fastest way to get an answer to your question is to e-mail us. (You will find our
email submission forms at our web site) We typically respond to email queries within 24-48
hours during the business week. Response times can be considerably longer over the
weekend, holidays and immediately after a product release. It all depends on how many
people we have working and how much e-mail is coming in at any one time, but we do try
really hard to get you the right answer as quickly as possible. Weekdays, excluding holidays,
during the hours when the phones are open, we still give e-mail questions our highest priority.
Through this site you will also have access to our FTP (File Transfer Protocol) area where you
can download patches and new enhancements as soon as they become available.
Assistance via Telephone or Fax:
We are available to take your calls Monday through Friday between 9:00 a.m. and 5:00 p.m.,
Pacific Time at (415) 615-6220 (voice) or (415) 547-1201(fax). Our tech support department is
closed on all major holidays. Note: You are responsible for all toll charges when calling.
To ensure the quickest service you will need to be at your computer and have the following
information at hand:
• A complete listing of your computer’s hardware. (Contact your computer manufacturer if
you are unsure)
•What version of Windows ® you are using.
•A copy of your DirectX Diagnostics report.
18
Page 19

• Click on Start
• Click on Run
• Type dxdiag
• Click on OK
• Click on the Save Information button and save the file to your computer.
• When you call our Technical Support line either have this file open or have a printed
copy. If you send an e-mail query you may attach the file to the e-mail.
• What error message(s), if any, you have had.
• How the game is currently configured.
NOTE: OUR SUPPORT AGENTS DO NOT HAVE AND WILL NOT GIVE GAME HINTS
STRATEGIES OR CODES
Product Return Procedure:
In the event our support agents determine that your game disk is defective, you will need
to forward material directly to us, please include a brief letter explaining what is enclosed
and why you are sending it to us. The agent you speak with will give you a authorization
number that must be included and you will need to include a daytime phone number so
that we may contact you if necessary. Any materials not containing this authorization
number will be returned to you unprocessed and unopened. Your postage paid package
should be sent to the following address:
Eidos Interactive Customer Services
651 Brannan Street, suite 400
San Francisco, CA 94107
RMA# (include your authorization number here)
Warranty Policy
If our technicians determine that the product storage medium is found to be defective with
ninety (90) days of original purchase (as described in Eidos Interactive’s Limited Warranty
and unless otherwise provided by applicable law) Eidos Interactive will replace the item,
free of charge, to the original purchaser, if the item is accompanied by the original dated
sales receipt, packaging and RMA#. If you do not have the original receipt or the warranty
period has expired. Eidos Interactive will replace the disk for a nominal fee.
Note: You are responsible for postage for your game to our service center.
Lost in the Abyss?
Call the EIDOS Interactive Hint Line
U.S.: 1-900-77EIDOS (773-4367)
Canada: 1900-64EIDOS (6434367)
Must be 18 years of age or have parent’s premission
www.eidosregistration.com
Cost of call: $0.99/minute.
Touch-tone phone required.
Please Register your game at:
19
 Loading...