

Page 1
Manual Mono Tyc PC GB 15-10-01 17:14 Page II
TABLE OF CONTENTS
First Things First
System Requirements
. . . . . . . . . . . . . . . IV
Setup and Installation . . . . . . . . . . . . . . . IV
The ReadMe File . . . . . . . . . . . . . . . . . . . . . . . . . . . . . . . . . . V
Build the Empire of your Dreams! . . . . . . .
Launching Monopoly Tycoon
. . . . . . . . . . . . . . . V
Setting the Games Options . . . . . . . . . . . . . . . . . VI
Tutorials
Quick Start
Controlling the Action
. . . . . . . . . . . . . . . . . . . . . . . . . . . . . . . . . . . . . . . . . . . . . . VII
. . . . . . . . . . . . . . . . . . . . . . . . . . . . . . . . . . . . . . . . . VII
. . . . . . . . . . . . . . . . . . . . . . . . IX
A Guided Tour of the Game
The Main Gameplay Screen
. . . . . . . IX
Block View and Business View. . . . X
The Mini Map
The Options Panel
. . . . . . . . . . . . . . . . . . . . . . . . . . . .
. . . . . . . . . . . . . . . . . . . . . XI
The Player Comparison Panel
The Multi-Purpose Panel (MPP)
City View – The Bigger Picture
. . . .
. . . XII
. . . . . . XIV
XI
XI
Online Manual . . . . . . . . . . . . . . . . . . . . . . . . . . . . . . . . . . XVI
Beyond the Basics…
The Citizens
The Passage of Time
Leasing a City Block
Auctions – A Bidding Frenzy
. . . . . . . . . . . . . . . . . . . 2
. . . . . . . . . . . . . . . . . . . . . . . . . . . . . . .
. . . . . . . . . . . . . . . . . . 4
. . . . . . . . . . . . . . . . . . . 6
. . . . . .
2
9
Boosting a Block’s Prestige
Building Successful
Shopping Centres
Apartments
Utility Companies
The Railroads
V
. . . . . . . . . . . . . . . . . . . . .
. . . . . . . . . . . . . . . . . . . . . . . . . . . . . . 13
. . . . . . . . . . . . . . . . . . . . . 14
. . . . . . . . . . . . . . . . . . . . . . . . . . . 15
In-Game Event Messages . . . . . . . . . 17
In-Game Options
. . . . . . . . . . . . . . . . . . . . . . 17
Loading a Previously
Saved Game . . . . . . . . . . . . . . . . . . . . . . . . . . . . . 20
Creating New Player Profiles
Unlocking More Scenarios
Multi-Player Support
Fact File 1:
All of the City Blocks . . . . . . . . . . . . . . . . 30
Fact File 2:
A Guide to Retail Businesses . . . .
Fact File 3:
Game Objectives
. . . . . . . . . . . . . . . . . . . . . . 45
Fact File 4:
The Chance Cards
. . . . . . . . . . . . . . . . . . . . 46
Fact File 5:
Hot Key Support
. . . . . . . . . . . . . . . . . . . . . . 50
Fact File 6:
The Tutorials
. . . . . . . . . . . . . . . . . . . . . . . . . . . . 51
Infogrames Web Sites
Technical Support
. . . . . . . . . . . . . . . . . . . . . . . . . . . . . . . . . . . . . . . . . . . . .
Credits
. . . . . . . . . . . . . . . . . . . . . . . . . . . . . XVII
. . . . . . 10
11
. . . 20
. . . . . . . 21
. . . . . . . . . . . . . . . . 21
32
. . . . . . . . . . . . . . 52
XVIII
III
Page 2

Manual Mono Tyc PC GB 15-10-01 17:14 Page IV
FIRST THINGS FIRST
Before you can install the MONOPOLY TYCOON CD-ROM game, make sure your
computer at least meets the minimum system requirements.
Minimum System Requirements
Operating System: Windows® 95/98/Me
Processor: Pentium® II 233 MHz or higher
Memory: 64 MB RAM
Hard Disk Space: 90 MB Free
CD-ROM Drive: 4X Speed
Video: 8 MB Windows® 95/98/Me - compatible video card*
Sound: Windows® 95/98/Me - compatible sound card*
DirectX®: DirectX® 8.0a version (included) or higher
Recommended System Requirements
Operating System: Windows® 95/98/Me
Processor: Pentium® II 266 MHz or higher
Memory: 64 MB RAM
Hard Disk Space: 200 MB Free
CD-ROM Drive: 8X Speed
Video: 16 MB Direct3D - compatible video card*
Sound: Windows® 95/98/Me - compatible sound card*
DirectX®: DirectX® version 8.0a (included) or higher
* Indicates device should be compatible with
DirectX® version 8.0a or higher.
SETUP AND INSTALLATION
1. Start Windows® 95/98/Me.
2. Insert the MONOPOLY TYCOON CD-ROM game disc into your CD-ROM drive.
3. If auto-play is enabled, a title screen should appear. If auto-play is not enabled,
double-click on the “My Computer” icon on your Win95/98/Me desktop. Next,
double-click on your CD-ROM icon to install the game. If the install screen still
does not appear at this point, locate the “setup.exe” file in the install folder of
the MONOPOLY TYCOON game disc and double-click on it.
4. Follow the remainder of the on-screen instructions to finish installing the game.
5. Once installation is complete, double-click on the MONOPOLY TYCOON game
icon (if you chose to install a shortcut on your desktop during installation) to
start the game. You may also start the game by clicking on the Start button
on your Win95/98/Me taskbar and choosing Programs/Infogrames
Interactive/MONOPOLY TYCOON/MONOPOLY TYCOON.
Note: You must have the MONOPOLY TYCOON game disc
in your CD-ROM drive to play.
Installation of DirectX®
The MONOPOLY TYCOON CD-ROM requires DirectX® version 8.0a (included)
or higher in order to run. If you do not have DirectX® version 8.0a (included)
or higher installed on your computer, click “Yes” when asked if you would
like to install it.
THE README FILE
The MONOPOLY TYCOON CD-ROM game has a ReadMe file where you can view
updated information about the game. To view this file, double-click on that file
in the MONOPOLY TYCOON directory found on your hard drive (usually
C:\Program Files\Infogrames Interactive\MONOPOLY TYCOON).
You can also view the ReadMe file by first clicking on the Start button on your
Win95/98/Me taskbar, then on Programs, then on Infogrames Interactive,
then on MONOPOLY TYCOON, and finally on the ReadMe file item. We strongly
encourage you to take the time to read this file in order to get the benefit of
changes made after this manual went to print.
BUILD THE EMPIRE OF YOUR DREAMS!
Build a business empire from Pall Mall to Piccadilly — one business at a time.
The MONOPOLY TYCOON CD-ROM game features all the risk taking and deal
making of the original MONOPOLY board game — and so much more!
Explore MONOPOLY CITY and get to know its inhabitants as you discover
profitable business opportunities. Create businesses, attract the most customers
and generate the cash you need. Compete for control of entire industries and
city districts. With opportunities and pitfalls at every corner, it’s up to you to
out-manoeuvre up to five other would-be tycoons determined on bankrupting
you. Don’t stop until you own it all!
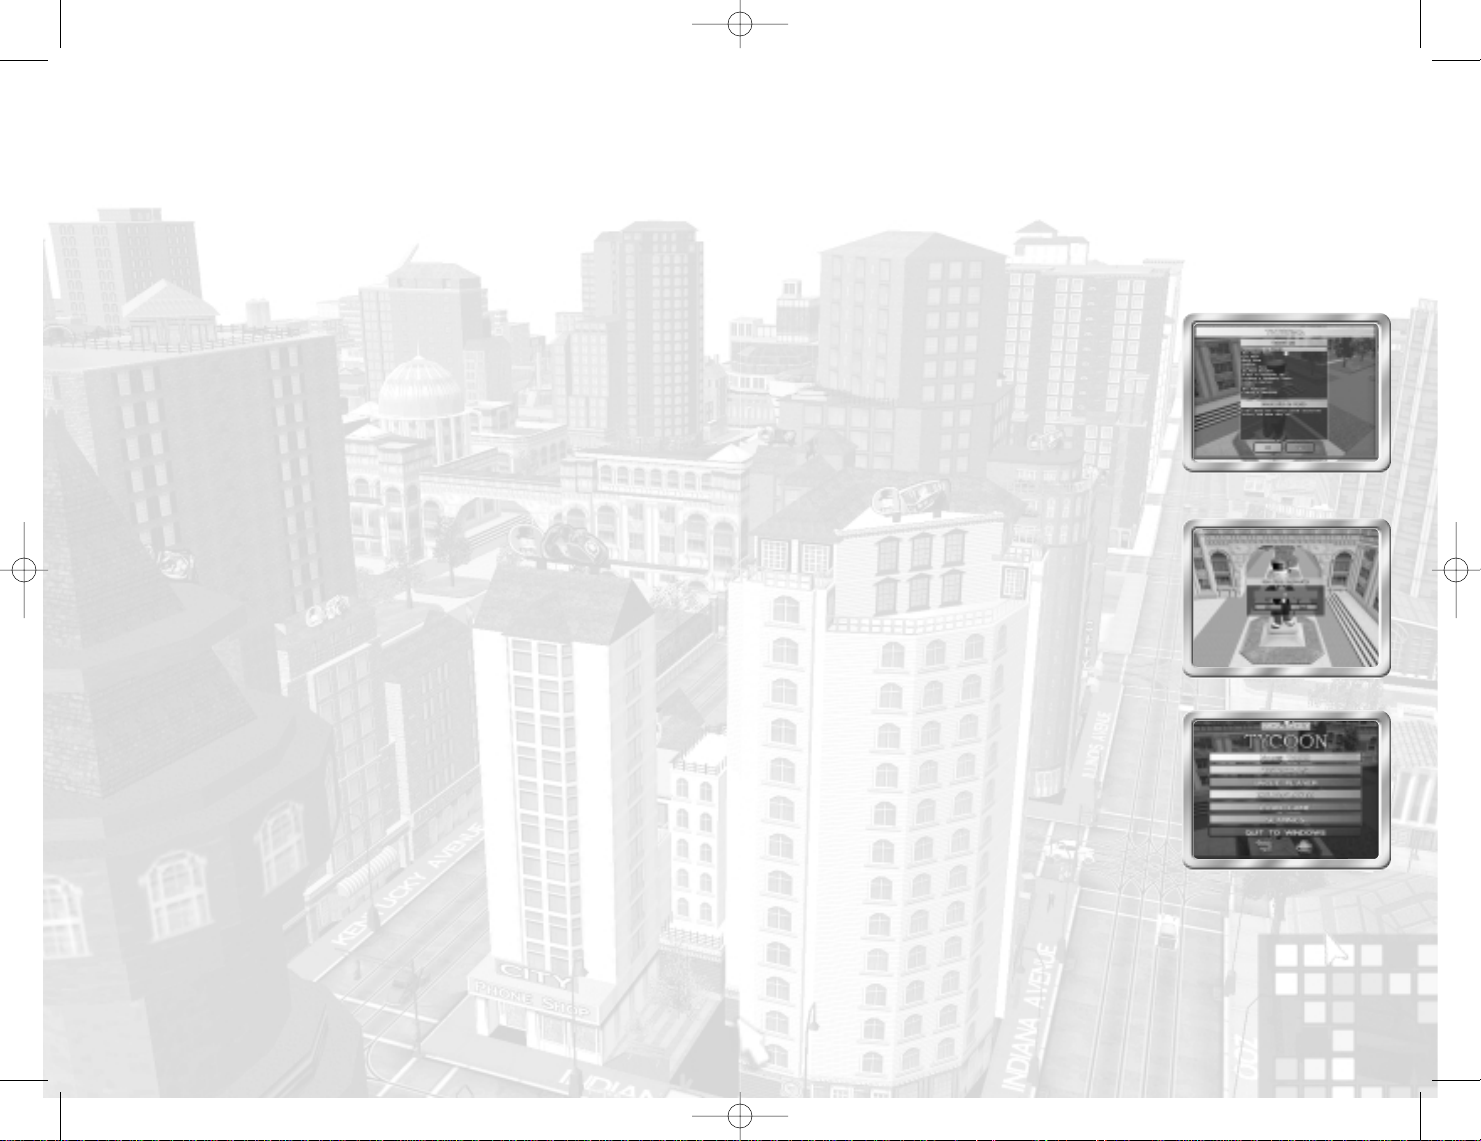
LAUNCHING MONOPOLY TYCOON
When you first launch the MONOPOLY TYCOON CD-ROM game, a dialogue box
will appear offering the following choices:
Play MONOPOLY TYCOON
Click on this button to go to the Main Menu screen. (If you want to get right
into the game, please see Quick Start on page VII.)
Configuration
Click on this button to open the Options Selector window where you can
configure the following presentation aspects of the game for your computer:
Renderer API
This will default to the option that is most applicable to your hardware setup:
Direct 3D if you have a suitable 3D card, or Software if you are running the
game without the benefit of a 3D video card.
IV
V
Page 3
Manual Mono Tyc PC GB 15-10-01 17:14 Page VI
Options
Select 16-bit graphics if you are experiencing poor performance; select 32-bit
graphics for smoother colour definition.
From the two pull-down menus, select your video card and your choice of
resolution and colour depth. The higher the resolution, the crisper the image
will be. However, on slower machines, this may cause the frame rate to drop.
Sound
This section shows the currently selected Sound Driver and whether or not 3D
sound is selected. You can also choose to turn the music and sound on or off.
Done
Click on this button to return to the previous menu.
Uninstall MONOPOLY TYCOON
Click on this button to uninstall the MONOPOLY TYCOON CD-ROM game from
your computer. Simply follow the on-screen prompts.
Exit
Click on this button to exit the game and return to your Windows® desktop.
SETTING THE GAME OPTIONS
From the Main Menu you can access the settings screen and adjust
the following options:
Sound
Both the music and sound volumes can be adjusted here.
Graphics
These options can be used to increase the speed at which the game runs.
• Detail Options determines how much extra detail is drawn in the 3D world
• Filtering Type is an advanced option for hi-end graphics cards
• Draw Distance changes how far into the distance the 3D world is drawn
Gameplay
These options adjust the camera, and mouse settings.
• Auto Camera Rotate - determines how the camera is positioned when
a building is selected.
• Invert Vertical Camera Movement - alters the way in which the right mouse
button and mouse up and down adjust the camera position.
• Hardware Cursor - is used to select between hardware and software cursors
for increased mouse responsiveness.
• Mouse Sensitivity - adjusts the speed at which the world is rotated when
the right mouse button is held down.
Board
This allows for different sets of street names from around the world to be
used in the game.
Credits
Press this button to see a list of the people that worked on this product.
TUTORIALS
You can access a variety of gameplay-related tutorials
from the Main Menu. Simply click on the Tutorials
button to gain access to the Tutorial List.
To view a tutorial, click on the desired tutorial name
and then click the OK button. Note: Clicking on the
Back button will take you back to the Main Menu.
To learn more about the different tutorials,
see Fact File 6: The Tutorials on page 51 of the
online manual.
QUICK START
When you first launch the game you will be taken
to the New Player Registration screen where you
must enter a name for your player profile.
Your profile will be updated each time you play
the game and, in effect, becomes your personal
MONOPOLY TYCOON record. From the Player
Selection screen you can select your profile, add
new profiles or delete existing ones.
PLAYING THE GAME
After you have selected a player profile, the Main
Menu screen appears. We strongly recommend that
you view the MONOPOLY TYCOON Tutorials before
playing the game for the first time. Note: The other
Main Menu choices are described throughout this
manual under their own sections.
VI VII
Page 4

Manual Mono Tyc PC GB 15-10-01 17:14 Page VIII
STARTING A SINGLE-PLAYER GAME
From the Main Menu, click on the Single Player
button to bring up the single player Scenario
Selection screen. At first you will only have access
to the first scenario. Like all scenarios, you can play
the first scenario at one of three difficulty levels:
Easy, Medium or Hard. We recommend that you
select Easy for your first game.
Scenario Description
Click on the first scenario, called Starting Out, and then select a difficulty level.
Note: The default is Easy. The information on the right side of the screen
describes your objective for that scenario.
Winning Cups
Each of the difficulty levels has a trophy cup associated with it: Easy – Bronze
Cup; Medium – Silver Cup; Hard – Gold Cup. When you complete a scenario as a
winner, you will be awarded the difficulty level’s relevant cup. The corresponding
cup slot next to the scenario name will then be filled with your cup. This will
become a permanent record of your success in that scenario.
Character Selection
Once you’ve selected a scenario, click on the OK button.
This will take you to the Character Selection screen. Click
on the left and right arrows beneath your player name
to select the character you want to represent
you during play. A general description of that character
will appear in the Your Character window.
Note: There are no computer-controlled
opponents for you to worry about in
the Starting Out scenario.
In later scenarios, however, computer-controlled opponents will fill
some of the player slots. Click on their images to see their profiles.
Once you’ve selected your character, click on the Start button.
Winning the First Scenario
The first scenario was purposely designed to be fairly easy at all three difficulty
levels. Your challenge is straightforward — make a target number of sales. The
premise is fairly basic. If you build some stores, people will come to shop. When
people shop, they spend money. You are free to build any of the available store
types. When you’ve made the required number of sales, which can be anything
from bread to furniture, you will have successfully completed the scenario.
Playing the Game
All it takes is a few clicks of the mouse to play
the MONOPOLY TYCOON CD-ROM game!
Don’t worry if you find it a little daunting at first.
Things will fall into place very quickly.
Feast your eyes on the playing field — MONOPOLY CITY. If you look closely, you’ll
see cars and people busying themselves in the streets below. This is the stage
upon which you will strive to make your fortune!
Hints and Tips
As you play through the first five scenarios, a gameplay tip will occasionally appear
on screen. These tips serve as prompts to help you move along in the game.
CONTROLLING THE ACTION
USING YOUR MOUSE
Single Left-click:
Use to select an item — anything from a city block, to an individual business, to a
menu option. Simply move the cursor over the relevant object and single-click
with the left mouse button.
Note: The cursor will change shape (pointer, block or building), depending
on the object it is over.
Double Left-click:
Use to carry out a particular action. For instance, double-clicking over a business
will bring up its corresponding Business Adjustment Panel (described on page XIII),
while double-clicking over a block when in City View (described on page XIV) will
cause the camera to zoom in and focus on the selected block.
Right-click and Hold:
Use to rotate around a block when in Block View (described on page X).
Left and right movement of the mouse, while the right button is held in a clicked
state, will cause the view to rotate left or right, respectively.
Simultaneous Left- and Right-click and Hold:
Click and hold both the left and right mouse buttons and then move the mouse
to move the camera view left, right, forward or backward.
USING YOUR KEYBOARD
Other than the hot keys described on page 50 of the online manual in Fact File 5:
Hot Key Support, the keyboard works just like a standard keyboard. Use it to
enter names and to chat over a Local Area Network (LAN) or the Internet.
See Chat on page 23 of the online manual.
A GUIDED TOUR OF THE GAME
THE MAIN GAMEPLAY SCREEN
This screen typically features a distant, angled 3D
view of MONOPOLY CITY — a metropolis with
a life all of its own. During play, click on individual
buildings, an entire city block, or even the people
themselves. What you select determines what you
will see next.
Note: You must hold down the Shift key to select a citizen.
IXVIII
Page 5

Manual Mono Tyc PC GB 15-10-01 17:14 Page X
BLOCK VIEW AND BUSINESS VIEW
There are two basic views that you can switch between during play: Block View
and Business View. The game screen will change to match your selected view.
BLOCK VIEW
Open/Close Button
Information
Buy/Sell Lease
Build
The Multi
Purpose Panel
Open/Close Button
The Player
Comparison Panel
In Block View, accessed by clicking on a street name, the camera is positioned to
show the scope of an entire city block. In Business View, accessed by clicking on a
particular building, the camera zooms in to focus on the selected business. To
rotate the selected view, hold down the right mouse button and move the
mouse left, right, up or down.
BUSINESS VIEW
Open/Close Button
Information
Business Adjustment
Buy/Sell
Refurbish
Demolish
The Multi Purpose
Panel
Go to Block View
Open/Close Button
The Player
Comparison Panel
Block Information
Land Rent
Profit
Efficiency
Buy Out/Sell Values
Business Information
Buy Out/Sell Information
Clock
Objective Button
Cash
Clock
Objective Button
Cash
Options
Card Indicator
Auction Timer
Navigator
Go to City View
Options
Card Indicator
Auction Timer
Navigator
Go to City View
THE MINI MAP
The grid of small, coloured squares in the bottom right corner of
the screen serves as a mini-map to help you navigate around the city.
Each square, colour-coded to the property colours from
the original MONOPOLY board game, represents a city block.
Compass
Button
Click on a square to be taken to its corresponding location
within the city. To see a “floor plan” of the entire city, click on the Compass
button. This is known as the City View, which is described in detail on page XIV.
THE OPTIONS PANEL
This panel (located at the top-right corner of
the screen) shows the following information:
• Your name
• Your player icon
Card
Button
• Your current bank balance
• The current time and year
• Whether or not you have a Chance card
Note: The Card button lights up when you have a Chance card.
One card is given to each player every game day (approximately
every 10 minutes). See Fact File 4: The Chance Cards on page 46
of the online manual.
Scenario Reminder
If you ever forget which scenario you are playing, click on your player icon
to bring up the Scenario Reminder panel.
In-Game Options
Click on the Options button to access the In-Game Options screen described
on page 17 of the online manual.
THE PLAYER COMPARISON PANEL
This panel, located in the bottom-left corner of the screen, shows a comparison
of all the players. Click on the arrow buttons to scroll through the following
comparison parameters:
• Cash
• Number of Businesses Owned
• Today’s Profit
• Empire Value
• Yesterday’s 6 a.m. Costs
• Election Rosettes (when applicable)
• Number of Sales
Note: In each comparison parameter, players and amounts will be
displayed in descending order, from highest to lowest.
X
XI
Page 6

Manual Mono Tyc PC GB 15-10-01 17:14 Page XII
THE MULTI-PURPOSE PANEL (MPP)
This panel, located in the upper-left corner of the screen, has many functions.
In a nutshell, it serves as the Information/Command Centre for every selectable
object in MONOPOLY CITY, including entire city blocks and individual businesses.
As an example of the MPP’s function and power, let’s focus on one of the most
important activities in the game — constructing a new business.
Constructing a New Business
This five-step sequence shows how the Multi-Purpose Panel is used to construct
a Book Store.
12345
1. With the Regent Street block selected, the MPP shows details of this particular city
block. The last of the three buttons to the left of the panel is the Build button.
Note: You must have a city block selected for this button to be available.
Click on the Build button to start the construction process.
2. Next, choose between Retail and Residential. Basically, do you want
to construct a retail business or an apartment? In this example, since
you want to build a Book Store, simply click on Retail.
3. You are now presented with a complete list of retail store options. Since you
know you want to build a Book Store, select it from the Select a Business list.
Note: It is usually a good idea to group daytime stores together on
one block, and nighttime stores on another. This, however, is only
a general rule. Mixed blocks can be made to work.
4. You now need to determine the exact location of where you want to build the
Book Store. Each type of store has a range of footprints or floor plans. Drag a
dimensional base plate by clicking with the mouse and dragging. When the
base plate changes from red to white, you know you have selected a legal
base plate and position for that type of business. Simply let go of the mouse
to make the selection.
5. Before finalizing your building, make any desired
adjustments to the number of Floors, the Build
Quality and the Build Style. Note: Adjustment of
the number of Floors and Build Quality affects
the cost of construction and the capacity of the
store. Build Style adjustments do not affect the
construction price of the building.
These calculations are displayed at the bottom
of the panel. When you’re satisfied with all of
your adjustments, click the Accept button to
activate the Book Store’s construction.
The new Book Store now sits proudly on the corner of Regent Street. Click on
the Book Store to select it. The green “bounding box” surrounding the building
and the new information displayed within the MPP confirms your selection.
Adjusting the Prices and Stock Level
Having built a Book Store, you’ll probably want to tinker with the price settings
and stock ordering. Select the Book Store and then click on the Business
Adjustments button (the orange button marked with a plus and minus sign to
the left of the MPP). If you prefer, simply double-click on the Book Store itself.
This, too, will bring up the Business Adjustment Panel, where you can tinker to
your heart’s content.
Here’s a basic overview
of how the Business
Adjustment Panel works in
relation to your new Book
Store:
• Without consideration
for the fixed overhead
of the store, like rent
and utility costs, the profit you will be making on each sale is the difference
between the ‘Cost Per Item’ and the ‘Selling Price.’ In this example, you can
see that the default mark-up for a Book Store represents an £8 profit per
book. Not bad!
• You can control the number of books you stock each day by changing
the number in the ‘Stock I Want’ column. Simply click on that column’s
plus or minus button. Your new Book Store is set to order to its maximum
capacity of 24. ‘Stock I Have’ is simply the number of books you have in
store at the moment. In this example, it currently reads 8, which means
you have already sold 16 of the 24 today!
• If you sell out you might want to consider raising the Selling Price a bit.
If sales are slow, you might want to reduce it.
• Clicking on the Apply button will apply the changes you’ve made without
closing the panel. Clicking on the OK button will also apply the changes,
but will close the panel as well.
XII
XIII
Page 7

Manual Mono Tyc PC GB 15-10-01 17:14 Page XIV
CITY VIEW – THE BIGGER PICTURE
Clicking on the green compass button (located just below the Mini Map)
takes you to the City View, where every block, building and citizen is quantified
and qualified.
CITY VIEW
City Information
Player Information
Locator
Commission Poll
The Multi
Purpose Panel
The Player
Comparison Panel
Population Information
Prestige
Building Rights
Block Ownership
Clock
Objective Button
Cash
Options
Card Indicator
Auction Timer
Exit City View
City View gives you access to a lot of useful data on the city itself, with the MPP
providing access to most of this information.
For example, the information displayed on the screen shown above includes
the current population of the city, the housing status of the people, the number
of daily commuters, and even the number of tourists that visit the city each day.
In addition, there are details regarding such things as the age split of the city’s
population and the citizens’ income levels. Note: Click on the small scroll arrows
in the PEOPLE section of the MPP. The citizen markers on the map will become
colour coded to show the locations of the different types of people based on the
selected parameter.
THE ORANGE BUTTONS
The orange buttons to the left of the MPP provide access to different categories
of information about the city. Click on a button to activate it. Some of the more
frequently appearing buttons are as follows:
City Information
This is home to a range of general information about the city, like the
population breakdown described in the example above. This button works in
tandem with the green Information Central buttons described on page XV.
Player Information
This button shows you information about each of the players in the game
and the state of their business empires.
Business & Commodity Finder
This button gives you access to the Business Locator and the Commodity Locator,
which is quite useful when trying to locate your chief source of retail competition.
Consumer Polls
This button takes you to the consumer-polling panel. If a city block has
one or more apartment blocks on it, it is worth carrying out a consumer poll
to determine what it is that the people living on the block actually want to
spend their money on. When you click on the Poll button, all apartments in
the city pulse on the city map. If you click on one of the blocks containing
an apartment, the MPP will display the commodities that the people living there
actually need. Polling is instant and costs nothing. It is often beneficial to poll
a number of neighbouring blocks to get an overview of demand in the area.
THE GREEN BUTTONS (Information Central)
When in City View, the green buttons at the top of the MPP
provide access to specific information. One of these buttons
is always active. Selecting a different button will change the information
displayed in the MPP. Important! The selection of green buttons changes
to reflect the orange button that is also currently selected.
Note: Holding your mouse cursor over a button will make its descriptive
text box appear.
Leaving the City View
You can leave the City View in one of three ways:
• By clicking on the green compass button underneath the Mini Map (which
will return you to the block you were on before you accessed the City View).
• By double-clicking on any of the city blocks in the City View map of the city
(which will zoom in on the selected block).
• By selecting businesses and blocks from listings in the MPP.
CONGRATULATIONS! YOU NOW KNOW THE BASICS!
XIV
XV
Page 8

Manual Mono Tyc PC GB 15-10-01 17:14 Page XVI
ON LINE MANUAL
The instruction manual can be found in files on the CD-ROM.
To view these files, double-click on the “My Computer” icon and select
the CD-ROM drive.
Click on the right mouse button and select “Open”.
Double-click on the “extras” folder were the “acrobat reader” and ”Manuals”
folders are located.
In “acrobat reader” you will find the installer for the software program, which
will allow you to view the game manual in the “Manuals” folder.
•
Österreich
•
Belgie
•
Danmark
•
Suomi
•
France
•
Deutschland
Infogrames Games Customer Service Numbers
0900 370 037 -
(ATS 14,85/Min) Montag bis Freitag. 14.00 bis 18.00 Uhr
(Nur technischer Support)
+32 (0)2 72 18 633 +31 (0)40 24 466 36
Open Maandag t/m Vrijdag 9.00 tot 17.30
0161 827 8060/1 -
09:30 to 17:00 Monday to Friday (except Bank Holidays)
0161 827 8060/1 -
09:30 to 17:00 Monday to Friday (except Bank Holidays)
Soluces: 0892 68 30 20
3615 Infogrames
Technique: 0825 15 8080
(Du lundi au samedi de 10h-12h, 14h-20h)
Technische: 0190 771 882
(DM 2,42 pro Minute) Täglich 14.00 bis 21.00 Uhr
(2,21 F/mn)
Infogrames France / Euro Interactive
(24h/24)
(2,21 F/mn)
(0.98 F/mn)
(mit Ausnahme von Feiertagen)
Service Consommateur
84 rue du 1er mars 1943
69625 Villeurbanne Cedex
Spielerische: 0190 771 883
http://www.de.infogrames.com
helpdesk@nl.infogrames.com
helpline@uk.infogrames.com
helpline@uk.infogrames.com
support@fr.infogrames.com
http://www.fr.infogrames.com
http://www.de.infogrames.com
EmailCountry Telephone Fax
XVI
•
Greece
•
Italia
•
Nederland
•
Norge
•
Portugal
•
España
•
Sverige
•
Schweiz/Suisse
•
UK
301 601 88 01
Infogrames France / Euro Interactive
-
Service Consommateur
84 rue du 1er mars 1943
69625 Villeurbanne Cedex
+31 (0)40 23 93 580 +31 (0)40 24 466 36
Open Maandag t/m Vrijdag 9.00 tot 17.30
0161 827 8060/1 -
09:30 to 17:00 Monday to Friday (except Bank Holidays)
351 21 460 85 83/89 50 351 21 460 85 88
de 2ª a 6ª, entre as 10:00 e as 17:00
+34 91 747 03 15 +34 91 329 21 00
lunes a viernes de 9,00 -14,00 / 15,30-18,30 h
08-6053611 -
13:00 till 15:00 helgfri måndag till fredag
Technische: 0900-105 172 Spielerische: 0900-105 173
(2,50 CHF/Min) Täglich 14.00 bis 21.00 Uhr
(mit Ausnahme von Feiertagen)
Hints & Cheats:
09067 53 50 10
*24 hours a day / 75p/min
*
Technical Support:
0161 827 8060/1
09:30 to 17:00 Monday to Friday
(except Bank Holidays)
info@gr.infogrames.com
support@fr.infogrames.com
http://www.it.infogrames.com
helpdesk@nl.infogrames.com
helpline@uk.infogrames.com
apoiocliente@pt.infogrames.com
stecnico@es.infogrames.com
support@segaklubben.pp.se
http://www.de.infogrames.com
helpline@uk.infogrames.com
Page 9

Manual Mono Tyc PC GB 15-10-01 17:14 Page XVIII
CREDITS
DEEP RED GAMES LTD.
Kevin Buckner
Project Director
Clive Robert
Development Director
Steve Beverly
Art Director
Jon Law
Creative Director
Lee Hickey
Game & Logic
Programmer
John White
Engine Programmer
Simon Roper
Andy Cakebread
Utilities Programmers
Keith Taylor
AI Programmer
Uzma Kahlid
In-game Artist
Ian Margetts
Lead Artist
Jon Palmer
Character Animator
Paul Howarth
Q.A. Lead
Dan McDaid
Matthew McSherry
Testers
Media Types
Soundtrack
Special Thanks
John Palmer
Matthew McSherry
Lewpen Kinross-Skeels
Phil Bak
INFOGRAMES
INTERACTIVE, INC
Producer
Todd Hartwig
Executive Producer
Eric Hayashi
INFOGRAMES
SHEFFIELD
QA Manager
L. Glover
Test Supervisor
R. Lunt
Lead Tester
S. Blower
INFOGRAMES EUROPE
Executive
Vice-President Production
and publishing
James North-Hearn
Executive
Vice-President Marketing
Larry Sparks
Executive
Vice-President
Certification
and Quality
Jean-Marcel Nicolai
European Producer
Vikky Hollings
Marketing Manager
Europe
Frank Heissat
Senior Brand Manager
Cyril Voiron
Junior Product Manager
Sébastien Brasseur
Public Relation Executive
Lynn Daniel
XVIII
Localisation
Chrystèle Dozoul
Maud Favier
Sylviane Pivot-Chossat
Babel Media Limited
Marketing & Creative
Services (MCS)
Emmanuelle
Tahmazian
Rose-May Mathon
Patrick Chouzenoux
Michel Mégoz
Sylvie Combet
Olivier Lachard
Eric Baesa
Neil Baltzer
Cécile Gillet
Jenny Clark
Marie-Emilie Requien
Catherine Louvier
Catherine Esteoule
Renaud Marin
Alexandre Breas
Certification & Planning
Support Group (CPSG)
Rebecka Pernered
Sophie Wibaux
Caroline Fauchille
Jérôme Di Tullio
Distribution EDS Selling
Patricia Nowak
Jake Tombs
Jean Grenouiller
Anne Sylvie Gautier
Anne Sigwalt
Special Thanks to
Catherine Heilbron
Suzanne Bongette
Aline Novel
Jim Tebbutt
Emily Sharp
Clare Maddalena
© 2001 Infogrames Interactive, Inc.
Infogrames and the Infogrames logo are
the trademarks of Infogrames Entertainment S.A.
MONOPOLY is a trademark of Hasbro, Inc.
© 2001 Hasbro International Inc. All rights reserved.
trademarks or trademarks of Microsoft Corporation
Licensing by Hasbro Consumer Products.
Published by Infogrames. Developed by Deep Red.
Industries, Ltd. The GameSpy logo and “GameSpy”
® denotes Reg. US Patent & TM office.
Windows and DirectX are either registered
in the United States and/or other countries.
Pentium is a trademark or registered trademark
of Intel Corporation or its subsidiaries in
the United States and other countries.
GameSpy Arcade is © 1994 - 2001 GameSpy
are the trademarks of GameSpy Industries, Ltd.
All Rights Reserved.
 Loading...