

Page 1
Page 2

MAKING STUFF . . . . . . . . . . . . . . . . . . . . . . . . 19
MAXIMUM UNITS . . . . . . . . . . . . . . . . . . 19
MAKING BUILDINGS . . . . . . . . . . . . . . . 19
UNMAKING BUILDINGS . . . . . . . . . . . . 20
MAKING TOWERS . . . . . . . . . . . . . . . . . 20
MAKING WALLS . . . . . . . . . . . . . . . . . . 20
MAKING STANDARD UNITS. . . . . . . . . . . . . . . 21
MAKING CONSTRUCTIBLES . . . . . . . . . . . . . . 22
FIXING THINGS . . . . . . . . . . . . . . . . . . . . . . . . 23
TECH BUNKERS . . . . . . . . . . . . . . . . . . . . . . 24
BUILDING DESCRIPTIONS . . . . . . . . . . . . . . . 25
TOWERS & WALL DESCRIPTIONS . . . . . . . . . 29
INFANTRY DESCRIPTIONS . . . . . . . . . . . . . . . 30
VEHICLES/ANIMALS DESCRIPTIONS . . . . . . . 32
CONSTRUCTIBLES DESCRIPTIONS . . . . . . . . 34
ARIAL UNITS DESCRIPTIONS . . . . . . . . . . . . . 38
SINGLE PLAYER GAMING. . . . . . . . . . . . . . . . 39
MULTIPLAYER GAMING. . . . . . . . . . . . . . . . . . 40
HOST SCREEN . . . . . . . . . . . . . . . . . . . 4 1
CLIENT SCREEN . . . . . . . . . . . . . . . . . . 43
ALLIANCES . . . . . . . . . . . . . . . . . . . . . . 43
CHATTING . . . . . . . . . . . . . . . . . . . . . . . 44
THE UNIT EDITOR. . . . . . . . . . . . . . . . . . . . . . 44
APPENDIX A: COMMANDS & SHORTCUTS . . . 45
APPENDIX B:
EFFECTS OF TECH LEVEL INCREASES . . . . . 47
TROUBLESHOOTING . . . . . . . . . . . . . . . . . . . 48
SUPPORT . . . . . . . . . . . . . . . . . . . . . . . . . . . . 49
CREDITS . . . . . . . . . . . . . . . . . . . . . . . . . . . . . 49
3
3
TABLE OF CONTENTS
TABLE OF CONTENTS. . . . . . . . . . . . . . . . . . . . 3
MINIMUM SYSTEM REQUIREMENTS . . . . . . . . . 4
INSTALLATION . . . . . . . . . . . . . . . . . . . . . . . . . 4
TO PLAY KKND KROSSFIRE . . . . . . . . . . . . . . 5
BACKSTORY. . . . . . . . . . . . . . . . . . . . . . . . . . . 5
OPTIONS SCREENS
(SUPERSTRUCTURE) . . . . . . . . . . . . . . . . . . . . 6
YOUR OBJECTIVE. . . . . . . . . . . . . . . . . . . . . . . 7
COMMANDS & SHORTCUTS
(A SUMMARY) . . . . . . . . . . . . . . . . . . . . . . . . . . 7
VISIBILITY: SEEIN’ STUFF . . . . . . . . . . . . . . . . 9
FOG OF WAR/SHROUD . . . . . . . . . . . . . 9
LINE OF SIGHT . . . . . . . . . . . . . . . . . . . . 9
MINIMAP . . . . . . . . . . . . . . . . . . . . . . . . . 9
RADAR. . . . . . . . . . . . . . . . . . . . . . . . . . 10
SHORTCUTS TO MAP AREAS . . . . . . . . 10
SELECTING STUFF . . . . . . . . . . . . . . . . . . . . . 10
STATUS BARS. . . . . . . . . . . . . . . . . . . . . . . . . . 11
BOSSING THINGS ABOUT . . . . . . . . . . . . . . . . 12
MOVING . . . . . . . . . . . . . . . . . . . . . . . . . 12
ATTACKING . . . . . . . . . . . . . . . . . . . . . . 13
WAYPOINTS & MARSHALLING POINTS . . 14
ORDERS LIST . . . . . . . . . . . . . . . . . . . . 14
SPECIAL ORDERS . . . . . . . . . . . . . . . . 15
RESOURCES . . . . . . . . . . . . . . . . . . . . . . . . . . 15
OIL. . . . . . . . . . . . . . . . . . . . . . . . . . . . . 15
ALTERNATIVE ENERGY . . . . . . . . . . . . . 16
TECH LEVELS . . . . . . . . . . . . . . . . . . . . . . . . . 16
VETERAN UNITS . . . . . . . . . . . . . . . . . . . . . . . 17
SIDEBAR DESCRIPTION . . . . . . . . . . . . . . . . . 18
Page 3
EVOLVED, OUT OF BRIEFS
They’ve had 40 more years to evolve in a radioactive environment, so they look almost as twisted as their new animals. They still believe that
the first war was caused by The Scourge, angry
gods punishing humans for shunning and destroying nature. It is the duty of The Further
Evolved to prevent the Survivors taking over, for
fear of even greater wrath. The Further Evolved
have gone back closer to nature, shunning the
vehicles used by their ancestors. Nature or nuthin’! Except for the guns, of course…
SERIES 9
The agricultural robots are new to the war, but
their motive is as old as they come. Revenge.
Nine series of robots were invented before the
Great War to perform menial tasks. Series 1-4,
citybots, were annihilated along with the cities
targetted by the Great War’s bombs. The fallout
from those bombs killed crops and sterilised
soil far away where the Series 9, agricultural
robots, were working, safe from the blast but not
the after-effects. Their circuitry fused, they
destroyed Series 5-8 out of spite (and lunacy)
and plotted revenge on the humans who ruined
their livelihood. In 2140, from a distance, they
observed the Survivors and Evolved warring
and realised that their pitchfork weapons
weren’t gonna cut it. They spent an extra 40
years developing a more ‘military’ approach.
They’re quite pleased with the results. Revenge
will indeed be sweet.
END OF STORY.
Now go out there and blow things up!
5
5
I
f you’ve used all the defaults during the
install process, you’ll find the KKND Krossfire
icon in your START menu under \Programs\Melbourne House\KKND Krossfire. It’s
the one with the little KKND Krossfire graphic
next to it. Click it, then hit the ‘Play’ button, and
you’re away!
A BRIEF HISTORY OF WAR
Let’s get you up to speed. 100 years ago, a
nuclear war totalled the planet, leaving only
two groups of people alive. Of these people,
half scuttled underground, avoiding radiation,
and formed the Survivor army. The other half
stayed on the surface, mutated like CRAZY,
tamed some freaky beasts and called themselves The Evolved. In 2140, they fought for ownership of the surface, and another two splinter
groups fled this war – cowardice or ‘going for
reinforcements’? You be the judge. It’s now
2179, and both groups have met on the surface
to fight for it again, only to find a third army also
wants some action. Those crazy kids!
SURVIVORS, IN BRIEF
Agoraphobia got the best of the military types,
and they cowered underground for 40 years
after deserting the First Surface War. Today,
they think they’re finally over it, and it’s time to
retake the surface in the name of the ‘true
humans’, as well as try out their weapon enhancements. They’re now called the New Survivors.
But the mentality hasn’t changed a bit.
4
• Operating System:
Windows ’95, Windows ’98, or Windows NT 4.0
• CPU Type & Speed:
Pentium 133MHz or faster
• Hard Drive Space:
100MB Disk drive space (additional space
required for DirectX 5, save games, and
Windows swapfile)
• Memory: 16MB RAM
• Graphics:
2MB DirectX compatible video card
• Sound Card:
DirectX compatible digital sound card
• CD-ROM Speed: 4X CD ROM
• Other Requirements:
Keyboard, Windows-compatible mouse
• Pentium 166MHz of faster CPU
• 32MB RAM
• KKND Krossfire supplies you with 2 CDs,
one containing the installation and Survivor
missions, the other containing the Series 9
and Evolved missions.
• Multiplayer games can be played using
either CD.
• 2-8 player network support using IPX net-
work protocol (high performance systems
recommended)
• 2 player modem play with Windows-compa-
tible, 14.4 kbps or faster modem
• 2 player serial play using null modem cable
• 2-8 player TCP/IP (Internet) play
I
nstallation of KKND Krossfire should be a
fun and wacky time to be had by all. Or at
least quick and painless so that you can get
in there and kill things NOW!
• Exit all other Windows programs.
• Insert the KKND Krossfire CD into your
CD ROM drive
• If you have AutoRun set as part of Win95
Setup, you’ll be taken to the install screen.
You’ll go to a fuzzy TV screen graphic.
Click Install. If you don’t have AutoRun
active, then click on your Win95 START
button (bottom left of your desktop), click
RUN, then click BROWSE. Make sure your
CD drive is selected in the ‘Look in’ window,
then select the file called SETUP.EXE.
Then click OK. Okay?
• Follow the instructions given, selecting the
directory and program folder where you
want KKND Krossfire installed
• A Note on DirectX: KKND Krossfire requires
DirectX 5.0 or higher to run. The install pro
gram will ask you if you wish to install it.
Say yes, unless you have a higher version
already installed.
• At the end of the install process, you’ll
be asked if you want to check out the
README.TXT file. This file contains updated
information that didn’t make it to this manual.
• Finally, hit RUN to start playing! You’re away!
4
SYSTEM REQUIREMENTS & ISTALLATIONS
MINIMUM SYSTEM REQUIREMENTS
Supported
INSTALLATION
Recommended
TO PLAY KKND KROSSFIRE
Backstory
PLAYING KKND KROSSFIRE
Page 4
• Help:
Click this to scroll through all the keyboard
and mouse commands used in KKND
Krossfire.
• Return:
Drops you back to the game. ESC does the
same thing.
• Quit:
Fires you back to the main screen.
W
ell, it’s like most wars. Your objective is
to own EVERYTHING... to own... THE
WORLD! (insert maniacal laughter here).
You go about this by selecting an army to
join, then annihilating everything that doesn’t wear the same colours. More specifically,
you gather resources, using them to produce your own buildings and units to fight and
remove the enemy’s buildings and units on
each territory. There’s a bit more to it than
that, and you’ll find out the finer points
during the mission briefings you’ll receive
before you’re sent out into the battle zone
by commanders who never go anywhere
near them. War! Who’ll ever understand it?
H
ere are the main commands and shortcuts
for playing the game. The full list appears
in Appendix A: Commands and Shortcuts.
LEFT MOUSE BUTTON
The Left Mouse Button is
mainly responsible for
Selecting, Moving and
Attacking. See under
each of these sections for
details. Here’s a brief list:
• Selection/Status:
Click individual units or drag select a bunch
of ‘em. They’ll be selected, and you’ll see
7
7
• Sound Volume:
Fiddle with the Sound Effects volume.
• Music Volume:
Ditto on the Music volume.
• Scroll Speed:
Sets your scroll speed for the cursor keys
and the Left Mouse Button (ie. your stan
dard scroll speed).
• Fast Scrollspeed:
Your Right Mouse Button allows you to
rapidly scroll over the map. This slider sets
the speed of this.
• Gamespeed:
Sets overall game speed, affecting construction times, unit speeds, things like that.
• OK: Okay?
• Save:
To Save your game position, click this button then either double click on a save slot
or click once then click the Save button.
Done! Your game details (name, time of
save) will occupy a slot. You can click an
occupied slot and you’ll be prompted to
confirm whether you want to replace the
current game in that slot with the new one.
Click yes to do so.
• Load:
See ‘Load Game’ above.
• Restart: Restarts your current mission.
• Briefing:
For an even briefer brief, click this. It’ll
restate your mission objectives in text form.
6
O
ptions! Express your democratic right to
choose!
SINGLEPLAYER GAME
Shuttles you off to start deciding what single
player mission you want. See ‘Single Player
Gaming’ below to find out more.
MULTIPLAYER GAME
Shunts you off to the Multiplayer section. See
‘Multiplayer Gaming’ later on.
LOAD GAME
Throws you at a screen
where you can pick up a
mission where you left off
(double click the mission
name or single click, then
click ‘Load’). The Delete
button clears the selected game slot of the
contained game.
CUSTOM MISSIONS
KKND Krossfire allows you to create your
own, custom-made missions, as well as to
download other people’s missions from the
internet. You can adjust practically everything: background graphics, their attributes,
unit placements – even mission completion
criteria. Check out the file CUSTMISS.TXT on
the KKND Krossfire CD for the details on
making your own missions.
UNIT EDITOR
Propels you to the Unit Editor, where you can
fiddle with the stats of all the units in a multiplayer game. See under the ‘Unit Editor’ section for the inside story.
OPTIONS
Transports you to the main options screen.
And the options are:
• Fog type:
Choose the degree of fog you’d like (see
under ‘Visibility’ for details).
• Smart Select:
On or off. See ‘Selecting’ for the meaning
of this.
• Hints:
Hints can pop up at the start of Singleplayer missions, if you choose so here.
• Sound Volume:
Slide it to set the volume level of the sound
effects.
• Music Volume:
Slide this one to set the volume level of the
music.
• OK: You feelin’ happy with everything? Hit
the OK button.
QUIT
Go on. Hit it. You’ll leave the game and all this
work will be for nought… <sob>… no, just do
it, we’ll be okay… <sniff>…
W
hen you’re happily in
the game, you might
still want some choice.
Choice is good. Hitting
the ESC key or clicking
the Options button (at the
bottom of your sidebar)
will throw you into the InGame Options menu:
• Options:
Your first option is more options! Here’s
what you can pick here:
• Smart Select:
On or Off. See ‘Selecting’ for details.
• Wait at Waypoints:
If it’s on, your group will wait at each
Waypoint for all its slower numbers to
catch up before proceeding. See under
waypoints’.
6
OPTIONS SCREENS (SUPERSTRUCTURE)
Main Screen
In-Game Options Screen
YOUR OBJECTIVE
COMMANDS & SHORTCUTS (A SUMMARY)
YOUR OBJECTIVE
Page 5
Minimap On/Off button appears near the
bottom of your sidebar. Click it (or hit TAB)
to see the Minimap, click it again to hide it.
• Upgrading it
Upgrading your main building also upgrades your Minimap. At Tech 1, the Minimap
shows terrain and friendly units; Tech 2
gives you enemy units as well; Tech 3
extends the radar range from your main
building.
• Understanding it
Here’s what it looks
like.
The black areas are
Shroud (see above).
Grey areas are Fog.
Coloured dots represent units or buildings, their colour
showing their team.
When you are under
attack, you’ll see little flashes of red on the
Minimap to point to the action. Some units
appear to appear and disappear under the
Fog. See Radar below for an explanation.
• Moving it
The tilde (~) key toggles your Minimap to
the top left or bottom left corners of your
screen so the Minimap isn’t in the way.
• Scrolling it
If the main playing area is quite large, the
Minimap won’t fit it all in, so you’ll need to
scroll around inside it. You can position the
cursor to an inside edge of the Minimap
and click repeatedly to move in that direction, or you can scroll around the larger
map (left or right mouse buttons or cursor
keys).
9
9
W
hen it comes to seeing stuff in KKND
Krossfire, you got options. Some units,
buildings and terrain can affect what you see
and how you see it, and there are other visibility options that you pick yourself. Let’s get
into it.
FOG OF WAR/SHROUD
A Shroud (in KKND terms) is a black area on
the map, representing an area your units
haven’t yet explored. Fog of War is a stippled
map overlay representing an explored area
no longer in the visual range of any of your
units or buildings. Under this ‘Fog’ only the
terrain is visible, not enemy buildings or units.
LINE OF SIGHT
At ground level, visibility is not always as
good as it could be. A unit’s line of sight can
be obscured by trees, cliffs and plenty of
other things. This is represented in KKND
Krossfire by the Fog or Shroud remaining
active in a unit’s visual range if that unit technically can’t see past an obstruction or over
the top of a cliff.
MINIMAP
The Minimap is a miniaturised version of the
map. Not many surprises there. It gives you a
quick overview of the surrounding area.
Here’s what you need to know:
• Getting it
Your main building (eg. Clanhall) starts at
Tech Level 0. Upgrade it once and your
8
their status bars (hit points, veteran level,
group number, etc)
• Add to selection:
Shift + LMB. Adds a unit to an existing
group.
• Move:
See under ‘Moving’ for the multiple moving
options.
• Attack/Force Attack:
See under ‘Attacking’ for the multiple
attacking options.
• Set Waypoint:
For issuing multiple orders. Hold Shift and
click. See under ‘Waypoints’.
• Issue Special Orders:
See under ‘Bossing Things About: Special
Orders’ for such orders as Defend, Repair,
Enter, etc.
RIGHT MOUSE BUTTON
• Fast scroll:
Position the cursor in
the main play area,
hold this button and
move the mouse. It
scrolls fast! Hence the
name.
• Deselect:
Right click on anything that’s not a unit or
building and you’ll deselect the current selection.
• Cancel Production:
Click on a production button to cancel a
unit/building’s production.
H
ere are some of the main keyboard shortcuts.
ALT+ENTER: Toggles between Full Screen and
Window View.
CTRL + [0-9]: Stores selected units/buildings
for quick retrieval. The number key
becomes a shortcut to selecting that
group of units/buildings.
[0-9]: Restore group selection. (Stored group
will be selected)
ALT + [0-9]:
Restore group and centre screen on
group
CTRL+ drag select:
Overrides Smart Select (if active), so
Tankers, buildings and Technicians will
be included in that particular drag select.
HOME: Centre view on your main building (eg.
Outpost). To view your other main buildings (if any), repeatedly click the
HOME key.
CTRL + [ F5 – F8 ]:
Store screen position. (See under
‘Visibility’)
F5 – F8:
Recall stored screen position. (Also see
under ‘Visibility’)
ESC: (During a game) Brings up the in-game
options menu.
TAB: Open/Close Minimap
~: Toggles Minimap between top left and
bottom left corners.
SPACE: Cancel current orders on selected units
(they’ll just stop!)
?: (Technically, it’s the / key). Activates
unit information label for the next unit
or building the cursor hovers over.
‘‘ ^^ aa __::
Scroll the view
BACKSPACE:
Recall last selected group
S: Stand Ground. Units will stay put, even
if fights break out around them.
D: Disperse. Selected units will scatter
away from the selected area.
F: Fight. Selected units will aggressively
seek and attack any enemy unit within
visual range.
G: Guard. Selected units will stick by the
Guarded unit, defending it if it gets
attacked.
M: Multiplayer message. See under
‘Multiplayer Gaming’ for details.
+/-: Increases/Decreases Game Speed.
(Technically, it’s the - and = keys).
8
COMMANDS & SHORTCUTS (A SUMMARY) VISIBILITY: SEEIN’ STUFF
KEYBOARD
VISIBILITY: SEEIN’ STUFF
Page 6

S
tatus Bars appear over units and buildings
when they’ve been selected. Since they’re
a few different types of Status Bar, you might
need a quick run down. So here we go:
Here is a list of all the information that could
possibly be contained in a Status Bar:
• Health level:
This is the coloured bar inside buildings,
units and vehicles/animals. It changes
colour and size as the unit takes damage or
heals.
• Oil level:
A blue bar showing how much oil is contained in the unit or reservoir.
• Tech Level:
Shows the Tech Level of a building. Yellow
indicates current Tech Level, black indicates room for further advancement, and red
indicates Tech Levels unavailable at this
time (the Global Tech Level limit).
• Capacity Slots:
Shows the capacity of transport units.
Yellow shows slots filled, black shows slots
available.
• Veteran Status:
Represented in the Status Bar’s border of
infantry and vehicles/animals. Grey border
represents inexperience, blue border signifies a first level veteran, red border indicates a top level veteran.
• Group Number:
Displayed below the Status Bar. Shows the
group’s number (ie. the key where its shortcut has been stored)
11
11
STATUS BARS
ecting all units contained. The only exception to the latter is when Smart Select is
active. See below.
ADDING TO SELECTIONS
To add a unit to an existing selection, hold
SHIFT and click on the unit you wish to add.
DESELECTING
To deselect, click the Right Mouse Button anywhere on the map that isn’t a unit or a building.
STORING & RETRIEVING GROUPS
You may wish to store a unit, group or building
somewhere, so you can access them quickly
and easily when the heat’s on. Easy! To store
something, first select it, then hold CTRL and
press a number key (0-9). It’ll be stored in that
shortcut key, and the number of the key will be
applied to all the status bars of the contained
units. To retrieve that selection and make it the
current selection, simply press that number
key.
SMART SELECT
Okay, so you’re under attack and you’ve
clicked and dragged everything in your camp to
go fight. And what happens? You notice that
your unarmed Tankers and Technicians have
run off to get killed, and you’ve selected your
buildings for no readily available reason.
Solution? Turn Smart Select on in your in-games
options menu (hit ESC)! With Smart Select on,
Tankers, Buildings and Technician-types are
ignored by drag selections. Note that you can
still click on these units individually, and you
can make them selectable on a one-off basis
by using the Override feature detailed below.
OVERRIDING SMART SELECT
Although Smart Select can be turned off completely via the in-game options menu (hit ESC
to access it), there are times where you’ll want
everything to respond to a drag selection, just
this once. Holding CTRL and performing a
drag select will include all units in that selection. Okay?
10
RADAR
Radar, in KKND terms, is a visual aid allowing
your Minimap to spot units and buildings
under the Fog of War (so don’t worry yourself
with it if you’ve got your Fog option switched
off!) Here’s how Radar works:
• Getting It:
Radar can appear in two forms. Firstly, your
main building (eg. Barn) issues a radar field
when upgraded to Tech Level 3. And
secondly, a Radar turret can be strapped
to a Constructible Unit to form a mobile
radar unit (see Constructible Units below).
• Understanding it:
Something equipped with radar will have a
regular visual range, completely exposing
all terrain around it, but will also have a
radar range. This radar range is represented by an area of Fog around the visual
range. And not only that, but this ‘radar fog’
will expose enemy units and buildings (in a
pulsing, sweeping pattern) on the Minimap.
Note that this won’t pick up Constructible
Units equipped with Radar Jam (see below).
• Jamming it:
There are two ways to prevent a unit showing up on enemy radar, Radar Jam (available to all armies) and Stealth (Survivors
only). Both these are available as extras in
the Constructibles menu. A vehicle equipped with Radar Jam will not show up on
enemy radar. One equipped with Stealth
will not only be invisible to radar, but will
generate an aura of radar jam (sticky stuff,
you’d think), so that nearby units will also
be hidden from radar scanners.
• Special Note:
You want mobile, aerial radar? Load a
radar-equipped vehicle into an aerial transport!
SHORTCUTS TO MAP AREAS
Though the Right Mouse Button held and
dragged is a great way to get around the
map quickly, a few other ways exist. And
here they are:
• Minimap Clicking:
To instantly cut to a distant area that’s visible on your Minimap, simply click on it in
the Minimap. Whoa!
• Bookmarking:
You can ‘bookmark’ screen positions,
which means storing screen positions as
shortcuts attached to keys. This is handy
for quickly ducking back to secondary
camps or areas of interest (oil setups,
enemy camps, etc). You can set up four
bookmarks. When you are on the desired
map position, hold CTRL and hit a function key (F5-F8). After this, simply hitting
that function key will display that map
area. Cool!
• Home Key:
The HOME key will centre the screen on
your main building (eg. Outpost). Repeated
clicking will cycle through other Outpost
type buildings, if you have them.
• Stored Groups:
If you’ve stored groups into number keys
(see Storing Groups below), then you can
recall the group and centre the screen on
them by holding ALT while hitting the
group’s key number.
Y
ou gotta get people’s attention before
you can get them to do stuff for you.
Here’s all you need to know about selecting
units and storing groups.
SELECTING
There are two basic ways to select units. You
either click on an individual unit or building,
or you click and drag a selection box around a number of units, then let go, thus sel-
10
SELECTING STUFF
SELECTING STUFF
STATUS BARS
Page 7
And by the way, to stop your unit Force
Attacking, select it and hit the SPACEBAR,
which cancels orders.
SHOOTING BIRDS (GROUND TO AIR ATTACKS)
Shooting aerial targets from the ground is the
same as regular attacking, except that only a
few units can do it. And those units are specifically anti-aircraft units or they’re long-range
units who can easily aim at the sky. These units
are: Anti-Aircraft Constructibles, Anti-Aircraft
Towers, other fighter aircraft, and Rocket
Launcher infantry (or equivalent). Of course, if
an aerial unit lands, then all units can go
bananas at it!
ARTILLERY
Artillery units (created as Constructible Units)
can shoot big distances and do big damage.
They have a minimum range (so help them out
if units get too close), but they have a delightful maximum range.
FIGHT ORDER
The Fight order, or the ‘Bully Patrol’ as we like
to call it, sets up your units to just go out wanderin’ and pickin’ fights. The units will immediately look around for any enemy units in their
visual range and go smack up the ones they’re
best at smacking. See more about Special
Orders below.
CLIFFS
A special note on cliffs is required here: All units
can shoot down ‘em, but only the Artillery
Constructible units can shoot up ‘em. So secure the tops of cliffs for some safe, deadly
action. And keep away from the bottom of them
if the enemy’s likely to have taken the high
road.
13
13
BOSSING THINGS ABOUT
Air: Air units, available at higher Tech Levels,
can be ordered about like any other unit.
They fly over all terrain, but will attempt to
land on the nearest piece of flat ground
when they reach their destination. If directed to attack, they will do so, then return to
the last point they touched the ground.
MOVING WITH ANGER
If you want your units to get from point A to
point B as fast as you can without getting
distracted, just click a destination on the map.
If, however, you want them to smack up anyone they come across in their travels, then hold
CTRL and hit the destination point. They’ll
walk, but they’ll walk with attitude.
THE REGULAR KIND
Simple ol’ attacking’s easy. Select your group,
position the cursor over the enemy unit or building you want attacked (the cursor will become
the attacking cursor), and click with the Left
Mouse Button. Your units will attack to the best
of their ability, attacking all units around that
area when they’re done. Easy.
FORCE ATTACK
There’ll be times when you want to shoot up a
weakened bridge, or just attack an area of ground to set up a nasty ‘firewall’. Or heck – you
might decide that now’s the right time to blow
the crap out of an ally. Or maybe you’ve gone
war crazy and you wanna shoot your own units
or buildings. Who can explain what happens
out there? Anyway, to perform a Force Attack,
hold ALT, position the cursor over the desired
target, and hit the Left Mouse Button. Kaboom!
12
And here’s a list of what has what:
• Infantry/Vehicles/Animals:
Health Level, Veteran Status, Group Number
• Buildings:
Health Level, Tech Level, Group Number
• Oil Tankers:
Health Level, Oil Level, Group Number
• Transports:
Health Bar, Capacity Slots, Group Number
• Oil Puddle: Oil Contained
• Walls: Health Level
B
eing a Commander is all about, y’know,
commanding. You’ve gotta be able to
direct your units all over the place so that
they can risk getting killed instead of you. Ah,
war. It’s a funny ol’ game. Here’s all you need
to know about shuffling units about.
BASIC STUFF
To move something, select it, then click on a
valid area of terrain. You’ll know
it’s not valid if you see a NO GO
cursor. No go areas are holes in
the ground, stuff like that. Note
that you can really map out which way you
want a unit or group to get to a destination.
That’s covered under Waypoints below.
TERRAIN (& NO TERRAIN) EFFECTS
There are a few things you’ll need to know
about terrain.
Trees: Only infantry can move through trees.
Roads: Roads allow units to move more quick-
ly than on unflattened terrain.
Water: There are three types of water, alt-
hough they’re sneaky and look identical.
Shallow water allows all units (including infantry) to cross, Medium level water allows
infantry and amphibious units only, and
Deep water will only allow amphibious units
across. This, of course, assumes that there’s a nice flat shoreline to enter the water
– no jumping in the pool!
12
BOSSING THINGS ABOUT
BOSSING THINGS ABOUT
Moving
Attacking
Page 8
A
few special orders for special units exist,
but they’re fairly straightforward. For
example, the Detonate order for suicide
units and the Repair order for the Mobile
Constructible Repair vehicle are treated as
basic ‘targetting’ orders. Click on the unit,
then click on the unit/building you’d like it to
affect.
RESOURCE UNITS
Resource Units represent the level of energy you’ve collected. Everything you make
costs Resource Units to build, and some functions (such as Research) cost Resource
Units as well. You can see your current level
of Resource Units in the Resource Display
at the top of your screen.
How do you acquire Resource
Units? Keep readin’…
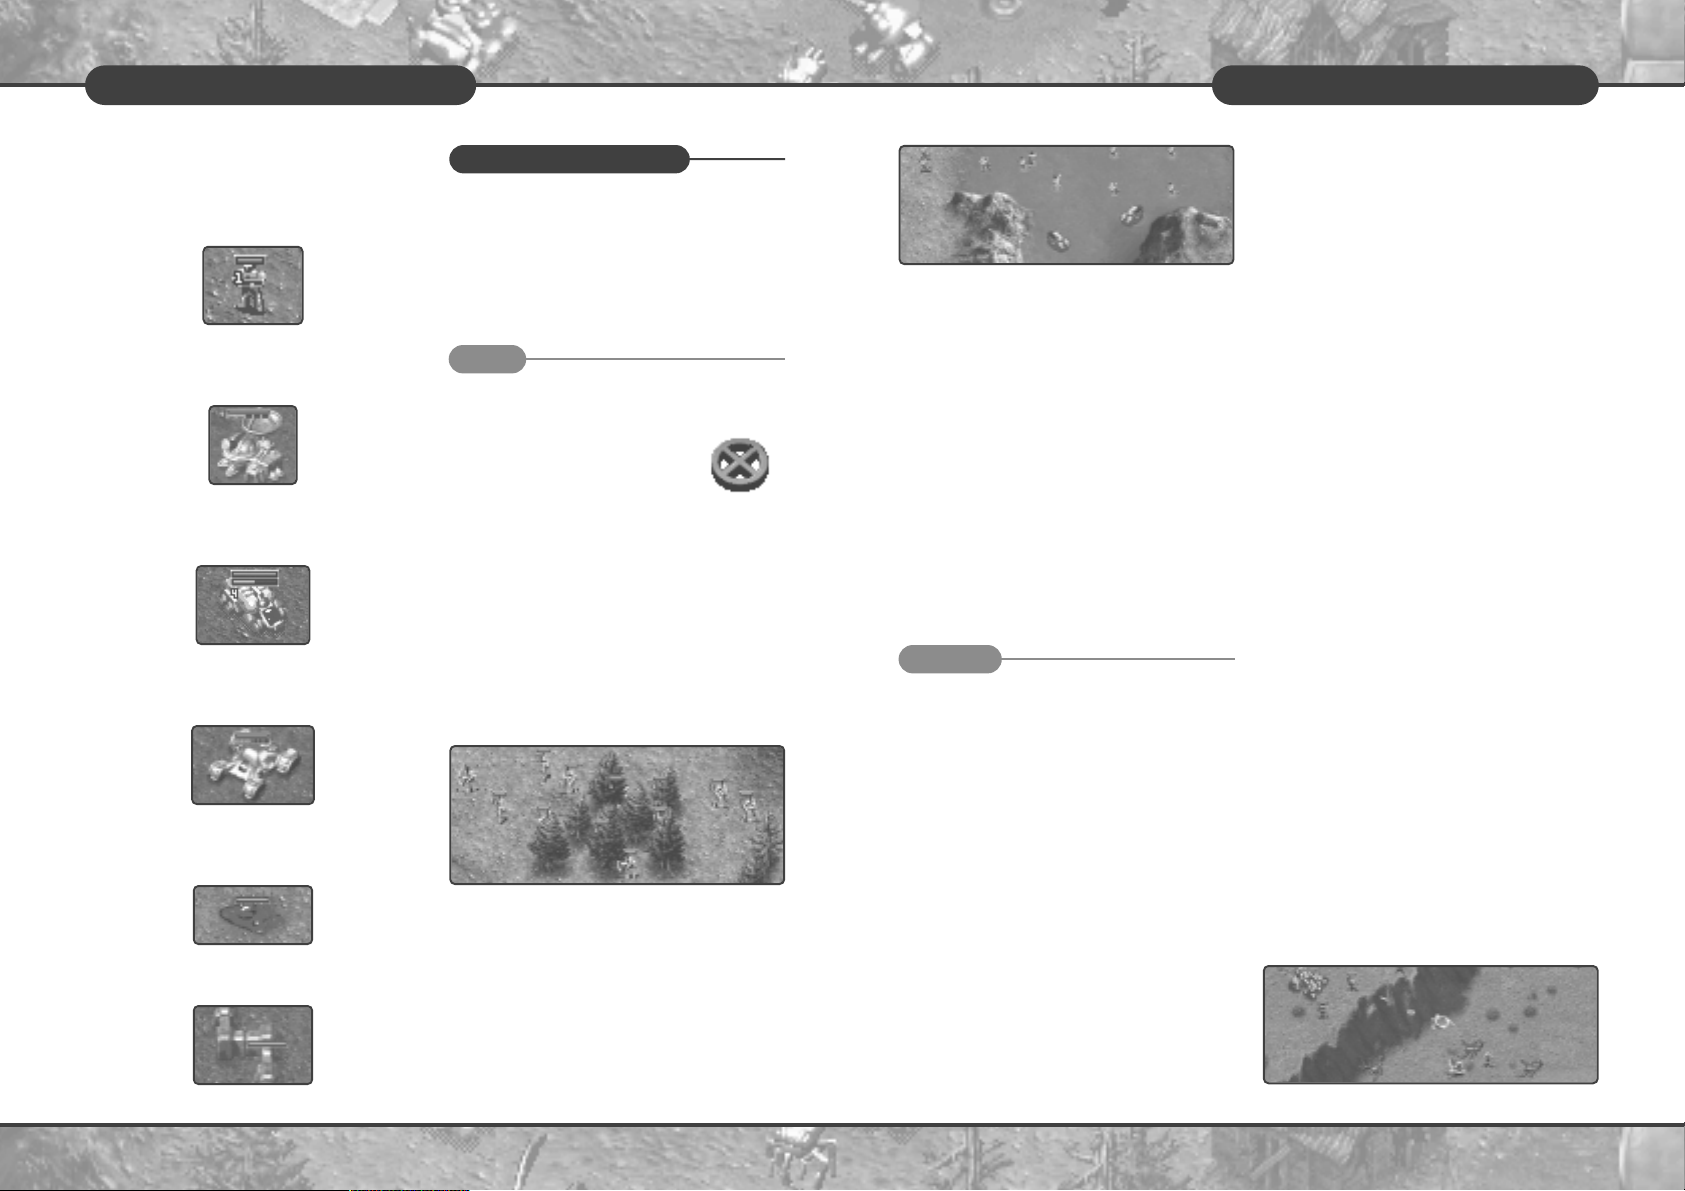
OIL
Oil (called Earth Blood by the more caring
Evolved) is great, and don’t you go listening
to what those nutritionists say. Oil is also the
richest source of Resource Units in the war,
and since Resource Units allow you to build
up a force, which allows you to wipe out the
enemy, which allows you to win the war,
which allows you to take over the whole
world, you can bet that oil’s pretty darned
important. You can
find out how much oil
is in each puddle by
holding the cursor
over a puddle and
looking at its Status
Bar.
An oil puddle.
15
15
RESOURCES
L: Load Transport. As part of a series of
Waypoint commands for a Transport,
clicking the L key will set the most
recently clicked destination as a
pick up point. The Transport will set
down and remain for a short time so
that units can be piled in, then it will
fly to its next destination point.
U: Unload Transport. As part of a series
of Waypoint commands for a Transport, clicking the U key will set the
most recently clicked destination as
the point it will lay down its cargo.
ALT: Force Attack. Forces a unit to attack
an ally, terrain feature, bridge, etc.
See ‘Force Attack’.
SHIFT: Waypoint/Queue orders. Sets
Waypoints. See above.
SPACE:Cancel Order. Selected units will
stop moving or attacking, selected
buildings will forget their Marshalling
Points, Selected towers will stop
firing.
T: Auto Assign Tanker. Sets an idle
Tanker off to find an Oil Rig and
Power Station and start hauling oil.
CTRL: Move while attacking. Holding CTRL
and selecting a destination point will
make your units alert – they’ll
defend themselves against attacks,
then continue to their destination
once they’re no longer under direct
threat.
14
WAYPOINTS
The units in KKND Krossfire have developed
better memories, and can now remember up
to 9 orders to complete in order. These
orders are called Waypoints. Usually you’ll
be using Waypoints to mark out specific
paths for the units to take (for example, an
aerial unit might be given a path that avoids
Anti-Aircraft towers to get to its destination
instead of taking the shorter, more dangerous, direct route). Sometimes, though,
you’ll give the units orders on the way, like
”Go here, fight whatever you see, return to
base for repairs, then return to your starting
point”. To find out how to set Waypoints,
keep reading.
Setting Waypoints
To set such Waypoint orders, select the
units, hold SHIFT and click out their path. A
dotted line will display their path. For orders
such as ”get repaired”, you’d click on the
Repair Bay as one of the steps. For a harassment order, you might hit the F (fight) key
after selecting a destination point.
Patrolling
Patrolling means a unit or group will travel
around in a continuing loop until an enemy
comes near, then they’ll attack it. To set up
a loop, set up a path of Waypoints, then
click the final destination point back on one
of the others. The Waypoint path turns red,
and the units will begin their ‘Marchin’ up ‘n’
down the square’.
Changing Waypoints
To change a set of Waypoints, select the
unit or group again, hold SHIFT and map out
the new set of orders.
Wait at Waypoints
This is an option available in your in-game
menu, designed for slow units. If ‘Wait at
Waypoints’ is active, your units will stop at
each Waypoint until all the members of the
group have caught up, and only then will
they wander off to the next Waypoint.
Marshalling Points
Units usually hang out the front of their creation building, but sometimes you’ll want your
fighting units to head straight into battle. To set
this up, click on the relevant creation building,
hold SHIFT, and click out some Waypoints
describing your desired path. New combat units
will follow this path upon creation. To cancel
this, select the building and hit SPACE (cancel
orders).
T
o inflate your ego as supreme commander
of the war, you now have more orders you
can lay on your poor little units. The
Keyboard commands are listed with the
descriptions below, and they also appear,
along with all Keyboard and Mouse
Commands, under the ‘Help’ button in the ingame options menu.
S: Stand Ground. Select units and hit
the S key and those units will remain
where they are and not attack
unless specifically ordered to do so.
D: Disperse. Selected units will imme-
diately scatter and move a short
distance from the current mousepointer position.
F: Fight. Selected units will attack any
enemy within visual range, and will
hunt what they’re best at killing if
there’s a choice.
G: Guard. Selected units will stay near
and Guard a building, unit, or area.
Select the units, hold the cursor over
that that requires guarding, and hit G.
14
BOSSING THINGS ABOUT
Waypoints & Marshalling Points
Order List
Spezial Order
RESOURCES
Page 9

VETERAN ANIMALS/VEHICLES
The big units, upon achieving Veteran Status,
acquire all the benefits of the Veteran
Infantry except for one – healing. Let’s face it
– band aids don’t work well on vehicles, and
animals just don’t have that opposing thumb
required to operate them. But these units can
use Repair Bays or Healing Tents, so quit
your complaining.
17
17
VETERAN UNITS
CANCELLING RESEARCH
While a building is being researched, hold
the cursor over it. You’ll see the ‘No
Research’ cursor. Clicking this cursor on that
building will cancel research, but you’ll also
lose all the resources spent so far in researching that building.
TECH TREES:
WHAT THE UPGRADES CAN DO FOR YOU!
To access some of the cooler units and stuff,
you have to upgrade a building or two. To see
the full list of the results of upgrading each
building, see Appendix B: Effects of Tech
Level Increases at the end of this here
manual.
I
f you leave a unit in the thick of war for
long enough, it’ll go bananas. But that’s
not the only cool thing to happen. The unit
will also start to learn more about their weapons, and about how to deal with pain a little better. These units are called Veteran
Units.
Units begin life quite stoopid, but can reach
two levels of veteranship if engaged in
enough meaningful combat. Veteran status
is represented by a change in the border
colour of the unit’s Status Bar, blue indicating first level Veteran, red indicating highest level Veteran. The effect of this
Veteranship depends on the type of unit.
Read on…
VETERAN INFANTRY
When infantry reach Veteran Status, they
achieve enlightenment. But more relevant to
the game, they become more accurate, they
shoot faster, they inflict more damage, and,
you’ll never believe this one, they heal
themselves, so long as they’re standing still
and not fighting! How cool is that?
16
HOW DO I GET OIL AND PROCESS IT?
You might start with a mobile oil rig unit (eg.
Mobile Derrick) or you might have to build
one. Either way, when you have one, select it,
then click the desired oil puddle. The unit will
travel to the puddle and set up an oil suckin’
building (eg. Drill Rig). You’ll need a refinery
(eg. Power Station) to process this oil and a
means to transport it. Luckily, building a refinery building gives you a free Tanker, which
will automatically seek out the Rig and begin
transporting oil. When the oil is in your refinery, it’ll start to convert into Resource Units,
which you can use to build stuff. Quick tip: it’s
best to have at least two Tankers per refinery/rig combo. Upgrade your vehicle/animal
building enough and you’ll be able to build
more Tankers for this purpose.
BURNING PUDDLES
If an Oil Rig is destroyed, the act of destruction sets the reservoir on fire. This fire will burn
away all the oil in that reservoir unless it is
stopped! The only way to stop the fire is to
construct another Oil Rig on the puddle.
O
il ain’t the only way to grab Resource
Units. Instead of just polluting nature,
make it work for you! Two types of alternative energy structures exist for each army, the
larger being more efficient than the smaller,
and these are available by upgrading your
main building (eg. Clanhall) a few times.
Alternative Energy
collectors are constructed like any building
(although you can only
own four of each building type at any one
time), and they provide
a slow but fairly constant income of
Resource Units.
T
ech Levels show how advanced your buil-
dings are right now, and hence determine
which units they can build, how efficiently they
run, or which higher functions they can perform.
Tech Levels come in two flavours, Global and
Local.
GLOBAL
The Global Tech level is the upper Tech Level
limit for the current mission – you cannot upgrade any building beyond this level. As you
progress through the missions, your army as a
whole learns more about different units and
buildings, and this information becomes available to you in the form of a raised upper limit on
research. The actual current level of your buildings is their Local Tech Level. Read on…
LOCAL
When you first set up a building, its Tech Level
will be zero. This means it can only function at
its most basic level. Upgrading the building (by
using your Research Lab or equivalent) is possible, up to the maximum set by the Global
Tech level. Read even further on…
INCREASING TECH LEVELS
Tech Levels can be increased to the maximum imposed by the Global Tech level. To
do this, first build a research building (eg.
Technostudy). Now select that research building and click the research cursor on the
target building. Research will begin, and
when the research bar reaches its end, the
building will increase by one Tech Level.
Note that research is impossible if another
building is currently being researched, if the
building has reached its maximum Tech
Level, or if no Resource Units are available.
16
RESOURCES
Alternative Energy
TECH LEVELS
+=
VETERAN UNITS
Page 10

arch building (eg. Alchemy Hall). You can
build four of each tower (for a total of 16
towers), 20 high tech walls, and well over 100
low-tech walls.
VALID/INVALID GROUND
When you are laying a new building, you’ll
notice that its ghostly appearance is colourcoded. Here’s what those colours mean:
• Yellow Bits:
If your ghostly building image is all yellow,
then go for it! You’re on totally valid ground, and you can build straight away.
• Blue Bits:
Blue still means you can build! Don’t fear it!
Because of the perspective of the graphics,
it only looks like something is obstructing
you – just drop the building as per usual.
• Red Bits:
Red bits on your ghostly building image
represent one of three things: an obstruction, an attempt to build too close to an Oil
Rig or an attempt to build too far from
camp. The obstruction could be a unit (right
click to cancel the build, move the unit,
then try again) or a landscape feature or
other building (build somewhere else). If
there’s no obstruction and your ghostly
building is still displaying some red,
then you may have
to move closer to
the rest of your
camp or further
away from an Oil
Rig.
NO FUNDS
If you haven’t enough funds even to lay your
building’s foundations, you’ll be met with this
symbol. When this happens, you’ll have to
wait until you’ve got at least one
Resource Unit to start the ball
rolling, then you can click your
building into place.
19
19
MAKING STUFF
T
here are pretty much two things you’ll want
to be building in KKND Krossfire: Units and
Buildings. Sure, there are subdivisions, but
we’ll get to them just after we talk about
Maximum Units. Just relax.
T
he maximum number of unit and/or buil-
dings for each team is 150. The bar next to
your Resource Display meter shows an
approximation of your current
unit/building numbers.
When this bar fills, it means that
you cannot build anything more at
this time, and the cursor will change
to the ‘No Build’ cursor if you try.
You will have to lose some units/buildings
(through battle, friendly fire or the Recycle
option) if you wish to build more.
M
aking buildings is easy, assuming there’s
no restrictions (which we’ll talk about
shortly). First up, here’s how to make a building. Click on the Building Menu button on the
Sidebar. On the resulting pop-out menu, click
the button of the desired building, move the
cursor to the main map area, and click the
ghostly transparent building on a piece of
valid ground. Voila! Your building begins constructing itself, resources willing. If you’re
having trouble building, check the possible
reasons below.
BUILDING NUMBERS
You generally have a limit of four for each
large building (including Alternative Energy
collectors). You are limited to one each of the
weapons building (eg. Armoury) and the rese-
18
INFANTRY MENU
VEHICLES/ANIMALS MENU
CONSTRUCTIBLES MENU
AIRCRAFT MENU see under ‘Making Things’ below
BUILDINGS MENU
TOWERS MENU
WALLS MENU
No function
No function
No function
ALLIANCES MENU
(MULTIPLAYER ONLY)
see ‘Multiplayer Gaming’ below
MESSAGES MENU
(MULTIPLAYER ONLY)
RECYCLE See under ‘Unmaking Things’ below
MINIMAP See under ‘Visibility’ above
OPTIONS MENUE Accesses the In-Game Options Menu
18
SIDEBAR DESCRIPTION
SIDEBAR DESCRIPTION
MAKING STUFF
Maximum Units
Making Buildings
Page 11

get a pop-out menu of available infantry
units. Click the one you want, and you’ll see
its production bar appear and start decreasing. This is the ‘time left before your unit
pops out a-screamin’ into the real world’
meter. When it’s done, your unit will pop out of
the relevant building (in this case, the
Barracks).
MULTIPLE UNITS (QUEUED UNITS)
You can queue as many different types of units
as you like, all at once. To queue multiple units,
just hit the button a number of times. You’ll see
a number appear next to the meter to show you
how many units are queued (these units will produce until they’re ready, only pausing to wait
for more resources if necessary). You can click
10 times to queue 10 units, or click an extra time
to set the button to infinite.
This means that units will keep producing,
using resources as they come in. An endless
supply of killers! Who could ask for more?
UUnniitt PPrroodduuccttiioonn BBuuttttoonn::
Production Meter for current unit –
Number of queued units remaining –
CANCELLING UNIT PRODUCTION:
Right click on the relevant production button
to stop production of one unit. Click on it multiple times to stop multiple units from being
produced.
21
21
MULTIPLE PRODUCTION BUILDINGS
If you’ve built more than one production building (Barracks, Machine Shop, etc), then
you’ll have multiple lists of production buttons. Two ways exist to find which column
applies to which building. The first is to scroll
to the production building in question, then
go into the Production Menu for that building
on the sidebar. If you hold the cursor over a
button from a column and you notice an information window appear above the building,
then you know that the two are connected.
The second method is to hold ALT and click a
production button to centre the screen on the
relevant building.
MAKING DEMONS
This is a feature only available to the Evolved.
When your Clan Hall has been upgraded to
Tech Level 5, a new building will appear in
your Buildings Menu. This building is The Altar
of the Scourge, a very scary building indeed.
Here’s the grisly deed that you must do –
grab 5 of your warrior infantry and walk them
into the Altar. They’ll die. But as a result of
their sacrifice, you’ll receive one nasty demon
critter, the Scourge Demon. And believe, me,
that’s a decent payoff!
T
o make infantry-types and basic vehicle-
types, you first need the relevant building.
Once your main building (eg. Outpost) is set
up, you’ll be able to build your infantry building, the Barracks/Warrior Hall/Microbot
Factory for little units and your Machine
Shop/Beast Enclosure/Macrobot Factory for
the big ‘uns (and for aerial units, if you upgrade it). And then it’s down to business.
SINGLE UNITS
The process of creating infantry and
vehicles/animals is the same. We’ll use infantry as the example here. To make an infantry
unit, first click on the Infantry button. You’ll
20
STARTING A NEW CAMP
At the start of some missions, as well as at a
high enough Tech Level, you’ll have access to
a mobile version of your Outpost/Clan
Hall/Barn. This allows you to roll anywhere and
set up a camp. To do this, move the mobile unit
to a valid area of terrain and hold the cursor
over it. If you see the
‘Deploy’ cursor then
you can set up there
– click it on the
vehicle, and whammo! Your vehicle becomes an Outpost/Clan Hall/Barn
and you can make a
new camp around it!
UNMAKING BUILDINGS
Two ways exist to get rid of one of your
unwanted buildings. The more fun way is to
blow it up using a Force Attack (see under
Attacking). The more economical way is to
Recycle it. To do the latter, just click on the
Recycle button in your sidebar, then click on
the unwanted building. The building will start
deconstructing itself, and you’ll
receive 80% of the current value (so
you’ll get less if you Recycle a
damaged building, dig?)
Y
ou build towers the same way you build
buildings, with two exceptions. First up,
you can only have four of each tower type in
existence at any one time. Second is that
Towers are the only constructions you can
build near Oil Rigs, regardless of their
distance from the main camp.
A
t a high Tech Level, each army becomes
capable of building two types of walls, Low
Tech Walls and High Tech Walls. Access the
walls via the Walls Menu button on the sidebar
• Low Tech Walls
These are your basic enemy-blockers, but
they’re clever in that they’ll link up if the
individual pieces are placed adjacent to
each other. They also have one other interesting build feature – the ‘place wall piece’
cursor remains active after you’ve placed a
wall piece, so you can immediately place
another. Click the right mouse button to
disengage wall building mode.
• High Tech Walls
High Tech Walls are sets of pylons which
produce dangerous electric beams if placed
near each other in a horizontal or vertical
line. These beams will damage enemy units
which try to pass through them, but will shut
down to allow friendly units through. Setting
them up is easy. Place the first pylon as you
would any building. Now click the High Tech
Wall button to grab another piece. If the
ghostly image of the second piece is red,
you are too far from camp. If it is blue, then
it is in line with another finished pylon piece
– building there will create a beam between
the two (which is what you want!). A yellow
ghostly image means the pylon is too far or
not in line with other existing pylons, or it is
in-line with an unfinished pylon. You can
build a pylon out of range or out of alignment with other pylons, but they won’t hook
up. You are also limited to 20 High Tech
Walls at
any one
time.
20
MAKING STUFF MAKING STUFF
Making Towers
Making Walls
Making Standart Units
Page 12

And that covers Constructibles! For a description of the Constructible bases, turrets and
extras, see the Constructible list below.
S
ad Fact of War #427: Things get hurt.
Luckily, avenues exist to repair those hurt
things. Let’s get into it.
B
uildings can only be repaired by the cle-
ver infantry unit from each army
(Technician/Mekanik/Systech). Create one of
these little brainiacs, select them, then click
on the damaged building, tower or High Tech
Wall (Low Tech walls cannot be repaired).
You’ll see the Repair icon above the building,
which will last until the structure is fully repaired or the units job timer runs out. When the
job is done, the worker will not come out and
will never work again – you’ll have to get another worker to fix the structure next time.
Unions – sometimes they just go too far…
T
here are a few ways to get the bigger units
repaired. So here goes:
REPAIR BAY
The Repair Bay/Healing Tent/Maintenance
Depot is where you send your sick, big units
for repairs. For free! To get the healin’ ahappnin’, click on the sick unit or group, then
click on the Repair Bay or equivalent. The
units will travel there and queue up to repair.
You can set up the ‘repair’ order as a
23
23
FIXING THINGS (REPAIRS & HEALING)
There are four main things to note here: the Info
box at the top of the columns, the leftmost
column (Turrets), the second column from the
left (Bases and Extras) and the thirdmost
column (selection storage buttons).
The Info box displays the capacity space still
available on the current Base, as well as a running total of the vehicle’s cost. These figures
change as you refine your selection. Okay,
let’s start putting the pieces together. From the
second column from the left, select the Medium
Base, then click on the Radar turret in the leftmost column. Your Info box now displays that
we’ve used 3 capacity slots, leaving 4 still unused. Now we want Self Repair (the bottom button of the second column). Clicking this brings
our remaining capacity down to 2. So, what the
heck, let’s add the Speed and Armour extras,
since we have the space. Our capacity remaining is now zero, so there’s not much left to do
but store the vehicle into a button, ready for
production.
Click on one of the ‘arrow’ buttons in the thirdmost column, and you’ll see a production button appear in the fourth column next to it. All
that remains is to produce one of these
vehicles! Click on the newly created button
and, just like all other vehicles, a production
bar appears. When it reaches its end, the new
vehicle will pop out of the Machine Shop, ready
to start intensive scouting for you. To make
more of these units later, you only need click
on the production button again, or even queue
multiples of them.
The production button shows that the unit is a
Medium Base Radar unit, but to find what Extras
you’ve included, hold the mouse cursor over
this button. You’ll see the vehicles name and
cost, and all the contained Extras appear in
miniature beside it.
22
C
onstructibles are custom made units,
which become available after upgrading
your Machine Shop and Armoury (or equivalents) to at least Tech Level 1. You select
which bases, turrets and extras you’d like
together for your own special units, then
assign your selections to their own production
buttons so you
can build them
like all other
units.
CONSTRUCTIBLE BASES
The three, different-sized Constructible Bases
are the ‘mobile’ parts of your Constructible,
the foundation for your turrets and extras. The
small, medium and huge bases become available by upgrading your Machine Shop (or
equivalent) to Tech Levels 1, 3 and 5 respectively. Each base has a different carrying
capacity, the small base able to carry 5
points’ worth of turrets and extras, the medium
7 and the huge 10. Holding the cursor over the
base’s button will reveal an info box showing
the base’s size, Resource Unit cost, and
capacity.
Base’s size Cost of base alone Base’s capacity
CONSTRUCTIBLE TURRETS
Turrets form the top parts of the Constructibles
– they give a Constructible its function. Turrets
can be offensive (eg. Artillery Turret) and not
(eg. Radar Turret). More Turrets become available with each upgrade of your Armoury (or equivalent). For the full list, refer to the Constructibles list below. Each turret takes up a certain amount of space on a base, the larger turrets requiring the larger bases to support them.
A Turret’s capacity requirement, displayed in
an info box, can be seen by holding the cursor
over the turret’s button.
CONSTRUCTIBLE EX TRAS
Extras are special abilities, like Speed and
Self-Repair, that you can build into a
Constructible. To increase the amount of
Extras available to your Constructibles, upgrade your Machine Shop (or equivalent).
Extras also have a space requirement. For the
full list of extras, look under the
Constructibles list below.
MAKING A CONSTRUCTIBLE: THE EX AMPLE
To make a Constructible, you pick the base,
turret and extras, then store the selection in a
Production Button, which then functions like a
regular Production Button for a unit. Let’s
work through an example, shall we? We want
to make a radar scout for the Survivor army,
with the ability to repair itself (it’ll be moving
far from the Repair Bay). So let’s go!
After upgrading your Machine Shop and
Armoury to Tech Level 5, hit the Constructibles menu button. What you’ll see at
first is a single column of empty buttons
(where you’ll be storing your creations), headed by the Constructible Components Menu
button. Click this top button.
CCoonnssttrruuccttiibblleess MMeennuu::
22
MAKING STUFF
Making Constuctibles
Turrets Menu
Capacity
Free
Store selection
in adjacent slot
Bases and
Extras Menu
Current cost Production Buttons
FIXING THINGS (REPAIRS & HEALING)
Repairing Structures
Repairing Vehicles/Animals
Page 13

25
25
BarnOutpost Clan Hall
BUILDING DESCRIPTIONS
24
Waypoint and send your units back to the
front straight after. Good, huh? You can also
upgrade your repair building so that it repairs
more quickly and efficiently.
MOBILE REPAIR CONSTRUCTIBLE
A Constructible fitted with a Repair Turret can
fix big vehicles/animals and aerial units right
on the front line! To do so, click the
Constructible Repair Unit then click the damaged unit. The Constructible will move to and
repair the damaged unit and other damaged
units from its army, then itself. Cool!
SELF REPAIR CONSTRUCTIBLE EX TRA
Another Constructible Extra is Self Repair.
You load this sucker into a Constructible, and
it’ll gradually repair itself, so long as it is staying still and not fightin’. Groovy.
REPAIRING AERIAL UNITS
Aerial units can be repaired, but they’re just
the wrong shape for the Repair Bays. They
can therefore only be repaired by mobile
repair vehicles (ie. Constructibles with Repair
Turrets). See above.
21
SSTT
CENTURY UNITS
21st Century Units can pop out of Tech
Bunkers. They’re from another time, and
because no-one knows how they work, no-one
knows how to fix them. So look after them if
you find them, okay?
REPAIRING INFANTRY
Infantry can only receive healing if they do it
themselves, and this self-healing is only available when they become Veteran Units. See
under Veteran Units above for details.
B
efore the great nuclear war, scientists
invented some really cool weaponry.
They tucked them away in Tech Bunkers,
huge locked containers, and the plan was
that these Bunkers would open if war broke
out and the big weapons would storm out
and win the war. Well, they screwed up. The
locks on the inside of the Bunkers didn’t
work, so the 21st Century technology has
remained locked up for many years.
The Tech Bunker Type II were used to hold
the larger, cooler weapons. And the locks on
these were SO impressive, they required
someone with actual mechanical aptitude
and brains to open them. So if you come
across a Tech Bunker, get a Technician/
Mekanik/Systech out there fast, or the
enemy may well get the weapon first. And
since the weapons ally with whichever army
releases them, you’d better hope it’s
yours…
24
TECH BUNKERS
TECH BUNKERS
Y
our main building. The ‘Flag Building’. You need to have one of these before you can build
anything else. Upgrades include Minimap, Walls, and Alternative Power Sources.
Microunit FactoryBarracks Warrior Hall
T
hese are where all your small ‘foot’ units are born. Upgrades increase your range of foot
units, from shooty types to Technician types to Suicide Units.
Macrounit FactoryMachine Shop Beast Enclosure
T
hese buildings create your big units. Upgrades provide a greater choice of vehicles, animals or
big robots, and also provide access to aerial units. Coupled with an upgrade of the Armoury or
equivalent, these buildings also provide more Constructible Base and Constructible Extra options.
Page 14

26
27
27
26
Weapon ControlArmoury Forge
T
his is where your weaponry is researched. Upgrades will give you more Constructible Turrets
to choose from, and also access to the different Defensive Towers. Each upgrade will also
improve the armour of all subsequently-produced units.
Power UnitPower Station Power Plant
T
he best way to increase Resource Units is to suck oil out of the ground and process it one of
these buildings. With each Power building, you get a free Tanker to transport oil from the Oil
Rigs. Upgrades increase the amount of Resource Units squeezed out of each Tankerload of oil.
OilbotDrill Rig Derrick
T
hese structures suck. They suck oil out of the ground. They usually begin life as a vehicle driven out to the oilfields and erected.
WindmillSolar Collector Big Pig
T
he low-level Alternative Power processors. These provide a small but fairly constant supply of
Resource Units using slightly more environmentally sound methods.
Wind TurbineThermal Exchanger Pig Pen
T
he high-level Alternative Power processors. Same as the low-level ones, only these suck more
resources for you over a shorter time.
Maintenance DepotRepair Bay Healing Tent
T
his is where you can send your large units for repairs or healing. Note that aerial units can-
not be repaired here – they need to employ a Constructible equipped with a Repair Turret.
Note also that 21st Century units (from Tech Bunkers) can’t be repaired. Upgrades of these buildings increase the efficiency of the repairs.
BUILDING DESCRIPTIONS BUILDING DESCRIPTIONS
Page 15

L
aunches area of effect projectiles. Better
against Vehicles/Animals.
29
29
Cannon Tower The Worm Pod Cannon
28
28
DEFENSIVE STRUCTURES (TOWERS & WALLS)
TechnostudyResearch Lab Alchemy Hall
T
hese are the brain houses, the houses of knowledge. They are also the buildings you need
for increasing the Tech Levels of other buildings. Upgrading a research building will increa-
se the speed and lower the cost of future upgrades.
Altar of the Scourge
A
unique building for the Evolved, appearing only as an option when your Clan Hall is at Tech
Level 5. You sacrifice infantry to make demon critters. Scary. Look under ‘Making Stuff:
Making Demons’ for details.
C
annot target ground units at all, but
against aerial targets – ay carumba!
AA Tower Bazooka Battery Solar Intensifier
G
reat all-rounders, dishing out much damage. They inflict most damage upon
vehicles/animals, though.
Laser Destroyer Touch of Death Lightning Generator
T
he basic, blocking wall. Stops enemies
advancing.
Barricade Skeletal Wall Boundary Fence
W
alls of energy. A deadly energy field is
created between the pylons you build.
This field will toast enemy units which pass
through, but will shut off to allow your own
units through unharmed.Force Wall Thunder Fence Bugzapper
Y
our basic towers. Better against infantry
than other targets.
Sentry Gun Kneecapper Distance Seeder
BUILDING DESCRIPTIONS
DESCRIPTION
Page 16

31
31
30
30
INFANTRY DESCRIPTIONS INFANTRY DESCRIPTIONS
T
hey hurl things that go Boom, with a bit of
an area of effect. Best against vehicles
and animals, and they hurt aerial units with
the same force! Gotta love the kaboom.
Grenadier Rioter Pod Launcher
T
heysquirt stuff that burns. Short range, but
decent area of effect. Best against buildings and walls.
Flamer Pyromaniac Weed Killer
L
ong range killers. Superb against aerial
targets.
Rocketeer Homing Bazookoid Spore Missile
Y
our basic gunner grunt type. More effective against other infantry than other tar-
gets. And cheaper, too!
Machine Gunner Berzerker Seeder
INFANTRY DESCRIPTIONS
T
hese dudes are weaponless, but they’re
clever. As well as being able to repair buildings, towers and High Tech Walls, they are
also the only units who can unlock Tech
Bunkers. Technician Mekanik Systech
N
asty, crazy little units indeed. Send them
to attack something and they’ll go explode near it – wiping out themselves and just
about anything else in the area. Nuts! And
they don’t break alliances if they attack an
ally. They’ve got their own crazy rules.Kamikaze Martyr Michaelangelo
N
ice accuracy over a huge range –
fabulous against infantry. They won’t
know what hit ‘em!
Laser Trooper Spirit Archer Sterilizer
INFANTRY DESCRIPTIONS
A FEW NOTES ON INFANTRY:
• Infantry are the only units small enough to
go through trees. As such, they can access
cool areas and even hide in the trees to
ambush the enemy. Cool, huh?
• Survivor and Evolved infantry are susceptible
to squashing under some of the larger units.
Series 9 infantry cannot be squashed!
• Veteran Infantry can heal themselves.
• Series 9 infantry are more expensive but
tougher than their human counterparts.
• The statistics are many, the pages are
few. Save a tree; check out all the stats in
the Unit Editor in the game, accessible
from the Main Menu.
Page 17

33
33
32
32
VEHICLES/ANIMALS DESCRIPTIONS VEHICLES/ANIMALS DESCRIPTIONS
T
hese are compact little drilling rigs. Order
them to sit on an oil puddle, and they’ll set
up a fully functioning oil rig there. They’ll also
smother any fires that may be burning on the
puddle, too.Mobile Drill Rig Mobile Derrick Mobile Oilbot
T
hese are the little, busy worker types which
transport oil from the rigs to the power buildings for processing. They’re unarmed – protect them!
Oil Tanker Bull Ant Tank Oil Tankeroid
Y
our fastest units. Great for scouting the
area. They’ve only got light weapons, so
only get in a fight if you’re forced into it.
Dirt Bike Dire Wolf Patrolbot
S
mall sized units, as far as the larger units
go. Great against infantry.
ATV Pit Scorpion Responsebot
S
low moving, but for a reason – these
vehicles carry kit versions of an army’s
main building. Drive it around, find a good
area to set up camp, then click the Deploy
cursor on it and watch the wonder unfold.
Mobile Outpost Mobile Clan Hall Mobile Barn
A QUICK NOTE ON VEHICLES/ANIMALS:
•Large enough Vehicles/Animals can squish
Evolved and Survivor infantry. Guns too slow?
Well run the little buggers over instead!
VEHICLES/ANIMALS
T
he largest of the ‘small’ units. Bit slow, but
good firepower and can shoot everything
well.
Anaconda Tank War Mastodon Tankbot
B
ig, mean, turreted units which can move
while firing. And on top of all that, they’re
amphibious! Death from the seas!
Barrage Craft Death Hippo Doom Dome
N
ow we’re getting silly. Big units which pack
a crazy punch, especially against infan-
try. And they look kinda scary, too.
The Enforcer Missile Crab Cauteriser
T
he biggest of the big. Take up lotsa space,
but heck – they create lotsa space by blo-
wing the crap out of everything in their way!
Juggernaught Mega Beetle Grim Reaper
N
asty demon critter which lives as a result
of sacrificed Evolved Warriors (see Making
Stuff: Making Demons). Pretty good against
just about everything, if a demon can be called good…Scourge Demon
T
ougher units, whose main advantage is
that they’re amphibious – so long as they
can get to the water’s edge, they can float
across it.
Hover Buggy Crinoid Radiator
VEHICLES/ANIMALS
Page 18

35
35
34
34
CONSTRUCTIBLES DESCRIPTIONS CONSTRUCTIBLES DESCRIPTIONS
M
ore armoured, slightly slower, and they
can hold 7 points worth of turrets and
extras.
Medium Medium Medium
T
he big kahuna. Holds 10 points of turrets
and extras, moves pretty slowly, but in a
more protected kinda way.
Large Large Large
S
mall Armoured Personnel Carriers. They
carry up to 5 infantry units or 1 small
vehicle/animal. In armoured comfort!
S.APC S.APC S.APC
M
akes the Constructible a mobile radar, so
you can keep an eye on that pesky
enemy. See under Visibility for details on how
Radar works.
Radar Radar Radar
G
ood, damaging weapon, best against
buildings, but pretty good against ever-
ything else, too.
Plasma Plasma Plasma
S
mallest and fastest of the bunch, these
bases carry light loads quickly. Carry 5
points of turrets/extras.
Small Small Small
CONSTRUCTIBLE BASES
CONSTRUCTIBLE TURRETS
C
reates a kind of Mobile Repair Bay, so big
units – including aerial units – can be healed on the go. Will heal themselves, too, if noone else is around to heal.
Repair Repair Repair
L
arge Armoured Personnel Carriers. Can
carry 10 infantry units or 2 small
vehicles/animals (or a combination) or 1 large
vehicle/animal. Transport craziness!
L.APC L.APC L.APC
T
he Stealth Turret creates an aura of Radar
Jam around it, so that other friendly units
close by are also hidden from enemy radar.
Stealth
G
ood for creatin’ bleedin’ ear’oles. Makes a
boom designed to shudder small units to
death. ”Gosh, I’m sure there was some infantry
here a second ago...” Sonic Boom affects vehicles a little, but animals moreso (the ears, y’see)Sonic Boom
B
ig arrows for big units. A delightful anti-
vehicle/anti-animal weapon.
Arrow
A
weapon that can only target air units, but
can move closer to where they are to get
‘em.
AntiAircraft AntiAircraft AntiAircraft
CONSTRUCTIBLE TURRETS
Not
visible
Not
visible
Not
visible
Not
visible
Page 19

37
37
36
36
L
ong range weapons, but note that they
have a minimum range too – so protect
them if the enemy get too close. Artillery only
automatically attack real threats (units of
Tech Level 3 and higher), and they can only
automatically attack if they have reached
veteran status.Artillery Artillery Artillery
E
lectro Magnetic Pulse. More than a mouth-
ful of words, this turret saps energy out of
things quickly. Great against buildings, but
pretty darn good against everything else.EMP
T
he fabled Berzerker Ray. Creates an area
of cra-a-aziness around it which makes all
its army’s units fight better (they dish out more
damage, take less damage, get more accurate – you know the drill).Frenzy
I
ncreases armour rating and negates a lot of
enemy attacks for all its own army members
that can fit in its area of effect.
Shield
T
he Localised Temporal Anomaly. Creates
a crazy time warp, sending enemy units a
few seconds into the future so you don’t have
to deal with them all at once. To us boring
‘static rate of time’ folk, the visual effect is just
to make the units disappear and reappear in
a few second’s time.
LTA
A
n all-round groovy, damaging turret. But
best against vehicles/animals.
Laser
CONSTRUCTIBLE TURRETS
CONSTRUCTIBLES DESCRIPTIONS CONSTRUCTIBLES DESCRIPTIONS
M
akes for a tougher unit. Boosts its armour
rating.
Armour Armour Armour
C
reates a field of Radar Jam around itself,
which prevents the unit showing up on
enemy radar, and has nothing to do with fruitbased, sugary conserves.Radar Jam Radar Jam Radar Jam
P
acks some mean explosives into your unit,
so that when it dies, it explodes in a nasty,
damaging, area of effect kinda way. Hey,
direct a few into an enemy camp and watch
the enemy blow themselves up! Funny!Destruct Destruct Destruct
S
elf Repair gives the unit the ability to
repair itself, so long as it is not moving or
attacking.
Self Repair Self Repair Self Repair
I
ncreases the speed of the unit. No surprises
here.
Speed Speed Speed
CONSTRUCTIBLE EXTRAS
Page 20

cessful mission opens up more mission choices as you fight towards the enemies’ home
bases to destroy them utterly.
After picking an army, you’ll notice that two
territories are highlighted. These are your
current mission choices. Learn more about
an active territory by holding the cursor over
it and reading the mission statistics at the
bottom of the screen. Hold the cursor over
an active territory to find more about that
area. Moving your cursor over the highlighted missions will bring up the mission statistics at the bottom of the screen. When you
find one you like, click it. You’ll be briefed
for the mission, then you’re into it! More
magic!
If you fail your mission, you’ll automatically
start it again. But if you succeed, you’ll get
the Debriefing Screen. Here you’ll learn your
rank, kills (both enemy and friendly),
Resources gathered and the time taken to
complete that mission. You can compare your
time with the Par Time, which is how long some
other twerp took to complete the same mission. See if you can beat the Twerp!
And if you complete a mission and want to
play it again, it’ll still be selectable from the
Mission Selection screen, only a different
colour. So there.
And that pretty much wraps it up for
Singleplayer Gaming.
39
39
SINGLE PLAYER GAMING
O
kay, you’ve got your caffeinated bever-
age, you’ve piled your junk food around
your PC, and you’re ready to settle in for a
night’s worth of you versus the computer.
Here’s how you do it.
First up, on the main screen, hit the
Singleplayer Game button. It’ll take you to
the Campaign Selection screen. Which looks
something like this: If there are no saved
games, all the slots will be blank. If there are,
you can select one of those, or maybe click
one and hit the DELETE button to clear it for
a new campaign, or just to annoy your little
brother who was really close to finishing the
whole game before you were. Ahh, spite is
what makes the world go round. Anyway, to
start a new campaign, click in an empty slot,
type a name you’d like for this Campaign,
(eg. Roger’s Master Plan), then hit ENTER.
Bing! You’re at the next screen, the Team
Selection screen.
Here’s where you pick an army. Click the
cursor on one of the brightly coloured
areas; Survivors are blue, Evolved are red
and the Series 9 are yellow). And badaboom, you’re at the Mission Selection screen! Magic!
KKND Krossfire’s non-linear game structure
means you have some choice as to which missions you want to play and when. Each suc-
38
38
AERIAL UNITS DESCRIPTIONS
A NOTE ON AERIAL UNITS:
• Aerial Units, once they’ve done their job, will
return to the point they last touched down.
This is so you can automatically set up your
fighters/bombers to fly from camp, do their
business, then return to camp. Okay?
• Aerial Units can only be repaired by Constructibles equipped with the Repair Turret.
They cannot be repaired by Repair Bays.
AG Responsebot FighterOrville Fighter Pteranodon
A
erial fighters. Target a building or a moving target and the aerial unit will keep doing deadly fly-bys, until it or the target is dead. They can also shoot at other aerial units.
Crop Duster BomberWilbur Bomber Wasp Bomber
B
ombers. Not so good against moving units (who run when they hear the skies humming with
doom), but great for smacking up camps. These units will release their payloads in several
passes, then return to camp to reload.
Transport DomeAirlifter Floater
U
narmed, but these units carry 10 units of cargo, the same breakdown as the Large APC in the
Constructibles menu. But they fly your units there! Luxury!
SINGLE PLAYER GAMING
Page 21

T
his option is great for practising, or just for
having the thrill of walloping a bunch of
smarmy, know-it-all computer players. You
can only host a game like this, and when you’re at the Host screen, you have to select at
least one CPU player before you can start the
game. So go check out the Host Screen section below!
T
he Host Screen is where nearly all the
decisions are made for the upcoming
Multiplayer Game. The host picks an army, a
colour and an alliance, just like everyone
else, but also picks the map, the resource and
Tech levels, CPU players and lots of other
stuff. Here is that other stuff:
THE PLAYERS WINDOW
This occupies the top half of the Host and
Client screens. It displays information on all
the players of this game and allows the Host
to add and configure CPU players. Here’s the
deal. Reading from left to right, you’ve got a
button which shows if the player is human or
CPU, then you’ve got the player’s Alliance
number. The army symbol follows this, followed by the player’s colour, then the player’s
name. The space next to this is where chat
messages appear.
CPU PLAYERS AND LOCKOUTS
As Host, you can create CPU players to spice
up the action. Do this by clicking on an empty
button on the far left of the Players Window.
Repeatedly clicking this same button will
cycle through the different armies for that
CPU player, the final option being actually to
lock out all players from that slot. This is useful if you really only want, say, four players in
a network game. You can lock out the other
four slots so no unwanted armies can barge in
and ruin your war. Note that alliances with
41
41
A
Modem game takes place down a phone
line to another player. To host a game,
click the Modem button, then host. You’ll be
asked to select a modem speed from the list,
then hit OK and toddle off to the Host Screen.
See below. Hitting Modem, then Join, will send
you, the Client, to the Modem Info screen,
where you select modem speed and insert
your friend’s phone number, then hit OK.
<graphic: the Modem info screen> You’ll be
shuttles off to the Client Screen. See below.
J
ust like a modem game, only without the
phone bills. Serial Gaming means hooking
two computers up with a Null Modem Cable.
Whether you pick Host or Join, you’ll end up
at the same screen: <graphic: Serial Screen
(Com port, Baud Rate)>. You’ll want to set the
Baud Rate to the highest number your computers can handle. Start at the highest number, and if you have problems later, go back
and lower the number. Problems could be the
result of older serial hardware, extra long
cables, lotsa stuff. And make sure you both
use the same
Baud Rate, or the
game won’t start!
Go off to your respective section,
Host Screen or
Client Screen
below.
40
M
ultiplayer gaming is where you link up to a
friend or 7 and spend the next few hours trying to ruin your friendships. Betrayal, Murder,
Backstabbing – they’re all signs of a healthy friendship, right? KKND Krossfire supports 2 players over Modem and Serial connections, and up
to 8 players (human and/or CPU) on TCP/IP,
IPX and SOLO PLAY.
From the Main Screen, click the Multiplayer
Game button. You’ll wind up in the Name and
Game screen. First things first, click on the
box next to ”Name” and type in a name you
want to use. Then hit ENTER.
Now click on the button next to the type of
multiplayer game you’ll be playing. TCP/IP
is for Internet play, IPX is a local area network. Modem is for over the phone, Serial is
for pretending you’re over the phone and
you just hook two computers up together
with a Null Modem cable. And Solo Play is
for when you want to play a multiplayer
game against the CPU – where you are the
only human player (great for practising).
When you’ve clicked on a Game Type (see
below), decide if you’re gonna Host the
game or Join someone else’s game. Hosting
means you get to make most decisions. And
joining? Heck – it means that you’re saying
to your friend ”Decide what you like, pal, I’m
still gonna kick yer butt.” Hosts can go
check out the Host Screen section below.
Joiners can move on over to the Client
Screen.
W
ith your internet connection active, hit
the TCP/IP button, then Host or Join,
depending on your preference. The Host button takes you to the Host screen. See below.
The Join screen asks you first for the TCP/IP
address of the server computer. Insert this
info, click okay, then you’ll be at the Client
screen. See below.
T
he perfect office weapon. After selecting
IPX, ‘Host’ will take you to the Host screen,
whereas ‘Join’ will take you via the Network
Games List screen before you arrive at the
Client Screen. <graphic: screen of Network
Game List> The Network Game List screen,
will show you what games (if any) are currently waiting for players. Click the one you want,
then hit the ‘Continue’ button. If you can’t see
the one you want, hit ‘Refresh’. This will make
the system check again to see if any new
games have come on-line since it last looked.
Selecting a game will shunt you off to the
Client Screen (see below).
40
MULTIPLAYER GAMING MULTIPLAYER GAMING
MULTIPLAYER GAMING
TCP/IP: The Internet Game
MODEM: Dial Them for Murder
SOLO PLAY: You and the CPU
Host Screen
SERIAL: Close enough to punch
IPX: Network War
Network Games List screen.
Modem Info Screen.
Serial Info Screen.
Page 22

their army. If you’re wanting to ally with your
friend, an Evolved, then hold the cursor over
the Evolved buttons until you find the one with
your friend’s name and colour. The little face
will look happy if you’re allied or angry if
you’re not. And clicking on that button will
reverse the current status. So there. If you ally
with someone, they will receive an info window
letting them know that you’re waving the selective white flag. Note that they don’t automatically ally with you, that’s their choice!
BREAKING ALLIANCES
There’s nothing quite as fun as imagining
the expression of betrayal on your friend’s
face when you start laying into the units
that, up until a second ago, were happy little allies, and the tiny message ‘<player>
has broken alliance’ pops up! There are two
ways to break alliances, the nice way and
the nasty way. With the nice way, you click
the Alliance button, find your allied friend’s
button, and click it. No blood spilled. Yet.
The nasty way is more fun – you just storm in
and start shooting up the unsuspecting
army. You’ll need to use a Force Attack (select your units, hold ALT, then click on the
targets), but once the alliance is broken,
you can just attack in the regular ol’ way.
One cool thing to note, though – Suicide
Units (Kamikaze/Martyr/Michaelangelo) operate under their own laws. You can make
them Force Attack an ally, and the Alliance
won’t be broken! Sneaky or what?
D
epending on the Host’s choice of Victory
Conditions in the Host Screen, the game
will end, (for you at least) if you or your allied
collective win or if your whole army is wiped
out. If you win, then you’ll go to the Debriefing
Screen, which gives you a ranking and details
of the game. If you die, then the game ain’t
necessarily over! If at least two other armies
are still alive, then you’ll become a bit of a
43
43
CLIENT SCREEN
The Client Screen is identical to the Host screen (above), but you only have control over a
few things. You can pick your Team, your
team’s Colour and your Ally number, and you
can use the Chat feature (see Chatting
above). As a Client, you wait for the Host to
begin the game, then play it as per usual.
Okay?
PLAYING THE MULTIPLAYER GAME
And once you’ve got it all happening, then it’s
just a matter of building up your army and
blowing everyone else to pieces. Unless, of
course, you’re allies. And there’s really
nothing stopping you from blowing them to
pieces, either. Remember... the Geneva
Convention blew up along with Geneva over
100 years ago in the Great Nuclear War. Yeah.
Y
ou want to exercise your right as a
bully? Well, gang up on someone in a
war – it’s great! Forming an alliance is easy,
and the results can be a real LAFF! Two
ways exist to ally:
FORMING ALLIANCES, PRE-GAME
Before the Multiplayer Game starts, you can
click on your ALLY button. Keep hitting it
until the number beside that button matches
the number of your soon-to-be ally in the
window above. Matching numbers mean alliances! Note that this is the only place the
CPU will agree to be your friend. Break an
alliance mid-game and try reforming the link
and you’ll be wearing your blood-soaked
white flag to your funeral. Dig?
FORMING ALLIANCES, MID-GAME
You can ally (and break an alliance – more
on that soon!) during a game by clicking on
the Alliance button (or pressing the A key). A
number of buttons pop out, each representing one of the other players and showing
42
CPU players are possible from this screen by
repeatedly clicking the CPU’s Alliance
Number button until it matches the number of
the desired player.
CHATTING DURING SETUP
Pre-game chats take place via the little Chat
box. To chat to other players, click the cursor
in the box, type your message, then hit
ENTER. Your message will appear in the
Players Window, and all other players will be
able to read it and respond. Chatting in-game
is covered in Chatting, below.
THE OPTIONS:
Team: Pick an army, any army. If you don’t know
the icons yet, the blue fist represents
Survivors, the Red head is the Evolved and
the yellow and red logo is the Series 9.
Colour: Pick a colour for your army from the
available colours.
Ally: Pick an alliance number. Picking the
same number as another player (you can
see their numbers in the Players Window
above) will create an immediate alliance
with that player.
RUs: Sets the amount of Resources with which
everyone begins. Clicking repeatedly cycles
through the available starting amounts.
CPU Diff: You got CPU players fighting in this
war? Set their aggressiveness here.
Max Tech: Sets the maximum Tech Level possi-
ble (Global Tech Level) for everyone in the
game.
Bunkers: Tech Bunkers will exist if this is set to
‘on’. This will allow a random element into the
game – where’s the Tech Bunker going to be,
who’s going to find it first, and what’s it gonna
contain? Could unbalance the war. But it
could be in your favour! Note that in multi-
player games, the Tech Bunkers will remain
locked to all units until a set time has
elapsed. Find ‘em. Guard ‘em. Hoard ‘em.
Unit Stats: This shows which library of unit statis-
tics the game will use. If you have created
your own library through the Unit Editor (from
the Main Menu), then you will have the option
of using standard ‘Units’ or your own. The button cycles through all available unit libraries.
Oil Avail.: The number of Oil Puddles will be the
same regardless of this setting, but they will
contain an amount dependant on your
choice here, ranging from Scarce to Infinite.
Lotsa oil means a bigger war, less oil means
a more skillful one.
Fog: Choose the level of Fog and Shroud you
want in the game (see under Visibility above
to find out more about Fog and Shroud).
Victory: Two settings exist here. A Death Match
will not end until only one army remains. Ally
Win will finish when only one allied group (or
one army) remains.
Map: Pick the map where you want your war to
take place.
Map Display: If you turn this on, you’ll see a
miniaturised version of the map where you’re
about to fight. You’ll also see where all the
other armies will be, and you can scroll
around this using the cursor keys. If you prefer this left to chance and mystery, then leave
the map off. Note: If you see the map, all the
players see the map, so don’t think of being
sneaky, awright? At least not yet…
Start Pos: Starting Position. Toggles between
Random and Group. Random will set up your
armies all over the map. Group will set up
allies close to each other, and you’ll be able
to see the starting positions on the little map.
Note: Changing alliance numbers will affect
positioning of your armies on the map!
42
Alliances
The End Of Multiplayer Game
MULTIPLAYER GAMING MULTIPLAYER GAMING
Page 23

port, clicking the U key will set the
most recently clicked destination as
the point it will lay down its cargo.
ALT: Force Attack. Forces a unit to attack
an ally, terrain feature, bridge, etc.
See ‘Force Attack’.
SHIFT: Waypoint/Queue orders. Sets
Waypoints. See above.
SPACE: Cancel Order. Selected units will stop
moving or attacking, selected buildings will forget their Marshalling
Points, Selected towers will stop firing.
T: Auto Assign Tanker. Sets an idle
Tanker off to find an Oil Rig and
Power Station and start hauling oil.
CTRL: Move while attacking. Holding CTRL
and selecting a destination point will
make your units alert – they’ll defend
themselves against attacks, then continue to their destination once they’re
no longer under direct threat.
GROUP SELECTION
CTRL + [0-9]:
Stores selected units/buildings for
quick retrieval. The number key becomes a shortcut to selecting that group
of units/buildings.
[0-9]: Restore group selection. (Stored
group will be selected)
ALT + [0-9]: Restore group and centre screen
on group
<: Next Group (technically , )
>: Previous (technically . )
45
45
APPENDICESTHE UNIT EDITOR
COMMANDS & SHORTCUTS (IN FULL)
GENERAL
ALT+ENTER: Toggles between Full Screen and
Window View.
ESC: Calls up in-game options screen
?: (Technically, it’s the / key). Activates
unit information label for the next unit
or building the cursor hovers over.
S: Stand Ground. Select units and hit the
S key and those units will remain
where they are and not attack unless
specifically ordered to do so.
D: Disperse. Selected units will immedia-
tely scatter and move a short distance
from the current mouse-pointer position.
F: Fight. Selected units will attack any
enemy within visual range, and will
hunt what they’re best at killing if there’s a choice.
G: Guard. Selected units will stay near
and Guard a building, unit, or area.
Select the units, hold the cursor over
that that requires guarding, and hit G.
L: Load Transport. As part of a series of
Waypoint commands for a Transport,
clicking the L key will set the most
recently clicked destination as a pick
up point. The Transport will set down
and remain for a short time so that
units can be piled in, then it will fly to
its next destination point.
U: Unload Transport. As part of a series
of Waypoint commands for a Trans-
44
ghost. The Fog and Shroud will clear, and
you’ll be able to scroll around the map and
watch how the war finishes. Watching it to the
end or getting annoyed and pressing ESC will
take you to the Debriefing Screen mentioned
above.
C
hatting during setup is covered under
Host Screen above. Chatting during the
game is covered… here. If you want to chat to
another player, hit the Messages button or hit
the M key. You’ll be presented with a few buttons:
Speak to allies only
Clear all selections
Speak to everyone
Speak only to the same army types
Select specific players
You’ll see a little messaging box with a cursor
in it. Type your message and hit Enter to send
it. To turn messaging off, hit the Messaging
Button again or hit the M key.
N
ot happy with the stats of your favourite
units? Want to make a little superhero out
of a Machine Gunner? Want to give a
MegaBeetle the strength of a regular ‘squish
it with a boot’ type of beetle? Well, the Unit
Editor may just be for you.
With the Unit Editor, you can adjust all the
statistics of all the buildings and units in the
multiplayer game, then store all that information in your own custom library file which you
can call up at a later stage. Cool or what?
Here’s how you work it.
From the Main Menu, click the Unit Editor button. You’ll be asked to input a name for your
new unit attribute table, so it can be saved
and called up and edited and resaved and
all that good stuff later on. If you’ve already
been working on one, you can just click on it
and hit okay. You’ll be thrown head-first into
this screen:
From here, just slide the sliders against all the
attributes to where you want ‘em. Hell, experiment a little! The options are pretty much selfexplanatory, dealing with speeds and damage versus certain unit types, the time it takes
to build a unit and how far it can ‘see’ into the
Fog or Shroud. So go to it! Tweak some
Freaks!
44
Chatting
THE UNIT EDITOR
The Unit Editor.
APPENDICES
Appendix A
Page 24

UPGRADING MACHINE SHOP/BEAST ENCLO-
SURE/MACROUNIT FACTORY
Each upgrade of this structure increases the
choice of vehicles/animals; increases the
choice of Constructible Bases and Extras.
(Constructibles are only available if the
Armoury or equivalent is also upgraded to at
least Tech Level 1)
1. Additional vehicles;
2. Additional vehicles, including Oil Tanker
3. Additional vehicles;
4. Additional vehicles; Make Aerial Transport
5. Additional vehicles, including Mobile
Outpost or equivalent; Make Aerial Fighter
and Aerial Bomber.
UPGRADING RESEARCH LAB/ALCHEMY
HALL/TECHNOSTUDY
Each upgrade on this building will result in
future upgrades to any building being completed in a progressively shorter time and at a
cheaper rate.
UPGRADING POWER STATION/POWER STATI-
ON/POWER STATION
Each upgrade on this building will make
increase the Resources refined from each
Tankerload.
UPGRADING REPAIR BAY/HEALING
TENT/MAINTENANCE DEPOT
Each upgrade on this building will increase its
efficiency. It will repair/heal more quickly.
47
47
EFFECTS OF TECH LEVEL INCREASES
UPGRADING OUTPOST/CLAN HALL/BARN
1. First level Minimap; Build Repair Bay
2. Second level Minimap; Build LoTech Wall
3. Radar around main building; Build first
level Alternative Power collectors
4. Build HiTech Wall
5. Build second level Alternative Power
collectors
UPGRADING BARRACKS/WARRIOR
HALL/MICROUNIT FACTORY
Each upgrade of this structure increases the
choice of infantry units.
Upgrading Armoury/FORGE/weapon control
Upgrading this structure increases the choice
of Turrets available for Constructible Vehicles
(Constructibles are only available if the
Machine Shop or equivalent is also upgraded
to at least Tech Level 1)
1. Build Tower level 1; Increases armour rating
on all new units
2. Build Tower level 2; Increases armour rating
on all new units
3. Build Tower level 3; Increases armour rating
on all new units
4. Build Tower level 4; Increases armour rating
on all new units
5. More Turrets for Constructibles; Increases
armour rating on all new units
46
BACKSPACE: Last Selected Group
ALT + >: Recall and centre screen on next sto-
red group
CTRL + DR AG SELECT: Overrides Smart Select
(if active), so Tankers, buildings and
Technicians will be included in that
particular drag select.
MAP AND SCROLLING
RIGHT MOUSE: Fast scroll. Hold the Right
Mouse Button and drag.
‘‘ ^^ aa __
: Scroll the view
HOME: Centre view on your main building (eg.
Outpost). To view your other main buildings (if any), repeatedly click the
HOME key.
CTRL + [ F5 – F8 ]: Store (Bookmark) screen
position. (See under ‘Visibility’)
F5 – F8: Recall stored screen position. (Also
see under ‘Visibility’)
IN-GAME MENU KEYS
ESC: (While In-Game menu is displayed)
Return to Game.
F1: Help
F2: Briefing
F3: Load Game
F4: Save Game
+/-: Increases/Decreases Game Speed.
(Technically, it’s the - and = keys).
SIDEBAR KEYS
I: Infantry Menu
V: Vehicle Menu
P: Aerial Unit (Planes) Menu
W: Walls Menu
T: Towers Menu
C: Constructibles Menu
A: Alliances
M: Multiplayer message. See under
‘Multiplayer Gaming’ for details.
R: Recycle
TAB: Open/Close Minimap
~: Toggles Minimap between top left and
bottom left corners.
TIMER BUTTONS
PRODUCTION BUTTONS
LEFT MOUSE:Increase Queue Counter by one
RIGHT MOUSE:
Decrease Queue Counter by one
CTRL+LEFT MOUSE:
Set Queue Counter to infinite
CTRL+RIGHT MOUSE:
Cancel Queued Production
ALT+LEFT MOUSE:
Centre on Unit’s Production Building
46
APPENDICES APPENDICES
Appendix B
Page 25

GAME PRODUCER
Justin ‘Feature Creep’ Halliday
LEAD PROGR AMMER
Shane Lontis
LEAD ARTIST
Dan Tonkin
CPU PLAYER PROGRAMMING
Paul Baulch
UNIT PROGRAMMER
Andrew ‘IDAK’ Scott
NETWORK & WINDOWS PROGRAMMER
Louis Solomon
ADDITIONAL PROGRAMMING
Frank C. Prete
BACKGROUND ARTIST
John Tsiglev
SURVIVOR ARTIST
Dan Tonkin
SERIES9 ARTIST
Toby Charlton
EVOLVED ARTIST
Jeremy Kupsch
SUPERSTRUCTURE ARTIST
Damien Borg
DESIGN
Craig Duturbure, Justin Halliday, Shane
Collier, Cameron Brown
MISSION BUILDING
Brian Uniacke, Justin Halliday,
Greg Johnson, Rowan Summers,
Ian Malcolm
49
49
I
f you have any problems running or playing
this game, please contact us by fax, email,
or telephone. The lines are open from 10.00
am to 7.00 pm every weekday (except bank
holidays) and from 10.00 am to 2.00 pm on
Saturdays.
The fax and email are available 24 hours a
day.
t: 0161 827 8060
t: 0161 827 8061
f: 0161 827 8091
e: helpline@infogrames.co.uk
Alternatively, many questions can be answered
by visiting our web site.
http://www.infogrames.fr
48
K
KND Krossfire is a Windows-native pro-
gram, so you should have few serious
troubles. Make sure you have the minimum
specifications for the game (as listed on the
box), make sure you have shut down all other
Windows programs before running KKND
Krossfire, and make sure everything (speakers, mouse, etc) is correctly connected. If
that all checks out and you still have problems, read on before contacting our Support
line (listed later).
V
irtual Memory is a part of the Windows system
which uses hard drive space as pretend RAM.
If there isn’t enough room for Virtual Memory to
stretch, then KKND Krossfire could slow or
crash. Find your Virtual Memory settings (for
Win95 users, this will appear under
ControlPanel\Systems\SystemProperties\Performance\Virtual Memory), then read on.
• If the top choice is highlighted (ie. Windows
looks after your Virtual Memory), then you’ll
need to ensure that you have 30Meg of
hard drive space free at all times for
Windows to use. You may have to delete
some of your unnecessary files or empty
your Recycle bin to make some room.
• If the bottom choice is highlighted (ie. You
have chosen to set aside an exact amount
of hard drive space, unusable by any other
program), then you just have to make sure
that this file is at least 30Meg in size, altering the number in this box if necessary.
K
KND Krossfire uses a system called
DirectX to display graphics and play
sound. You need DirectX Version 5.0 or higher
for KKND Krossfire to function, and it is this
version which is installed at your discretion
during KKND Krossfire’s install procedure.
Here’s a couple of possible problems:
• If KKND Krossfire shuts down immediately
upon booting up, it could mean your
DirectX files have not been properly installed or no longer exist on the drive. The solution is to run the install program of KKND
Krossfire again, being sure to say ‘Yes’ to
installing DirectX 5.0 on your hard drive.
• If DirectX appears to be correctly installed
and the game still won’t run, then you may
need updates of your other device drivers
(display, etc). Contact your vendor or the
manufacturer’s Web Page.
A
lmost all modern sound cards are digital,
which is a good thing, because KKND
Krossfire requires a digital soundcard to operate. Some cards, such as the original Adlib
sound card, are non-digital and will need to
be upgraded to bring the system into line with
the minimum requirements as specified on the
box.
48
TROUBLESHOOTING CREDITS
TROUBLESHOOTING Technical Support CREDITS
Memory Problems
DirectxSituations
Sound
Page 26

50
PUBLICITY AND WEB ACTIVITIES
Kirstin Beamish, Adrian Giles,
Judy Routt, Sandee Agee,
Peter Jankulowski
BACKGROUND OFFICE NOISE
Paul Baulch, Jeremy Kupsch
TECHNICAL DIRECTORS
Iain Cartwright, Andrew Carter
ART DIRECTOR
Holger Liebnitz
PRODUCER AND STRESS MERCHANT
David Giles
EXECUTIVE PRODUCER
Adam Lancman
PUBLISHER
Fred Milgrom
MISSION DESIGN
Justin Halliday, Brian Uniacke,
Ian Malcolm, Andrew P. Scott,
Shane Collier, David Giles,
Aidan Doyle, Judy Routt,
Hien Tran, Richard Au,
Greg Johnson
LEAD CINEMA ARTIST
Chris Jones
CINEMA ARTISTS
Sam Crook, Brendan Bottomley, Domenic
Georgio
MUSIC AND SOUND EFFECTS
Marshall Parker, Gavin Parker
LEAD TESTER
Shane Collier
TESTERS
Alex McNeilly, Glenn Shanley,
Gary Ireland, Rhys Quinert, Ashley Parker,
Jared Quinert, Daniel Walters,
Nick Evans, Asher Doig,
John Robinson, Angie Kindred,
Toby Couchman, Damon Fredrickson,
Tim Kane, Jason Foo, Vito Trifilo,
Tamzin Barber, Paul Tracey,
Alex Dekterev, Louis Solomon
MISSION EDITOR PROGRAMMING
Matthew Curtis, Alex Lindsay
MISSION BRIEFING ARTISTS
David Woodland, Adam Ryan, Marnie Pitts
MISSION BRIEFING ACTORS
Matthew King, Craig Duturbure, Gary Files,
Jonah Klien, Rosanna Morales
FAMOUS MOTION CAPTURE ENGINEERS
Glen Horrigan, Thomas Ruth
LOCALISATION COORDINATOR
Steve Mann
MANUAL TEXT & LAYOUT
Craig Duturbure
PROGRAMMING SUPPORT
Phillip Mitchell, Brian Post, Myles Abbott,
Darren Bremner
HARDWARE TECH SUPPORT
Tim Bos, Ryan Bessemer, Alex Braunegg
MANUAL-LAYOUT
AND PACKAGING-DESIGN
Maren Hengst/Graphik Design
50
CREDITS
 Loading...