

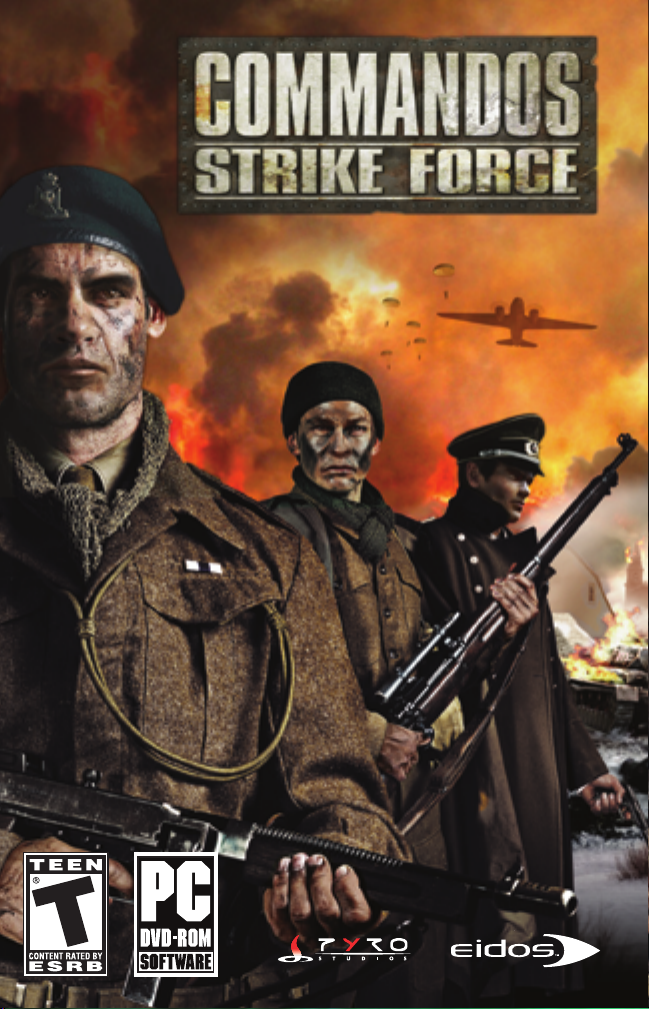
Page 1
™
Page 2
GETTING STARTED ...................... 2
Installing the Game ...................... 2
Playing the Game in Spanish
or French ...................................... 2
Uninstalling the Game .................. 2
STARTING THE GAME .................. 3
EAX® Technology .......................... 3
DEFAULT CONTROLS .................... 4
MAIN MENU .................................. 5
Settings ........................................ 5
Profiles .......................................... 6
Campaign Menu ............................ 6
COMMANDOS CAMPAIGN .......... 6
Briefing ........................................ 6
COMMANDOS TEAM .................... 7
IN-GAME DISPLAY ........................ 8
TACTICAL MAP .............................. 9
PAUSE MENU ................................ 9
SAVING GAME DATA .................... 9
TACTICS/TIPS ................................ 9
General Hints .............................. 10
Stealth ........................................ 10
Action .......................................... 11
STEALTH KILL TECHNIQUES .... 12
WEAPON USE .............................. 13
EXPLOSIVES ................................ 13
EQUIPMENT ................................ 14
THE ENEMY .................................. 14
General Behavior ........................ 14
Alarm Status .............................. 15
ENEMY PERSONNEL .................. 15
ONLINE PLAY ................................ 17
System Requirements.................... 17
Using the USB Headset .............. 17
Battleground Profiles .................. 17
Creating Profiles .......................... 17
Creating and Joining Matches ...... 18
Normal Search Menu .................. 18
Create Match .............................. 18
MULTIPLAYER GAME SETUP .... 19
MULTIPLAYER GAME MODES .. 19
Deathmatch ................................ 19
Team Deathmatch ...................... 20
Sabotage .................................... 20
CREDITS ........................................ 21
TECH SUPPORT .......................... 24
CONTENTS
EPILEPSY WARNING
A very small percentage of individuals may experience epileptic seizures when
exposed to certain light patterns or flashing lights. Exposure to certain patterns
or backgrounds on a television screen or while playing video games may induce
an epileptic seizure in these individuals. Certain conditions may induce previously
undetected epileptic symptoms even in persons who have no history of prior
seizures or epilepsy. If you, or anyone in your family, has an epileptic condition,
consult your physician prior to playing. If you experience any of the following
while playing a video game — dizziness, altered vision, eye or muscle twitches,
loss of awareness, disorientation, any involuntary movement, or convulsions —
IMMEDIATELY discontinue use and consult a physician before resuming play.
PRECAUTIONS TO TAKE DURING USE
• This game disc is intended for use exclusively on Windows®-based systems
with the minimum configurations specified on the system requirements
of the game purchased.
• Do not sit too close to the screen. Sit a good distance away from the monitor,
as far away as the length of the cable allows.
• Avoid playing if you are tired or have not had much sleep.
• Make sure that the room in which you are playing is well lit.
• Rest for at least 10 to 15 minutes per hour while playing
a video game.
HANDLING YOUR GAME DISC
• Avoid bending the disc. Do not touch, smudge or scratch
its surface.
• Do not leave the disc in direct sunlight or near
a radiator or other source of heat.
• Take occasional rest breaks during extended play.
• Always store the disc in its protective case.
ESRB RATING
This product has been rated T for Teen
by the Entertainment Software Rating
Board. For information about the ESRB
rating, or to comment about the
appropriateness of the rating, please
contact the ESRB at www.esrb.com.
Page 3
~ 2 ~ ~ 3 ~
STARTING THE GAME
Once the game is installed and you are ready to play, click the Play Commandos Strike
Force
button on the Launch Panel to start the game.
To begin playing the game at a later date, insert the disc into the DVD-ROM drive.
After a few seconds, the
COMMANDOS STRIKE FORCE
™
Autorun program will
appear via the AutoPlay feature.
❑
Click the Run button to start the game.
— OR —
❑
Select Start # Programs # Eidos # Pyro Studios # Commandos Strike Force
# Play Commandos Strike Force.
To leave the game, click the
Exit button.
EAX®TECHNOLOGY
COMMANDOS STRIKE FORCE
™
uses Creative EAX®audio
technology to enhance the game audio. With EAX
®
technology,
you can experience audio that sounds so realistic, you’ll feel
like you’re actually in the game!
To take advantage of EAX
®
technology, you will need to equip your system with one
of the Sound Blaster sound cards. For more information on Sound Blaster, please go
to
http://soundblaster.com.
GETTING STARTED
INSTALLING THE GAME
To install COMMANDOS STRIKE FORCE™, insert the game disc into your drive.
After a few seconds, the install program will appear. This program will guide you
through the installation process via onscreen prompts.
❑
If the install program does not appear when you insert the disc, double-click
the
My Computer icon, then double-click the DVD-ROM icon to launch
the install program.
— OR —
Click the Start button, then:
❑
Choose RUN from the pop-up menu.
❑
Type d:\setup in the box provided (d: designates your DVD-ROM drive letter;
use the correct letter for your drive).
❑
Click the OK button to begin the install program.
❑
When prompted, select the path and directory on your hard drive where you want to
install the game. The default is
C:\Program Files\Eidos\Pyro Studios\Commandos
Strike Force
. You can change this path to designate another location if you like.
❑
Click the Readme button to view important information about COMMANDOS
STRIKE FORCE
™
.
PLAYING THE GAME IN SPANISH OR FRENCH
Game language is selected during game installation. When installing the game, select
either
Spanish or French at the Choose Setup Language screen. Then complete
the install as described above.
Note: You must uninstall and re-install the game to change to a new language.
UNINSTALLING THE GAME
To uninstall COMMANDOS STRIKE FORCE:
❑
From your desktop select Start # Programs # Eidos # Pyro Studios #
Commandos Strike Force # Uninstall Commandos Strike Force.
❑
When prompted, click Yes to remove COMMANDOS STRIKE FORCE
™
from your computer.
™
Page 4
~ 4 ~ ~ 5 ~
DEFAULT CONTROLS
CONTROL
MENU CONTROLS
Esc
cursor keys
Enter
Esc
MOVEMENT CONTROLS
W/S
mouse
A/D
C
spacebar
Left Shift
F
COMBAT CONTROLS
left mouse button
right mouse button
R
Left Alt
mouse wheel
1/2 or 1
2
OTHER CONTROLS
E
Tab
Return
H
Q
right mouse button
MULTIPLAYER CONTROLS
mouse wheel button
F
1
F2
F3
H
ACTION
Pause Menu
Select menu item
Confirm selection
Cancel/Previous menu
Move forward/backward
Look
Strafe left/right
Crouch/Stand Up
Jump
Run
Talk/Interact with object/Open unlocked
door/Swap weapon
Fire primary weapon
Zoom weapon
Reload primary weapon
Use secondary weapon/item
Select primary weapon
Select secondary weapon/item
External view
Switch character
View tactical map
Use medikit
Display objectives
Use binoculars
Talk
Chat
Team chat
Target chat
Use medikit
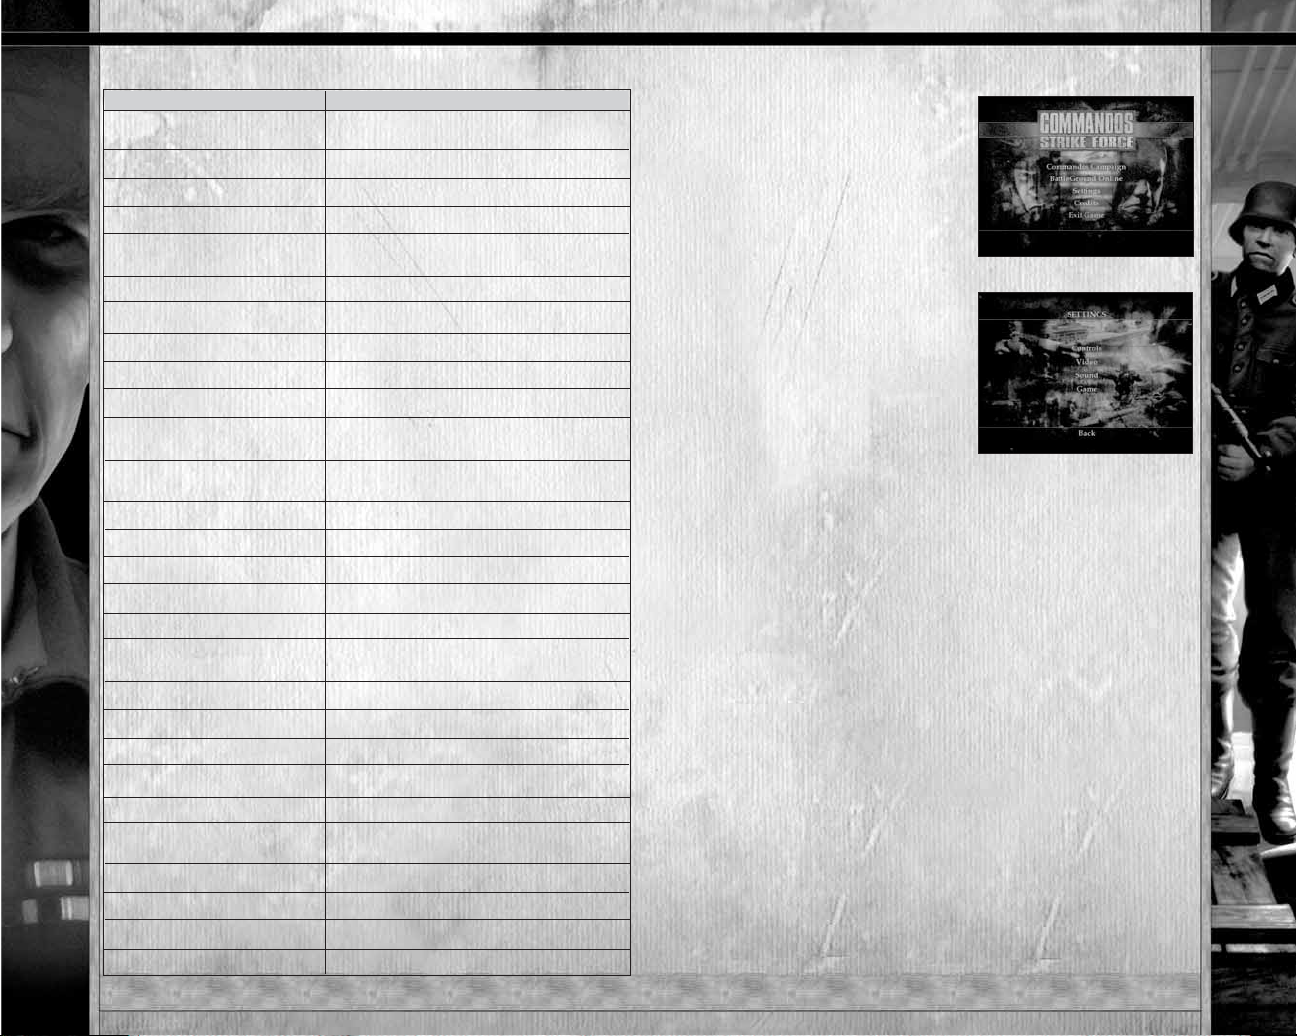
MAIN MENU
Start by checking and adjusting your
settings
(below). Use the menu controls
(page 4) to make selections. Then return
to the Main Menu and choose between
Commandos Campaign (Single Player
game) or
Battleground Online
(Multiplayer game). If you select
Commandos Campaign you will be
asked to set up your game profile.
SETTINGS
CONTROLS
Change your control configuration;
you can also reset to the default
configuration. Click
Save to confirm
your changes.
VIDEO
Video Quality
Select a preset
configuration or
create a custom
configuration. Click
Scan for suggestions
on the optimum configuration.
Video Mode Select a video resolution.
Brightness Adjust screen brightness.
Noise Toggle visual noise filter.
Advanced Modify advanced video settings.
SOUND
Music Volume
Adjust the music volume.
SFX Volume Adjust the sound effects volume.
Output Choose your audio.
Reverb Toggle On/Off.
EAX If your system is EAX 2.0 compatible, toggle
to
Yes to activate.
X-Fi COMMANDOS STRIKE FORCE
™
is not currently
X-Fi compatible. Please visit
www.soundblaster.com
or support.eidosinteractive.com to download
the
COMMANDOS STRIKE FORCE
™
Update
when available. (See the
Read Me file for further
information.)
GAME
Subtitles
Toggle On/Off.
Invert Axis Invert the Y axis.
Mouse Sens Adjust mouse sensitivity.
Voice Chat Select a voice output source (Multiplayer only).
Page 5
~ 6 ~ ~ 7 ~
PROFILES
Before you begin playing, you must create a new profile. Select New and input
your profile name. To delete a profile, highlight it and click
Delete.
CAMPAIGN MENU
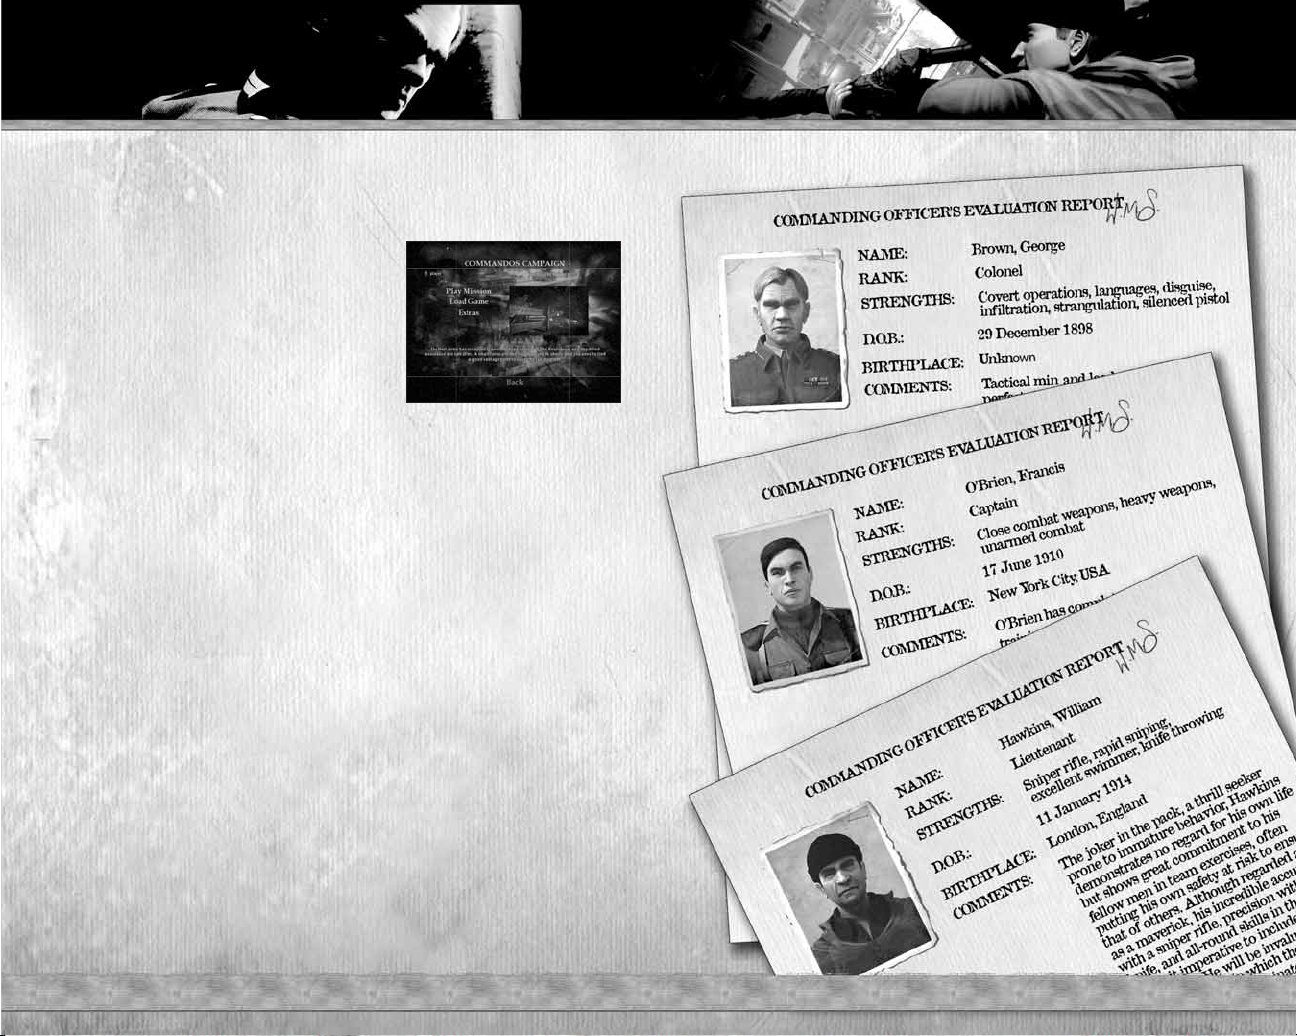
Play Mission Start a mission by selecting
a mission and then choosing
your difficulty level.
Load Game Load a saved mission.
Extras View bonus COMMANDOS
STRIKE FORCE
™
material.
COMMANDOS CAMPAIGN
BRIEFING
A number of unorthodox military operations have been detailed to respond to the Nazi
threat that has cast a dark menacing cloud over Europe. The formation of the first
Commandos regiments has been sanctioned to defeat this seemingly invincible Nazi
army. The Commandos raison d’être is deploying smaller groups of Special Forces
to infiltrate, gather intelligence, engage in sabotage and harass the enemy deep behind
their lines.
You control a Commandos strike force unit. Your incursions will take you into France,
Norway and Russia with three elite Commando corps members — Colonel George
Brown (Spy), Captain Francis O’Brien (Green Beret) and Lieutenant William Hawkins
(Sniper) — at your disposal. You have a full arsenal of weapons, and each of your men
possesses a series of special actions and skills. You must switch between these
Commandos to adapt to all stealth and combat situations.
The missions that lie ahead will challenge you and your unit to the limit. You must:
❑
Assault and defend strategic positions.
❑
Sabotage enemy installations.
❑
Support allied troops in their own operations.
Good luck!
COMMANDOS TEAM
Page 6

~ 8 ~ ~ 9 ~
IN-GAME DISPLAY
Using the visual aids on the in-game
display, you can anticipate the threats
you will have to face; the locations of
targets in the current mission; any
weapons available; and your
Commando's health and stamina.
Visual aids include:
TACTICAL MAP
Press Return to open the tactical map.
Use the tactical map to locate your
position and keep track of your mission
objectives and targets.
❑
Move through objectives by pressing
the
cursor keys 4/3. Objective
locations will appear on the map.
Press
1/2 to cycle through various
components of an objective.
❑
Press Tab to cycle through the summary screens.
PAUSE MENU
During play, press Esc to pause the game
and display the Pause Menu, offering
the following options:
Continue Continue mission.
Restart Mission Restart current
mission.
Load Game Load a saved game.
Save Game Save your progress.
Settings Adjust gameplay
options.
Exit Exit current mission.
SAVING GAME DATA
Save your game by pressing Esc and selecting Save Game. To overwrite
a save game, double-click on the save you want to overwrite.
❑
Selecting Yes overwrites older data, which cannot be restored.
❑
Press F5 to quick-save. Press F9 to quick-load.
TACTICS/TIPS
For certain missions, you will fight as one or two members of your unit.
Choose wisely — your tactical decisions have a direct influence on the
outcome of these missions. You can also decide the order in which to
accomplish mission objectives. For example, to stop the advance of a group
of Nazi tanks through the ruins of Stalingrad, you can use the scenario’s
tactical advantages (stock up on explosives, use narrow passes to set up
ambushes, etc.). You can decide where, when and how to attack the enemy.
RADAR
Check the radar to get information on your surroundings within
a range of approximately 18 meters. Enemy view range is
15 meters, so besides receiving directions you will also see
enemies in your radar before they see you.
❑
The radar also shows the locations of allies (blue),
checkpoints and objectives. If objectives are on the same floor as you are, they
appear in bold. If they’re on a different level, the location indicator is dimmed.
❑
The range of the radar increases while you’re using the binoculars.
❑
The radar may not show the positions of certain enemies (snipers). You must
discover their positions by some other means.
MEDIKITS
Displays the number of medikits in your possession.
SELECTED SECONDARY WEAPON/ITEM
Secondary weapon or item equipped/amount of item you have.
SELECTED WEAPON
Your selected weapon/amount of that weapon’s ammo you have.
CHARACTER
Displays the Commando you currently control, along with
the character’s
Stance (crouching or standing), Health
and Stamina.
CROSSHAIRS/WEAPON SIGHT
Use the crosshairs and other sights to aim your weapons.
A crosshair automatically appears whenever you have a firearm
selected; a sight appears for knives and piano wire. Crosshairs/
sights turn yellow/red to indicate enemies or blue/green to
indicate allies. If nothing is in your sights, they remain white.
PICTURE IN PICTURE
Provides intelligence on events surrounding the development
of the mission. May also display hints on possibilities
available in your area. Following a picture-in-picture update,
targets show up automatically on the radar.
TIMED OBJECTIVE
In specific missions, a counter appears above the radar. If time runs out before you
complete the mission, you will have failed the objective.
Page 7

~ 10 ~ ~ 11 ~
GENERAL HINTS
RUNNING — To run, hold down Left Shift while moving forward. The commando’s
stamina drops during a sprint, so it will only last a short time.
INTERACTION — When your Commando is near a person or an interactive object,
text describing the interaction/action will appear. Press
F to initiate
the interaction/action.
PICKUPS — When your Commando is standing over an item that can be picked up,
text appears alerting you to this. Press
F to initiate the interaction; use the cursor
keys
to scroll through the pick-ups.
STEALTH
The use of stealth is imperative to the success of specific missions during each
campaign. There are a number of ways to remain covert during operations:
CROUCHING — Crouching and moving slowly helps you remain undetected
by the enemy. To crouch, press
C. Crouching also helps you avoid battle damage.
❑
Remember: you can quickly sprint from the crouching position, find cover, then
automatically return to the crouching position when you stop moving.
EXTERNAL VIEW — The external view allows you to look around objects while using
cover. Use this to observe your enemy and remain undetected during missions.
Hold down
E and move the mouse to adjust the view.
STEALTH VIEW — All Commandos can peer through keyholes. When your
Commando is standing in front of a door, make him look down or crouch;
a contextual message will appear. Press
F to enter keyhole view. Press F again
to exit the view.
BINOCULARS — Use binoculars to survey the scene. Click the right mouse button
to activate the binoculars.
❑
Clicking the right mouse button activates weapon zoom if the selected weapon
has that ability.
STEALTH KILL — The stealth kill (page 12) allows you to eliminate your enemy
silently, without being detected.
DISGUISE — Use disguises throughout missions to pass undetected through heavily
Nazi-populated areas and to infiltrate enemy ranks, obtain intelligence and give
conflicting orders to enemy personnel. When a mission starts, you will not be
provided with a disguise. Obtaining one is your initial task.
❑
You can only distract uniformed soldiers if their rank is inferior to the rank
of your disguise.
THE SPY — Colonel Brown can only carry one disguise besides his own uniform.
The higher the rank of the uniform he wears, the more freedom of movement he
acquires. He will always wear his normal clothing, unless he obtains a disguise
at the beginning of a mission. He can switch at will between his normal clothing
and the disguise he carries.
❑
In the close-range view, officers can recognize Brown in disguise. SS officers will
shoot at him in their close-range view even if he is disguised.
DISTRACTING GUARDS — Use items in the missions to distract enemy soldiers.
This is useful when you’re trying to gain entry to buildings or move through heavily
Nazi-populated areas undetected.
❑
Press Left Alt to throw or place an item.
❑
Coins — Use coins to create a noise to distract the enemy. The guard will leave his
position to investigate the noise. (If you are being observed by the enemy when
you’re throwing a coin, that enemy will not turn.)
❑
Cigarettes — Use cigarettes to visually distract the enemy. If you put cigarettes
on the floor, the enemy will look in that direction, giving you enough time to sneak
up on him for the silent kill or to sneak past him.
SWIMMING — You can swim underwater to infiltrate areas unseen, making it
possible to surprise the enemy from behind, or to reach hidden underwater access
points. Your swimming time is limited by your Commando’s physical characteristics.
Due to his ability to focus his senses, the Sniper can swim in near-freezing water
without suffering any damage.
ACTION
Stealth aside, you will also need to employ an equal measure of firepower to overcome
your opponents. Ordnance at your disposal includes:
GRENADES — Grenades are effective weapons against armored and “soft” targets
alike; they are especially effective against massed troops.
❑
To throw a grenade, first select it (press 2), then press Left Alt to throw it.
The distance thrown depends on how long you hold down
Left Alt.
ORDNANCE LAUNCHER (Captain O’Brien [Green Beret] only) — The ordnance
launcher is used in the same way as grenades but offers far greater accuracy,
with a crosshair allowing you to pinpoint chosen targets.
❑
To fire the ordnance launcher, first select it (press 2), then press Left Alt to fire.
Page 8

~ 12 ~ ~ 13 ~
SNIPER RIFLE (William Hawkins [Sniper] only) — Use the sniper rifle
to selectively eliminate enemies without revealing your position.
The precision crosshairs have an enhanced zoom that takes some time
to stabilize. To do that, press
Left Alt to hold your breath while looking
through the scope.
DOUBLE GUNS (Captain O’Brien [Green Beret] only) — This enables you
to carry two guns at once, giving you a constant supply of firepower.
VEHICLE-MOUNTED/GROUND-MOUNTED WEAPONS — Use these
weapons to inflict massive damage on the enemy.
POISON GAS CANISTERS — These canisters release a gas that will
eliminate the enemy. They will also eliminate your Commandos.
GAS MASK — The gas mask protects against gas attacks.
SMOKE CANISTERS — Smoke canisters release a dense gas that
obscures enemy vision and causes choking.
STEALTH KILL TECHNIQUES
Each Commando has the ability to perform stealth kills that will eliminate
the enemy with the minimum amount of noise.
COLONEL BROWN (Spy)
❑
Piano Wire — Equip your piano wire. Sneak up quietly behind
an enemy until you are within grabbing distance, then press
F
to strangle your enemy.
❑
Silenced Pistol — When equipped, this pistol works in the same way
as a normal pistol but with minimal sound.
CAPTAIN O’BRIEN (Green Beret)
❑
Neck Break — Equip your knife. Sneak up quietly behind an enemy
until you are within grabbing distance, then press
F to silently break
the enemy’s neck.
❑
Slash — You can also use the knife to slash enemies. However, this can
require a few hits to kill, which may allow the enemy to raise the alarm.
LIEUTENANT HAWKINS (Sniper)
❑
Stab — Equip your knife. Sneak up quietly behind an enemy until you
are within grabbing distance, then press
F to silently stab the enemy
in the back.
❑
Throwing Knife — Head and torso shots kill the enemy. Arm and leg
hits result in damage but not death. Recover a knife by moving your
Commando over the knife on the floor.
WEAPON USE
Commandos will carry only a limited number of weapons. You must decide what
weapons to carry, and choose those that best fit the Commandos’needs. Each
Commando can carry his exclusive weapon and one or two medium weapons.
Only O’Brien (Green Beret) can carry both a medium and a heavy weapon.
USING WEAPONS
❑
Press the left mouse button to use your primary weapon.
❑
Press Left Alt to use your secondary weapon/item.
AIMING WEAPONS
❑
Move the mouse to aim your weapon using the crosshairs, depending
on your weapon of choice.
USING THE SNIPER SCOPE
❑
When controlling the sniper, click the right mouse button to use
the sniper scope. The sniper scope is steadier from a crouched position
and when holding your breath (press
Left Alt).
RELOADING WEAPONS
❑
Press R to reload weapons.
CHANGING WEAPONS
❑
Press 1 to select/cycle/change your primary weapon. You can also use
the
mouse wheel (if applicable). Press 2 to select/cycle/change your
secondary weapon/item.
SWAPPING WEAPONS
❑
When you find a weapon (either
army issue or one dropped
by an enemy), the weapon swap
icon appears. You can swap the weapon you’re holding for the weapon
you found by pressing
F. (When you swap weapons, you put down
the weapon you’re carrying.)
MOUNTED WEAPONS
❑
You’ll discover a number of mounted weapons throughout the missions.
To use one of these weapons, press
F.
EXPLOSIVES
Explosives are essential when you’re executing synchronized sabotage
or preparing enemy ambushes.
STICKY BOMBS — Use these to blow up vehicles. The bomb
explodes a few seconds after being stuck to an area on the vehicle.
ANTI-TANK MINES — Mines can be deployed on any type
of ground (visible for soldiers but not for vehicles) but can only
be buried on soft ground. Mines explode when shot and are
mission-specific.
Page 9

~ 14 ~ ~ 15 ~
EQUIPMENT
You have varied tactical equipment, offering certain tactical advantages over the enemy.
GRENADE — Explosive used to blow up tanks, half tracks and groups
of enemy soldiers. The grenade detonates after a period of time has elapsed.
MOLOTOV COCKTAIL — These are thrown and explode on contact. Effective
against vehicles and soldiers.
SMOKE CANISTERS — The smoke hides your Commando from the enemies’
view. As a side effect, the smoke incapacitates those who breathe it in for a few
seconds. (See Gas Mask below.)
POISON GAS CANISTERS — Poison gas canisters take out groups of enemy
troops silently.
GAS MASK — To put on your gas mask during an attack, press 2 to select it,
then press Left Alt.
CIGARETTES — Use cigarettes to distract enemy guards (visual).
SILVER COINS — Use silver coins to distract enemy guards (aural).
MEDIKITS — Restores a large amount of health. You can accumulate medikits
throughout a mission and use as needed. You can also use them on allies to
help restore their health.
PANZERFAUST — The ordnance from this disposable anti-tank
rocket launcher loses speed and force after a short distance.
THE ENEMY
There are different ranks in the Nazi army: soldiers, sergeants, officers and feared SS
and Gestapo agents. There are also civilian Nazi sympathizers to watch out for.
GENERAL BEHAVIOR
All Nazi soldiers can see you, hear you, chase you, follow your tracks, find dead soldiers
and sound the alarms. They can be posted to cover an area, occupied with some activity,
or on patrol. If they are alerted, some will not leave their posts, but others will go
to the alarm location.
VISION
Vision is relative to the situation and the location of the enemy. For example, the enemy
will have more difficulty detecting your presence if you are crouching. Following this
logic, you need to be alert when facing more vigilant enemies who will sweep the area
for anything out of the ordinary.
HEARING
The chance of the enemy hearing you is increased when you’re executing noisy actions
(running, shooting, etc.) and lessened by stealth actions (moving while crouched, using
the knife or the silencer, etc.). The noisier you are, the more chance you have of being
detected and the alarm being raised.
ALARM STATUS
If a soldier or guard spots you during a mission or an alarm is raised, the soldier
or guard will go through a series of stages before returning to normal status.
Normal — Guards perform their usual actions. If something
out of the ordinary happens they become suspicious and a timer
appears above their heads.
Suspicious — Once the timer appears you have to rectify the unusual
occurrence, hide, or get away from that position before the timer
completes a cycle. If the timer fills, the enemy will go to Alerted status.
If the timer does not complete a cycle, the enemy will return to Normal
status after a period of time.
Alerted — If a soldier or guard goes to Alert status, they will attack,
call for support, raise the alarm or run away.
ENEMY PERSONNEL
SOLDIERS
Low-ranking soldiers of the German Army. There are
several types with different behaviors and characteristics.
They can be walking, patrolling, taking a break, fixing
vehicles, carrying supplies, operating radios, etc.
Page 10

~ 16 ~ ~ 17 ~
ONLINE PLAY
The online portion of this game is subject to the terms and conditions under
the User Agreement found within the game. For a full copy of the User
Agreement go to:
www.eidos.com.
SYSTEM REQUIREMENTS
Up to 16 players can battle online (WAN) or over a Local Area Network.
In order to play
COMMANDOS STRIKE FORCE
™
online, you need:
❑
Broadband Internet connection, or
❑
Local Area Network (LAN).
USING THE USB HEADSET
The USB headset allows you to talk to other players during online play.
This is an optional feature, and is not required to enjoy the game. Connect
the USB headset into a USB connector on your computer before launching
COMMANDOS STRIKE FORCE
™
.
BATTLEGROUND PROFILES
Multiplayer Mode offers you the chance
to compete against the best players
online. The game is based on players
competing either as Allied or Axis
characters, with a variety of different
game modes to choose from.
In order to play, you need to create a
multiplayer profile. To do this, select
New
in the Battleground Profiles menu. The Modify and Delete options
allow you to change your profile settings and eliminate existing profiles
you no longer want.
CREATING PROFILES
Here, enter your User ID and Password
(note that the Password and Re-type
Password fields must contain exactly
the same characters). When you’re done,
select
Save to return to the Battleground
Profiles Menu. Then select your profile
to enter the Multiplayer Menu.
Note: When a profile already exists, you
must enter the password in the same way as when the profile was created.
When creating a new profile, you must enter the password you entered
when logging in.
SUBOFFICERS
Of higher-rank than soldiers, subofficers
usually lead groups. They can be lieutenants,
sergeants, sappers, tank sub-officers
or scouts.
OFFICERS
An officer is one of the most precious enemy
troops. Officers lead their men in battle.
Enemy snipers are included in this category.
GENERALS
Generals always seem to be well protected
and escorted. They usually decide the routes
of patrolling troops.
GESTAPO
Perhaps the most powerful enemy unit, a
Gestapo officer can establish his enemy’s
identity in a split second
STATIC TROOP
Soldiers assigned to guard a specific position. They react to your presence
but hold their positions.
MOBILE TROOP
Soldiers covering a guard route. They react to your presence and leave their
positions to investigate any suspicious circumstances.
PATROLS
Group of mobile lookouts. These groups react to your presence and instruct
other enemies to: approach, track, sound the alarm, take cover, etc.
REINFORCEMENTS/GARRISON
Soldiers can respond to a request for reinforcements. They start from a fixed
point and spread out in their area of influence.
Page 11

~ 18 ~ ~ 19 ~
CREATING AND JOINING
MATCHES
From the Multiplayer Menu, you can either create
a match or join an existing one.
NORMAL SEARCH MENU
To display servers, specify a Match Type and then
select
Get New List.
CREATE MATCH
You must enter a Session Name in order to create
a match. The rest of the options define the rules
of the game and the map in which it will take place.
The Host can change maps from within a game.
MULTIPLAYER GAME SETUP
CHARACTERS AND CLASSES
Each side has the same three classes (Commando, Sniper and Spy) and specific
characters. Each player can choose from Allied and Axis characters and character class.
WEAPONS
You can choose a main weapon. Other equipment is standard issue for your type
of soldier.
FRIENDLY FIRE
(Team Deathmatch and Sabotage modes only)
If you select Friendly Fire: No, bullets will not harm your teammates,
though explosions and gas grenades will still cause damage.
SCORING
Scoring depends on the game type, but is divided into:
❑
Player Points — You score Player Points by killing enemies or completing mission
objectives. In multiplayer games, you’re rewarded in the form of special items
and weapons as your kill count increases.
❑
Team Points — Teams score Team Points by completing objectives.
Team Points are used to determine the winner of the game.
MULTIPLAYER GAME MODES
DEATHMATCH
In this classic free-for-all game mode you fight alone without joining a team.
Maps are simple to encourage faster gameplay. Players spawn randomly
on the map. A player wins by reaching the score limit (40 by default) first
or having the most points when time runs out (15 minutes by default).
SCORING
❑
A kill is worth 1 point.
❑
If a player accidentally kills himself (with a grenade, for example),
he incurs a -1 point penalty.
Page 12

~ 21 ~~ 20 ~
CREDITS
PYRO STUDIOS
Original Concept
Ignacio Pérez
Jorge Rosado de Álvaro
Producer
José Manuel García Franco
Lead Designer
Jorge Rosado de Álvaro
Game & Mission Design
Arturo Sánchez Eiras
Juan de Miguel Contreras
Level Design & Gameplay Scripting
Armando Sobrado Cros
Ignacio Valéncia Perello
Miguel Navío Vivó
Víctor Cerezo Olmo
Norvin José Altamirano Ruíz
Production
José Miguel Oliveros Pérez
Luis Fernando Sánchez García
With the collaboration of
Paul Robinson
The Design team would like to thank
César Valéncia, Sofía Manzano Sobrado,
para Montxe, a Carmen Garcia Higueras
y Luis Sanchez Fernandez,
a Ron Gilbert, a mi familia
y a mi novia Ana, Esther Ruiz Gomez,
a Alex, a Blanca, para Ana Cid
Art Directors
Francisco Javier Soler Fas
Juan Benito Garraza Zurbano
Lead Artists
Daniel Estival Hernández
Daniel Olaya Ortiz
Juan Jesús García Galocha
Artists
Pedro Solís García
Javier García-Lajara Herrero
Daniel Moreno Díaz
Omar Antonio Parada Martínez
David Laguens Velasco
José Manuel Pérez de Vries
Antonio José González Benitez
David Melchor Díaz
José Antonio Grandal Souto
José Augusto Rodríguez Sepúlveda
Angel Gabriel Díaz Romero
Diego Gimeno Ostertag
Javier Candeleda García
César Martínez Álvaro
Sergio Matesanz Gutiérrez
Eduardo Oliden Hermida
José F. Bermejo Fernández Salinero
Juan Servera Safon
Jaime Otegui Malo
David Mora Chamorro
Lead Animator
José Manuel Liébana Santamaría
Animators
Iván Lobón Herrera
Santiago García Berrocal
Iván del Río Gómez
The Art team would like to thank
Rafael Moreno, Nelly Casaña,
Gema Gómez, Pilar Usoz,
Paloma Amigo, Palos Colegas,
Tabitha Pocovi,
Concepción Fernandez-Salinero,
Maureen Helen, Virginia Rodriguez Mora,
Eva Margarita,
Alberto Domingo Rodriguez “Nano,”
Alicia García, Sara “PEKE,” Abel García,
Moni, Compañeros “Sierra Madrid,”
“Cascos de Bud,” Laura Barco Candeleda,
Ana Gómez, Laura González,
Pablo Boullosa Calvar, Lino García,
Olga Sanchez Morales, Nicolas Solís,
Mica Whitton, Julia Sanchez Falco,
Maximino Casanova,
a los colegas de Burguillos,
Iván De Andrés González,
Enrique Orrego Franco
Lead Programmer
Víctor Mendiluce Gil de Sagredo
Co-Lead Programmers
Francisco Ismael Raya Roa
Joaquín Martínez Albors
Programming
Daniel García-Arista Delgado
Raúl Chaparro Castellano
Raúl Mellado Arias
Juan José Garrido Gómez
Ángel Luis Cabrero Senderos
José Mª Calvo Iglesias
Cesar Botana Rivera
Gustavo Adolfo Carrazoni García
Rubén Ramos Salvador
Juan Alberto Muñoz González
Enrique José Sainz Navarro
The Programming team
would like to thank
A don Fidel y a Melusina,
para Charlie y para Zahara,
a Bo Fu, Maricarmen García Marco,
José Eduardo Pizarro,
a mi gatita Tygra,
familia García-Arista,
Yolanda Ballesteros,
a mi hermana Cruz
y a mi cuñado Víctor Boluda,
Fuensanta Gómez Giménez,
Rubén Seivane
y a Francisco José González Garrido,
Lolín la loca, María Rosa,
María José Sánchez Calderón,
familia Muñoz González, a Rosa “Peke,”
a Boni y Luis, a Eva (Darkbaby),
para Angewa, para Shua
Lead Tester
Isaac Barrón
A.P.T.C
José Ramón Díaz Martín
Test Department
Joaquín de Prado García
Manuel Mendiluce Gil de Sagredo
Juan Fernández De Simón Pérez
Javier Agenjo Torres
Manuel Martín Usero García
Álvaro Medina Agraz
TEAM DEATHMATCH
Similar to Deathmatch, but players are divided into two teams (Allied
and Axis). Maps are arena-style, kept simple to encourage faster gameplay.
Players spawn randomly on the map. A team wins by reaching the score
limit (100 by default) first or having the most points at the end of the time
limit set in the server for that map (20 minutes by default).
SCORING
❑
The same scoring system is used as in Deathmatch. Killing oneself does
not affect the team score.
❑
The team score (total score of all team members) determines the winner.
SABOTAGE
A variation on Team Deathmatch, in this mode the use of Spies is the key
to winning. The mission's overall objective is to sabotage enemy
installations by first sending in characters to interrogate the opposition in
order to gain a code key to arm the enemy bomb.
The Spies on both sides are the only characters who can interrogate players
on the enemy team. Every time an opponent is killed, he will remain
susceptible to interrogation for a few seconds. During this time a Spy can
interrogate him (by getting close and pressing
F with the crosshair over
the victim until the meter is full). If the opponent is a Spy, he can reveal half
of the code key (3 digits); if not, he can only reveal 1 digit. A Spy has
a longer interrogation time (10 seconds) than the other characters
(5 seconds).
Note: The code key is a 6-digit code.
As soon as a Spy finds out the code key, he can go and sabotage the enemy
base. When a Spy successfully sabotages the enemy base, his side scores.
Maps have two distinct base areas, one for each side, where players spawn
and sabotage.
The first team to reach the score limit or with the most points at the end
of the time limit configured on the server for this map wins.
Note: Each team must have at least one Spy.
SCORING
❑
Players score points by killing or interrogating opponents
(1 individual point).
❑
Team points are awarded for sabotaging the enemy base (1 team point).
Page 13
~ 22 ~ ~ 23 ~
The Test team would like to thank
Esther Fernández, Mónica Gómez-Hidalgo,
Conchi Álvarez, Chinaski,
Piso Sentinel, Edgar Alía,
Music Composed by
Mateo Pascual
Sound Lead
Mateo Pascual
Fernando Román Martínez
Music Performed by
The Bratislava Symphony Orchestra and City Choir
Conductor: David Hernando
Orchestrator: Luis Miguel Cobo
Concertino: Pavel Bogacz
CEO/Creative Director
Ignacio Pérez
Development Director
Francois Coulon
Marketing Director
Iñigo Vinós
Marketing Materials Designer
Maria José Romero
Administration
Marta Lorenzo Zamorano
Laura Leo Fernández
Special Thanks
Our friends from other projects, our friends from Proein,
Luis Calero, Fernando Hernando,
Mariano Parra, Enrique Gato,
Rafael Lozano, Raul Ovejero,
Óscar Rodriguez, Fernando Colomer,
Rubén Alcañiz
EIDOS UK
Executive Producer
Michael Souto
Brand Manager
Adrian Arnese
Localisation Manager
Alex Bush
Head of Communications
Chris Glover
PR Manager
Gareth Ramsey
European PR Manager
Emily Britt
Creative Manager
Quinton Luck
Creative Designers
Gus Aliyu, Jodie Brock, Philippa Pratley
Website Design
Christophe Taddei, Leigh Kirwan
QA Manager
Marc Titheridge
QA Supervisors
Ghulam Khan
Dave Isherwood
Product Test Co-ordinators
Lawrence Day
Gabriel Allen
Paul Harrison
Assistant Product Test Co-ordinator
Adam Phillips
QA Technicians
Ben Asghar
Adam Humphrey
Andrae Mackenzie
James Cawte
Jonathan Fuguet
Josh Roulston
Jonathan Fuguet
Mark Parker
Stefan Vincent
Andrew Nicholas
Jamie Stokes
Alex Kunzelmann
David Fowler
Damien Peter
Gareth Mills
Ben Davis
Sam Beard
Andrew Brown
Edward Crone
Linus Dominique
Daniel Mills
Richard Dunham
Head of Mastering/Compatibility
Jason Walker
Mastering Engineer
Ray Mullen
Compatibility Engineer
Marc Webb
Localisation QA Manager
Arnaud Messager
Localisation Product Test Co-ordinator
Laure Diet
Localisation Technicians
Pablo Trenado, Martín Zumarraga,
Iain Willows, Edwige Béchet,
Augusto D’Apuzzo, Marco Angiuoni,
Alessandro Marchesini, Grzegorz Kluz,
Thomas Orciuch, Tobias Horch,
Henrik Prinz, Lars Carstensen
Francisca Barceló Ávila
Operations
Bernadette Cowan
Peter Willis
Richard Lever
Special Thanks
Mark Christy, Patrick Cowan,
Flavia Timiani, All at Side UK,
Neeltje, Spitfire, John Webb,
Simon Wells, Chris Rowley,
Steve Starvis, Mark Allen,
Roxana Daneshmand, Lee Briggs,
Andy Cockell, Scott Sutherland,
Marco Vernetti, Iain Willows,
Nicola Mason, Caroline Simon,
Amanda Green, Karen Johnson,
Carmel Hudson, Monica Dalla Valle
EIDOS US
CEO & President, Eidos North America
Bill Gardner
Executive Vice President of Sales & Marketing
Bob Lindsey
Vice President, Legal & Business Affairs
James O'Riordan
Vice President, Finance
Malcolm Dunne
Vice President, Human Resources
Edie Dykstra
Marketing Manager
David Bamberger
Director of Public Relations
Michelle Seebach Curran
Public Relations Manager
Tali Fischer
Senior Public Relations Manager
Loretta Stevens
Online Community Specialist
Matt Dalghren
National Sales Manager
Joe Morici
Channel Marketing Manager
Janty Sumimoto
Senior Channel Marketing Specialist
Ilana Budanitsky
Channel Marketing Coordinator
Rafal Dudziec
Director of Marketing Communications
Stephanie Lipetzky
Creative Services Project Manager
Eileen Buenviaje
Media Specialist
Micheal Tran
Graphic Designer
James Song
Web Producer
Roderick Van Gelder
Operations Manager
Gregory Wu
Senior External Producer
Nick Goldsworthy
Associate Project Manager
Clayton Palma
Associate Manager of Product Operations
Colby McCracken
Quality Assurance/Customer Service Manager
Mark Cartwright
Product Test Coordinator
Stephen Cavoretto
Assistant Product Test Coordinator
Elizabeth Rutlin
Quality Assurance Technicians
Richard Hartzell
John Hayes
Clint Waasted
Nicholas Cooprider
Mackenzie Hume
Jeff Lowe
Dan Franklin
Erik Kennedy
Kip Ernst
Ergin Dervisoglu
Aaron Keillor
Richard Campbell
Special Thanks
Jordan Romaidis, Patrick Goodspeed,
Annie Meltzer, Hanshaw Ink & Image,
Rocketshop, Shane Francis Co.,
Chip Blundell, Sean Mylett,
Susan Kwon, Danny Jiang
ONLINE FEATURES
THE ON-LINE FEATURES OF THIS GAME AR E SUBJECT TO ACCEPTANCE OF ON-LINE TERMS OF SERVICE. EIDOS RESERVES
THE RIGHT TO CHANGE OR TERMINATE THE ON-LINE FEATURES OF THIS GAME. E IDOS MAKES NO GUARANTEE AS TO THE
AVAILABILITY OF THE ON-LINE FEATURES FOR THIS GAM E OR THAT THE EIDOS ON-LINE SERVICE WILL BE UNINTERRUPTE D
OR ERROR-FREE. Please read the Eidos On-line Terms of Service for full terms and conditions, a copy of which is available
at www.eidos.com/online and in-game. Certain on-line features may be subject to payment of an additional fee.
RATINGS
The Game’s content has been rated T for TEEN. However, the content of the Game may change due to interactive
exchanges between players in On-line mode. Eidos does not accept any responsibility for content which is external
to the Game itself. Please refer to the Terms of Service for further conditions of use relating to On-line play.
Page 14

~ 24 ~
EIDOS, INC., LICENSE & LIMITED WARRANTY
Eidos, Inc., warrants to you, the original purchaser of this disc, that for a
period of ninety (90) days from the date of your purchase, this disc shall be
free from defects in materials and workmanship. If, at any time during the
applicable ninety (90) day warranty period you determine that this limited
warranty has been breached, Eidos, Inc., agrees, in its sole option, to repair or
replace, free of charge, any such disc, provided the disc is returned postagepaid to the Eidos, Inc., Factory Service Center and a proof of date of purchase
is included. This limited warranty is not applicable to normal wear and tear
and shall be void with respect to any defects that arise from disc abuse,
unreasonable use, mistreatment or neglect. This disc is sold “as is” without
any warranties of any kind, express or implied, including implied warranties
of merchantability or fitness for a particular purpose, other than the limited
warranty expressly stated above.
No other claims arising out of your purchase and use of this disc shall be
binding on or obligate Eidos, Inc., in any manner. Eidos, Inc., will not be liable
to you for any losses or damages incurred for any reason as a result of your
use of this disc, including, but not limited to, any special, incidental, or
consequential damages resulting from your possession, use or malfunction
of this disc.
This limited warranty states the entire obligation of Eidos, Inc., with respect
to the purchase of your disc. If any part of this limited warranty is determined
to be void or illegal, the remainder shall remain in full force and effect.
For warranty support please contact our Customer Support department at
(415) 615-6220. Our staff is available Monday through Friday, 9:00 a.m. to
12:00 p.m. and 1:00 p.m. to 5:00 p.m. Pacific Time. You are responsible for all
toll charges. Customer Support Representatives will not provide game hints,
strategies or codes.
PRODUCT RETURN PROCEDURE
In the event our support agents determine that your game disc is defective,
you will need to forward material directly to us. Please include a brief letter
explaining what is enclosed and why you are sending it to us. The agent you
speak with will give you an authorization number that must be included and
you will need to include a daytime phone number so that we can contact you
if necessary. Any materials not containing this authorization number will be
returned to you unprocessed and unopened.
Send your postage-paid package to the following address:
Eidos, Inc. Customer Services
RMA# (state your authorization number here)
651 Brannan Street, Suite 400
San Francisco, CA 94107
You are responsible for postage of your game to our service center.
® 2006 Creative Technology Ltd. The Creative logo, Sound Blaster logo, X-Fi logo, EAX logo,
EAX ADVANCED HD logo are registered trademarks of Creative Technology Ltd, in United
States and/or other countries. All brands or product names listed are trademarks or registered
trademarks and are property of their respective holders.
Register online at
www.eidosregistration.com
CONTACTING TECH SUPPORT
If you have a technical problem with
the game, our Support Department is
here to help. Our web site contains
up-to-date information on the most
common difficulties with our products;
this information is the same as that
used by our support agents. If you are
unable to find the information you
need on our web site, please feel free
to contact us via email, fax, telephone
or letter. (When contacting us via
email or fax, please be sure to put the
game title in the subject of your
message.)
ASSISTANCE VIA THE WORLD
WIDE WEB
The fastest way to answer most
questions is by visiting our online
support. You can find the latest
support information at
http://support.eidosinteractive.com/GI
/CustomerSupport/FaqSearch.jsp. Our
support FAQ’s are available 24/7 for
your convenience. These pages are
updated frequently and have the same
information that our support techs will
use to answer your question if you call
or email us. The answers to about
90% of the questions we are asked
can be found there, so it really is
worth the time to take a look!
The second fastest way to get an
answer to your question is to email us.
(You will find our email submission
forms at our web site.) We typically
respond to email queries within 24-48
hours during the business week.
Response times can be considerably
longer over the weekend, holidays and
immediately after a product release. It
all depends on how many people we
have working and how much email is
coming in at any one time, but we do
try really hard to get you the right
answer as quickly as possible.
Weekdays, excluding holidays, during
the hours when the phones are open,
we still give email questions our
highest priority.
Through this site you will also have
access to our FTP (File Transfer
Protocol) area where you can
download patches and new
enhancements as soon as they become
available.
ASSISTANCE VIA TELEPHONE
OR FAX
We are available to take your calls
Monday through Friday, 9:00 a.m. –
12 noon and 1 p.m – 5:00 p.m.,
Pacific Time at (415) 615-6220 (voice)
or (415) 547-1201 (fax). Our tech
support department is closed on all
major holidays.
Note: You are responsible for all toll
charges when calling.
To ensure the quickest service you will
need to be at your computer and have
the following information at hand:
• A complete listing of your
computer’s hardware. (Contact your
computer manufacturer if you are
unsure.)
• What version of Windows®you
are using.
• A copy of your DirectX Diagnostics
report.
1. Click Start.
2. Click Run.
3. Type dxdiag.
4. Click OK.
5. Click the Save Information button
and save the file to your
computer.
6. When you call our Technical
Support line, either have this file
open or have a printed copy.
If you send an email query you
may attach the file to the email.
• What error message(s), if any, you
have had.
• How the game is currently
configured.
NOTE: OUR SUPPORT AGENTS DO NOT HAVE AND WILL NOT GIVE
GAME HINTS STRATEGIES OR CODES
TECH SUPPORT
 Loading...