

Page 1
TM
Page 2
8
0
0
RED EAGLE PASSES HAWK
0
4
IDEOLOGY: It came to Stalin in a series of dreams. The birthright of the Soviet
Empire is nothing less than conquering and dominating the entire globe. And the
birthright of Josef Stalin is nothing less than conquering the spirit and dominating the
actions of every Soviet citizen.
CURRENT HEAD OF STATE: Josef Stalin
BASE OF OPERATIONS: Entire EuroAsian peninsula. Command posts
identified in Moscow, Kiev, Stalingrad, Khartoum, Karachi, Da Nang.
MILITARY STRENGTH: Enlisted forces exceed 14 million. Non-regular
forces, including police and NKVD, about 7 million.
ECONOMIC STRENGTH:
Considerable operating assets believed to
be in excess of 486.2 billion Swiss
Francs.
POLITICAL STRENGTH:
Since every person in the Soviet Union
must be a member of the Communist
Party, an incredible agent network of over
200 million citizens have infiltrated the
governments of most Pan African, Pan
Indian and Pan Asian governments with
suspected strongholds in Mexico City and
Vancouver.
AFFILIATIONS: World Democratic
Society; Asian Defense League; Freedom Consortium.
SEE ALSO: Henderson, D.K. and Chou, K.L., Soviet Terrorist Activities.
Page 3

1
0
1
RED ALERT RED ALERT
0
5
IDEOLOGY: To resist Soviet aggression against any first and second world
powers. Uphold ideals defined in World Association of Nations charter.
CURRENT TITULAR LEADER: General Gunter von Esling, Supreme
Commander of Allied Forces.
BASE OF OPERATIONS: Headquarters, Unified Operations, London;
Northern Theatre, Oslo; Southern Theatre, Madrid.
MILITARY STRENGTH: Enlisted forces about 3.4 million. Non-regular
forces, including guerrilla and resistance forces, about 1.7 million. Armament classified
per DEFCOM document 177.4, Allied Defense Regulations.
ECONOMIC STRENGTH: Satisfactory. Assets classified because of number
of governments and currencies.
POLITICAL STRENGTH: Not applicable. Currently operates as modified
Military Junta.
AFFILIATIONS: United Nations
SEE ALSO: Einstein, “A History of Allied Weaponry.” Fort, Charles A., “F-
Invasions and Telemetry”.
Page 4
5
0
2
SOVIET FORCES SECT SEVEN
0
6
SYSTEM REQUIREMENTS
WINDOWS 95
An IBM or 100% compatible computer with Pentium CPU required
Windows 95 required, 8MB of RAM (16MB strongly recommended)
1MB PCI or local bus video accelerator card (ISA video cards not supported) & color monitor.
Digital Audio via Windows 95-supported Sound Cards
Double-speed CD-ROM or faster, 40MB free Hard Drive space
14.4 (28.8 recommended) modem for modem play
IPX network for Local Area Network play, Keyboard, Mouse
INTERNET REQUIREMENTS (Windows 95 only)
28.8 modem or direct Internet connection, Winsock 1.1 compliant TCP/IP stack, 16MB RAM
DOS
An IBM or 100% compatible computer with minimum 486 66Mhz CPU
MS DOS version 5.0 or higher or Windows 3.1 or higher
8MB of RAM (16MB recommended)
VGA or MCGA (256 color) graphics adapter & color monitor
Digital Audio via Sound Blaster, Sound Blaster Pro, Sound Blaster 16, Sound Blaster AWE/32 and
100% Sound Blaster compatible cards, Gravis UltraSound, Gravis UltraSound MAX,
Ensoniq Soundscape, Roland RAP-10, ESS Audiodrive, Microsoft Sound System,
Gold Sound Standard or Pro Audio Spectrum 16.
Double-speed CD-ROM or faster, 40MB free Hard Drive space
14.4 (28.8 recommended) modem for modem play
IPX network for Local Area Network play, Keyboard
100 % Microsoft compatible mouse
SETUP & INSTALLATION
WINDOWS 95
Insert any Red Alert CD into the CD-ROM drive.
Red Alert for Windows 95 uses the “Windows 95 Autoplay” feature to present you with installation
and gameplay options as appropriate. Inserting any Red Alert CD into your CD-ROM drive should
cause the autoplay dialog to appear. If you have not installed Red Alert before, you will be presented
with an “Install” option from this dialog. Click this and follow the on-screen instructions.
In the event that the “Windows 95 Autoplay” feature does not work on your system, you should
install the product by clicking on the “Start” button on the Windows 95 taskbar, located in the lower
left-hand corner of the screen. Click “Run…”, type “D:\SETUP” (where D is the letter that designates your CD-ROM drive), and then click the “OK” button. Please follow the on-screen instructions which appear.
Once Setup is complete, you will be returned to Windows. By default, Red Alert is installed into
a directory named C:\WESTWOOD\REDALERT.
Page 5
4
4
1
BUILDING RUNWAYS
0
7
DOS
Insert any Red Alert CD into the CD-ROM drive. At the C:\> prompt, type "D:" [Enter] (where D
is the letter that designates your CD-ROM drive). Once you see the new prompt (“D:\>“ in this
case), type "SETUP" [Enter].
Please follow the on-screen instructions which appear.
By default, Red Alert is installed into a directory named C:\WESTWOOD\REDALERT.
Note: If you are installing the DOS version of Red Alert on a system running Windows 95, please
follow the Windows 95 installation instructions. This will install entries for the DOS game under
the “Red Alert” sub-menu under the “Westwood” program group.
WINDOWS AND WINDOWS FOR WORKGROUPS V.3.1 & V.3.11
(DOS version only)
Insert any Red Alert CD into the CD-ROM drive.
From the Windows Program Manager select the "File" menu. From this menu select "Run". From
the pop-up dialog type "D:\SETUP" (where D is the letter that designates your CD-ROM drive),
then click on the “OK” button.
Please follow the on-screen instructions which appear.
Once SETUP is complete you will be returned to Windows where a “Westwood” program group
containing icons for Red Alert and the Setup program will be added to the desktop.
By default, Red Alert is installed into a directory named C:\WESTWOOD\REDALERT.
LOADING INSTRUCTIONS
WINDOWS 95
Insert any Red Alert CD into the CD-ROM drive.
Red Alert uses the “Windows 95 Autoplay” feature to present you with installation and gameplay
options as appropriate. Inserting any Red Alert CD into your CD-ROM drive should cause the autoplay dialog to appear. If you have previously installed Red Alert you will be presented with a “Play”
option from this dialog. Click this to launch the game. The Introduction to the game will follow.
Alternatively, Red Alert can be launched by clicking the “Start” button on the Windows 95 taskbar,
clicking “Programs”, then “Westwood”, then “Red Alert”, and then clicking “Red Alert Windows
95 Edition”.
DOS
Insert any Red Alert CD into the CD-ROM drive.
At the C:\> prompt, type "CD \WESTWOOD\REDALERT" [Enter] and then type "RA" [Enter].
If you have installed Red Alert to another directory you must type "CD [name of your directory]"
[Enter] first, then type "RA" [Enter].
Note: If you have installed the DOS version of Red Alert on a system running Windows 95, you
should ignore the “Windows 95 Autoplay” dialog which pops up when you insert the Red Alert
CD; instead, you should run the game by clicking the “Start” button on the Windows 95
taskbar, clicking “Programs”, then “Westwood”, then “Red Alert”, and then clicking “Red Alert
DOS version”.
WINDOWS AND WINDOWS FOR WORKGROUPS V.3.1 & V.3.11
(DOS version only)
Insert any Red Alert CD into the CD-ROM drive. From the Windows Program Manager, double click on the “Red Alert DOS” icon which can be found in the Westwood program group.
Page 6
6
6
6
ASSAULT UNITS
0
8
STARTING THE GAME
CHOOSING YOUR SIDE: ALLIES OR SOVIETS
C&C: Red Alert gives you the option to play one of two distinct fighting forces: The Allies,
consisting of a handful of remaining free European countries that oppose Stalin; or the
Soviet Empire, the mighty war juggernaut bent on continental domination.
If you choose the Allies, you will fight against the Soviet Empire. If you choose the Soviet
Empire, you will fight against the Allies. Each side is radically different from the other,
with varying strengths and weaknesses, different units, technologies, and different
philosophies towards war. In addition, different stories will unfold depending on the side
you have chosen.
The first time you load the game, you will be taken right into the game itself, depending
on the CD inserted. If you put in the Soviet CD, the Soviet game will start. If the Allied
CD, the Allied missions will begin.
When you start a new game, a dialog box will come up asking which side you wish to
play. Simply click the side that you want and that game will begin. You may be asked
to swap the CD in the drive, depending on which side you want to play.
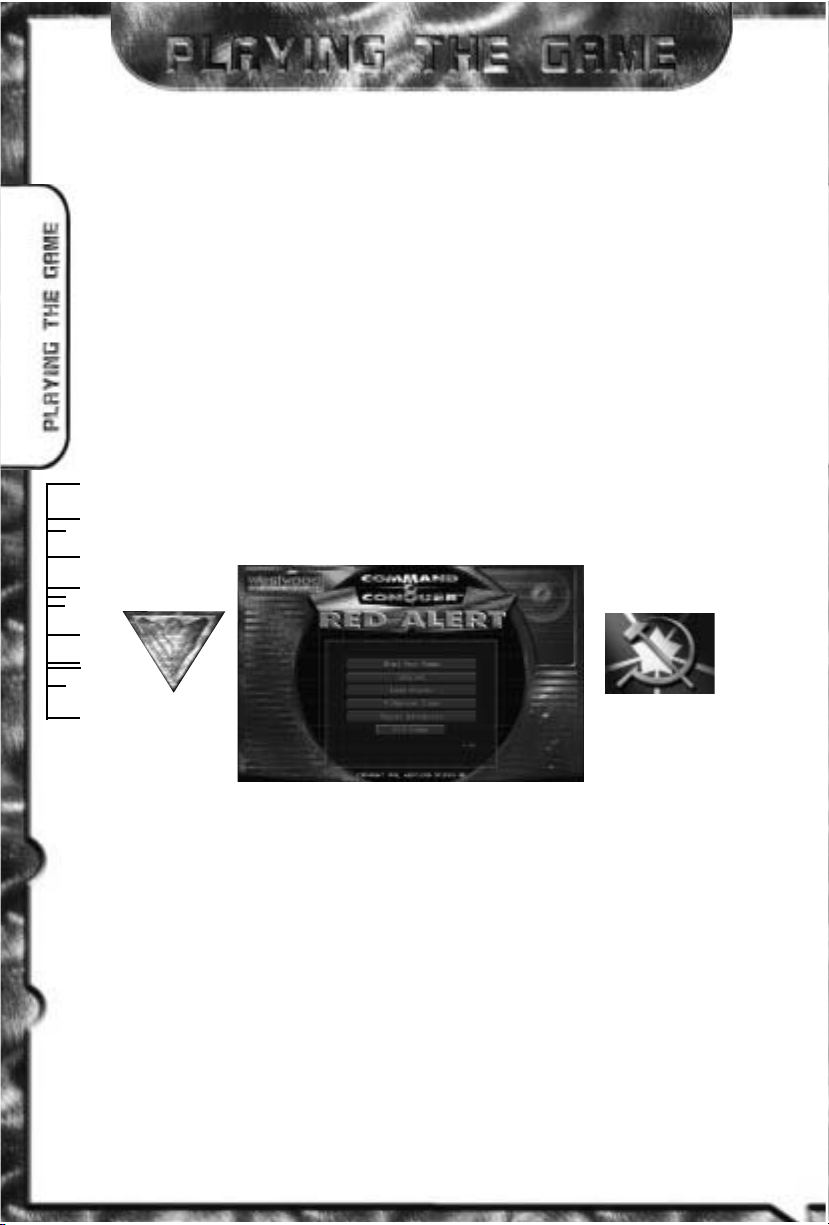
TITLE SCREEN MENU
TITLE SCREEN MENU
When you start the game for the first time, you’ll be treated to C&C: Red Alert’s exciting introduction. After which the game itself will begin. In subsequent games, you’ll be
taken directly to the Title Screen menu.
START NEW GAME
If you want to start a new game, choose this option. Your new game will start with a screen
for you to select your difficulty level, then present you with the choice of which side to play:
Allies or Soviet. When starting a new game, the introduction is not shown again.
ALLIES SOVIETS
Page 7
9
6
5
DISPATCH ASAP
0
9
DIFFICULTY LEVELS
There are 3 difficulty settings, which will change the balance of the game. We recommend
playing the game at “Normal” difficulty, but if you feel the game is too hard or too easy,
you can tailor it to your tastes. Difficulty can ONLY be set at the beginning of a new game
– you cannot change it once you are in the missions.
Depending on what you set the difficulty to, your units and structures could be cheaper / more
expensive to build, move faster / slower, fire quicker / slower, and the opponent’s will be the
opposite.
INTERNET
Select this option to go on-line via Westwood Chat and play over the Internet. (Windows 95
only, see page 28 for internet play.)
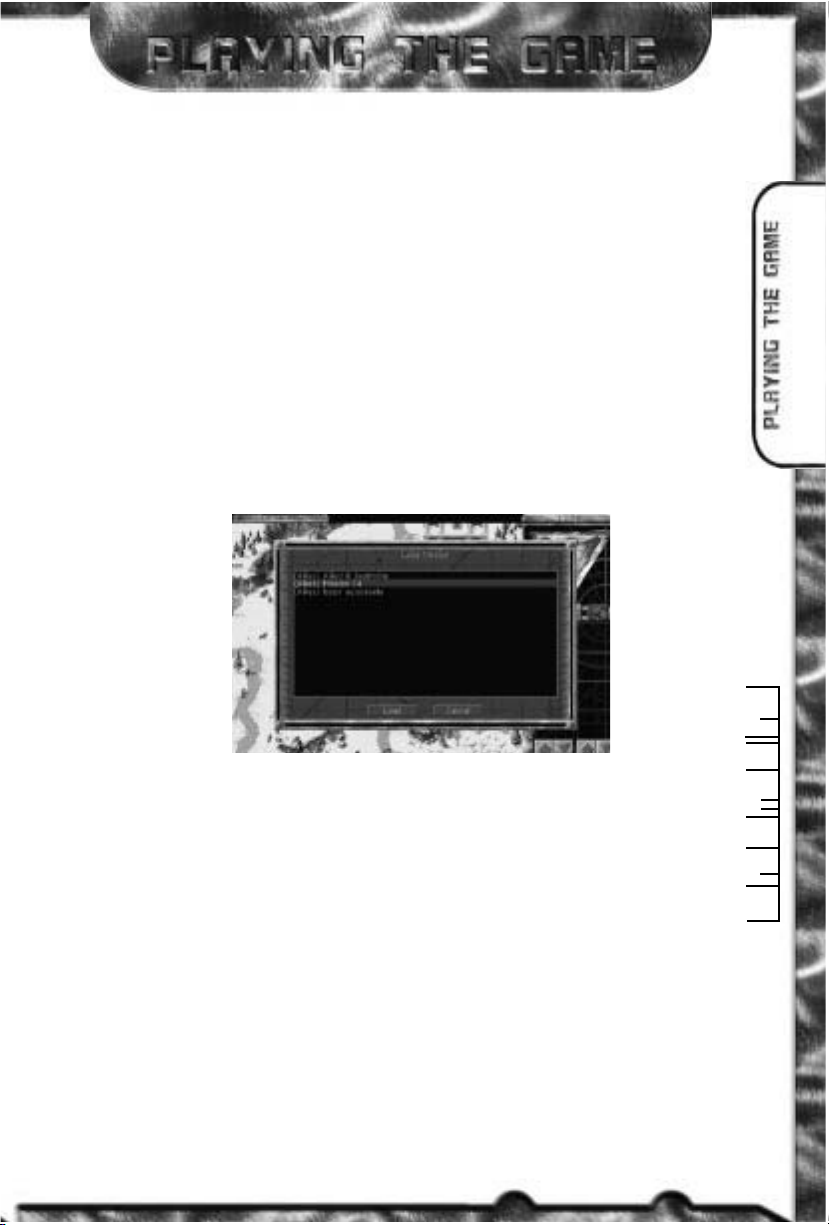
LOAD A MISSION
If you want to play a previously-saved mission, choose this option. (See page 21 for saving
missions.)
LOAD MISSION SCREEN
From this screen (see diagram), click on the up-arrow or down-arrow to scroll through your
saved missions. Select the saved mission you wish to reload and left-click on LOAD.
MULTIPLAYER GAME
This option allows you to select a skirmish, multiplayer network (if detected) or serial (null
modem or modem) game. See the Multiplayer Game section (page 28) for more details.
REPLAY INTRODUCTION
If you want to see the introduction again, select this option.
EXIT GAME
Select this option to exit back to the Windows 95 desktop or DOS, depending on what version you are playing.
Page 8
MESSAGE COM HQS SEVEN
1
0
C&C: RED ALERT’S BASIC INTERFACE
The interface for C&C: Red Alert has been designed to allow maximum control of your units
and structures with little effort. If you are familiar with the Windows environment (point &
click, etc.), then you can play C&C: Red Alert with ease. The mouse will move your pointer
around the screen, and depending on what you click on, you can order units, build structures, attack, repair, and perform a variety of other commands. As a general rule in C&C:
Red Alert, left clicking confirms orders, changes modes, or selects units and structures. Right
clicking pauses and cancels actions, modes and selections.
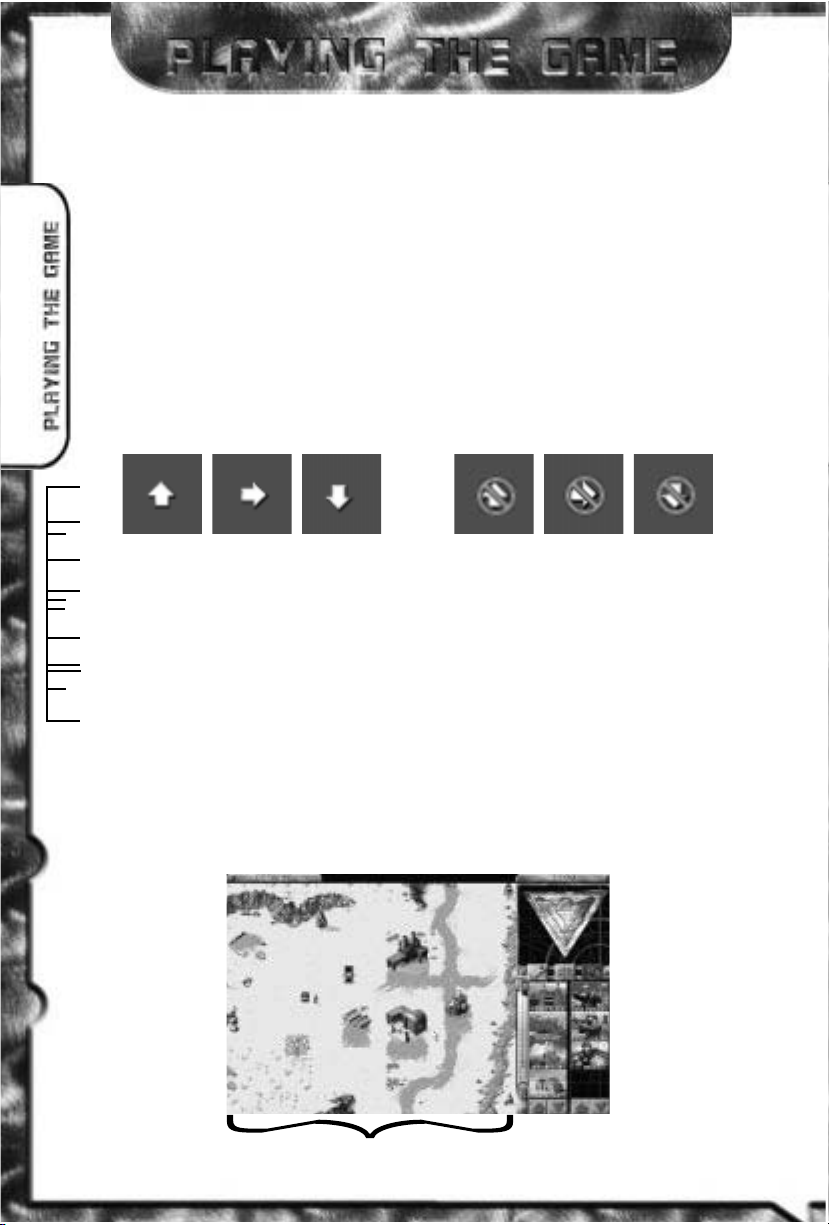
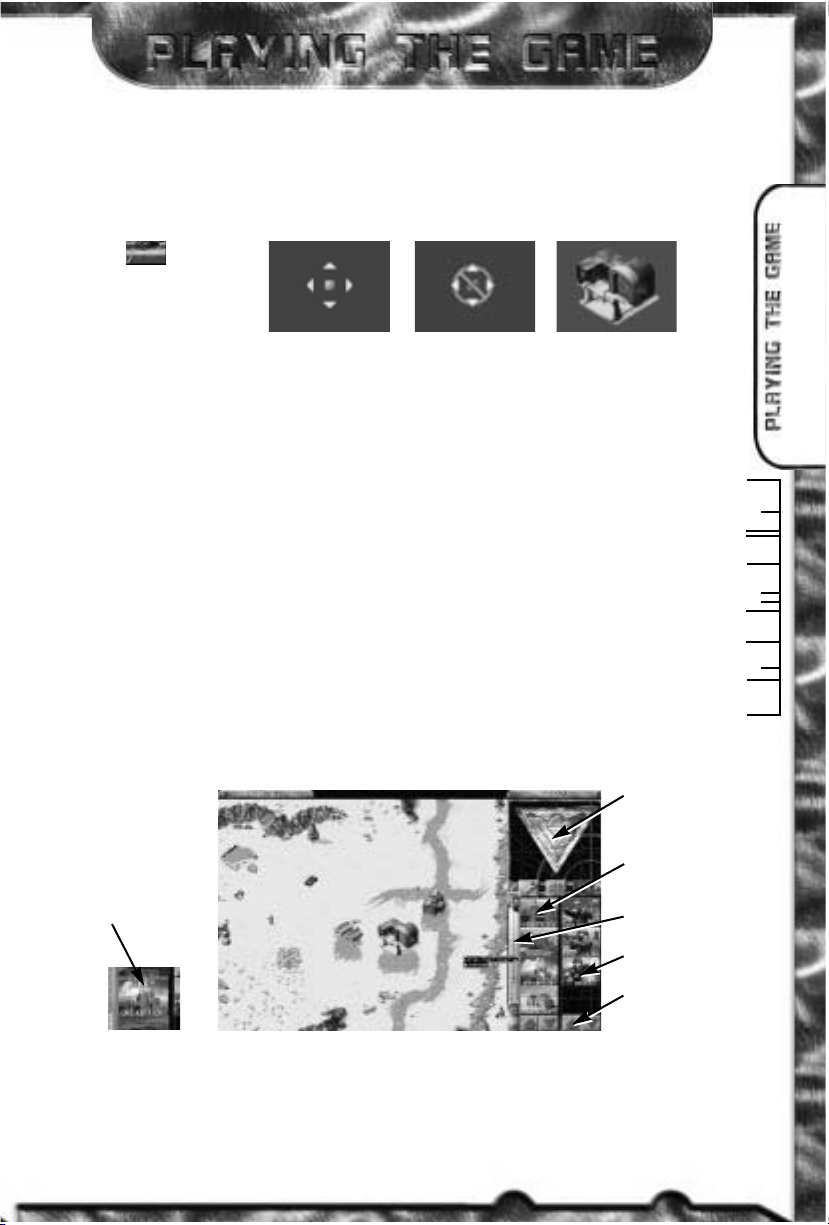
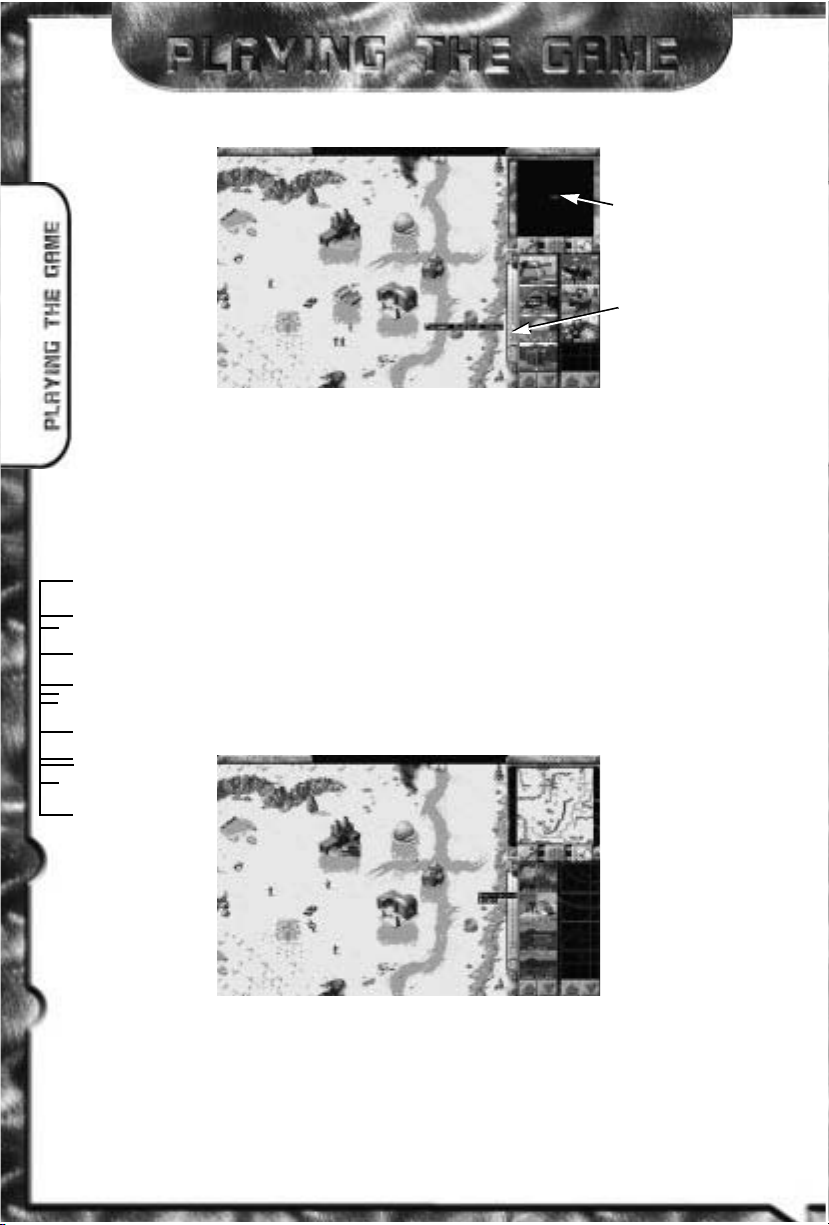
SCROLLING AROUND
To scroll the main viewing window around the battlefield, move the cursor to the edge of
the screen. The cursor will become a solid white arrow and the view will scroll in the indicated direction. If you’re at the edge of the battlefield, a universal no slash will appear over
the arrow indicating that this is as far as you can go.
SCROLL ARROWS CAN’T SCROLL ARROWS
ORDERING YOUR TROOPS AROUND
To get your units to act, select a unit by left-clicking on them, then move the cursor to the
desired point on the battle field where you want the unit to go. If the cursor is over a potential target, it will change to one of the targeting cursors (see targeting cursors on next page).
Left-clicking at this point will cause the unit to attack the target. Otherwise, it will move the
unit to that location, unless it is impassable (e.g. a cliff or trees), in which case it will get as
close as it can to the target.
You can select your aircraft while they are in the air by band-box selecting (see group activities) them while they are in flight. You can then give them new orders, check their health, etc.
To cancel out of move / attack mode (or any mode), right-click and the unit will be deselected. Although no longer selected, the unit will retain its orders, so it will continue to follow its last command. To stop a unit from moving, select it again and redirect it to a new
location or press the ‘S’ key to make it stop.
8
4
0
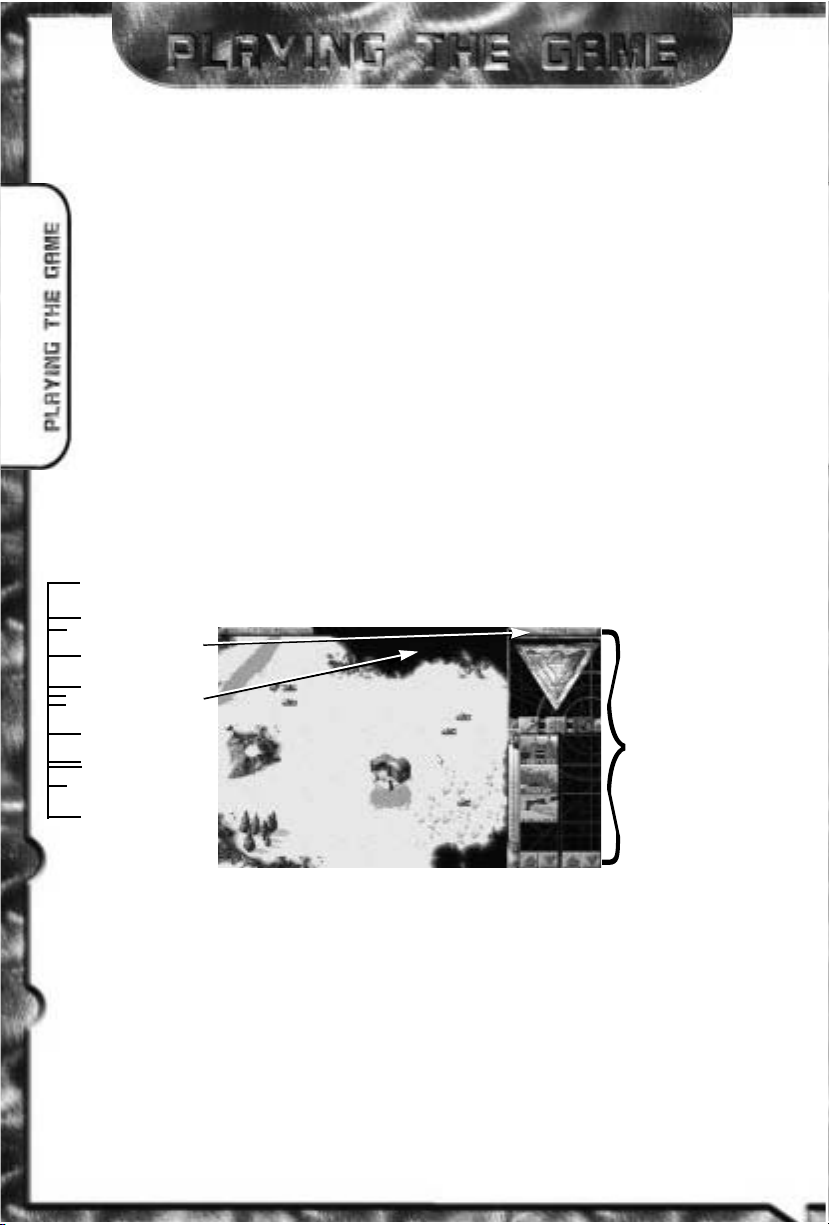
MAIN
GAME
SCREEN
THE BATTLE FIELD
Page 9
8
5
7
DECODE CRYPTO
1
1
SELECTION MOVEMENT NO MOVE
CURSOR CURSOR CURSOR
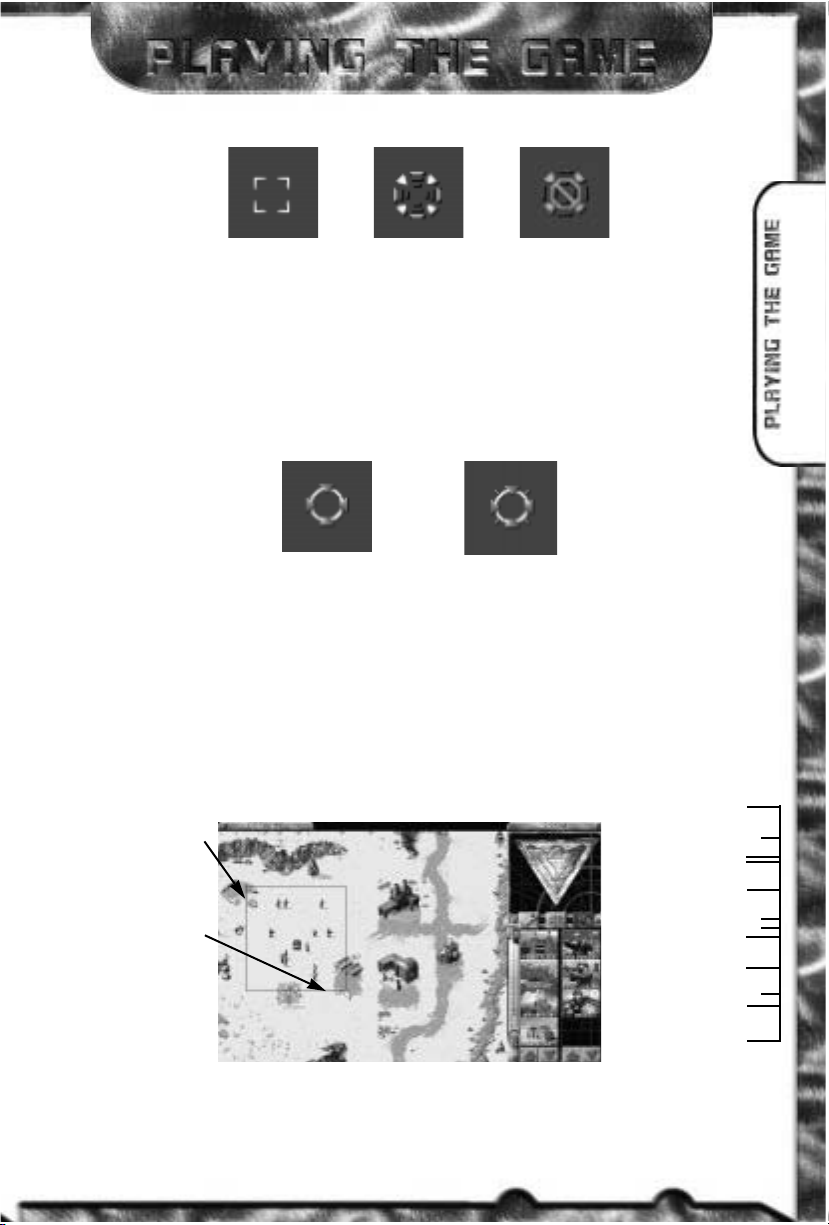
TARGETING CURSORS
There are two targeting cursors in C&C: Red Alert. The difference between the two is not
large, but depending on which cursor you get, you can tell whether the selected unit is within
range of the target, or if it will have to move to attack the object you’ve targeted. This information becomes important later in the game with some of the longer-range units (or when
you’re trying to avoid their effects). Note that this information will only be available when
one unit is selected at a time.
TARGET, TARGET, NOT
IN RANGE CURSOR IN RANGE CURSOR
GROUP ACTIVITIES
To save time, you can form teams among your troops. To select several units simultaneously,
left-click and hold the mouse button down. Drag the mouse cursor to include all the troops
you want selected. A white box outline indicates the range of this selection. Then, release
the mouse button, and all the units within the white box will be selected. You can give that
group an order the same way you’d give a single unit an order. Some units in groups will
not respond to certain commands. For instance, a Medic in a group ordered to attack will
not move when the rest of the group engages, because he has no weapon.
SELECTING A GROUP
LEFT CLICK
AND HOLD
BUTTON
DOWN
THEN DRAG
THE CURSOR
TO INCLUDE
DESIRED
UNITS
Page 10
VULTURE SNACKS
1
2
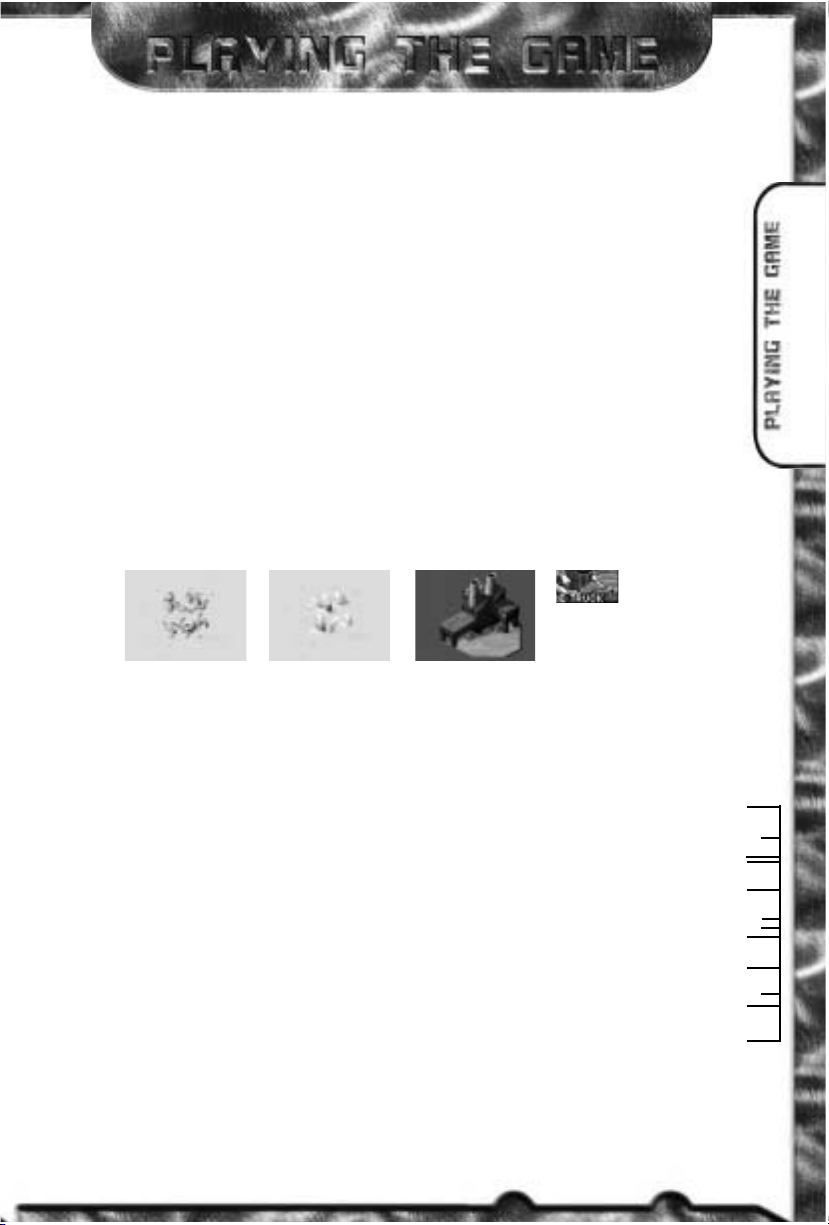
THE SHROUD
When you start a mission, much of the battle field will be covered with a black “Shroud.”
This represents the unknown areas of the battle field that are unexplored. As you move your
units towards the edge of the visible area, the Shroud will be uncovered around them depending on how far the units can “see”. You can order a unit to move deep into the Shroud,
uncovering large sections of the area at a time. Some structures or units will be able to replace
the Shroud, blocking you (or your opponents) from seeing in that area.
THE SIDEBAR
The Sidebar is your tool for accessing information and abilities not directly related to your
troops. With it, you can build units and buildings, get a radar view of the area (if you have
a Radar Dome or GPS) and also tell you how much power your base is producing vs. how
much it needs.
In the Windows 95 version of C&C: Red Alert, the Sidebar is always open and cannot
be closed. In the DOS version, it can be toggled open or closed. From the Main Game
screen, the Sidebar may be opened by left-clicking the Sidebar button in the upper right
corner. Click on it a second time to close it. If you have a Construction Yard, the Sidebar
will open automatically. The Credit Indicator is located above the Sidebar button in Win
95 and to the left in DOS. This tells you how much money you have to maintain your base
and its forces. See the section on Ore and Collecting for more information on credits and
how to earn them. (See page 17)
SIDEBAR OPEN
BUILDING YOUR BASE
Critical to the success of many missions is the construction of your own field Base, and
the constant maintenance and defense of this Base during combat. The Base is necessary
for the gathering of resources (through the Ore Refinery with its accompanying Ore Truck),
construction of units, and defense thereof.
To begin building your Base, you must have a Construction Yard. Unless the Construction
Yard is set up when the mission begins, you’ll have to deploy the Mobile Construction
Vehicle (MCV). Move the MCV to where you want the Construction Yard placed. Move
8
3
3
CREDITS
SHROUD
SIDEBAR
Page 11
the cursor over the MCV and you’ll get the Deploy cursor. You’ll need clearance on all
sides of the MCV in order to deploy it. If you try to deploy the MCV where there isn’t
enough room, you will receive the No Deploy cursor, and the MCV won’t deploy. If you
do have enough room, left-click to deploy the MCV, and it’ll turn into a Construction Yard.
MCV DEPLOY NO DEPLOY CONSTRUCTION
CURSOR CURSOR YARD
In DOS, once the Construction Yard is set up, the Sidebar will open. In Win 95, the Sidebar
will fill with icons and become active. In the large upper window on the Sidebar, you will
see the symbol of your side (Allied or Soviet). Later, this area becomes a radar display
once you’ve built a Radar Dome – and have enough power to run it.
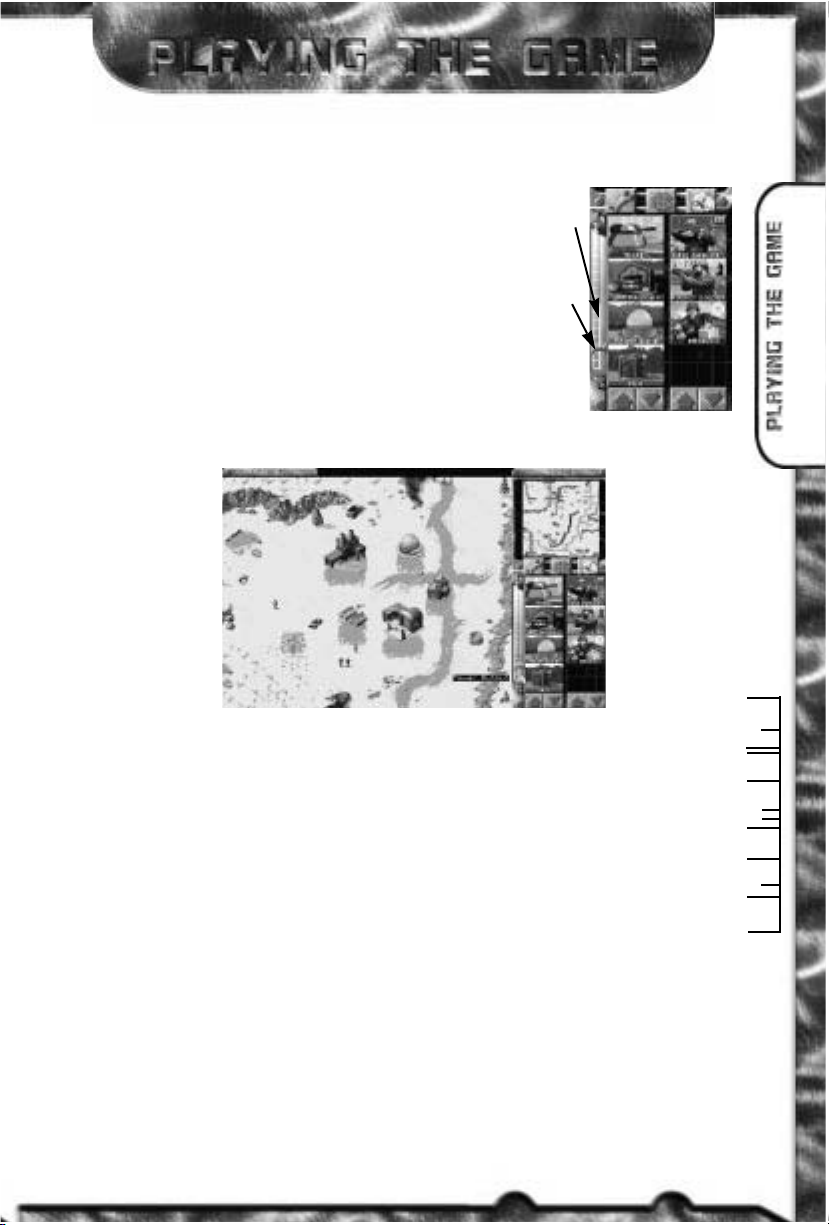
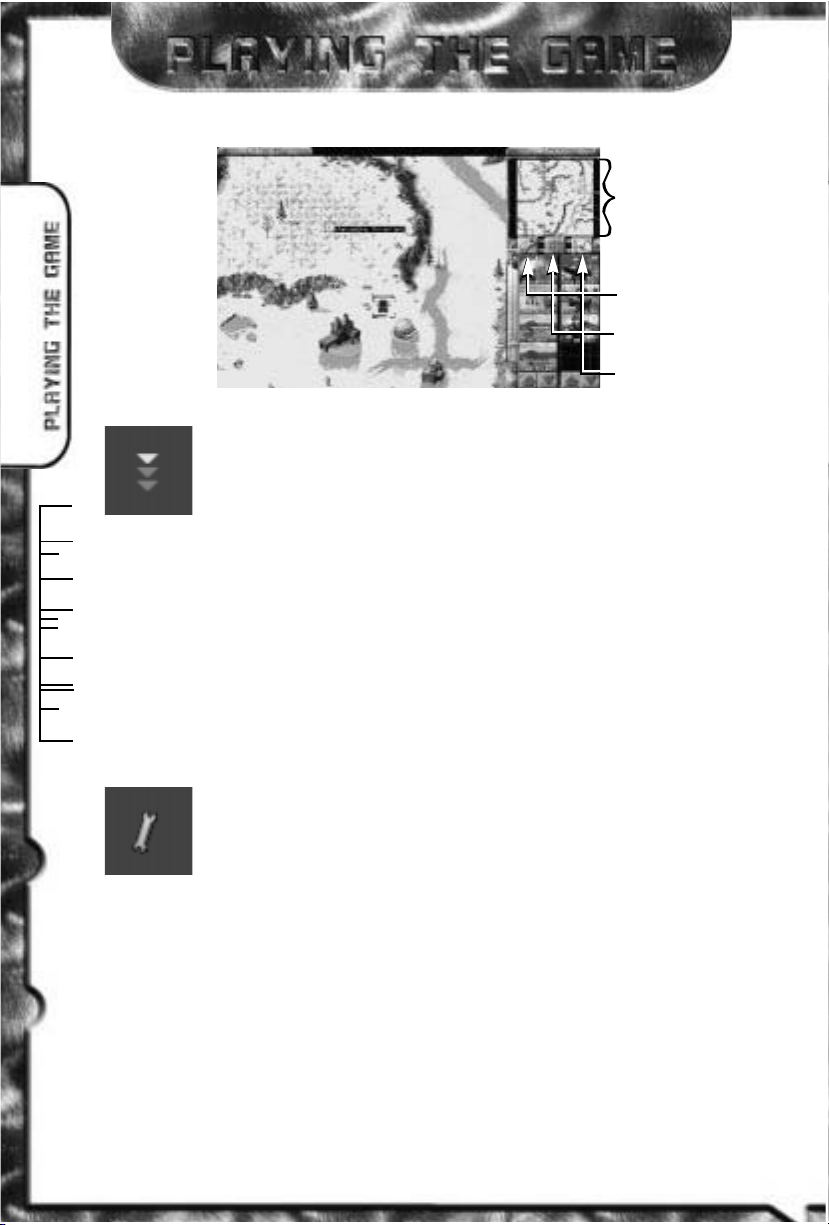
BUILDING THINGS
Below and slightly overlapping the radar display is a horizontal row of three icons. These are
for repairing buildings, selling them, or toggling the radar map display. Each one has its own
function (see page 19). Below these three buttons are two columns of icons. The left column
displays which structures your Construction Yard can build; the right column displays the units
you can create. The arrow buttons at the bottom of these icons allow you to scroll through the
selections when there are more than four available.
To build a structure or unit, left-click on the appropriate icon. Construction will take a period
of time, as indicated by the sweeping hand over the icon. Cost for construction and purchasing will be automatically deducted from your credits. Only one unit (of any one class)
and one structure can be built at any one time. If you move the mouse cursor over the
icon (without clicking), you’ll see what that icon represents and how much it would cost
you to build, buy, or train it.
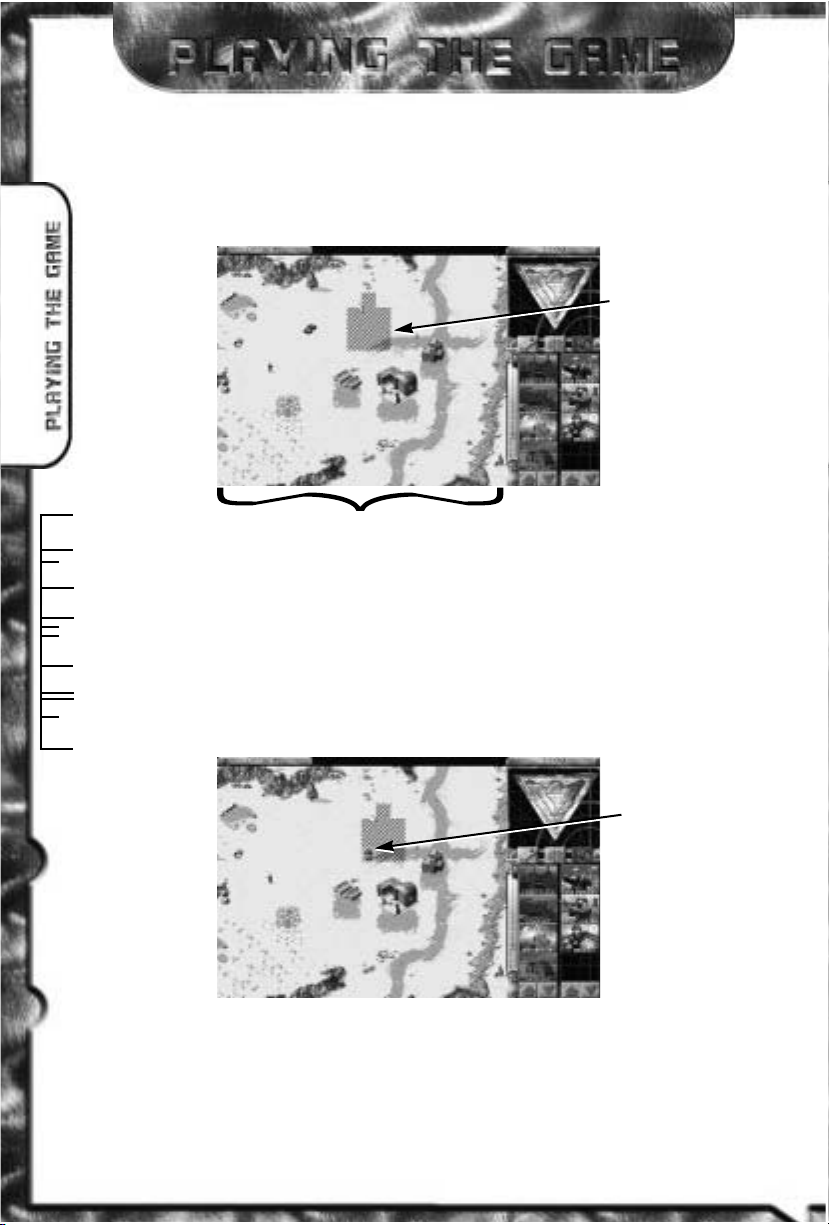
When construction of buildings is completed the word READY appears across the top of
the selected icon in the Sidebar. Left-click on this icon, and the mouse cursor will turn into
a placement grid on the battlefield. The grid gives you an idea of how large the building
1
0
3
ALLIES LOSE VERDUN
1
3
YOUR SIDE/
RADAR
DISPLAY
BUILDING
ICONS
POWER BAR
UNIT ICONS
SCROLL
BUTTONS
READY
Page 12
8
0
0
FORCES DESTROYED
1
4
will be on the battle field. Move the grid to where you want the building placed. Once you’ve
found a suitable location, left-click and the building will be placed where you indicated. The
grid should be entirely white; any red in the grid indicates that the placement area is blocked,
and you will not be able to deploy the building.
While there is a grid on the battle field, you will not be able to build anything else. You’ll
have to either place the ready building, or cancel placement. To cancel, right-click
while the placement grid is still up. The grid will disappear, and READY will appear on
the icon again. Right-clicking again on the icon in the Sidebar will cancel the building
and refund your credits.
When training or construction of a unit is complete, the new unit emerges from its originating building (Barracks, Kennel, or War Factory) and is ready to use. You are not
required to place them. However, it is a good idea to keep some space in front of these
buildings, so units don’t bunch up and block any other units from coming out.
NOT OKAY TO PLACE
BLOCKED
PLACEMENT
PLACEMENT
GRID
OKAY TO
PLACE
THE BATTLE FIELD
Page 13
1
0
1
DISPATCH TROOPS ASAP
1
5
POWER
To the left of the construction icons is a narrow bar
with a horizontal indicator on it. This is your Power
Bar – keep an eye on it! Every building that you
place requires power to run. Knowing how much
power you have and how much you are using is
very important.
The horizontal indicator tells you how much power
your base needs to function optimally, while the vertical bar tells you how much power your base is
putting out. If the bar is in the yellow or orange,
your base doesn’t have enough power! If it is
green, your base has enough power to run all of the
structures you have built.
NORMAL POWER
Lack of full power will slowly damage your buildings, slow construction, and shut down
the radar (if you already have it), as well as deactivate some of the high-tech base
defenses available in the game. Power Plants are good targets to go after if the enemy has
defenses that you are having a tough time cracking. Without power, the enemy is denied
information, quick response time, and base defense.
POWER
PRODUCTION
“THRESHOLD”
BAR
Page 14
8
3
2
RETRIEVE TANYA
1
6
LOW POWER
The amount of power produced by Power Plants depends on their state of repair. Make
sure to keep all of your Power Plants fully repaired, or you may find yourself losing power
at an inopportune moment.
CREATING ADDITIONAL UNITS
If you have a Construction Yard and enough credits, you can build a Barracks, which will
allow you to train infantry. At first, the type of units you can train will be limited. As you
win missions, you’ll receive new technologies and upgrades. Once you do this, new units
with unique abilities will become available.
As the game progresses and you build up your base, you’ll have a chance to construct a
War Factory. With this, you can acquire new and more powerful units like Rangers, MineLayers, and Tanks. Keep in mind that all the units and buildings mentioned above won’t be
available for both sides, and some units require you to build other structures (like a Tech
Center or Radar Dome) before they become available.
BUILD BARRACKS
LOW POWER
DEACTIVATES
RADAR
LOW POWER
Page 15
1
6
2
CRITICAL MOVEMENTS
1
7
CREDITS(MONEY), ORE, AND COLLECTING
There are two types of resources that you can collect to make money: Ore and Gemstones.
Ore is found in many places; Gemstones are much rarer. Gemstones are a more valuable,
so it is always in your favor to collect as many Gemstones as you can.
In the upper right of the screen, the Credit Counter keeps track of the money you have to
build structures and units. This decreases as you build or repair units and structures, and
increases if you sell a building, deposit ore from an Ore Truck into the Refinery, or find a
crate that contains money.
In order to make money, you need to collect Ore. To collect Ore, you need to build an Ore
Refineries or Trucks. Every Refinery that you build comes with a Truck, and you can build
extra if you want to collect ore faster. Once construction of the Refinery is complete, place
the Refinery where you want it to go. The closer the Refinery is to ore, the faster the turnaround on collection will be.
When the Refinery is built, an Ore Truck will appear with it. The Ore Truck will move to the
nearest patch of Ore visible on your battle field and begin collecting it. The Ore Truck will try
to remember where it was collecting from and after dumping all of the collected Ore into the
Refinery it will return to the ore patch and continue to collect from it. This process is automatic,
but can be interrupted by you at any time by redirecting the Ore Truck to another location.
ORE GEMSTONES ORE ORE TRUCK
REFINERY
If there is no Ore in sight when you build your Refinery, the Ore Truck will appear outside
the Refinery and not move. Take one of your other units and scout around your base until
you find some Ore. Once you find some, select the Truck by left-clicking on it, and put your
cursor over the Ore. You will see the cursor change to an attack cursor. Since the Ore Truck
doesn’t have a weapon, this cursor tells it to start collecting. Left-click again, and the Ore
Truck will proceed to the Ore and begin to collect it. The automatic collection process will
be started, so you no longer need to order the Ore Truck back and forth.
Page 16
0
1
2
SPOTTED NW SAHX
1
8
TARGETING ORE
You can force the Ore Truck to return to the Refinery early by left-clicking on the Ore Truck, then placing your cursor over the Refinery. The
cursor will change to an Enter Cursor (3 green arrows), telling the Ore
Truck to return to the Refinery with its current load. If you want it to do
this, left-click on the Refinery. If you want it to continue what it is
doing, deselect it by right-clicking.
Note: if you move the Ore Truck somewhere and do not tell it to collect Ore, it won’t.
When it reaches its destination, it will just sit there until you order it to move again.
The automatic collection only happens when you first build an Ore Truck and there is
ore in sight.
KEEP AN EYE ON YOUR ORE TRUCK! There is nothing worse than not watching your Ore
Truck, only to have it wander into enemy territory in order to collect Ore. It is the weakest
link in your financial operations – remember to keep it safe!
REPAIR BUTTON & REPAIRING
To repair a damaged building and keep it operating at full efficiency,
left-click on the Repair button in the Sidebar. The mouse cursor on the
battle field will turn into a silver Wrench. Left-click the Wrench on the
building you want repaired. When repairing the cost of repair will be
deducted from your credits. Several buildings can be repaired simultaneously. Right-click when you want to cancel out of repair mode. To stop repairs on an
structure, left click on the structure.
Engineers can also repair buildings. If you select one of your Engineers and target one of your
own buildings, a golden Wrench icon will appear over the building. If you left-click, the Engineer
will enter the building, and instantly repair it back to full-health. You will lose the Engineer,
but this is sometimes better than losing your Construction Yard to an enemy attack!
THE
“ENTER
CURSOR”
WRENCH
CURSOR
REPAIR
BUTTON
SELL
BUTTON
RADAR
BUTTON
RADAR
ACTIVE
Page 17
3
4
5
NUCLEAR WARHEADS
1
9
SELL BUTTON & SELLING
To sell a building, left-click on the sell or $ button in the Sidebar. The mouse
cursor will turn into a gold $ sign. Left-click on the building you want to sell.
It will deconstruct, and you’ll be credited half of the structures original cost.
In the case of structures that come with vehicles, you will be refunded half
the amount of the structure minus the cost of the vehicle.
BE CAREFUL! As long as the cursor is in $ mode, any building you left-click on will be deconstructed and sold! To cancel out of $ mode, right-click.
To sell units, move the unit into the Service Depot. While a vehicle is on the Service Depot, carefully clicking on the unit with the green $ cursor will scrap the vehicle. Infantry and naval units
cannot be sold.
RADAR BUTTON & RADAR
If you have not built a radar facility you will see your side’s insignia (Allied
or Soviet) where active radar appears (see diagram on previous page). With
radar active you will see a small map of all the revealed areas of the battle
field. In multiplayer mode, if you click on the radar button you will get additional information on your enemy. Clicking repeatedly on the radar button
will display radar or your insignia once more.
CAPTURING ENEMY BUILDINGS
As the game advances, a special infantry unit, the Engineer, will become
available. Engineers are unarmed but they allow you to capture enemy
buildings. To do this, left-click on the Engineer and place the cursor over
an enemy building. If the building is a valid building that you can take, you
will see one of two enter cursors. If a red enter icon is displayed, the
Engineer will damage the building, but not capture it. If the building is damaged into the
red on its status bar, you will get a green enter cursor instead – this means the Engineer can
capture the structure. Left-click if you want the Engineer to damage or try to capture the building. If you are successful, the building will be damaged, or the color of the building you targeted will change to the color of your side and fall under your control.
If you captured the building, it is now part of your base. You can build base structures around
it, sell it, or just leave it there, denying your enemy of its use. Depending on the structure you
captured, you may be able to build some units or structures that are normally unavailable to
you! Your enemy may attempt to retake the building, so if you don’t plan on attacking from
within, sell it or be prepared to defend it!
ENTER
CURSOR
SELL
CURSOR
RADAR
BUTTON
Page 18

8
4
4
DESTINED WASHINGTON
2
0
CHECK-UP
To check the health status of a unit or structure, select it by left-clicking
on it when the cursor is in Select mode (deselect with a right-click). As
long as the bar is green, it’s healthy. As the bar shrinks and turns red,
it’s closer to being destroyed. Units that are in the yellow and red will
not function as efficiently as those that are green. This may result in slower construction
time, slower movement, and a variety of other negative effects. In later missions, vehicles
can be repaired if you build a Service Depot.
Some units have a carrying capacity or a limited ammo supply, indicated by a series of
boxes in the lower left corner of the unit (when selected). This will tell you at a glance how
much your unit is carrying. When the boxes are all full, so is the unit.
REPAIRING/RELOADING UNITS
Later in the game, the ability to build a Service Depot will become
available. The Depot has two functions: it can reload AP and AT Mine
Layers, and it can also Repair damaged vehicles .
To Repair a damaged vehicles, select it, and then move the cursor over
the Service Depot. The cursor will change to an enter icon. Left-click, and the unit will move
back to the Depot and begin repairs. Money will automatically be deducted from your
account depending on the type of unit and the severity of the damage.
Re-loading the Mine Layers is accomplished in the same way – simply drive the unit onto
the Repair Pad, and it will be reloaded automatically.
For naval units, select the unit and highlight one of your Sub Pens or Naval Yards. The cursor will change to an enter cursor. Left-clicking will cause the unit to move back to the Pen
or Yard and repairs will begin. To cancel repairs, move the unit away from the Pen or Yard.
OPTIONS
Choosing the Options mode will stop all the action on the battle field while you adjust your
visual, audio, and game control. Note that in multiplay (Net, modem & Internet HTH) the
game will not pause while you change settings.
.
OPTIONS MENU
Page 19
5
5
6
DELAYED STRIKE AX ZULU
2
1
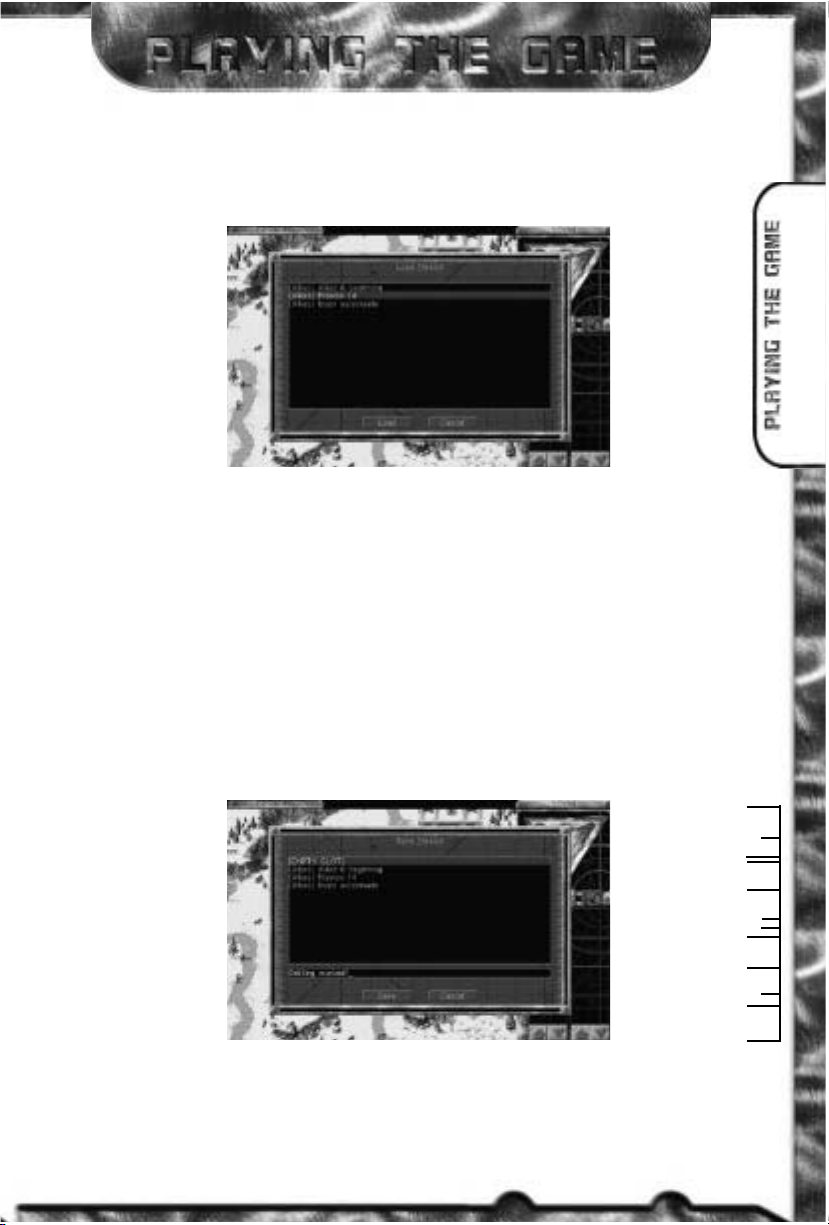
LOAD MISSION
Select Load Mission from the Options menu if you want to play a previously saved mission.
The mission you are currently playing will be lost unless you save it first.
LOAD MISSION MENU
Left-click on the up or down arrow to scroll through your saved games. Then left-click on
LOAD, to load the selected game.
If you wish to leave this screen without loading a game, left-click on CANCEL.
SAVE MISSION
Select Save Mission from the Options menu to Save the mission you’re currently playing. In the
Save Mission menu, choose the Saved Mission slot you wish to use. If you Save a game over a
slot already used, you’ll overwrite the selected game. If you want to Save into a new slot, choose
[Empty Slot] and name your mission. The number of saved games available depends on your
hard drive space. If you’re out of room, [Empty Slot] won’t appear. You’ll have to Save over a
previously saved game or delete some games. Red Alert will automatically add Allied or Soviet
to the beginning of your save game, to help you identify them later.
SAVE MISSIONS MENU
Left-click on the up or down arrow to scroll through your saved games. Then left-click on
SAVE to save the selected game. If you wish to leave this screen without saving a game, leftclick on CANCEL.
Page 20
1
1
2
ADVISE ETA
2
2
DELETE MISSION
Select Delete Mission from the Options menu when you want to get rid of some saved
games. This is especially useful if you need to free up space on your hard drive.
In the Delete Mission menu, choose the mission you want to get rid of by left-clicking on
it. Then left-click on DELETE to get rid of that mission.
A confirmation window will pop up just to make sure this is what you want. If you’re intent
on ridding yourself of that mission, left-click on OK. Otherwise, left-click on CANCEL.
ABORT MISSION
Select Abort Mission if you decide you don’t like how things are going and want to escape
to the Title Screen. A confirmation window will come up, just to make sure. You can also
restart the mission from this screen.
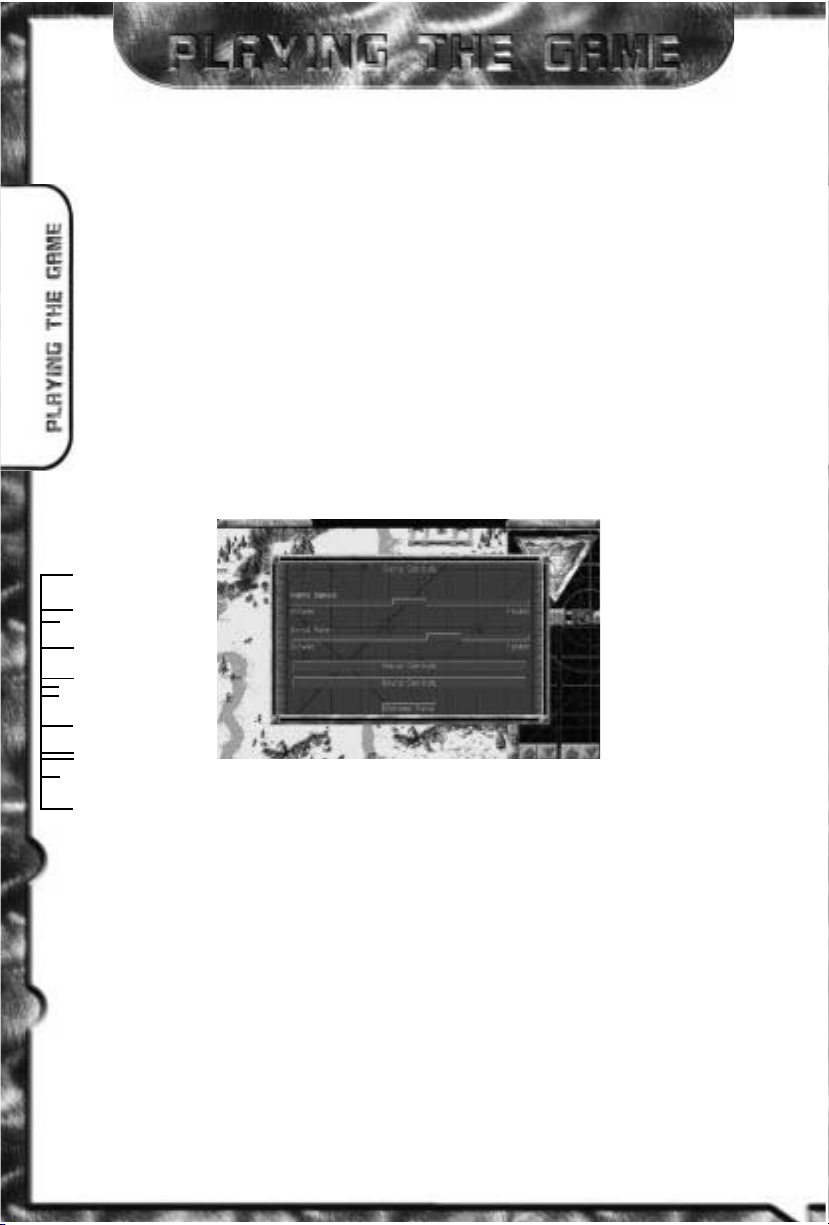
GAME CONTROLS
From the Game Controls menu, you can customize your sound and video options to your
liking. You can also change the game’s speed and scroll rate.
GAME CONTROLS
GAME SPEED
This slider bar allows you to change the speed at which the game functions. Note that missions with a timer will be affected by your setting. The clock will run faster/slower
depending on your setting.
SCROLL SPEED
Use this slider bar to set the Scroll Rate of the game screen to your liking. The higher the
setting, the faster the scroll rate in the game.
Page 21
7
7
9
DETAILED CINPACOM
2
3
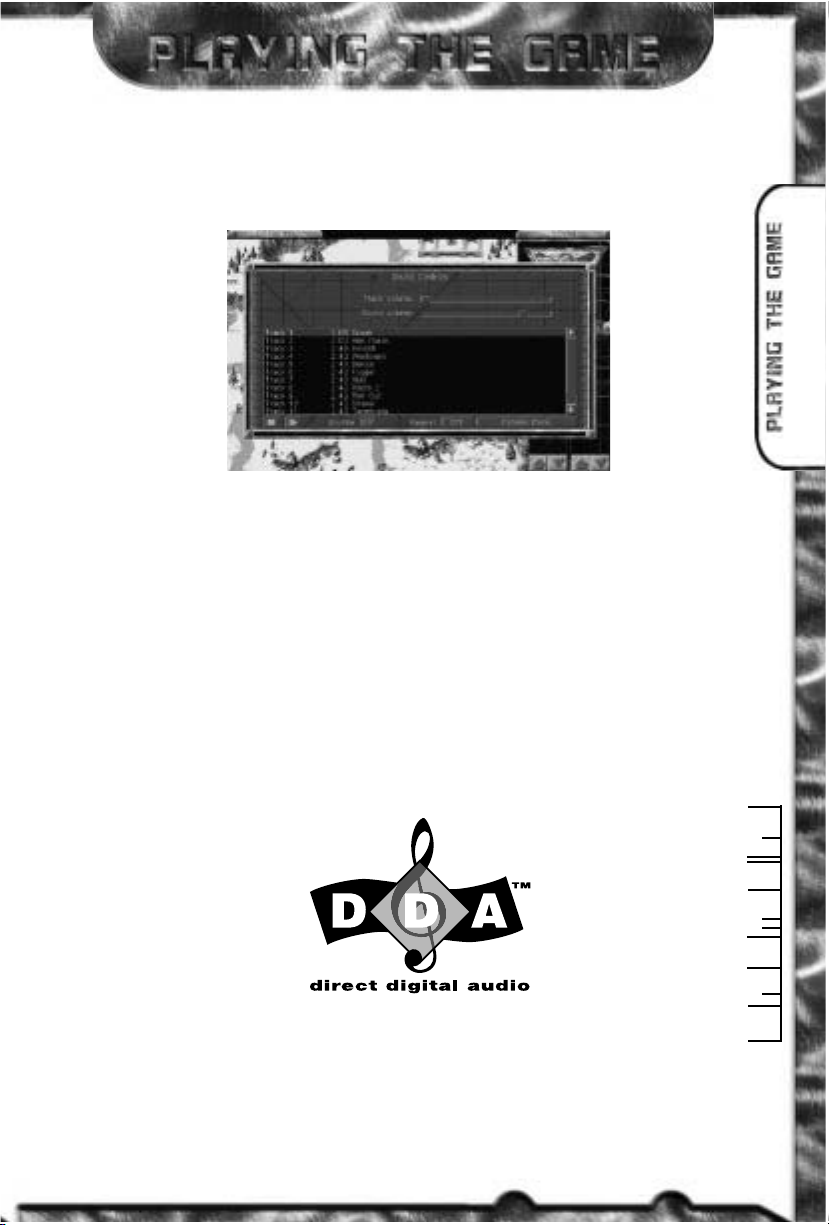
SOUND CONTROLS
Select Game Controls, then Sound Controls to adjust the volume of the music or sound effects,
or to change the song currently playing.
SOUND CONTROLS
SOUND CONTROLS
To control the volume of music or sound effects, drag the knob left or right. Going right will
make that audio track louder. Going left will make it softer. If you want to shut off music or
sounds, drag the control knob all the way to the left.
MUSIC
To hear a new song, left-click on any track (as shown above) and then left-click on the PLAY
button. To stop a song from playing, left-click on the STOP button. When you begin the game
only a few tracks will be available to play. As you play further into the game, more music
tracks will become available.
Clicking the OPTIONS MENU button at the bottom of the menu will return you to the Options
Menu, saving any changes you have made in the Sound Controls panel.
Red Alert supports Westwood’s DDA (Direct Digital Audio). DDA provides 100% digital
audio, giving you premium quality music and sound. With DDA, PC audio is no longer
restricted to FM or General MIDI limitations.
Page 22
8
0
0
PRIORITY INCOME
2
4
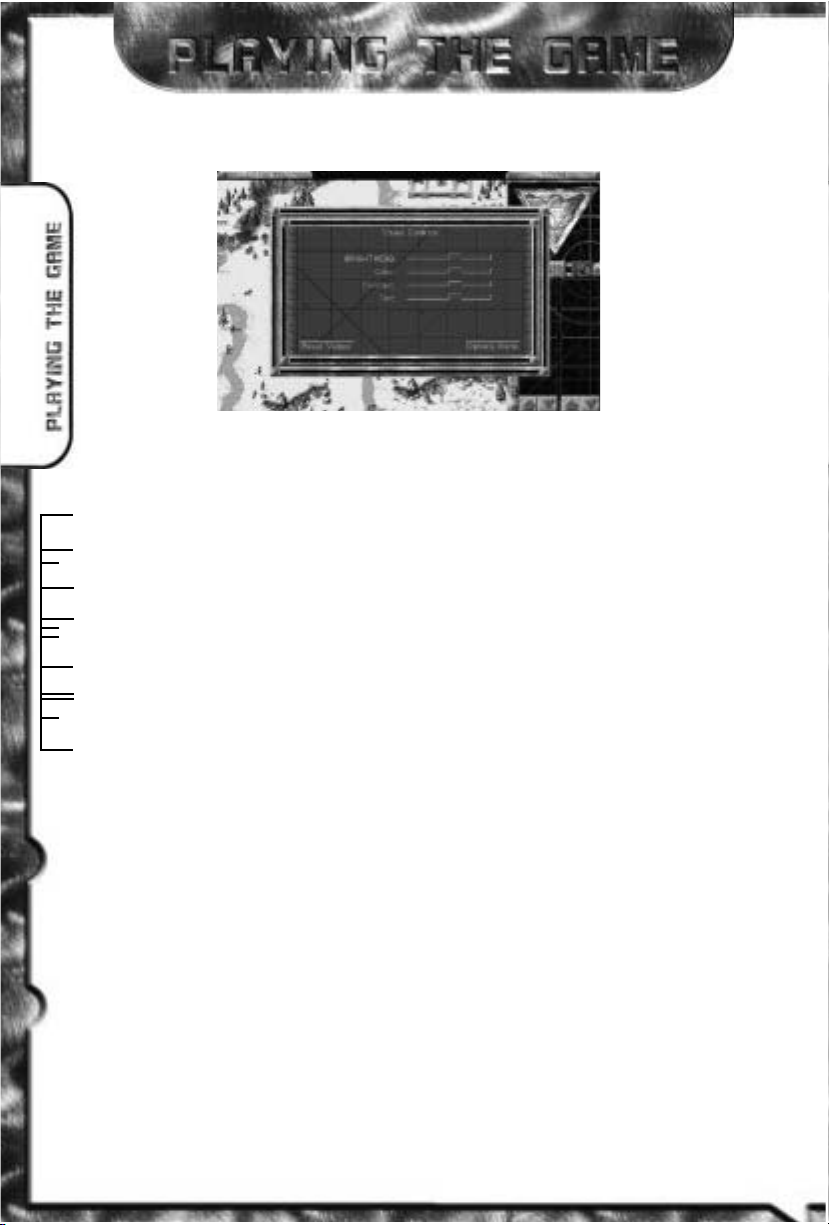
VISUAL CONTROLS
VISUAL CONTROLS
Visual Controls gives you display options. To adjust any of the controls, drag the control
knob left or right. Going right increases a setting. Going left decreases a setting.
You can reset the Visual Controls to their default normal settings by clicking the RESET
VALUES button.
Click on the OPTIONS MENU button to return to the Options Menu. The changes made
in the Visual Controls take immediate effect.
RESUME MISSION
Left-click on RESUME MISSION to get back to the main game.
BRIEFING
Left-click on BRIEFING if you forgot what your mission objectives are. The next Briefing will
be displayed. If you wish to see the Video Briefing again, click on the Video button. When
you are ready to return to the mission, click the Resume Mission button. Note that some missions do not have Video Briefings, in which case you will not see a Video button.
ADVANCED GAME CONTROLS
Once you’ve got a good grasp of the basic controls for your units, it’s time to move on to
some of the more advanced controls that are offered in Red Alert. If you are going to pit
your skills against other players, learning how to use these controls is a must.
TEAMS [CTRL
+ #, #,
ALT
+ #
]
As you’ve learned, you can select more than one unit at a time by left-clicking on an empty
space and dragging a box to select all of the units that you want to move at once. What if
you want to select that particular team again in the middle of battle? Normally you’d have
to band-box them all over again. This may mean scrolling the screen as well, since most of
the time you are trying to do more than one thing at a time.
You can “Save” all of the selected units into a team. To do this, first select all the units that you
want in your team, then hold down the CTRL key, and hit any one of the number keys on your
keyboard (0-9). This will make all the selected units part of that team. To instantly select that
team, just hit the number key corresponding with that team, and they will all be selected.
Page 23
1
0
1
INVESTIGATE SUDDEN
2
5
Note that this will not re-center your view on that team, it will just select them so you can give
them orders. If you want to see that group, hold down the ALT key and hit the number you’ve
assigned for that team. This will center the view on that team.
You can add members to an already existing team easily. First, select that team by hitting the
appropriate number key. Then, hold down the SHIFT key and individually click on the units
that you want to add to that team (sorry, you can’t band-box with this method). Once you’ve
got them all highlighted, resave the team again by holding down CTRL and hitting the number of the team. That’s it!
BOOKMARKS [CTRL
+
F9 - F12, F9 - F12]
You can save 4 positions of the screen and return to them at any time. To save a position,
hold down the CTRL key, and hit one of the function keys F9-F12. You can then just hit the
F9-F12 keys to jump to that location on the battle field.
FORMATIONS [‘F’ KEY]
Once you have created a team, you can make that team follow Formation orders. Simply
hit the # key that corresponds to the team you have created, then hit the ‘F’ key. A small
F will appear next to the team number.
Units in Formation will try to maintain their order as you had them when you made the
Formation, and will move at the speed of the slowest unit. This is good for keeping rocket launching units behind tanks, or other lighter units behind the heavier-armored ones.
To undo a Formation, simply select the group that is in Formation, and hit the ‘F’ key again.
GUARD MODE [‘G’ KEY]
Normally, units that you have stationed around the battle field will only respond if they’re fired
upon, or an enemy unit gets close enough to be fired on. However, they won’t go looking for
trouble – they’ll only get involved if someone else starts it.
If you want your units to pick fights with anyone that comes within range, select the units and
hit the ‘G’ key on the keyboard. This will put all the selected units into Guard Mode. With this
on, your units will be much more aggressive, moving towards any threats that come near them.
Guard Mode will continue to function on those units until you move them, or give them another
order, such as stop or scatter.
Giving Guard orders to aircraft or helicopters will cause them to stop their attack and return
to their airfield or helipad.
FORCE FIRE [CTRL
+
‘L’ CLICK]
Sometimes, you may want to have certain units fire on a building or area even if it isn’t an
enemy target. To get them to do this, you can use the Force Fire command. Simply select the
units that you want to do this, hold down the CTRL key, and click on the location that you want
the units to attack. The icon will be a targeting cursor as long as you hold down the CTRL key.
Units in this mode will continue to fire on that area, ignoring all other threats, until you tell
them to stop, or give them a new order to follow. Some units cannot be forced to fire at something, like an Engineer or Medic.
Page 24
8
4
1
DEATHS FOURTEEN ALLIES
2
6
FORCE MOVE [ALT
+
‘L’ CLICK]
Infantry annoying your tanks? Squish ‘em. Using the Force Move command, you can make
your Tanks (or any heavy unit) move into an enemy occupied area and attempt to overrun
the infantry in the square. To do this, select the unit(s) to Force Move, then hold down the
ALT key and left-click on the area you want to Force Move to. You can also use this to single-out a particular infantry unit that is giving you a hard time. Your unit will attempt to crush
that infantry until either it succeeds, you give it a new order, or your unit is destroyed.
Vehicles cannot overrun each other, and infantry cannot overrun tanks. Only tracked or
heavy units can Force Move into enemy infantry. You cannot force your tanks to crush
your own infantry.
SCATTER [‘X’ KEY]
Tanks trying to squish your infantry? Planes coming in with Parabombs? With Scatter, you
can make your troops move in a random direction from their current location, allowing
them to (most of the time) dodge out of harms way.
To Scatter units, select them and hit the ‘X’ key. Units that are scattering will continue to
carry out any attack orders, so you can select them, tell them to attack, then hit the ‘X’
key to make them Scatter from the threat.
Note, scattering will only make all the selected units move once. If you want them to continually Scatter, you must keep the units selected, and continue to hit the ‘X’ key every second or so. Otherwise, they will Scatter once, then stop, continuing to attack the target you’ve
given them. Also, units that are scattering may Scatter out of their fire range. If this happens, left-click on the target again (with the units still selected), and your units will move
back into firing range.
STOP [‘S’ KEY]
If a unit is marching to certain death, or has been given an order that you don’t want them
to continue to do, you can force that unit (or structure if it’s a turret of any kind) to Stop
firing, moving or mining. Select the unit(s) that you want to Stop, and hit the ‘S’ key.
ESCORT [CTRL
+
ALT+‘L’ CLICK]
Sometimes, you may want units to ‘escort’ another unit as it moves around the battle field.
This can be good for protecting an Ore Truck or any other critical unit as it moves about.
To Follow a unit, select the unit(s) that are going to be doing the ‘escorting’, and hold down
the CTRL and ALT keys. While these are still held down, you will see the cursor has
changed to a gold movement cursor. Click on the unit that you want Followed, and they
will automatically go after it, following it wherever it goes.
Note, having large groups of units escorting another unit can be counter-productive. Don’t
have a large group of units escort your Ore Truck, or it may hinder the Ore Truck’s movement, and slow down your collection of Ore. If enough units are escorting, they may surround their target, and it will not be able to move at all.
Aircraft, helicopters, and units without weapons (like Medics and Engineers) will not escort
either.
Page 25
1
7
4
TOXIC TESTS SHOW
2
7
CENTER VIEW [HOME KEY]
Hitting the home key will center your view on the currently selected unit/structure.
CONSTRUCTION YARD VIEW [‘H’ KEY]
Hitting ‘H’ will instantly center your view on your Construction Yard. This is useful for jumping back to your base when you’ve been concentrating your efforts somewhere else on the
battlefield.
EVERYTHING SELECT [‘E’ KEY]
Hitting ‘E’ will select every unit that you can see on the battle field. This is useful for putting
your entire base into guard mode, or making a mad charge on the opponent’s base with
everything that you can see.
NEXT UNIT [‘N’ KEY]
This key will select another unit in your army. You can cycle through all your available units
with this key.
MULTIPLAYER ONLY KEYS
ALLY [‘A’ KEY]
During multiplayer games, it is sometimes advantageous to ally with other players. To Ally with
a player select one of that player’s units, and hit the ‘A’ key. A message will tell everyone that
you have Allied with the other player. Allies can share Service Depots, Helipads, etc., and will
not attack each other automatically. You will also see all of your Ally’s units on the radar map,
and his units will reveal the areas of the battle field for you that you did not have uncovered.
Making alliances are only ONE-WAY. If the other player does not Ally with you, their units
will still attack yours, but yours will not attack back. It is a good idea to make sure the other
player wants to Ally with you before you commit to the alliance.
To break an alliance, select one of your Ally’s units, and hit the ‘A’ key again. Unlike making an alliance, breaking an alliance breaks it for both players. Both sides’ units will
become hostile to each other immediately.
MESSAGE SYSTEM [F1 - F8]
To send messages to the other players in a multiplay game, hitting F1 - F7 will prompt you to
enter a Message to a specific player. F8 will send your Message to everyone currently playing.
You can determine who each key represents by looking at the score screen in the map display. The players are listed in order (top to bottom), excluding yourself.
Note that when you are entering a Message, none of the keyboard commands will function.
If you wish to abort the Message, hit the ESC key.
Page 26
8
4
1
FOMIC ACID LEVELS
2
8
MULTIPLAYER GAME
Red Alert has several different types of multiplayer support, each of which is described
in this section. Please note that all screenshots in this section are taken from the Windows
95 version of the game. The DOS version of the game has the same screen layout and
options except where noted.
MULTIPLAYER GAME OPTIONS
When playing a multiplayer game, the game host (the player who starts the game session)
can choose several game settings:
Unit Count - General force level of starting units.
Tech Level - Ceiling on available structures and units.
Credits - Credits each player begins with.
AI Players - This sets the number of non-human players.
Bases - Enables/disables production and building bases.
Ore Spreads - Enables/disables Ore spreading.
Crates - Enables/disables weapon pick-ups and bonuses.
Capture the Flag - Enables/disables the capture the flag mode. (Not available if “Bases” are disabled)
Shroud Regrows - Enables/disables shroud regrowth.
INTERNET GAME
(Windows 95 feature only)
Red Alert Windows 95 Edition supports multiplay over the Internet. You are able to play
Head-to-Head over the Internet right out of the box.
In order to play in Internet Head-to-Head mode, make sure you have the following:
1. 28.8 (minimum) modem, ISDN or direct connection to the Internet.
2. Winsock 1.1 compliant TCP/IP stack (included in Windows 95).
3. A valid account with an Internet service provider (ISP) and a valid Internet
e-mail address.
Red Alert Windows 95 Edition will attempt to connect to your Internet provider if your system is configured correctly. If you are in any doubt, you can initiate your Internet connection prior to loading Red Alert Windows 95 Edition.
WESTWOOD CHAT
(Windows 95 feature only)
From the Title menu, select Internet. If you have previously registered your copy of Red
Alert Windows 95 Edition with Westwood Studios and signed up for a Westwood Chat
account, the Westwood Chat window will open and you’ll be prompted for your user name
and password. If you haven’t already registered, you’ll be taken step by step through the
registration process. Once you’ve registered and chosen your user name you’ll receive
your Westwood Chat password via e-mail within a few minutes.
Once at the Westwood Chat window, you can join various chat “Channels” or “Rooms”
to talk about Red Alert Windows 95 Edition and other topics with other people around the
world. You can also host or join a game of Red Alert in Head-to-Head mode over the Internet.
Page 27
1
5
3
TO CINPACOM
2
9
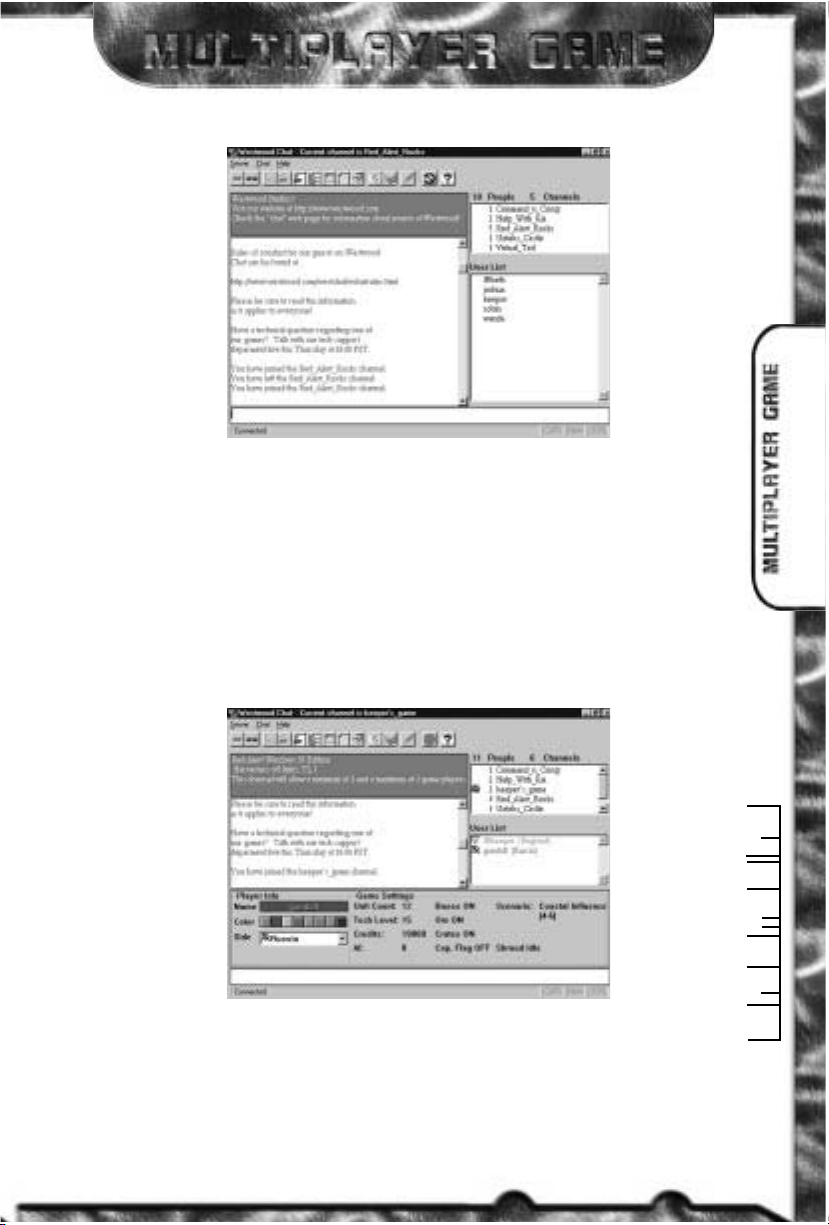
MAIN CHAT WINDOW
MAIN CHAT WINDOW
The Main Chat window has a scrolling message area (your outgoing messages and incoming messages from other people appear here), a channel (or “room”) list, a user list and a
typing area. Once you’ve joined a channel (by double clicking on its name in the channel list)
the user list changes to show the user names of other users in that channel.
JOINING INTERNET HEAD-TO-HEAD GAME
Open games are denoted by a Red Alert icon in the Channel List window. Other channels
may be chat channels or other types of games. To join an open Red Alert Windows 95
Edition game, simply double click on its name in the window.
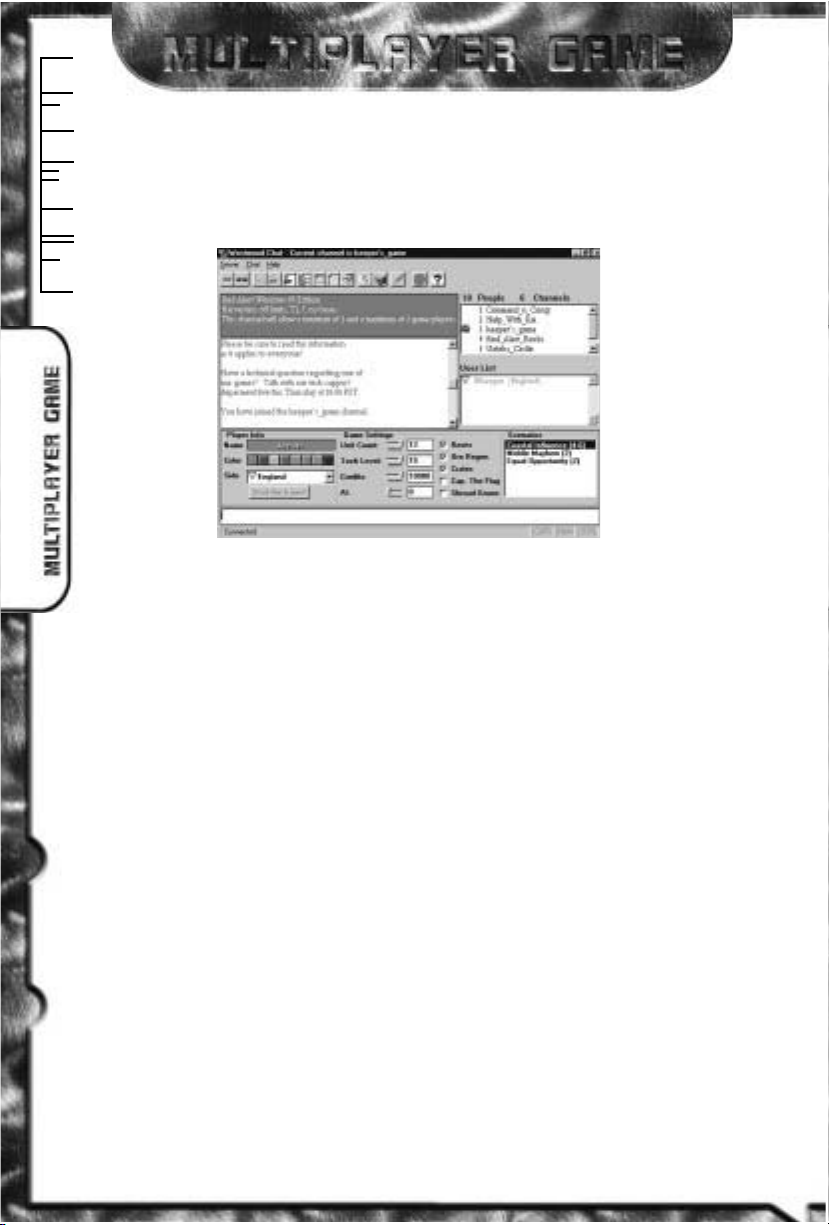
JOIN INTERNET HEAD-TO-HEAD GAME WINDOW
Once you have joined an open game you’ll see the familiar channels list, message area, typing area and user list, along with a game options area. As a joiner you are not able to change
the options; instead you can type messages to the host requesting that options be changed. If
at any time you are not happy with the options you can simply leave the channel. Once you
Page 28
8
2
2
PRIORITY SEVEN OUTGO
3
0
are happy with the game options, indicate this to the host and he can then go ahead and
start the game. Once the host clicks on the “Start the Game!” button Red Alert Windows
95 Edition will automatically start.
HOSTING INTERNET HEAD TO HEAD GAME
HOST INTERNET HEAD-TO-HEAD GAME WINDOW
If you’d prefer to be in the driver’s seat, you can choose to host a Red Alert Windows 95
Edition game. To do this, click on the Red Alert Windows 95 Edition icon in the tool bar.
This will bring up a dialog where you can specify a description for your game. Clicking
OK in this dialog will create a new game for others to join. As the host, it is up to you
to select the game options (scenario, credits, tech level, etc). Your opponent may send you
messages requesting various options are changed, so you should change the appropriate settings if you agree - otherwise you’ll have to debate the options! Once you have both
agreed on the game settings, as host, you can start the game by clicking on the “Start the
Game!” button. Red Alert Windows 95 Edition will automatically start.
Once the game is under way, you can send messages to your opponent by hitting the F1F8 keys.
When the game is over, both you and your opponent will be returned to the Westwood
Chat window for post battle debate.
IPX LOCAL AREA NETWORK GAME
(DOS and Win 95)
Red Alert supports up to eight players per game on a local area network (LAN) using the IPX
protocol. You must have an IPX compatible network protocol bound to your network adapter
card. This setting can be found in the Windows 95 “Network” control panel. If you are in any
doubt, ask your network administrator to install the correct drivers on your workstation.
Red Alert works better if all multiplayer game participants are connected on the same local
network without routers and bridges so that IPX packets have a direct path between systems. This will also ensure minimal load on other network components (such as servers
and routers) when a multiplayer game is in progress.
Page 29
1
5
4
FOMIC ACID COMPLAINT
3
1
LAN GAME PRELIMINARIES
Red Alert supports an unlimited number of games over one network socket. Westwood
Studios uses a registered socket that other software cannot officially use and under normal
circumstances you should never need to change this; however, if you are experiencing difficulty playing Red Alert over a local network, it may be because other software is using our
socket. To resolve this under Windows 95, you can change the socket that Red Alert will
use to connect by running the 'Red Alert Windows 95 Edition Setup' program which can
be found under the 'Red Alert' entry in the Windows 'Start' menu. Enter a number from 0
to 16383 in the box labeled 'Socket Number'. To return to using the Westwood Studios
default socket, delete the number in the 'Socket Number' box. Under DOS you can change
the socket from the command line (type RA -SOCKETXXXXX, where XXXXX is a number from
0 to 16383). This number represents a socket in the public socket area which any software
application may use. You must use the same socket number on all the machines you will be
trying to connect with.
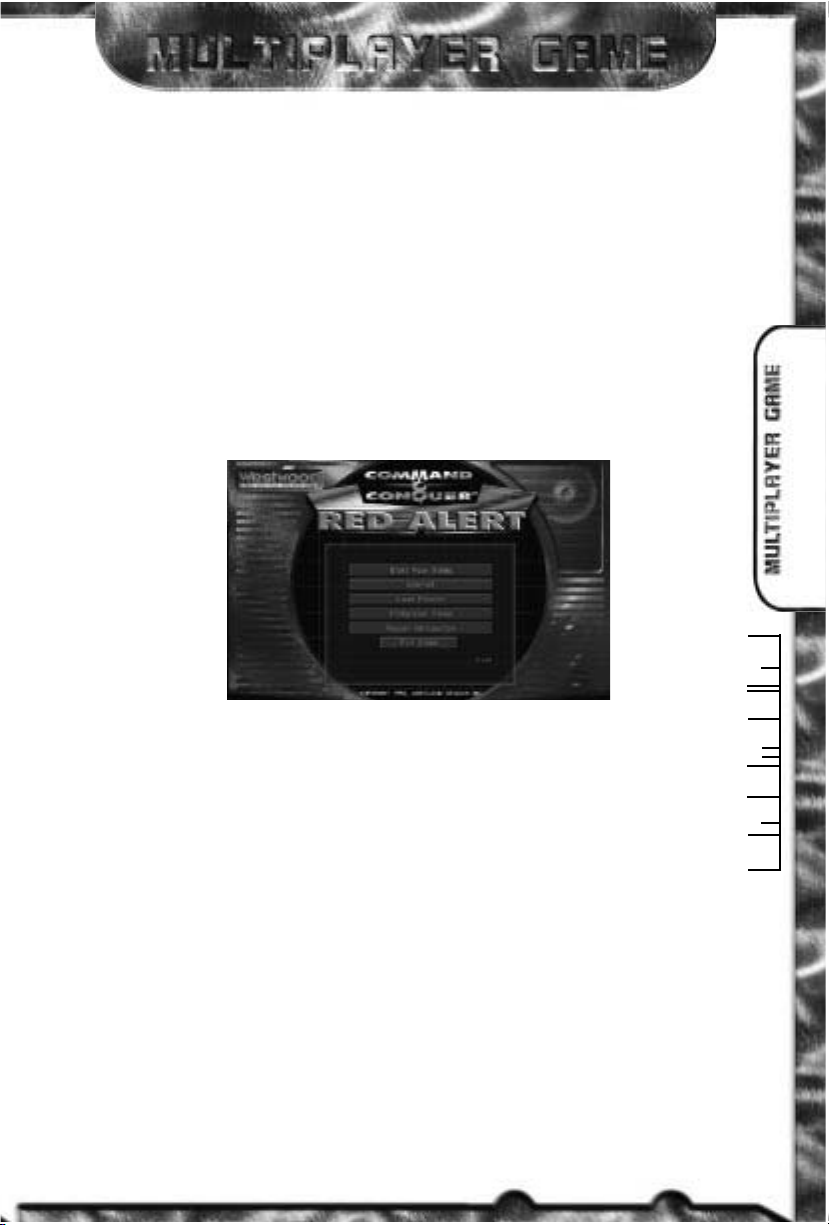
CHOOSE MULTIPLAYER GAME FROM THE TITLE MENU
To begin a multiplayer LAN game, select Multiplayer Game from the Title menu. You should
see the “Select Multiplayer Game” dialog with Modem/Serial, Skirmish and Network
options. If you don’t see the “Network” option, it means that Red Alert has not detected the
presence of IPX drivers and you should verify that these have been installed and configured
correctly for your system.
If all is well, select Network. This takes you to the “Join Network Game” dialog. Here you
can enter your name, choose your country and select a color for your units and buildings.
There are two windows in the dialog, the “Games” window and the “Players” window. The
“Games” window shows all active game sessions on the current socket. Games which are
closed (in progress) are in brackets, like this: [Player’s Game].
You have three options from this point; you can choose to Join a game, Host a new game
for others to join. You cannot join a closed game.
Page 30
6
3
0
ACCURATE
3
2
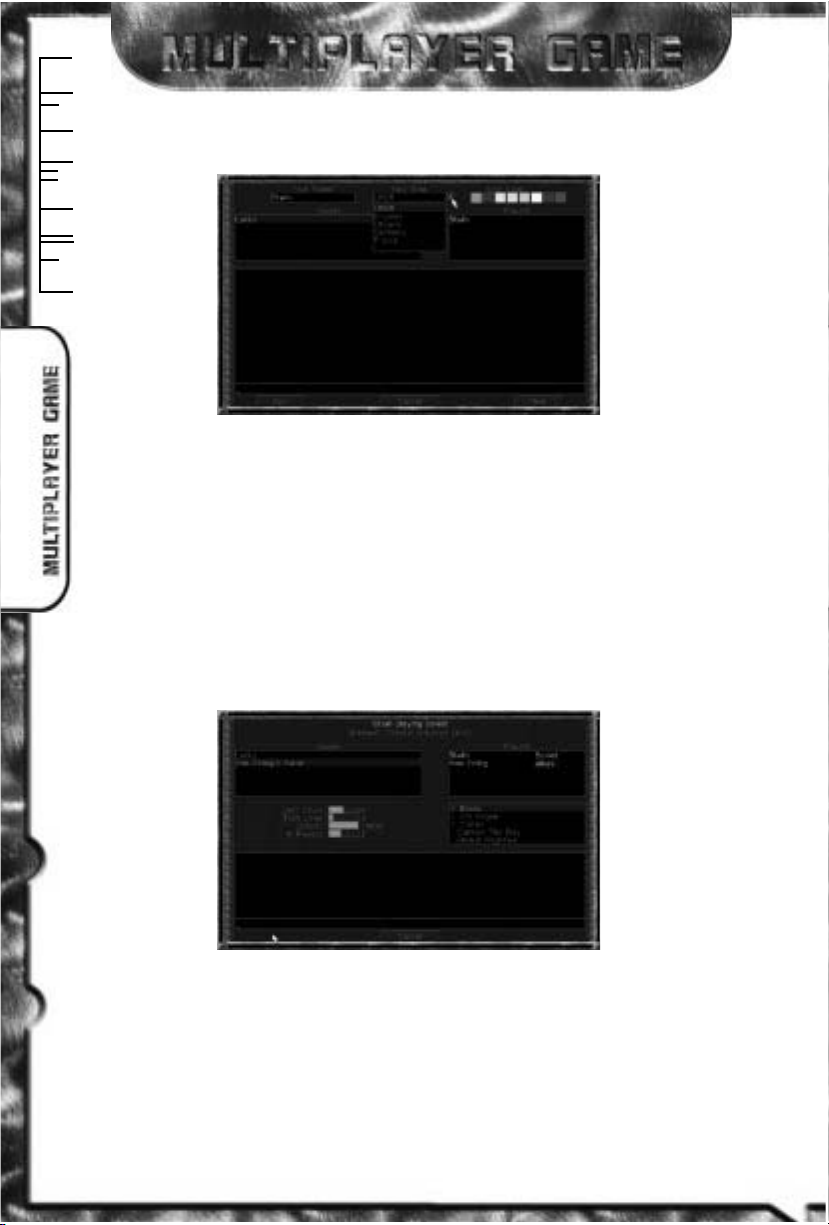
HOST NEW NETWORK GAME
NEW NETWORK GAME DIALOG
Before clicking on New game you must enter your name and choose a side and color. Clicking
on New makes you the Host of the new game and takes you to the “Network Game Setup”
dialog. This dialog has a “Players” window and a “Scenarios” window. The “Players” window shows you which other players are joined to your new game. As the Host of the new
game you alone have the option to reject other players who might try to join the game.
The “Scenarios” window shows the available scenarios. As the game Host, this is up to
you to select, as are the Credits, Bases, Crates, Ore and AI Players options.
Once you have 2 or more players you are able to click OK. As the Host you get to decide
when to commence play, so you should do this only when all game participants have joined.
JOIN NETWORK GAME
JOIN GAME DIALOG
Before clicking on “Join Game” you must enter your name and choose a side and
color. Once you have done this, you can either select an open game and then click on
Join or double-click on the game’s name. If your name is the same as an existing player
you must enter a different name. If your color is the same as an existing player, the computer picks an available color for you.
Page 31

9
0
8
ALSO FIND CRUSHED
3
3
The “Join Game” dialog has a message window. Messages from the other players in your game
appear here, just as your messages appear in the message windows of all the other players.
Once you have clicked Join, the dialog changes so that the New and Join buttons disappear. You are then in a wait state until the host of the game chooses to start the game. In
this mode you cannot change your name, side or color. You will be able to see the game
options that the host selects.
THE LOBBY
The first name in the list of available games to join is “Lobby”. This represents a “waiting
area” for all players looking for a game to join. If you’re joined to a game, you can go back
to the Lobby by either selecting “Cancel”, or by double-clicking the Lobby name. Joining
the Lobby is equivalent to leaving the game you’re joined to.
While in the Lobby, you can send messages to all other players in the Lobby. Also, you can
see messages from any player in the Lobby. This will help you to find allies or opponents
to play with, and facilitates formation of new games.
SENDING MESSAGES
From the “Join Network Game” or “Network Game Setup” dialog, typing your message on
the keyboard and pressing [Enter] will send it to all other players.
Within the game, keys F1-F7 send a message to one of the other players. (Hint: hit one of
the function keys to find out who that key is assigned to). You will see a message “To Player
[Side]” at the top left side of the screen. The F8 key sends a message to all other players.
SERIAL GAME
Red Alert is designed to be played as a head-to-head game either by modem or null modem
link. A null modem link is a special cable which you should be able to purchase at your local
computer supplier. Such a link allows two computers which are within 30 feet of each other
to be connected.
SERIAL GAME PRELIMINARIES
SELECT SERIAL GAME DIALOG
Page 32

1
0
0
VERTEBRATE AND SLASHES
3
4
Before you can play a Serial game, you will need to configure Red Alert with the appropriate settings. To do this, select Multiplayer Game from the Title menu. Then, select
“Modem/Serial.” Select SETTINGS from the “Select Serial Game” dialog.
SERIAL GAME SETTINGS
SETTINGS DIALOG
This takes you to the “Settings” dialog where you can set up your default serial communications settings. Select the COM PORT (and under DOS your IRQ) which correspond to your
modem or serial port along with the baud rate that you intend to use. It is important that
the selected baud rate is at least the speed of your modem. Once you are happy with the
settings, click on SAVE and you will be taken back to the “Select Serial Game” dialog.
For DOS users, here are the default COM PORT/IRQ combinations:
PORT IRQ (default) IRQ (alternate)
COM1 3F8 4
COM2 2F8 3
COM3 3E8 4 2/9, 5
COM4 2E8 3 2/9, 5
Also in this dialog you can enter a custom Modem Initialization string (separate multiple
lines with a “|” [vertical bar or “pipe” character]) as well as a Disable Call Waiting string.
If you do not know what these terms mean, you should leave them in their default settings.
If you want to learn more about these strings, please consult your modem manual and
your local telephone service provider.
You are also able to choose between TONE or PULSE dialing to suit your local telephone
service.
Next, you need to select modem or null modem game.
Page 33

0
9
1
ON HEAD AND FACE
3
5
MODEM GAME
Red Alert requires a modem that is capable of at least 14400 baud.
To begin a two player modem game, select MULTIPLAYER GAME from the Title menu. Then
select the MODEM/SERIAL option.
You next need to decide whether you or your opponent will initiate the telephone call required
to play the modem game. If the other person is going to call you, select ANSWER MODEM.
Assuming that you have the correct communications settings (using the “Settings” dialog)
your modem will wait for your opponent to call. Once a connection has been established,
you will see the “Join Serial Game” dialog.
If you are going to be making the call to your opponent, you should select DIAL MODEM.
You will then be taken to the “Phone List” dialog.
PHONE LIST DIALOG
From the “Phone List” dialog you can dial numbers manually or add a name and number
into a Phone List to speed up dialing in the future.
To dial a number manually, click in the dial area and enter the number (the number will be
added to the Phone List without a name). To store a number for future use, along with name
and custom dialing settings, click on ADD. This will take you to the “Edit Phone Number”
dialog. Click on EDIT to modify a previously-entered number.
PHONE NUMBER DIALOG
Page 34

4
4
0
TWO THOUSAND HEADLESS
3
6
Here you can enter a name and associated phone number. Assign default settings
(COM/PORT/IRQ, modem init string, baud rate, etc.) by clicking Default Settings or use
custom settings by clicking on Custom Settings. Click SAVE to go back to the “Phone List”
dialog.
Once you have a number in the Phone List, you can select that number for dialing by clicking on it in the listing window. The number will appear in the Dial Box.
Once the required phone number is in the dial box, either by manual entry or by selection from the listing window, you should click on DIAL which will communicate with your
modem and dial the number. Once a connection has been established you will see the
“Host Serial Game” dialog.
NULL MODEM GAME
To begin a two-player Null Modem game, select Multiplayer Game from the Title menu.
Then select the Modem/Serial option. When both players are ready, click on the Null
Modem button, and a connection will be established.
Once a null modem connection has been established you will be taken to either the “Host
Serial Game” or “Join Serial Game” dialog, depending upon who clicked first on the Null
Modem selection.
HOST SERIAL GAME
HOST SERIAL GAME DIALOG
Here you must enter your name and choose a side and color.
The “Scenarios” window shows the available scenarios. As the game host this is up to you
to select, as are the Credits, Bases, Crates, Ore and AI Players options.
You will see a message window so that you can communicate with your opponent as you
select these game options. Messages from your opponent appear in window. As you
change options, these are reflected on the dialog that your opponent can see. As the host
you get to decide when to commence play. Once both players have agreed on the scenario and options, you should click OK to begin play.
Page 35

JOIN SERIAL GAME
JOIN SERIAL GAME DIALOG
You must enter your name and choose a side and color. If your name is the same as another
player you must enter a different name. If your color is the same as another player the computer picks an available color for you.
You will be able to see the game options that the host selects. The game commences when
the host player clicks OK.
SENDING MESSAGES
From the “Host Serial Game” or “Join Serial Game” dialog, typing your message on the
keyboard and pressing [Enter] will send it to the other player.
Within the game, pressing the F1 key sends a message to your opponent. You will see a
message “To Player [Side]” at the top left side of the screen.
SKIRMISH MODE
Red Alert supports a new multiplayer option called Skirmish Mode. Skirmish mode is one
player against up to seven computer controlled opponents. The computer opponents will build
up their bases and will create teams of units for attack and defense. The computer opponents can be made allies and the computer players will fight amongst themselves.
TERRAIN EDITOR
Command & Conquer: Red Alert allows you to create your own multiplayer battle fields using
the Terrain Editor. Due to production limitations, information and instructions on how to use the
editor are located in the readme.txt file on both Command & Conquer: Red Alert CD-ROMs.
1
6
3
NO BLEEDING RESPOND
3
7
Page 36

POWER PLANT
ARMOR: Light
PURPOSE: Provides power for base
structures
The standard Power Plant. Power output is
directly related to the Power Plant’s condition,
so protect them during battles.
ARMOR: Heavy
PURPOSE: Allows construction of all
other base structures
The Construction Yard is the foundation of a
base and allows the construction of other
buildings.
ADVANCED POWER PLANT
ARMOR: Light
PURPOSE: Provides power for base
structures
This large, high-yield structure handles the
energy strains of some later, more powerintensive structures and defenses.
Page 37

ORE SILO
ARMOR: Light
PURPOSE: Holds smelted ore
This Silo can hold up to 1,500 credits of
smelted ore. Guard it carefully. If destroyed or
stolen, the amount stored is deducted from
your account.
ARMOR: Light
PURPOSE: Smelts, stores, holds, and
converts ore into spendable credits
The Refinery smelts ore into its component
elements. Building the Refinery immediately
deploys an Ore Truck. The Refinery can store
up to 2,000 credits of smelted ore.
TENT BARRACKS
ARMOR: Light
PURPOSE: Trains Infantry units
The Tent Barracks is where all Allied infantry
are trained. Some advanced / special infantry
units may not be available until other structures
are built.
Page 38

NAVAL YARD
ARMOR: Light
PURPOSE: Constructs & repairs naval
vessels
The Naval Yard builds and launches all Allied
naval vessels. Damaged sea craft docked at the
Naval Yard can be repaired. Building multiple
Naval Yards decreases the amount of time
required to create a naval vessel.
ARMOR: Light
PURPOSE: Constructs vehicles
This structure is responsible for the building of
all ground -based Allied vehicles. Building
multiple War Factories decreases the amount
of time required to create a vehicle.
HELIPAD
ARMOR: Light
PURPOSE: Constructs & reloads
helicopters
The Helipad allows construction of all
helicopters and will reload any that are in
need. Each new Helipad comes with an Apache.
Page 39

CAMOUFLAGED PILLBOX
ARMOR: Heavy
PURPOSE: Anti-infantry defense
Identically equipped as the Pillbox, this
defensive structure has the advantages of better
armor and near-perfect camouflage. It blends
with the surrounding terrain, making it virtually
invisible.
ARMOR: Medium
PURPOSE: Anti-infantry defense
Armed with a rapid fire vulcan cannon, the
Pillbox is ideal for defending your base from
enemy infantry attacks.
TURRET
ARMOR: Heavy
PURPOSE: Anti-tank defense
A Turret-mounted 105mm cannon. Heavily
armored with good range, this Turret is
effective against armored threats.
Page 40

SERVICE DEPOT
ARMOR: Light
PURPOSE: Repairs & reloads vehicles
The Service Depot repairs any damaged vehicle
that you move onto it. Mine Layer units can be
re-loaded by driving them onto the pad.
(Repairing a vehicle is much faster than
building one, and costs a fraction of the
original price. This is a worthy investment.)
ARMOR: Heavy
PURPOSE: Anti-aircraft defense
Although its range is not great, any enemy
aircraft flying over these are guaranteed to be
heavily damaged, if not destroyed. They are
accurate and deadly.
RADAR DOME
ARMOR: Light
PURPOSE: Provides radar
The Radar Dome gives you an overhead view
of the battlefield when fully powered.
Page 41

GAP GENERATOR*
ARMOR: Light
PURPOSE: Creates shroud
The Gap Generator allows the Allies to hide
associated base from enemy sight. Any
enemies scouting the area will only reveal
around themselves. The Shroud will
immediately close up once the invading unit is
destroyed or leaves the area.
ARMOR: Light
PURPOSE: GPS Satellite launch &
construction of high-tech structures
In addition to allowing the construction of hightech units like the Cruiser and Gap Generator,
building a Tech Center also starts construction
of the GPS Satellite. When finished, the satellite
will automatically launch.
CHRONOSPHERE
ARMOR: Light
PURPOSE: Allows chronoshift
The evolution of the Philadelphia Experiment,
the Chronosphere allows the Allied player to
move a unit from one location to an other
without having to cross the space in between.
However, the unit will only exist in its new
location for a brief time before returning to its
point of origin. This technology is still a bit
Page 42

SANDBAG BARRIER
ARMOR: Light
PURPOSE: Passive defense
The Sandbag Barrier is good for stopping non
tracked vehicles and infantry. All tracked
vehicles can run right over this barrier.
ARMOR: None
PURPOSE: Deceives the enemy
The Allies have four Fake Structures at their
disposal: Construction Yard, War Factory,
Radar Dome, and Naval Yard. These have a
fraction of the hit-points of a normal structure,
but can be used to create the illusion that
critical structures are in a different location.
CONCRETE BARRIER
ARMOR: Heavy
PURPOSE: Passive defense
More effective than the Sandbag Barrier,
Concrete Walls are not crushable and block
tank ordnance.
Page 43

ALLIED STRUCTURE HIERARCHY
*
Fake Structures can be built once original structure is built.
*
*
*
Page 44

MEDIC
RANGE: N/A
ARMOR: None
WEAPON: Bandages
Any friendly infantry near the Medic will
automatically be healed to full health. Although
a Medic cannot heal himself, Medics working in
teams make excellent additions to any infantry
force.
RANGE: Short
ARMOR: None
WEAPON: M-16 Rifle
Armed with an M-16, this Infantry unit is at its
best against other Infantry and Tanks (when in
groups).
ROCKET SOLDIER
RANGE: Medium
ARMOR: None
WEAPON: Dragon TOW rocket
Capable of rapidly damaging armored units,
these infantry make up for their lack of speed
with a powerful punch. In addition to dealing
with ground targets, their missiles are also
effective against airborne attackers.
Page 45

ENGINEER
RANGE: N/A
ARMOR: None
WEAPON: None
An Engineer can fully repair any of your
damaged buildings instantly. When sent to
enemy buildings, an Engineer can damage or
capture it.
RANGE: N/A
ARMOR: None
WEAPON: Information
Master of disguise, the Spy can slip by enemy
forces undetected. A versatile unit, the Spy can
gather many kinds of information on an enemy
player – what they’re building, how much
money they have, how many units they have,
etc. Beware – Attack Dogs are not fooled by the
Spy’s appearance.
THIEF*
RANGE: N/A
ARMOR: None
WEAPON: Fast fingers
Any Thief that enters an enemy Ore Silo or
Refinery will steal half the credits in that
structure.
Page 46

AT MINE LAYER
RANGE: N/A
ARMOR: Medium
WEAPON: AT Mines
The Anti-Tank Mine Layer is one of the most
effective units on the Allied side. Able to
destroy most units with just one mine, a savvy
commander can neutralize an enemy force
before they get near a base. The Mine Layer
carries 5 mines, and can be reloaded at the
Service Depot.
RANGE: Medium
ARMOR: None
WEAPON: Dual Colt .45s & C-4
explosives
Armed with two .45s, Tanya can mow through
infantry like they weren’t there. Her C-4
Explosives can destroy buildings… if you can
get her to them. Unlike other units, Tanya can
never be put in guard mode – you must
manually target all enemies that you wish
attacked.
ORE TRUCK
RANGE: N/A
ARMOR: Heavy
WEAPON: None
The Ore Truck collects raw, unprocessed ore.
Although slow, it is heavily armored, able to
withstand a hammering and still escape intact.
Page 47

LIGHT TANK
RANGE: Medium
ARMOR: Medium
WEAPON: 75mm Cannon
The standard Allied Tank. Fast, with decent
armor, the Light Tank works well in mixed
groups, and also in large divisions. What it
lacks in firepower, it makes up for in speed and
rapid fire.
RANGER
RANGE: Short
ARMOR: Light
WEAPON: M-60 Machine gun
Fast and lightly armored, this unit is ideal for
scouting an area quickly. Used as a support
unit for an infantry squad, the Ranger can
soften up the enemy before a direct
confrontation occurs.
APC
RANGE: Short
ARMOR: Heavy
WEAPON: M-60 Machine gun
With the Armored Personnel Carrier, the Allies
can transport up to 5 infantry units quickly
across land. A tracked vehicle, the APC is the
lightest unit with the ability to crush Sandbag
and Barbed Wire Barriers. The Turret-Mounted
M-60 helps keep infantry at bay while it goes
Page 48

MEDIUM TANK
RANGE: Medium
ARMOR: Heavy
WEAPON: 105mm Cannon
The higher-grade Allied Tank, this unit is just as
well armored, faster, and less costly than the
Soviet Heavy Tank, though armed with only a
single barrel. Used in groups with Light Tanks,
the Medium Tank can draw fire while the
Lighter Tanks destroy the threat.
RANGE: Long
ARMOR: Light
WEAPON: 155mm Cannon
Very effective, if somewhat inaccurate, Artillery
can devastate infantry and structures from afar.
Its slow speed and light armor require that it be
protected.
MOBILE GAP GENERATOR*
RANGE: Medium
ARMOR: Light
WEAPON: Shroud generator
The mobile version of the Gap Generator
functions in much the same way the stationary
one does. Although it projects a smaller gap
field, you can hide several units under its cover,
blocking the enemy from seeing what you’re
sending against them.
Page 49

TRANSPORT
RANGE: N/A
ARMOR: Medium
WEAPON: None
The Landing Ship Transport allows
transportation of up to 5 ground-based units
across the water. Transports can only be
loaded / unloaded on shore terrain, and they
are at their most vulnerable while unloading.
MCV
RANGE: N/A
ARMOR: Heavy
WEAPON: None
The Mobile Construction Vehicle allows creation
or expansion of a base. Although expensive,
the MCV is useful to have around if the original
Construction Yard (a favorite target of the
enemy) is destroyed or captured. As with any
other construction facility, the more of them you
have, the faster construction will proceed.
GUNBOAT
RANGE: Short
ARMOR: Light
WEAPON: 2-inch deck gun & depth-
charge launcher
The fastest and lightest of the Allied naval
vessels, the Gunboat is good at scouting naval
routes, and detecting Submarines before they
can cause any mischief. Its depth charge
launcher will automatically fire at any
Page 50

CRUISER
RANGE: Extreme
ARMOR: Heavy
WEAPON: 8-inch artillery cannons
Slow moving death. What the Cruiser lacks in
speed, it makes up for in firepower and range.
Able to lob destruction onto targets incredible
distances away, this ship can decimate an
enemy base in minutes. A favorite target of
Submarines, these ships have no sea-based
defenses, relying on the faster moving
Destroyer and Gunboat to protect them.
RANGE: Medium
ARMOR: Medium
WEAPON: Stinger missiles & depth-
charge launchers
The mid-level naval vessel, the Destroyer is
effective against land, air, and sea-based
threats. Its fast-firing stinger missiles can hit air
targets easily, and can also decimate nearby
ground targets. If it detects a Submarine, its
dual depth-charge launcher ensures that the
Sub will be rapidly taken out of commission.
APACHE LONGBOW
RANGE: Short
ARMOR: Heavy
WEAPON: Hellfire missiles
The Allies attack helicopter is loaded with
hellfire missiles, allowing it to destroy armored
targets with ease. Used in conjunction with
naval or ground attacks, the Longbow is an
ideal support aircraft, able to rapidly inflict
additional damage to a target – usually with
Page 51

SONAR PULSE
RANGE: N/A
ARMOR: N/A
WEAPON: Sonar image
A special ability of the Allies, a Sonar Pulse will
temporarily reveal all enemy Submarines on
the map for a few seconds. This can be
incredibly useful in planning your naval
campaigns and devising countermeasures. The
Sonar Pulse is acquired when a Spy enters an
enemy Sub Pen.
RANGE: N/A
ARMOR: N/A
WEAPON: Satellite imagery
When launched from the tech center, the
Global Positioning System (GPS) Satellite will
provide free, unpowered radar to the player
that launched it. In addition, because the
Satellite can see much more of the battlefield,
the entire map will be revealed when it
reaches orbit.
Page 52

+
+
+
+
+
+
+
*
*
*
Page 53

POWER PLANT
ARMOR: Light
PURPOSE: Provides power for base
structures
The standard Power Plant. Power output is
directly related to the Power Plant’s condition,
so protect them during battles.
ARMOR: Heavy
PURPOSE: Allows construction of all
other base structures
The Construction Yard is the foundation of a
base and allows the construction of other
buildings.
ADVANCED POWER PLANT
ARMOR: Light
PURPOSE: Provides power for base
structures
This large, high-yield structure handles the
energy strains of some later, more powerintensive structures and defenses.
Page 54

ORE SILO
ARMOR: Light
PURPOSE: Holds smelted ore
This Silo can hold up to 1,500 credits of
smelted ore. Guard it carefully. If destroyed or
stolen, the amount stored is deducted from your
account.
ARMOR: Light
PURPOSE: Smelts ore into credits
The Refinery smelts ore into its component
elements. Building the refinery immediately
deploys an Ore Truck. The Refinery can store
up to 2,000 credits of smelted ore.
BARRACKS
ARMOR: Light
PURPOSE: Trains Infantry units
The Barracks is where all Soviet infantry are
trained. Some infantry units may not be
available until other structures are built.
Page 55

WAR FACTORY
ARMOR: Light
PURPOSE: Constructs vehicles
This structure is responsible for the building of
all Soviet ground based vehicles. Building
multiple War Factories decreases the amount
of time required to build a vehicle.
ARMOR: Light
PURPOSE: Trains attack dogs
The Kennel trains Attack Dogs.
SUB PEN
ARMOR: Light
PURPOSE: Constructs & repairs naval
vessels
The Sub pen builds and launches Submarines
and Transports. Damaged Submarines and
Transports docked in the Sub Pen are repaired.
Page 56

HELIPAD
ARMOR: Light
PURPOSE: Constructs & reloads
Helicopters
The Helipad allows construction of helicopters,
and will reload any that are in need. Each
new Helipad comes with a Hind.
ARMOR: Heavy
PURPOSE: Builds & reloads airplanes
The Airfield allows construction of MIG and
Yak planes, and allows access to Paratroopers,
Parachute bombs, and Spy Planes. Only one
plane is allowed per Airfield that has been
constructed. If an in-use Airfield is destroyed
while its associated plane is still in the air, the
plane will crash.
SERVICE DEPOT
ARMOR: Light
PURPOSE: Repairs & reloads vehicles
The Service Depot repairs any damaged
vehicle moved onto it. Mine Layer units can be
re-loaded by parking on the pad. (Repairing a
vehicle is much faster than building one, and
costs a fraction of the original price.)
Page 57

TECHNOLOGY CENTER
ARMOR: Light
PURPOSE: Construction of high-tech
structures
The Soviet Tech Center allows the construction
of high-tech units like the Mammoth Tank and
Tesla Coil.
ARMOR: Light
PURPOSE: Provides radar
The Radar Dome gives you an overhead view
of the battlefield when fully powered, and
repaired of serious damage.
FLAME TOWER
ARMOR: Heavy
PURPOSE: Fire-based defense
The Flame Tower targets and destroys
approaching enemy ground units by shooting
balls of fire. It is best used against large groups
of infantry; it is effective against armored units
as well. Since there are volatile fuels used in the
Flame Tower, it damages nearby units and
structures if destroyed.
Page 58

SAM SITE
ARMOR: Heavy
PURPOSE: Anti-aircraft defense
SAM Site automatically launches longranging missiles at enemy aircraft. Slower
moving or hovering aircraft will fare the
worst against this defensive structure.
ARMOR: Light
PURPOSE: Lightning-based defense
The Tesla Coil automatically directs bolts of
lightning at enemy ground units, reducing men
to ash and tanks to molten steel in seconds.
IRON CURTAIN
ARMOR: Light
PURPOSE: Temporary invulnerability
defense
The Iron Curtain renders a vehicle or building
invulnerable for a short period of time.
Page 59

ARMOR: Heavy
PURPOSE: Launches atomic missile
Once built, the Silo readies an Atomic Bomb
that can be launched onto the battlefield,
causing massive destruction to structures and
infantry. The more heavily armored units will
fare better, but not by much.
BARBED-WIRE BARRIER
ARMOR: Light
PURPOSE: Passive defense
Barbed-Wire Barrier stops non-tracked
vehicles and infantry. Tracked vehicles can
destroy the barrier by shooting it and/or
running over it.
CONCRETE BARRIER
ARMOR: Heavy
PURPOSE: Passive defense
More effective than the Barbed-Wire Barrier,
Concrete Walls are not crushable and block
tank ordnance.
Page 60

SOVIET STRUCTURE HIERARCHY
Page 61

RIFLE INFANTRY
RANGE: Short
ARMOR: None
WEAPON: AK-47 Rifle
Rifle Infantry are the backbone of the Soviet
infantry. Armed with an AK-47, this Infantry
unit is versatile against other infantry.
RANGE: N/A
ARMOR: None
WEAPON: Sharp teeth
Attack Dogs are the only unit that can detect
Spies that are trying to infiltrate the base.
Although unarmored and easy to kill, Dogs
make the perfect in-base guard unit against
sneak attacks by Engineers, Spies, and Thieves.
They also make fine pets.
GRENADIER
RANGE: Short
ARMOR: None
WEAPON: Grenade
The Grenadier has a longer range and more
destructive power than regular infantry. In
groups, Grenadiers are effective against
heavily armored units and structures.
Page 62

ENGINEER
RANGE: N/A
ARMOR: None
WEAPON: None
An Engineer can fully repair any of your
damaged buildings instantly. When sent to
enemy buildings, an Engineer may damage
or capture it.
RANGE: Short
ARMOR: None
WEAPON: Flame-thrower
These soldiers are slower and more susceptible
to damage than other infantry (due to the large
tanks of flammable chemicals they carry). The
Flame Soldier can decimate structures and
infantry in seconds with his flamethrower.
ORE TRUCK
RANGE: N/A
ARMOR: Heavy
WEAPON: None
Used in the collection of raw ore, the Ore
Truck is an indispensable piece of equipment.
Although slow, it is heavily armored, able to
withstand a hammering.
Page 63

AP MINE LAYER
RANGE: N/A
ARMOR: Medium
WEAPON: AP Mines
The AP mine layer deploys Anti-Personnel
Mines to thwart the Allied heavy infantry
ranks. This Mine can destroy entire groups of
infantry with one explosion. The Mine Layer
carries 5 mines, and can be reloaded at the
Service Depot.
RANGE: Medium
ARMOR: Heavy
WEAPON: Twin 105mm cannons
The basic tank of the Soviet Empire, this beast is
equipped with twin 105mm cannons, giving it
twice the punch of the nearest Allied equivalent,
the Medium Tank. It sacrifices speed for this
bonus, but the net result still makes it a
formidable opponent on the battlefield.
V2 ROCKET LAUNCHER
RANGE: Long
ARMOR: Light
WEAPON: V2 Rocket
The V2 Launcher can destroy most buildings
with just two rockets. Factor in its incredible
range, and it is easy to see why the Allies fear
this weapons platform. Its drawbacks are its
light armor, long reload time, and inability to
hit fast-moving targets.
Page 64

MAMMOTH TANK
RANGE: Medium
ARMOR: Heavy
WEAPON: Twin 120mm Cannons &
missile packs.
Tanks don’t come any bigger. The largest landbased weapons platform, the Mammoth Tank
can take and dish out a lot of punishment. Its
twin cannons are unmatched in power on land,
and its missiles make it effective against
infantry and air units as well.
RANGE: Long
ARMOR: Light
WEAPON: White-noise generator
The Mobile Radar Jammer (MRJ) disrupts
enemy radar functions, shutting down
transmissions and display. The range of this
unit allows it to hide a good distance away
from the enemy base while other forces use the
radar blackout to attack.
MCV*
RANGE: N/A
ARMOR: Heavy
WEAPON: None
The Mobile Construction Vehicle allows
creation or expansion of a base. Although
expensive, the MCV is useful to have around if
the original Construction Yard (a favorite target
of the enemy) is destroyed or captured. As with
any other construction facility, the more of them
Page 65

SUBMARINE
RANGE: Long
ARMOR: Medium
WEAPON: Torpedo
Silent and stealthy, Submarines can attack
ships from afar. Subs must surface to fire,
giving away their position, and opening
themselves up to any nearby units that can
hit them.
RANGE: N/A
ARMOR: Medium
WEAPON: None
The Landing Ship Transport allows
transportation of up to 5 units across the water.
Transports can only be loaded / unloaded on
shore terrain, and they are at their most
vulnerable while unloading.
YAK
RANGE: Short
ARMOR: Light
WEAPON: Twin machine-guns
Sometimes called the “Infantry Eraser,” the Yak
fires in strafing runs, swooping down on groups
of marching infantry, potentially destroying them
all in a single run. The Yak is not that fast, making it an easy target for Allied Rocket Soldiers –
those that actually survive the first strafing run.
Page 66

PARATROOPERS
RANGE: Short
ARMOR: None
WEAPON: AK-47 Rifle
Dropped from the Badger, this squad of 5
infantry soldiers are in every way similar to
regular ground based infantry. Paratroopers
can be dropped anywhere on the map, even in
areas not yet explored.
RANGE: N/A
ARMOR: Light
WEAPON: Dropped bombs &
paratroopers
The Badger Bomber is the transport plane used
for dropping Paratroopers and Parachute
Bombs onto a designated target. It is somewhat
slow, and its lack of armor can make it a snack
for any enemy AA-guns that may be guarding
the target.
PARACHUTE BOMBS
RANGE: N/A
ARMOR: N/A
WEAPON: High-explosive yield
Dropped from Badger Bombers, these
explosives fall in a line over their target,
removing the object targeted and anything in
the area around it. Troops can see these falling
and will attempt to leave the targeted area.
Page 67

MIG
RANGE: Medium
ARMOR: Light
WEAPON: Heat-seeking missiles
This fast-attack craft carries a limited number of
powerful and accurate missiles. Used in hitand-run tactics, the MIG can remove armored
craft before they can become a threat.
RANGE: N/A
ARMOR: Light
WEAPON: Camera
When targeted, the Spy Plane will swoop in
from off board and take a snapshot of the
targeted area, removing the shroud.
HIND
RANGE: Short
ARMOR: Heavy
WEAPON: Vulcan chain-gun
Large and armored, the Hind uses its highvelocity Vulcan chain-gun to tear apart enemy
units and structure. Equipped with a large
ammo supply, the Hind will follow its target for
quite some time, all the while wearing away at
its defenses.
Page 68

RANGE: N/A
ARMOR: Medium
WEAPON: None
Able to transport 5 infantry-type units through
the air, the Transport Helicopter is ideal for
landing engineers and other assault squads in
an enemy base.
Page 69

+
+
+
+
+
+
*
*
*
Page 70

gg
r in the middle of the Game Speed slider. Moving the bar to the right w
Page 71

jpg
se in this mission, let’s just ignore it until you get to mission two.
to the field.
TESLA CO
Page 72

y,
you move your units around, they reveal the terrain and the shroud disap
ain, and the unit will try to move there.
SHROUD
Page 73

yj g y
ected. This will unselect the unit you were controlling and select the new one.
tton. This will unselect all units, which can be nice, so you don’t accidentally te
d we don’t want to risk getting in the way of the Tesla Coil.
s by nature are unstable, and will explode, chain-reacting with other nearb
rrels when shot. The resulting blasts usually destroy any structures and uni
POWER
PLANTS
Page 74

hen you release the left mouse button, anything in the white box will b
ected. This way, you can order multiple units to perform a specific task at once
LEFT CLICK
AND HOLD
DRAG TO
HERE AND
RELEASE
Page 75

tomatically fire at things that are close to her – you have to manually tell Tany
shoot at targets. She’s important to keep alive, so make sure she only pick
hts that she can win. Also, notice that your troops will continue to shoot at th
wer plant – even if they are attacked by something else. If you want to re-targ
Page 76

yy pp gy ,y
arding something? We’ll check in a second, but let’s make doubly sure thos
d move the cursor over the unharmed Power Plant. Notice that it changes to
ng infantry, isn’t it?
Page 77

rth. North equals up, so scroll the screen up and you should see a green smok
w you’re going to get Einstein out of here.
SIGNAL
FLARE
CHINOOK
Page 78

Page 79

ints and a 50% leadership, that would give you 500 points for leadership.
ck of the seven highest scores on any given mission. This is useful if you an
e that you clicked in will then be the mission that you will play.
se. Von Esling has made it clear that the supply convoy is due through the are
Page 80

y, y y g
to the map – that’s your Mobile Construction Vehicle (MCV), and that’s how
u’ll notice that items appear in the sidebar boxes that were empty in the previou
, asking you if you want to Abort, Restart, or Cancel.
Page 81

esn’t deploy, check around the MCV for things that might get in the MCV
CAN
DEPLOY
BLOCKED
BY
INFANTRY
Page 82

ygg py y gg V
the top of the Sidebar (Win 95) or just to the left of the Sidebar tab (DOS). Th
Page 83

. When construction on the Power Plant is done, a “Ready” message w
top of existing units or terrain obstacles (cliffs, trees, mountains, infantry, etc.)
existing building that belongs to you. You can not build off of walls or enem
ild up and go on-line.
BLOCKED B
CONSTRUCT
YARD
Page 84

EASURING POWER EFFICIENCY
wer your base is currently using, and the vertical bar shows your current avai
le power. Every building that you build will raise the power requirements o
long as the bar is in the green, your base has enough power to operate every
Page 85

u’ll also get the option to build Pillboxes. You probably don’t see Pillboxes on th
see any more that you have, left-click on the arrows below the column you want t
SCROLL
BUTTONS
Page 86

yy p g
you infantry to the left of where you started, and you’ll see some ore. There
d begin to collect it.
selecting it, and then left-clicking over the Refinery (you’ll see an enter cursor
ORE
REFINERY
ORE
TRUCK
Page 87

ected. This shows you how much ore it has collected. If you leave it selected
Page 88

the way. You should be able to beat all of them without heavy losses, but if yo
d yourself losing, train some soldiers by clicking on the icon of them. Whe
od at hurting other infantry, but can do more damage to vehicles and structur
HEAL
TARGET
CURSOR
Page 89

y,ggyy ygy
d heal them back to full health. Medics don’t have any other weapon, so mak
now we’ve built some more infantry, plowed down the road to the south, an
d across the bottom of the map.
ck. You don’t have to attack it now, but if you do, you can get it out of the wa
d deny the enemy their income. Be warned, though – attacking an Ore Truc
Page 90

se from other directions. Build a Pillbox to the west of your base just to be safe
the Soviet forces.
Page 91

your Red Alert CD). There are Command & Conquer and Red Alert chat room
Page 92

g,p
file: under DOS go to the installed directory (normally C:\WESTWOOD\REDALER
and type README[ENTER]), under Windows 95 use the “Programs/Westwood/Re
Alert/Red Alert Readme” shortcut on the “Start” menu to view the readme file. Alternatively
the readme file exists as a plain text file (readme.txt) and a Windows .WRI file (readme.w
in the root of the CD.
Q. WHY DOESN’T RED ALERT INSTALL ONTO MY HARD
DISK?
A. WINDOWS 95 & DOS:
Make sure you have enough free hard dis
space. Red Alert requires 40MB (41,943,040 bytes) to install. If you’re using
disk compression system (such as DriveSpace) you must double the amount o
space needed during installation (i.e. 83,886,080 bytes) because not every fi
will compress at 2:1. In general, we recommend against using disk compre
sion systems with Red Alert.
Q. WHY DOESN’T RED ALERT LOAD?
A. WINDOWS 95:
Make sure you have enough free memory (see below). If yo
are very low on RAM (for example, on an 8MB system), Windows 95 will try to cre
ate a temporary swap file on your hard drive. If Windows can’t create the swap file
Red Alert will either run very slowly or not at all. You should have at least 15M
(15,728,640 bytes) of free space on your hard drive prior to running Red Alert.
DOS: Make sure you have enough free memory and disk space. To be safe
you should have at least 15MB (15,728,640 bytes) of free space on your har
disk prior to running Red Alert.
Q. DOES RED ALERT REQUIRE A SPECIFIC TYPE OF
MEMORY CONFIGURATION SUCH AS EMS OR XMS?
A. WINDOWS 95:
No special settings are needed.
DOS: Red Alert is designed to be very tolerant of memory configuration. From th
C:\> prompt, make sure you have enough memory by typing MEM /C [Enter]. Yo
need at least 6MB (6,291,456 bytes) of free XMS or EMS memory to run Red Aler
Q. WHY DO I GET A BLACK SCREEN WHEN I CLICK ON
THE RED ALERT GAME ICON?
Page 93

)g ,
ems to work well on all video cards. Graphics may appear a little squashed in th
. WHY DOESN’T THE SOUND WORK?
Make sure your speakers are powered on and connecte
your PC. Make sure that your speaker volume controls are adjusted correctly.
. WHAT IF MY SOUND CARD IS NOT ON THE SETUP
Your sound card must be 100% compatible with one of the supporte
. THE GAME RUNS SLOWLY ON MY SYSTEM. WHAT CAN
Use the Red Alert for Windows 95 Setup utility (via t
tting this option as it may cause video problems during the game on certain sy
certain rare cases you may be able to improve performance by running the Re
ert for Windows 95 Setup utility (via the “Programs/Westwood/Red Alert/Re
ert Windows 95 Edition Setup” shortcut on the “Start” menu) and un-checkin
vere performance degradation can occur with an incorrect setting. Check gam
Page 94

Q. WHY DO THE MOVIES STUTTER?
A. WINDOWS 95 & DOS:
Red Alert requires at least a double-speed
300KB per second CD-ROM drive.
WINDOWS 95: You may get smoother movie playback by turning off CD
ROM caching. To do this, use the “Settings/Control Panel” shortcut on th
“Start” menu, double-click the “System” icon, click on the “Performance” tab
click the “File System” button, click the “CD-ROM” tab and set Optimize Acces
Pattern for No Read Ahead. Make a note of the original settings as other appl
cations may be affected by modifying the settings.
DOS: When playing Red Alert DOS version from Windows 95,make sure CD
ROM caching is turned on. To do this, use the “Settings/Control Panel” shortc
on the “Start” menu, double-click the “System” icon, click on the “Performance
tab, click the “File System” button and click the “CD-ROM” tab. Make sur
“Optimize Access Pattern for” and “Supplemental cache size” enabled co
rectly for your CD-ROM drive.
Q. WHY DOESN'T THE MOUSE WORK WITHIN RED ALERT?
A. DOS:
Make sure you have a mouse driver loaded. The way you do th
varies depending on what brand you have. If you are not sure what the corre
driver is called or how you install it, consult the documentation that came wit
your system. If the mouse is behaving erratically contact the manufacturer t
check for an updated driver.
Q. WILL RED ALERT FOR DOS RUN FROM WINDOWS 3.X?
A. DOS:
Yes. The DOS version of Red Alert uses a special mode (which we ca
TrueDOS) to launch the game in a Windows 3.X environment. TrueDOS require
that all other Windows 3.X applications be closed down in order to give the full powe
of your computer to Red Alert. You will not be able to access other Windows app
cations (e.g. by ALT-tabbing) while Red Alert is running.
Q. WILL RED ALERT FOR DOS RUN FROM WINDOWS 95?
A. DOS:
Yes. Please refer to the Getting Started section at the beginning of th
manual for details about running the DOS version of Red Alert under Windows 95
Q. RED ALERT STILL DOES NOT RUN, WHAT CAN I DO?
Page 95

und to your network adapter card. The network game option is hidden if no IP
rts IPX and to have the drivers configured for your machine.
X SOCKET CONFLICT: It is possible an errant network application
ng a socket number that conflicts with Red Alert:
tup” shortcut on the “Start” menu) to change Red Alerts SOCKET numbe
ecify a number between 0 - 16383 to change the socket (making sure that a
me participants use the same number).
Page 96

IN THE “JOIN” DIALOG:
There may be a network bridge between yo
and another system. If so, you can tell Red Alert to run across the bridge by:
WINDOWS 95: Set the destination network address (DESTNET) value usin
the Red Alert Windows 95 Edition Setup utility (by use th
“Programs/Westwood/Red Alert/Red Alert Windows 95 Edition Setup” shor
cut on the “Start” menu). DESTNET has the form XX.XX.XX.XX (e.g
00.00.00.44). On a Novell network, use the Novell USERLIST /A comman
(from an MS-DOS prompt) to obtain a list of all users’ network numbers an
node addresses. If USERLIST reports spaces in the network number, replac
them with 0’s when you type the number in. All four numbers (8 digits) must b
included for DESTNET to work. All players in the game must specify a DEST
NET containing the network number of the machines on the opposite side of th
bridge. If not all players specify the correct setting, one or more players may b
left out, and the game will not run.
DOS: Tell Red Alert to run across the bridge with the -DESTNET command-lin
argument. Specify -DESTNETXX.XX.XX.XX, where “XX.XX.XX.XX” is the ne
work number of the other machine (i.e. -DESTNET00.00.00.44). On a Nove
network, use the Novell USERLIST /A command to obtain a list of all users’ ne
work numbers and node addresses. If USERLIST reports spaces in the networ
number, replace them with 0’s when you type the number in. All four numbe
(8 digits) must be included for DESTNET to work. All players in the game mu
specify a -DESTNET argument containing the network number of the machine
on the opposite side of the bridge. If not all players specify the correct argu
ment, one or more players may be left out, and the game will not run.
GENERAL TROUBLESHOOTING GUIDELINES FOR SERIAL
PLAY:
If you have an external modem make sure it’s powered on and the cables (seria
and phone) are connected to your PC. Under DOS there is no auto-detection cod
for modems so make sure the COM PORT/IRQ: settings are correct (check the doc
umentation that came with your modem for this info). Your modem must be set a
the same baud rate as the person to whom you are connecting.
Page 97

pg
one call the game plays best with modem error-correction and data-compre
t Red Alert has a selection of standard prefixes to choose from. Check with you
one company to get the right one. If it’s not one of Red Alert’s standard choice
ngs for more than 30 seconds this is a good sign that something is awry.
correct errors and will even try to reconnect if the line is dropped. Still, b
Page 98

ECHNICAL SUPPORT
FORE YOU CALL FOR TECHNICAL SUPPORT
o
v
r h
lay
o
e
e
g
ou are having problems, please consult the “Troubleshooting” section of this bo
ore calling technical support. We receive many calls every day, so in order to ser
more efficiently, please have the following information available:
1.The correct name of the game.
2.The type of computer you are running the game on.
3.The information listed when right clicking on the Windows 95
desktop icon corresponding to your computer and selecting
properties. This includes information about the Windows 95
version number, amount of memory & type of CPU.
4.Exact error message reported (if any).
5.The contents of your AUTOEXEC.BAT and CONFIG.SYS files.
r technical support number is (01753) 546465. Have a pen and pape
en you call, and be near your computer if at all possible. No game p
ts will be given through this number.
N-LINE SUPPORT SERVICES
stwood Studios provides upcoming news, latest versions, updates, product dem
iews, technical support, counseling, and more on the following on-line services.
TERNET: WORLD WIDE WEB
find Westwood’s home page on the world wide web, you will need a brows
r address is http://www.westwood.com.
TERNET: FTP
ou’re looking for our latest support files for any of our products, you’ll be abl
et them from our ftp site at ftp.westwood.com.
TERNET: E-MAIL
d e-mail to support@westwood.com with any specific queries you have.
Page 99

PRODUCER
DEL CASTILLO
H
G
T
N
M
,
N
,
A
.........................................ED
ORIGINAL CONCEPT.........................BRETT W. SPERRY, JOE BOSTIC
LEAD GAME PROGRAMMERS ........JOE BOSTIC, BARRY GREEN,
STEVE TALL
GAME PROGRAMMERS ....................PHIL GORROW, BILL RANDOLP
MARIA del MAR McCREADY LE
INTERNET PROGRAMMERS ............JEFF BROWN, DAVID ALDRIDGE
TRANSLATION PROGRAMMER.......VICTOR GRIPPI
TECHNICAL DIRECTION ...................STEVE WETHERILL, ERIC WANG
DESIGNERS ........................................ADAM ISGREEN, MICHAEL LIGH
LEAD ARTISTS..................................CHRIS DEMERS, MATTHEW HA
ARTISTS .............................................DAVID T. POTTER, DAMON RED
VIDEO POST PRODUCTION............FELIX KUPIS, KEVIN BECQUET
ORIGINAL STORY .............................RON SMITH, ED DEL CASTILLO
SCREENPLAY.....................................RON SMITH, ADAM ISGREEN,
AUDIO DIRECTION ............................PAUL S. MUDRA
SOUNDTRACK ....................................FRANK KLEPACKI
SOUND EFFECTS..............................DWIGHT K. OKAHARA
QA DIRECTION...................................GLENN SPERRY
QUALITY ASSURANCE ....................JAMES ADKINS, JOHN ARCHER
LLOYD BELL, CHRIS BLEVEN, D'ANDRE CAMBELL, ERROL CAMPBELL,
PHILLIP CASTRO, STEVE CORCORAN, KENNY DUNNE, RANDY GREE
ABE HERNANDEZ, CHRIS HOLLOWAY, JAMES HUGHES, BEN LUBLIN
LEVI LUKE, ISAIAH MYERS, RICHARD RASMUSSEN, CHRIS RUBYOR,
CHAD SHACKELFORD, ALBERT SPRINGFIELD, MIKE SMITH, TYLER TH
BOX DESIGN......................................MATTHEW HANSEL AND
MANUAL DESIGN ..............................VICTORIA HART
MATT THORN
ERIK YEO
JOSEPH B. HEWITT IV
PAUL WESBERRY, BRIAN WHITE
JOHN SCOTT LEWINSKI
THOMAS PUCKETT INC.
Page 100

VON ESLING...............................ARTHUR ROBERTS
C
G
N
I
STAVROS ....................................BARRY KRAMER
ALBERT EINSTEIN.....................JOHN MILFORD
TANYA..........................................LYNNE LITTEER
INTERROGATOR .........................DOM MAGWILI
ANNOUNCER ...............................GWEN CASTALDI
ALLIED SOLDIERS
FINALE .........................................RICKY RUSSELL, NICK PAULOS,
SCOTT RYAN TALLY
COMMANDERS ............................JOE BOSTIC, CHRIS DEMERS,
BARRY GREEN, MATTHEW HANSEL, ADAM ISGREEN, FRANK KLEPA
MIKE LIGHTNER, BILL RANDOLPH, PHILIP E. SHELBURNE, ERIC WAN
OVIET SIDE:
JOSEF STALIN...........................EUGENE DYNARSKI
KUKOV .........................................CRAIG CAVANAH
GRADENKO ..................................ALAN TERRY
NADIA ...........................................ANDREA ROBINSON
KANE.............................................JOE KUCAN
SOVIET SOLDIERS....................JOHN ARCHER, MIKE GRAYFORD
FRANK KLEPACKI, FELIX KUPIS, CHRIS RUBYOR, ERIK YEO
GAME VOICES
V.A. ...................................................MARTIN ALPER
NYA.................................................LANAE FREEBORN
FANTRY & UNITS ........................MIKE GRAYFORD, ADAM ISGREE
FRANK KLEPACKI, TROY LEONARD, DWIGHT OKAHARA,
CHRIS RUBYOR, ERIC WANG, ERIK YEO
RODUCTION CREW
RECTED BY....................................JOSEPH D. KUCAN
STUME DESIGN............................CHRISTIE MOELLER
AKE-UP & HAIR .............................CINDY CLINE
UND ENGINEER ............................PAUL MUDRA
STING .............................................MARILEE LEAR, C.S.A.
DEO ..................................................KEVIN BECQUET
GHTING ............................................ERIC GOOCH
AD PRODUCTION ASSISTANT ..PAUL BASTARDO
ODUCTION ASSISTANTS ...........RICK APPIN, PATIENCE BECQUET,
 Loading...