

Page 1
M
Draft for Beta2 10/6/98
Page 2

Information in this document is subject to change without notice. The names of companies, products, people, characters and/or data
mentioned herein are fictitious unless otherwise noted. Complying with all applicable copyright laws is the responsibility of the user.
No part of this document may be reproduced or transmitted in any form or by any means, electronic or mechanical, for any
purpose, without the express written permission of Microsoft Corporation. If however, your only means of access is electronic,
permission to print one copy is hereby granted.
Microsoft may have patents, patent applications, trademarks, copyrights, or other intellectual property rights covering subject
matter in this document. Except as expressly provided in any written license agreement from Microsoft, the furnishing of this
document does not give you any license to these patents, trademarks, copyrights, or other intellectual property.
P
© and 1996–1998 Microsoft Corporation. All rights reserved. Microsoft, MS, Windows, the Windows logo, MSN, and Windows NT are
either registered trademarks or trademarks of Microsoft Corporation in the U.S. and/or other countries.
© 1996–1998 by Atomic Games, Inc. All rights reserved.
Atomic, Atomic Games, and the Atomic logo are trademarks of Atomic Games, Inc.
Other product and company names mentioned herein may be the trademarks of their respective owners.
Document No. X04-03133-1298
Page 3
Getting Help from Microsoft Product Support Services
If you have a simple question and need an answer fast
Quickly find answers yourself online
Use Support Online to easily search the Microsoft Knowledge Base and other
technical resources for fast, accurate answers. To begin your search, go to http://
support.microsoft.com/support.
If your question is urgent and more complex
Telephone Microsoft Product Support Services
Work with a support engineer to solve your issue through the following options.
Standard No-Charge Support — for help during business hours
If you acquired this product as a stand-alone retail product, you are eligible
unlimited support at no charge. You can receive no-charge support via e-mail
(explained later) or via telephone by calling one of the following numbers,
available Monday – Friday , excluding holidays.
In the U.S.: (425) 635-7008 In Canada: (905) 568-3503
6:00 A.M. - 6:00 P.M. Pacific time 8:00 A.M. - 8:00 P.M. eastern time
i
If your Microsoft product was preinstalled or shipped with your personal
computer, you are not eligible for Standard No-Charge Support from Microsoft
and must contact your computer manufacturer for support. For phone numbers,
please refer to the documentation that came with your computer.
Pay-Per-Incident Support — for help after hours or to supplement Standard Support
If you need help after hours, or have used up or are not eligible for Standard NoCharge Support, you can purchase Pay-Per-Incident Support. Support fees are
billed to your VISA, MasterCard, or American Express card..
In the U.S.: (800) 936-5600 In Canada: (800) 668-7975
Cost: $15 US per incident Cost: $45 CDN plus tax per incident
24 hours a day, seven days a week, 8:00 A.M. - 8:00 P.M. eastern time
including holidays Monday - Friday, excluding holidays
If your question isn’t urgent
Send e-mail to a Microsoft Product Support Engineer
Ideal for questions requiring attached files, submit a question anytime and
receive a response within one business day. Submit a question at http://
support.microsoft.com/support using one of the following options:
Page 4

ii
Standard No-Charge Web Response
Submit unlimited support incidents at no charge as described in the Standard
No-Charge Support section above.
Pay-Per-Incident Web Response
Submit your question for a fee of $15 US.
For additional support needs
If you need text telephone (TTY/TDD)
A vailable Monday – Friday, excluding holidays. In the United States, call (425)
635-4948, 6:00 A.M. - 6:00 P.M. Pacific time. In Canada, call (905) 568-9641,
8:00 A.M. - 8:00 P.M. eastern time.
If you don’t have access to the Internet
FastTips is a fax-back service providing Knowledge Base articles and answers
to common questions. (800) 936-4100.
If you need support services for a business
Priority Annual, Priority Plus, and Premier provide a selection of support
packages geared for businesses. To learn which account meets your needs, go to
http://www.microsoft.com/support. Or call
(800) 936-3500 for information on accounts for small- to medium-sized businesses and (800) 936-3200 for large, enterprise businesses.
If you need on-site, multivendor, or proprietary product support
Microsoft Certified Solution Providers (MCSPs) and Authorized Support
Centers (ASCs) specialize in providing support packages for hardware, network,
and software products from both Microsoft and other vendors. For more
information about MCSPs, call (800) 765-7768 or visit http://
www.microsoft.com/mcsp. For more information about ASCs, contact your
Microsoft account representative, or visit http://www.microsoft.com/support.
If you need support outside the United States and Canada
For information on support available in other countries, contact the Microsoft
subsidiary nearest you, using the Worldwide Subsidiary list in the Readme file.
The services and prices listed here are available in the United States and Canada
only. Support outside the United States and Canada may vary. Microsoft’s
support services are subject to Microsoft’s then-current prices, terms, and
conditions, which are subject to change without notice.
Page 5
Close Combat III:
The Russian Front
Contents
iii
iv Quicksktart!
1 Chapter 1:
Gearing Up for Gameplay
1 The Game
2 Your Objective
2 Scenario T ypes
3 Rank and Promotions
3 Installing and Starting
the Game
3 Entering Boot Camp
(Optional)
3 Choosing a Scenario
4 Viewing Historical
Information (Optional)
5 Assembling Y our Forces
7 Getting Y our Briefing
7 Choosing Game Settings
(Optional)
9 Starting the Game
9 Choosing Additional
Options (Optional)
12 Chapter 2: Fighting Battles,
Operations, and Campaigns
12 Surveying the Battlefield
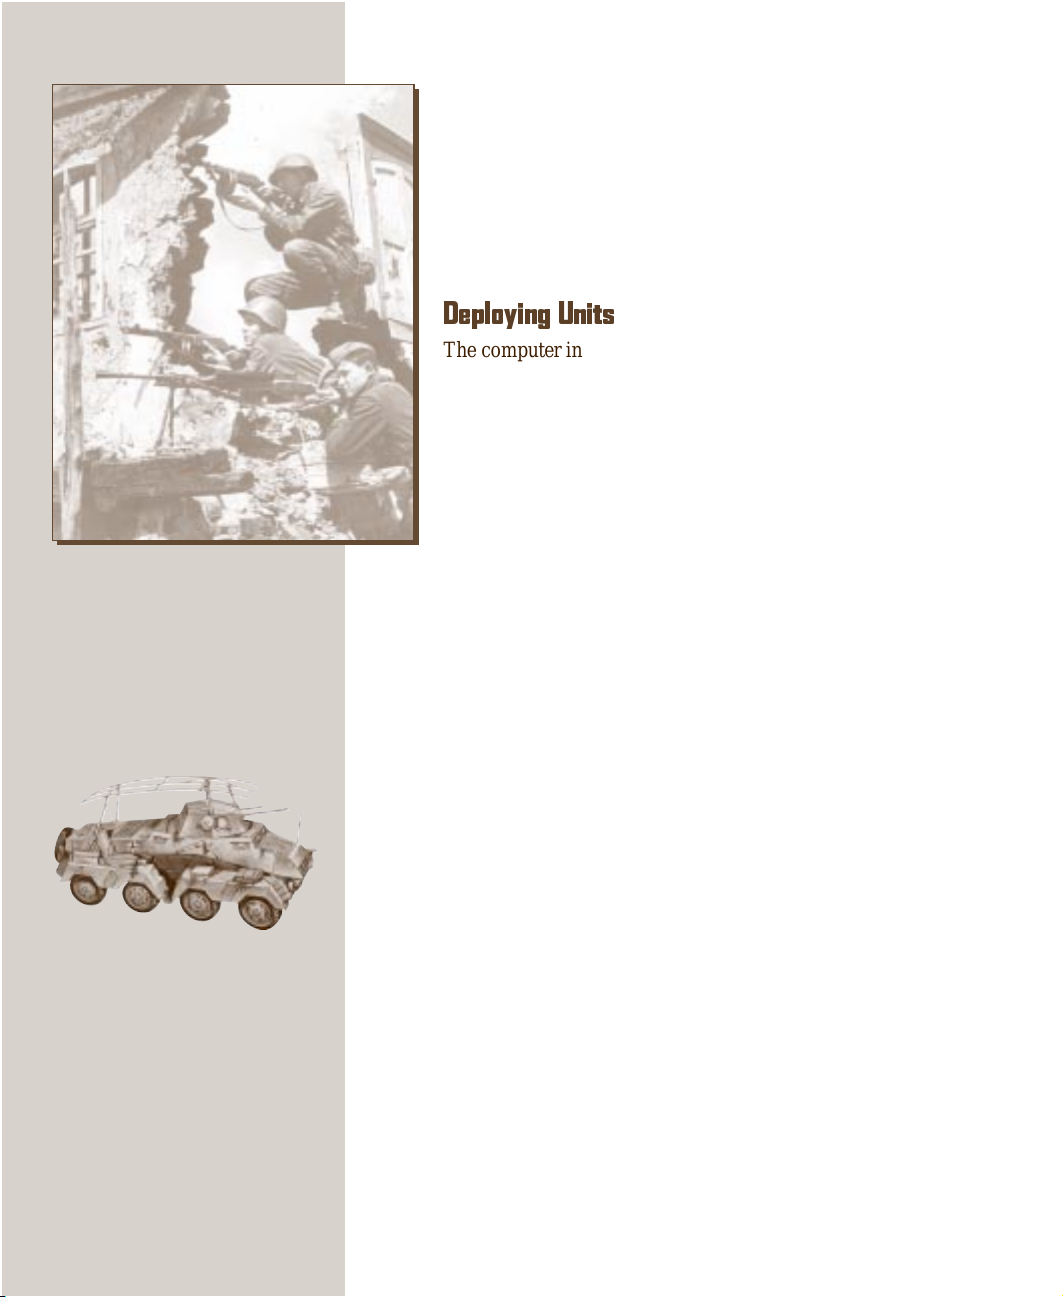
14 Deploying Units
15 Starting the Battle
15 Issuing Orders
18 Interpreting Order Dots
18 Using Your W eapons
Effectively
20 T aking Prisoners
and Rallying
Separated Soldiers
21 Viewing Battlefield Status
21 Ending a Battle
22 Checking the Status of
Your Soldiers
22 Winning and Losing: The
Debriefing Screen
24 Chapter 3:
Strategy and Tactics
24 Determining Y our Basic
Strategy
25 Managing Y our T eams
27 Using T errain to Your
Benefit
29 On the Attack
32 On the Defense
34 Using Cover and Protec-
tion
35 Checking Fields of Fire
35 Clearing Mines and
Passing Through
Minefields
36 Chapter 4: Unit Tactics
36 Using Command Teams
36 Using Infantry Teams
37 Using Other Teams as
Infantry
37 Using Rifle Teams
38 Using Engineer Teams
38 Using Snipers
38 Using Support Teams
42 Using Armor Teams
43 Conserving Ammunition
43 Attacking Crews in
Vehicles
44 Chapter 5:
Building Your Own Scenarios
44 Starting the Scenario
Editor
44 Choosing a Game
45 Choosing Maps
45 Adjusting Game Settings
48 Editing Map Elements
50 Selecting Forces
51 Saving and Playing
Custom Scenarios
51 Copying Custom Games
52 Chapter 6:
Multiplayer Games
52 T ypes of Connections
52 Using an Internet TCP/IP
Connection
53 Using an IPX Connection
53 Using a Modem Connec-
tion
53 Using a Serial Connec-
tion
53 Using the MSN Gaming
Zone
55 Communicating with
Your Opponent
56 Index
Keyboard and Mouse Input
(inside back cover)
Page 6
iv
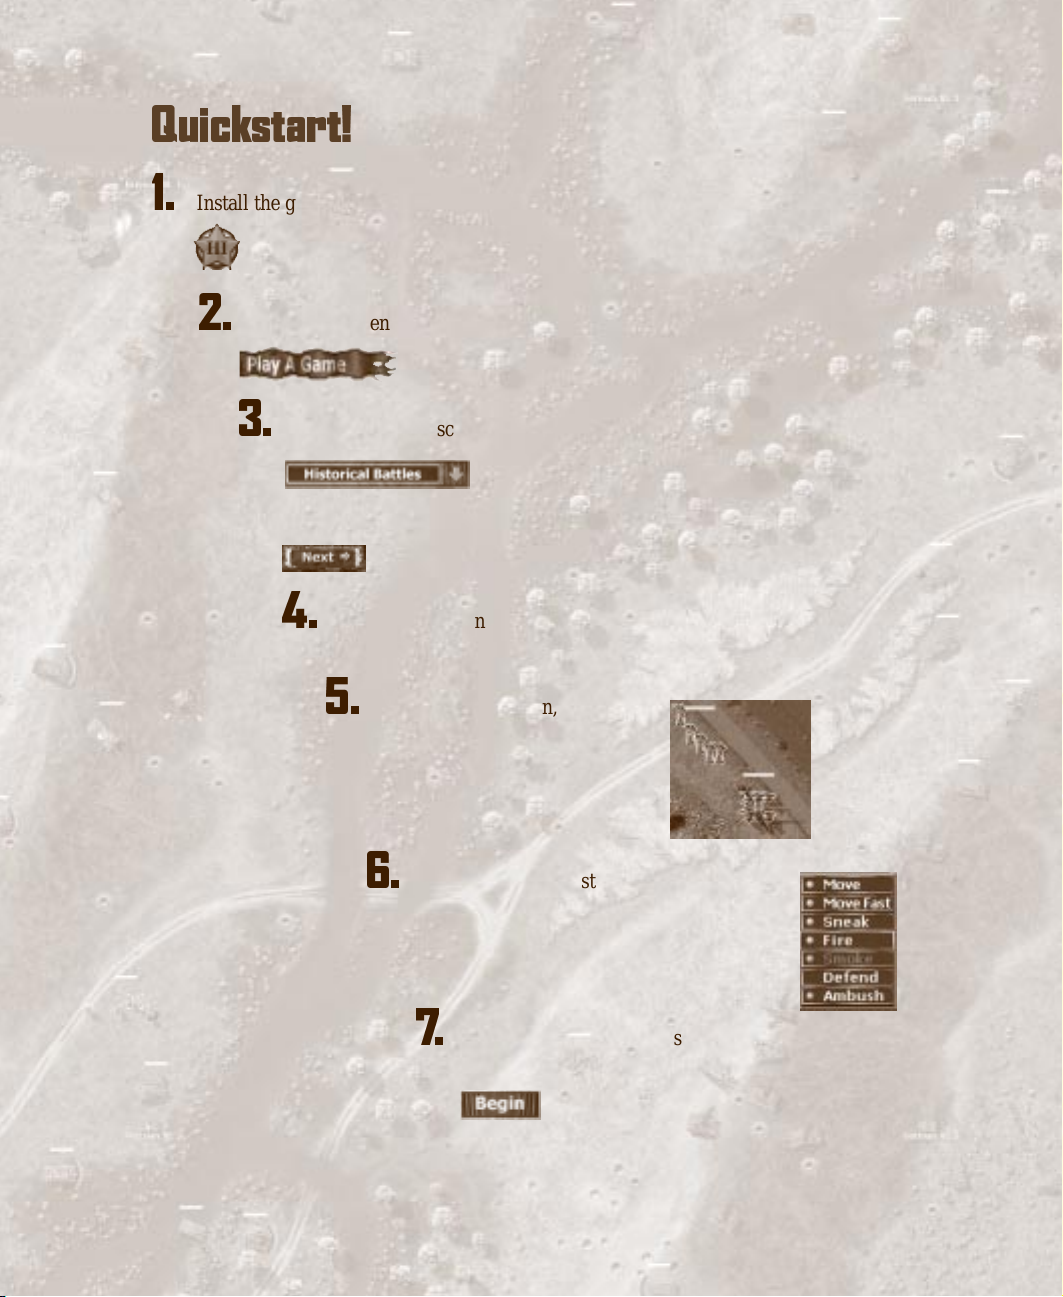
Quickstart!
1.
Install the game and click Play Close Combat.
2.
On the Main menu, click Play A Game.
3.
On the Command screen, click the scenario you want to play.
Click Next.
4.
On the Requisition screen, review the troops you are going to take
into battle, and then click Next again.
5.
On the combat screen, deploy
your troops: Click and drag each
unit to a new position. (Or keep
the default deployment.)
6.
If you want to issue starting orders to any
units, right-click a unit and then click the
order you want. (The Defend or Ambush
orders are in effect by default.)
7.
When you have your units in position and have issued any
orders you want, click Begin.
On to victory!
Page 7
Chapter 1
Gearing Up for Gameplay
June, 1941.
A huge German army waits on that country’s border with Russia. An
even more immense Russian army stands by on the other side. Both are
about to enter a massive four-year war unparalleled in history. From
Finland to the Caucasus Mountains, over 5 million Germans will fight
against the Russians while more than 30 million Russians battle the
Germans. German casualties will exceed 3 million; Russian casualties,
including civilians, a staggering 43 million.
It will be a conflict of contrasts: of warfare on endless plains and in city
streets; of disciplined soldiers against untrained, unequipped conscripts;
of exhausting summer heat and brutal winters so cold that rifle bolts
shatter. Whole armies will panic and run; whole divisions will stand and
fight to the last man. It will also be a conflict of similarities. On each
side, brutal dictators terrorize civilians and order soldiers to fight to the
death. Neither will stop until the other is completely destroyed.
It will be the greatest and longest land battle ever fought, starting as a
conflagration rolling east toward Moscow, blazing along a 3,000-mile
front, and then rolling back to consume Berlin. It will be a fire in the east
that heralds a new world order.
The Game
Close Combat III: The Russian Front transports you to the squad-level
war in the eastern arena of World War II. Your men in the trenches
respond like real soldiers—they react authentically to the stress of
combat and are affected by their fatigue level, ability, physical and mental
condition, and other factors. The game adds a role-playing element by
making you the commander of a fire brigade—a special company of elite
troops moving among hot spots on the Eastern Front. You are responsible
for keeping your men alive and for advancing your own rank, which, in
turn, increases the size and quality of your forces. As the four years of
conflict pass and both German and Russian technology improves, you
can add new and better weapons to your arsenal.
Chapter 1: Gearing up for Gameplay 1
Mausar Kar 98
German Rifle Teams
(Schützen including ErsatzSchützen)
Rifle teams were the backbone of the
German army. Armed with bolt-action
rifles that were accurate and effective
at short to medium range, soldats
(infantrymen) fought their way across
Russia—on foot. These teams had some
antitank (AT) weapons: cluster bombs
early in the war; Panzerfäusts later on.
You are in control of the scope and complexity of your game. You can
start simple—with individual battles—and then progress to operations,
campaigns, and finally, to the game’s Grand Campaign. You can also
design custom scenarios for battles. For example, you can set up a battle
in which you are surrounded and outnumbered but have an advantage in
firepower and experience over your opponent.
Page 8
2 Close Combat III: The Russian Front
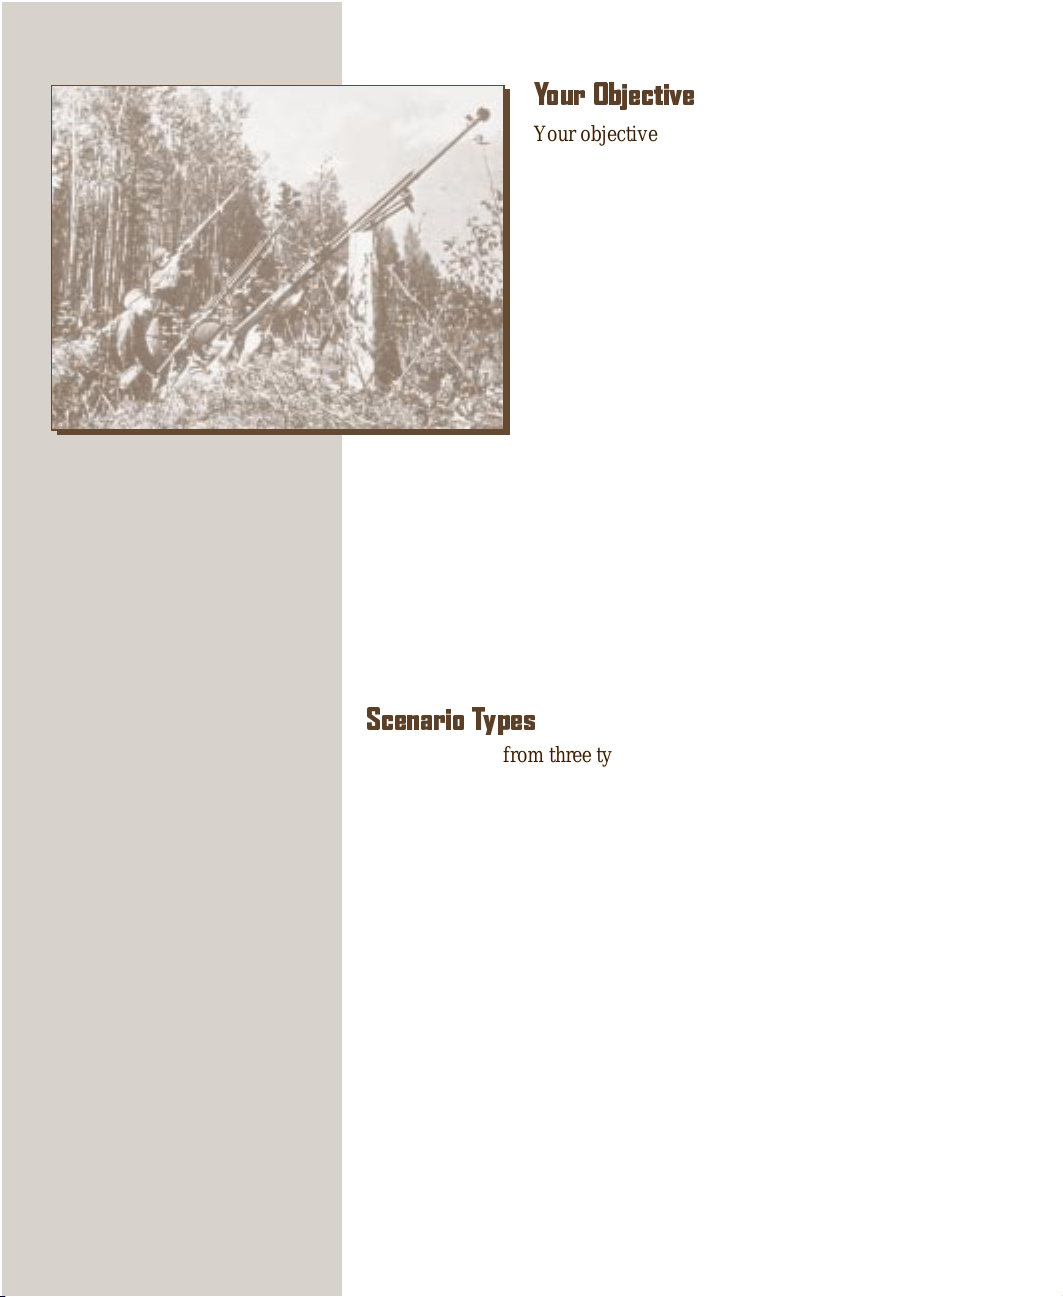
Russian troops firing at German
planes near Leningrad. The soldier
in the foreground is firing a
Panfilov antitank rifle. A holdover
from World War I, its high
velocity, 14.5mm slug was unable
to penetrate most mid- to latewar tank armor.
Your Objective
Your objective is to win battles by inflicting casualties
and capturing victory locations—points of strategic
importance—without wasting your men. You use your
skills on the battlefield and your abilities as a strategist to attain this objective. For example, you can win
battles by being aggressive and using frontal or
flanking assaults to capture the enemy’s victory
locations. You can also win by infiltrating the
enemy’s positions and launching surprise attacks. Or,
you can take a defensive stance, successfully protect
your victory locations against the enemy, and then
counterattack your weakened foe.
Your choice of an offensive or a defensive battle has
implications for the teams you choose and how you deploy them. If you
plan on attacking, you need teams capable of movement (infantry teams)
and of providing suppression fire (machine gun, mortar, and gun teams).
You’ll need to deploy some of your teams so they can suppress your
opponent while the remainder attack enemy positions. For defensive
tactics, going heavy on firepower and light on mobility is the rule.
However, you might want some mobile forces for rapid movement to
danger points or for counterattacks. For further information on choosing
teams and deploying them effectively, see Chapter 3, “Strategy and
Tactics.”
“You can no longer retreat across
the Volga. There is only one road,
the road that leads forward.
Stalingrad will be saved by you, or
be wiped out with you.”
— Russian orders to the troops in
Stalingrad
Scenario Types
You can choose from three types of scenarios in Close Combat III: The
Russian Front: battles, operations, and campaigns. Battles involve only
one map; an operation is a series of battles played one after another. For
example, the Roads to Moscow operation consists of four battles: Panzers
in the Snow, The First Fortification Ring, Next Stop Moscow, and Battle
for the Kremlin.
A campaign takes place on an even greater scale: it is a series of operations played one after another. The game’s Grand Campaign comprises all
the operations in the game, covering the four-year duration of the war on
the Russian Front.
When you play operations or campaigns, the results carry over from battle
to battle. For example, a team other than a command team that is wiped
out in the first battle of an operation will not be available in subsequent
battles of the operation. However, units that survive successive battles
become better soldiers because their experience and cohesion improves
with time.
Between each battle of an operation or campaign, you’ll need to make
decisions regarding the units that make up your fighting force. You can
Page 9
add new units to your surviving force, refit surviving units with new
recruits and equipment, or choose to rest surviving units for refit in a
later battle.
Rank and Promotions
When you play campaigns, you receive promotions based how you
perform during battles. Promotions are valuable because they improve
the quality of commanders. As a commander improves, he can ef fectively
command a larger area of the battlefield. Also, each time you are promoted, you can add a new unit to your fighting force. For example, if you
are a first lieutenant and you’re promoted to the rank of captain, you are
allocated 14 teams instead of 13.
Higher rank carries a price, however; you are expected to maintain higher
force strength and gain more victory locations than a commander at a
lower rank.
Installing and Starting the Game
1 Insert the game CD into the CD-ROM drive. Setup will run
automatically .
If Setup does not start, run Setup.exe from the Windows directory on
the CD.
2 When the Setup screen appears, click Install Close Combat.
3 Double-click the Close Combat III: The Russian Front icon.
4 On the introductory screen, click Play Close Combat. The introduc-
tory video plays, and the Main screen appears.
Chapter 1: Gearing up for Gameplay 3
MP-40
German Scout Teams
Aufklärungs - Assault
German scout teams often served as
“eyes” for the Wehrmacht. Armed
primarily with submachine guns, they
were particularly effective in closequarters fighting (house-to-house and
forests). Although scout teams had no
antitank (AT) weapons early in the war,
they had Panzerfäusts later on.
Entering Boot Camp (Optional)
To get you started commanding troops, Close Combat III
provides Boot Camp, an online tutorial for learning basic
battlefield skills. To start the tutorial, on the Main screen, click
Boot Camp (Training).
Choosing a Scenario
You choose the scenario you want to play using the Command
screen. Close Combat III has built-in battles, operations, and
campaigns that are based on actual World War II scenarios. Or
you can create custom scenarios (see Chapter 5), and then go
back to the Command screen to start your custom game. You
can also play saved games; you can start an operation one day,
save it, and then pick up where you left off at another time.
To bring up the Command screen
• On the Main screen, click Play a Game.
Although they do not present a full picture of the
fighting on the Russian Front, the casualty statistics
help define the totality and scale of the fighting. By
war’s end, the Russians mobilize nearly 35 million men
and women into military service. Total Russian military
casualties in the war probably exceed 28 million—
nearly 9 million killed, 15 million wounded, and over 4
million captured or missing. Civilian deaths probably
exceed 15 million, which means over 25 million Russian
soldiers and civilians died on the Russian Front. By
comparison, total American combat deaths in World
War II, in both the European and Pacific Theaters, were
less than 600,000.
Page 10
4 Close Combat III: The Russian Front
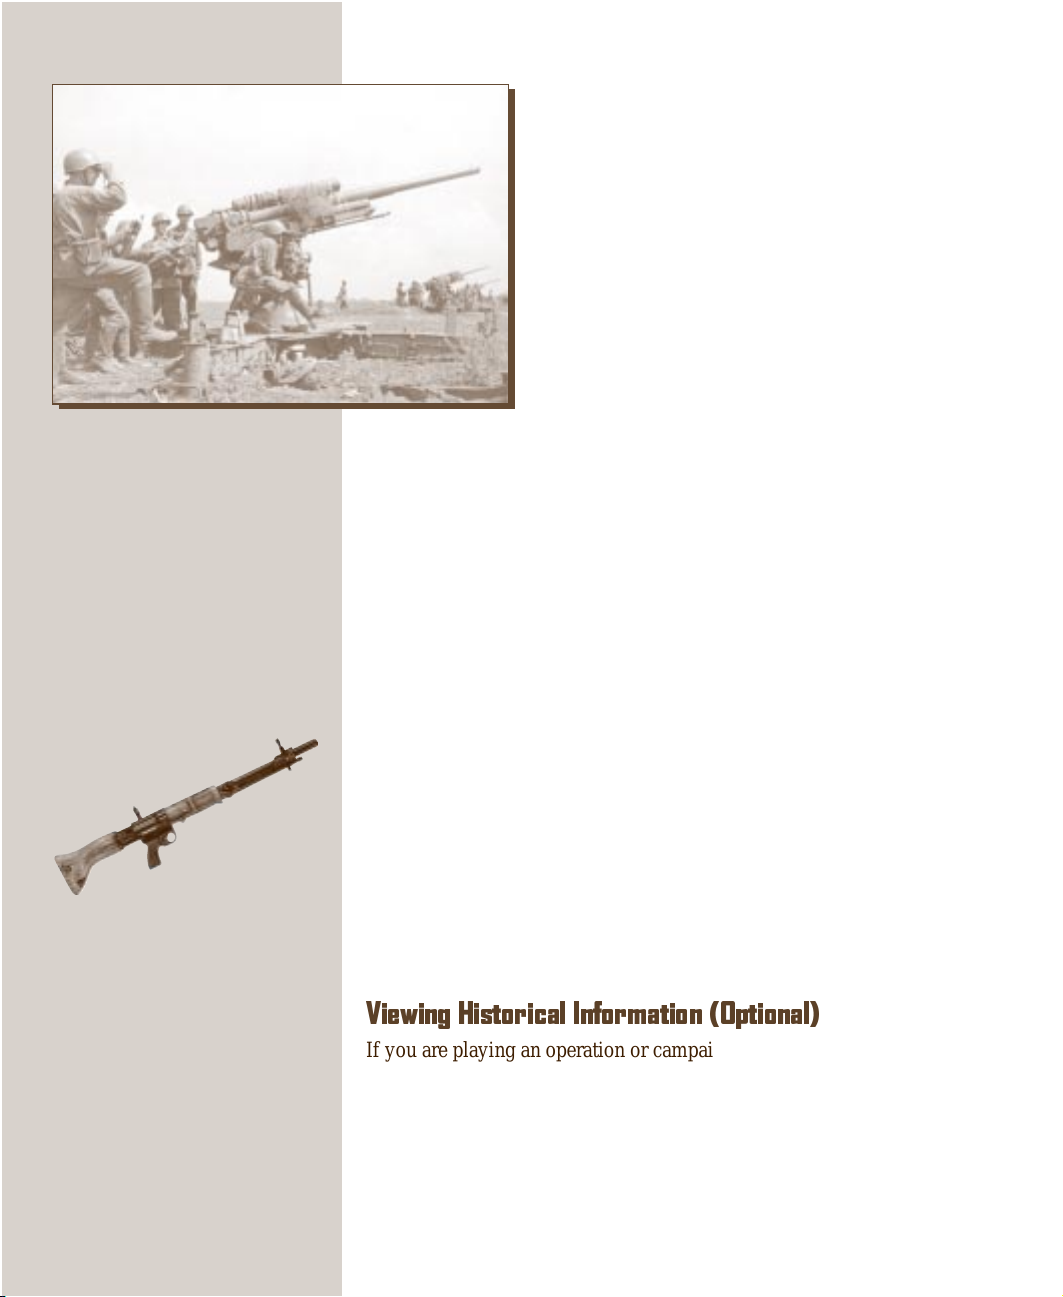
A battery of Russian ZP39 85mm
anti-aircraft guns. Although
originally designed solely for the
anti-aircraft roll, the ZP39—like
its German counterpart, the FlaK
43 8.8cm AA gun—found much
favor on the front lines as an
antitank gun. Its high velocity
85mm rounds were devastating
against even the heaviest of
German armor.
To choose a scenario type
• In the upper-left corner of the Command screen,
in the Game Types list box, select the type of
scenario you want to play: Historical Battles,
Historical Operations, Historical Campaigns,
Custom Scenarios, or Saved Games. (Saved
Games is unavailable until you play a game and
save it.)
To browse the scenarios
The box in the left portion of the screen contains a
list showing the type of scenario you chose in the
previous step. Click one and a thumbnail of the map
you’ll be contesting appears in the lower-left portion
of the screen. If you’re playing an operation, the screen shows all maps
you’ll be fighting for. If you’re playing a campaign, the maps for the
campaign’s first operation appear. For a saved campaign, you see the
maps for the operation you are about to begin.
To view information about another scenario, click it in the list box.
For more detailed information about any scenario, click the Briefing
button on the toolbar. The briefing is fully explained in “Getting Your
Briefing” later in this chapter.
To choose sides
• On the right side of the Command screen, click the flag of the side
you want to play.
FG-42
German Heavy Assault Teams
Kampfstaffel
These German infantry teams carried
heavy weapons: the hand-held assault
versions of the MG-42, the FG-42,
cluster bombs (early war), and
Panzerfäusts (later war). They laid down
heavy fire effective at medium to long
range, but were slower than other
infantry because of the weight of their
heavy weapons.
You can set other gameplay options at this time, as described in “Choosing Game Settings” later in this chapter.
To load the scenario you want to play
In the list box of scenarios, double-click the one you want to play. Or, if it
is already selected, you can click Next to bring up the Requisition screen.
For operations and campaigns, enter a name for the scenario in the dialog
box that appears. Your game is automatically saved under this name after
each battle.
Viewing Historical Information (Optional)
If you are playing an operation or campaign, you can view historical
information about it:
1 On the toolbar, click History. The History screen appears.
2 In the map, right-click the operation you want to read about. (Opera-
tions appear as red dots and are labeled with white text.)
Page 11
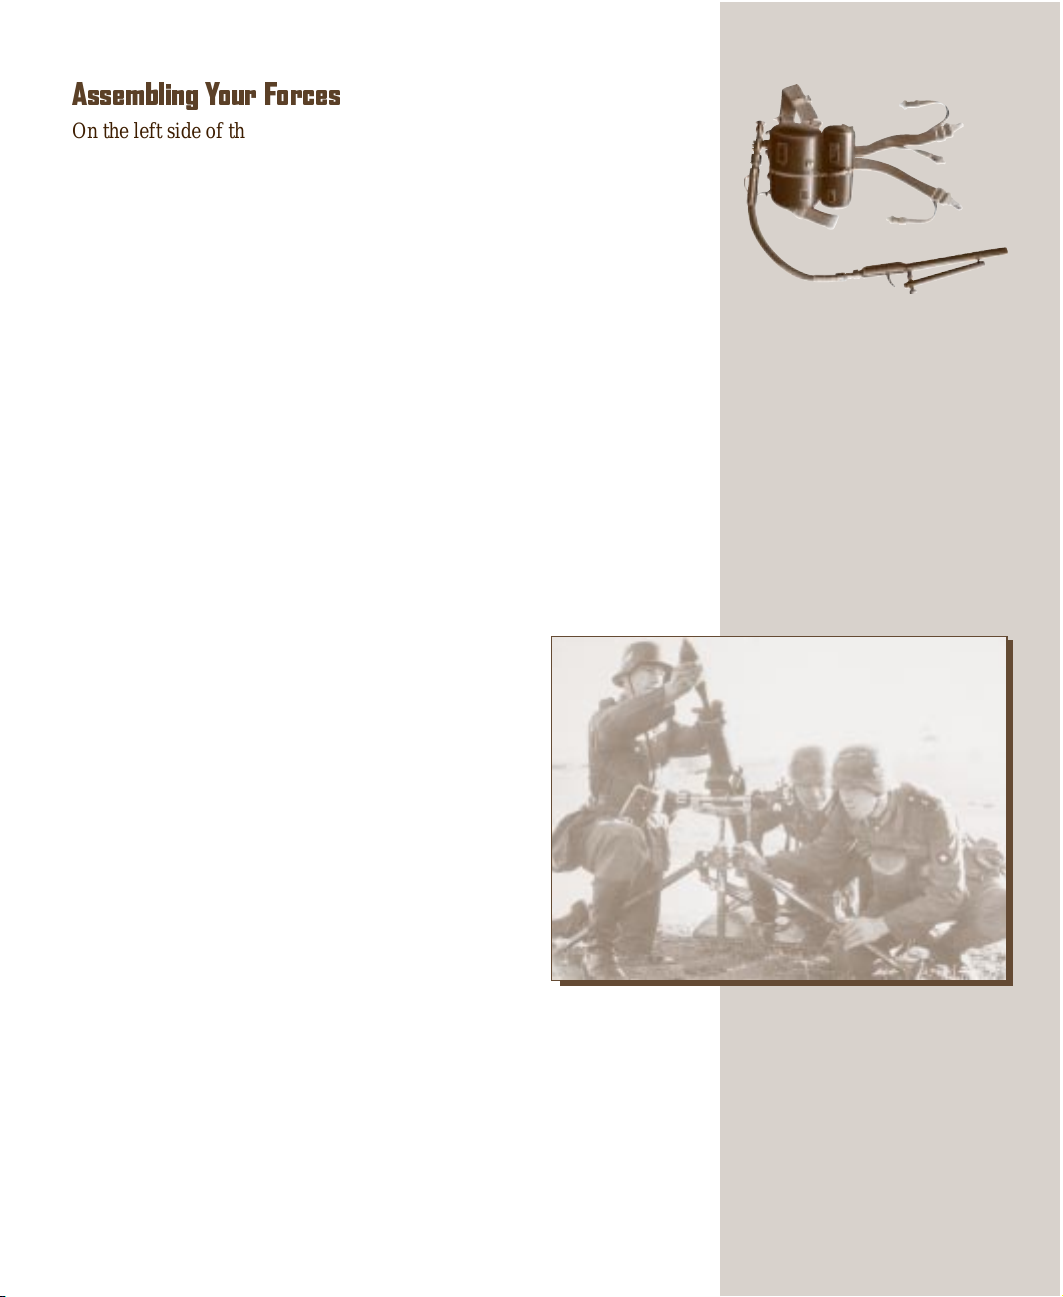
Assembling Your Forces
On the left side of the Requisition screen is the Force Pool list box, which
displays the teams you can requisition. The teams in your fighting force
appear on the right side, in the Active Roster list box. An asterisk denotes
that a team is equipped for winter conditions.
Chapter 1: Gearing up for Gameplay 5
In single battles and in the first battle of an operation, all team slots in the
Active Roster except for one are already filled. As an operation or
campaign progresses, you are given more team slots and requisition
points—the currency you use to “buy” teams. The number of slots
depends on your primary commander’s rank; the higher the commander’s
rank, the more teams you’re allowed (up to 15) and the higher the quality
of the teams available to you. When you’re playing campaigns, winning
operations advances the rank of your commander, which gives you more
team slots for the next battle.
You are given a fixed number of requisition points at the beginning of
each battle, and you receive more as the operation progresses. Your
requisition points are displayed in the lower-right corner of the Requisition screen.
Viewing Different Types and Quality of Teams
You can choose the type of teams in your force. Close
Combat III includes command, infantry, armor, and
support teams:
• Command teams provide command and control on
the battlefield; they improve the performance of
teams within their command radius.
• Infantry teams are foot soldiers armed primarily
with rifles, submachine guns, and hand grenades.
Infantry teams can also have heavier weapons,
including machine guns, flamethrowers, and
antitank (AT) weapons.
• Armor teams consist of tanks, tank destroyers,
self-propelled guns, and armored cars.
• Support teams include halftracks, field guns,
mortars, machine guns, flamethrowers, and
AT weapons.
To display a different type of team
1 Click the Team Types list box. The available team types appear.
2 Click Command, Infantry, Armor, or Support. The teams of the
type you chose appear in the Force Pool box.
Flammenwerfer 42
German Flamethrowers
Flammenwerfer Units
German flamethrower teams were used
against strongpoints, infantry, and
vehicles. Flamethrowers were employed
effectively in ambush or with plenty of
infantry support. Unfortunately, these
weapons were nearly as dangerous to
their users as they were to the enemy.
They were also very heavy, limiting
mobility.
A German 8cm mortar team. This
photograph clearly shows how
these teams could become
fatigued when moving on foot. The
three basic components (tube,
base plate, and tripod) had a total
weight of 124 pounds—without
ammunition.
Page 12

6 Close Combat III: The Russian Front
8cm Mortar
German Mortars
Granatenwerfer 5, 8 and 12cm mortars
The German Army used mortars as close
support artillery: to support infantry
attacks, break up enemy assaults, lay
smoke screens, and shell enemy mortar
and artillery units. The 5cm and 8cm
mortar teams were mobile, but the 12cm
mortar teams were hard to move. The
Germans had to use mortar ammunition
sparingly because of the shaky supply
situation on the Russian Front.
To display a different quality of team
You can choose the quality of the teams in your force; Close Combat III
includes conscript, regular, and elite units. Conscript units have poor
training and adequate weapons; elite teams have the best training and
finest weapons.
1 Click the Team Quality list box. The available quality options appear.
2 Click Conscripts, Regular, or Elite. The teams belonging to the
degree of quality you chose appears in the Force Pool box.
Getting Information on Units
You can get both basic and detailed information about the teams displayed
in the Force Pool list box. This information is displayed in the Unit
Description box below the Force Pool list box.
To see a unit description
• In the Force Pool list box, click a team.
To see details about and the current status of a team
• With the team selected, click the Details button.
Detailed information and current status appears in the box. You can go
back to the information you saw in the previous step by clicking Info. Or
you can view details on another team by clicking it in the Force Pool box.
To get the sound and name of each weapon in a team
After clicking Details, click the picture of a weapon in the right portion of
the box. Often, the most important difference between infantry teams is
the types of weapons they carry.
Moving Teams to the Active Roster
When you choose teams, you move them from the Force Pool to the
Active Roster. After you fill all the slots or use all your requisition points,
you can choose more teams only if you retire one from your active force.
When you’re playing an operation or campaign, you might not want to
use all of your available requisition points for each battle; you can
accumulate them to use in trouble spots later.
To add a team to your active roster
• In the Force Pool box, double-click the team you want to add. The unit
moves from the Force Pool box to the Active Force box.
To retire a team from your active force
• In the Active Roster box, select the team you want to retire and click
the Retire button. You can also double-click the team you want to
retire. The unit moves to the Force Pool box.
Page 13
To cancel all of your selections
• On the toolbar, click Revert. The Force Pool and Active Roster return
to their original state.
Chapter 1: Gearing up for Gameplay 7
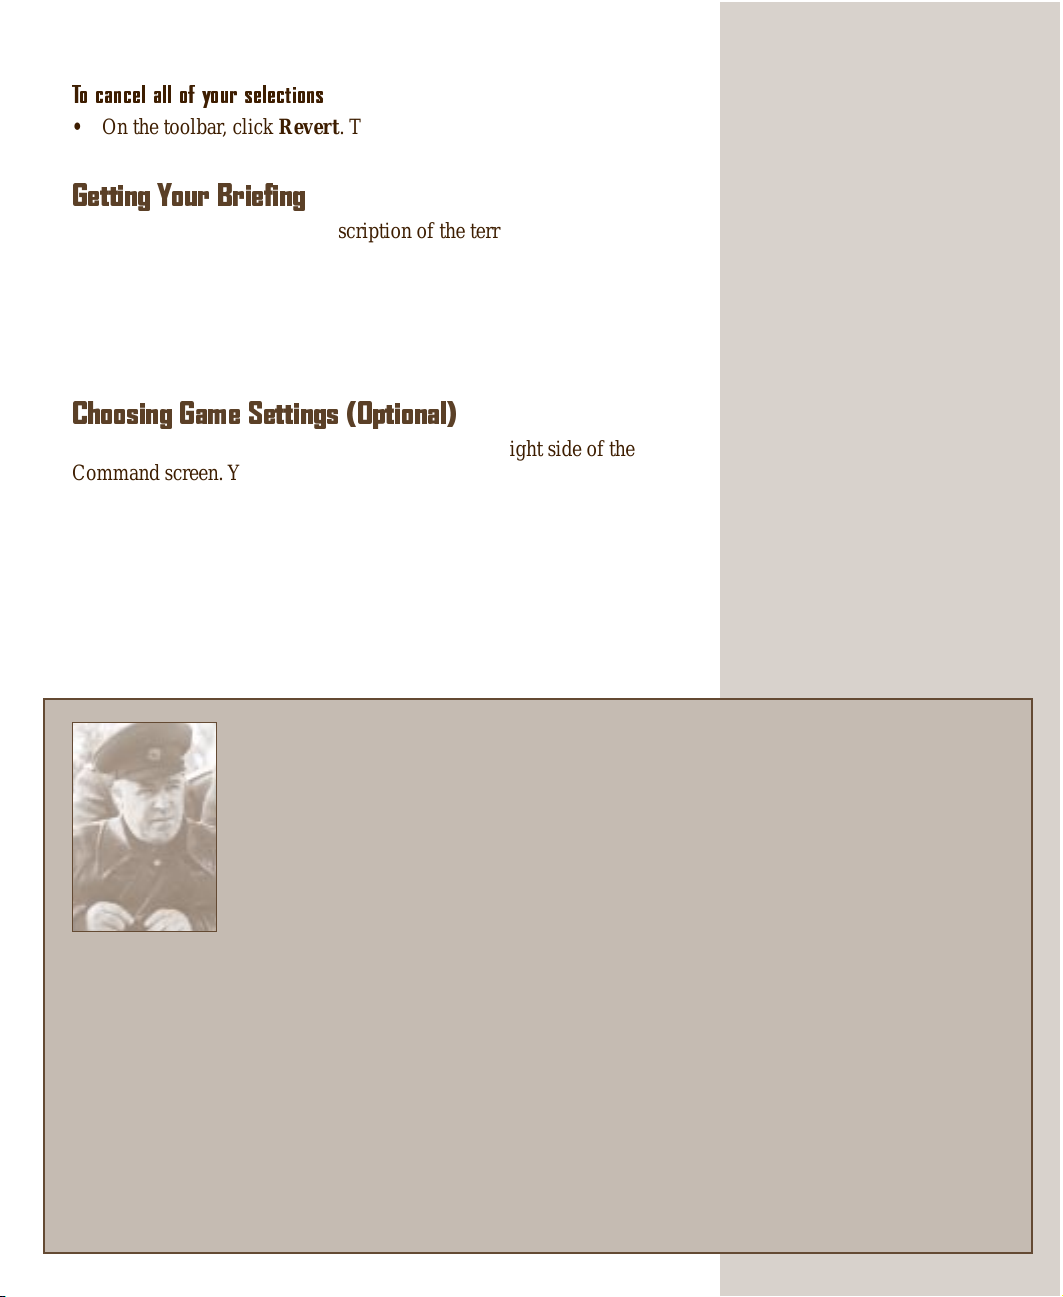
Getting Your Briefing
The briefing includes a short description of the terrain and your disposition in the upcoming battle or operation. You can view your briefing any
time prior to actually deploying troops and fighting.
1 On the toolbar, click Briefing. The Briefing screen appears.
2 Click the Battle Briefing button to display the battle briefing text or
the Operation Briefing button to display the operation briefing text.
Choosing Game Settings (Optional)
The game settings currently in effect appear on the right side of the
Command screen. You can use the default settings, or you can customize
your game.
To bring up the Settings dialog box, click the Settings button, located in
the upper-right portion of the Command screen.
Choosing Player Name and Side
Your default player and online name is Commander, but you can change
this name to anything you choose:
Marshal Georgi Zhukov
(1896–1974)
“…the only person who feared no
one. He was not afraid of Stalin.”
— Marshal Semyon Timoshenko’s
assessment of Marshal Georgi Zhukov
Zhukov is considered by the Russian people,
and by most non-Russian military observers,
to be the greatest military hero of the “Great
Patriotic War.” Zhukov’s military skills are
matched by a knack for politics and public
relations, which keep him in Stalin’s good
graces for the duration of World War II. For most of the war, Zhukov is
Deputy Supreme Commander in Chief of the Red Army.
In October 1941 Zhukov replaces Stalin’s crony Voroshilov in an attempt
to hold Leningrad, which the Germans have placed under siege. After
Zhukov strengthens the city’s defenses and arranges a supply system
that eventually breaks the siege, he is named Commander in Chief of the
Western Front, the force protecting Moscow.
In 1942, Zhukov commands the defense of Stalingrad and helps plan and
direct the counteroffensive in which the entire German Sixth Army is
surrounded and forced to surrender.
After the Russian victory in the war’s greatest tank battle at Kursk,
Zhukov takes command of all the fronts facing the center of the
German lines in June 1944. He directs these fronts to the Russians’
great breakthrough—the collapse of Army Group Center in
Belorussia. After the fall of Warsaw the Russians drive across
Prussia, slowed only occasionally by supply problems, to the Battle of
Berlin. The battle ends with Zhukov accepting the German surrender.
Following the war, Zhukov is given a series of obscure assignments by
Stalin, who fears that Zhukov’s great popularity makes him a political
opponent. Stalin’s grudging recognition of Zhukov’s monumental
military skills probably spare the marshal the fate suffered by
millions of Stalin’s political opponents. After Stalin’s death in 1953,
Zhukov’s reputation is somewhat rehabilitated, but the ascent of his
old rival Nikita Khrushchev assures Zhukov’s permanent absence
from Russian military leadership.
Page 14
8 Close Combat III: The Russian Front
1 In the Settings dialog box, click the Battle Settings tab.
2 Type the name you want to use.
3 To choose which side you want to play, click either Command the
Russians or Command the Germans. You can also pick a side on the
Command screen by clicking the flag of the side you want to play.
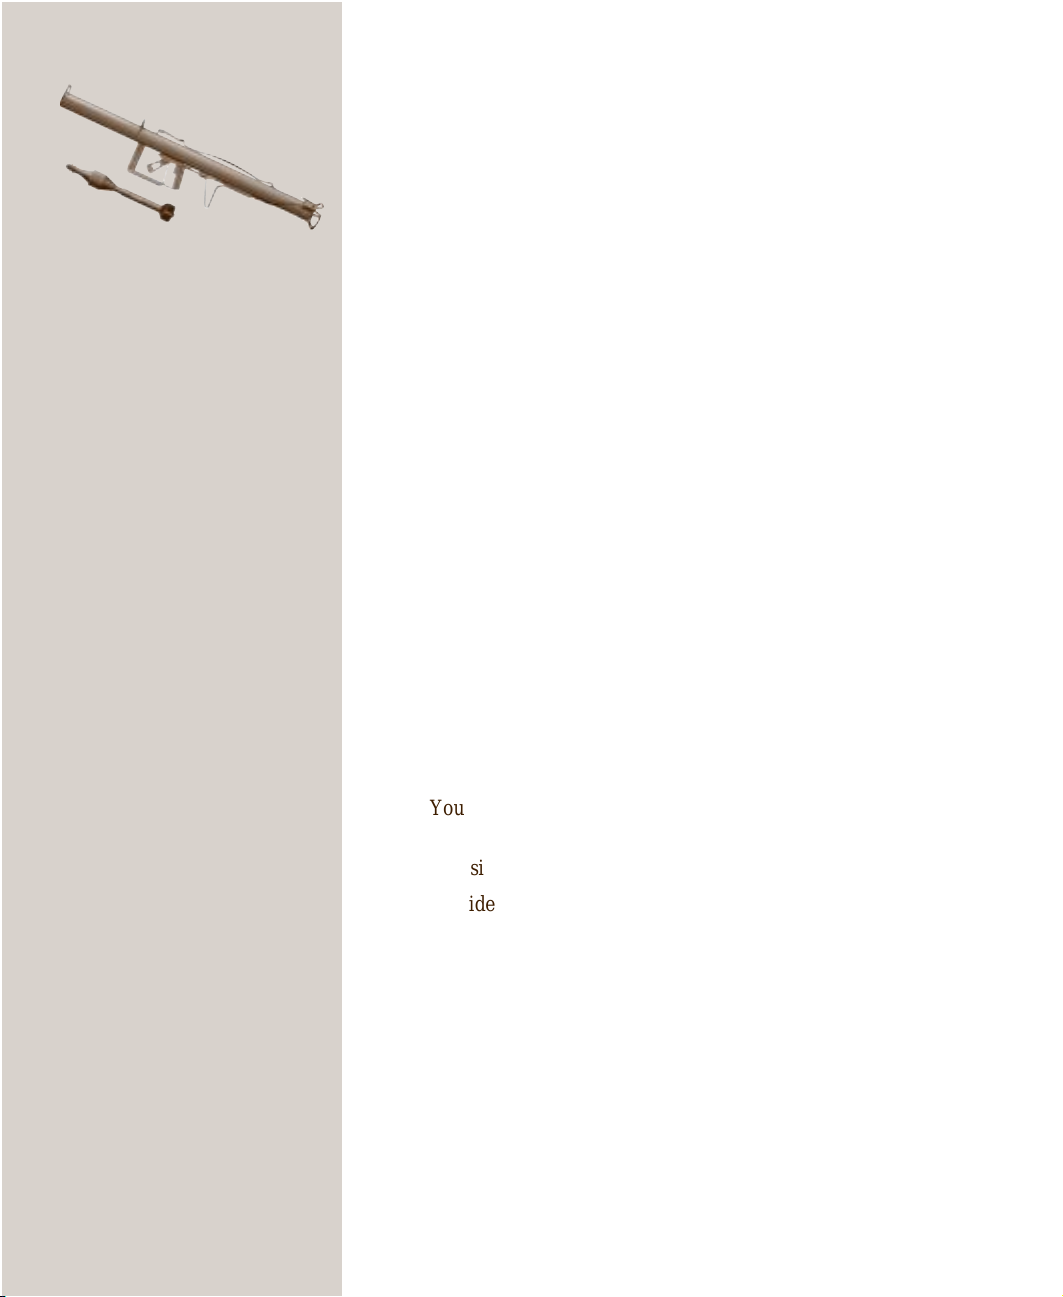
Panzerschreck
German Antitank (AT) Teams
The Panzerschreck (“Tank Terror”) was
an electrically fired, hand-held rocket
launcher used against tanks, vehicles,
and other targets. This weapon’s design
was not unique; in fact, the Germans
based the design on American bazookas
captured in North Africa. Its weight
(about 20 lbs) and length (nearly 65 in.)
made the Panzerschreck cumbersome;
however, it was very effective at ranges
up to 125 meters.
“The effect of climate in Russia is
to make things impassable in the
mud of spring and autumn,
unbearable in the heat of summer,
and impossible in the depths of
winter. Climate in Russia is a
series of natural disasters.”
— Staff officer, German 12th Army
Choosing End Battle Options
You can choose one of three ways for a battle to end using the Battle
Settings tab. Your choice is an important factor in determining what kind
of battle to fight and which teams to select, as explained in Chapter 3,
“Strategy and Tactics.”
Fight to the finish The fighting ends when one side is wiped out; this is the
default setting.
When time expires The fighting ends when the timer runs out. You can set
the timer for 1 to 99 minutes.
After taking all victory locations The fighting ends when you capture all the
victory locations on the map. A further option—hold them for two
minutes—ends the battle only if you can hold the captured victory
locations for two minutes. If the enemy recaptures a victory location
before the two minutes expire, you must continue playing.
Battles can also end by either side calling a truce or fleeing as explained
in Chapter 2, “Fighting Battles, Operations, and Campaigns.”
Choosing Difficulty Level
On the Difficulty tab in the Settings dialog box, use the slider to set your
side’s strength:
Recruit
Your side is given every advantage in strength, morale, and
supplies.
Veteran
The sides are balanced as they were historically .
Hero
Your side is initially at a disadvantage in strength and, in campaign
mode, has far fewer resources available.
When you play your first few games, you might want to set the difficulty
level to Recruit. As your skills improve, try the tougher settings.
Difficulty levels affect the number of daily requisition points you receive
during an operation or campaign (at harder levels, you’ll get fewer daily
points). Levels also handicap your score by making battles more difficult
to win and, in a campaign, making promotion points harder to gain. (For
more information on scoring and promotion points, see Chapter 2,
“Fighting Battles, Operations, and Campaigns.”)
Page 15
Choosing Realism Options
You use the Realism tab in the Settings dialog box to set the degree to
which you want the game to emulate a real battlefield. You can choose
realism options for both your side and the enemy.
Always see the enemy Enemy units will always be visible. (Normally, Close
Combat III gives you a limited—but realistic—view of the battlefield.)
You can’t see units that are hiding unless you click this option.
Never act on initiative Your units never act on their own; they act only when
you give them orders.
Always have full enemy info You will receive summary information on the
enemy teams (toolbar information, not Soldier Monitor information.).
Always obey orders Y our units will do whatever you tell them to do.
The realism rating is determined by the number of checkboxes you have
selected. This rating affects your tournament score, which is used on the
MSN Gaming Zone. Scoring is explained at the end of Chapter 2, “Fighting Battles, Operations, and Campaigns.”
When you play your first few games, you might want to make the battlefield less realistic. For example, making enemy units always visible can
help you plan your strategy and hone your tactics. As you gain experience, you can make your game more like a real battlefield.
Starting the Game
To start the game, on the Requisition screen, click Next.
The combat screen appears. To begin deployment and battle, see Chapter
2, “Fighting Operations, Battles, and Campaigns.”
Choosing Additional Options (Optional)
The default gameplay options are adequate for most players. However,
you can change them to give Close Combat III the look and feel you
want. Unlike the settings described earlier in this chapter, you can change
most game play options while you are playing a game.
Chapter 1: Gearing up for Gameplay 9
“Military thought in the capitalist
world has got into a blind alley.
The dashing “theories” about a
lightning war, or about small
select armies of technicians, or
about the air war which can
replace all other military
operations; all these theories
arise from the bourgeoisie’s
deathly fear of the proletarian
revolution. In its mechanical way,
the imperialist bourgeoisie
overrates equipment and underrates man.”
— Pravda (the official Soviet Communist
Party newspaper), February 1939
Game play options include general options, team info bar and
soldier outline options, and language options. Performance options
help Close Combat III perform best with your hardware and your
level of experience.
To begin setting game options
• On the toolbar, click Options.
The Options dialog box appears. You can also bring up the
Options box by clicking Options in the lower-left corner of the
Combat screen, or by pressing F8 from any screen.
In a little less than three months (November 19,
1942 to February 2, 1943) the German Army
Group South suffers staggering losses. The
Russians destroy over 30 divisions; the
remaining 16 divisions have 50% to 75% of their
strength carved away. Total losses in the Don,
Volga, and Stalingrad region amount to 1.5 million
men, 3,500 tanks and self-propelled guns,
12,000 guns and mortars, and 3,000 planes.
Page 16
10 Close Combat III: The Russian Front
Choosing Overall Game Play Options
You can choose from the following overall game play options by selecting
the checkboxes on the General tab in the Options dialog box:
• Music.
• Beginning- and end-of-operation videos.
• Game sounds, such as gunfire and soldiers’ voices.
Choosing Language Options
You can choose to hear the soldiers’ voices in English, German, or
Russian using the General tab in the Options dialog box. Hearing the
voices in German and Russian lends authenticity to the game; however, if
you don’t speak these languages, you won’t understand the audio messages sent by your teams. (Combat messages on the screen appear in
English no matter what language you choose for the audio messages.)
Choosing Game Speed Options
You use the General tab in the Options dialog box to set game speed
options. Game speed affects how quickly the game progresses in real
time. If you set it to a slower speed, your men will
move slower, giving you more time to think about
your tactics. If you set it to a faster speed, action on
the screen will be faster. To improve game performance on slower computers, choose the Slow option.
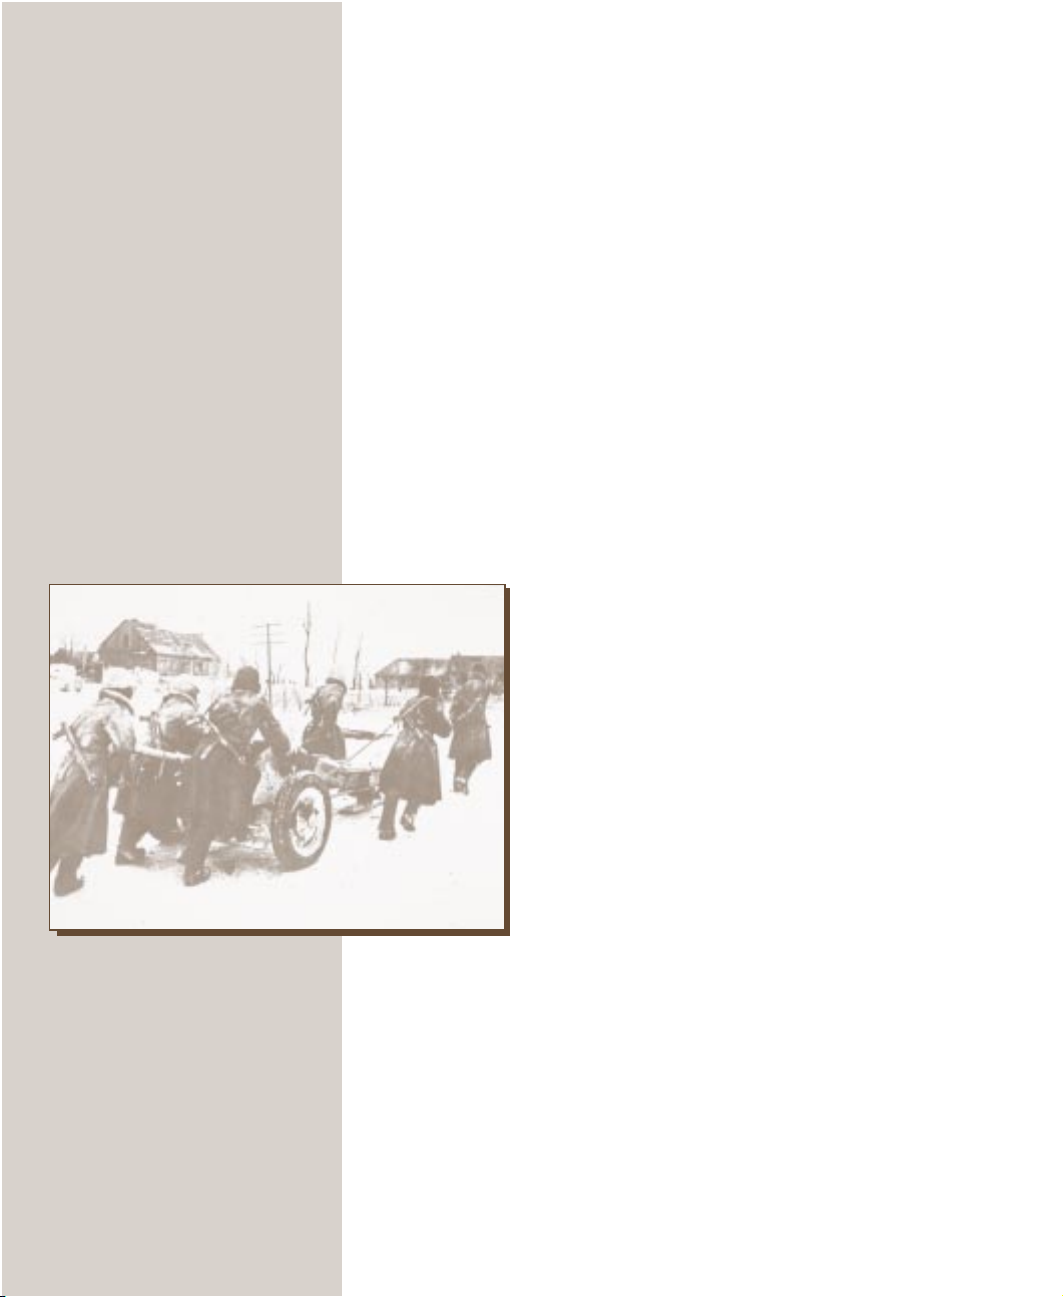
A Russian crew hauls their AT gun
through the snow. Red Army
soldiers were used to such
hardships, although the Russians
became more and more mechanized as the war continued.
Choosing Screen Resolution Options
You use the General tab in the Options dialog box to
set screen resolution options. Close Combat III must
be played at a screen resolution of 800 ´ 600 or
higher.
The game automatically detects which resolutions
are available from your video hardware and drivers.
If you experience slow play, bring their resolution
down.
If you change the screen resolution, you must restart the game for the
change to take effect.
Choosing Scroll Speed Options
You use the General tab in the Options dialog box to set the game’s scroll
speed. The higher the scroll speed, the faster you can move around the
map (without using the inset map).
Page 17
Choosing Specific Game Play Options
You can choose from the following specific game play options by selecting the checkboxes on the Game Play tab in the Options dialog box:
• Whether trees appear on the combat screen. (If you have a slower
computer, remove trees for better performance.)
• Whether soldiers killed in action appear on the combat screen. (If you
have a slower computer, remove soldiers killed in action for better
performance.)
• Whether to display team data; team data shows the status of every
team in your fighting force.
• Whether to display the soldier monitor; the soldier monitor shows the
status of a team’s individual soldiers.
• Whether to display the inset map. The inset map is a small map
displayed in the combat screen to facilitate movement around the
battlefield.
Note You can move the soldier monitor and inset map by right-clicking
and then dragging to the screen location you want.
Choosing Team Information Bar Options
Team information bars appear (by default) just above each team in the
normal view; you won’t see them if you zoom in or out. These bars
provide quick and easy-to-understand information about your units. You
choose the type of information you want shown. For example, if you
select Show Experience, the experience level of your teams appears in
the team information bars.
Chapter 1: Gearing up for Gameplay 11
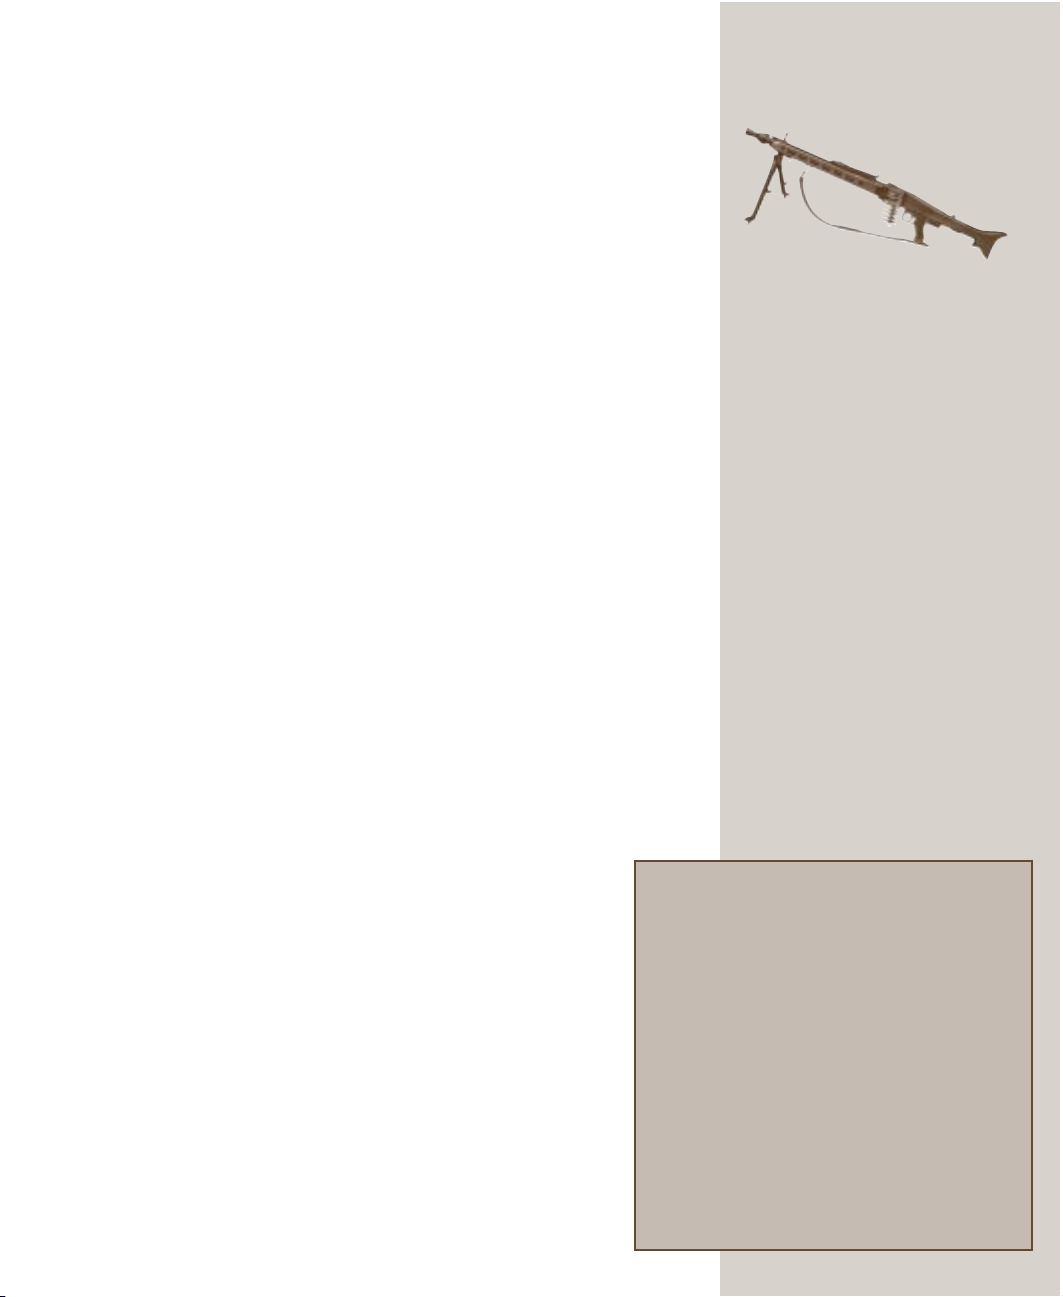
MG-42
German MG Teams
Schwer
The MG42 was perhaps the best machine
gun of World War II. With its high rate of
fire and interchangeable barrels, the
MG42 proved devastating against
infantry and light vehicles. One MG42
team in a well-protected position was
more than a match against enemy
infantry. This machine gun’s relatively
light weight (25 lbs) made German
machine gun teams more mobile than
their Russian counterparts.
You set these options using the list boxes on the Options dialog box’s
Game Play tab. If you don’t want team information bars displayed at all,
select Do Not Show.
Choosing Soldier Outline Options
You can use soldier outlines to provide quick and easy-tounderstand information about the individual soldiers in your
fighting force. For example, you can select Show Ammo to
have the outlines show supply of ammunition. Soldier outlines
appear only in the normal and zoomed-in views.
You specify soldier outline options using the Game Play tab in
the Option dialog box, as explained in the previous section.
The horrific losses in the first year of the war forced
the Soviet Union to mobilize the entire population. As a
result, women served in virtually every capacity in
the Russian military. Women filled then-traditional
roles as secretaries and nurses; however, Russian
combat nurses often served in a front-line role
similar to the American medic. Entire units of
transport and combat pilots were composed of
women. In fact, several units of women pilots flew
biplanes in precision bombing missions—at night. In
most cases, the only concession to having women in
regular Russian units was the addition of a gynecologist to the medical staff.
Page 18
12 Close Combat III: The Russian Front
5.0cm PaK 40
German Antitank (AT) Guns
PaK 37-43, FlaK 43
All German AT guns had a higher rate of
fire than the equivalent caliber gun
mounted on a tank. German AT guns were
especially important early in the war,
when Russian T-34 and KV1 tanks were
far superior to German tanks in both
firepower and armor. The Germans tried
to position AT guns where they were
sufficiently protected (buildings or
bunkers), camouflaged, and supported
by infantry, machine gun, and mortar
teams.
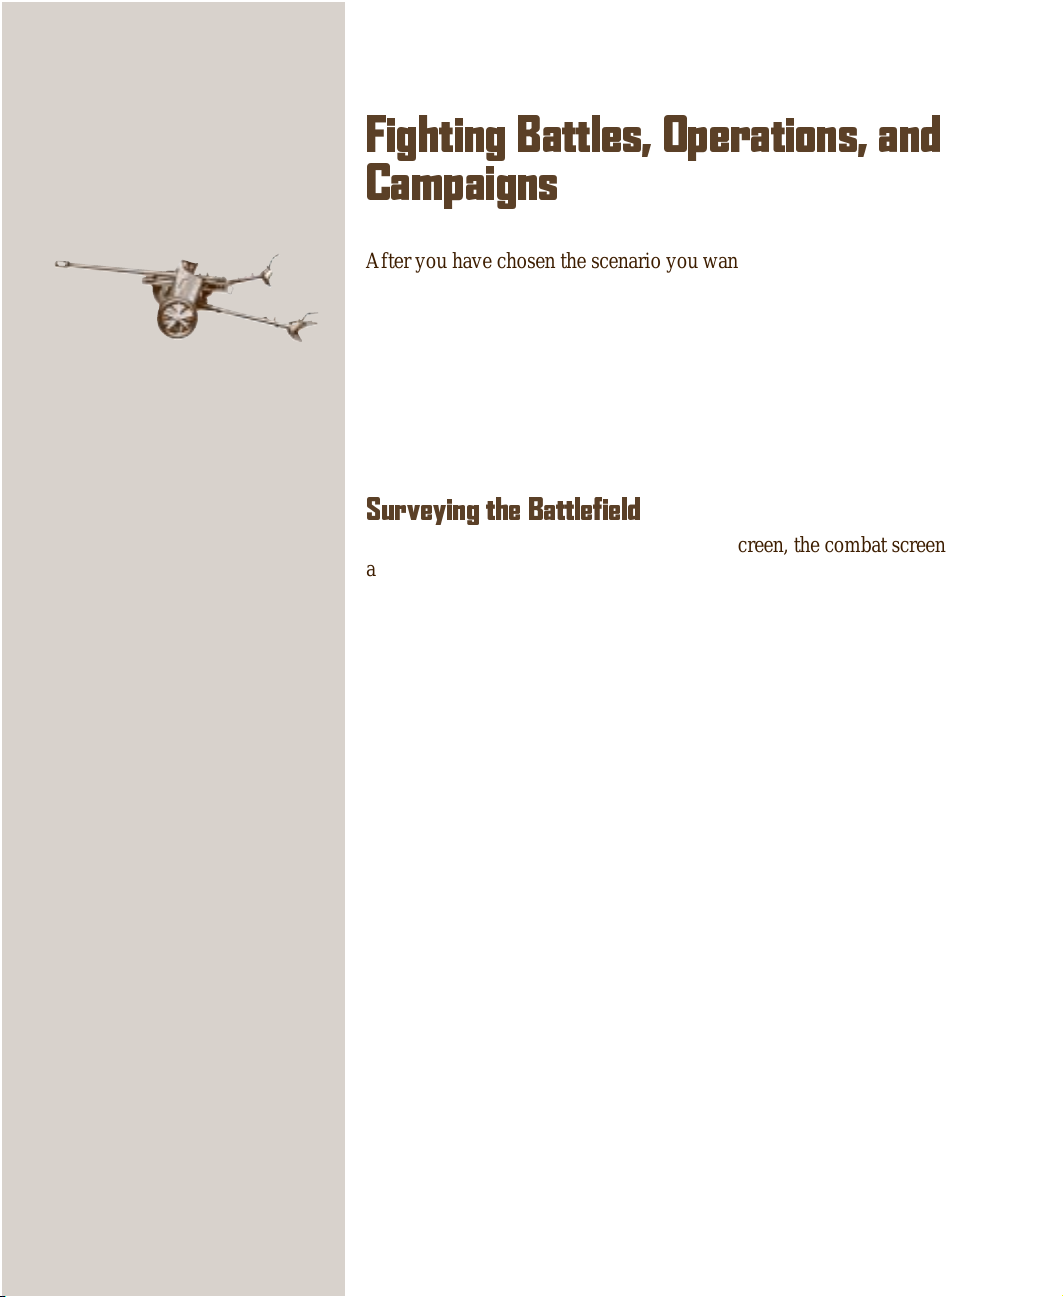
Chapter 2
Fighting Battles, Operations, and
Campaigns
After you have chosen the scenario you want to play, reviewed your
troops, and set any options you want, you are ready to march into battle.
This chapter provides information on the mechanics of game play:
surveying the battlefield, deploying your units and issuing orders to them,
and using your weapons.
However, remember that playing Close Combat III: The Russian Front
involves more than just mechanics. To best use the material in this
chapter, study the corresponding sections in Chapters 3, “Tactics and
Strategy ,” and 4, “Unit Tactics.”
Surveying the Battlefield
When you click Next from the Requisition screen, the combat screen
appears. You are now ready to examine the map and deploy your troops.
You can zoom in or out of the map, as well as scroll to different areas of
the map. You might want to zoom out prior to deploying troops to see a
complete picture of the map and determine potential areas of strength and
weakness.
To zoom in or out
• On the toolbar, click the zoom-in button (magnifying glass with a plus
sign) or the zoom-out button (magnifying glass with a minus sign).
“In a race with death, which had
no trouble catching up with us and
was wrenching its victims out of
our ranks in great batches, the
army was increasingly pressed
into a narrow corner of hell.”
— Joachim Wieder, author of
Stalingrad
To scroll through the map
• Move the mouse to the right, left, top, or bottom edge of the screen.
You can also use the arrow keys to scroll.
To view and move the inset map
• By default, a thumbnail of the map appears in the lower-left portion of
the screen. To toggle the inset map on and off, click the Map button.
To move the inset map to another location on the combat screen, rightclick and drag it.
To bring a new part of the map into the combat screen
• On the inset map, click the location you want to view.
The combat screen repositions to show that area.
Page 19
Chapter 2: Fighting Battles, Operations, and Campaigns 13
Deployment Zones
Note that different parts of the map are shaded. The unshaded area is the
portion of the map that you’ll control at the beginning of the battle. You
can deploy anywhere in the unshaded portion. The dark gray areas are
enemy-controlled and the light gray areas are neutral territory. After you
click the Begin button, the shading disappears.
Buildings and Terrain
Some maps include buildings as well as natural terrain features such as
hills, ditches, and foliage. Multistory buildings are indicated by numerals
(2, 3, or 4) representing the number of floors in the building. Building
roofs disappear as friendly troops enter and control the structures.
When teams (other than AT guns) enter a multistory building, they
automatically move to the highest floor.
To view details of a terrain element
• Right-click and hold on the element. Information appears in the lower-
left portion of the screen.
Victory Locations
Victory locations are buildings or terrain elements of strategic and tactical
importance. If you are zoomed into the map, victory locations are designated by the flag of the side that controls them; if you are zoomed out or
are viewing the inset map, crosses identify German victory
locations and stars identify the Russian ones. (If both sides
are currently engaged in battle for a particular victory
location, half of each flag is shown.) Your objective is to
capture the victory locations belonging to the other side and
replace their flag with yours, while protecting your own
victory locations.
Find the victory locations on the map: Note the position of
the enemy’s victory locations in relation to your deployment
zone. If the enemy’s victory locations are relatively far away
and you’re planning to attack rather than defend, you’ll want
teams with mobility and long- to medium-range firepower.
For a defensive strategy, concentrate on protecting your own
victory locations.
Check the terrain around the victory locations. If buildings
surround the victory locations, bring in your teams with
short-range firepower and high rates of fire. If a victory location is
surrounded by open terrain, you’ll need long- to medium-range firepower,
as well as good support positions.
By September 1942, Russian losses are staggering. Military
losses in killed and captured are at least 6 million, and
perhaps as high as 10 million. Civilian losses are nearly as
high; over 1 million civilians in Leningrad starve to death
during the winter of 1941–1942. The territory lost to the
Germans was the home to over 80 million people; millions
die, tens of millions are displaced by one side or the other.
The territory lost produced over 80 percent of Russian
sugar, 70 percent of its pig iron, nearly 60 percent of its
steel and mined coal, and roughly 40 percent of its
electrical power, grain, and cattle.
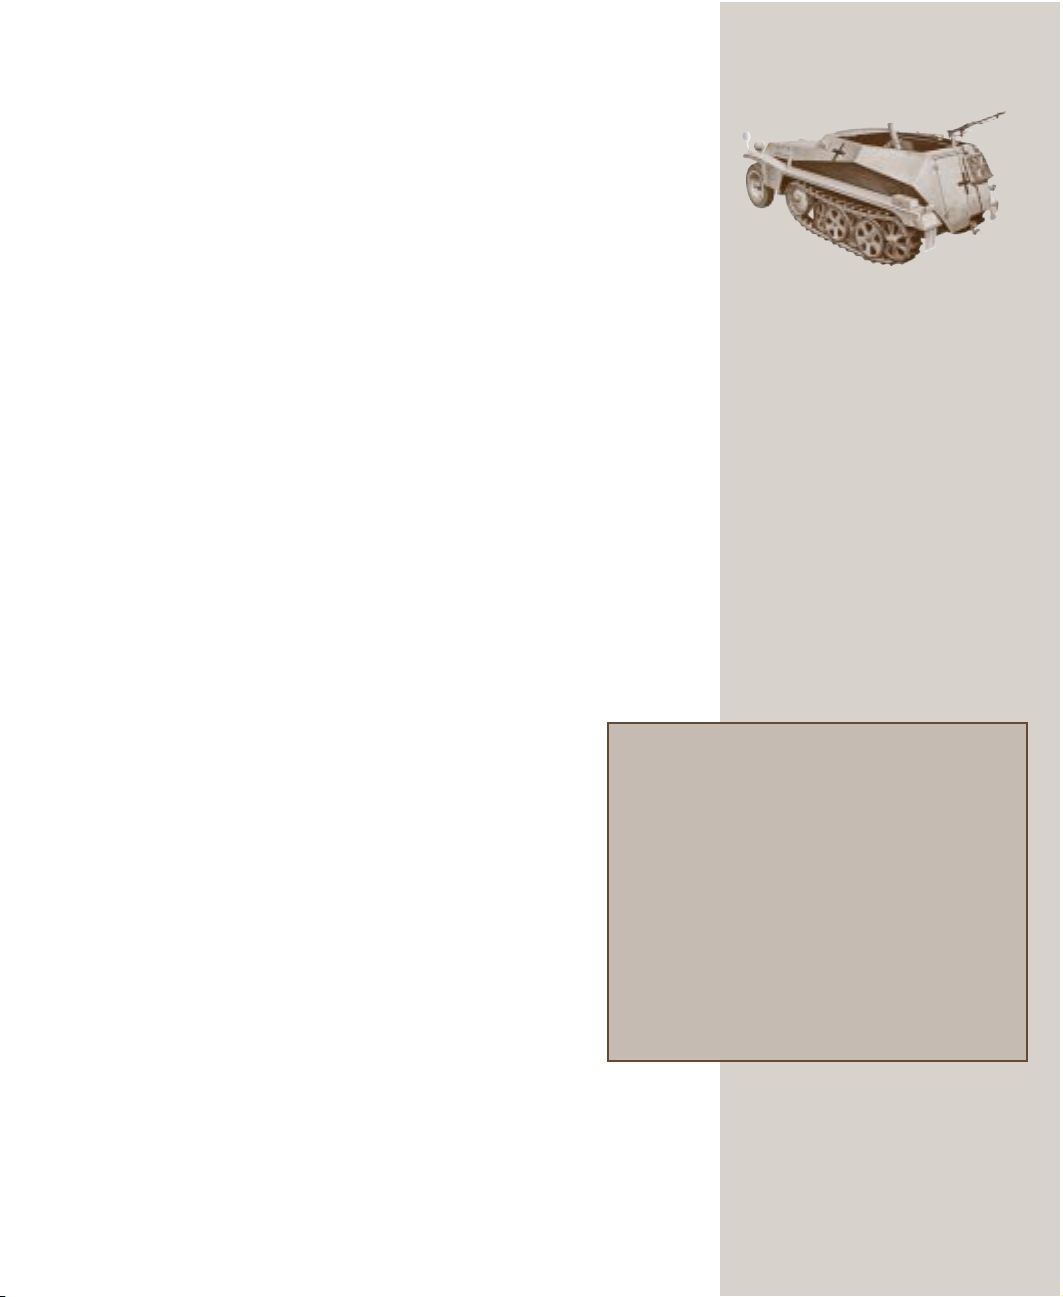
SdKfz 250/7
German Halftracks
SdKfz 250/251 variants
German halftracks played a number of
roles. When armed with machine guns,
halftracks proved devastating against
infantry. When armed with mortars or
Wurfrahmen (medium-range rockets),
halftracks were effective as mobile
artillery. However, the halftracks’
relatively thin armor made them
susceptible to small arms and machine
guns at short range.
Page 20
14 Close Combat III: The Russian Front
Red Army infantrymen fight
amidst the rubble of a Russian
city. The soldier in the foreground
is using DP 1928 machine gun, a
French design from World War I.
For more information on taking and defending victory locations,
see Chapter 3, “Strategy and Tactics.”
Minefields
Red spheres on the map (when it is fully zoomed out) depict
minefields; when you clear a section of a minefield, those
spheres become green. For information about mines, see “Clearing Mines and Passing Through Minefields” in the next chapter.
Deploying Units
The computer initially deploys your troops for you. Although the
default deployment may be satisfactory, you’ll probably want to
change it to fit your own battle plan. When deploying your units,
consider your basic strategy (attacking or defending), the
position of the victory locations, the type of teams you selected,
and the terrain. For example, the deployment for the relatively
treeless Kursk battlefield should be different than that for an
urban battle such as Red Square. For information on developing
your strategy, see Chapter 3, “Strategy and Tactics.”
You can move any or all of your units during deployment by clicking and
dragging. You can also move groups by selecting two or more teams
(group select), and then clicking and dragging. Teams retain the same
positions relative to each other at their new locations, and teams that will
be off the map at their new location do not move. For more information,
see “To issue the same order to a group of teams (group select)” later in
this chapter.
SdKfz 232
German Armored Cars
Armored cars were even faster than
halftracks. German armored cars were
normally armed with machine guns, but
were no match for tanks. They were
used primarily for reconnaissance or
against infantry targets.
To check fields of fire
All weapons except mortars and rockets require a clear line of sight for an
effective field of fire. To check a team’s field of fire during deployment,
click the unit while pressing the ALT key and swing the target dot across
the area of the map you want to cover. Note where the line changes color;
where it turns red, something is obstructing your shot. For more information on line of sight and using your weapons, see “Using Your Weapons
Effectively” later in this chapter.
To move your units to a starting position
1 Click the unit you want to move.
If you want to move units as a group (group select), click and hold a
spot near one of the groups, and then drag a rectangle around the units
you want to group.
2 Drag the unit or units to the location you want.
You can position your troops only on the unshaded areas of the map.
If you attempt to drop units on a shaded portion, they snap back to
their previous position.
Page 21
Chapter 2: Fighting Battles, Operations, and Campaigns 15
To issue an initial order
• Follow the procedure described in “Issuing Orders,” later in this
chapter.
You’ll issue most of your orders during battle, but you can issue one order
to each team during deployment. The units will begin carrying out their
initial order immediately after the battle starts.
With the exception of the Move order with multiple waypoints (for more
information, see “Establishing Waypoints”), you can issue only one order
per team prior to starting the battle. Issuing a second order or redeploying
the unit cancels the first order.
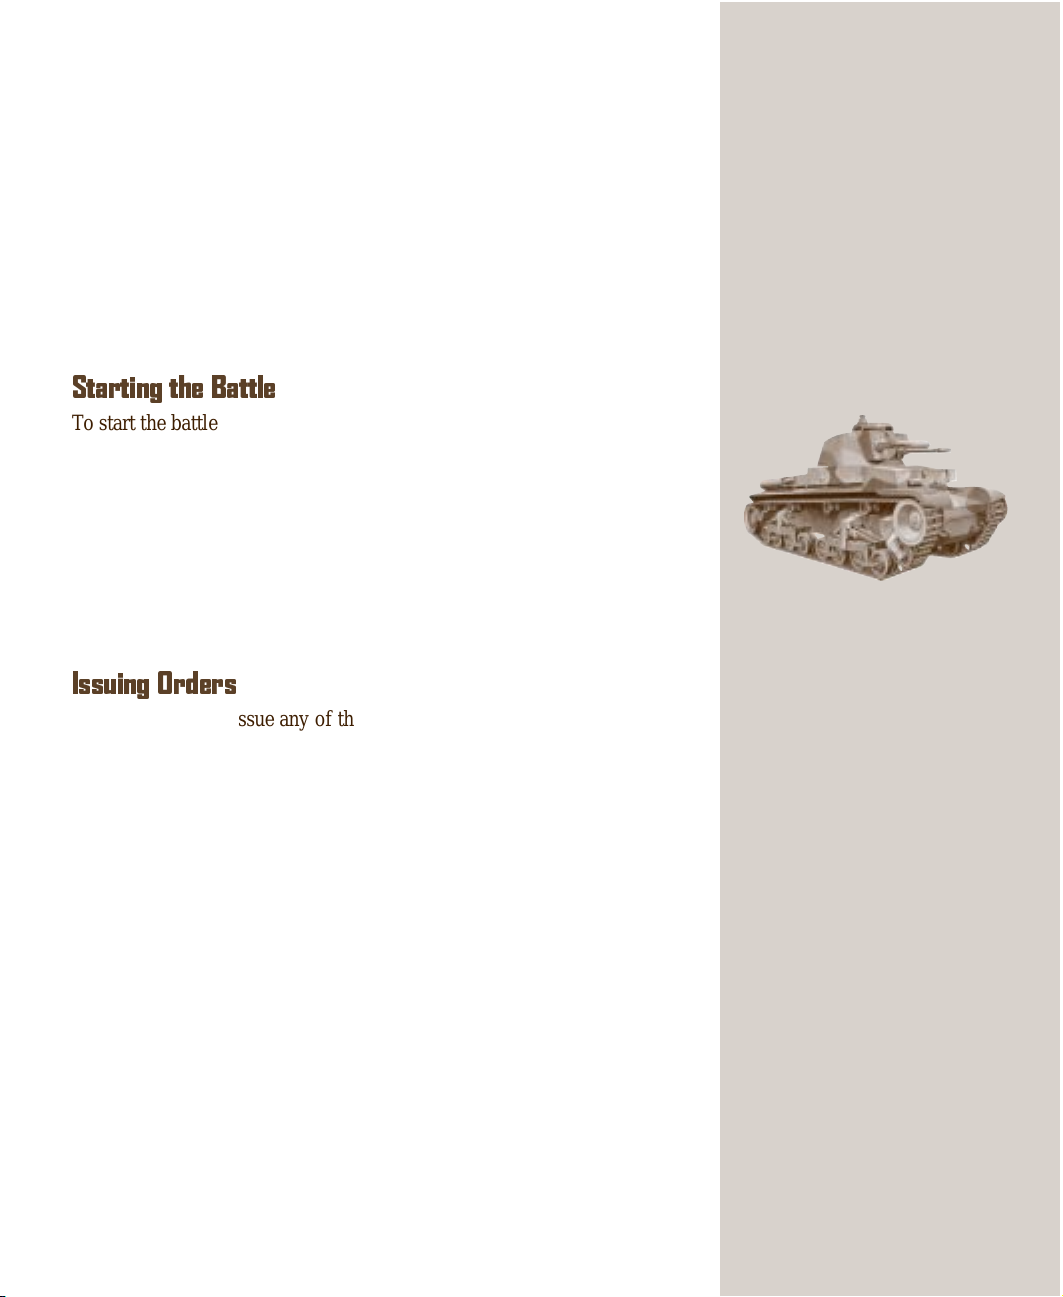
Starting the Battle
To start the battle, click Begin.
Note that enemy units might not be visible at first. Like conditions on a
real battlefield, your soldiers cannot see enemy teams hidden from view.
Your opponent becomes visible only when one of your teams sees them;
however, smoke and muzzle flashes from enemy fire may be visible
before the enemy team members are visible.
When playing your first few games, try selecting the Always see the
enemy option as described in the previous chapter. You’ll be able to see
all enemy troops on the map after your opponent has finished deployment.
Issuing Orders
You use a menu to issue any of three types of orders: those that initiate
movement (Sneak, Move, and Move Fast), those that require a target
(Fire and Smoke), and those that have your units dig in and fight or
prepare an ambush (Defend and Ambush).
Any order you issue remains in effect until your unit carries it out completely. Note, however, that the team might reject the order if, for example, their morale is low or they are being fired upon.
Panzer 35(t)
German Light Tanks
Panzer Mark II, Panzer 35(t),
Panzer 38(t)
German light tanks were used in the
same manner as armored cars and
halftracks, especially when the Germans
recognized the superiority of the
Russian T-34 medium tank.
If you issue a new order before the first one is completed, the first order is
canceled and the new one is carried out.
Note that you issue orders to an entire team, not to individual soldiers.
Also, you cannot issue orders to a separated soldier.
To issue an order
1 Right-click any soldier in the team you want to issue an order to.
The orders menu appears.
2 On the menu, click the order you want.
If the order requires you to designate a position or target (Sneak,
Move, Move Fast, Fire, or Smoke), click the location on the combat
screen where you want the order to take place or end.
Page 22

16 Close Combat III: The Russian Front
An order dot appears, as explained in the “Interpreting Order Dots”
section later in this chapter.
3 If you have issued a defensive order (Defend or Ambush), you can
specify a defend arc, as described in the “Digging In” section later in
this chapter.
To change an order you’ve already issued
• Issue a new order, using the procedure for issuing orders described
previously . The original order is countermanded.
To cancel an order while you are issuing it
• Right-click before placing the order dot.
To countermand an order that you issued previously
• Issue either the Ambush or the Defend order.
Panzer IV Ausf J
German Medium Tanks –
Early War
Panzer Mark III, Panzer Mark IV
Mainstays of German panzer (tank)
units, the Panzer III and IV underwent
constant improvement throughout the
war; armor was thickened and weapons
upgunned. Neither model ever gained
equal footing against the Russian T-34;
German tankers had to get dangerously
close for their shells to penetrate the T34’s armor. Another disadvantage of the
Panzer III and IV were their narrow
treads, which easily bogged down in mud
and snow.
To change the target or destination of an order
• Drag the order dot to a new location.
To issue the same order to a group of teams (group select)
You can drag a rectangle around multiple teams (group select) and issue
the same command to all of them. If you give your teams Move, Move
Fast, or Sneak orders, the order dots appear in the same relative positions
as the teams. If you issue a Defend or Ambush order, the teams hold their
relative positions (as long as the cover and protection are sufficient). If
you issue a Fire or Smoke order, the teams center on the selected target
(if they can).
Moving Your Units (Sneak, Move, Move Fast)
The Sneak, Move, and Move Fast orders designate the speed of move-
ment as well as how alert your troops are to danger around them as they
move.
Sneak is your troops’ slowest and safest rate of movement. (However,
avoid sneaking to an enemy-occupied location; the risk of ambush is too
great.) Sneaking soldiers crawl to their destination, stick to the best cover,
watch carefully for signs of the enemy, and try to avoid detection. When
the unit reaches its destination, the Ambush order is in effect by default.
Move is the normal movement rate. When issued a Move order, the unit
attempts to reach the destination while watching for, and defending
against, possible attack. When the unit reaches its destination, the Defend
order is in effect by default.
If you give a Move order to move a unit to an enemy-occupied location,
they will try to get close and shoot it out with the enemy.
Page 23

Chapter 2: Fighting Battles, Operations, and Campaigns 17
Move Fast is the maximum movement rate. Soldiers moving fast are less
concerned with attack than they are with getting to their destination. This
order is most effective when a unit has cover fire from one or more units.
Soldiers given a Move Fast order run to their destination or sprint if
they’re under fire.
If you give a Move Fast order to move a unit to an enemy-occupied
location, they will assault and try to engage the enemy in hand-to-hand
combat. However, remember that moving fast will tire your soldiers much
more rapidly than moving or sneaking.
Establishing Waypoints
When you issue a Move, Move Fast, or Sneak command, you can
specify the route you want a team to take by establishing waypoints. You
can use waypoints for individual teams, or use group select and establish
waypoints for a group of teams.
An important function of waypoints is to control a team’s final facing.
The direction you move a team with the final path segment determines the
direction of its defend or ambush arc. You want to make sure the final
facing places the arc where you need it.
1 Select a team and issue a Move, Move Fast, or Sneak command.
2 Drag the pointer to the position where you want the first waypoint.
3 Hold down the SHIFT key, click the mouse button, and continue to
hold down SHIFT . The first waypoint appears.
4 Repeat steps 2 and 3 until you place the final order
dot, and then release SHIFT . The final order dot
appears.
German Panzer IV
Mine-Roller Variant
Both the Germans and Russians utilized
tanks with front-mounted rollers that
would detonate mines, allowing the tank
to make clear a path through minefields.
Both German and Russian models could
clear mines moving forward but could be
destroyed when backing over
unexploded mines.
Targeting (Fire, Smoke)
Fire and Smoke are the targeting orders. If you
attempt to lay a smoke screen or fire on a target that
you can’t reach, the order is ignored. Infantry team
members cannot throw smoke grenades farther than
30 meters, or 15 meters if prone.
Because the targeting orders are important elements of
the game, make sure you fully understand how and
when to use your weapons. For more information, see
“Using Your Weapons Effectively” later in this chapter.
Digging In (Defend, Ambush)
Defend and Ambush are your “dig-in” orders.
Defend tells your men to take cover and stand their ground. They will
return fire as necessary, although they may decide to take the offensive on
their own.
Red Army soldiers haul a heavy
Maxim machine gun into action on
the front lines west of Stalingrad.
Russian machine guns were often
mounted on small carts to
facilitate movement.
Page 24

18 Close Combat III: The Russian Front
Tiger I
German Heavy Tank
First introduced in 1943, the Tiger I was
the answer to the existing Russian heavy
tanks, the KV-I and KV-II, and the medium
T-34 as well. The primary weaknesses of
the Tiger were speed and maneuverability; it had neither. However, its nearly
impenetrable armor and high-velocity
8.8cm gun were deadly against all midwar opponents.
When you issue a Defend command, a blue arc appears in front of the
team to indicate the size and direction of the territory the team is watching
for approaching enemies. Defend is the default order for armor at the
beginning of a battle.
To adjust the arc
1 Click and hold the arc.
2 Drag the arc to the compass heading you want the team to defend.
3 Click to establish the arc’s position.
Ambush
launch an ambush when the enemy comes within 30 meters or closer.
When you issue an Ambush command, a green arc appears, similar to the
Defend command’s blue arc. This is particularly valuable when your unit
is out of ammunition or too injured to be of much use to you in the current
battle. If they still have ammunition, your men will fire only if enemy
soldiers pass very close to their hiding place. Ambush is the default order
for infantry and support teams at the beginning of the battle, although no
green ambush arc appears unless you specifically give the Ambush order.
tells members of a unit to keep their heads down, and then
Interpreting Order Dots
After you issue an order, an order dot appears on the map to remind you
which order you issued. The following table shows orders and the
corresponding colors of the order dot.
With burning countryside behind
them and Moscow ahead, this
German antitank team rolls
forward.
Order Color
Move Blue
Move Fast Purple
Sneak Yellow
Fire Orange (for suppression fire)
Red (for direct fire)
Smoke Gray
Ambush Green arc
Defend Blue arc
(For information on direct and suppression fire, see
“Using Your Weapons Effectively,” later in this chapter.)
Using Your Weapons Effectively
Because your supply of ammunition is finite, choose your targets carefully before you open fire.
Close Combat III has two types of fire: direct and indirect. Direct fire
requires a clear line of sight; indirect fire does not (although a clear line of
sight can improve accuracy). The only indirect fire weapons at your
disposal are mortars and rockets. Every other weapon—rifles, machine
guns, tank mounted guns, and artillery—requires a clear line of sight.
Page 25

Chapter 2: Fighting Battles, Operations, and Campaigns 19
Remember that all weapons have strengths and weaknesses. For example,
rifle and machine gun fire probably will not destroy a tank (although it
may reduce the effectiveness of an inexperienced tank team), but can be
much more effective in close-quarters fighting than a tank. Tanks offer
maximum firepower, mobility, and good protection, but have limited
visibility; guns offer the firepower of a tank with less protection and
mobility.
Some weapons, such as hand grenades, explosives, and Molotov cocktails, aren’t subject to your orders. The teams only use them when they are
in situations where such weapons will be effective. For example, a team
in close proximity to an enemy position will use hand grenades.
For a graphic representation of the concepts described in this section, see
the back cover of this manual.
Determining Range
Range is the distance from a weapon to a target. Most weapons diminish
in effectiveness as the distance increases. If you try to target an area out of
the effective range of your weapon, the order will be ignored.
Weapons have different range capabilities. When you issue a Fir e order, a
range indicator (in meters) appears at the end of the fire line. The color of
the range indicator tells you whether you are in range: green = good,
yellow = adequate, red = poor, black = very poor.
Determining Line of Sight
Line of sight is a measure of the obstructions between a weapon and a
potential target. When you issue a Fire order and point to a target, the
color of the line tracing from your weapon describes your line of sight:
Bright green
Dark green The unit cannot clearly see the target or is firing through
obstructions.
It seems strange that Stalin continued to believe that Hitler would not
attack the Soviet Union even after Barbarossa was launched. Stalin
believed that his country would eventually fight a war with Germany.
However, the Russian leader believed that war would come in 1944 or
1945, when his country was ready for war. Even though both the United
States and Great Britain, supposedly Russian allies, sent warnings of
the impending German attack, Stalin refused to listen. He also refused
to listen to the warnings sounded by his own intelligence sources. Even
commanders on the Polish frontier who asked for permission to put
their troops on alert (based on observations of German formations
massing across the border) were told to do nothing. Stalin thought the
The unit can see the target.
Germans were trying to provoke the Russians, and that a Russian
response would then give Germany justification for launching a blitzkrieg
against Russia. The Russian leader realized that his country was not
ready for war, and he did everything he could to avoid a war he didn’t
want, even if that meant ignoring the obvious.
In spite of Stalin’s attitude, rumors of war were rampant in Berlin and
Moscow. Stalin moved to squelch the rumors; Tass (the official Soviet
news agency) issued a communiqué stating that Germany was observing
the non-aggression pact just as strictly as the Russians and there were
no indications that Germany had any intention of breaking the pact.
Hetzer Flammenwerfer
German Flame Tank
The Hetzer, based on the Czech 38T
chassis, was a well-armored tank
destroyer. Combining a flamethrower
with its 7.5cm main gun, the Hetzer
provided a double threat. Its small size
and maneuverability made this tank
destroyer effective in close-quarter
conditions, especially in urban fighting.
The Hetzer’s heavy flamethrower had a
much greater range than infantry
flamethrowers.
Page 26

20 Close Combat III: The Russian Front
A German MG42 machine gun
sweeps a street with fire to
silence Russian foes.
actually see the target from its position. Although you don’t need a clear
line of sight to hit a target using indirect fire, you have a greater chance of
hitting your target if you can see it.
If a green or red line appears, your team is out of mortar rounds or
rockets; they’re now essentially an infantry team.
Red The unit cannot fire through the obstruction; the order will be
ignored.
Note that the game checks line of sight from each individual soldier to
each enemy soldier. Line of sight might vary among soldiers on a
team. If, for example, you issue the Fire command to a team and only
one soldier begins shooting, he is probably the only one with a clear
line of sight to the enemy.
Line of sight for indirect fire uses different color coding, as explained
in the next section.
Using Indirect Fire
When you’re using mortars and rockets, you will see an orange line
instead of a red or green line stretching to your target as you point to it.
A brown line indicates that the target is not in the line of sight. This
tells you that it is indirect fire—you are lobbing explosives at your
target instead of firing at it directly. An orange order dot appears on the
combat screen above the target for mortars. With indirect fire, accuracy
depends on the experience of your team, as well as whether it can
“All planning must take into
account the unalterable fact that
the predicted strength of the
Army field forces as of 1 November 1942 will be 800,000, or 18
percent, below established
strength (approximately
3,200,000) and that it is no
longer possible to reduce those
numbers.”
— Report from Organizational Branch,
German High Command, September 8,
1942
Using Suppression Fire
You don’t have to hit a target directly for a shot to be effective; suppression fire alone can sap enemy morale. For example, if you are attacking a
building occupied by an enemy antitank (AT) unit, you can spray the
building with machine gun fire. This suppression fire should make the
enemy keep their heads down, which reduces their effectiveness, and
consequently , their ability to aim and fire. While the machine gun fire
keeps them suppressed, your infantry or armor units can maneuver toward
the building to destroy the enemy unit.
The heavier the fire, the greater the suppression effects on any enemies in
the area. Make sure you don’t move your own soldiers into an area that is
being actively suppressed; they might accidentally get shot.
Taking Prisoners and Rallying
Separated Soldiers
When enemy soldiers surrender to you, they become your prisoners. They
move toward your side of the map and do not participate in the battle. To
get enemy soldiers to surrender, you can try to bracket or surround them
with suppression fire and then move into close range for an assault.
Page 27

Chapter 2: Fighting Battles, Operations, and Campaigns 21
Because prisoners are worth three times more than their normal value at
the conclusion of the scenario, try to capture your opponent’s immobilized tanks and routing infantry.
You can recover your own surrendered soldiers by moving a team to them
before they exit the map.
Soldiers can get separated from their units. A soldier may rejoin his group
without encouragement if given enough time. To encourage a separated
soldier to rally with his original team, you can move the team closer to
him. Proximity of a commander can also help keep soldiers from leaving
their unit or encourage a soldier to return to their unit.
Viewing Battlefield Status
Close Combat III provides two-way communication between the battlefield and you, the commander. You issue orders to your men, and they
keep you up-to-date on their status using the message monitor in the
lower-right portion of the screen. They also provide information on the
enemy.
You can view detailed information on your teams. To display or hide this
information, click the button to the right of the message monitor, at the
extreme lower-right corner of the combat screen.
You can also listen for audio messages from your teams (if you have
enabled sound for the game); each message displayed in the lower-right
portion of the screen has a corresponding audio message.
Ending a Battle
A battle can end several ways, depending on which option you selected in
Chapter 1, “Gearing Up for Game Play.”
Battles can also end if one side or the other offers a truce (which is then
accepted) or flees from the battlefield.
If you call a truce and your opponent does not agree to it, you can either
continue the fight, retreat, or flee. When you retreat, you do not surrender
your teams; you just issue orders for them to move off the map. When you
flee, the battle ends immediately . The game calculates the teams kept or
lost, and the enemy takes control of the entire map.
“Our route was strewn with
corpses that the snow soon
covered as if in compassion…”
— Joachim Wieder, author of
Nashorn
Stalingrad
German Self-Propelled
Antitank (AT) Guns
Marder III, Hummel, Nashorn
These tank destroyers were equipped
with heavy guns but light armor.
Consequently, they were used to engage
enemy armor at medium to long range.
They were reasonably fast, but their
light armor and open turret made them
vulnerable to enemy fire.
To signal that you are willing to call a truce
• On the toolbar, click the Truce button.
The battle ends when both sides have clicked Truce. If the truce is
accepted while one side holds all victory locations on the map, then
that side wins the map.
Page 28

22 Close Combat III: The Russian Front
To end the battle and surrender
• On the toolbar, click the Flee button. You can also flee by issuing the
To quit the game after you cease-fire, retreat, or flee
1 On the Debriefing screen, click Main.
2 On the Main screen, click Quit.
3 To quit from any screen press ALT+F4.
To stop a battle but stay in the game
• Press ESC. The battle stops and is not saved. This is useful if, for
Move order to all your teams and moving them off the right or left
edge of the map.
example, your battle is going poorly and you want to start over.
Sturmgeschutz III
German Infantry Support
Tanks
StuG III, StuG 38, StuH 42
Both of these self-propelled guns were
heavily armored on their front to
provide close infantry support. They
were used primarily with infantry to
make rapid advances against fixed
targets. At short range these guns were
also effective as tank destroyers.
Checking the Status of Your Soldiers
You can check the status of the soldiers in your active roster at any time
before or after combat. To bring up the Soldier screen, click the Soldiers
button. This screen gives you detailed information on each soldier’s
health, history , kills, and medals.
Winning and Losing: The Debriefing Screen
After a battle ends, the Debriefing screen shows you the results of your
battle or the current status of your operation or campaign.
The upper-right portion of the screen tells you whether you scored a total,
decisive, major, or minor victory, or the equivalent level of defeat.
The upper-left portion of the screen uses single or double arrows—and
the point equivalent of those arrows—to show whether you performed
better or worse than expected during the latest scenario:
• Force strength – The measure of how well you kept your troops
alive. Specifically, force strength is your surviving teams’ requisition
value plus any remaining requisition points, minus your starting
teams’ requisition value.
Force Strength is the same for single battles and operations. For
campaigns, you are given points from a cumulative score of the
operations you fought.
• Casualties – The damage you inflicted on your opponent’s troops.
Prisoners are worth three times their normal value.
• Land gained – Victory locations taken, compared to the number you
were expected to take.
To see the number of victory locations you were expected to take for a
particular battle or operation, either select the scenario on the Command
screen or view the briefing for that scenario. The map displays a statement
Page 29

Chapter 2: Fighting Battles, Operations, and Campaigns 23
telling you how many victory locations you need to take or hold to
achieve an “Expected” score on the Debriefing screen. Deviations from
that score determine the number and direction of the arrows appearing at
the top of the screen. For example, if you are expected to take three
victory locations and you take only two, you’re given one arrow pointing
down; if you take five, you’re given two arrows pointing up.
Battle Scores and Tournament Scores
You receive two scores for each battle: a battle score and a tournament
score.
Battle score is the sum of your base score and the three factors described
previously—force strength, casualties, and land gained. Base score is
based on rank. Because you are expected to fight more successfully as
you move up in rank, your base score is highest when you are at the
lowest rank and decreases as you rise in rank.
Tournament score is used only on the MSN Gaming Zone to compare
your outcome to other players. This score is a product of battle score and
the realism factor described in “Choosing Realism Options” in Chapter 1.
Operational Debriefing
The Operational Debriefing screen is similar to the Battle Briefing screen
except that your battle score is determined within the current context of
the operation. You can, for example, win a battle but still score a defeat if
you haven’t achieved your objectives for that part of the operation.
“The Battle of Stalingrad was
extremely fierce, and I personally
can compare it only with the
Battle for Moscow.”
— Marshal Georgi Zhukov
JagdPanther
The Operational Debriefing screen shows your status at the current
point of the operation. The status might change when you continue
the operation.
Campaign Debriefing
The Campaign Debriefing screen gives you information on promotion
points, which you accumulate to elevate your rank.
You gain promotion points at the end of each operation. The Campaign
Debriefing screen shows your running total of promotion points along
with the number of points you need before you are promoted to the
next rank.
You win a campaign by having more total promotion points than your
opponent.
German Tank Destroyers
Jagdpanzer IV, JagdPanther,
JagdTiger, Hetzer
Heavily armored, fixed-gun versions of
the Panzer IV, Panther, and King Tiger,
these tank destroyers were some of
the war’s most effective. Both the
JagdPanther and the JagdTiger had the
armor and firepower to engage and
destroy any tank the Russians fielded.
However, without a traversing gun,
these tank destroyers were vulnerable
to maneuverable opponents and flank
attacks.
Page 30

24 Close Combat III: The Russian Front
Chapter 3
Strategy and Tactics
Strategy and tactics are the core of Close Combat III: The Russian Front.
Strategy is the most basic part of your plan: you’ll need to make overall
decisions such as whether you will you attack or defend or be aggressive
or cautious. To a great extent, your strategy is driven by the end battle
Elefant
German Heavy Assault Tanks
Ferdinand, Elefant
These heavy tank destroyers were
based on the Tiger I chassis. With heavy
armor and 8.8cm main guns, they were
more than a match for any Russian tank.
Their lack of speed and maneuverability,
combined with forward-only machine
guns, made these tank destroyers
vulnerable to infantry with explosives or
flamethrowers. But properly supported,
they were devastating.
Red Army soldiers rush forward
in a large-scale infantry attack in
the Ukraine. Note the machine gun
on its wheeled cart in the right
foreground.
option you chose, as described in Chapter 1, “Gearing Up for Battle.” For
example, winning a 10-minute game requires a fundamentally different
strategy than capturing all victory locations on the map.
Tactics defines how you accomplish your plan: if your strategy is to
attack, how broad will your front be, and will you make a frontal or flank
attack? What weapons will you use for suppression, and what routes will
your troops take? If your strategy is to defend, will your defensive
position be broad or deep, static or mobile? Good tactics help you drive
your opponent from the map while preserving your own teams.
Determining Your Basic Strategy
At the beginning of each battle, operation, or campaign, you should set up
a specific strategy. Examine the map and consider the following:
• Where are the victory locations? If they’re close to your deployment
• If you defend, what positions should you hold to protect your victory
zone, you might want to attack quickly and then defend.
• Does the map have lots of open space or is it
crowded with buildings? Open spaces mean long
and wide fields of fire; you might want to make
the enemy cross them instead of risking your own
troops.
• Is the ground dry, snowy , or muddy? Although
armor moves well on snow and dry ground, it can
bog down in mud.
• Where are the elevations (hills and tall build-
ings)? If you can use elevated positions with long
and wide fields of fire, you can suppress the
enemy during an attack.
• If you attack, what will your route be and where
might the enemy be positioned? Look for routes
that offer cover and protection (see “Using Cover
and Protection” later in this chapter for a thorough description of these
concepts). Sneak your troops forward to maintain surprise and prevent
ambush.
locations? Find positions that offer good fields of fire. Place machine
Page 31

guns where they can sweep the approaches to your lines. Look for
places that allow you to ambush and then withdraw.
• How many troops will you have compared to the enemy? The higher
you set the difficulty level, the more troops your opponent will have.
Unless you have teams to spare, don’t try to mount a full-scale assault
or defend a large area.
Chapter 3: Strategy and Tactics 25
Managing Your Teams
When selecting your fighting force, try for the optimal balance of mobility and firepower given your strategy and the terrain in which your troops
will be fighting. For example, if your plan is to attack across open terrain,
you’ll want teams that are mobile (infantry or armor) and teams that can
provide suppression (a combination of machine guns, mortars, antitank
(AT) guns, and armor). Too many infantry teams and too few tanks might
leave your attack positions easily suppressed by a few tank rounds; too
many tanks and too few infantrymen could force your tanks to take on
antitank guns without infantry support.
The balance of firepower and mobility is equally important if you plan a
defensive strategy. To make sure you can shift to danger points or launch
counterattacks, combine tough but less mobile weapons (machine guns,
mortars, flamethrowers, antitank guns, and antitank teams) with some
easily transportable units (infantry , vehicles, and armor).
Selecting Teams for Your Force
When you choose teams to include in your fighting force, consider not
only what you want to accomplish; but also the number of teams you are
allowed and what is currently available for selection. For example, if you
plan on attacking aggressively with a limited number of requisition
points, you might want to select the highest quality teams available to
create an elite fighting force. Or, you can do the opposite:
choose lower quality troops to maximize the number of men
in your force (you might want more than one commander in
this scenario to keep your conscripts under control).
When you’re on the battlefield, make sure you don’t ask
teams to do something they are not suited for. For example,
don’t order a mortar team with a full complement of ammunition to move fast in a frontal assault against a machine gun.
Don’t send a rifle team to stop a tank unless it has an antitank
weapon (Molotov cocktail or Panzerfaust). Likewise, don’t
order an unsupported flamethrower team to move across open
terrain. Not only will these orders place your teams at high
risk, they’ll also drain your teams’ morale.
The fighting for Stalingrad takes a horrific toll on both
sides. Between August and early October, the German
Sixth Army loses 7,700 dead, 30,000 wounded, and 1,100
missing. One Sixth Army division had an average battalion
strength of 3 officers, 11 non-commissioned officers, and
62 soldiers. Russian losses are even higher.
The ferocity of the fighting at Stalingrad can be measured
in the amount of ammunition consumed. Between January
10 and February 2, 1943, the Russian Don Front was the
primary force charged with eliminating the encircled
Germans. This front (or army group) fired over 900,000
artillery shells, 990,000 mortar rounds, and 24,000,000
rifle and machine gun rounds in 23 days.
German Panzer
Mark V “Panther”
After their experience against the
Russian T-34, the Germans designed and
built the Panther. It had better armor
and firepower than the Mark III or Mark
IV; it was faster and far more maneuverable than the Tiger. Perhaps the best allaround tanks of the war, they were
initially rushed to the Russian Front
without adequate break-in time, which
compromised mechanical reliability. A
tough one-on-one match for all but the
heaviest Russian tanks, Panthers were
never produced in sufficient numbers to
overcome the Russian T-34 and KV
series.
Page 32

26 Close Combat III: The Russian Front
Allocating Commanders
The higher ranked the commander, the more likely he can keep his men
from panicking and rally other soldiers near him. Also, the higher the
commander’s rank, the larger the physical range in which soldiers are
affected by that commander.
When you select your fighting force, Close Combat III automatically puts
a primary commander on your side. This commander represents you on
the battlefield. You can choose to either lead the battle alone or add
secondary commanders to expand your control. With more than one
German
Panzer Mark VI
Ausf A Tiger II
Reaching the battlefield in late 1944 (both
on the Russian Front and in the ill-fated
Ardennes Offensive), the Tiger II was the
heaviest tank of the war. A heavy version
of the Panther rather than an update of
the Tiger I, its only liabilities were low
speed and cumbersome width. Too slow
to fight in the open, the Tiger II was a
formidable foe when fighting from cover
or in formation.
commander, you can try the following strategies:
• Execute a multi-pronged assault by building several small forces
• Place commanders at critical points in a defensive formation.
• Keep a command team as a reserve to move to danger points and rally
• Elevate the performance of inexperienced units by teaming them with
Promoting Morale and Cohesion
Good morale and cohesion are essential for good performance. Troops
with bad morale might ignore their commander, panic, and eventually run.
The primary way to keep morale high is to give units orders that are
appropriate for them, as explained in “Selecting Teams for Your Force”
earlier in this chapter.
around commanders.
broken soldiers, or lead a counterattack.
seasoned commanders.
“We doubt the veracity of your
information.”
— The response of Russian military
intelligence after receiving repeated
warnings from spy Richard Sorge about
the impending launch of Barbarossa
Try not to isolate teams (where they can be outnumbered), and keep them
away from areas strewn with dead and wounded. Don’t let your teams get
ambushed (caught out in the open while being shot at close range), shot at
by a tank when they lack antitank capability, or fired at from multiple
directions (surrounded). Low-quality teams or teams with no leaders
perform very poorly when left to themselves. Try to keep these teams
grouped with others or near a commander.
If a team’s morale is sagging, you can improve it considerably by letting
them ambush the enemy or destroy an enemy tank.
Using Suppression and Movement
You don’t need to hit enemy soldiers to drive them from a position.
Suppression—simply firing at the enemy to keep them from firing back—
can reduce morale and effectiveness enough to make them keep their
heads down while your teams maneuver. Suppression fire alone sometimes makes teams panic and run. It is effective even when your opponent
has good cover; again, you might not score any kills, but you can make
them keep their heads down and prevent them from firing back.
Page 33

Although you can use any weapon for suppression, machine guns
and mortars are especially suited to this task. But don’t waste all of a
team’s ammunition on suppression; they might need it later to defend
themselves.
Chapter 3: Strategy and Tactics 27
60M
Using Terrain to Your Benefit
Always adapt your strategy and tactics to the conditions in which you’re
fighting. Open terrain means longer fields of fire and fewer places to
hide, while closed terrain—cities, villages, and forests—reduces fields of
fire and abounds with ambush possibilities. Summer and winter maps
offer excellent mobility, but life-sapping cold can occur in some winter
battles. Autumn and spring mean mud, and mobility is reduced to a
slogging pace.
Regardless of the terrain or weather, look to the high ground—crest
terrain and tall buildings. Elevation always improves your field of fire. A
couple of well-placed machine guns—positioned on a hill or in a multistory building—can dominate a map. Mortar accuracy improves because
the team can see their target. You can widen an antitank gun’s field of fire,
increasing its chances of making multiple kills. You can even use elevation to destroy tanks; ambushes by antitank teams firing down on tanks
from multistory buildings can be deadly.
Fighting in the Streets
When you fight in and around streets and buildings, sight lines (and therefore, fields of fire) are
constricted. Long-range weapons lose effectiveness, but weapons with high rates of fire become
more valuable.
If you’re attacking in the streets, you’ll probably
want to concentrate your forces, which enables
units to support each other. Leapfrogging is very
effective: use three teams to move from house to
house; one team moves while the other two
provide support and suppression. You can move
units quickly until you engage the enemy because
buildings mask your movements. After you
encounter the enemy, go back to sneaking your
units.
Because city streets constrict movement, tanks are
not ideal in city fighting. Even though tank fire can
penetrate virtually any building, tanks are also
susceptible to ambush in confined areas. Lighter,
more maneuverable vehicles (halftracks and
armored cars) armed with machine guns are
particularly valuable on city streets. Mortars are
Field Marshal Fedor von Bock (1880–1945)
Son of a Prussian general, Bock epitomizes the German officer class
that detests National Socialism but serves Hitler faithfully. An
experienced infantry commander in World War I, he rises rapidly in
rank between the wars, and becomes one of three army group
commanders during the early part of World War II. Bock’s Army Group
North sweeps aside its opposition in Poland. In the west his Army Group
B overruns the Low Countries and plays a major role in the battle of
France.
Bock is given command of Army Group Center in the attack on Russia.
He advances from Poland to the outskirts of Moscow in the second half
of 1941, but overextended supply lines, exhausted troops, the killing
cold, and stiffening Russian resistance halt his advance. During the
Russian counteroffensive in December 1941, Bock is relieved of
command. In early 1942, he replaces Rundstedt as commander of Army
Group South, and presides over the early successes in the drive
toward the Caucasus Mountains. However, he is relieved of command—
permanently—after another dispute with Hitler.
German Panzerfäust
Panzerfäust 30M, 60M and 100M
Not available until 1943, this simple
hand-held, percussion-fired weapon
could take out most Russian tanks less
than 150 meters away. Throughout the
rest of the war, one or two Panzerfäusts
were distributed to most German
infantry units. Because the Panzerfäust
was a single-shot, single-use weapon,
the team needed to make sure they took
a good shot, aiming for the side or rear
of medium and heavy tanks.
Page 34

28 Close Combat III: The Russian Front
always effective against infantry. Heavy mortars (120mm) can blast
through stone buildings, but 50mm mortars can barely penetrate wood.
If you’re outnumbered, city and village streets offer many excellent
opportunities for ambushes. You can hit the enemy, and then pull back to
another ambush position to maximize the effectiveness of your units. If
you are defending in confined terrain, make sure you site your heavy
weapons where they have an effective field of fire. For example, place a
machine gun and antitank gun where they can sweep the main road on the
map. This forces the attackers onto secondary routes, where you can have
ambushes waiting.
Note that most of the tactics that apply to city fighting are also workable
when fighting in forests. Dense trees reduce sight lines (and therefore
fields of fire) and constrict mobility. The major difference between cities
and forests is that some tanks can knock down trees, but no tanks can
flatten buildings, as the risk of throwing a track, damaging the gun barrel,
or falling into a cellar is too great.
Fighting in the Country
When you fight in open terrain, sight lines are both long and wide. Shortrange weapons such as submachine guns and flamethrowers lose effectiveness, but weapons with high rates of fire are as valuable as they are in
city fighting.
Stielhandgranate 39
German Alternate Weapons
Grenades, shape charges
Most German units were armed with
small arms, including hand grenades.
Grenades were effective in a wide
variety of situations. Many infantry
teams were armed with shaped
charges—explosives shaped to
penetrate the thickest tank armor. While
devastatingly effective, the user had to
get close for the charges to actually hit
the tank.
Tanks and other armored vehicles have freedom of movement in open
terrain, but remember that the enemy can see you coming. Finding and
attacking the enemy’s antitank units with your infantry is not as important
as in city conditions; improved sight lines make the tanks somewhat more
secure. However, you’ll still want to try to draw enemy fire with infantry
or scout vehicles before committing your tanks.
Because open terrain makes you highly visible to the enemy, move slowly
and be patient. Use any available cover or protection to mask your
movements, but expect the enemy to have these routes covered. Conversely, if you are defending, make sure you can put any approach routes
under fire.
Despite your precautions, your units might still get trapped in the open.
Ordering these teams to move forward or back can be counterproductive;
instead, try ordering them to dig in (Ambush command), and then bring
machine gun, mortar, antitank gun, or tank fire to bear on the teams that
have your units pinned down.
Regardless of whether you are attacking or defending, using the edges of
the map can be effective in open terrain. If you can advance forces along
the edges, you might be able to catch the enemy in a crossfire. Crossfires
can rapidly crush the enemy , especially if accompanied by a flank or
frontal assault.
Page 35

On the Attack
Attacking can serve several purposes. You might want to capture an
enemy position or kill enemy soldiers. You might attack to hold enemy
forces in place while other units maneuver onto the enemy’s flank. Or you
might just want to divide the enemy’s attention and make their job of
defending more difficult.
The primary rule of attacking is to never send an unsupported unit directly
at their objective—it’s asking them to commit suicide. You give up the
element of surprise and leave the enemy unsuppressed, which minimizes
your chances of success. The only time you should throw an unsupported
unit into an attack is when the survival of your whole force depends on it.
For example, you might have to sacrifice a unit to enable the remainder of
your force to withdraw or reach defensible positions.
Planning Your Attack
Plan your attack with care. Look for the positions you
think the enemy will hold and the approaches you
want to use: see if you can cover these positions with
rifle and machine gun fire to provide suppression.
Position mortars within range to add to the suppression and provide smoke (if you’re planning a frontal
assault). You might even want to position an antitank
gun to provide suppression and counter any enemy
tank units.
Chapter 3: Strategy and Tactics 29
“Occupy it, administer it,
exploit it.”
— The German plan for conquered
Russian territory
If you plan on using armor during your attack, you’ll
want to examine the routes they’ll take. Plan to take
them around minefields or have engineers precede them through mined
areas. Make sure tanks can stay out of sight until you need them, but keep
them close enough to the front line so their effect can be felt immediately.
You should take your plan of attack into account when you are deploying
your troops. You’ll want to deploy troops as close to their jump-off point
as possible, where they can provide suppression fire, or where they can
move up easily when the situation requires.
There are two basic types of attack: frontal assault and flank attack.
Launching Frontal Assaults
Because they’ll cost you many of your own troops, you’ll generally want
to avoid frontal assaults. They also require plenty of resources; you’ll
need firepower to suppress the enemy while your assault teams move
forward. However, frontal assaults do have one simple advantage: they
decide the issue quickly and decisively.
Deployment is critical. You’ll need at least one machine gun with a clear
field of fire to the target; and a mortar team, preferably one that can see
On the site of the Achievement
Exhibition in Moscow, Russian
antiaircraft guns wait for the
Luftwaffe. The Germans and
Russians did not resort to
strategic bombing on the scale
practiced by the United States and
Great Britain.
Page 36

30 Close Combat III: The Russian Front
the target. Next, you’ll need a commander who can either accompany the
assault team or whose command radius encompasses the terrain up to the
objective. Finally , make sure your assault team has the shortest or easiest
possible route to traverse. This team should consist (ideally) of infantry
armed with submachine guns, automatic rifles, and grenades; support
units should be armed with weapons that can reach the target from where
Mosan-Nagant M1938
the team is deployed.
Russian Rifle Teams
As they were in the German Army, rifle
teams were the backbone of the Red
Army. Most Russian infantrymen were
armed with bolt-action rifles accurate
and effective at short to medium range.
Russian infantrymen were often better
supplied, but more poorly trained and
led, than their German counterparts.
Russian antitank gun team moving
a PP27 Model 1927 76mm infantry
gun into position. The low-velocity
of this gun rendered it ineffective
against medium and heavy tanks
except at close range. It was
obsolete by 1943.
The following steps outline a good plan for conducting a frontal assault:
1 Initiate the attack with suppression fire; issue Fire orders to your
machine gun and mortar teams. Let the teams fire for 30 to 60
seconds.
2 Switch the mortar to smoke. If you have two mortar teams, one can
keep up suppression while the other fires smoke.
3 When the smoke begins to take effect, send your assaulting force
forward with a Move Fast order. Attacking with more than one unit,
especially if they attack from different compass points, can improve
your chances of victory .
4 As the assault unit moves forward, issue Fire orders to the support
units, give Defend or Ambush orders to the mortar team (protecting
the assault team from friendly fire), and keep the machine gun (or
guns) firing until the assault team gets into the line of fire.
5 After the assault team captures the location,
give them the Defend or Ambush order and let
them rest.
Launching Flank Attacks
Flanking the enemy—attacking from the side or the
rear—is often preferable to a frontal assault. While
frontal assaults require superior numbers and
overwhelming firepower, flank attacks need mobility
and guile. Holding attacks (or demonstrations) are
usually associated with flank attacks; the holding
attack grabs the enemy’s attention while the assault
team maneuvers onto the enemy’s flank and
launches the attack.
Flank attacks have several advantages:
• They can help maintain surprise. This reduces the requirement for
firepower, although more firepower never hurts.
• You can be more patient when executing a flank attack, increasing the
chances that the enemy might reveal his positions first.
• You can sneak your troops into position, which enables them to avoid
ambush, thereby reducing fatigue and increasing cohesion. Slowmoving teams can move heavier weapons without tiring; this is one
case when ordering a machine gun into an attack might be worthwhile.
Page 37

• They are demoralizing to the enemy. If a team receiving suppression
fire from the front is suddenly subjected to fire on an exposed flank,
they often panic and run.
Before attempting a flank attack, study the battlefield. Plan the route your
assault team will take. Pick the location you want them to occupy before
they launch their attack. Remember that flanking is less effective when
your enemy is well protected on all sides. And, if the enemy outnumbers
you, he can flank your flanking teams.
Initiate your flank attack by issuing a Sneak order (preferably with
waypoints) to the assault team. Remember, be patient; surprise counts. As
the assault team gets close to its jump-off point, start your suppression
fire. You can even make a holding attack, sending a low-grade unit
forward to draw enemy fire. Time the suppression so that it is still active
when the flank attack begins. Start the flank attack by issuing a Fire or
Move Fast order. When the assault team occupies the enemy position,
you can move other units forward.
Chapter 3: Strategy and Tactics 31
You can also execute a double flank attack (envelopment); the objective
of envelopment is to encircle the enemy . This strategy was executed on a
grand scale, with devastating results, by the German army during the first
six months of fighting on the Russian Front.
On the Defense
When defending, determine whether your primary objective is to protect
territory or inflict losses. When you protect territory, your forces must
Colonel General Heinz Guderian
(1888–1954)
Guderian is the German officer most
responsible for what becomes known as
blitzkrieg; a combination of tanks,
motorized infantry, and close support from
ground attack aircraft.
Guderian, who served as a communications officer in World War I,
advances the theory in the early 1930s that tanks are the primary
weapon of attack in modern warfare. In 1937 he publishes a book
(
Achtung Panzer
) that describes his theory of armored war. In 1938
he is appointed commander of mobile troops and advances to the
rank of lieutenant general.
In the blitzkriegs against Poland and France, Guderian commands the
XIX Panzer Corps, demonstrating to the world that his theories about
armored warfare can be successfully applied to the battlefield.
Guderian’s panzers lead the way when Hitler launches Barbarossa. He is
advancing toward Moscow when Hitler diverts his forces into the
Ukraine. Here Guderian’s panzers help surround a vast Russian force at
Kiev. Nonetheless, he is openly critical of Hitler for diverting the panzers
from the thrust toward Moscow. Because of this and other disagreements with Hitler and Kluge, Guderian is relieved of command.
Guderian is recalled in 1943 and given the title of Inspector General of
armored troops. He makes reforms and substantially reorganizes the
panzer forces. After the bomb plot on Hitler’s life, Guderian is appointed
Chief of the General Staff. Hitler, however, continues to ignore
Guderian’s advice, especially his proposal that German forces withdraw
to form a defensive line around Germany. On March 28, 1945 Hitler
dismisses Guderian, thus losing the service of perhaps his best
commander and military theorist.
“We will not surrender Moscow.”
— Soviet leader Josef Stalin,
October 19, 1941
Page 38

32 Close Combat III: The Russian Front
hold positions to the last man. Although this can cause heavy losses to the
enemy, you also risk having your own forces wiped out. When you
choose to inflict losses, your defense can be more mobile. You can set an
ambush, engage the enemy, and then move to another advantageous
position.
Mosan-Nagant
Sniper Rifle M1891/30
Russian Snipers
Russian soldiers with excellent
marksmanship were often made snipers.
They served as both forward observers
and officer hunters. Targeting officers
helped reduce cohesion and morale of
the affected unit. Snipers often received
special training in hand-to-hand and
close-quarter fighting.
Planning Your Defense
Plan your defense in much the same manner as you would plan an attack.
Study the victory locations and determine whether they are defensible. (A
multistory stone building with a good field of fire is defensible, while a
single-story wood building surrounded by trees limiting the field of fire is
not as defensible.) Check the fields of fire from positions that cover the
approaches to the victory location. Holding positions that cover the
victory location might be more defensible than the victory location itself.
Next, find the positions that give you the best fields of fire over the
approaches to your positions. You should also see which enemy positions
you can take under fire. Remember that the ideal way to stop your
attackers is to start shooting at them before they launch their attack.
After you’ve determined the fields of fire for your key positions, decide if
you’ll fight a static or mobile defense. In a static defense, your troops
hold their positions until they’re overwhelmed; place your men in positions that maximize their protection. In a mobile defense, your men hold a
position until it is no longer advantageous, and then move to a new
position to take up the fight again. If you plan to use
a mobile defense, you’ll want to position teams so
they can cover each other when they withdraw . A
mobile defense, by definition, requires mobile teams;
heavy infantry is an excellent choice because these
units provide good firepower with mobility. Tanks
and other vehicles are also excellent choices as long
as they have room to maneuver.
A Russian antitank gun crew
under fire.
If you think your opponent will use armor, site your
antitank weapons where they have a good field of fire
but are also protected from attack. Consider the
terrain (open versus constricted) and weather (muddy
versus dry or frozen) when placing your antitank
weapons. In open terrain and muddy ground, concentrate your positions to cover the roads because tanks will be less able to
travel cross-country .
Deploying for Defense
Deploying for defense has two key similarities to deploying for an attack.
First, you want to deploy your units in their positions (or as close as
Page 39

possible) before the shooting starts. After your units are in place, give
them Ambush orders. Second, you want to deploy in positions that offer
the best combination of field of fire, cover, and protection.
Look for places that let your men control portions of the map. For
example, a three-story house with a line of sight covering a road junction
is a better position than the shell crater in the middle of the road junction.
If you’re deploying for a static defense, find locations where the enemy
can come very close before you run the risk of being seen. Remember, the
closer the enemy is to your position when you open fire, the less room
they have to maneuver. If you open fire too early, you reveal your location
before you have accomplished your objective.
Holding your fire also makes the enemy do the work: they must move,
which signals their location and fatigues their troops. Give your troops the
Ambush command, making it as difficult as possible for the enemy to
flush your forces out. Deploy tanks back from the front line (unless they
have an excellent hiding place near the front).
Chapter 3: Strategy and Tactics 33
PPSh-41
Also keep in mind that a good defense might require offensive maneuvers. If the key position on the entire map lies outside your deployment
zone, you might need to capture the position before you can put up a good
defense. A well-timed and well-placed counterattack can also play an
important role in your defense; remember to keep a reserve, if you can,
for this purpose.
When defending, pick positions that let you catch attacking units in a
crossfire. An ambush that utilizes crossfire is particularly devastating.
Ambushes and Counterattacks
Setting an ambush is the most effective way of engaging the enemy. An
ambush requires keeping your troops hidden as long as possible, and then
opening fire into the flank or rear of the enemy.
Try an ambush when you have limited forces at your disposal; it maximizes your chances of eliminating an enemy unit, which helps you reduce
the enemy’s manpower advantage. Look for positions that let you stay
hidden until the enemy is at point-blank range (30 to 50 meters). Your
position should either offer excellent protection (if you want to continue
to hold the position after you open fire) or a good escape route (if you
want to withdraw after you’ve wiped out or chased off the enemy).
If you’re caught in an ambush and can’t find cover, rush the enemy.
Although you have been caught by surprise, your opponent has moved
very close to you and is easy to hit.
Russian Shock Infantry
These Russian infantry teams carried
rifles, submachine guns, and heavy
weapons: machine guns, flamethrowers,
explosives, and antitank (AT) rifles or
bazookas. They laid down heavy fire
effective at medium to long range, but
were slower than other infantry because
of the weight of their weapons.
Counterattacks are much like ambushes: they’re attacks that use surprise
and the delivery of effective fire from an unexpected direction. Counterattacks are most effective against troops already tired and frazzled from
Page 40

34 Close Combat III: The Russian Front
fighting. For example, if you keep three attacking enemy units pinned
down for several minutes with machine gun fire, a counterattack might
route them.
Using Cover and Protection
Cover provides concealment; it hides you from the enemy. Protection
Simonov AT Rifle PTRS-41
Russian Antitank (AT) Rifles
Prior to the start of World War II, most
tanks had light armor, and heavy, highvelocity rifles were the Red Army’s
preferred infantry AT weapon. Effective
at up to 1,000 meters, these 14.5mm
caliber rifles were used in large
numbers early in the war. A lot of nerve
and a good shot were needed to take out
anything heavier than a Panzer II.
keeps you from getting injured or killed. Some terrain, such as high grass,
hides you effectively but offers little protection from enemy fire. In other
terrain, such as a stone building, the enemy might be able to see you but
probably can’t hit you. Still other terrain elements, such as a deep ditch or
stone wall, offer both cover and protection.
In general, the more powerful the weapon, the greater the degree of
protection you’ll need. For example, a wooden building might shield you
from submachine gun fire, but will not protect you from a machine gun
bullet or an antitank round. However, a stone building can withstand all
weapons except the largest guns (75mm or greater), and pillboxes can
withstand all but 100m guns or greater.
You can use four types of cover in Close Combat III, each providing
varying degrees of concealment and protection.
Linear cover: walls, trenches, gullies Provides good protection against enemy
fire coming perpendicular to the line of cover, but poor concealment and
protection from parallel fire.
Marshal Ivan Konev
(1897–1973)
Konev becomes a member of the Russian
officer corps in 1926 after serving as a
military commissar in the Russian Civil War.
Konev is said to regard Marshal Georgi
Zhukov as his nemesis because he serves
most of his career on a parallel, but subordinate, career path.
Konev serves as commander in the Smolensk sector in the summer of
1941. From October 1941 through 1942 he commands the Kalinin Front,
which helps stay the German advance on Moscow. In 1943, he is in
charge of the Steppe Front during the great tank battle at Kursk. Later
in 1943, Konev leads the Steppe (later Second Ukrainian) Front to
victories at Kirovograd and Korsun-Sevchevosky. He is then given the
First Ukrainian Front, with which Konev recaptures Lvov. Konev is
promoted to Marshal in February 1944.
Konev’s front, along with Zhukov’s, advance across the Oder River and
on to Berlin. Konev’s forces continue on to the Elbe River, where they
link up with American forces at Torgau.
Light cover: high grass, bushes Provides good concealment, but very poor protection from enemy fire.
Medium cover: trees, crests, embankments Protects from the
front, but gives almost no cover from the side or the
rear.
Heavy cover: buildings, foxholes Offers excellent protection and concealment from multiple angles.
Some tips for using cover are:
• Make use of cover whenever you can. Avoid
getting pinned in cover that provides poor
concealment and protection.
• If you are attacked by an enemy who is using
good cover, move your troops to equal or
better terrain, or flank the enemy.
Checking Fields of Fire
Because the majority of weapons in the game are
direct fire weapons, establishing good fields of fire
is paramount. The field of fire equates to a team’ s
Page 41

line of sight; if a tree or building blocks a team’s line of sight, then the
team’s field of fire is also blocked.
You can check a team’s field of fire by issuing (and then canceling) a Fire
order. When the target line is bright green, your field of fire is clear and
effective. If the line turns dark green, the target is obscured but not
blocked from view; your chances of hitting the target are reduced but a hit
is still possible. If the line is red, you have no chance of hitting the target.
Remember also that your weapons govern the depth of your field of fire.
Submachine guns, personal antitank weapons (such as Panzerfausts), and
flamethrowers have the shortest range, while heavy guns have the longest
range.
Clearing Mines and Passing Through Minefields
Mines can stop or slow your advance; the enemy lays them to steer you
into his kill zones. Though deadly, you can use several methods to help
you pass through minefields safely:
• Use mine-rolling tanks, and keep them moving forward. Make sure
you can suppress any armor or AT guns your minerollers encounter;
maneuvering in minefields is treacherous at best. Because the
minerollers are on the front of the tank, back up using extreme
caution. Try to keep the path through the mines as direct as possible to
avoid turns, which can accidentally detonate mines. You’ll need to
make several passes through the mines to clear a path wide enough for
the safe passage of other armor, vehicles, and troops.
• Use engineer teams to clear mines. Move them using the Sneak
command.
• Sneak infantry through minefields. Sneaking troops have a much
smaller chance of detonating a mine than troops moving fast.
• Lay mortar fire or use an artillery barrage to detonate mines.
• Send conscripts into the minefields to clear a path for your better
troops. (Unfortunately, both sides practiced this method during World
War II.)
Chapter 3: Strategy and Tactics 35
Bazooka
(U.S. made)
Russian Rocket
Launcher Teams
The United States shipped thousands of
bazookas to Russia as part of the Lend
Lease program; they proved so effective
the Russians began producing them to
replace their antitank (AT) rifle. As with
German AT weapons, bazookas were
most effective when used to take shortrange shots at the side of a tank, or
medium-range shots at the rear of a
German tank.
To check whether mines have been cleared, zoom out. Green spheres
indicate a clear path through a minefield.
Page 42

36 Close Combat III: The Russian Front
The Red Army on a march to get
behind the Germans. The Germans
were surprised time after time by
seemingly “impossible” Russian
movements. The Red Army
traversed forests and swamps
considered impassable by the
Germans.
within their command radius by increasing the units’ cohesion and mental
stability. Command teams consist of a single officer, of ficer with staff, or
officer and vehicle crew.
Unless you plan on playing a static defense with all troops in one command radius, you probably want to put more than one commander in your
force. This expands your authority and control; you can build battle
groups around your commanders and stage multi-pronged assaults.
Because commanders are your most valuable battlefield assets, you need
to protect them, especially when fighting operations and campaigns.
However, don’t keep them too far away from the action. If your troops are
operating outside any command radius, their unit effectiveness declines.
Chapter 4
Unit Tactics
You manage several different types of units in Close
Combat III: The Russian Front; each with its own
advantages and disadvantages, strengths and weak-
nesses. This chapter describes the best ways to use
each type of unit.
Using Command Teams
Command teams are crucial to your battlefield
success. They improve the performance of the units
Degtyarev
Pekhotniy LMG
Russian Light MG Teams
Like their MG42-toting counterparts in
the German Army, teams carrying the
Degtyarev Pakhotniy machine gun were
mobile enough to keep pace with
advancing infantry. Although this
machine gun couldn’t match the MG42’s
rate of fire, it was still effective against
infantry, halftracks, armored cars, and
wooden buildings.
Using Infantry Teams
Infantry is the backbone of any army. They range from poorly equipped
and unskilled conscripts to heavily armed and well-trained veterans. Your
infantry units can play a number of roles. They can serve as assault teams
in flanking or frontal attacks on enemy positions, or they can provide
suppression fire while other units advance. They can defend victory
locations, serve as shock troops at critical junctures in a battle, or lie in
ambush. You can also send infantry forward to rouse your opponent’s
antitank (AT) weapons and get them to reveal their positions.
Infantry teams are effective in varied terrain; they can fight equally well
in open steppes, swampy forests, or city streets. By comparison, tanks and
other vehicles are excellent on the steppes, but are of limited value in
forests and close-quarters urban fighting.
Infantry units require the fewest requisition points, which fits the
infantryman’s historic position as the most easily spent currency on the
battlefield. However, don’t waste infantry in unsupported attacks—those
undertaken without suppression fire—and assaults on enemy tanks
Page 43

(unless your infantry is armed with antitank weapons). These tactics will
result in unnecessary casualties.
In deploying infantry teams, spread them out to reduce losses in case of
mortar, rocket, and artillery fire. Also, panic can spread quickly if teams
are too close together when one unit breaks and runs. However, units
spread too sparsely cannot support each other. Make sure they are close
enough to each other that their fields of fire overlap.
Chapter 4: Unit Tactics 37
When moving your teams, take them short distances. If you order a team
to move fast over a long distance, you increase the team’s fatigue,
increase the chances of being seen, and invite a flank attack. Break up
long moves into segments using waypoints.
Never move infantry teams without support; use two or more infantry
teams in conjunction with machine gun, mortar, and other heavy weapons.
Using Other Teams as Infantry
When mortar and other teams run out of ammunition, they function as
infantry teams. However, use them carefully (especially if you’re playing
an operation or campaign); your gun teams are more valuable than your
regular infantry units. The best way to use gun teams serving as infantry
is as reserves. They can also help anchor your flank because they’ll use
their small arms if enemy infantry comes within range.
Using Rifle Teams
Rifle teams include assault teams and reconnaissance. Because they
become less fatigued than a unit with heavier weapons such
as machine guns, mortars, or flamethrowers, use them to
perform the majority of your movement—reconnaissance,
flank movements, holding attacks, and frontal assaults.
Rifle team firepower varies according to the team and the
situation. Units armed with only bolt action rifles are no
match for a team of equal size, experience, and cohesion
armed with semiautomatic rifles. Most rifles, manual or
semiautomatic, have superior range to submachine guns,
giving rifles an advantage in open terrain. Submachine guns
have the edge in confined areas because of their smaller size
and higher rate of fire.
Although rifles or submachine guns are no danger to tanks,
rifle teams might have weapons (Panzerfausts, Molotovs,
antitank grenades, or grenade bundles) that can destroy tanks,
tank destroyers, or self-propelled guns. Rifle and submachine
gun fire can damage lighter vehicles (halftracks and armored
cars) at close range and suppress the crew of any open-top
vehicle. Rifle teams can also successfully attack antitank gun
teams (if they can avoid taking fire from the gun itself),
Marshal Semyon Timoshenko (1895–1970)
Timoshenko is commander of the forces that take the full
brunt of the German invasion in 1941. Although the
Russians suffer staggering losses of men, equipment, and
territory, Timoshenko delays the Germans long enough
for Zhukov to save Moscow.
Timoshenko began his career in the cavalry and became a
friend of Stalin’s during the civil war. After service in
Poland and Finland (bringing the war to a successful
conclusion), he was made a marshal in 1940 and was
charged with a major reorganization of the Red Army.
Placed in command of the Southwestern Front in the fall of
1941, he is unable to stop the Germans from taking the
Crimea. After his forces are routed in an offensive at
Kharkov in May 1942, Timoshenko is relieved and
transferred to the quieter Northwestern Front.
Maxim MG M1910
Russian Heavy MG Teams
The Red Army started the war with the
Maxim as the standard heavy machine
gun. Based on a World War I design, it
had a slow rate of fire, but it discharged
a heavy slug with good muzzle velocity.
The Goryunov was a more modern
design that improved the rate of fire
without reducing firepower. Both types
were cumbersome to move and timeconsuming to set up.
Page 44

38 Close Combat III: The Russian Front
Breaking through the German line,
Russian infantry and tank units
of weapons make these units excellent for attacking enemy strongpoints
or defending your victory locations.
advance in the Crimea.
Using Snipers
Snipers are deadly when the enemy has to cross a large open area. A
sniper in deep cover can usually fire several shots before the enemy sees
him. When he is found, pull him out of the line of fire and hide him in a
new place. Snipers avoid shooting if they risk giving their position away,
although they will shoot if being assaulted.
mortar teams, and machine gun teams (if they can
attack from the flank and the machine gun is being
suppressed or held).
Using Engineer Teams
Engineer teams are your most proficient and strongly
armed infantry units. These teams include members
armed with semiautomatic rifles, submachine guns,
flamethrowers, antitank weapons, and even light
machine guns. In addition to clearing mines, these
teams make good assault teams because of their
firepower; engineer teams can be devastating when
attacking an enemy’s flank. An engineer team’s array
ROKS-1
Flamethrower
Russian Flamethrowers
Russian flamethrower teams were used
against strongpoints, infantry, and
vehicles. They were employed effectively
in ambush or with plenty of infantry
support. Like their German counterparts, these weapons were very heavy
and nearly as dangerous to their users
as they were to the enemy.
Snipers prefer to shoot at leaders. They can also hold up an enemy
advance, buying you time to bring up reserves or withdraw other units to
a more defensible position. Note, however, that snipers cannot capture or
hold victory locations.
When attacked by a sniper, try to locate the source of the fire, use
suppression fire to pin him, and then order your troops to charge or
surround him.
Using Support Teams
Support teams include machine gun teams, flamethrowers, mortars,
antitank gun teams, antitank teams, and halftracks.
Using Machine Gun Teams
Machine guns are your primary infantry support weapon. They can wipe
out attacking units, stopping an attack almost before it begins. Use
machine guns to suppress the enemy when you are attacking. When
defending, they should cover the approaches to your victory locations.
Regardless of whether you’re attacking or defending, check the sight lines
of each machine gun team during deployment to ensure a good field of
fire. For example, if you want to use a machine gun to suppress the
enemy, you’ll need a clear line of sight to the target area. Overlapping
Page 45

fields of fire are especially effective. If you can position machine guns
such that they have clear fields of fire across the majority of a map, you
have a good chance of dominating that map. You can also position
machine guns on high ground or tall buildings to increase the depth and
breadth of their field of fire. Make sure you keep your teams clear of a
machine gun’s line of sight; otherwise, they can be hit by friendly fire.
You’ll want to move these heavy guns as little as possible, although
sneaking a machine gun onto the flank can crumple an enemy’s infantry
positions. But watch out; after your machine guns take enemy teams
under fire, the enemy will try to suppress them with machine gun and
mortar fire. You can either withdraw your machine gun team to a safer
location, or preferably, have other teams engage the enemy machine gun
and mortar teams.
If your infantry teams come under machine gun fire, lay down a smoke
screen to obscure your team’s movement. Have the team either advance to
engage the machine gun team in hand-to-hand combat, reposition quickly
to attack the machine gun team’s flank, or move to a protected position
and have another unit maneuver to provide support.
Machine guns are ineffective against tanks, but they can be used successfully against halftracks and antitank guns.
Using Flamethrower Teams
Flamethrowers are deadly weapons, but flamethrower teams are among
your most vulnerable. One rifle bullet can send the whole unit up in
flames. These teams consist of one or two soldiers with tanks of pressurized fuel strapped to their backs. Russian engineer teams also use
flamethrowers. These weapons are heavy and restrict movement, and their
limited range (less than 50 meters) makes them ineffective in open terrain.
In World War II, infantry teams heavily supported most flamethrower
teams; you’ll find this a successful tactic. Try to pin the enemy down with
rifle, machine gun, and mortar fire while your flamethrower team moves
into position. Flamethrowers can also be devastating when employed in
close-quarters fighting (whether you’re attacking or defending) or in an
ambush. They can destroy any kind of team from the lightest infantry to
the heaviest tanks.
Chapter 4: Unit Tactics 39
120mm Mortar
Russian Mortar Teams
50mm, 82mm, 120mm
Russian mortar teams performed a
similar role to that of the Germans.
However, as the war progressed, the
Russians added more and larger mortar
contingents to their front line forces.
The main difference between the German
and Russian mortar teams was
ammunition; the longer the war went on,
the greater the Russian advantage in
supplies.
If you’re attacked by a flamethrower team, fire at the flamethrower or
move quickly to get away. When you destroy a flamethrower, keep a safe
distance; the resulting explosion can kill or injure nearby troops.
Using Mortar Teams
Mortars have a high rate of fire and are very useful when the enemy is not
in your line of sight. You can also use them to lay down smoke to protect
your infantry’s advance.
Page 46

40 Close Combat III: The Russian Front
Mortars are most effective in open terrain and among trees; however,
mortar rounds can explode in tree tops, giving any of your troops below a
“Each position, each meter of
Soviet territory must be stubbornly defended, to the last drop
of blood. We must cling to every
inch of Soviet soil and defend it to
the end!”
— Part of Order 227—the infamous
“Not a Step Back” order—issued on July
28, 1942
deadly shower of shrapnel. Mortars are long-range weapons; because of
the arcing trajectory of the shell, they are useless at close range. Whenever your mortar teams don’t have a target, issue an Ambush order so
they don’t waste ammunition. If you can afford it, include two mortar
teams in your force; their combined fire can be devastating. Make sure to
place them far apart to make the enemy’s counterfire more difficult.
Although mortar teams don’t need line of sight to hit their target, this does
improve accuracy, especially with inexperienced teams.
As with machine gun teams, avoid moving mortar teams as part of an
assault. Their fatigue levels will go up and their effectiveness will lessen.
Mortar teams run out of ammunition quickly; manage them wisely and
don’t waste their fire on targets they can’t hurt such as heavy tanks. When
a team does run out of ammunition, you can send them to the front line to
use their rifles or submachine guns.
“The enemy is firing from every
hole. You must not let yourself
be seen.”
If a mortar team attacks you, try to determine the location of the enemy
mortar team and fire your own mortars at that area. You can also lead an
assault against your opponent’s team.
— A German soldier in Stalingrad
Using Antitank Gun Teams
The Russian military was both inflexible in its methods
and bereft of well-trained officers in its lower
echelons (from the division level down through the
ranks). An example of both shortcomings is the
fighting around the Porechye bridgehead in July and
August of 1941. Although the bridgehead was only two
miles deep and a quarter-mile wide, the Russians
showered over 2,000 artillery shells a day into the
bridgehead; ground support aircraft bombed the
bridgehead at least once a day.
However, swampy forest surrounded the bridgehead,
making it impossible for the Russians to do anything
but attack straight down the two roads leading
toward the bridge, which they did as many as ten
times a day. Tanks led off the attacks, echeloned
several deep, followed by waves of infantry. The
attacks were finally suspended when new attacks
could not get around the 78 wrecked tanks and 2,000
dead comrades that choked the roads.
One defense against enemy tanks is antitank (AT) guns. In
deploying AT guns, look for fields of fire that cover likely tank
routes. Remember to aim for tanks’ weakest points: the side or
rear of German tanks and the rear of Russian tanks. Protect AT
guns by placing them in buildings, trenches, or deep woods. Be
sure to support antitank gun positions with infantry or machine
gun teams; because antitank teams can’t move very fast, they
need to be protected.
Part of any good antitank defense is taking out enemy infantry
without committing your antitank guns. Remember that infantry
is sent forward to get antitank weapons to reveal their position.
If you can use infantry, machine guns, and mortars to take out
advancing infantry, you’ll keep the enemy’s tanks guessing
about your antitank gun’s location.
As with other weapons, accuracy and destructive power increase as the target moves closer. Firing on targets at long range
can disrupt enemy operations before movement begins, but
doing so also reveals the position of the gun when you have
only a small chance of knocking out the target.
Give your antitank guns the Ambush command until you can
get a good shot at enemy targets—when a Fire order gives you
a bright green target dot.
Page 47

Although AT guns are primarily antitank weapons, they are also lethal
against infantry and long-range targets. Because they are slow to move
after they are deployed, make sure you set up your guns in a protected
location with a good line of sight.
To defend against a gun, don’t group up and don’t hide in buildings.
Spread out in a field, cautiously approach to a point within grenade range,
and then charge the gun.
Using Antitank Teams
Another defense against enemy tanks is antitank
teams—teams armed with Panzerfausts,
Panzerschrecks, bazookas, or antitank rifles. All of
these weapons have limited range and killing power.
You should be closer than 100 meters away to shoot
at a tank with one of these weapons. Even if you’re
within 50 meters, you probably need a side or rear
shot if you hope to destroy an enemy tank.
Whenever you can, use other units to draw the tank’s
attention so your antitank teams can approach their
target without being detected. However, rather than
maneuvering your antitank teams into position, try to deploy them in
ambush positions so they don’t have to move. You can then withdraw
them to safety after they take out their target.
You can also keep antitank teams behind the front line, and then move
them forward as the battlefield situation dictates.
Even when an enemy tank come within range of your antitank team, it
might take more than one shot to kill it. Remember that tanks almost
always turn toward the direction of attack; be ready to withdraw your
antitank team if the situation deteriorates.
You can use antitank teams against targets other than tanks. They can be
especially useful in taking out enemy antitank guns, which have little
armor to penetrate. Their gun shields are useful only against small arms
fire.
Chapter 4: Unit Tactics 41
Russian ski troops being pulled
toward the front by Americanmade light tanks. The Red Army
suffered embarrassing losses to
the Finnish ski troops during the
Winter War in 1940; it is a
measure of the Red Army’s
adaptability that tactics used
against them were in turn used
against the Germans.
Using Halftrack and Armored Car Teams
Halftracks are lightly armored trucks equipped with mortars, rockets,
machine guns, flamethrowers, and light antitank guns. They offer the
same offensive firepower as infantry units carrying these weapons, along
with greater speed and mobility . But because of halftracks’ thin armor,
they are no match for enemy tanks or antitank weapons.
Halftracks have long-range firepower but are vulnerable at close range.
Even infantry , using grenades, can destroy these vehicles if they come
too close.
Page 48

42 Close Combat III: The Russian Front
“However, an attack in the near
future against Rumanian Third
Army with the objective of cutting
the railroad to Stalingrad and
thereby threatening the German
forces farther east and forcing a
withdrawal from Stalingrad must
be taken into consideration.”
— German intelligence appraisal,
November 12, 1942
ZIS-3 76.2mm AT gun
Russian Antitank (AT) Infantry Guns
ZIK-37 45mm, ZIS-2 57mm, PP27
76.2mm, P39 76.2mm, ZP39 85mm AA
At the start of the war, German tankers
found Russian antitank guns superior to
those they faced in Western Europe in
1940. Effective against all but the
heaviest German tanks, Russian AT guns
were almost always employed either in
massed formations (for offensive
operations) or in well-supported
positions as part of an in-depth defense.
The 8.5cm gun was also used on the
upgunned T-34/85.
Armored cars are light tanks on wheels. Although they lack the strong
armor to take on antitank weapons or enemy tanks, their speed and low
cost make them useful for scouting. Like halftracks, armored cars have
long-range firepower but are vulnerable at close range. Keep them at a
safe distance from enemy firepower.
In cold weather, make sure you use vehicles equipped for winter conditions. Otherwise, they might be frozen in place at the beginning of
a battle.
Using Armor Teams
Armor teams include tanks, tank destroyers, and self-propelled (assault)
guns. Even though small arms (rifle and machine gun) fire might not
destroy tanks, it can suppress crews by forcing them to keep the hatches
shut, reducing their ability to see. Because some tanks (such as Marders)
are open-topped, they are very vulnerable to infantry at close range or
higher elevations.
Using Tank Teams
Tanks are the lions of the battlefield, capable of killing anything they
encounter. However, their poor visibility makes them easy prey for
antitank (AT) weapons, particularly when an AT team is hidden in dense
terrain. Clear the battlefield with your infantry before moving your armor
into combat.
Tanks have both strong and vulnerable areas. As a rule, tanks have tough
front and weak rear armor. German tanks also have penetrable side armor
and are slower to maneuver, especially in adverse weather conditions. If a
tank gets stuck or you want a tank to retreat, use the Move command. The
tank will drive in reverse, keeping its strong front armor facing the enemy .
Do not use the Move Fast command, which will make the tank turn
around and expose its rear armor to enemy fire. Also, note that a moving
tank is harder to hit than a standing tank, although a standing tank can fire
more accurately than a moving one.
Whenever you want to send your tanks into battle, make sure infantry has
cleared the way; you can use armor to support an infantry attack, but
don’t send armor into unexplored terrain unsupported.
As with other vehicles, tanks that are not equipped for winter conditions
might be frozen in place at the beginning of a battle.
Using Self-Propelled Gun and Tank Destroyer Teams
Tank destroyers and self-propelled (or assault) guns are generally inferior
to tanks. Tanks have enclosed turrets that can swivel to engage targets;
most tank destroyers and self-propelled guns have open turrets or limited
Page 49

traverse on their guns. Open turrets mean crews are susceptible to rifle,
machine gun, and mortar fire; limited traverse means the vehicle must
shift positions to engage targets at different compass points.
Conserving Ammunition
Some of your weapons have smaller supplies of ammunition than others.
Because mortars, flamethrowers, and antitank weapons have limited
ammunition, don’t waste the efforts of these teams on targets they have
little chance of hitting.
Issuing an Ambush order usually stops a team from firing. A team with
this order will wait until the enemy gets within 30 meters or less before
opening fire.
Chapter 4: Unit Tactics 43
BA-10
Attacking Crews in Vehicles
A crew in a vehicle that is buttoned up—that is, the entire crew is inside
the vehicle—cannot easily spot enemy teams. If a vehicle is fired upon, its
crew will button up, which makes them vulnerable to sneak attacks.
Crews that need to be exposed to fire the vehicle’s main weapon are easy
targets for small-arms fire.
Field Marshal Gerd von Rundstedt (1873–1953)
An old-line Prussian general, Rundstedt leaves the Army before
World War II. Recalled in 1939, he’s given command of Army
Group A, which invades Poland in September of that year. In May
of 1940, he commands the same army group in the blitzkrieg
against France, where his panzers isolate the British Expeditionary Force (BEF) at Dunkirk. Rundstedt’s decision to halt his
advance and reduce the British pocket by air strikes allows for
the evacuation of most of the BEF to England.
Russian Armored Cars
Russian armored cars were used in
much the same manner as German
armored cars. They often served as
command, reconnaissance, and infantry
support vehicles. Their armored cars
typified Russian war production: the
design was simple but effective, and vast
quantities were produced.
Rundstedt is given command of Army Group South for the
invasion of the Soviet Union. He is relieved of command after a
dispute with Hitler, and then recalled again in 1942 to serve as
Commander in Chief, West. For the duration of the war he’s
caught up in Hitler’s almost constant shuffling of commanders,
but Rundstedt acquits himself well wherever he serves.
Page 50

44 Close Combat III: The Russian Front
Chapter 5
Building Your Own Scenarios
Along with its realistic combat model and real-time action, you can use
Close Combat III: The Russian Front to create your own battlefield
scenarios. You can customize the data composing your scenarios and
adjust the mix and the numbers of troops on both the Russian and German
sides.
For example, you can design a challenging battle in which one side has a
high number of lightly armed, inexperienced infantry units, and the other
has infantry units that are small in number but heavily armed and more
experienced. You can define one single victory location to be defended by
a single large force, or you can define many small victory locations,
requiring that you spread out your forces to defend them. By adjusting
these different elements of warfare, you can create a wide range of
scenarios for testing your skills as a commander.
Starting the Scenario Editor
U.S. M-3 Halftrack
(Lend-lease)
Russian Halftracks
Russian halftracks suffered the same
weakness as German halftracks: they
were fast, had firepower, but lacked
armor. Even heavy machine gun fire
could penetrate halftrack armor.
However, they still proved effective
as mobile weapons platforms for
machine guns, mortars, and light
antitank (AT) guns.
• To start the scenario editor, on the Main screen, click Cr eate A
After you start the scenario editor, the process of building any type of
custom game is basically the same regardless of the game type:
• Select the type of game you want to build.
• Select the battle maps.
• Adjust the game settings.
• Edit the maps.
• Select the forces.
• Save the game, go to the Command screen, and play.
Choosing a Game
The first step in creating a custom game is to decide what kind of game
you want to serve as a starting point for your custom game.
Scenario. The Scenario Edit screen appears.
1 In the Scenario Types list box, click the one of the following options:
Historical Battle To edit one of the battles that is provided with the
game.
Historical Operation To edit one of the operations that is provided
with the game.
Custom Scenario To edit a custom game that you built previously.
New Scenario To build a custom game from scratch.
Page 51

Chapter 5: Building Your Own Scenarios 45
2 If you chose New Scenario, the Map Selection screen appears
immediately. If you selected any of the first three choices, select
the specific battle, operation, or scenario you want to start with,
and then click Next to bring up the Map Selection screen.
Choosing Maps
The next step in creating a custom game is choosing the maps you
want to include in your scenario. If you chose a historical battle or
operation in the previous step, the Map Selection screen displays the
default maps for the battle or operation in the lower portion of the
screen.
The Scenario Maps box includes all of the battle maps included in
Close Combat III. You can scroll through all the available maps and
choose the map or maps you want. You can either add maps to the
existing maps in the Scenario Map boxes, or replace existing maps
with new maps:
• To add a map between existing maps, click the map you want to
add, drag it to the later of the two existing maps, and then release
the mouse button. For example, if you want to add a map to the
Kharkov Operation, you can drag a new map to the Scenario Map 2
box, which inserts the new map between the Kharkov 1 and 2 maps.
• To add a map to the next available Scenario Map box, either drag it to
the Scenario Map box or double-click it.
• To delete a map, double-click the map you want to delete. The map
moves from the Scenario Map box to the available maps.
• To delete a map and replace it with a new one, double-click the map
you want to delete, and then drag the map you want to add to the
vacant box.
A German artillery barrage aimed
at Russian troops fighting near
Kharkov in the Ukraine.
After you are done choosing your maps, click Next to bring up the
Scenario Info screen.
Adjusting Game Settings
The next step in creating a custom game is adjusting the game settings
using the Scenario Info screen. In this step, you’ll determine the historical
timeframe for your game, the number of days in your game, and the
weather conditions. You also set the highest rank of the German and
Russian commanders, requisition points, and ammunition supplies; as an
option, you can create briefing text for both sides.
Choosing a Season and Year
You use the Seasons list box to pick a season and year for your scenario.
Your choice affects the units that are included in the force pool. For
T-70
Russian Light Tanks
BT-7m, BT-5, T-26C, T-60, T-70
One Russian light tank earned the
nickname “coffin for seven brothers.”
Russian light tanks were fast and
maneuverable but hopelessly undergunned and under-armored against any
German tank heavier than a Panzer III.
Although effective when employed as a
halftrack or armored car, they were
helpless against most tanks and AT guns.
Page 52

46 Close Combat III: The Russian Front
example, if you pick Summer 1942 as the season and year, German Tiger
and Russian Josef Stalin III tanks won’t be included in the force pool—
neither tank was being produced in 1942.
Choosing Game Length
The next step in creating a custom game is setting the number of days
your battle or operation will last. You can have the number of days match
T-34/76 Russian
Main Medium Tank
The workhorse tank of World War II,
more T-34s were produced than any
other tank in any army. It had a rugged
chassis and wide tracks that gave it
excellent all-around mobility. Its engine
was powerful and reliable; the tank itself
easy to operate and maintain. Sloped
armor provided maximum protection
while reducing weight. The 76.2mm gun
was powerful enough to destroy any
early-war German tank. This tank was
refined throughout the war and inspired
the Germans to design and build the
Panther.
the number of maps (up to five maps) or have more days (up to fifteen
days) than maps. Use the Days list box to select the number of days you
want.
Choosing the Weather
• In the Weather list box, click either Clear or Frigid.
Creating Optional Briefing Text
The next step in creating a custom game is optional; you can type
German and Russian briefing text that appears when you start the game.
The briefing length is limited to the size of the text box in the Briefing
dialog box.
1 Click the Briefing Text button. The Briefing dialog box appears with
2 Type the German briefing and then press TAB.
3 Type the Russian briefing in the Russian Scenario Briefing box and
the cursor in the German Scenario Briefing box.
then click OK.
“Rations exhausted. Over 12,000
unattended wounded in the pocket.
What orders should I give the
troops, who have no more
ammunition and are subjected to
mass attacks supported by heavy
artillery fire? The quickest
decision is necessary since
disintegration is already starting
in some places. Confidence in the
leadership still exists, however.”
— General Freidrich Paulus, Commander
of the German Sixth Army, to Adolph
Hitler, January 22, 1943
Choosing Historical Unit Allocation
Determine whether you want to allocate units based on their historical
rarity. For example, if you base your custom game on the Korsun operation and restrict yourself to historical rarity, German Tiger tanks will not
often appear in the force pool.
To use historical unit allocation, click the Restrict Players to Historical
Rarity of Units button.
Setting Requisition Points
If you are building a custom operation, you can set the number of requisition points each side receives on each day of the game. The higher you set
the points, the more high-value teams you can add to your active roster.
You set the points for the first day of an operation using the Map Info
screen.
1 In the Map Info screen, click the Map Data button. The Scenario
Information dialog box appears.
Page 53

Chapter 5: Building Your Own Scenarios 47
2 In the dialog box, select the number in the Germans Receive box, and
then type the number of requisition points you want allocated to the
Germans on Day 1.
3 Select the number in the Russians Receive box, and then type the
number of requisition points you want allocated to the Russians on
Day 1.
4 Click OK.
You set the points for day two through the operation’s end day using the
Scenario Info screen.
1 In the Scenario Info screen, click the Requisition Points Per Day
button. The Requisition dialog box appears.
2 Select the number in the Day 2 box, the then type the number of
points you want allocated to Day 2.
3 Repeat step 2 for each day in your game, and then click OK.
Choosing the Commanders’ Ranks
Deciding the rank of the primary Russian and German commanders is the
next step in creating a custom scenario. The higher
your primary commander’s rank, the more effective
your commander on the field, and the more teams
you’ll have in your active roster. The rank you give
your primary commander also helps determine how
the game is scored. For example, assume you make
your primary commander a sergeant and the enemy’s
primary commander a major. Because you are at a
command disadvantage, your side does not have to
perform as well as your opponent to achieve the same
level of victory. You might, for example, have to take
only three victory locations to achieve a major
victory, while your opponent would have to take four.
On the side of the screen with German data, click the cross corresponding
to the rank you want to assign to the German Commander. On the Russian
side, click the star corresponding to the rank you want.
Setting Ammunition Levels
The last step you complete on the Scenario Data screen is choosing each
side’s ammunition level. Bear in mind that the more ammunition your
teams have, the heavier their loads when they move.
“It was a huge, truly titanic task.”
— Marshal Alexander Vasilevsky on the
preparations for the battle at Kursk:
assembling 1.3 million men, 3,400 tanks,
and 19,000 guns and mortars
A Russian mortar crew readies
for an attack. As the war
progressed, the Red Army
employed more and more
mortars; over one million Russian
mortar rounds were fired during
the final push into Germany.
On both the German and the Russian sides of the screen, click the Full
Ammo, 80%, or 60% button.
After you’ve adjusted all the game settings on the Scenario Data screen,
click Next to bring up the Map Info screen.
Page 54

48 Close Combat III: The Russian Front
Editing Map Elements
The Map Info screen shows the default victory locations and deployment
zones. You use this screen to add or change victory locations, modify the
deployment zones, target your artillery barrage, and edit map data.
KV-2
Russian Heavy Tanks –
Early War
KV-1, KV-2
The KV series of tanks, along with the T-
34, surprised the Germans; German
officers and men had been told the
Russians had only antiquated tanks and
then very few of those. Although many
Russian tanks were inferior, the KV-1 and
KV-2 packed more punch than any
German tank until the Tiger appeared in
1943. Slower and less well armored than
the T-34, the KV series was still
formidable.
Adding, Moving, and Deleting Victory Locations
Victory locations appear in the Victory Location box in the upper-right
corner of the Map Info screen. Victory locations are also displayed on the
map as red-bordered boxes. When you click a victory location in the
Victory Location box, that location is outlined in green on the map.
Each map in your custom game must have at least one victory location;
no map can have more than eight victory locations. You can move, delete,
or add victory locations.
To add a victory location
1 Click the first map in your custom game (the map in the Scenario
Map 1 box).
2 Click the Victory Location button.
3 Click the place on the map where you want to add the victory location.
The Edit Victory Location dialog box appears.
4 In the Location Name box, type a name for the new victory location.
5 Complete steps 1 through 4 for each map in your custom game.
To move a victory location
• On the map, drag the victory location to a new position.
To edit or delete a victory location
1 On the map, double-click the victory location you want to edit or
delete. The Edit Victory Location dialog box appears.
2 To rename or assign and new value to the victory location, specify the
new information, and then click OK.
To delete a victory location, click Delete.
“Up until then one believed in
victory as an act of faith, but now
there was no shadow of doubt:
Victory was assured.”
— Russian writer and Stalingrad
survivor Ilya Ehrenburg on the
importance of the victory at Stalingrad
Editing Deployment Zones
Each map in Close Combat III consists of Russian, German, and neutral
deployment zones. You can use the scenario editor to redistribute territory
as you choose. For example, if the Russians currently control a certain
area of the map, you can give control of that area to the Germans instead.
You can edit the deployment zones only on the first map of a custom
game. The deployment zones on subsequent maps are determined by the
outcome of the preceding battle.
Page 55

Chapter 5: Building Your Own Scenarios 49
The map on the Map Info screen is divided into tiles. Each tile contains an
indicator that shows which side can deploy in that tile: a star for Russians,
a cross for Germans, and an empty tile for neutral territory. To edit
deployment zones:
1 Set the map mode to the side to which you want to assign territory:
click the Russian Deployment, German Deployment, or Neutral
Deployment button.
2 Click the tile on the map you want to reassign. The tile’s indicator
shows its new designation, according to the side you chose in step 1.
For example, if you assigned a former Russian tile to the Germans,
the star in the center of the tile changes to a cross.
If you want to reassign a large number of tiles, you can drag over
them instead of individually clicking each one.
3 To change the map mode and assign territory to a new side, repeat
step 1 by selecting a new side, and then repeat step 2.
Setting Barrage Coordinates
An artillery barrage is a concentrated delivery of artillery fire. In Close
Combat III, the barrage consists of two minutes of rocket fire (Katyushas)
for the Russians or 150mm fire for the Germans. The Katyusha rounds
tend to land in clusters, but they are not nearly as accurate as the
German fire.
If you want to include an artillery barrage in your custom scenario, you
need to decide where to target it. You can target up to four map coordinates for your barrage; you can target a barrage on every map in your
custom game. The barrage is heavy enough to damage buildings and
destroy tanks. The more locations targeted, the more dispersed and harder
to avoid the barrage is.
To target your barrage
1 Click the Barrage button.
2 Click the map locations you want to target. You can target up to four
locations.
Entering Scenario Information
The final step on the Map Info screen is entering scenario information.
This step includes determining the game’s starting and ending maps and
whether one side must control the map to win the battle.
Russian IS-2 Josef Stalin II
Heavy Tank
The Josef Stalin II was the second
generation of Russian heavy tanks. This
tank surpassed the KV series; the armor
and speed were improved while the main
gun was upgunned to 122mm. Vulnerable
against only the heaviest German guns, it
was probably the best Russian heavy
tank to actually see action on the
Russian Front.
You can also determine how many map requisition points will be awarded
to each side when each map in your custom game is reached. Map
requisition points are different from the day requisition points you chose
on the Scenario Data screen. You receive day requisition points for each
Page 56

50 Close Combat III: The Russian Front
day in your game, regardless of whether you advance to another map. You
receive map requisition points only when you advance to the next map.
“…a symphony from hell.”
— Marshal Georgi Zhukov describing the
Russian barrage that opened the battle
at Kursk
SU-85
Russian SP Tank Destroyers
SU-76, SU-85, SU-100, SU-122,
SU-152, ISU-152
Russian tank destroyers (TDs) and selfpropelled (SP) guns had designs similar
to their German counterparts: limited
traverse main guns, heavy front armor,
and reasonable speed and maneuverability. Vulnerable to flank attack, TDs and SP
guns required support or protection on
their flanks to survive.
To change the starting map
1 In the Scenario Map boxes, click the map you want as your starting
map, and then click Map Data. The Enter Scenario Information
dialog box appears.
2 Select the Starts on this map checkbox.
3 Enter the number of map requisition points given to each side when
they enter the map.
To change the end map
The end map is the final map of an operation. In the Scenario Map boxes,
click the map you want as your ending map, and then click Map Data.
The Enter Scenario Information dialog box appears.
1 Click the Ends on this map checkbox.
2 Click either German Offensive, Russian Offensive, or Meeting
Engagement. In the first two choices, the winning side needs to hold
80 percent or greater of the victory locations. For the Meeting
Engagement choice, each side holds 50 percent.
To create custom battle briefing text
1 In the Scenario Map boxes, click the map for which you want to create
briefing text, and then click the Map Data button. The Enter Scenario
Information dialog box appears.
2 Click the German Battle Briefing text area, type the German briefing
text you want, and then press TAB.
3 Type the Russian briefing text you want, and then click OK.
To move to the next screen
• On the Map Info screen, click Next.
Selecting Forces
You use the next screen in the scenario editor to select the units that will
fight for both the Germans and Russians. In most other respects, this
screen (and the process of selecting forces) is the same as it is on the
Requisition screen. It lists available troops, basic information about them,
and what was preselected for you based on history. You can add or
remove these units from your or your opponent’s troop list.
All unit types are available to you regardless of which map you choose
to play .
Page 57

Chapter 5: Building Your Own Scenarios 51
To select which units will fight in the battle
1 Choose the side whose forces you create by clicking either the
German or Russian button.
2 Click the Team Availability button to choose which year’s forces you
want displayed in the Force Pool box. You can choose any year during
the war, or All to list all the forces available in Close Combat III.
3 In the Force Pool box, double-click the unit you want to add to the
Active Roster.
4 Once you’ve chosen all the units you can (or want) for one side, click
the name of the other side, and then pick teams for them.
Saving and Playing Custom Scenarios
When you save your custom scenario, you assign it a name to appear
in the listing of previously defined custom scenarios on the Command
screen:
1 On the Force Info screen, click Next.
2 In the dialog box that appears, type the name you want to give your
custom game (up to 14 alphanumeric characters), and then click OK.
Your new scenario will be listed along with any other custom scenarios on
the Command screen. You play the customized battle just as you would
any other battle.
Russian T-34/85
This variant of the T-34 eliminated the
original’s most glaring weakness; the
turret was enlarged to make room for a
true gunner, relieving the tank’s
commander from his dual role of
commander and gunner. The main gun
was upgunned to 8.5cm, giving this tank
enough firepower to take on all but the
heaviest German tanks. Although not as
well armored as the Panther, it was very
capable of winning a head-to-head fight
with one.
Copying Custom Games
Your custom games are saved in the \games\battles
folder on your hard drive. If you want to give your
battle to another player or copy it to another computer, just copy the battle from your computer and
paste it into the \games\battles folder on the other
computer.
When the other player starts Close Combat III, the
custom scenario will appear with any other custom
scenarios on the Command screen.
A Russian machine gun squad
mans their Maxim Heavy Machine
gun underneath the barrel of an
overrun German
Panzerabwehrkanone (PaK) 40,
7.5cm antitank gun.
Page 58

52 Close Combat III: The Russian Front
Russian IS-3 Josef Stalin III
Heavy Tank
Historians still debate whether this tank
actually saw combat during World War II.
First seen by the Western observers at
the May Day parade in Moscow in 1945, it
was the best heavy tank anywhere at the
end of the war. Faster and more
maneuverable than any other heavy
tank, its armor could stop all but the
heaviest German guns. The high-velocity
122mgun was more than a match for any
German tank, although it took longer to
reload than many other tank guns.
Chapter 6
Multiplayer Games
In single-player mode, your opponent is a computer’s artificial intelligence program. Two-player mode pits you against a foe that may be even
more challenging than the computer: another human being.
Types of Connections
You can use any of five types of connections to play Close Combat III.
Both the host and the joiner must use the same type of connection, and
each must have a game CD. Note that certain types of connections have
special requirements for protocols and modems.
Internet TCP/IP Using this type of connection, you can play the game with
another player in two ways: over a Local Area Network (LAN) using a
network card or on the Internet. The TCP/IP protocol must be installed on
both computers.
IPX You can play the game with another player over a LAN using a
network card. The IPX protocol must be installed on both computers.
Modem connection Two players are connected using a modem and a phone
line.
Serial connection Two players are connected using a null modem cable.
MSN Gaming Zone For information on the Zone, see “Using the MSN
Gaming Zone” later in this chapter.
Using an Internet TCP/IP Connection
Use this procedure to start a two-player game using an Internet TCP/IP
connection:
1 Connect to your Internet service provider.
2 On the Main screen, click Multiplayer.
3 The Multiplayer screen appears.
4 In Connection Method, click the Internet TCP/IP button.
5 If you are playing over a LAN, you can join any game listed on the
screen: click it and then click the Join button. You can also doubleclick the game to join it. If a game you want to play has just started
but has not yet appeared in the list, click the Refresh button.
If you are playing over the Internet, click the Host IP button and enter
the host’s IP address; for example 192.168.129.12. The host’s Internet
address appears beneath the connection method; the host can tell you
the address using e-mail or a second phone line.
Page 59

6 If you want to host a game, click the Host button, and then click the
Choose a Battle button to bring up the Command screen. Then
choose a game and settings. Your IP address appears on the screen
under the connection method.
7 Next, click the Ready button, whether you are the host or the joiner.
After both players have clicked this button, the host must click the
Next button to start the game.
Using an IPX Connection
Use this procedure to start a two-player game using an IPX connection:
1 On the Main screen, click Multiplayer.
2 The Multiplayer screen appears.
3 In Connection Method, click the IPX button.
4 Follow steps 5, 6, and 7 in the previous section.
Using a Modem Connection
Use this procedure to start a two-player game using a modem connection:
1 On the Main screen, click Multiplayer.
2 The Multiplayer screen appears.
3 In Connection Method, click the Modem button.
4 To host a game, click Host. In the Modem Connection box, make sure
your modem appears in the list box, and then click the Answer button.
5 To join a game, click Call. In the dialog box that appears, either
double-click the host’s game or select it and click Join.
Chapter 6: Multiplayer Games 53
“The kinship with nature, which
the Russians have retained to a
greater degree than the other
peoples of Europe, is also
responsible for the ability of the
Russian soldier to adapt himself
to terrain features, and actually
to merge with them. He is a
master of camouflage, entrenchment, and defense construction.
With great speed he disappears
into the earth, digging in with
unfailing instinct so as to utilize
the terrain to make his fortifications very difficult to discover.
When the Russian has dug himself
into his native soil and has molded
himself into the landscape, he is a
doubly dangerous opponent.”
— Generaloberst Erhard Rauss,
Commander, Fourth and Third Panzer
Armies
Using a Serial Connection
Use this procedure to start a two-player game using a serial connection:
1 On the Main screen, click Multiplayer.
2 The Multiplayer screen appears.
3 In Connection Method, click the Serial button. In the dialog box that
appears, specify: port, baud rate, stop bits, parity , and flow control.
4 Follow steps 5, 6, and 7 in “Using an Internet TCP/IP Connection”
earlier in this chapter.
Using the MSN Gaming Zone
The MSN Gaming Zone (“the Zone”) is a free gaming service you can
use to play games on the Internet. It also offers tips and news about Close
Combat III: The Russian Front.
To play on the Zone, you will need either Internet Explorer (version 3.2 or
later) or Netscape Navigator (version 4.0 or later).
“The German could never assume
that the Russian would be held
back by terrain normally considered impassable. It was in just
such places that his appearance,
and frequently his attack, had to
be expected.”
— Generaloberst Erhard Rauss,
Commander, Fourth and Third Panzer
Armies
Page 60

54 Close Combat III: The Russian Front
Registering on the Zone
To play games on the Zone, you need to set up a Zone account and install
the Zone software:
1 Connect to your Internet Service Provider.
2 Launch either Internet Explorer or Netscape Navigator.
3 Go to the Zone W eb site: http://www.zone.com. Or, on the Close
4 At the Zone Web site, click New Zone Users: Signup to Play Games
RG F-1 Fragmentation
Grenade
5 In the “Sign In was successful!” window, click Zone software to
6 Click Complete Install and type an install directory.
Russian
Antipersonnel Weapons
(Grenades, shaped charges, and Molotov
cocktails)
Russian infantry was armed with both
smoke and antipersonnel hand grenades.
Many were also armed with shaped
charges as antitank weapons. Molotov
cocktails—bottles filled with flammable
liquid and stopped with a rag that served
as a fuse and detonator—were used
against infantry, strongpoints, tanks,
and vehicles.
Playing Close Combat III on the Zone
After you have set up a Zone account and installed the Zone software, you
can start playing games:
1 Insert your game disc in the CD-ROM drive. If the game launcher
2 Connect to your Internet Service Provider and launch either Internet
3 Go to the Zone W eb site: http://www.zone.com.
4 At the Zone Web site, click Games List.
5 In the games list, click Close Combat III: The Russian Front.
6 In the sign-in window, type your member ID and password, and then
7 To begin playing, click one of the rooms listed in the game room
Combat III Multiplayer screen, click the MSN Gaming Zone button.
if you are not a member of the Zone. Complete the form and click
Submit to register on the Zone.
install the software on your computer.
appears, do not start the game; instead, exit from it.
Explorer or Netscape Navigator.
click OK. The Zone page for Close Combat III appears.
window.
A list of game tables appears. Move your mouse over any of them. If a
table is unoccupied, a host icon appears. To host a game, click the host
icon and wait for other players to join. You can use the chat feature to
recruit other players. When all players are logged on and ready to go,
click Launch to begin.
If you are hosting a game and decide to quit, the first player who joined
your game will become the host.
You can also join a game hosted by another player. Move your mouse
over a table and click Join to add your name to the game, and wait for the
Page 61

Chapter 6: Multiplayer Games 55
host to launch it. Next to each player’s name is a latency indicator, which
shows the speed of your current connection compared to that of each
player. If you are joining a game, you should connect to a host with a
green latency indicator.
Communicating with Your Opponent
You can send messages to or receive messages from your opponent at any
time during the game. The first line of a new message sent across the
network appears at the bottom of the screen. You can then bring up a chat
window to view the rest of the message and, if you want, to reply to that
message.
If you receive a message while you’re in game mode, the message
appears over the game screen for a few moments, and then automatically
disappears.
To send a message prior to game play
1 If the chat window is not already on your screen, in the lower-left
portion of the screen, click Chat or press ENTER.
A chat window appears on the screen.
2 Type your message, and then click ENTER.
To close the chat window, click Chat again.
To send a message during game play
1 Click Chat or press ENTER.
A black box appears above the toolbar.
2 Type your message. To send it, press ENTER.
“The most common Russian form
of combat was the use of mass.
Human mass and mass of materiel
were generally used unintelligently
and without variation, but under
the conditions, they were always
effective. Both had to be available
before they could be used so
lavishly and were therefore
dependent upon limitless Russian
supplies. The Russian disdain for
life—always present, but
infinitely heightened by communism—favored this practice. A
Russian attack which had been
twice repulsed with unheard-of
losses would be repeated a third
and fourth time at the same place
and in the same fashion. Unimpressed by previous failures and
losses, new waves always came
on. An unusual inflexibility of mind
and unimaginative obstinacy lay in
this use of masses, and was
dearly paid for. It is not possible
to estimate Russian casualties in
World War II with any degree of
accuracy; there will always be a
potential error of many hundred
thousands. This inflexible method
of warfare, with the objective of
accomplishing everything through
the use of human masses, is the
most inhuman and costly possible.”
— Generaloberst Erhard Rauss,
Commander, Fourth and Third Panzer
Armies
Page 62

56 Close Combat III: The Russian Front
Index
A
active roster
adding teams to 6
described 6
adding teams 6
Always See the Enemy option 15
ambush arcs
and waypoints 17
described 18
Ambush order 18
ambushes
and city fighting 28
planning 33
tips 34
ammunition
and custom scenarios 47
conserving 43
antitank (AT) gun teams
defending against 41
deploying 40
tips 40
using 40
antitank (AT) teams, using 41
armor teams, types of 42
armored cars, and city fighting 28
armored cars, using 42
attacks
armor in 29
deploying for 29
planning 29
strategy for 29
tips 29
B
barrage, setting coordinates for 49
bars above each team 11
Battle Briefing button 7
battle scores
described 23
within operations 23
battlefield. See combat screen
battles
choosing 3
described 2
ending 8, 21
starting 15
stopping 22
winning 22
Begin button 15
Bock, Fedor von 27
Boot Camp 3
Briefing button 7
briefings
described 7
for custom scenarios 46
buildings 13
buttons
Begin 15
Briefing 7
Flee 22
History 4
Operation Briefing 7
Options 10
Quit 22
Retire 6
Revert 6
Settings 7
Soldier 22
Truce 21
C
Campaign Debriefing screen 23
campaigns
and promotion points 23
and rank 3
described 2
viewing background of 4
winning 23
chat window 55
city fighting
and specific units 27
strategy for 27
close-quarters fighting. See city
fighting
cold weather. See winter conditions
combat screen. See also maps
described 12
surveying 12
Command screen 3
command teams
using 36
using more than one 36
commanders
allocating 26
protecting 36
Communicating with opponents 55
country. See Germans, Russians, or
open terrain
cover
described 34
tips 34
types of 34
crosses on maps 13
custom scenarios
ammunition levels 47
choosing 44
choosing forces in 50
choosing length 46
choosing maps 45
choosing season, year 45
choosing weather 46
copying 51
creating briefing text 46
deployment zones in 48
described 44
ending map in 50
game settings for 45
historical unit allocation 46
playing 51
requisition points in 49
saving 51
setting commanders’ rank 47
setting requisition points 46
starting map in 50
victory conditions in 50
victory locations in 48
D
Debriefing screen 22
defend arcs
adjusting 18
and waypoints 17
described 18
Defend order 18
defending
against machine guns 39
against mortars 40
in city fighting 28
defense
choosing teams for 25
deploying for 33
planning 32
Page 63

Index 57
defense (continued)
tips 33
types of 32
deployment
and victory locations 13
antitank (AT) gun teams 40
checking fields of fire 14
default 14
described 14
for attacks 29
for defense 33
for frontal assaults 30
infantry 37
initial orders 15
deployment zones
defined 13
editing 48
Details button 6
difficulty levels 8
and promotion points 8
and requisition points 8
and scoring 8
direct fire, described 19
E
editing maps 48
elevation, advantages of 13, 27
end battle options 8
engineer teams
described 38
uses for 38
envelopment 32
F
fields of fire
checking 34
checking during deployment 14
described 34
Fire order 17
and line of sight 20
determining range 19
flamethrowers
defending against 39
described 39
tips 39
flanking
advantages of 30
described 30
tips 31
Flee button 22
fleeing 21
forests, fighting in 28
frontal assaults
deploying for 30
described 29
G
game settings 8, 9
game sounds, videos 10
game speed 10
Game Types list box 4
game play options 7, 9, 10, 11
game play settings 11
games
copying 51
hosting. See multiplayer games
joining. See multiplayer games
multiplayer. See multiplayer games
objective of 2
overview of 1
playing custom 51
quitting 22
setting difficulty levels 8
speed of 10
starting 9
winning 22
Germans, choosing to play 4, 8
Grand Campaign 2
green spheres on maps 14
group select 16
Guderian, Heinz 31
H
halftracks
and city fighting 28
using 41
high ground, advantages of 13
historical background of game 1
History button 4
hosting games. See multiplayer games
I
indirect fire
and line of sight 20
described 19
using 20
infantry
deploying 37
moving 37
uses for 36
using other teams as 37
Info button 6
inset map
described 12
displaying 11
moving 12
toggling on, off 12
installation 3
Internet TCP/IP connections
described 52
playing games using 52
IP addresses 52
IPX connections
described 52
playing games using 53
issuing orders 15
J
joining games. See multiplayer games
K
Khrushchev, Nikita 7
Konev, Ivan 34
L
LAN connections. See multiplayer
games
language options 10
line of sight
and direct fire 19
and indirect fire 19, 20
checking during deployment 14
described 20
determining 20
Page 64

58 Close Combat III: The Russian Front
M
machine gun teams
defending against 39
using 38
Map Info screen 48
Map Selection screen 45
maps
buildings and terrain 13
choosing for custom scenarios 45
controlling 2
crosses on 13
editing 48
green spheres on 14
inset. See inset map
minefields on 14
navigating 12
red spheres on 14
scrolling through 12
stars on 13
victory locations 13
zooming in, out 12
messages, sending to opponents 55
minefields
described 35
on maps 14
tips 35
minerollers, described 35
modem connections
described 52
playing games using 53
morale, promoting 26
mortars
and city fighting 28
and line of sight 20
defending against 40
described 40
tips 40
Move Fast order 16, 17
Move order 16
MSN Gaming Zone
and tournament scores 23
described 53
hosting games 54
joining games 55
playing games on 54
registering on 54
multiplayer games
connection types 52
using MSN Gaming Zone 53
N
navigating maps 12
O
objective of game 2
online name 8
online tutorial (Boot Camp) 3
open terrain
strategy for 28
tips 28
Operation Briefing button 7
Operational Debriefing screen 23
operations
and battle scores 23
described 2
status of 23
viewing background of 4
opponents, communicating with 55
Options button 10
order dots, described 18
orders. See also specific orders
and order dots 18
canceling 16
changing 16
changing the target of 16
initial 15
issuing 15
issuing to group 16
types of 15
using waypoints 17
overview of game 1
P
Panzerfäusts. See antitank teams
Panzerschrecks. See antitank teams
player name 8
points, promotion. See promotion
points
points, requisition. See requisition
points
prisoners
taking 21
value of 21, 22
promoting morale, cohesion 26
promotion points
and difficulty levels 8
described 23
promotions, described 3
protection, described 34
Q
Quit button 22
quitting a game 22
R
rallying separated soldiers 21
rank
advancing in 3, 23
and custom scenarios 47
and team slots 5
described 3
realism options 9
realism rating, described 9
red spheres on maps 14
requisition points
and difficulty levels 8
for custom scenarios 46, 49
gaining 5
Requisition screen 5
Retire button 6
retiring teams 6
retreating 21
Revert button 6
rifle teams
used against other units 37
uses for 37
weapons used by 37
Rundstedt, Gerd von 43
Russians, choosing to play 4, 8
S
Scenario Edit screen 44
scenarios
browsing 4
choosing 3
custom. See custom scenarios
types of 2
viewing information on 4
scores
and difficulty levels 8
battle 23
tournament 23. See also
tournament scores
scouts, using armored cars as 42
screen resolution 10
screens
Campaign Debriefing 23
Command 3
Debriefing 22
Map Info 48
Map Selection 45
Operational Debriefing 23
Requisition 5
Scenario Edit 44
Page 65

Index 59
Soldier 22
scroll speed 11
self-propelled guns 43
separated soldiers 15, 21
serial connections
described 52
playing games using 53
Settings button 7
Setup 3
sides, choosing 4, 8
Smoke order 17
Sneak order 16
snipers
defending against 38
using 38
soldier monitor, displaying 11
soldier outlines 11
Soldier screen 22
soldiers
checking status of 22
separated 15, 21
Soldiers button 22
soldiers killed in action, displaying 11
Stalin, Josef 7
stars on maps 13
stopping battles 22
strategy 32
advantages of elevation 27
allocating commanders 26
ambushing 33
attacking 29
balancing teams 25
city fighting 27
described 24
determining basic 24
fighting in forests 28
flanking 30
frontal assaults 29
open terrain 28
promoting morale, cohesion 26
selecting teams 25
using suppression 26
using terrain 27
street fighting. See city fighting
support teams, types of 38
suppression
using 26
weapons for 27
suppression fire
described 20
using 20
surrendering 22
T
tactics, described 24
taking prisoners 21
tank destroyers 43
tanks
and city fighting 27
and minefields 35
and open terrain 28
and winter conditions 42
destroying using antitank (AT)
weapons 41
disadvantages of 42
strong, weak points of 42
using 42
using antitank (AT) teams against
41
using elevation to destroy 27
targets, determining range 19
team data, displaying 11
team information bars 11
team slots 5
teams. See also specific team types
adding 6
balancing 25
deploying. See deployment
improving morale of 26
quality of 6
retiring 6
types of 5
viewing details on 6
terrain
high ground 13
open. See open terrain
strategic uses of 27
using 13
viewing details of 13
territory , reassigning 48
Timoshenko, Semyon 37
tournament scores
and MSN Gaming Zone 9, 23
described 23
trees, displaying 11
Truce button 21
truces
accepted 21
calling 21
described 21
not accepted 21
tutorial (Boot Camp) 3
U
units. See also teams
getting information on 6
moving 16
using effectively 36
urban fighting. See street fighting
V
vehicles. See also specific vehicles
and winter conditions 42
attacking crews in 43
victory locations
adding 48
and deployment 13
deleting 48
described 13
editing 48
moving 48
symbols for 13
videos 10
W
waypoints
and defend, ambush arcs 17
using 17
weapons. See also specific weapons
determining range 19
getting names of 6
hearing sounds of 6
using effectively 19
using for suppression 26
using indirect fire 20
weather
choosing for custom scenarios 46
problems with 27
winning games 22
winter conditions
and tanks 42
and vehicles 42
indicated on Requisition screen 5
Z
Zhukov, Georgi 7
Zone. See MSN Gaming Zone
zooming in,out 12
Page 66

60 Close Combat III: The Russian Front
Photographs provided by:
Globe Photos, Inc.
Archive Photos
Corbis
SOVFOTO-EASTFOTO
Illustrations provided by:
Histoire et Collections
John Batchelor Illustration
Page 67

Keyboard and Mouse Input
Key or combination Order or command
Z Move
X Move Fast
C Sneak
V Fire
B Smoke
N Defend
M Ambush
SPACEBAR Show each command radius
Arrow keys Scroll the map during battle
ESC Quit current battle without saving
CTRL+ [number key] Save group to [number key]
CTRL+K T oggle display of killed/incapacitated soldiers
CTRL+T T oggle display of trees
CTRL+S Toggle sound on/off
CTRL+M Toggle music on/off
CTRL+V Toggle video on/off
ALT+F4 Exit program or game
F3 or PAUSE Pause game
F5 T oggle display of team monitor
(n/a in overview map mode)
F6 T oggle display of inset map
F7 Toggle display of soldier monitor
F8 Open options dialog box
Right-click mouse Cancel an order line without placing an order dot
Move
Move Fast
Sneak
Fire
CV NM
XZ
B
Smoke
Ambush
Defend
Page 68

Targeting Lines
Red line
No clear shot
Dark green line
Some obstructions
Bright green line
Clear shot to target
Indirect Fire Lines
Brown – No line of sight
Low accuracy
Targeting Dot
Green: High chance to kill (100–60%)
Yellow: Good chance to kill (59–30%)
Red: Low chance to kill (29–10%)
Black: Extremely low chance to kill (9–0%)
Orange – Clear line of sight
High accuracy
Soldier Status
Healthy
Slightly injured
Incapacitated
Panicked
Dead
Surrendered
*X04-03133* M
 Loading...