

Page 1
Page 2
Table of Contents
page
In the Beginning . . . . . . . . . . . . . . . . . . . . . . . 2
The World of Clans . . . . . . . . . . . . . . . . . . . . . 4
Getting Started . . . . . . . . . . . . . . . . . . . . . . . . 5
Installing Clans . . . . . . . . . . . . . . . . . . . . . . . 6
Playing the Game . . . . . . . . . . . . . . . . . . . . . . 7
Beginning a new game . . . . . . . . . . . . . . . . . . . 9
Selecting a Character . . . . . . . . . . . . . . . . . . . 10
The Gameplay Interface . . . . . . . . . . . . . . . . . . 17
Combating Evil . . . . . . . . . . . . . . . . . . . . . . . 25
Saving and Loading a Game . . . . . . . . . . . . . . . 34
The Demon and His Footsoldiers . . . . . . . . . . . . . 34
Winning the game . . . . . . . . . . . . . . . . . . . . . 35
Non-Player Characters . . . . . . . . . . . . . . . . . . . 35
Playing a Multiplayer Game . . . . . . . . . . . . . . 39
Host Game Menu . . . . . . . . . . . . . . . . . . . . . . 40
Join Game Menu . . . . . . . . . . . . . . . . . . . . . . 41
The Multiplayer Game Lobby . . . . . . . . . . . . . . . 42
Multiplayer Modes . . . . . . . . . . . . . . . . . . . . . 44
Menu Hot Keys . . . . . . . . . . . . . . . . . . . . . . . . 48
Credits . . . . . . . . . . . . . . . . . . . . . . . . . . . . . . . 49
- 1 -
Page 3
- 2 -
Page 4
- 3 -
Page 5

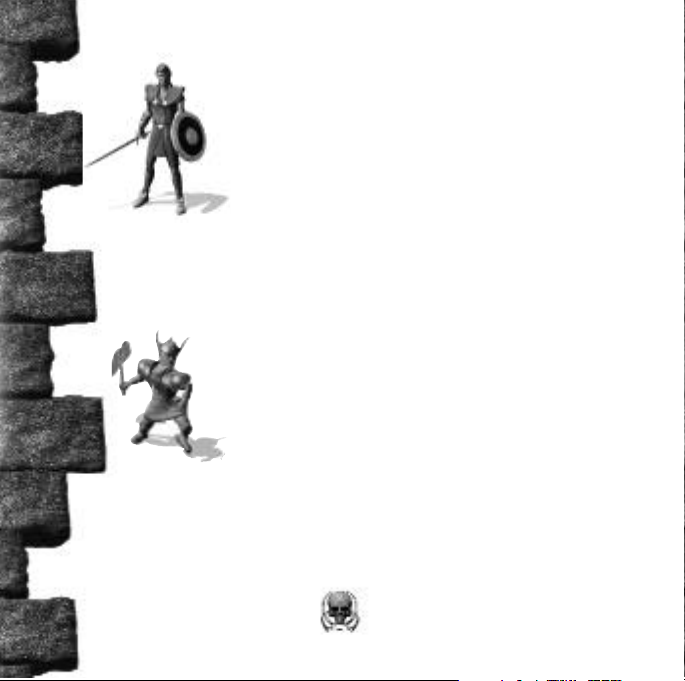
The World of Clans
Clans is a fantasy action/adventure game in which you
assume the role of one of four champions selected by your
Clan to restore peace and order to the world. Your goal is
to confront and destroy the Demon and locate the lost
Crown of Peace. You will roam your once-beautiful land,
routing out the Demon’s hateful minions, solving the
mysteries of the fortress, and moving ever-closer to your
final encounter with the Demon.
The Demon has occupied an ancient fortress as his base of
operations. Your adventure starts at the castle gates, and
proceeds ever deeper into the heart of the Demon’s lair.
There are 7 levels of play in Clans:
1) At the Gates
2) Underdark, a cavern realm of molten lava
3) Chambers of Torment, the dungeons of the fortress
4) The Commoners Quarters
5) Garden of Eternity, the fortress courtyard
6) The King’s Quarters
7) The Dragon’s Den
- 4 -
Page 6

You may play Clans by yourself or with friends. To start a
single player game, see the section, “Playing the Game”.
For more information about multiplayer games, see the
section, “Multiplayer Setup”.
Getting Started
System Requirements
Windows 95/98
DirectX 6.0
Pentium 120 (Pentium 200 recommended)
32 mb ram
DirectX Compatible SVGA Video Card
DirectX Compatible Sound Card
250 mb Free Hard Drive Space
4X Cd-Rom Drive
Microsoft Compatible Mouse
Multiplayer: 56 kbps modem
IPX Network or TCP/IP Internet connection
- 5 -
Page 7

Installing Clans
It is strongly recommended that you read the readme.txt
file, accessible from the Start Menu or on the Clans CD
for the most current information about Clans.
To begin play, you must install Clans onto your hard
drive. The installation screen opens automatically after the
CD is inserted. Click on the Install button to begin the
installation process. If the Install screen does not open
automatically, double-click on Setup.exe in the root directory of the Clans CD.
Follow the on-screen instructions to run the game.
Uninstalling Clans
To remove Clans from your hard drive, simply click on
the “Uninstall” icon in the Clans Start Menu folder. Clans
will automatically be removed from your system.
- 6 -
Page 8
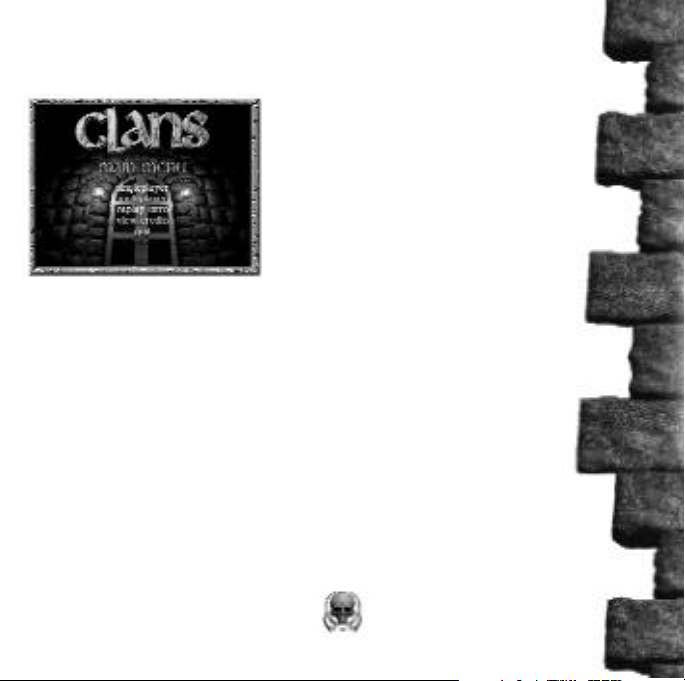
Playing the Game
The Main Menu
When you load Clans, the
Main Menu appears.
The following options are
available from the Main
Menu:
Singleplayer: Start a new game or load a saved adventure.
Multiplayer: Play with friends or strangers on a Local
Area Network (LAN) or on the Internet.
(see “Multiplayer Setup Menu”)
Replay Intro: Watch it again. Those who forget the past
are condemned to repeat it.
View Credits: See who put the game together.
Quit: This ends your Clans session.
- 7 -
Page 9
To make your selection, place the cursor over your
selection and left-click to activate.
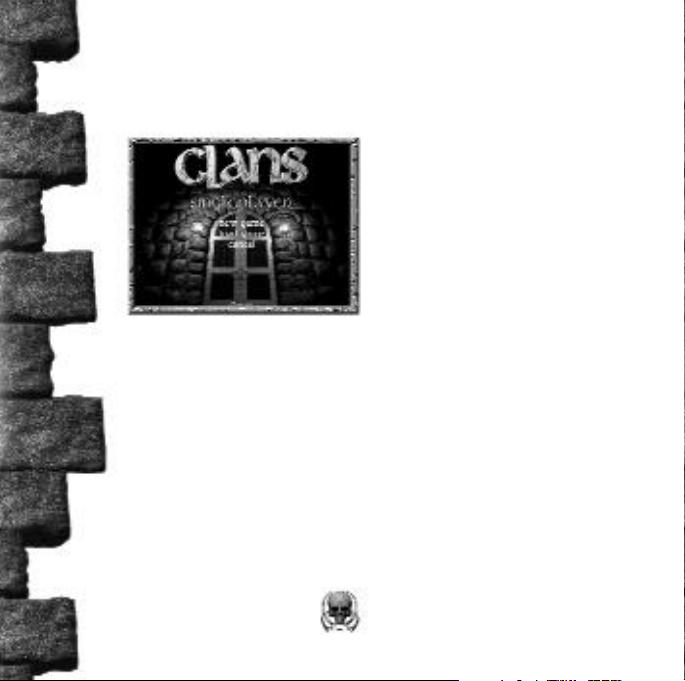
Single Player Game
From the Single Player Game
Menu you may begin a new
game, load a previously saved
game, or return to the main
menu. To select an option,
place the cursor over your
selection and left-click to
activate.
To begin a new Clans adventure, select New Game.
To load a previously saved game, select Load Game
(see “Saving and Loading a Game”)
Select Cancel to return to the Main Menu.
- 8 -
Page 10
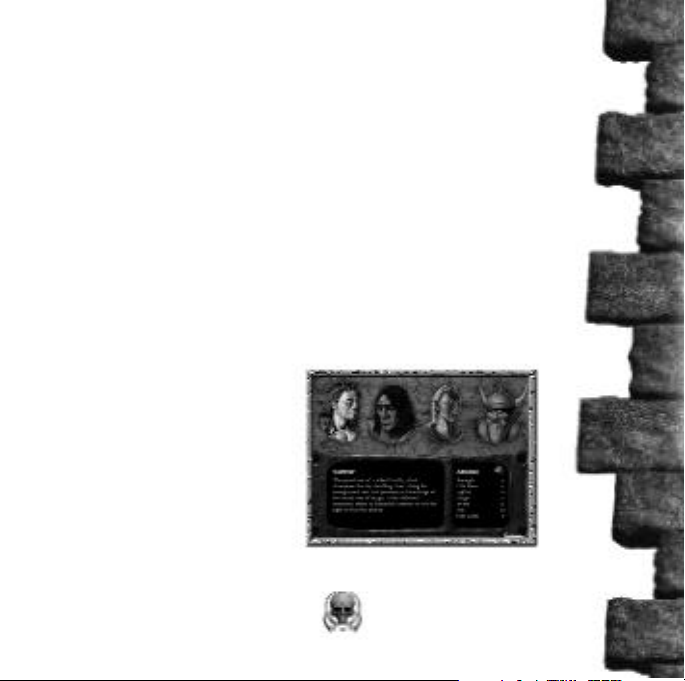
Beginning a New Game
When you select “New Game”, the Character Selection menu
appears.
Selecting a Character
To begin Clans, you must select a character. There are
four characters from which to choose. Each character has
his strengths and weaknesses. See table on page 15 for a
comparison of the four characters.
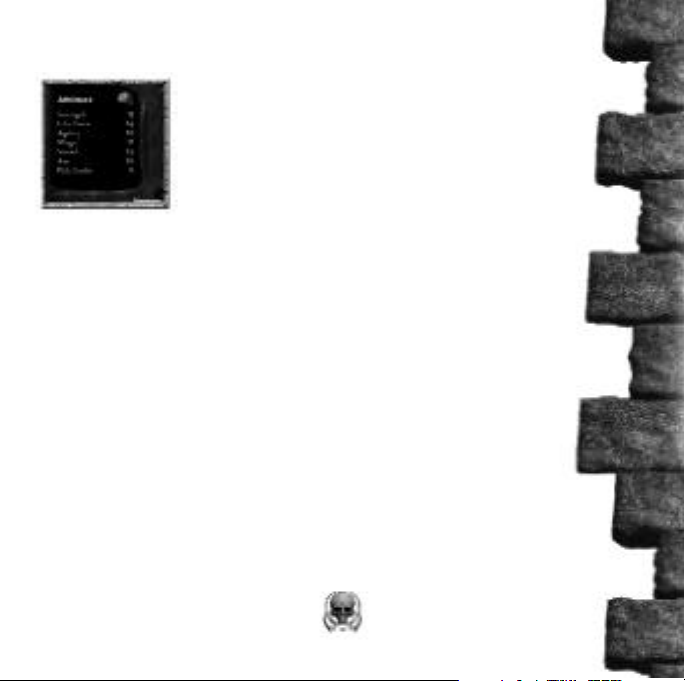
The Character Screen allows you to access information
about each character. To see a brief character biography,
left-click on a character’s image. The character’s attributes
and abilities are displayed in
the bottom right window.
See “Abilities Window” for more
i n f o rmation about your character’s
a b i l i t i e s .
- 9 -
Page 11

To select a character, left-click on the character’s image.
Click the sword icon in the bottom right-hand corner of the
screen. The game loads automatically.
The Champions
Each of the four heroes has won the right to represent his
clan through a grueling series of tests, both magical and
mundane. Any of the characters, if played with a mixture of
caution and courage, will allow you to vanquish the Demon.
- 10 -
Page 12
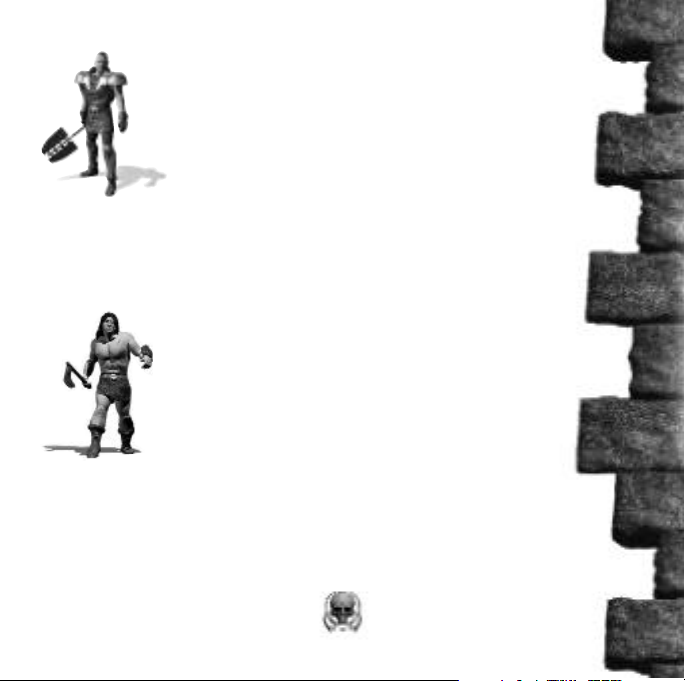
Warrior
The proud son of a noble family, Alaric
c h a m p i o n s the city-dwelling Warrior Clans.
Using his strong sword-arm and thorough
knowledge of the arcane arts of magic, Alaric
proved himself to be the best of all competing
Warriors. His balanced ability in all skill areas
makes Alaric a solid character with which to
begin the adventure .
Barbarian
Among the clans that inhabit the harsh periphery
of the land, Gard Stoneskin is renowned for his
superior strength and vitality. He wields the
s w o rd and axe with equal (and deadly) expertise,
but the magical arts utterly mystify this matterof-fact Barbarian.
- 11 -
Page 13
Elf
In stark contrast to Gard Stoneskin, Leayandor
was born into a world teeming with magic. The
dexterous Elf views the sword and the axe as
clumsy and inefficient. Leayandor’s dazzling
displays of wizardry more than compensate for
his lack of strength and martial prowess. It has
been whispered among the Clans that Leayandor
stands the best chance of penetrating deep into
the Demon’s lair.
Dwar f
Legend has it that Thorfinn was born with an
axe in his hand, and no one has found reason to
dispute this. He sneers at the mere mention of
swords and magic, which he calls “useless and
unnecessary”. Thorfinn earned his Clan warrior
name, Ogrebane, crushing ogre incursions into
the mines of the Mountain Dwarf Clans, and has
since announced that he will not stop fighting
until all evil has been driven from the land.
- 12 -
Page 14
The Abilities Window
The Abilities window displays the seven
character abilities that define your
character. Each ability has been assigned
a number between 3 and 18, with a
rating of 3 indicating a total lack of ability and 18 indicating near-perfection.
You may customize some of your character’s abilities by
“rerolling” them. See “Generating New Character
Abilities”, below.
Strength indicates your character’s physical might.
Strength is crucial when using a weapon. The greater your
strength, the more damage you will inflict on your enemy.
The Strength ability may be rerolled.
Life Force represents your character’s health. The higher
your life force, the more hits you can withstand. When
your life force is reduced to zero, your character dies. The
Life Force ability may be rerolled.
- 13 -
Page 15
Agility represents your character’s dexterity and quickness. Agility is important when your character must dodge
blows or magical attacks. The Agility ability may be
rerolled.
Magic represents your character’s magical energy. When a
spell is cast, your character is depleted of a certain amount
of Magic points or Mana. More powerful spells require
more Mana to cast. Once a spell has been cast, your Mana
slowly replenishes itself. The Mana ability may be rerolled.
Swor d reflects your character’s proficiency with this
weapon. The higher your sword rating, the more likely
you are to score a hit on your enemy.
Axe reflects your character’s proficiency with this doubleedged weapon. The higher your Axe rating, the more likely you are to score a hit on your enemy.
Pick Locks represents your character’s knack for opening
locked doors and chests.
- 14 -
Page 16
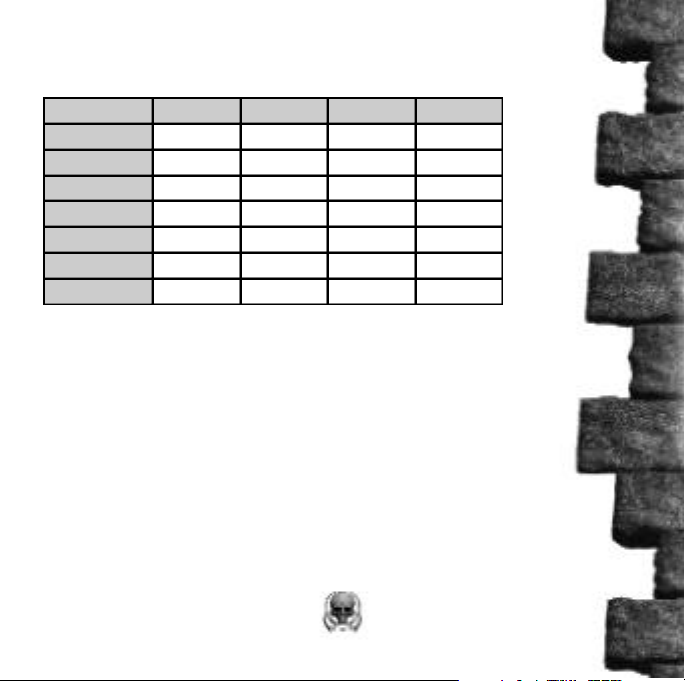
The following table allows you to compare the various
characters before making your selection:
Strength
Life Force
Agility
Magic
Sword
Axe
Pick Locks
Warrior
13
14
10
11
14
10
8
Barbarian
15
15
16
6
12
12
6
Elf
10
12
14
17
10
6
13
Dwarf
15
12
10
10
8
16
10
If you would like to customize your character’s abilities,
click on the “die” icon in the Abilities window.
If you have finished selecting your character, click on the
sword icon in the bottom right-hand corner of the screen.
The game loads automatically.
- 15 -
Page 17

Generating New Character Abilities
You may randomly change some of your character’s
abilities by left-clicking on the “die” icon in the Abilities
window. Each of the first four abilities will now be
“rolled” automatically by three throws of the die. You
may speed up this process by left-clicking on the animated
dice window. After the four abilities have been rolled, you
may allocate 10 additional ability points among all of the
seven abilities. This allows you to exceed the normal
maximum 18 rating. To add points to an ability, left-click
on the +/- icon located next to the ability you would like
to change. To remove allocated ability points, right-click
on the +/- icon. You
may not go lower than
the character’s base
ability score.
When you are finished
customizing your
character, click on the
sword icon in the
bottom right-hand corner of the screen.
The game loads automatically.
- 16 -
Page 18

The Gameplay Interface
The Gameplay Interface
provides you with everything
you need to know while
adventuring. It consists of
several icons, slots, and
windows, as well as the
gameplay screen.
To find out the function of an item or icon, place the cursor over top of it. The name of the item or icon appears in
the display window just below the gameplay screen.
To activate any of the Gameplay Interface options, place
the cursor on your selection and left-click.
Ankh Icon: Indicates the number of lives remaining for
your character. Each character begins the game with 1 life.
You may gain an additional life by drinking an Extra Life
potion.
- 17 -
Page 19

The following options are available from the Game Menu:
Resume: Exit the Game Menu and return to play.
Save game: Allows you to save the current game
(see “Saving and Loading a Game”).
Load game: Allows you to load a previously
saved game (see “Saving and Loading a Game”).
Abort: Quit the current game and re t u rn to the
Main Menu.
Quit: Exit Clans and return to Windows.
View Map: Check your character’s location on the
current level. A red “X” marks your current location.
The map also shows you the areas that your character
has already explored (on the current level only).
You may “tag” important rooms for future reference by
pressing the ‘.’ key. The room will now appear highlighted
whenever you view the map.
Pressing the “.” key a second time will “untag” a room.
- 18 -
Page 20

View Abilities Screen: Left-click the View Abilities icon
to access the Abilities Screen. The Abilities Screen shows
your character’s abilities. It also displays the Ring Slots.
When you find a ring, access the Abilities Screen. Drag
the ring to an empty ring slot and left-click.
To exit the Abilities Screen and return to play, click the
View Abilities Screen icon.
The Red Skull: Located in the bottom left-hand corner
of the screen, the red skull provides a visual indication of
your character’s life force. The first number indicates your
current life force level. The second number indicates the
maximum number of life force points for your character.
The Blue Skull: Located in the bottom right-hand corner
of the screen, the blue skull provides a visual indication
of your character’s magical energy, or Mana. The first
number indicates your current Mana level. The second
number indicates the maximum number of Mana points
for your character. Mana is drained when a spell is cast,
but is automatically replenished.
- 19 -
Page 21

Inventory slots: Inventory slots are located along the right
side of the screen. Each item currently in your character’s
possession will appear in one of the inventory slots. When
you find an item, drag it to an empty inventory slot and
left-click to add it to your inventory. You may store extra
weapons and spell scrolls in your inventory slots as well.
Weapon slots: Weapon slots are located along the bottom
of the screen. A red circle surrounds the weapon currently
in use by your character.
When you find a weapon and pick it up, left-click over an
available weapon slot to place it there. You may also
exchange for another weapon by left-clicking over top of
the desired weapon slot. You may carry up to four weapons
at one time but you must always have one weapon in a slot
at all times.The two slots located below the weapon slots
are for armor (left slot) and shield (right slot).
Getting Around
To move your character anywhere on the screen, click
the cursor on your desired destination. Your character automatically walks to that location.
- 20 -
Page 22

Paths
Paths to neighboring rooms are identified by red arrows.
Move the cursor onto the red arrow. The cursor turns
into a hand icon. Left-click and you will automatically
move to the exit point. Your character now appears at the
edge of the next screen.
Some paths are visible in the background, and are not
marked with red arrows. These can be discovered by
moving the cursor around the gameplay screen until the
cursor turns into a hand icon. Left-click and you will
automatically move to the exit point. Your character now
appears at the edge of the next screen.
Hidden areas in the background can be detected by moving the cursor around the screen until it turns into the
hand icon. Click on your desired destination, and your
character will automatically move to that location.
- 21 -
Page 23

Doors
To open a door, place the cursor over the door. The cursor turns into a hand icon. Right-click to open the door,
and left-click to enter the room. Your character now
appears at the edge of the next screen.
Locked Doors: Some doors cannot be opened using the
normal door opening procedure. You must have a key to
open these locked doors. Remove the key from your
inventory and position it on the door. Left-click to unlock
the door, then right mouse click to open the door. You
may now cautiously proceed.
There are many other ways of moving through the Clans
environment. Mastery of keys, levers (both for drawbridges and as part of puzzles), and portals (which transport you to other areas of the same level) are all necessary
to successfully complete your mission.
- 22 -
Page 24

Portals
There are three types of portals. Each one transports you
to a different section of the level. Portals are also used to
end a multiplayer round.(see “Multiplayer Setup Menu”)
Interacting With Objects, Items and Puzzles
Exploring your environment is as necessary as killing the
monsters who inhabit it. To discover those elements of the
environment with which you can interact, move the cursor
slowly around the screen. When the cursor changes to the
hand icon, the selected item can be picked up or used for
some purpose.
- 23 -
Page 25

For easier identification, many objects in the Clans
environment are highlighted when you pass the cursor
over them.
To pick up an item, place the glove icon on top of it, and
left-click. Move it to the appropriate slot, and left-click.
The following is a list of commonly found items and the slots
where they are stored.:
Place gold into the purse in the inventory slot
Place any weapon in a vacant weapon slot
Place any ring in a vacant ring slot, located in the View
Abilities menu.
Place armor into the armor slot
Place a shield into the shield slot
- 24 -
Page 26

Combating Evil
The four holes at the bottom of the Gameplay Interface
are the weapon slots. At the beginning of the game, your
sword occupies one of these slots. The weapon slots may
be filled with either weapons or scrolls. You must always
have a weapon in one of the weapon slots.
To use a weapon, place the cursor over the desired
weapon in your weapon slot. Left-click to select the
weapon. A red circle surrounds the weapon icon, and the
weapon now appears in your character’s hand. Move the
cursor on top of your enemy. The cursor changes into the
weapon. Right-click to attack.
You may switch weapons at any time during a battle by
left-clicking on the desired weapon, or by using the
shortcut keys to select the slot that contains the weapon
you wish to use:
Press ‘A’ to select slot 1
Press ‘S’ to select slot 2
Press ‘D’ to select slot 3
Press ‘F’ to select slot 4
- 25 -
Page 27

You may also switch weapons and spells by placing the
new weapon or spell over the item you wish to replace.
Left-click to make the switch.
Weapons, armor, and your shield are all available in
enchanted forms of varying strength, ranging from +1 to +5.
You will find out soon enough that the sword (or axe)
alone is not enough to defeat the minions of the Demon.
Spells, rings and potions are potent means of defeating the
enemy, especially at higher levels of the game.
Magic
There are many magical items that will aid you in your
quest. Some of these items are defensive (for example, a
Health Potion), while others are offensive (for example,
the Ring of the Sword). Magic comes in three forms:
Potions, Rings, and Spells.
- 26 -
Page 28

Potions
To select a potion, position the cursor on top of it and
left-click. You may now move the potion to your inventory,
or use it immediately.
To use a potion that is in your inventory, position the
cursor on top of the potion you wish to drink and
right-click.
To use the potion as soon as you have found it, position
the potion icon on top of the face at the bottom of the
gameplay screen and left-click.
- 27 -
Page 29

Health Potion
This red potion adds 8 points to your current health.
You cannot exceed your maximum health value.
Mana Potion
This blue elixir adds 8 points to your current mana.
You cannot exceed your maximum mana value.
Potion of Strength
Consuming this green concoction adds 4 points to your
strength rating.
Potion of Magic
Imbibe this yellow potion to add 1 point to
your
maximum mana rating.
Potion of Life
A purple brew that adds 1 point to your Life
Force rating.
Extra Life Potion
This blood-red potion gives your character an extra life.
- 28 -
Page 30

Poison
As black as death. In the Single Player Clans game, the
Poison potion may be used to kill some plants.
Poison is a very effective weapon in multiplayer mode.
Contaminate a perfectly good potion by moving the
poisoned potion on top of either a health or mana potion
in your inventory. Right-click to combine the contents of
both bottles and leave it behind to surprise your rivals.
Rings
To use a ring, access the Abilities Window from the
Gameplay Interface. Drag the ring to a vacant ring slot
and left-click. The powers of a ring are effective as soon
as the ring is placed in a ring slot.
Each ring has unique properties.
- 29 -
Page 31

Ring of Agility
Wearing the ring of agility adds 3 points to your
Agility rating.
Ring of Fir e
Cast a fireball spell while wearing this ring and
you’ll do additional damage to your enemy.
Ring of the Swor d
Wear this ring while wielding your sword to do
additional damage to the enemy.
Ring of Destruction
Cast an Explosion spell while wearing this ring
for maximum detonation.
Ring of the Axe
Any axe-wielding character will deliver mighty
damage while wearing this ring.
- 30 -
Page 32

Warrior
The proud son of a noble family, Alaric
c h a m p i o n s the city-dwelling Warrior Clans.
Using his strong sword-arm and thorough
knowledge of the arcane arts of magic, Alaric
proved himself to be the best of all competing
Warriors. His balanced ability in all skill areas
makes Alaric a solid character with which to
begin the adventure .
Barbarian
Among the clans that inhabit the harsh periphery
of the land, Gard Stoneskin is renowned for his
superior strength and vitality. He wields the
s w o rd and axe with equal (and deadly) expertise,
but the magical arts utterly mystify this matterof-fact Barbarian.
- 11 -
Page 33

You may switch spells and weapons by placing the new
spell or weapon over the item you wish to replace. Leftclick to make the switch.
Combining Spells
Spells of the same type can be combined to dramatically
increase the potency of a spell. Left-click on the scroll,
drag it on top of the other scroll in the weapon slot, and
right-click. Combining two spells in this way creates a
level 2 spell. You may combine up to 5 spells in this way.
- 32 -
Page 34

The following is a list of the spells you may use:
Fireball
An enormous flaming orb shoots forth from the
spellcaster’s fingertips.
Explosion
A blazing blast of pure energy engulfs the target.
Confusion
Your enemy is befuddled and freezes in his tracks
for several seconds. An excellent, even noble way
to effect a retreat from an intimidating enemy.
Lightning Bolt
The sky crackles, and a bolt of forked fire hurtles
down on your enemy.
Meteor Rain
A torrential meteor shower rains down on your
unsuspecting adversary.
Use caution: Meteor Rain causes damage in the area
surrounding the immediate target area. Don’t get
trapped in the impact zone.
- 33 -
Page 35

Non-Player Characters
There are many characters in the Clans environment with
whom you may interact. These characters usually want something from you - demanding a certain object or that a specific
task be performed - and will reward you for your efforts.
Saving and Loading a Game
To save a game, press the Game Menu icon (accessible
from the Gameplay Interface) at any time during the
game. You may also access the Game Menu by pressing
the Esc key. Select the Save Game option. Select one of
the “Empty” save slots and left-click. You may erase a previously saved game by left-clicking on one of your previously saved games.
When you save a game, you are returned to the action.
“Game Saved” appears for a few seconds at the top of the
gameplay screen.
To load a previously saved game, press the Game Menu
icon (accessible from the Gameplay Interface) at any time
during the game. You may also access the Game Menu by
pressing the Esc key. Select the Load Game option.
Left-click on the game you wish to load. Each game is
named for the level at which it was saved. For example, if
- 34 -
Page 36

you have saved the game while on Level 1, your saved
game will be called “At the Gates”. The game now loads
automatically.
Click Cancel to return to the Main Menu.
Winning the Game
The goal of Clans is to restore peace to the land. Vanquish
the demon and retrieve the Crown of Peace, and your
mission is accomplished.
The Demon and His Footsoldiers
The Demon has brought with him a fierce entourage.
These creatures are entirely devoted to their dark master,
and will stop at nothing to terminate your courageous
quest. Prepare to battle to the death. These monsters
won’t retreat, and will hunt you down if you try.
In their jealous pursuit of the Demon’s favor, any of these
creatures will turn on one another if they think they can
please their Master. Take advantage of the squabbling.
- 35 -
Page 37

Goblin
The Goblins make up the bulk of the Demon’s
infantry. They compensate for their small size
and lack of strength by attacking in packs.
Goblins are also very agile combatants.
Dark Elf
The degraded Dark Elves have lost their magical powers, but their lightning-quick attacks
are deadly. The Dark Elves look down on their
inferior Goblin comrades.
Lillfet
The lumbering Lillfet are notoriously slow, but
when they pummel you into dust you’ll
understand why they conserve their energy.
Green Or c
The mighty Green Orcs wield their spiked
clubs with savage accuracy. They turn to stone
when slain.
- 36 -
Page 38

Orc
The Demon rarely employs his prized Orc
troops, who are even stronger than their fierce
green-skinned cousins.
Orcs turn to stone when slain.
Skeleton
Lean and mean, the Skeletons are the animated
remains of the Demon’s slain enemies.
Troll
The ferocious Trolls haunt the darkest and
dingiest regions of the land. Slow-moving, but
exceptionally strong, Trolls are often used by
the Demon to guard his prized possessions.
Reptile
Reptiles dwell in the realm’s deepest caverns,
fiercely protecting their subterranean lairs.
They attack with powerful, razor-sharp claws.
- 37 -
Page 39

Mage
The cunning Mage are the Demon’s pride and
glory. Their preferred status permits them to
live a luxurious lifestyle, and they are usually
found in the richest surroundings. The Mage
are masters of magic, and always choose a
tactical melee over a mindless brawl.
Black Mage
The Black Mage are the most powerful of the
Demon’s beloved magic-using minions. They
have learned much from their dark Master.
Raven
Although easily destroyed, the pesky Ravens
attack in flocks, and their quick and agile
attacks are not easily repulsed.
Demon
Legend has it that the Demon’s command of
magic is flawless, and that one blow of his
mighty axe can cleave the sturdiest warrior in
two. Move quickly and use every trick in the
book to vanquish this truly evil monstrosity.
- 38 -
Page 40

Playing a Multiplayer Game
Multiplayer Setup Menu
Clans can be played competitively or cooperatively with
friends and strangers alike on a Local Area Network (LAN)
or on the Internet (TCP/IP). Up to four players may play at
any time. You may play any combination of characters,
including four of the same
character type. To hone your adventuring skills, you may play
any of the game modes alone on the Local Area Network.
- 39 -
Page 41

To host a game, left-click on the Host Game option.
To join an existing game, left-click on the Join Game option.
Host Game Menu
To Host a game, select a name
for your game by left-clicking in
the Host Name dialogue box.
Press the backspace key until the
default Host Name, “Clans”, is
removed. Now type in the new
name. Press the Enter key.
You may also select a name for
your character and multiplayer persona by left-clicking in the
Player Name dialogue box. To change from the default,
“Unnamed”, press the backspace key until the default is erased.
Now enter your new name. Press the Enter key.
Select LAN Game or Internet Game by left mouse clicking on
the appropriate option to setup the multiplayer game.
The view now changes to the Multiplayer Lobby screen.
- 40 -
Page 42

Join Game Menu
You may select a name for your character and multiplayer
persona by left-clicking in the Player Name dialogue box.
To change from the default, “Unnamed”, press the backspace key until the default is erased. Now enter your new
name. Press the Enter key.
Select LAN Game or Internet Game by left-clicking on the
a p p ropriate option to begin searching for a multiplayer game.
When you left-click on LAN Game, a list of games that are
available on your LAN connection appears. Left-click on
the title of the game you wish to play.
When you left-click on Internet Game, the IP setup screen
appears. Enter the IP address of the Host’s computer
(including periods) in the
dialogue box located below
“IP Address”. Click on
Connect. The name of the
Host’s game appears.
Left-click on the name.
The view now changes to
the Multiplayer Lobby
screen.
- 41 -
Page 43

The Multiplayer Game Lobby
The following options are available in the Multiplayer
Game Lobby:
Your character: Left-click to cycle through the four characters. A game may have more than one character of the
same character type. For example, you may have two or
more Warrior types playing in the same game.
Ready: Click this box when you have selected the character you want to play.
Game Type: Select from either Gold Rush or
Cooperative.
- 42 -
Page 44

Game Settings: These options determine the nature of the
Gold Rush or Death Match game.
No Monsters: When toggled on, no monsters appear in the game.
Time Limit: Set the length of play time in minutes.
Kills Limit: To play the game in Death Match mode, you must
enter the number of kills that players must reach to win the ro u n d .
Gold Limit: You may set the gold limit to a maximum of
10000. The player who reaches this pre-set limit wins the ro u n d .
World Category: You may play Gold Rush and Death Match
games in 4 different environments: Mud, Lava, Commoner,
and King levels.
World Size: You may set the game world size to a minimum of
5x5 rooms and a maximum of 20x20 rooms.
Chatting: You may chat with other players in the Multiplayer
Lobby by entering a line of text in the dialogue box located at
the bottom of the screen and pressing Enter.
Sword: The Host starts the game by clicking on the sword icon.
- 43 -
Page 45

Dialogue Boxes and Chatting
To change the text in a
dialogue box, left-click in
the box. A flashing cursor
appears. Backspace until the
old text is deleted. Now, type
in the new text and press
Enter. You may chat in the
Game setup screen and in the
Stats screen after a game is completed.
Multiplayer Modes
Clans offers a number of modes of multiplayer action.
Make your choice in the Multiplayer Game Lobby
(see the “Multiplayer Game Lobby” section).
Each mode of play is completed when a character exits the
level via a portal. The portal becomes active only when a
player has entered the treasury room. Once a player has
entered the treasury, anyone may exit through the portal
to end the level.
- 44 -
Page 46

Death Match games are completed when a player reaches
the pre-set number of kills.
Gold Rush games are completed when a player acquires
the pre-set amount of gold.
Gold Rush
This mode involves collecting as much gold as you
possibly can. There are two ways of playing Gold Rush:
a) Collect as much gold as possible before one of the players exits through the portal. You may still win if you have
more gold than the player who exits the level. You do not
need to set any limits to play in this mode.
b) Establish a pre-set amount of gold. The first character
to obtain that amount of gold wins the game. However, if
a player exits through the portal before the limit is
reached, then the victor is the player with the most gold.
- 45 -
Page 47

Death Match
Death Match requires you to kill your fellow characters to
reach the preset number of kills as quickly as possible.
Killing monsters does not count towards your kill total. If
a player exits through the portal before the Kills Limit is
reached, then the victor is the player with the most kills.
To set up a Death Match game, select the Gold Rush
game type. Now enter a kills limit in the Kills Limit dialogue box.
When you complete a Gold Rush or Death Match game,
the Stats Screen appears. The name of the winner appears
in yellow at the top of the list.
Cooperative Mode
Up to 4 players may participate in a cooperative attempt
to slay the Demon. When your character is killed, you do
not die but must start at the beginning of the level you
are currently playing.
A word of caution: Your spells and weapons may damage
the other characters in your party.
- 46 -
Page 48

Multiplayer Spawn Version
Up to 4 players may play multiplayer games on a LAN with
1 Clans CD-ROM. To do so you must install the Multiplayer
Spawn version of Clans onto your hard drive. The installation
screen opens automatically after the CD is inserted. Click on
the Install Multiplayer Spawn Version button to begin the
installation process. If the Install screen does not open
automatically, double-click on Setup.exe in the root directory
of the Clans CD.
Follow the on-screen instructions to run the game.
When using the Multiplayer Spawn version of Clans you may
only join a Multiplayer game. All other game modes and
options are disabled. The Host must have the full version of
Clans installed on their computer and the Clans CD must be
in the CD-ROM drive.
- 47 -
Page 49

Menu Hot Keys
Following is a list of hot keys that will save you time and make
your gaming experience more rewarding:
HOT KEYS
Left Mouse Button
Right Mouse Button
ESC
Tab
Period (.)
I or
Enter
A
S
D
F
Space
M
Insert
Delete
PgUp
PgDown
F5
F8
F12
Tag/Untag a room on the map overlay
Open Multiplyer chat dialogue box
Use weapon or magic in first equipment slot
Use weapon or magic in second equipment slot
Use weapon or magic in third equipment slot
Use weapon or magic in fourth equipment slot
Save screenshot to Clans folder
EFFECT
Walk, Pickup, Drop, Unlock
Attack, Open/Close
Access Game Menu
Show Map
Shaow character abilities
Drink Health potion
Drink Mana potion
Increase brightness
Decrease brightness
Increase SFX volume
Decrease SFX volume
Quick Save
Quick Load
- 48 -
Page 50

Credits
Computerhouse AB
Executive Producer : Mikael Ostberg
Producer: Anders Larsson
Project Manager: Calle Hansson
Lead Programmer: Anders Larsson
Programmers: Per Jahn
Additional Programming: Rickard Prieto
Graphic Artists: Henrik Andersson
Additional Graphics: Hakan Persson
Music and Sound Effects: Calle Hansson
Additional Sound Effects: Olle Netzler
Johan Dohl
Bjorn Winkler
Erik Moller
Peter Pettersson
Alf Svensson
Hampus Gimfalk
Anders Larsson
Anders Caspersson
- 49 -
Page 51

Voices: Hakan Persson
Calle Hansson
Anders Hejdenberg
Alf Svensson
Voice-Over Sound Engineer: Calle Hansson
Story and Game Design: Calle Hansson
Anders Larsson
Henrik Andersson
Johan Dohl
Alf Svensson
Patrik Haggblad
Strategy First
Producer: James McNeely
Associate Producer: Paul Thibault
Quality Assurance: Stéphane Brault
Michel Chouinard
Prokopios Sotos
Emanuel Protopapas
Yvon St-Louis
James Miguel
Michel Therrien
Michael LeDrew
Voice-Over Script: James McNeely
- 50 -
Page 52

Manual: Calvin Campbell
Marketing: Steve Wall
Catherine McDermott
Design and Packaging: Litsa Babalis
Theo Skalkos
Voice-Over Sound Engineers: Stéphane Brault
Peter McLaughlin
Voice Talent: Edward Wheeler
Adam Kelly
Bonnie Wurst
Michael Smith
Paul Thibault
Special Thanks: Elizabeth Kular
Don McFatridge
President
Steve Wall
V.P., Marketing
Richard Therrien
V.P., Product Development
Dave Hill
V.P., Systems
- 51 -
Page 53

Technical Suppor t
Should you experience a technical problem concerning the
operation of this product, please contact our technical
support staff. Before you call, please read the
README.TXT file on the Clans CD to see any last
minute recommendations pertinent to your problem.
Also, check out the Support page on our web site listed
below. When you call, please be at your computer and
have the following information available:
* Computer make and model
* Windows version
* Total system RAM
* Total Hard Drive space
* Video card make and model
Phone # (514) 846-3152, Mon. - Fri., 10am - 5pm EST
Fax # (514) 846-0593, Attn: Support
Internet e-mail: support@strategyfirst.com
World Wide Web: http://www.strategyfirst.com/
 Loading...