

FUTABA 14MZ HELICOPTER, 14MZ Quick Manual
When turning on the 14MZ, you must let the system cycle through before turning off.
There is a sequence that should be followed to get you started.
R5014DPS Receiver
First you should know the 14MZ receiver (R5014DPS) has
a different layout than the standard layout Futaba has
used in the past.After you have all your servos installed in
your helicopter, you’ll want to use one of these charts to
plug the proper servos into the R5014DPS receiver.
H-4 Swash All Others
Ch 1 Throttle Throttle
Ch 2 Rudder Rudder
Ch 3 Aileron (Left/Right Cyclic) Gyro
Ch 4 Elevator 1 (Fore/Aft Cyclic) Aileron (Left/Right Cyclic)
Ch 5 Pitch Elevator (Fore/Aft Cyclic)
Ch 6 Elevator 2 Pitch
Ch 7 Gyro Governor 1
Ch 8 Governor 1 Governor 2
Ch 9 Governor 2 Needle
Ch 10 Needle Auxiliary 3
Ch 11 Auxiliary 2 Auxiliary 2
Ch 12 Auxiliary 1 Auxiliary 1
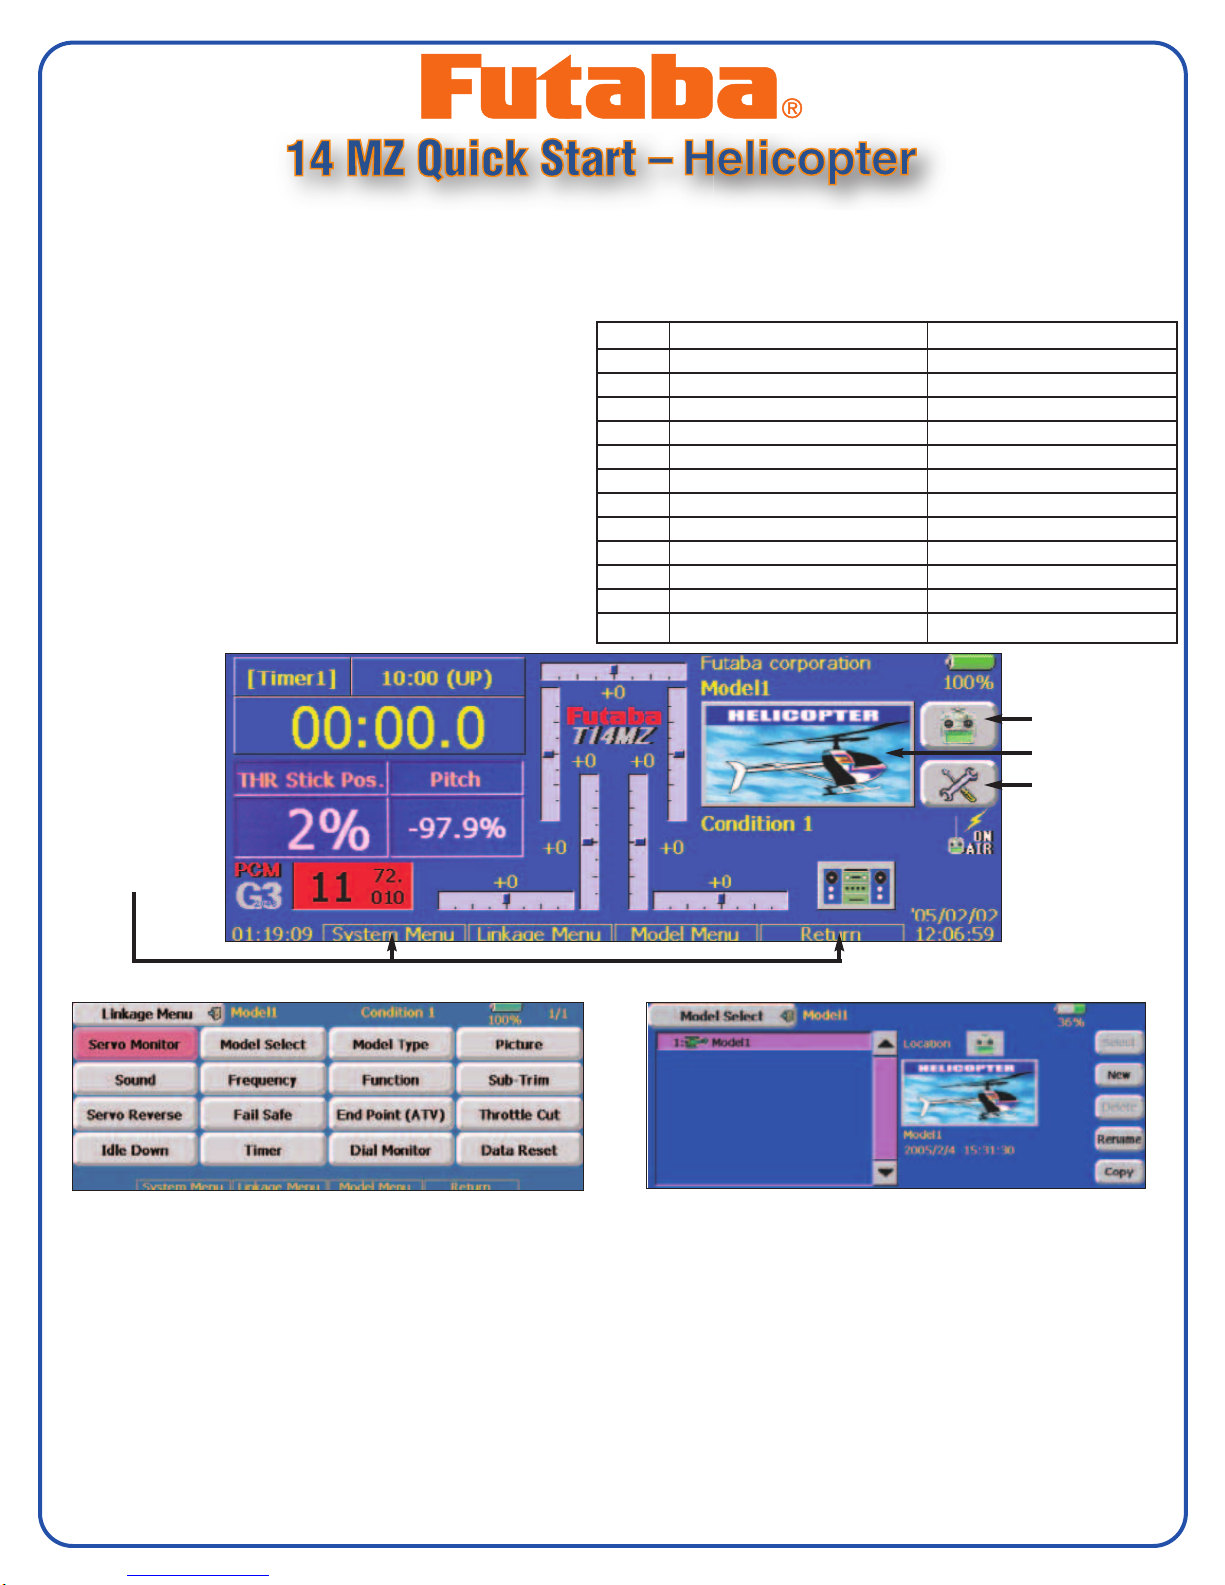
CHOOSING MODEL TYPE AND SWASH TYPE
After turning on the power switch and pressing No for transmit. This will take you to the Home Page. Press Linkage Menu
then Model Select then press New, and then pressYes. Press on Swash Type and choose from one of the 7 different Swash
Types in the diagram that corresponds with the type of control system on your helicopter. You’ll be asked “Check Change”, if
correct, press Yes.
After selecting the swash type you will come to the Frequency page. Select the frequency by pressing the Pink Box and then
select the frequency or channel you would like to be on for this particular model. After selecting the frequency, press Enter at
the top right hand corner of the screen. You’ll be asked to Check the change. If Yes, you’ll need to make sure you have your
battery plugged into the receiver but no power to the receiver. Once you press Yes, then turn on the power to the receiver to
program the receiver to the frequency you just selected. You must have the transmitter antenna very close to the receiver
antenna when doing this.
Please follow the steps in the manual on page (26) How to change the Frequency. Then you’ll need to turn off the power to
cycle through for the frequency to take affect.
Turn the system back on.Press “Yes” for Transmit. This will take you to the Home Page to star t setting everything up.
System Menu
Model Menu
Linkage Menu
Direct Keys
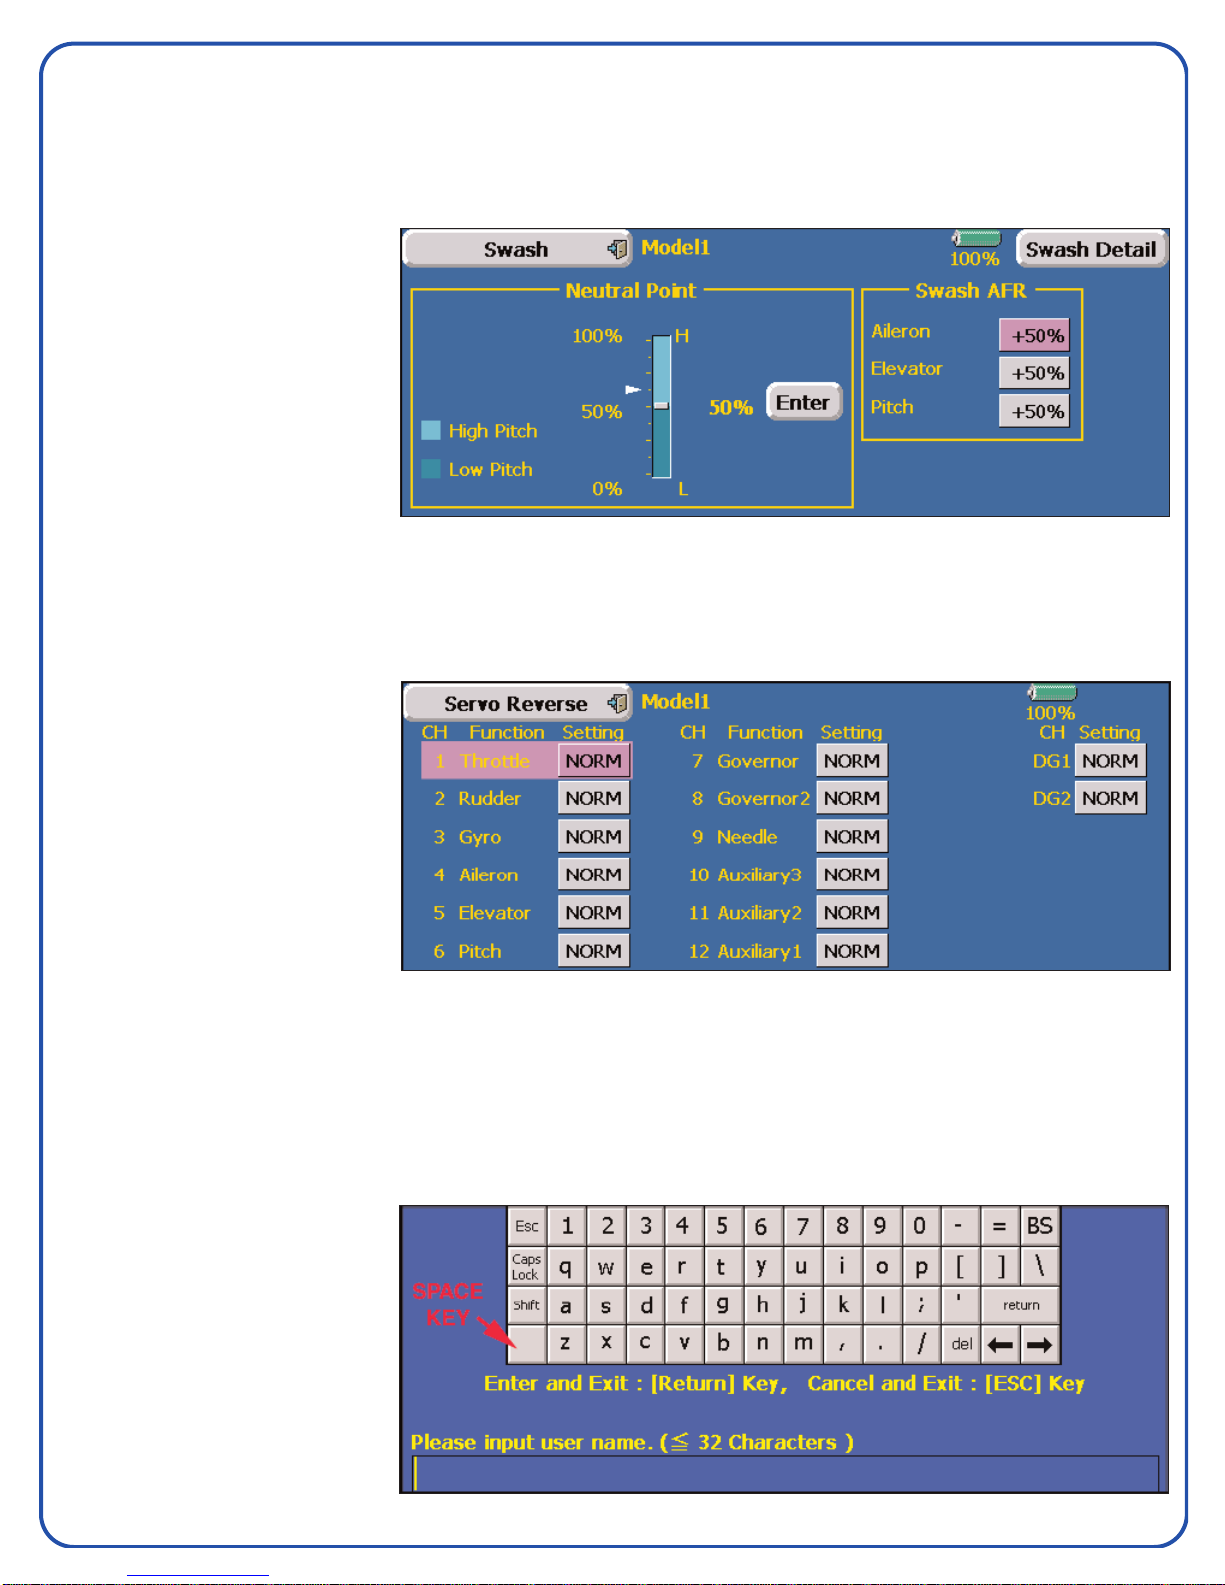
SETTING SWASH MIXING
At this time you should install and set up your servos as per the helicopter manufactures instructions.
While at the Home Page, you’ll notice on the left side of the screen THR Stick Pos. and Pitch just under the Timer. As you move
the stick up and down, you’ll see the numbers change . Use the Pitch numbers to center your collectiv e pitch servo as these numbers
read out stick position in tenths of a percent which is more accurate than the THR Stick Pos.
If while moving the collective stick
up/down one or more of the servo is
moving against the others, you’ll need
to go into the Servo Reverse menu.
To do this from the home page press
on Linkage Menu and press Servo
Reverse. This screen will tell you
what each channel slot is on the
receiver. Select the ser vos that need
to be reversed b y pressing on NORM.
You will be asked Sure?, press yes, if
not no. When finished you’ll need to
go back into your Swash, Swash
AFR and repeat the check.
Be careful moving the sticks to the extremes as you could bind up any of the servos. If the swashplate (pitch) is traveling too
far or binding, go to the Linkage Menu and then Swash. Under Swash AFR reduce the Pitch percentages to stop the binding
or over throw of the swashplate (pitch) to give you the pitch range you need.
Press the Linkage Menu and press
Swash. In the Swash AFR section to
the right side of the screen, you’ll
notice that all the values are set to
+50% for Aileron, Elevator and Pitch.
These are standard values and will
apply to most helicopters.
If your collective is moving
backwards, change Swash AFR
+50% to -50%, to do this press the
box for Aileron, Elevator or Pitch and
you’ll have two arrow and single
arrows for up and down and a reset to the right of the Swash AFR settings. The single Arrows move the settings in increments
of one percent. The two arrows move the increments in ten percent. Reset will reset the settings to +50%. Check the left/right,
fore/aft cyclics and adjust these values if needed through the Swash AFR from +50% to -50%.To get back to the Home Page
press Swash button in the top left corner of the screen and then press Linkage Menu in the top left corner of the screen.
CHANGING MODEL NAME
Press Linkage Menu, Model Select.
At the bottom right side of the screen
press Rename.
This will bring up a key board to use
in naming your model. You may want
to use the Stylus for pressing the
small letters. You can enter up to 32
Characters.
At the bottom of the page you’ll notice
a box with a flashing cursor. To erase
“New Model-1” just press del.
Use the keyboard to input the desired
name of the model and press Return to save the name. When finished, press ESC at the top left corner of the keyboard.
 Loading...