

FUTABA 14MZ AIRCRAFT, 14MZ Quick Manual
1) Turn on transmitter.Allow up to 30 seconds to complete the start up cycle. It is important that you allow this cycle to complete.
2) Initially choose "NO" when asked whether you wish to transmit.
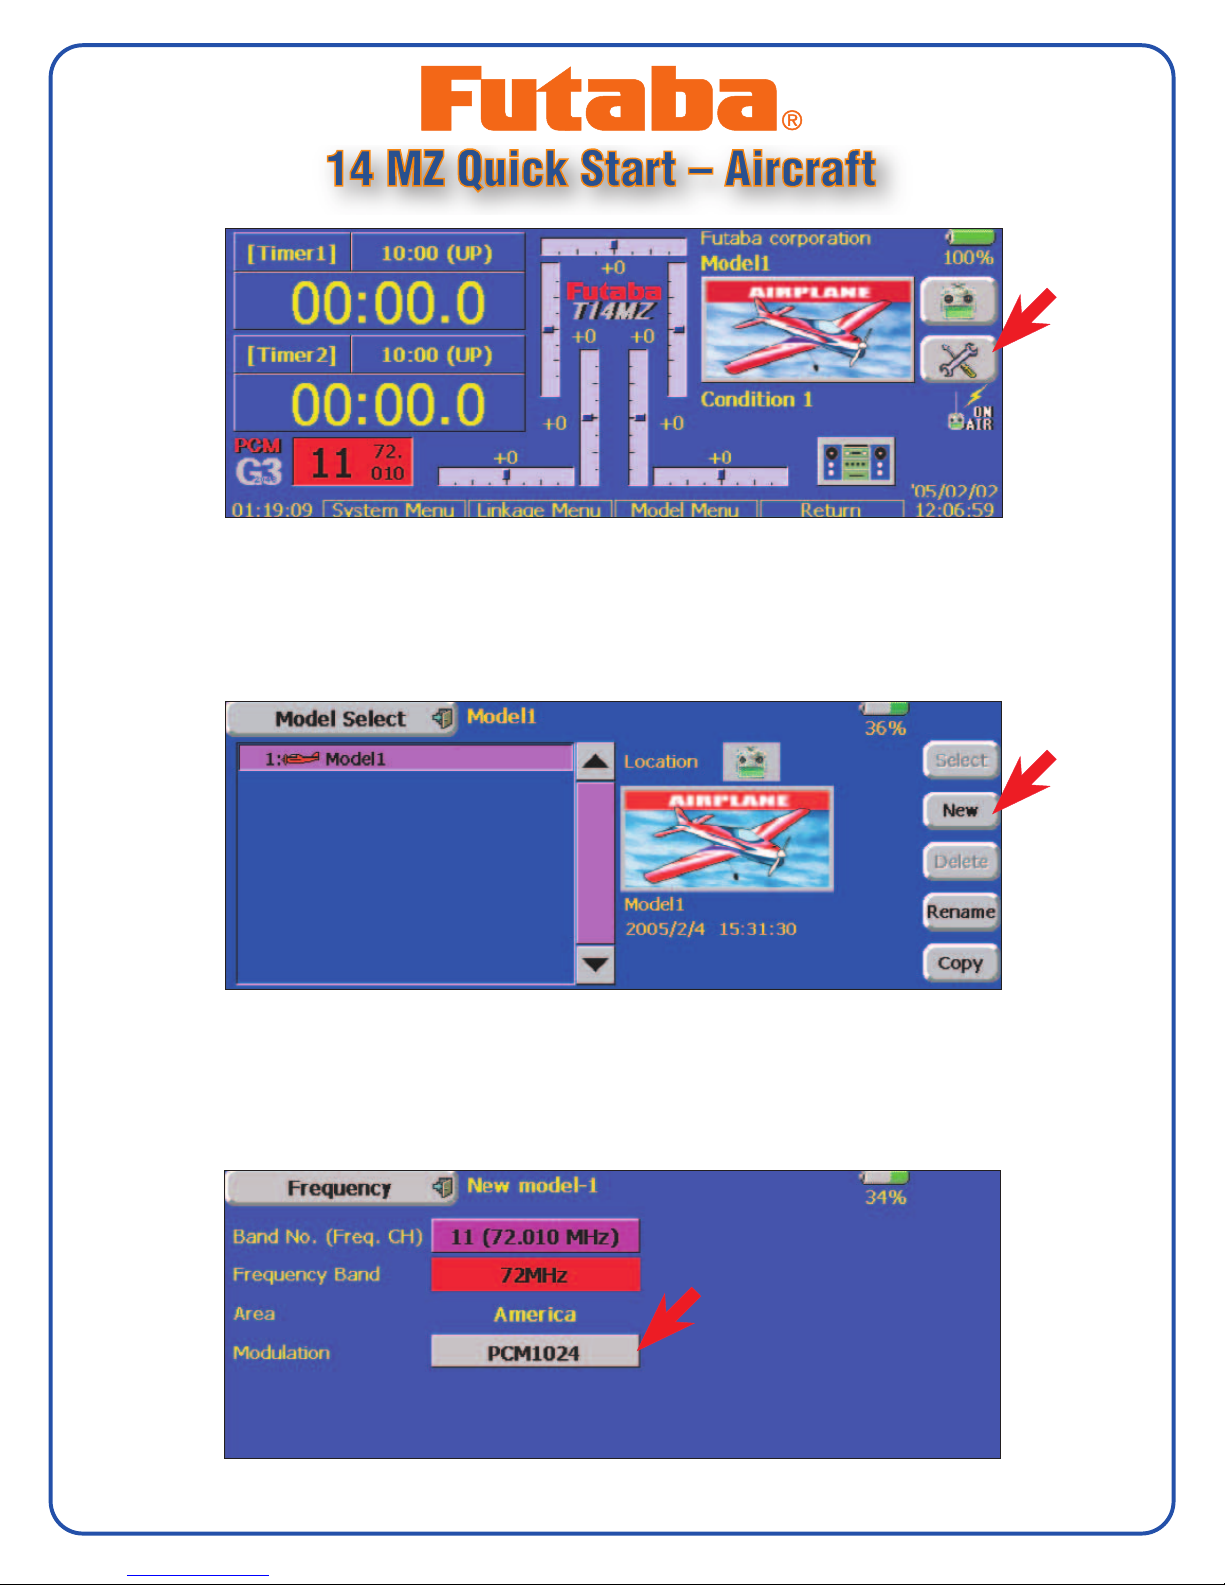
3) Select the Linkage Menu by holding the linkage menu button until it beeps or by pressing on the wrench/screw driver icon.
4) Press the Model Select icon with your stylus.This will take you to the Model Select Menu.
Press on the New icon on the right side of the screen. When prompted with the Model change (Radio Stop) screen, select
"YES".The Model Type screen will open and here you will be able to specify what type of model, wing and tail you have.
Press on the Model Type icon on the top left side of the screen to exit if you are flying a conventional aileron, elevator and
rudder model. Otherwise, touch the appropriate model type first, then exit.
5) The next screen that opens up is the Frequency screen. Modulation type needs to be specified.Touch the box next to
modulation and then select PCM-G3.Turn off the transmitter when asked and turn it back on after it cycles.
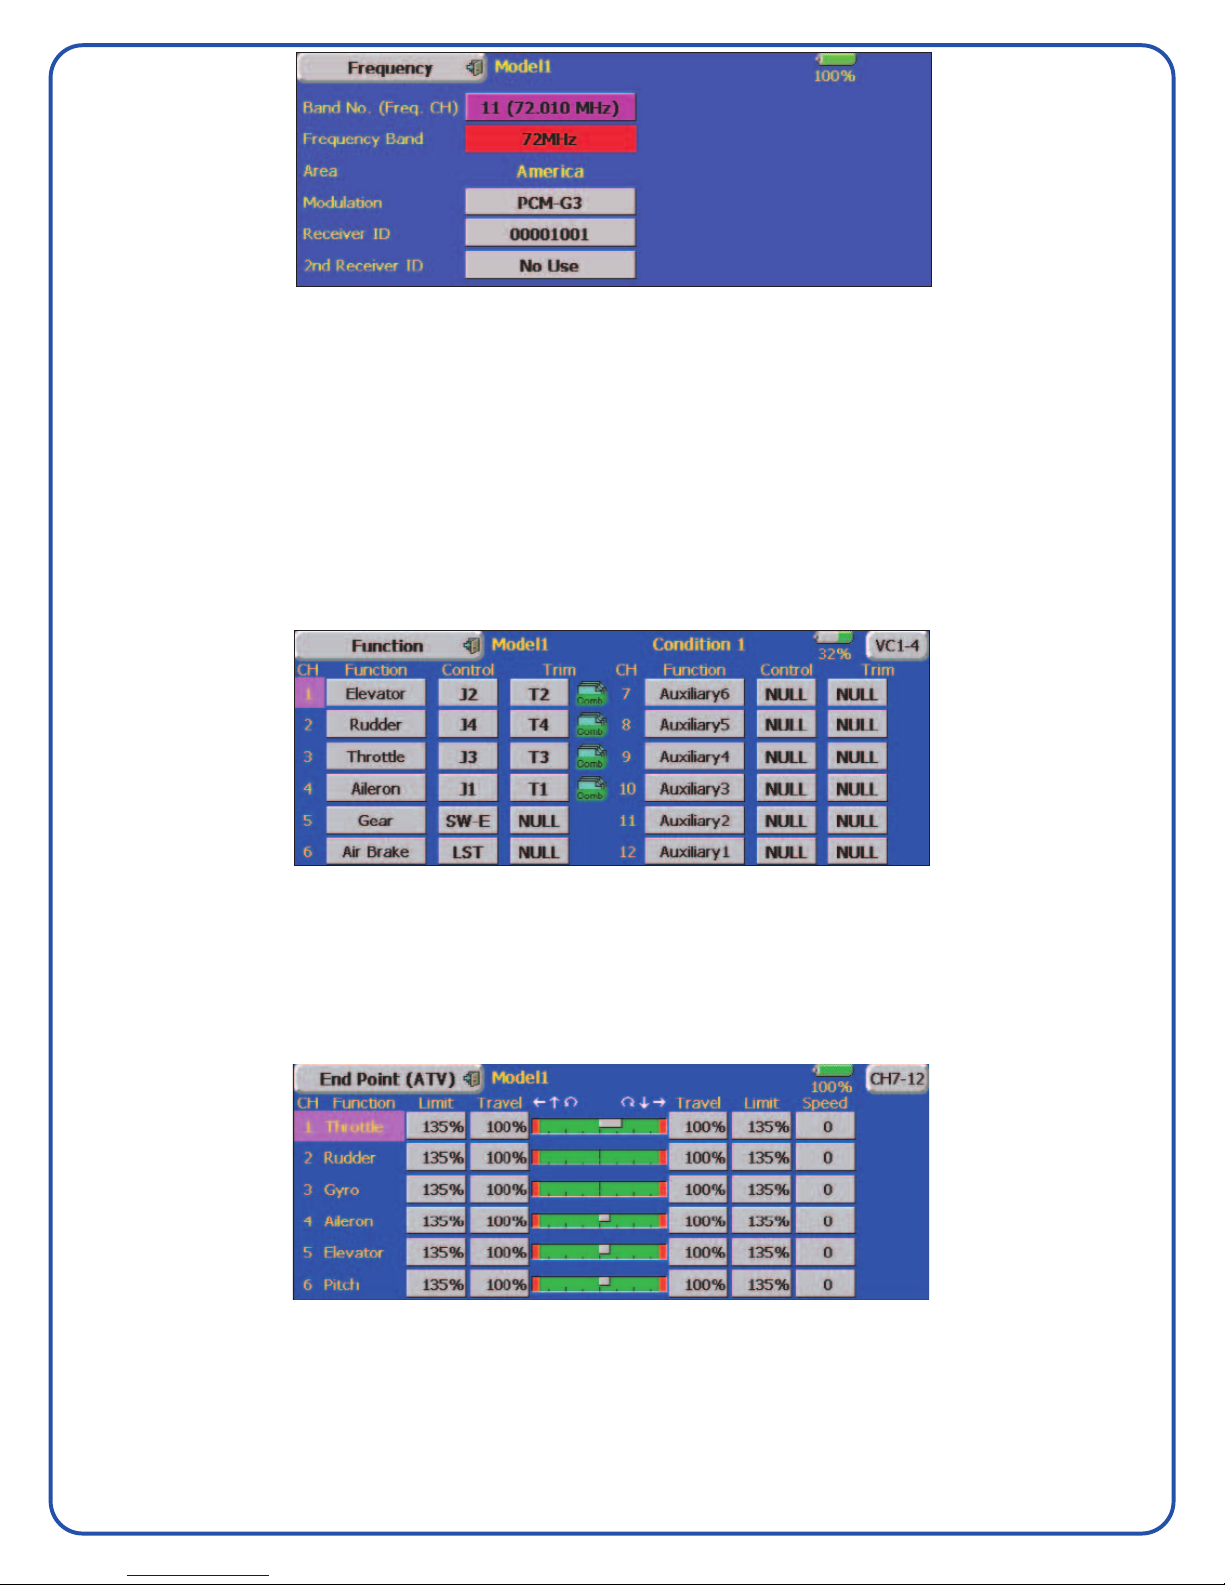
12) In this step we will adjust your models servo End Point (ATV). Press on the End Point (ATV) icon in the Linkage Menu. The
ATV is set by selecting the percentage under Travel on either direction for that particular function. Limit defines how far the servo
will rotate over the specified A TV T ravel when mixing and/or subtrim changes are linked to that channel.Remember to do this for
both sides of the travel.Press on the End Point (ATV) icon on the top left corner of the screen to exit.
13) Press on the Linkage Menu icon on the top left of the screen to return to the home screen.
This concludes our Quick Start guide. For more advanced programming, please refer to your owner’s manual. We sincerely
hope you enjoy your new Futaba 14MZ radio system.
10) To place the servos in the traditional Futaba slots (1=aileron, 2=elevator, 3=throttle, 4=rudder), Select the Function icon
and this will show you all of your functions and their current locations. For traditional setup, select Elevator next to CH 1,
this will take you to the Function page, select Aileron to turn slot 1 of your receiver into the aileron channel. Repeat this
process for all the other channels. Note that more than one slot in your receiver can perform the same function at any
time. Also, note that the sticks and trims that handle each function can also be changed in this screen by selecting the
icons under the Control and Trim headings
11) Return to the Linkage Menu by selecting the Function icon on the top left side of the screen.
6) Press "NO" when asked if you want to transmit.Select the Linkage Menu by holding the linkage menu button until it beeps.Select
the Frequency icon again to finish setup the frequency or you can just press on the frequency display with your stylus.
a) If the Receiver ID is not correct, enter your receiver ID number and press enter with your stylus.
b) Press on the Frequency/Channel icon next to the Band No. and on the screen that appears, select the frequency you
wish to use. Press enter with your stylus.
c) Fully extend your transmitter antenna and select "YES" in the check change? block. The transmitter will start
transmitting to the receiver to set it up.
d) When prompted, turn on your receiver.When the process is done, select End and turn off your transmitter.
e) Turn on your transmitter and select "YES" to transmit.Your receiver should work now.
7) Select the Linkage Menu by holding the linkage menu button until it beeps or by pressing on the wrench/screw driver icon.
8) On the Model Select screen, press on the Rename icon to rename your model. After you input the name of the model,
press return to go back to the Model Select screen.
9) Press on the upper left Model Select icon with your stylus to return to the linkage menu.
FUTZ8651 for FUTJ9400, FUTJ9407, FUTJ9410
 Loading...