

Page 1
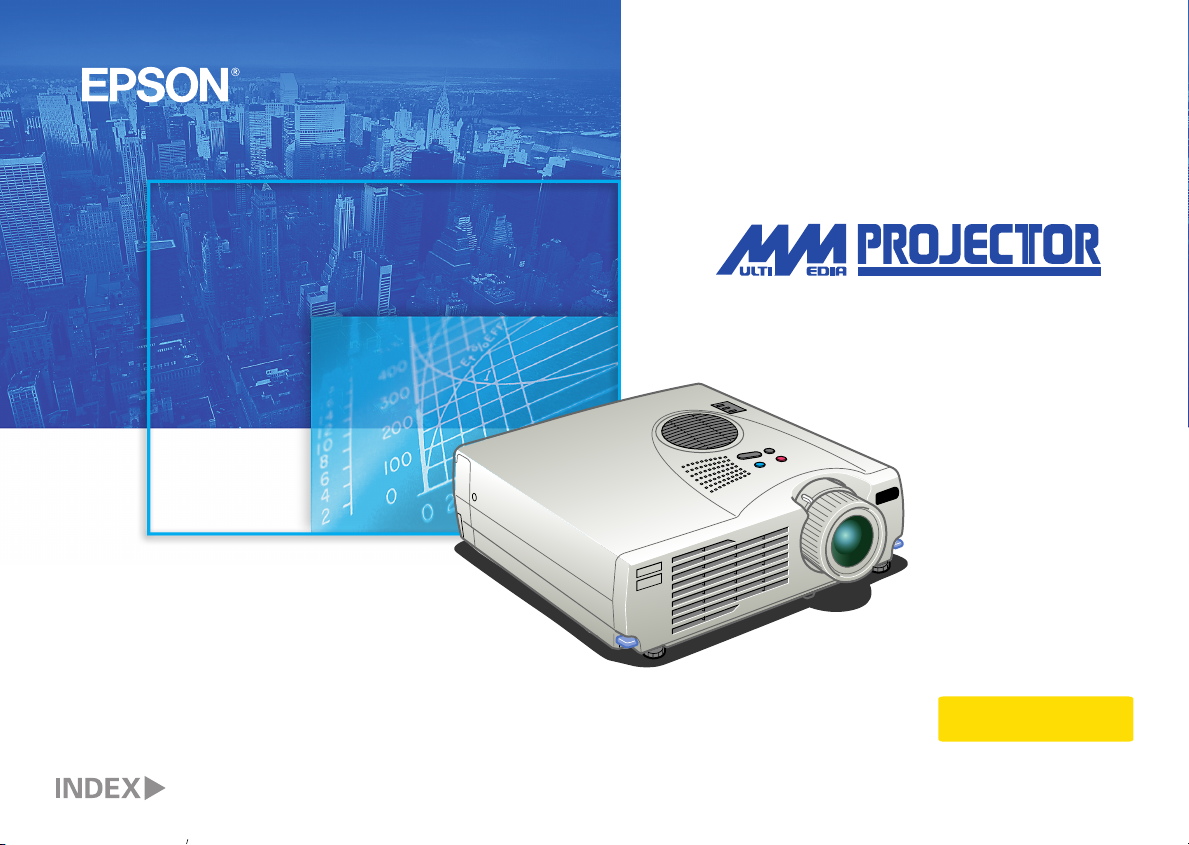
QUICK REFERENCE GUIDE
EMP-713/703/503
Be sure to read the Owner's Manual thoroughly before using this projector.
WARNING
Never look into the lens while
the projector's power is turned on.
Page 2

Setting Up
Page 4 of
Owner's Manual
Adjust the distance between the projector and
the screen until the desired image size is obtained.
screen size
300"
610X460(cm)
200"
150"
100"
80"
60"
40"
30"
26"
61X46
53X40
81X61
–44.7
120X90
(–1.1)
42.5–52.1
200X150
160X120
(1.1–1.3)
57.6–70.4
305X228
(1.5–1.7)
87.8–107.0
410X300
(2.3–2.7)
118.1–143.6
148.3–180.2
(3.0–3.6)
(3.8–4.5)
223.9–271.7
299.5–363.3
(5.7–6.9)
(7.7–9.2)
450.7–546.3 inches
(11.5–13.8m)
projection
distance
1
* When installing to wall, leave a space of about
7.87 inches (0.2m) between the projector and the wall.
Page 3
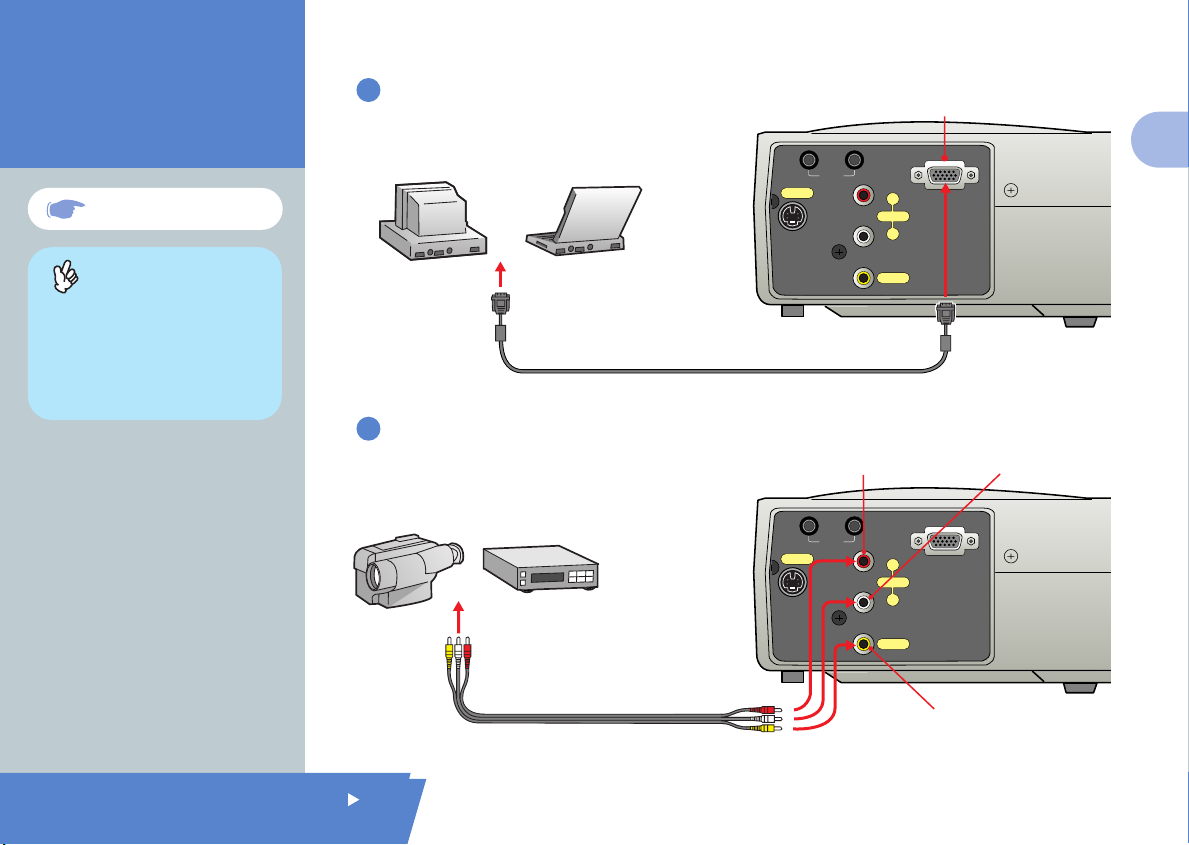
Computer
Audio
InOut
S-Video
Audio
R
L
Video
* Turn off the power for both the projector and the other equipment before connecting them.
Computer
Audio
InOut
S-Video
Audio
R
L
Video
Connections
Pages 6, 22 of Owner's Manual
Tip
Depending on the shape of the
computer monitor terminal, it may not
be possible to make connections with
the accessory computer cable. Please
convert it using a commercially
available adapter, etc.
Connecting to a Computer
To computer's
monitor port
(video port)
Computer cable (accessory)
Connecting to a Video Source
Audio R connector (red)
To video output connector (yellow)
To audio output L connector (white)
To audio output R connector (red)
A/V cable (accessory)
Computer connector
2
Audio L connector (white)
Video connector (yellow)
Setting Up /
Connections
Page 4
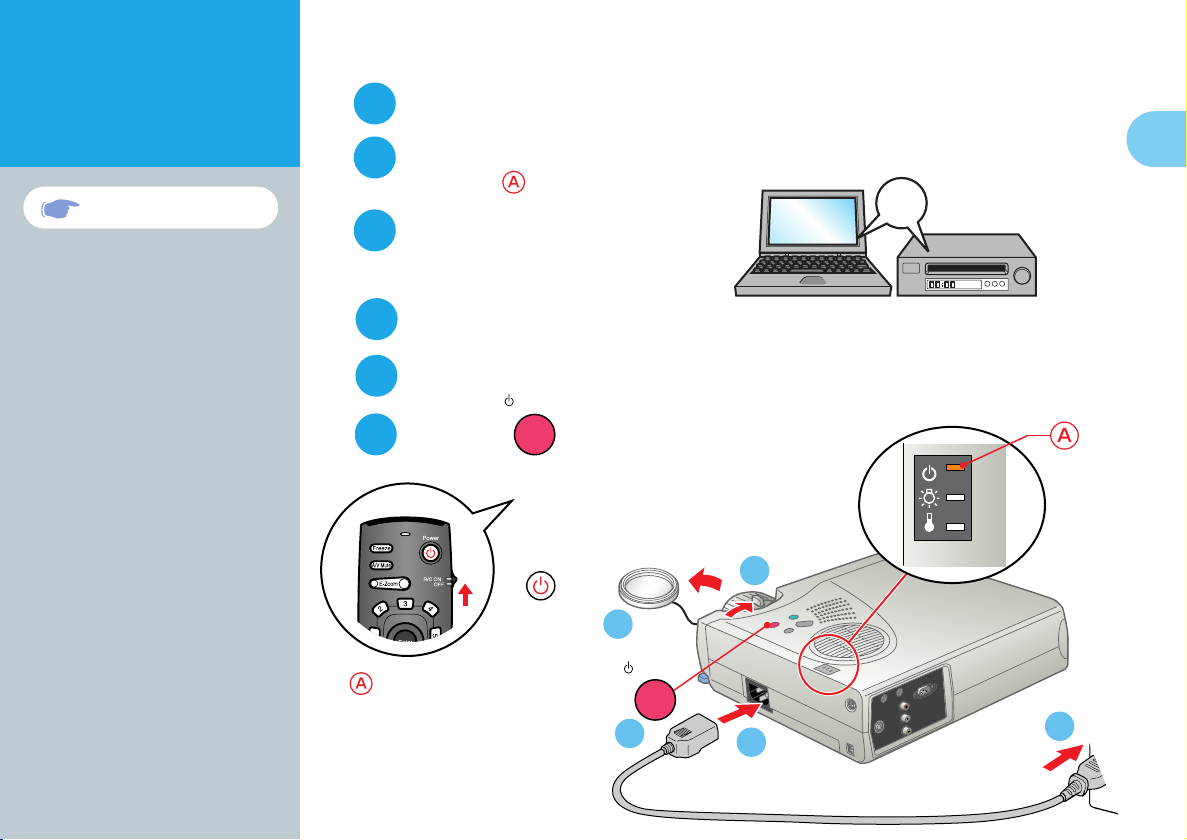
Projecting
Pages 29,30 of Owner's
Manual
Connect the power cord to the projector.
1
Connect the power cord to an electrical outlet.
2
The indicator will light orange.
ON
3
Turn on the power for the
input source.
In the case of a VCR, press the PLAY button.
4
Rotate the zoom lever to the central position to extend the lens.
5
Remove the lens cover.
Power
6
Press the to turn on the
projector's power.
If using the remote control, set
the R/C switch to the ON
position and then press the
Power
.
5
4
3
Operation
indicator
will start flashing green and
projection will start.
(Warm-up in progress)
6
Power
1
2
Page 5
Tip
If a laptop computer or a computer with a
LCD screen has been connected to the
projector, you may need to change the
output destination for video signals
depending on the computer keys ( or
) or the computer's settings. The
output destination can normally be
changed by holding down the computer's
and pressing one of the Function
keys.
Once the source has been changed, after
a short wait the projector will start
projecting. If the output has been
changed to external output, only the
external output should be used.
For details, refer to the documentation
provided with your computer.
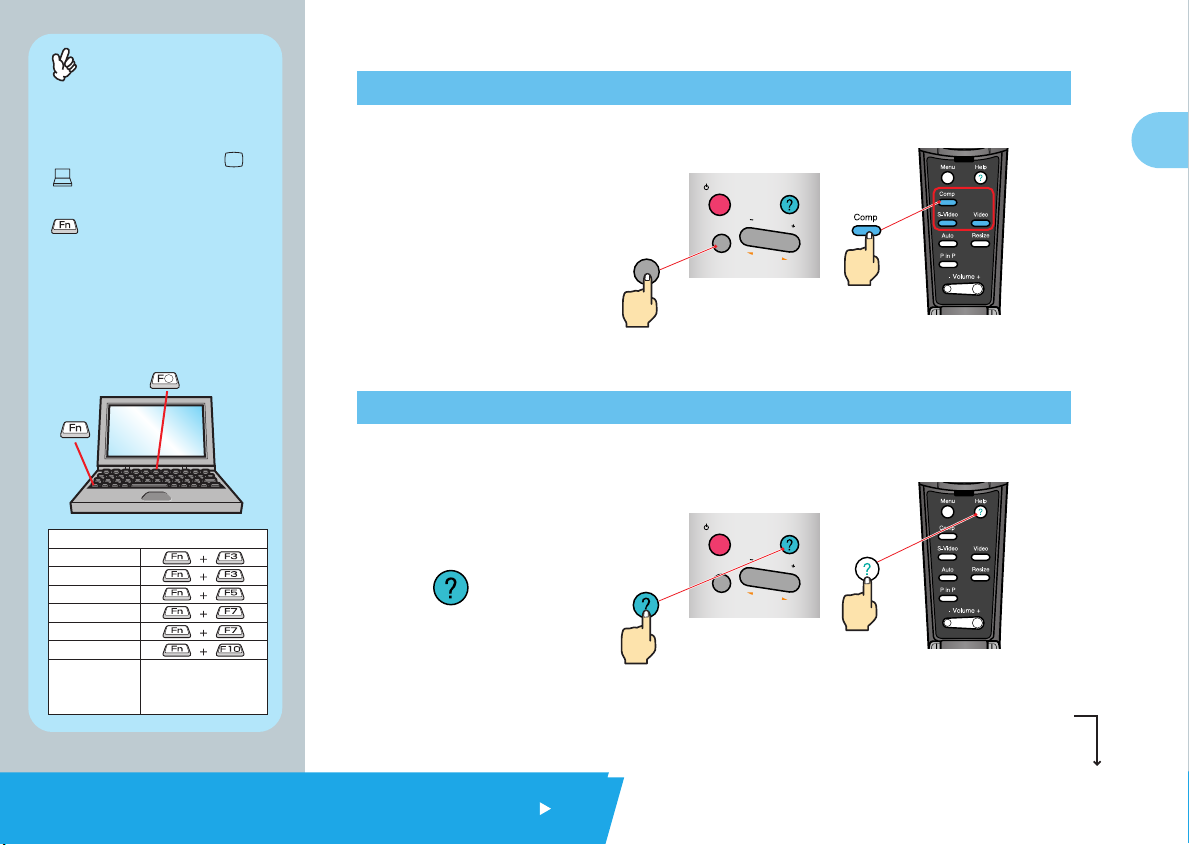
If images do not appear ...
Change the input
signal.
Source
Power
Source
Enter
If you have other problems ...
Refer to the online
4
Help
Keystone
Select
Projector Remote Control
Examples of changing output
NEC
Panasonic
TOSHIBA
IBM
SONY
FUJITSU
Macintosh
After restarting the computer,
change the Control Panel
monitor and sound settings
so that Mirroring is active.
Help information.
Help
Press , and
then follow the
instructions.
Projecting
Help
Power
Source
Enter
Keystone
Select
Help
Help
Projector Remote Control
* Refer to Troubleshooting.
Page 6

Adjustment
Pages 31,32 of
Owner's Manual
Tip
If you change the projection angle, you
may get keystone distortion in the
images. You can use the on
the projector's control panel to correct
keystone distortion.
Keystone
See page 7.
Adjusting the projection angle
Lift the front of the projector while pressing on the foot lever, adjust the amount extension or
retraction of the front foot, then adjust the projector’s projection angle.
To make fine adjustments:
Becomes
lower
Becomes higher
Adjusting the image size and focus
Focus adjustment
5
Image size adjustment
Turn to Wide to increase the size
Turn to Tele to reduce the size
Page 7

Automatically adjusting computer images to the
USB Mouse
Mouse/Com
optimum settings
Press on the remote control to automatically adjust the tracking and the display position and
synchronization.
Remote Control
Other adjustments
Press on the remote control to display the setting menu on the projection screen.
Then adjust the required settings, such as brightness, contrast and sharpness.
Using the on-screen menus
Main menu Remote control
Select
Move
left
Move
down
Remote Control
Return
Move
up
Move
right
6
Adjustment /
Turning Off the Projector
Page 8

Adjustment
If the images have keystone distortion ...
Keystone
Press on the projector's control panel to correct the keystone distortion.
7
Correcting keystone distortion
Pages 38 of
Owner's Manual
Tip
When keystone correction is carried
out, the projected image will become
smaller.
The trapezoid correction state is
recorded in memory. Please readjust it
when the projection angle is changed.
If the images become uneven in
appearance after keystone correction is
carried out, decrease the Sharpness
setting.
Power
Source
Enter
Keystone
Select
Help
Keystone
Page 9

Turning Off the Projector
Pages 29,30 of
Manual
Owner's
Turn off the power for the equipment connected
1
to the projector.
Power
Press the twice to turn off the
2
projector's power.
will start flashing orange. (Cool-down in progress)
Check that is lit steadily with an orange color,
3
and then disconnect the power cord.
If the power cord is disconnected while is still flashing orange, it may cause problems with
projector operation.
* Set the R/C switch on the remote control to the OFF position.
Operation indicator
8
Adjustment /
Turning Off the Projector
Page 10

Functions for
USB Mouse
Mouse/Com
Enhancing Projection
Tip
When using the remote control as
a wireless mouse, you need to
connect the projector as follows.
Mouse/USB port
Mouse cable
(accessory)
Use the USB mouse cable if you
are connecting to the computer’s USB
terminal.
If the mouse function does not
work after connecting a PS/2 mouse,
you will need to restart the computer.
Use only the accessory mouse
cable provided, otherwise the
wireless mouse function may not
operate correctly.
Mouse/Com connector
USB
Mouse
connector
This projector is equipped with a variety of useful functions
for enhancing projection.
Refer to the corresponding pages of the Owner's Manual for
details on each function.
Using the remote control for one-person presentations
The remote control can be used to carry out the same functions as left-clicking and right-clicking mouse buttons
on a computer. You can use the remote control to control the computer's mouse pointer from a distance.
Mouse pointer movement
Tilt the in the direction you want
the mouse pointer to go.
Mouse clicks
Mouse
Mouse
Computer
In
Out
Audio
S-Video
R
Audio
L
Video
9
For left clicks: Press For right clicks: Press
Page 11

Effect function
Page 51 of
Owner's Manual
Enhancing presentation materials
Press . Press .
Tip
Press to erase the stamps,
squares, markers and free lines set
for decorative purposes.
Displays the pointer icon. Tilt the
to move the icon, and then
press to stamp the pointer
icon in position.
Press .
Displays the marker icon. Tilt the
to move the icon to the
starting point, and then press .
Tilt the again to move the
icon to the ending position, and
then press .
10
Displays the square icon. Tilt the
to move the icon to the
starting point, and then press .
Tilt the again to move the
icon to the ending position, and
then press .
Press .
Displays the free line icon. Tilt the
to move the icon to the
starting point, and then press .
Then tilt the in the direction
that the line is to be drawn.
Press the to complete line
drawing.
Functions for
Enhancing Projection
Page 12

Functions for
Enhancing Projection
E-Zoom function
Page 36 of
Owner's Manual
Enlarging part of projected images
11
Press to enlarge the image being projected.
Tilt the on the remote control to scroll to the area that is to be viewed.
Tip
After enlarging part of the image,
you can tilt the to scroll around
the image.
To cancel the enlargement effect,
press the .
Press .
Press the right side of the button
to enlarge the image.
Enlargement ratio
Press the left side of
the button to reduce
the size of the
enlarged area.
Page 13

A/V Mute function
Pages 36,52 of Owner's Manual
Momentarily turning off images and sound
The A/V Mute function momentarily pauses the image and sound, and displays either a blank blue
or black screen or the user's logo screen. It can be used when you do not want to show viewers
details of operations such as selecting different files when computer images are being projected.
Press .
First press the , select "Settings" and then "A/V Mute". Then select the type of screen to be displayed
when projection is being stopped. The following choices are available. The default setting is the black screen.
12
Press once more.
Projection of the images and sound will be restarted.
If you use this function while projecting moving images, the images and sound will still continue to be
played back, and you cannot return to the point where the A/V Mute function was activated.
Functions for
Enhancing Projection
Page 14

Troubleshooting
Viewing the Online Help
This projector is provided with an online help function which can be used when you have a
problem using the projector.
Help
Press .
1
Select the item to view.
2
Press the on
Select
the projector's control panel.
Or tilt the on the
remote control.
Accept the selected item.
3
Press the on the
projector's control panel.
Enter
Help
Power
Source
Enter
Projector Remote Control
<HELP Menu>
Help for the image.
Help for the sound.
Language selection.(Language)
Return
If you follow the instructions to solve the problem
unsuccessfully,unplug the power from the wall outlet and
contact your local dealer.
: Select : Enter : Exit
Keystone
Select
Help
Help
13
Or press the on the
remote control.
The selected item will appear
4
on the screen.
<HELP Menu>
An image does not appear on the Screen.
The image is blurred.
The image is not displayed fully on the screen.
(cut off/too big/too small/partial)
The colors of the image are not correct.
The image is too dark.
The image is a trapezoid.
Return
: Select : Enter : Exit
Page 15

Page 39 of
Owner's Manual
Checking the Indicators
The projector is equipped with indicators that alert you to problems with projector operation.
The following tables show what the indicators mean and how to remedy problems that they indicate.
Lamp Indicator
Operation indicator
Lamp indicator
Temperature indicator
Indicator status Problem and remedy
Blinking
in Red
Illuminated
in Red
Blinking
in Orange
Extinguished
Lamp error
Replace the lamp with a new one .
Time to replace the lamp.
Replace the lamp with a new one .
Nearing the time for replacing the lamp
Prepare a new lamp.*2
The power has not been switched on or normal
projection is in progress.
*2
*2
Temperature Indicator
Indicator status Problem and remedy
Operation Indicator
Indicator status Problem and remedy
Illuminated
in Orange
Blinking
in Orange
Illuminated
in Green
Blinking
in Green
Blinking
in Red
Extinguished
*1 If an indicator is showing a status which does not appear in the previous tables, contact your dealer or nearest address provided at "International
Warranty Conditions" in "Safety Instructions/World-Wide Warranty Terms" included in the package.
*2 Contact your dealer for a spare lamp.
Standby condition
Projection starts when the is pressed.
Cool-down in progress
After while, the projector switches to the
standby condition (the indicator lights orange).
Projecting in progress
Warm-up in progress
After warm-up is complete, projection
will start when a video signal is input.
Internal problem
Stop using the projector and ask for projector
to be repaired. *1
The power is not switched on
Power
Illuminated
in Red
Blinking
in Red
Blinking
in Orange
Extinguished
Excessive internal temperature (overheating)
The lamp goes off automatically and projection
becomes impossible. Wait for approximately 5
minutes with the projector in that state. After 5
minutes has passed, pull out the power plug
once, then insert it again.
When the power plug is reinserted, the projector
will recover to the normal state, so press the
Power
and turn on the power again.
Internal problem
Stop using the projector and ask for projector
to be repaired. *1
High-speed cooling in progress.
If the internal temperature rises any higher,
projection will stop.
Check that the air inlet and exhaust vents are clear
and that the indoor temperature is not too high.
The power has not been switched on or normal
projection is in progress.
14
Troubleshooting
Page 16

Printed on 100% recycled paper.
Printed in Japan
90018701
-
.2B(C01)
01.09
 Loading...