


English............ 1 Français.......... 5
EnglishFrançaisDeutschItalianoEspañol
Deutsch........ 10 Italiano.......... 15
Español ........ 20
...28
...24

0
Errata
The following errors have been found in the description of the EasyMp Operation Guide
stored in "Document CD-ROM" supplied with this projector. Please accept our
apologies, and note the corrections to the User’s Guide.
p.14 Please correct the followings in the table
Incorrect .wmv WMV9
The reproducible audio format is WMA99.
Correct .wmv
.ASF
p.14 Please add the following sentence under the table of "Supported file
types"
Extension Video Codec Audio Codec Detail
.mpg MPEG2 MPEG1 Layer 1/2 30 fps, Resolution:720 x 576
.wmv WMV8 WMA 30 fps, Resolution:720 x 480
.asf WMV9 WMA 30 fps, Resolution:720 x 576
Files to which DRM (Digital Rights Management) is applied cannot be projected.
p.42 Please correct the notes of file type ".jpg" in the table
Incorrect Cannot project images in CMYK color format,
progressive mode, and with a resolution greater than
4608 x
7072.
Correct Cannot project images in CMYK color format,
progressive mode, and with a resolution greater than
4608 x 3072.
WMV8/9
The reproducible audio format is WMA.
English
p.42 Please add the following to the file type (extension) ".wmv"
Add .asf
p.42 Please add the following table under the table
Supported Video Formats
Extension Video Codec Audio Codec Detail
.mpg MPEG2 MPEG1 Layer 1/2 30 fps, Resolution:720 x 576
.mp4 MPEG4 ASP
MPEG-4 AVC
.wmv WMV8 WMA 30 fps, Resolution:720 x 480
.asf WMV9 WMA 30 fps, Resolution:720 x 576
MPEG4 AAC-LC 30 fps, Resolution:720 x 576
1
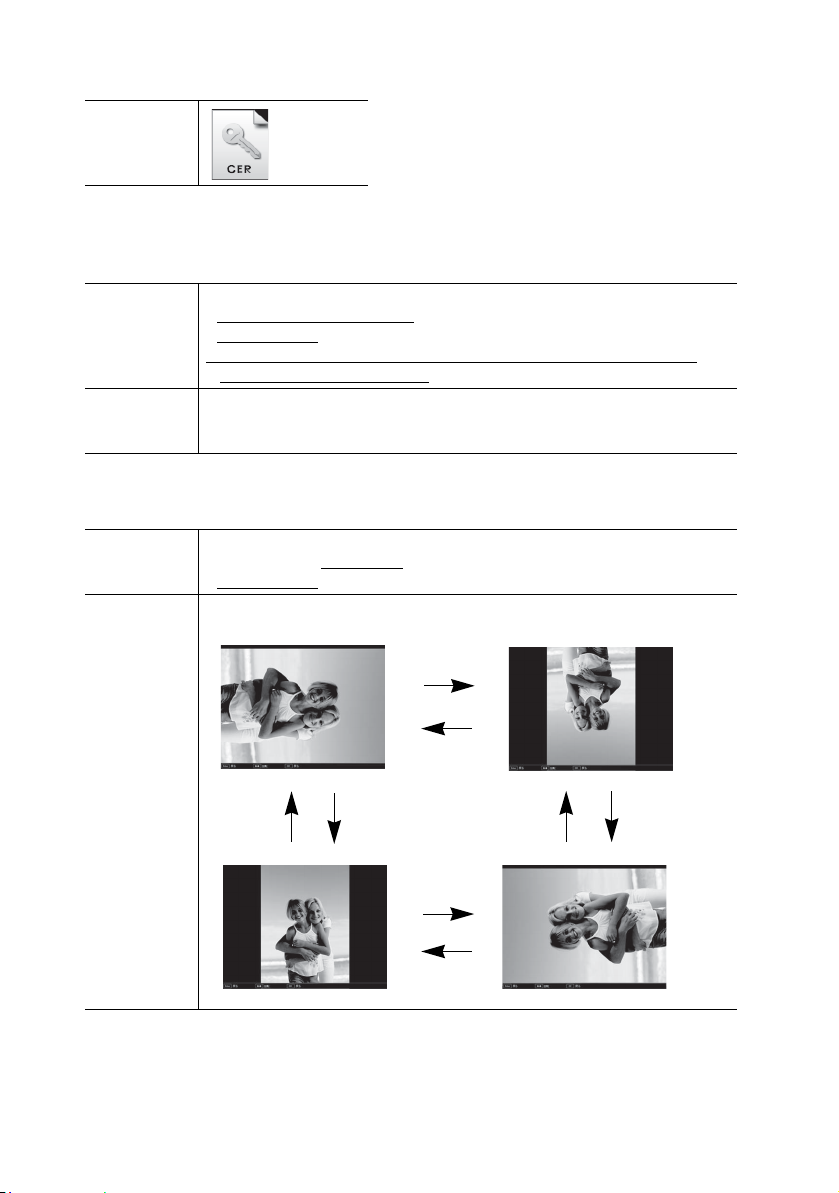
p.47 Please add the following icon to the electronic certificate file
Icon
p.50 Please correct the following in procedure 2 and 3 of "PC Free Basic
Operations"
Incorrect 2 Press the [Enter] button on the remote control.
Correct 2 Press the [Enter] button on the remote control.
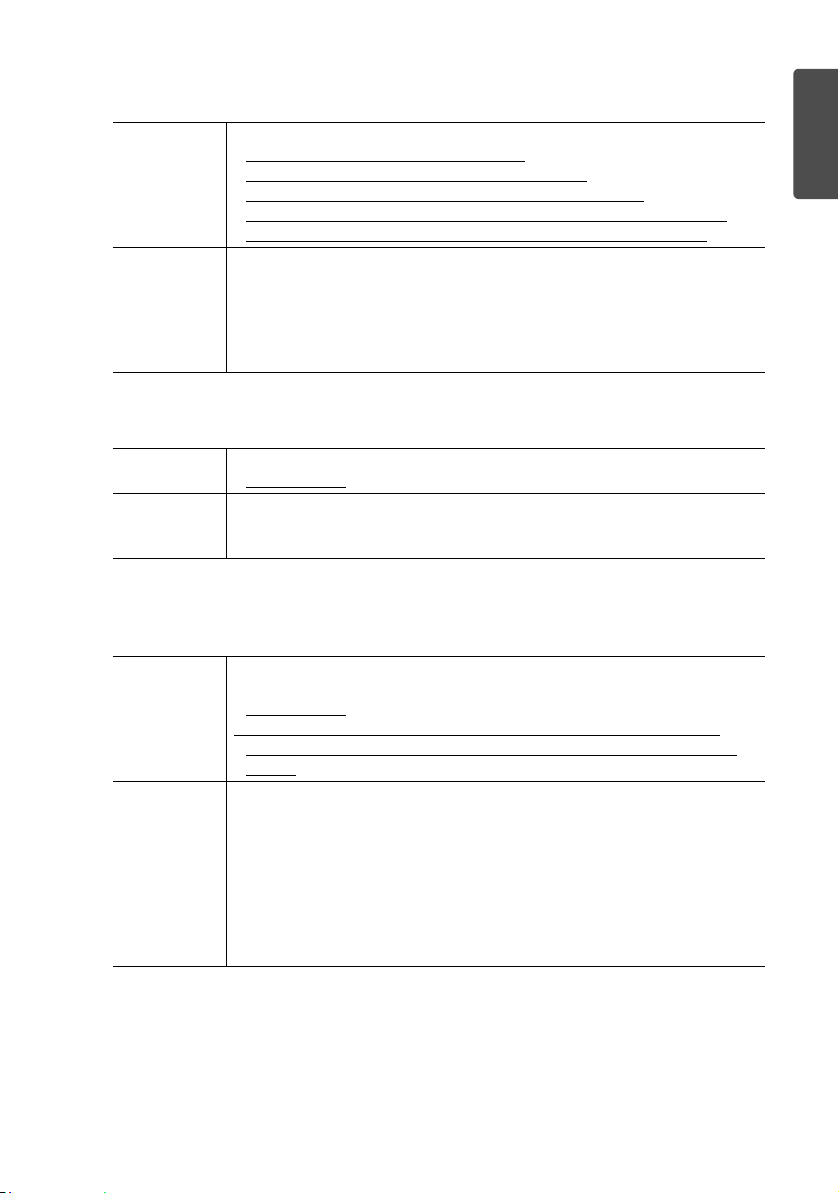
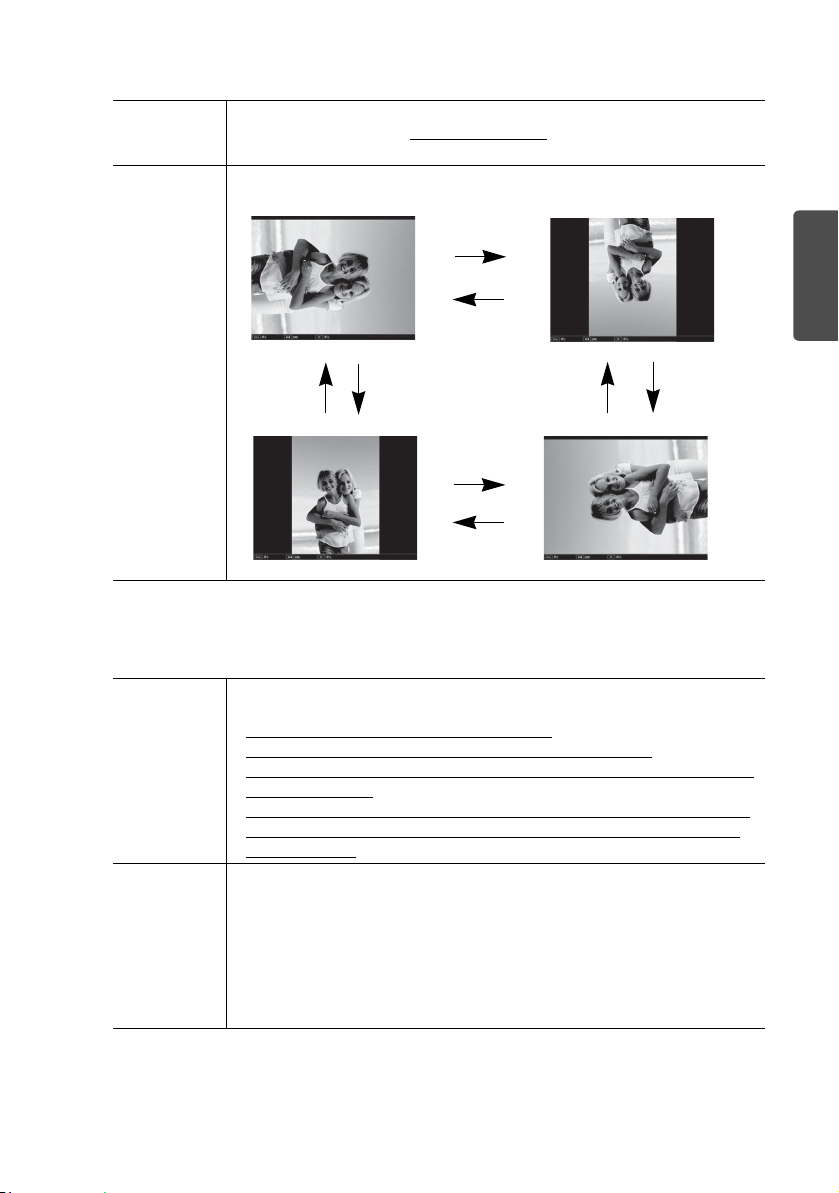
p.50 Please correct the following in procedure 2 of "Rotating the Image"
Incorrect 2 While projecting a JPEG image, tilt the [h] button on the remote
Correct 2 While projecting a JPEG image, tilt the [h] button on the remote
The sub menu is displayed.
<screen shot>
3 Select the target item from the display menu and press the [Enter]
button on the remote control.
Selected image is displayed.
<Non screen shot and procedure 3.>
control to the
<screen shot>
control to the up or down.
Down UP
left or right.
Down
UP
DownUP
UP
Down
2
p.51 Please correct the following in procedure 3 of "Creating and editing a
scenario"
Incorrect 3 Position the cursor to the desired slide, and then press the [Esc] button.
Position the cursor to the desired slide.
To change the order of the slides - Go to step 4.
To set non-display for a slide - Press the [Enter] button.
After selecting whether to change the order in which the slides are
projected, or to set display/non-display, press the [Enter] button.
Correct 3 Position the cursor to the desired slide, and then press the [Esc] button.
The sub menu is displayed.
To change the order of the slides - Select "Move files" / To set display/
non-display – Select "Show/Hide". Then press the [Enter] button.
When selected the "Move files" - Go to step 4.
When selected the "Show/Hide" - Go to step 5.
p.52 Please correct the following in procedure 3 of "Playing a Scenario"
Incorrect 3 Press the [Enter] button on the remote control.
<screen shot>
Correct 3 Press the [Enter] button on the remote control.
<Non screen shot>
Playing a Scenario is started.
p.54 Please correct the following in procedure 3 and 4 of "Projecting Images/
Movies"
English
Incorrect 3 Press the [Enter] button on the remote control.
The image or movie starts to play back.
<screen shot>
4 If the [Enter] button or the [Esc] button on the remote control are
pressed while projecting an image or movie, it returns to the file list
screen.
Correct 3 Press the [Enter] button on the remote control.
The image or movie starts to play back.
<Non screen shot>
4 To return to the file list screen, take the following operation.
• While projecting an image:
Press the [Esc] button on the remote control.
• While projecting movie:
Press the [Esc] button, select "Exit" in the screen displayed then
press the [Enter] button.
3

p.55 Please correct the following in procedure 2 and 3 of "Projecting all Image
and Movie Files in a Folder in Sequence (Slideshow)"
Incorrect 2 Tilt the [h] button on the remote control to position the cursor on the
folder to perform the Slideshow.
3 The Slideshow will be performed and the image and movie files in the
folder will be projected in sequence one at a time.
Correct 2 To select the content, tilt the [h] button on the remote control to
p.83 Please add the following at the bottom of "Error message when starting
up EMP NS Connection"
After a computer connected with EMP NS Connection is disconnected, the
network settings are not restored.
When the computer is started, is the
connection to the wireless LAN made
manually?
Quick Connection Mode
position the cursor on the folder that you want to perform the
Slideshow then press the [Enter] button.
3 Select "Slideshow" from the bottom of the screen by tilting the [h]
button on the remote control, then press the [Enter] button.
The Slideshow will be performed and the image and movie files in the
folder will be projected in sequence one at a time.
Check Remedy
Connect to the Wireless LAN manually.
4
Errata
Les erreurs suivantes viennent d'être découvertes dans le "Guide d'utilisation EasyMP"
(CD-ROM de documentation (Document CD-ROM)) qui accompagne le projecteur.
Veuillez effectuer les corrections qui s'imposent dans le manuel.
p.14 Veuillez corriger ce qui suit dans le tableau
Incorrect .wmv WMV9
Le format audio pouvant être reproduit est WMA99.
Correct .wmv
.ASF
p.14 Veuillez ajouter la phrase suivante sous le tableau "Types de fichiers pris
en charge"
Extension Codec vidéo Codec audio Détails
.mpg MPEG2 MPEG1 Layer 1/2 30 images/sec,
.wmv
.asf
Il est impossible de projeter les fichiers auxquels le DRM (Digital Rights
Management - gestion des droits numériques) a été appliqué.
WMV8 WMA
WMV9 WMA
WMV8/9
Le format audio pouvant être reproduit est WMA.
résolution:720 x 576
30 images/sec,
résolution:720 x 480
30 images/sec,
résolution:720 x 576
Français
p.42 Veuillez corriger les notes du type de fichier ".jpg" dans le tableau
Incorrect Impossible de projeter des images en formats de
couleur CMYK, en formats progressifs et avec une
résolution supérieure à 4608 x
Correct Impossible de projeter des images en formats de
couleur CMYK, en formats progressifs et avec une
résolution supérieure à 4608 x 3072.
p.42 Veuillez ajouter ce qui suit au type de fichier (extension) ".wmv"
Ajoutez .asf
7072.
5
p.42 Veuillez ajouter le tableau suivant sous le tableau
Formats vidéo pris en charge
Extension Codec vidéo Codec audio Détails
.mpg MPEG2 MPEG1 Layer 1/2 30 images/sec,
.mp4 MPEG4 ASP
.wmv
.asf
p.47 Veuillez ajouter l’icône suivante au fichier de certificat électronique
Icône
p.50 Veuillez corriger ce qui suit dans les procédures 2 et 3 de "Fonctions de
base de PC Free"
Incorrect 2 Appuyez sur le bouton [Enter] de la télécommande.
Correct 2 Appuyez sur le bouton [Enter] de la télécommande.
MPEG-4 AVC
WMV8 WMA
WMV9 WMA
Le sous-menu s'affiche.
<capture d’écran>
3 Sélectionnez la cible à l'écran puis appuyez sur le bouton [Enter] de la
télécommande.
L’image sélectionnée s'affiche.
<Non capture d’écran et procédure 3.>
MPEG4 AAC-LC
résolution:720 x 576
30 images/sec,
résolution:720 x 576
30 images/sec,
résolution:720 x 480
30 images/sec,
résolution:720 x 576
6
p.50 Veuillez corriger ce qui suit dans la procédure 2 de "Rotation de l’image"
Incorrect 2 Tout en projetant une image JPEG, faites basculer le bouton [h] de la
télécommande vers la
gauche ou la droite.
<capture d’écran>
Correct 2 Tout en projetant une image JPEG, faites basculer le bouton [h] de la
télécommande vers le haut ou vers le bas.
Vers le bas
Vers le haut
Vers le bas
Vers le haut Vers le haut
Vers le haut
Vers le bas
Vers le bas
p.51 Veuillez corriger ce qui suit dans la procédure 3 de "Création et
modification d’un scénario"
Incorrect 3 Placez le curseur sur la diapositive voulue, puis appuyez sur le bouton
[Esc].
Placez le curseur sur la diapositive voulue.
Pour modifier l'ordre des diapositives, passez à l'étape 4.
Pour faire en sorte qu'une diapositive ne soit pas affichée, appuyez sur
le bouton [Enter].
Une fois que vous avez choisi l'ordre dans lequel les diapositives sont
projetées, ou que vous avez choisi l'affichage ou non, appuyez sur le
bouton [Enter].
Correct 3 Placez le curseur sur la diapositive voulue, puis appuyez sur le bouton
[Esc].
Le sous-menu s'affiche.
Pour modifier l’ordre des diapositives : sélectionnez "Déplacer" / Pour
choisir l’affichage ou non
: sélectionnez "Affich/Cach". Puis appuyez
sur le bouton [Enter].
Une fois "Déplacer" sélectionné, allez à l’étape 4.
Une fois "Affich/Cach" sélectionné, allez à l’étape 5.
Français
7
p.52 Veuillez corriger ce qui suit dans la procédure 3 de "Lecture d’un
scénario"
Incorrect 3 Appuyez sur le bouton [Enter] de la télécommande.
<capture d’écran>
Correct 3 Appuyez sur le bouton [Enter] de la télécommande.
<Non capture d’éran>
La lecture d’un scéario commence.
p.54 Veuillez corriger ce qui suit dans les procédures 3 et 4 de "Projection
d’images et de films"
Incorrect 3 Appuyez sur le bouton [Enter] de la télécommande.
Correct 3 Appuyez sur le bouton [Enter] de la télécommande.
p.55 Veuillez corriger ce qui suit dans les procédures 2 et 3 de "Projection de
tous les fichiers d’image et de film d’un dossier en séquence (Diaporama)"
Incorrect 2 Faites basculer le bouton [h] de la télécommande pour placer le
Correct 2 Pour sélectionner le contenu, faites basculer le bouton [h] de la
La lecture de l'image ou du film démarre.
<capture d’écran>
4 Si vous appuyez sur le bouton [Enter] ou [Esc] de la télécommande
pendant la projection d'une image ou d'un film, vous revenez à la liste
des fichiers.
La lecture de l'image ou du film démarre.
<Non capture d’éran>
4 Pour revenir à la liste des fichiers, effectuez l’opération suivante.
• Tout en projetant une image :
appuyez sur le bouton [Esc] de la télécommande.
• Tout en projetant un film :
appuyez sur le bouton [Esc], sélectionnez "Quitter" dans l’écran qui
s’affiche, puis appuyez sur le bouton [Enter].
curseur sur le dossier qui servira au Diaporama.
3 Le Diaporama sera exécuté et les fichiers d'image et de film du dossier
seront projetés un par un en séquence.
télécommande pour positionner le curseur sur le dossier qui servira au
Diaporama, puis appuyez sur le bouton [Enter].
3 Sélectionnez "Diaporama" en bas de l’écran en faisant basculer le
bouton [h] de la télécommande, puis appuyez sur le bouton [Enter].
Le Diaporama sera exécuté et les fichiers d'image et de film du dossier
seront projetés un par un en séquence.
8

p.85 Veuillez ajouter ce qui suit sous "Message d’erreur au démarrage d’EMP
NS Connection"
Après la déconnexion d’un ordinateur connecté à EMP NS Connection, les
paramètres réseau ne sont pas restaurés.
Vérification Remède
Lorsque l'ordinateur démarre, la connexion
avec le LAN sans fil se fait-elle
manuellement
?
Mode Connexion rapide
Connectez manuellement le LAN sans fil.
Français
9

Erratum
In der "EasyMP Bedienungsanleitung" (Document CD-ROM) im Lieferumfang des
Projektors wurden die folgenden Fehler gefunden. Nehmen Sie bitte die
entsprechenden Korrekturen in der Bedienungsanleitung vor.
S.14 Bitte korrigieren Sie Folgendes in der Tabelle
Falsch .wmv WMV9
Das Audioformat für die Wiedergabe ist WMA99.
Richtig .wmv
.ASF
S.14 Bitte fügen Sie folgenden Satz zur Tabelle "Unterstützte Dateitypen"
hinzu
WMV8/9
Das Audioformat für die Wiedergabe ist WMA.
Erweiterung
.mpg MPEG2 MPEG1 Layer 1/2 30 F/s, Auflösung:720 x 576
.wmv
.asf
Dateien, denen DRM (Digital Rights Management) zugewiesen ist, können nicht
projiziert werden.
S.42 Bitte korrigieren Sie die Hinweise zum Dateityp ".jpg" in der Tabelle
Falsch Wiedergabe von Bildern im CMYK-Farbformat,
Richtig Wiedergabe von Bildern im CMYK-Farbformat,
S.42 Bitte fügen Sie Folgendes zum Dateityp (Erweiterung) ".wmv" hinzu
Hinzufügen .asf
Video-Codec Audio-Codec Detailangaben
WMV8 WMA 30 F/s, Auflösung:720 x 480
WMV9 WMA 30 F/s, Auflösung:720 x 576
progressiven Modus und mit einer höheren
Auflösung als 4608 x 7072 nicht möglich.
progressiven Modus und mit einer höheren
Auflösung als 4608 x 3072 nicht möglich.
10

S.42 Bitte fügen Sie folgende Tabelle unter der Tabelle hinzu
Unterstützte Videoformate
Erweiterung
.mpg MPEG2 MPEG1 Layer 1/2 30 F/s, Auflösung:720 x 576
.mp4 MPEG4 ASP
.wmv
.asf
S.47 Bitte fügen Sie folgendes Symbol unter Elektronisches Zertifikat als Datei
hinzu
Symbol
p.50 Bitte korrigieren Sie Folgendes unter Schritt 2 und 3 des Vorgehens von
"Grundbedienung von PC Free"
Falsch 2 Drücken Sie die [Enter]-Taste der Fernbedienung.
Richtig 2 Drücken Sie die [Enter]-Taste der Fernbedienung.
Video-Codec Audio-Codec Detailangaben
MPEG-4 AVC
WMV8 WMA 30 F/s, Auflösung:720 x 480
WMV9 WMA 30 F/s, Auflösung:720 x 576
Das Untermenü wird angezeigt.
<Screenshot>
3 Wählen Sie den gewünschten Punkt im angezeigten Menü und drücken
Sie die [Enter]-Taste auf der Fernbedienung.
Das gewählte Bild wird angezeigt.
<Kein Screenshot und Schritt 3.>
MPEG4 AAC-LC 30 F/s, Auflösung:720 x 576
Deutsch
11

S.50 Bitte korrigieren Sie Folgendes unter Schritt 2 des Vorgehens von
"Drehen des Bildes"
Falsch 2 Drücken Sie bei der Wiedergabe eines JPEG-Bildes die Taste [h] der
Fernbedienung nach
links oder rechts.
<Screenshot>
Richtig 2 Drücken Sie bei der Wiedergabe eines JPEG-Bildes die Taste [h] der
Fernbedienung nach oben oder unten.
Nach unten
Nach oben
Nach unten
Nach oben
Nach oben
Nach unten
Nach untenNach oben
S.51 Bitte korrigieren Sie Folgendes unter Schritt 3 des Vorgehens von
"Erstellen und Bearbeiten eines Szenarios"
Falsch 3 Bewegen Sie den Cursor auf die gewünschte Folie und drücken Sie die
[Esc]-Taste.
Stellen Sie den Cursor auf die gewünschte Folie.
Zum Ändern der Reihenfolge der Folien
– fahren Sie mit Schritt 4 fort.
Zum Festlegen der Ausblendung einer Folie
– drücken Sie die Taste [Enter].
Drücken Sie die Taste [Enter], nachdem Sie ausgewählt haben, ob die
Projektionsreihenfolge von Folien geändert werden soll, bzw. nachdem
Sie die Anzeige/Ausblendung von Folien festgelegt haben.
Richtig 3 Bewegen Sie den Cursor auf die gewünschte Folie und drücken Sie die
[Esc]-Taste.
Das Untermenü wird angezeigt.
Zum Ändern der Reihenfolge der Folien – wählen Sie "Dateien
verschieben" / Zum Festlegen der Anzeige/Ausblendung – wählen Sie
"Ein/Ausblenden". Drücken Sie anschließend die Taste [Enter].
Wenn Sie "Dateien verschieben" gewählt haben – fahren Sie mit Schritt
4 fort.
Wenn Sie "Ein/Ausblenden" gewählt haben – fahren Sie mit Schritt 5
fort.
12

S.52 Bitte korrigieren Sie Folgendes unter Schritt 3 des Vorgehens von
"Wiedergabe eines Szenarios"
Falsch 3 Drücken Sie die [Enter]-Taste der Fernbedienung.
<Screenshot>
Richtig 3 Drücken Sie die [Enter]-Taste der Fernbedienung.
<Kein Screenshot>
Die Wiedergabe eines Szenarios wird gestartet.
S.54 Bitte korrigieren Sie Folgendes unter Schritt 3 und 4 des Vorgehens von
"Wiedergabe von Bildern/Movies"
Falsch 3 Drücken Sie die [Enter]-Taste der Fernbedienung.
Die Wiedergabe der Bild- bzw. Movie-Datei beginnt.
<Screenshot>
4 Wird während der Wiedergabe die [Enter]-Taste oder die [Esc]-Taste
auf der Fernbedienung gedrückt, wird die Anzeige auf die Dateiliste
zurückgeschaltet.
Richtig 3 Drücken Sie die [Enter]-Taste der Fernbedienung.
Die Wiedergabe der Bild- bzw. Movie-Datei beginnt.
<Kein Screenshot>
4 Zum Zurückschalten der Anzeige auf die Dateiliste gehen Sie wie folgt
vor.
• Bei der Projektion eines Bildes:
Drücken Sie die [Esc]-Taste auf der Fernbedienung.
• Bei der Projektion eines Movies:
Drücken Sie die [Esc]-Taste, wählen Sie im angezeigten Bildschirm
"Verlassen" und drücken Sie anschließend die [Enter]-Taste.
S.55 Bitte korrigieren Sie Folgendes unter Schritt 2 und 3 des Vorgehens von
"Aufeinanderfolgende Projektion von allen Bild- und Movie-Dateien in einem
Ordner (Dia-Show)"
Falsch 2 Drücken Sie die Taste [h] der Fernbedienung, um den Cursor auf den
Ordner mit der Dia-Show zu stellen.
3 Die Dia-Show wird eingeschaltet und die Bild- und Movie-Dateien im
Ordner werden nacheinander wiedergegeben.
Richtig 2 Zum Auswählen des Inhalts drücken Sie die Taste [h] der
Fernbedienung, um den Cursor auf den Ordner mit der Dia-Show
zustellen, und drücken Sie anschließend die [Enter]-Taste.
3 Drücken Sie zum Wählen von "Dia-Show" am unteren Bildschirmrand
die Taste [h] auf der Fernbedienung und anschließend die [Enter]Tas te .
Die Dia-Show wird eingeschaltet und die Bild- und Movie-Dateien im
Ordner werden nacheinander wiedergegeben.
Deutsch
13

S.85 Bitte fügen Sie Folgendes am Ende von "Fehlermeldung beim Start von
EMP NS Connection" hinzu
Nach dem Unterbrechen der Verbindung zu einem mit EMP NS Connection
angeschlossenen Computer werden die Netzwerkeinstellungen nicht
wiederhergestellt.
Überprüfen Sie Abhilfe
Wird die Verbindung zum WLAN beim
Starten des Computers manuell hergestellt?
Schnellverbindung
Stellen Sie die Verbindung zum WLAN
manuell her.
14

Errata corrige
Nella guida "Guida operativa di EasyMP" (Document CD-ROM) in dotazione con il
proiettore, sono stati individuati i seguenti errori. Effettuare le necessarie correzioni sul
manuale.
p.14 Correggere quanto segue nella tabella
Errato .wmv WMV9
Il formato audio riproducibile è WMA99.
Corretto .wmv
.ASF
p.14 Aggiungere la frase seguente sotto la tabella "Tipi di file supportati"
Estensione Codec video Codec audio Dettagli
.mpg MPEG2 MPEG1 Layer 1/2 30 fps, Risoluzione:720 x
.wmv
.asf
Non è possibile proiettare file a cui viene applicato il DRM (Digital Rights
Management).
p.43 Correggere le note del tipo di file ".jpg" nella tabella
WMV8 WMA
WMV9 WMA
WMV8/9
Il formato audio riproducibile è WMA.
576
30 fps, Risoluzione:720 x
480
30 fps, Risoluzione:720 x
576
Italiano
Errato Non è possibile proiettare le immagini in formato di
colori CMYK, modalità progressiva e con una
risoluzione superiore a 4608 x
Corretto Non è possibile proiettare le immagini in formato di
colori CMYK, modalità progressiva e con una
risoluzione superiore a 4608 x 3072.
p.43 Aggiungere quanto segue al tipo di file ".wmv" (estensione)
Aggiungere .asf
7072.
15

p.43 Aggiungere la tabella seguente sotto la tabella
Formati video supportati
Estensione Codec video Codec audio Dettagli
.mpg MPEG2 MPEG1 Layer 1/2 30 fps, Risoluzione:720 x
.mp4 MPEG4 ASP
.wmv
.asf
p.48 Aggiungere l’icona seguente al file per certificato elettronico
Icona
p.51 Correggere quanto segue nelle procedure 2 e 3 della sezione "Operazioni
di base di PC Free"
Errato 2 Premere il tasto [Enter] sul telecomando.
Corretto 2 Premere il tasto [Enter] sul telecomando.
MPEG-4 AVC
WMV8 WMA
WMV9 WMA
Viene visualizzato il sottomenu.
<schermata>
3 Selezionare la voce di destinazione dal menu del display, quindi
premere il tasto [Enter] sul telecomando.
Viene visualizzata l’immagine selezionata.
<Nessuna schermata e procedura 3.>
MPEG4 AAC-LC
576
30 fps, Risoluzione:720 x
576
30 fps, Risoluzione:720 x
480
30 fps, Risoluzione:720 x
576
16

p.51 Correggere quanto segue nella procedura 2 della sezione "Rotazione
dell’immagine"
Errato 2 Mentre viene proiettata un'immagine JPEG, inclinare il tasto [h] del
telecomando verso
<schermata>
Corretto 2 Mentre viene proiettata un'immagine JPEG, inclinare il tasto [h] del
telecomando verso l’alto o il basso.
Basso Alto BassoAlto
p.52 Correggere quanto segue nella procedura 3 della sezione "Creazione o
modifica di uno scenario"
sinistra o destra.
Basso
Alto
Alto
Basso
Italiano
Errato 3 Posizionare il cursore sulla diapositiva desiderata, quindi premere il
tasto [Esc].
Posizionare il cursore sulla diapositiva desiderata.
Per modificare l'ordine delle diapositive - Passare al passaggio 4.
Per impostare la non visualizzazione di una diapositiva
- Premere il tasto [Enter].
Dopo aver selezionato se modificare l'ordine di proiezione delle
diapositive o impostare la visualizzazione/non visualizzazione,
premere il tasto [Enter].
Corretto 3 Posizionare il cursore sulla diapositiva desiderata, quindi premere il
tasto [Esc].
Viene visualizzato il sottomenu.
Per modificare l’ordine delle diapositive – Selezionare "Sposta file" /
Per impostare la visualizzazione/non visualizzazione – Selezionare
"Mostra/Nascondi". Premere quindi il tasto [Enter].
Una volta selezionata l’opzione "Sposta file" – Andare al passaggio 4.
Una volta selezionata l’opzione "Mostra/Nascondi" – Andare al
passaggio 5.
17

p.54 Correggere quanto segue nella procedura 3 della sezione "Riproduzione
di uno scenario"
Errato 3 Premere il tasto [Enter] sul telecomando.
<schermata>
Corretto 3 Premere il tasto [Enter] sul telecomando.
<Nessuna schermata>
Viene avviata la riproduzione di uno scenario.
p.56 Correggere quanto segue nelle procedure 3 e 4 della sezione "Proiezione
di immagini e filmati"
Errato 3 Premere il tasto [Enter] sul telecomando.
Corretto 3 Premere il tasto [Enter] sul telecomando.
Viene avviata la riproduzione dell'immagine o del video.
<schermata>
4 Se se si preme il tasto [Enter] o [Esc] sul telecomando durante la
proiezione di un'immagine o un filmato, viene visualizzata la
schermata dell'elenco dei file.
Viene avviata la riproduzione dell'immagine o del video.
<Nessuna schermata>
4 Per tornare alla schermata con l’elenco dei file, eseguire le seguenti
operazioni.
• Durante la proiezione di un’immagine, premere il tasto [Esc] sul
telecomando.
• Durante la proiezione di un filmato, premere il tasto [Esc],
selezionare "Esci" nella schermata visualizzata, quindi premere il
tasto [Enter].
18

p.57 Correggere quanto segue nelle procedure 2 e 3 della sezione "Proiezione
in sequenza di tutte le immagini e i filmati contenuti in una cartella
(Slideshow)"
Errato 2 Inclinare il tasto [h] del telecomando per posizionare il cursore sulla
Corretto 2 Per selezionare il contenuto, inclinare il tasto [h] sul telecomando in
p.87 Aggiungere quanto segue alla fine della sezione "All’avvio di EMP NS
Connection viene visualizzato un messaggio di errore"
Una volta disconnesso un computer connesso con EMP NS Connection, le
impostazioni di rete non vengono ripristinate.
Se il computer viene avviato, la connessione
alla LAN wireless è eseguita manualmente?
cartella ed eseguire la Slideshow.
3 La Slideshow viene eseguita e le immagini o i filmati contenuti nella
cartella vengono proiettati uno alla volta in sequenza.
modo da posizionare il cursore sulla cartella da cui si desidera eseguire
la presentazione, quindi premere il tasto [Enter].
3 Selezionare "Slideshow" nella parte inferiore della schermata
inclinando il tasto [h] sul telecomando, quindi premere il tasto
[Enter].
La presentazione viene eseguita e le immagini e i filmati contenuti
nella cartella vengono proiettati uno alla volta in sequenza.
Verifica Risoluzione
Collegare manualmente alla LAN wireless.
Connessione rapida
Italiano
19

Errata
Se han encontrado los siguientes errores en la "Guía de funcionamiento de EasyMP"
(Document CD- ROM) provisto con el proyector. Realice las correcciones apropiadas al
manual.
p.15 Corrija los siguientes datos en la tabla
Incorrecto .wmv WMV9
El formato de audio reproducible es WMA99.
Correcto .wmv
.ASF
p.15 Añada la siguiente oración debajo de la tabla "Tipos de archivo
admitidos"
Extensión Códec de vídeo Códec de audio Detalle
.mpg MPEG2 MPEG1 Layer 1/2 30 fps, resolución:720 x 576
.wmv
.asf
Los archivos con DRM (gestión de derechos digitales) no pueden proyectarse.
p.43 Corrija las notas del tipo de archivo ".jpg" en la tabla
Incorrecto No es posible proyectar imágenes en formato de
Correcto No es posible proyectar imágenes en formato de
WMV8 WMA 30 fps, resolución:720 x 480
WMV9 WMA 30 fps, resolución:720 x 576
color CMYK, en modo progresivo y con una
resolución superior a 4.608 x
color CMYK, en modo progresivo y con una
resolución superior a 4.608 x 3.072.
WMV8/9
El formato de audio reproducible es WMA.
7.072.
p.43 Añada los datos siguientes al tipo de archivo (extensión) ".wmv"
Añada .asf
p.43 Añada la siguiente tabla debajo de la tabla
Formatos de vídeo admitidos
Extensión Códec de vídeo Códec de audio Detalle
.mpg MPEG2 MPEG1 Layer 1/2 30 fps, resolución:720 x 576
20
.mp4 MPEG4 ASP
MPEG-4 AVC
.wmv
.asf
WMV8 WMA 30 fps, resolución:720 x 480
WMV9 WMA 30 fps, resolución:720 x 576
MPEG4 AAC-LC 30 fps, resolución:720 x 576

p.48 Añada el siguiente icono al archivo de certificado electrónico
Icono
p.51 Corrija la siguiente información en los procedimientos 2 y 3 de
"Operaciones básicas con PC Free"
Incorrecto 2 Pulse el botón [Enter] del mando a distancia.
Correcto 2 Pulse el botón [Enter] del mando a distancia.
p.51 Corrija la siguiente información en el procedimiento 2 de "Girar la
imagen"
Incorrecto 2 Durante la proyección de una imagen JPEG, incline el botón [h] del
Correcto 2 Mientras proyecta una imagen JPEG, incline el botón [h] del mando a
Se visualiza el sub menú.
<captura de pantalla>
3 Seleccione el elemento de destino desde el menú de visualización y
pulse el botón [Enter] en el mando a distancia.
Se muestra la imagen seleccionada.
<Sin captura de pantalla y procedimiento 3.>
mando a distancia
<captura de pantalla>
distancia arriba o abajo.
Abajo Arriba AbajoArriba
hacia la izquierda o derecha.
Abajo
Arriba
Español
Arriba
Abajo
21

p.53 Corrija la siguiente información en el procedimiento 3 de "Crear y editar
un escenario"
Incorrecto 3 Coloque el cursor en la diapositiva deseada y luego pulse el botón
[Esc].
Coloque el cursor en la diapositiva deseada.
Para cambiar el orden de las diapositivas, vaya al paso 4.
Para definir la no visualización de una diapositiva, pulse el botón
[Enter].
Después de seleccionar si desea cambiar el orden de proyección de las
diapositivas, o de definir la visualización/no visualización, pulse el
botón [Enter].
Correcto 3 Coloque el cursor en la diapositiva deseada y luego pulse el botón
[Esc].
Se visualiza el submenú.
Para cambiar el orden de las diapositivas – Seleccione "Mover"/Para
definir la visualización/no visualización – Seleccione "Mostrar/
Ocultar". A continuación, pulse el botón [Enter].
Cuando se seleccione "Mover" – Continúe en el paso 4.
Cuando se seleccione "Mostrar/Ocultar" – Continúe en el paso 5.
p.54 Corrija la siguiente información en el procedimiento 3 de "Reproducir un
escenario"
Incorrecto 3 Pulse el botón [Enter] del mando a distancia.
Correcto 3 Pulse el botón [Enter] del mando a distancia.
p.55 Corrija la siguiente información en los procedimientos 3 y 4 de
"Proyectar imágenes y películas"
Incorrecto 3 Pulse el botón [Enter] del mando a distancia.
Correcto 3 Pulse el botón [Enter] del mando a distancia.
22
<captura de pantalla>
<Sin captura de pantalla>
Se inicia la reproducción de un escenario.
Empieza la reproducción de la imagen o de la película.
<captura de pantalla>
4 Si pulsa los botones [Enter] o [Esc] del mando a distancia durante la
proyección de una imagen o película, vuelve a la pantalla de lista de
archivos.
Empieza la reproducción de la imagen o de la película.
<Sin captura de pantalla>
4 Para regresar a la pantalla de lista de archivos, efectúe la siguiente
operación.
• Mientras se proyecta una imagen:
Pulse el botón [Esc] del mando a distancia.
• Mientras se proyecta una película:
Pulse el botón [Esc], seleccione "Salir" en la pantalla mostrada y, a
continuación, pulse el botón [Enter].

p.56 Corrija la siguiente información en los procedimientos 2 y 3 de
"Proyectar todos los archivos de imagen y de película de una carpeta
secuencialmente (Ver presen.)"
Incorrecto 2 Incline el botón [h] del mando a distancia para colocar el cursor sobre
Correcto 2 Para seleccionar el contenido, incline el botón [h] en el mando a
p.85 Añada lo siguiente en la parte inferior de "Mensaje de error al iniciar EMP
NS Connection"
Cuando un ordenador conectado con EMP NS Connection se desconecta,
la configuración de red no se restaura.
Cuando el ordenador se inicia, ¿la conexión
a la red LAN inalámbrica se realiza
manualmente?
Modo de conexión rápida
la carpeta y activar la presentación.
3 Se ejecutará la función Presentación y los archivos de imagen y de
película de la carpeta se proyectarán secuencialmente de uno en uno.
distancia para colocar el cursor sobre la carpeta a partir de la cual
desea efectuar la presentación de diapositivas y, a continuación, pulse
el botón [Enter].
3 Seleccione "Ver presen." en la parte inferior de la pantalla inclinando el
botón [h] en el mando a distancia y, a continuación, pulse el botón
[Enter].
Se ejecutará la función Presentación y los archivos de imagen y de
película de la carpeta se proyectarán secuencialmente de uno en uno.
Comprobar Solución
Realice la conexión a la red LAN
inalámbrica manualmente.
Español
23

勘误表
已经在投影机附带的 “EasyMP 操作说明书”(Document CD-ROM)中发现如下错误。请
对手册作相应更正。
第 14 页 请纠正表格中以下内容
错误 .wmv WMV9
可再现的音频格式是 WMA99。
正确 .wmv
.ASF
第 14 页 请在表格 “支持的文件类型”下添加以下句子
扩展名 视频编解码 音频编解码 详情
.mpg MPEG2 MPEG1 Layer 1/2 30 帧 / 秒,分辨率 720 x
.wmv
.asf
不能投影应用 DRM (数字权利管理)的文件。
第 42 页 请纠正表格中文件类型 “.jpg”的注解
错误 不能投影 CMYK 色彩格式、逐行模式及解像度高
正确 不能投影 CMYK 色彩格式、逐行模式及解像度高
WMV8 WMA
WMV9 WMA
于 4608 x
于 4608 x 3072 的影像。
7072 的影像。
WMV8/9
可再现的音频格式是 WMA。
576
30 帧 / 秒,分辨率 720 x
480
30 帧 / 秒,分辨率 720 x
576
第 42 页 请添加以下到文件类型 ( 扩展名 ) “.wmv”
添加 .asf
24

第 42 请在表格下添加以下表格
支持的视频格式
扩展名 视频编解码 音频编解码 详情
.mpg MPEG2 MPEG1 Layer 1/2 30 帧 / 秒,分辨率 720 x
576
.mp4 MPEG4 ASP
MPEG-4 AVC
.wmv
.asf
第 47 页 请添加以下图标到电子证书文件
图标
第 50 页 请纠正 “PC Free 基本操作”的步骤 2 和 3 中以下内容
错误 2 按下遥控器上的 [Enter] 按钮。
正确 2 按下遥控器上的 [Enter] 按钮。
WMV8 WMA
WMV9 WMA
显示子菜单。
< 屏幕截图 >
3 从显示菜单中选择目标项目,然后按下遥控器上的 [Enter] 按
钮。
所选影像显示。
< 无屏幕截图和步骤 3。>
MPEG4 AAC-LC
30 帧 / 秒,分辨率 720 x
576
30 帧 / 秒,分辨率 720 x
480
30 帧 / 秒,分辨率 720 x
576
25

第 50 页 请纠正 “旋转图像”的步骤 2 中以下内容
错误 2 投影 JPEG 图像时,向左或向右倾斜遥控器上的 [h] 按钮。
正确 2 投影 JPEG 图像时,向上或向下倾斜遥控器上的 [h]钮。
第 51 页 请纠正 “建立和编辑脚本”的步骤 3 中以下内容
错误 3 将光标移动到所需幻灯片上,然后按一下 [Esc] 钮。
正确 3 将光标移动到所需幻灯片上,然后按一下 [Esc] 钮。
< 屏幕截图 >
下
上
下上 下上
上
下
将光标移动到所需幻灯片上。
要改变幻灯片的顺序 - 进至步骤 4。
要设定不播放幻灯片 - 按一下 [Enter] 钮。
在选择是否改变投影幻灯片的顺序,或设定是否投影之后,按一
下 [Enter] 钮。
显示子菜单。
要改变幻灯片的顺序 – 选择 “移动文件” / 要设定显示 / 不
显示 – 选择 “显示 / 隐藏”。然后按一下 [Enter] 钮。
选择 “移动文件”时 - 进到步骤 4。
选择 “显示 / 隐藏”时 - 进到步骤 5。
第 52 页 请纠正 “播放脚本”的步骤 3 中以下内容
错误 3 按下遥控器上的 [Enter] 按钮。
正确 3 按下遥控器上的 [Enter] 按钮。
26
< 屏幕截图 >
< 无屏幕截图 >
开始播放脚本。

第 54 页 请纠正 “投影图像 / 视频”的步骤 3 和 4 中以下内容
错误 3 按下遥控器上的 [Enter] 按钮。
正确 3 按下遥控器上的 [Enter] 按钮。
第 55 页 请纠正“连续投影文件夹中的所有图像和视频文件 ( 幻灯片放映 )”的步骤 2
和 3 中以下内容
错误 2 倾斜遥控器上的 [h] 按钮将光标定位在要执行幻灯片放映的文
正确 2 要选择内容,倾斜遥控器上的 [h] 按钮,将光标移动到要执行
图像或视频开始播放。
< 屏幕截图 >
4 投影图像或视频时,如果按下遥控器上的 [Enter] 按钮或
[Esc] 按钮,会返回文件一览屏幕。
图像或视频开始播放。
< 无屏幕截图 >
4 要返回文件一览屏幕,进行以下操作。
· 投影图像时:按一下遥控器上的 [Esc] 按钮。
· 投影视频时:按一下 [Esc] 按钮,在显示的画面上选择 “退
出”,然后按一下 [Enter] 钮。
件夹上。
3 幻灯片放映将运行,文件夹中的图像和视频文件将一个接一个地
连续放映。
幻灯片放映的文件夹,然后按一下 [Enter] 钮。
3 倾斜遥控器上的 [h] 按钮以从屏幕底部选择 “幻灯片放映”,
然后按一下 [Enter] 钮。
幻灯片放映将运行,文件夹中的图像和视频文件将一个接一个地
连续放映。
第 82 页 请在 “启动 EMP NS Connection 时出现错误消息”的底部添加以下内容
用 EMP NS Connection 连接的计算机断开连接时,将不恢复网络设定。
检查下列情况 解决办法
启动计算机时,是否手动连接无线
LAN?
快速连接模式
手动连接无线 LAN。
27

છᄱܑ
已經在投影機附帶的 “EasyMP 操作說明書”(Document CD-ROM)中發現如下錯誤。
請對說明書作相應更正。
ௐ 14 ࢱ ኛ۬ϒܑͽ˭
錯誤
正確
ௐ 14 ࢱ ኛдܑ ņ೯۞ІᙷݭŇ˭ΐͽ˭ή
ᕖЩ ෛᐛበྋቅ ࢰᐛበྋቅ ྎଐ
.mpg MPEG2 MPEG1 Layer 1/2
.wmv
.asf
不能投影應用 DRM (數字權利管理)的文件。
ௐ 42 ࢱ ኛ۬ϒܑІᙷݭ ņ.jpgŇ۞ොྋ
錯誤 不能投影 CMYK 色彩格式、逐行模式及解像度
正確 不能投影 CMYK 色彩格式、逐行模式及解像度
ௐ 42 ࢱ ኛΐͽ˭זІᙷݭ ( ᕖЩ ) ņ.wmvŇ
.wmv WMV9
可再現的音頻格式是 WMA99。
.wmv
.ASF
WMV8 WMA
WMV9 WMA
高於 4608 x
高於 4608 x
7072 的影像。
3072 的影像。
WMV8/9
可再現的音頻格式是 WMA。
30 幀 / 秒,解析度 720 x
576
30 幀 / 秒,解析度 720 x
480
30 幀 / 秒,解析度 720 x
576
28
添加
.asf

ௐ 42 ኛдܑ˭ΐͽ˭ܑ
೯۞ෛᐛё
ᕖЩ ෛᐛበྋቅ ࢰᐛበྋቅ ྎଐ
.mpg MPEG2 MPEG1 Layer 1/2
.mp4 MPEG4 ASP
MPEG-4 AVC
.wmv
.asf
ௐ 47 ࢱ ኛΐͽ˭ဦᇾזᙋІ
圖標
ௐ 50 ࢱ ኛ۬ϒ ņPC Free ۞ૄώፆүŇ۞Վូ 2 3 ͽ˭
WMV8 WMA
WMV9 WMA
MPEG4 AAC-LC
30 幀 / 秒,解析度 720 x
576
30 幀 / 秒,解析度 720 x
576
30 幀 / 秒,解析度 720 x
480
30 幀 / 秒,解析度 720 x
576
錯誤 2 按遙控器上的 [Enter] 鈕。
顯示子選單。
< 屏幕截圖 >
3 從顯示選單選擇目標項目,並按遙控器上的 [Enter] 按鈕。
正確 2 按遙控器上的 [Enter] 鈕。
所選影像顯示。
< 無屏幕截圖和步驟 3。>
29

ௐ 50 ࢱ ኛ۬ϒ ņᖼߍညŇ۞Վូ 2 ͽ˭
錯誤 2 投影 JPEG 映像時,向左或向右傾斜遙控器上的 [h] 鈕。
正確 2 投影 JPEG 映像時,向上或向下傾斜遙控器上的 [h] 鈕。
ௐ 51 ࢱ ኛ۬ϒ ņޙϲበᏭཙώŇ۞Վូ 3 ͽ˭
錯誤 3 將游標移動到所需幻燈片上,然後按一下 [Esc] 鈕。
正確 3 將游標移動到所需幻燈片上,然後按一下 [Esc] 鈕。
< 屏幕截圖 >
下
上
下上 下上
上
下
將游標移動到所需幻燈片上。
要改變幻燈片的順序 - 進至步驟 4。
要設定不播放幻燈片 - 按一下 [Enter] 鈕。
在選擇是否改變投影幻燈片的順序,或設定是否投影之後,按一
下 [Enter] 鈕。
顯示子選單。
要改變幻燈片的順序 – 選擇 “移动文件” / 要設定顯示 / 不顯示
– 選擇 “
選擇 “移动文件”時 - 進到步驟 4。
選擇 “显示 / 隐藏”時 - 進到步驟 5。
显示 / 隐藏”。然後按一下 [Enter] 鈕。
ௐ 52 ࢱ ኛ۬ϒ ņᇫٸཙώŇ۞Վូ 3 ͽ˭
錯誤 3 按遙控器上的 [Enter] 鈕。
正確 3 按遙控器上的 [Enter] 鈕。
30
< 屏幕截圖 >
< 無屏幕截圖 >
開始播放腳本。

ௐ 54 ࢱ ኛ۬ϒ ņԸᇆᇆည / ൺŇ۞Վូ 3 4 ͽ˭
錯誤 3 按遙控器上的 [Enter] 鈕。
正確 3 按遙控器上的 [Enter] 鈕。
ௐ 55 ࢱ ኛ۬ϒņాᜈԸᇆІӵ۞ٙѣߍညІൺІ ( ፶ٸߍ )Ň۞ Վ
ូ 2 3 ͽ˭
錯誤 2 傾斜遙控器上的 [h] 鈕將游標定位在要進行幻燈片放映的文件夾
正確 2 要選擇內容,傾斜遙控器上的 [h] 按鈕,將游標移動到要執行幻
映像或短片開始播放。
< 屏幕截圖 >
4 投影映像或短片時,如果按下遙控器上的 [Enter] 鈕或 [Esc] 鈕,
會返回到文件一覽畫面。
映像或短片開始播放。
< 無屏幕截圖 >
4 要返回文件一覽畫面,進行以下操作。
‧ 投影影像時:按一下遙控器上的 [Esc] 按鈕。
‧ 投影短片時:
按一下 [Esc] 按鈕,在顯示的畫面上選擇 “退出”,然後按一
下 [Enter] 鈕。
上。
3 運行幻燈片放映,一個接一個地連續投影文件夾中的映像文件和
短片文件。
燈片放映的文件夾,然後按一下 [Enter] 鈕。
3 傾斜遙控器上的 [h] 按鈕以從畫面底部選擇 “幻灯片放映”,然
後按一下 [Enter] 鈕。
運行幻燈片放映,一個接一個地連續投影文件夾中的映像文件和
短片文件。
ௐ 82 ࢱ ኛд ņୁજ EMP NS Connection ۞ᄱŇ۞غొΐͽ˭
ϡ EMP NS Connection ాତ۞ཝᕝฟాତĂޭೇშྮనؠĄ
ᑭߤ ྋՙᏱڱ
啟動電腦時,是否手動連接無線 LAN? 手動連接無線 LAN。
ԣిాତሀё
31

32

33

Printed in China
XX.XX-.XA(XXX)
 Loading...