

Epson AlbumMaker 2.0 User Manual
®
User’s Guide
NPD1320-02

No part of this publication may be reproduced, stored in a retrieval system, or transmitted
in any form or by any means, electronic, mechanical, photocopying, recording, or otherwise,
without the prior written permission of Seiko Epson Corporation. The information contained
herein is designed only for use with this product. Epson is not responsible for any use of this
information as applied to other products.
Neither Seiko Epson Corporation nor its affiliates shall be liable to the purchaser of this
product or third parties for damages, losses, costs, or expenses incurred by the purchaser or
third parties as a result of: accident, misuse, or abuse of this product or unauthorized
modifications, repairs, or alterations to this product, or (excluding the U.S.) failure to strictly
comply with Seiko Epson Corporation’s operating and maintenance instructions.
Seiko Epson Corporation shall not be liable for any damages or problems arising from the
use of any options or any consumable products other than those designated as Original Epson
Products or Epson Approved Products by Seiko Epson Corporation.
EPSON is a registered trademark of Seiko Epson Corporation.
Microsoft and Windows are registered trademarks of Microsoft Corporation.
General Notice: Other product names used herein are for identification purpose only and may be
trademarks of their respective companies.
Copyright © 2005 Seiko Epson Corporation. All rights reserved.

Contents
Chapter 1 Introduction and Setup
How to Read This Manual . . . . . . . . . . . . . . . . . . . . . . . . . . . . . . . . . . 8
Cautions and Notes . . . . . . . . . . . . . . . . . . . . . . . . . . . . . . . . . . . 8
Screens . . . . . . . . . . . . . . . . . . . . . . . . . . . . . . . . . . . . . . . . . . . . . . 8
Overview of EPSON AlbumMaker. . . . . . . . . . . . . . . . . . . . . . . . . . . 8
File output . . . . . . . . . . . . . . . . . . . . . . . . . . . . . . . . . . . . . . . . . . . 9
Write to CD . . . . . . . . . . . . . . . . . . . . . . . . . . . . . . . . . . . . . . . . . . 9
Export movie file. . . . . . . . . . . . . . . . . . . . . . . . . . . . . . . . . . . . . 11
Printing. . . . . . . . . . . . . . . . . . . . . . . . . . . . . . . . . . . . . . . . . . . . . 11
EPSON AlbumMaker System Requirements. . . . . . . . . . . . . . . . . . 12
EPSON AlbumMaker Setup. . . . . . . . . . . . . . . . . . . . . . . . . . . . . . . . 13
EPSON AlbumMaker Software Suite Installation . . . . . . . . . 13
Template Converter setup . . . . . . . . . . . . . . . . . . . . . . . . . . . . . 18
Template Data Collection Installation . . . . . . . . . . . . . . . . . . . 21
Chapter 2 Basic Workflow
EPSON AlbumMaker Startup and Shutdown. . . . . . . . . . . . . . . . . 25
EPSON AlbumMaker startup . . . . . . . . . . . . . . . . . . . . . . . . . . 25
EPSON AlbumMaker shutdown . . . . . . . . . . . . . . . . . . . . . . . 26
Creating a New Job . . . . . . . . . . . . . . . . . . . . . . . . . . . . . . . . . . . . . . . 26
Step 1 Selecting a type of creation . . . . . . . . . . . . . . . . . . . . . . 27
Step 2 Selecting photos. . . . . . . . . . . . . . . . . . . . . . . . . . . . . . . . 38
Step 3 Editing layout . . . . . . . . . . . . . . . . . . . . . . . . . . . . . . . . . 41
Step 4 Outputting files . . . . . . . . . . . . . . . . . . . . . . . . . . . . . . . . 52
Writing to CDs . . . . . . . . . . . . . . . . . . . . . . . . . . . . . . . . . . . . . . . . . . . 59
Choosing a default CD writing application . . . . . . . . . . . . . . 59
Step 1 Selecting a type of creation . . . . . . . . . . . . . . . . . . . . . . 61
Step 2 Selecting photos. . . . . . . . . . . . . . . . . . . . . . . . . . . . . . . . 62
Step 3 Writing to CD. . . . . . . . . . . . . . . . . . . . . . . . . . . . . . . . . . 63
Exporting Movie File. . . . . . . . . . . . . . . . . . . . . . . . . . . . . . . . . . . . . . 69
Step 1 Selecting a type of creation . . . . . . . . . . . . . . . . . . . . . . 69
3

Step 2 Selecting photos. . . . . . . . . . . . . . . . . . . . . . . . . . . . . . . . 70
Step 3 Exporting movie . . . . . . . . . . . . . . . . . . . . . . . . . . . . . . . 72
Printing Files. . . . . . . . . . . . . . . . . . . . . . . . . . . . . . . . . . . . . . . . . . . . . 75
Chapter 3 Editing Layouts
Common Editing Operations . . . . . . . . . . . . . . . . . . . . . . . . . . . . . . . 80
Items . . . . . . . . . . . . . . . . . . . . . . . . . . . . . . . . . . . . . . . . . . . . . . . 80
Select and unselect . . . . . . . . . . . . . . . . . . . . . . . . . . . . . . . . . . . 80
Movement . . . . . . . . . . . . . . . . . . . . . . . . . . . . . . . . . . . . . . . . . . 81
Changing the size . . . . . . . . . . . . . . . . . . . . . . . . . . . . . . . . . . . . 82
Rotation . . . . . . . . . . . . . . . . . . . . . . . . . . . . . . . . . . . . . . . . . . . . 83
Deletion . . . . . . . . . . . . . . . . . . . . . . . . . . . . . . . . . . . . . . . . . . . . 84
Replacing items . . . . . . . . . . . . . . . . . . . . . . . . . . . . . . . . . . . . . . 85
Adjusting positions. . . . . . . . . . . . . . . . . . . . . . . . . . . . . . . . . . . 86
Adding shadows to items . . . . . . . . . . . . . . . . . . . . . . . . . . . . . 90
Making transparent items . . . . . . . . . . . . . . . . . . . . . . . . . . . . . 91
Grouping items . . . . . . . . . . . . . . . . . . . . . . . . . . . . . . . . . . . . . . 92
Undo/Redo operation . . . . . . . . . . . . . . . . . . . . . . . . . . . . . . . . 93
Editing Images . . . . . . . . . . . . . . . . . . . . . . . . . . . . . . . . . . . . . . . . . . . 94
Rotating an image . . . . . . . . . . . . . . . . . . . . . . . . . . . . . . . . . . . . 94
Cropping an image . . . . . . . . . . . . . . . . . . . . . . . . . . . . . . . . . . . 96
Applying special effects (filters) . . . . . . . . . . . . . . . . . . . . . . . . 99
Correcting an image . . . . . . . . . . . . . . . . . . . . . . . . . . . . . . . . . 102
Editing Clipart . . . . . . . . . . . . . . . . . . . . . . . . . . . . . . . . . . . . . . . . . . 106
Editing clipart . . . . . . . . . . . . . . . . . . . . . . . . . . . . . . . . . . . . . . 107
Adding clipart . . . . . . . . . . . . . . . . . . . . . . . . . . . . . . . . . . . . . . 107
Editing Text. . . . . . . . . . . . . . . . . . . . . . . . . . . . . . . . . . . . . . . . . . . . . 109
Changing text . . . . . . . . . . . . . . . . . . . . . . . . . . . . . . . . . . . . . . 109
Deleting text. . . . . . . . . . . . . . . . . . . . . . . . . . . . . . . . . . . . . . . . 109
Changing the format of text . . . . . . . . . . . . . . . . . . . . . . . . . . 110
Curving a text frame. . . . . . . . . . . . . . . . . . . . . . . . . . . . . . . . . 111
Editing Shapes . . . . . . . . . . . . . . . . . . . . . . . . . . . . . . . . . . . . . . . . . . 112
Drawing a shape . . . . . . . . . . . . . . . . . . . . . . . . . . . . . . . . . . . . 112
Editing a shape . . . . . . . . . . . . . . . . . . . . . . . . . . . . . . . . . . . . . 113
4

Chapter 4 Troubleshooting
Troubleshooting . . . . . . . . . . . . . . . . . . . . . . . . . . . . . . . . . . . . . . . . . 116
Cannot import images . . . . . . . . . . . . . . . . . . . . . . . . . . . . . . . 116
Current product is beyond repair. . . . . . . . . . . . . . . . . . . . . . 116
Text is not displayed correctly . . . . . . . . . . . . . . . . . . . . . . . . 116
No image thumbnails are displayed in the Images tab. . . . 117
The Start button in the Export Movie File Setting window
is disabled . . . . . . . . . . . . . . . . . . . . . . . . . . . . . . . . . . . . . . . 117
Error Message List . . . . . . . . . . . . . . . . . . . . . . . . . . . . . . . . . . . . . . . 117
Write to CD error messages. . . . . . . . . . . . . . . . . . . . . . . . . . . 117
Select Photos error messages. . . . . . . . . . . . . . . . . . . . . . . . . . 118
Export Movie File error messages . . . . . . . . . . . . . . . . . . . . . 118
Undo/Redo error messages . . . . . . . . . . . . . . . . . . . . . . . . . . 118
Chapter 5 Reference Information
EPSON AlbumMaker Folder Configuration . . . . . . . . . . . . . . . . . 120
Using Template Converter . . . . . . . . . . . . . . . . . . . . . . . . . . . . . . . . 121
About Template Converter . . . . . . . . . . . . . . . . . . . . . . . . . . . 121
Applications Supported by Template Converter. . . . . . . . . 121
Operating procedures . . . . . . . . . . . . . . . . . . . . . . . . . . . . . . . 122
Uninstalling the Software . . . . . . . . . . . . . . . . . . . . . . . . . . . . . . . . . 126
Deleting the template data collection. . . . . . . . . . . . . . . . . . . 126
Deleting the program . . . . . . . . . . . . . . . . . . . . . . . . . . . . . . . . 129
Uninstalling Template Converter. . . . . . . . . . . . . . . . . . . . . . 130
Customizing EPSON Photo Memory Player . . . . . . . . . . . . . . . . . 131
About copyrights on sound files
for EPSON Photo Memory Player . . . . . . . . . . . . . . . . . . . 131
Selecting the background music
for EPSON Photo Memory Player . . . . . . . . . . . . . . . . . . . 132
Displaying information when replaying. . . . . . . . . . . . . . . . 132
Customizing Movie File . . . . . . . . . . . . . . . . . . . . . . . . . . . . . . . . . . 133
About copyrights on a sound file for the movie file . . . . . . 133
Selecting background music for a movie file . . . . . . . . . . . . 133
5

Chapter 6 Dialog Boxes
Registering/Managing Photos. . . . . . . . . . . . . . . . . . . . . . . . . . . . . 136
Select Photos window . . . . . . . . . . . . . . . . . . . . . . . . . . . . . . . 136
Editing/Managing Pages . . . . . . . . . . . . . . . . . . . . . . . . . . . . . . . . . 138
Main window for pages . . . . . . . . . . . . . . . . . . . . . . . . . . . . . . 138
Editing/Managing Items . . . . . . . . . . . . . . . . . . . . . . . . . . . . . . . . . 140
Main window for items . . . . . . . . . . . . . . . . . . . . . . . . . . . . . . 140
Editing Images . . . . . . . . . . . . . . . . . . . . . . . . . . . . . . . . . . . . . . . . . . 143
Color Balance dialog box . . . . . . . . . . . . . . . . . . . . . . . . . . . . . 143
Crop/Cutout dialog box . . . . . . . . . . . . . . . . . . . . . . . . . . . . . 144
Soft Edge dialog box. . . . . . . . . . . . . . . . . . . . . . . . . . . . . . . . . 145
Brightness/Contrast dialog box . . . . . . . . . . . . . . . . . . . . . . . 146
Convert to Sepia/Monochrome dialog box . . . . . . . . . . . . . 147
Floating Windows . . . . . . . . . . . . . . . . . . . . . . . . . . . . . . . . . . . . . . . 148
Dimensions dialog box. . . . . . . . . . . . . . . . . . . . . . . . . . . . . . . 148
Transparency dialog box . . . . . . . . . . . . . . . . . . . . . . . . . . . . . 149
Fill/Stroke dialog box . . . . . . . . . . . . . . . . . . . . . . . . . . . . . . . 149
Rotate/Flip dialog box. . . . . . . . . . . . . . . . . . . . . . . . . . . . . . . 151
Shadow dialog box . . . . . . . . . . . . . . . . . . . . . . . . . . . . . . . . . . 151
Text dialog box . . . . . . . . . . . . . . . . . . . . . . . . . . . . . . . . . . . . . 152
Preferences . . . . . . . . . . . . . . . . . . . . . . . . . . . . . . . . . . . . . . . . . . . . . 153
Preferences dialog box . . . . . . . . . . . . . . . . . . . . . . . . . . . . . . . 153
Saving Jobs/Templates . . . . . . . . . . . . . . . . . . . . . . . . . . . . . . . . . . . 159
Save as dialog box. . . . . . . . . . . . . . . . . . . . . . . . . . . . . . . . . . . 159
Save as Template dialog box . . . . . . . . . . . . . . . . . . . . . . . . . . 160
Job Info dialog box . . . . . . . . . . . . . . . . . . . . . . . . . . . . . . . . . . 161
Outputting Files . . . . . . . . . . . . . . . . . . . . . . . . . . . . . . . . . . . . . . . . . 162
Print dialog box. . . . . . . . . . . . . . . . . . . . . . . . . . . . . . . . . . . . . 162
Export dialog box . . . . . . . . . . . . . . . . . . . . . . . . . . . . . . . . . . . 163
Write to CD Setting dialog box. . . . . . . . . . . . . . . . . . . . . . . . 164
Export Movie File Setting dialog box. . . . . . . . . . . . . . . . . . . 168
Glossary
Index
6

Chapter 1
Introduction and Setup
How to Read This Manual . . . . . . . . . . . . . . . . . . . . . . . . . . . . . . . . . . 8
Cautions and Notes . . . . . . . . . . . . . . . . . . . . . . . . . . . . . . . . . . . 8
Screens . . . . . . . . . . . . . . . . . . . . . . . . . . . . . . . . . . . . . . . . . . . . . . 8
Overview of EPSON AlbumMaker. . . . . . . . . . . . . . . . . . . . . . . . . . . 8
File output . . . . . . . . . . . . . . . . . . . . . . . . . . . . . . . . . . . . . . . . . . . 9
Write to CD . . . . . . . . . . . . . . . . . . . . . . . . . . . . . . . . . . . . . . . . . . 9
Export movie file. . . . . . . . . . . . . . . . . . . . . . . . . . . . . . . . . . . . . 11
Printing. . . . . . . . . . . . . . . . . . . . . . . . . . . . . . . . . . . . . . . . . . . . . 11
EPSON AlbumMaker System Requirements. . . . . . . . . . . . . . . . . . 12
EPSON AlbumMaker Setup. . . . . . . . . . . . . . . . . . . . . . . . . . . . . . . . 13
EPSON AlbumMaker Software Suite Installation . . . . . . . . . 13
Template Converter setup . . . . . . . . . . . . . . . . . . . . . . . . . . . . . 18
Template Data Collection Installation . . . . . . . . . . . . . . . . . . . 21
Introduction and Setup 7

How to Read This Manual
Cautions and Notes
Cautions
must be observed to avoid damage to your equipment.
c
Notes
contain important information and useful tips on the operation of your
product.
Screens
This manual uses the screens from Windows XP in the
descriptions.
Note:
The templates for individual products shown on the screen may differ
from the content of the actual product template.
Overview of EPSON AlbumMaker
The EPSON AlbumMaker software suite offers a variety of useful
features. It imports images and combines those images with a
template. You can then choose to save your product to hard disk
or print it from your EPSON printer. You can also record those
images to CD or export them as a movie file.
Files output from AlbumMaker can be printed at very high
quality with the EPSON Professional Portrait Printing System
(PPPS) using EPPLayout.
See the PPPS user’s guide or the EPPLayout online manual
regarding detailed operations for EPPLayout.
Introduction and Setup 8

File output
AlbumMaker provides various types of products (such as
albums) by arranging photographs with a template. For details,
refer to “Creating a New Job” on page 26.
Write to CD
AlbumMaker provides the Write to CD feature that allows the
writing of images and EPSON Photo Memory Player to a CD. For
details, refer to “Writing to CDs” on page 59.
EPSON Photo Memory Player overview
EPSON Photo Memory Player is a new type of player software
that allows images recorded to CD to be played as a slide show
together with background music.
Introduction and Setup 9

EPSON Photo Memory Player system requirements
Windows:
OS: Windows XP/2000 Professional/Me/98 SE
CPU: Intel Pentium III compatible processor, 500MHz or
better
Memory: 64 MB or more
(The amount of memory required may differ
depending on conditions of use.)
Video card: 32 bit 4 MB VRAM (800 × 600), or better
CD-ROM
16 × speed or faster
drive:
Sound: Sound Blaster compatible sound card and speakers
Browser: Internet Explorer 4.0 or later, Netscape Navigator 4.0
or later, or equivalent
Macintosh:
OS: Mac OS 9.x/Mac OS X 10.2.x/10.3.x/10.4.x
CPU: Power PC G3, 800 MHz or better recommended
Memory: 64 MB or more
(The amount of memory required may differ
depending on conditions of use.)
Video card: 32 bit 4 MB VRAM (800 × 600) or better
CD-ROM
16 × speed or faster
drive:
Browser: Internet Explorer 4.5 or later, Netscape Navigator 4.0
or later, Safari 1.0 or later, or equivalent
Introduction and Setup 10

For operating methods, refer to the help menu in the lower left
corner of the EPSON Photo Memory Player main screen.
Export movie file
AlbumMaker offers an Export Movie File feature that allows you
to export movie files created from a series of images. For details,
refer to “Exporting Movie File” on page 69.
Printing
AlbumMaker allows the direct printing of products on EPSON
printers. For details, refer to “Printing Files” on page 75.
Introduction and Setup 11

EPSON AlbumMaker System Requirements
The following system is required to operate AlbumMaker.
OS: Windows XP (Home Edition/Professional)
SP2 or later
Windows 2000 (Professional) SP4 or later
*1
*1
CPU: Pentium 4, 1.7 GHz or better
Memory: 512 MB or more (1 GB or more recommended)
HDD: Program installation drive - 1 GB or more
*2
Video Resolution: 1024 × 768 or larger, full color or better
DVD/CD-RW
drive:
*1
NTFS file system is recommended.
*2
5 GB or more free space is required when exporting a movie file.
Necessary when using the Write to CD
feature.
Note:
❏ AlbumMaker will not work if EPPLayout has not been installed.
Install EPPLayout before using AlbumMaker.
❏ You must log on as the computer administrator to use AlbumMaker.
❏ To write to DVD, a third-party authoring application must be
installed.
Introduction and Setup 12

EPSON AlbumMaker Setup
AlbumMaker setup consists of installation of the software suite
and template collection. When setting up AlbumMaker, first
install the software suite, then the template collection.
Note:
You must log on as the computer administrator before installing
AlbumMaker.
EPSON AlbumMaker Software Suite Installation
The AlbumMaker software suite is installed from the System
CD-ROM.
Installation Menu
The following programs can be installed.
❏ EPSON AlbumMaker 2.0
Installs AlbumMaker 2.0.
❏ EPSON AlbumMaker Template Converter 2.0
Installs Template Converter 2.0. Template Converter is a
plug-in for Adobe Photoshop 6.0/7.0/CS. It is used to directly
export layout frames (DNF files) used for templates from
Adobe Photoshop.
❏ Adobe Reader 7.0
Installs Adobe Reader 7.0. Adobe Acrobat Reader 4.0 or later
is required to read the EPSON AlbumMaker User’s Guide.
❏ ICC Profile (Adobe)
Installs Adobe ICC profiles.
Introduction and Setup 13
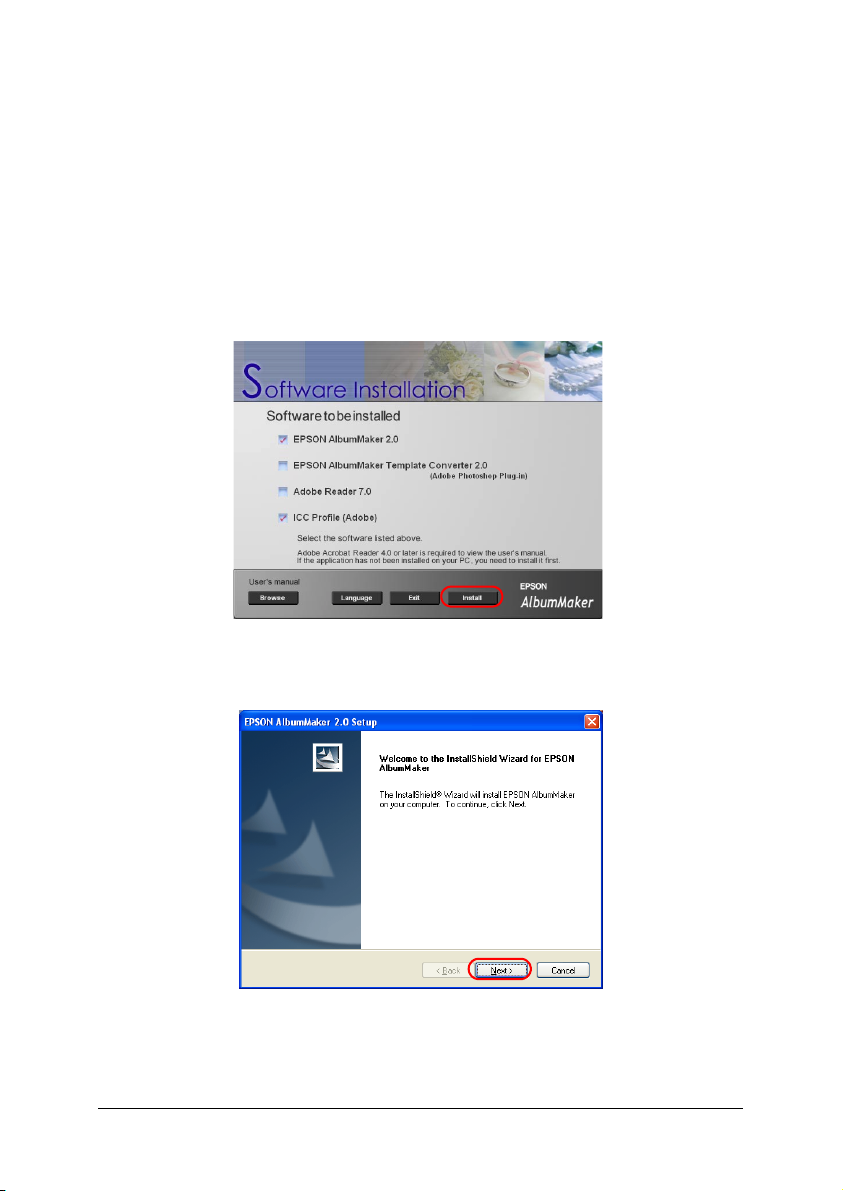
1. Place the System CD into the CD-ROM drive.
The Software Installation menu will start automatically.
Note:
If the Software Installation menu does not start, use My Computer
to view the contents of the CD-ROM and double-click the
EPSETUP.EXE file.
2. Select the programs to install, and click the Install button.
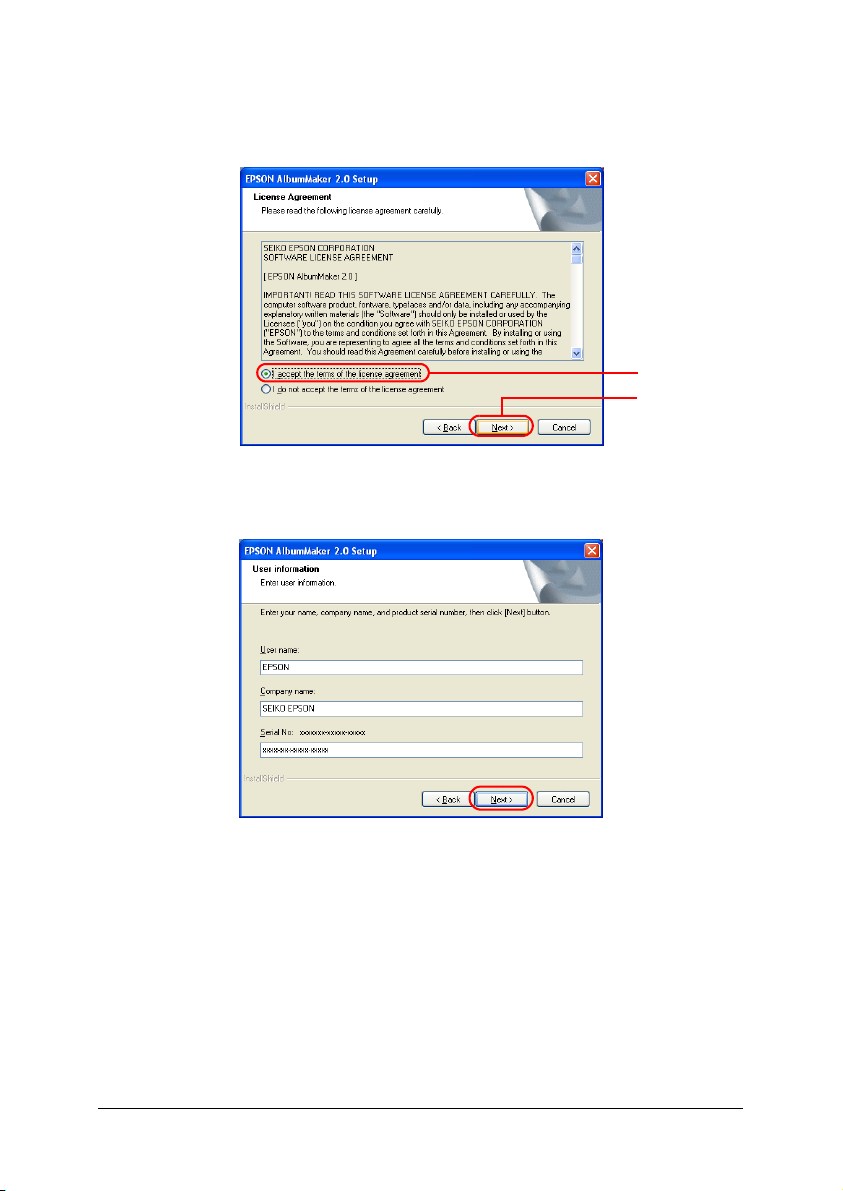
3. Click the Next button.
Introduction and Setup 14
4. Select I accept the terms of the license agreement, and
click the Next button.
1
2
5. Enter the user information, and click the Next button.
❏ The name registered for the current computer user is
automatically displayed in the User name field. Change
it as required.
❏ Enter your company name, affiliated organization names,
etc. in the Company name field.
Introduction and Setup 15
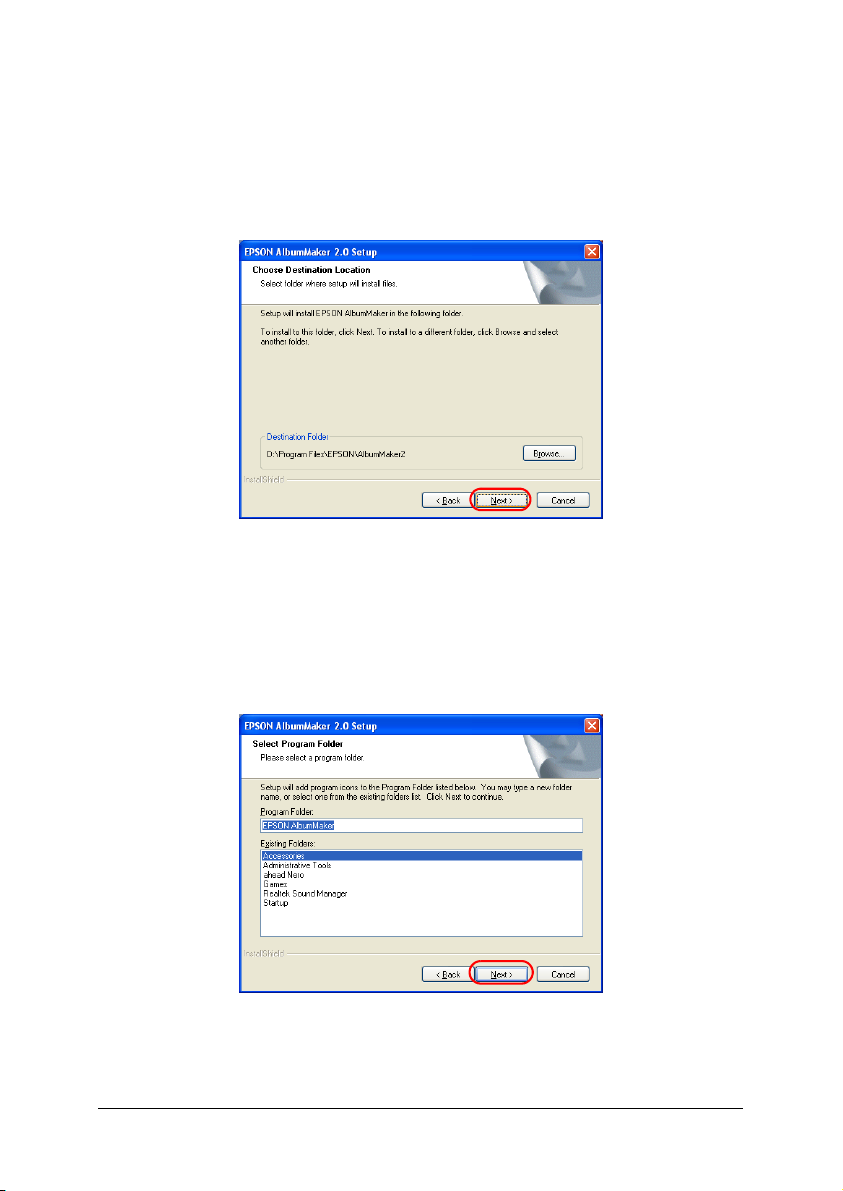
❏ Enter the serial number from the sticker affixed to the
CD-ROM case for the Serial No field.
6. Confirm the installation folder for the program, and click the
Next button.
Normally, the installation destination of the program does not
need to be changed. However, if a change is required, click
the Browse button to select a different installation folder.
7. Confirm the program folder, and click the Next button.
Introduction and Setup 16
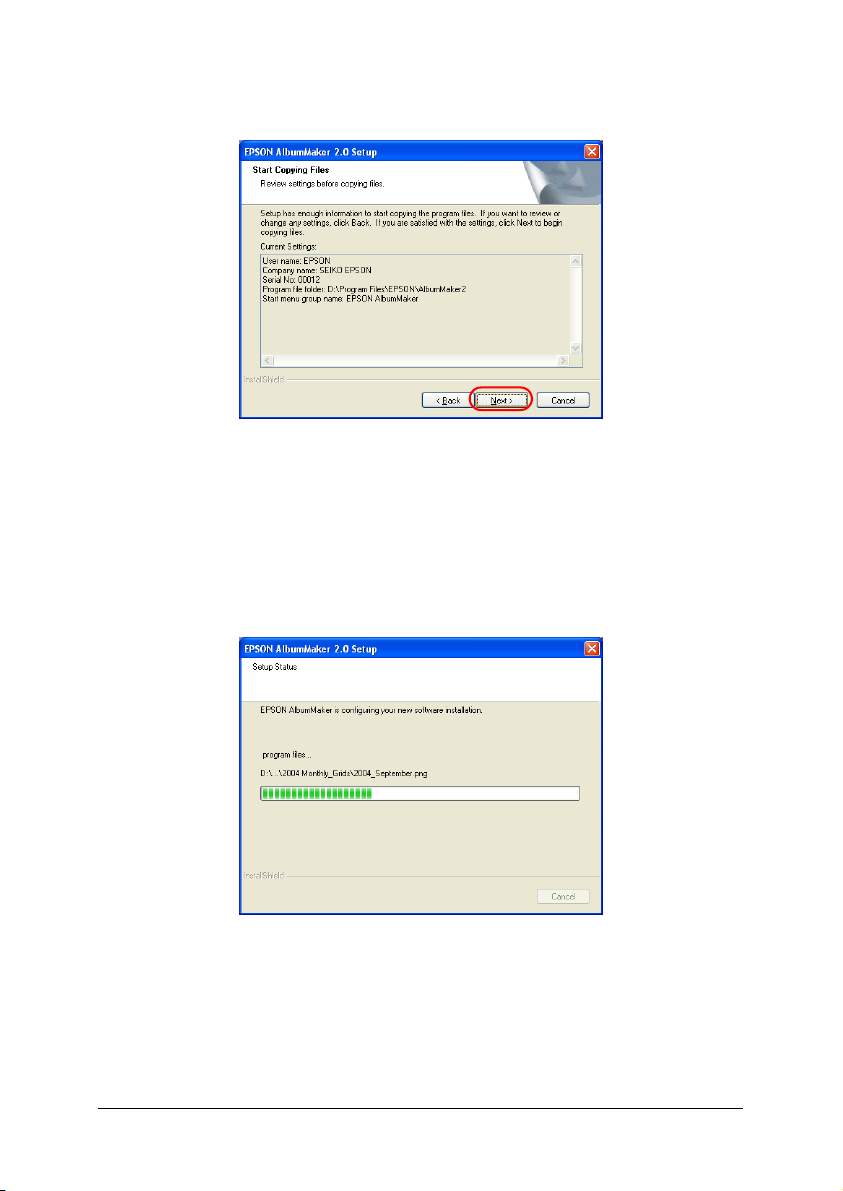
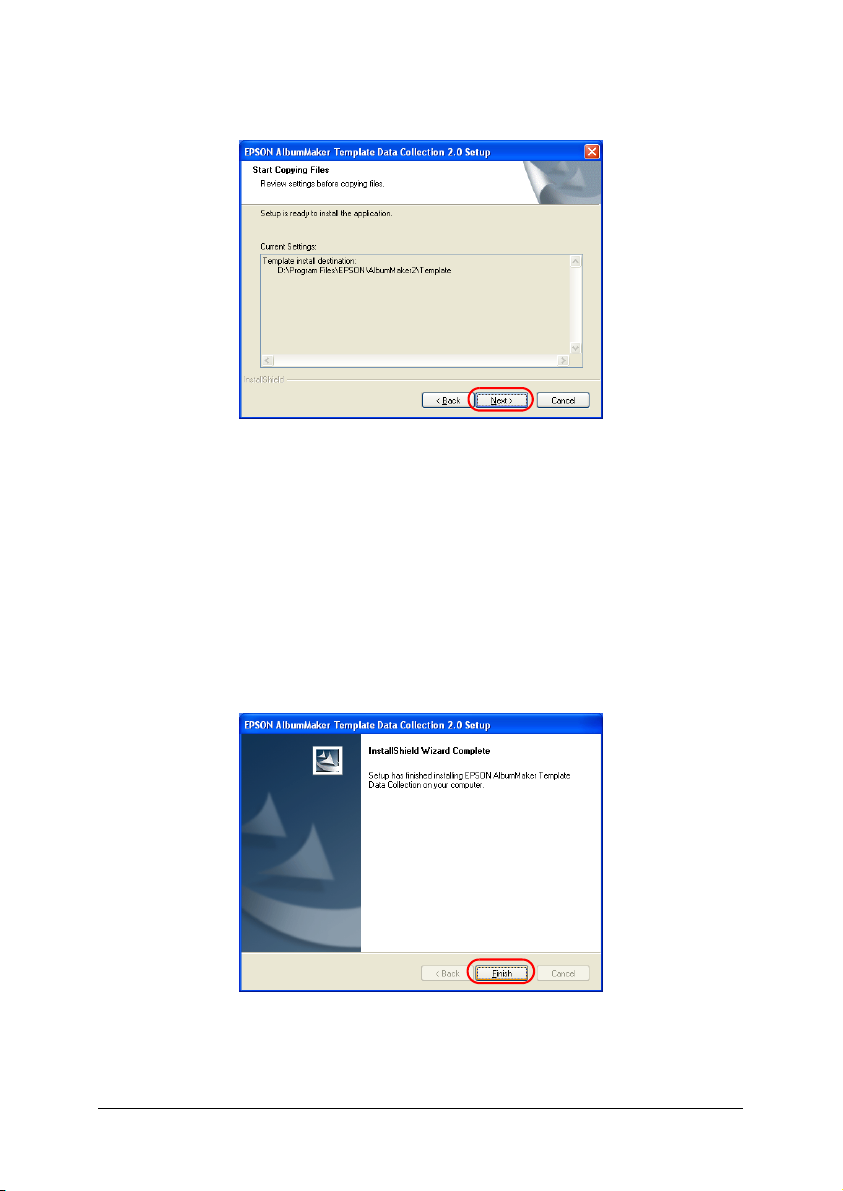
8. Confirm the settings, and click the Next button.
The settings that have been made are displayed under
Current Settings. Check the contents to make sure they are
correct.
When the Next button is clicked, InstallShield Wizard will
begin installing the program.
When installation is complete, the InstallShield Wizard
Complete screen is displayed.
Introduction and Setup 17
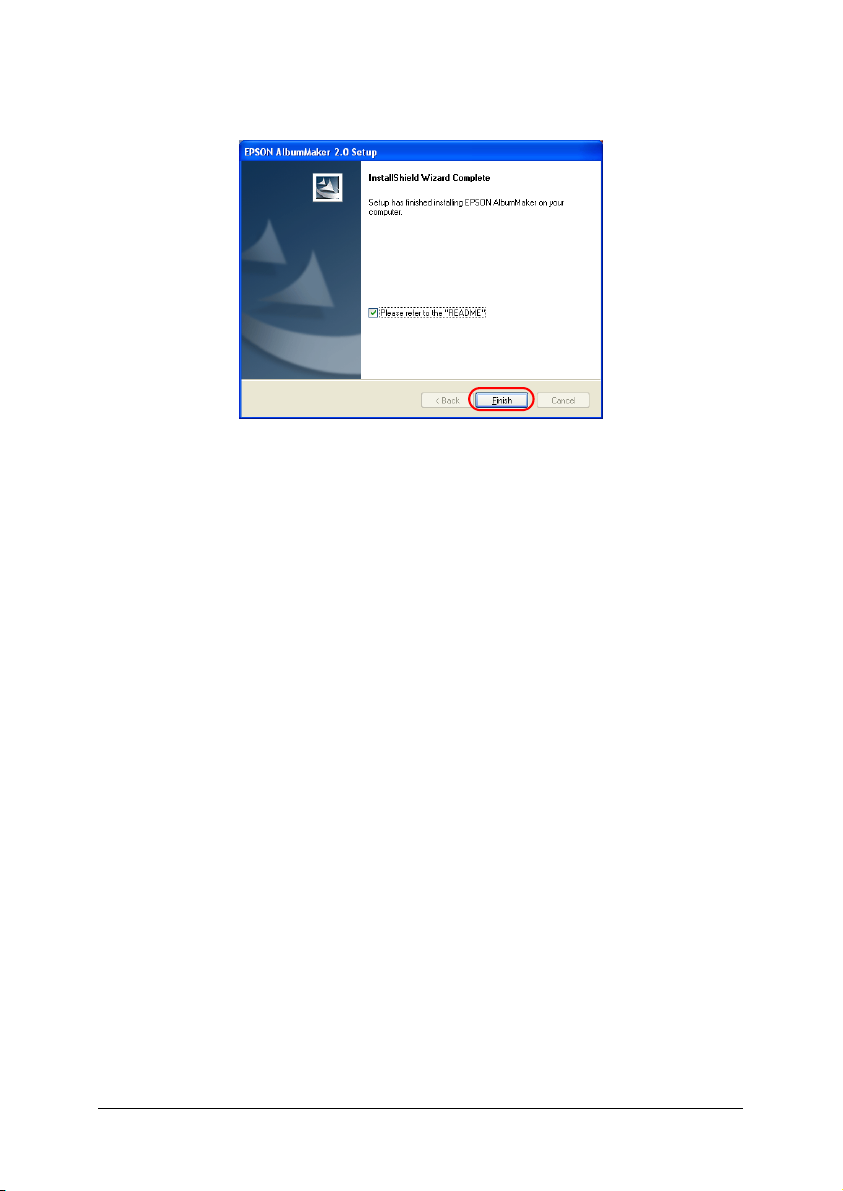
9. Click the Finish button.
If the Please refer to the “README” check box is selected,
the readme file will be displayed. Be sure to read this file, since
it will contain the latest updated information that could not
be added to the manual.
Note:
If other programs were selected on the Software Installation menu,
program installation will continue. Otherwise, the exit screen is
displayed.
This completes the AlbumMaker installation. The shortcut
icon for AlbumMaker is created on the desktop.
Template Converter setup
When EPSON AlbumMaker Template Converter 2.0 is selected
in the Software Installation menu, the EPSON AlbumMaker
Template Converter Setup starts up automatically.
Introduction and Setup 18
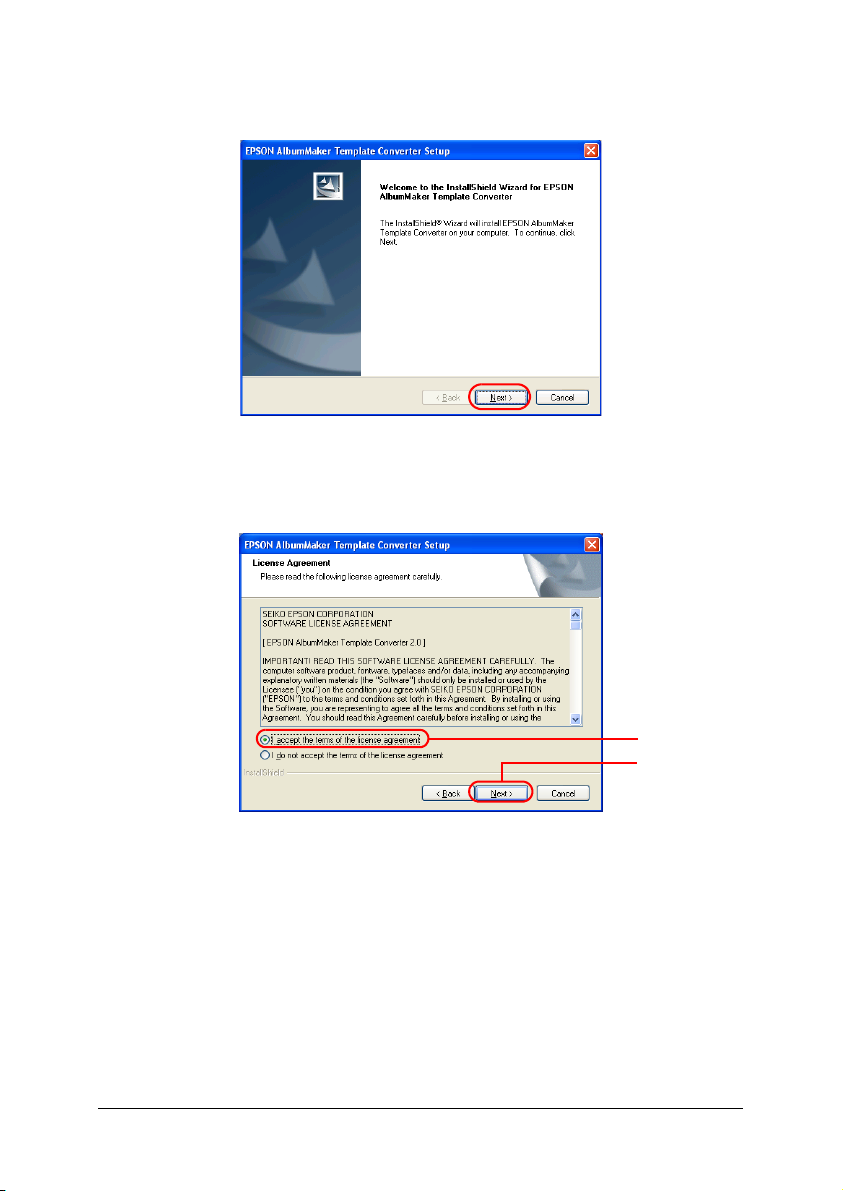
1. Click the NEXT button.
2. Select I accept the terms of the license agreement, and
click the Next button.
1
2
Introduction and Setup 19
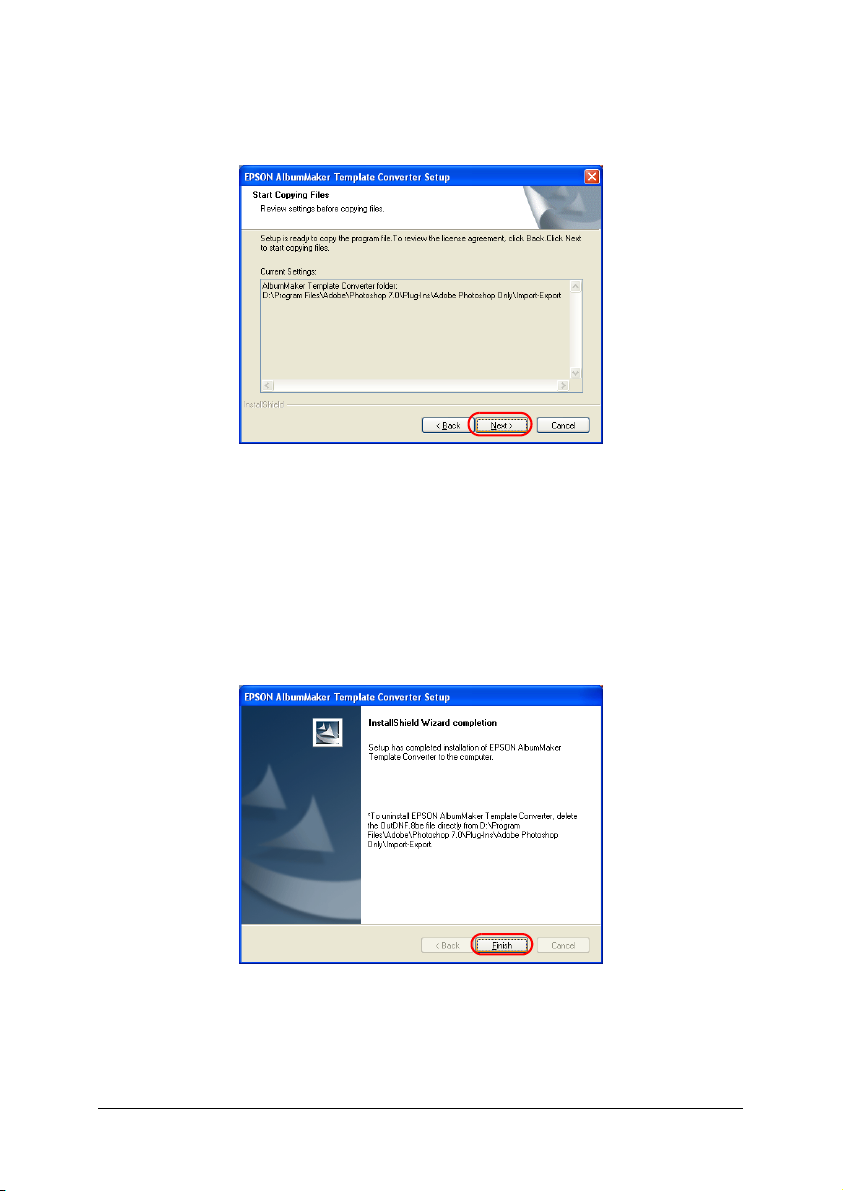
3. Confirm the installation folder for the data files, and click the
Next button.
When the Next button is clicked, the program is copied to the
selected folder.
When setup is complete, the InstallShield Wizard completion
screen is displayed.
4. Click the Finish button.
This completes Template Converter setup.
Introduction and Setup 20

5. Click the Exit button on the Software Installation screen.
This completes the program installation. Continue with the
following procedure to install the template collection.
Template Data Collection Installation
The templates for EPSON AlbumMaker are installed from the
Template CD-ROM.
1. Place the Template CD-ROM into the CD-ROM drive.
The InstallShield Wizard will start automatically.
Note:
If the InstallShield Wizard does not start automatically, use
Explorer to view the content of the CD-ROM, and double-click the
Setup.exe file.
Introduction and Setup 21

2. Click the Next button.
3. Select I accept the terms of the license agreement, and
click the Next button.
1
2
Introduction and Setup 22
4. Confirm the settings, and click the Next button.
Confirm the template installation destination displayed
under Current Settings.
When the Next button is clicked, EPSON AlbumMaker
Template Data Collection Setup will begin installing the
templates. When installation is complete, the InstallShield
Wizard Complete screen is displayed.
5. Click the Finish button.
This completes the installation of the template data collection.
Introduction and Setup 23

Chapter 2
Basic Workflow
EPSON AlbumMaker Startup and Shutdown. . . . . . . . . . . . . . . . . 25
EPSON AlbumMaker startup . . . . . . . . . . . . . . . . . . . . . . . . . . 25
EPSON AlbumMaker shutdown . . . . . . . . . . . . . . . . . . . . . . . 26
Creating a New Job . . . . . . . . . . . . . . . . . . . . . . . . . . . . . . . . . . . . . . . 26
Step 1 Selecting a type of creation . . . . . . . . . . . . . . . . . . . . . . 27
Step 2 Selecting photos. . . . . . . . . . . . . . . . . . . . . . . . . . . . . . . . 38
Step 3 Editing layout . . . . . . . . . . . . . . . . . . . . . . . . . . . . . . . . . 41
Step 4 Outputting files . . . . . . . . . . . . . . . . . . . . . . . . . . . . . . . . 52
Writing to CDs . . . . . . . . . . . . . . . . . . . . . . . . . . . . . . . . . . . . . . . . . . . 59
Choosing a default CD writing application . . . . . . . . . . . . . . 59
Step 1 Selecting a type of creation . . . . . . . . . . . . . . . . . . . . . . 61
Step 2 Selecting photos. . . . . . . . . . . . . . . . . . . . . . . . . . . . . . . . 62
Step 3 Writing to CD. . . . . . . . . . . . . . . . . . . . . . . . . . . . . . . . . . 63
Exporting Movie File. . . . . . . . . . . . . . . . . . . . . . . . . . . . . . . . . . . . . . 69
Step 1 Selecting a type of creation . . . . . . . . . . . . . . . . . . . . . . 69
Step 2 Selecting photos. . . . . . . . . . . . . . . . . . . . . . . . . . . . . . . . 70
Step 3 Exporting movie . . . . . . . . . . . . . . . . . . . . . . . . . . . . . . . 72
Printing Files. . . . . . . . . . . . . . . . . . . . . . . . . . . . . . . . . . . . . . . . . . . . . 75
Basic Workflow 24
EPSON AlbumMaker Startup and Shutdown
This section explains the startup and shutdown procedures for
AlbumMaker.
EPSON AlbumMaker startup
The startup method for Windows XP is described here.
Note:
Before starting up AlbumMaker, make sure that EPPLayout has been
installed.
AlbumMaker will not work if EPPLayout has not been installed.
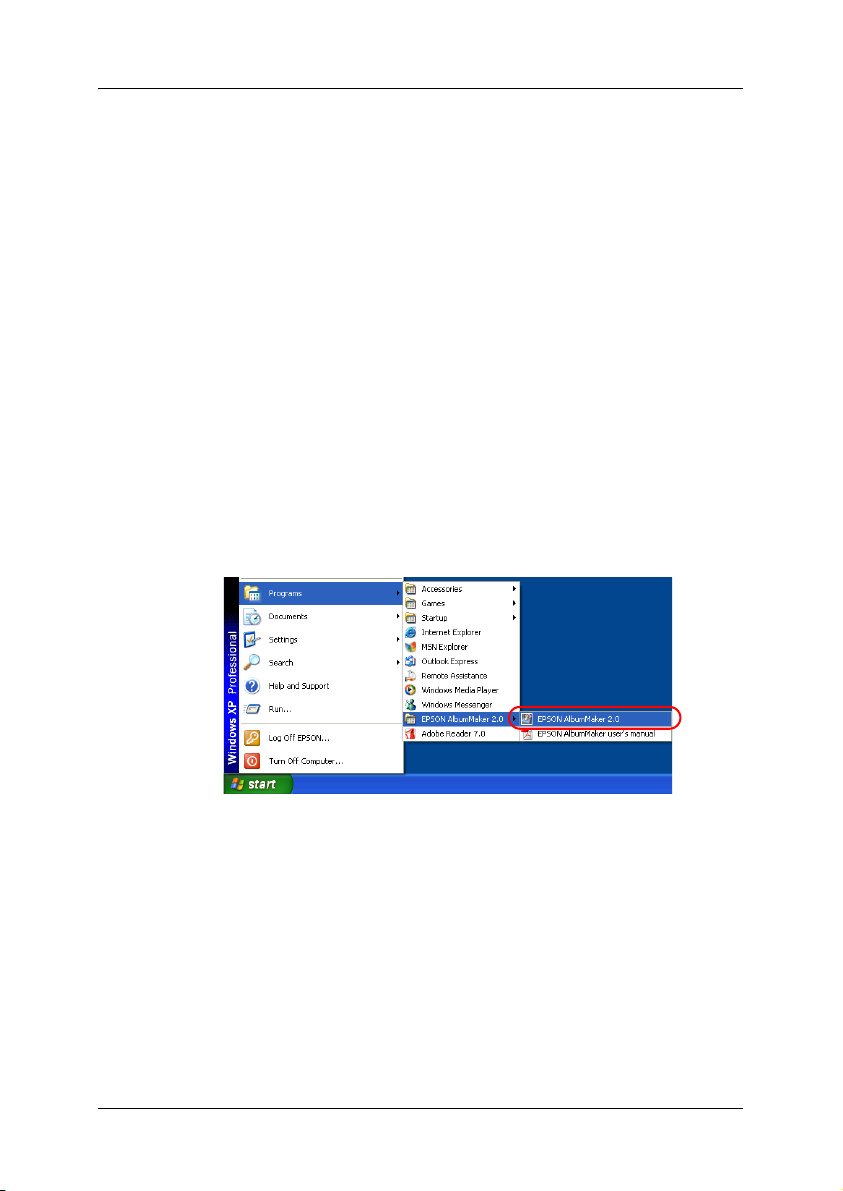
1. Select Start - All programs - EPSON AlbumMaker 2.0 EPSON AlbumMaker 2.0.
Note:
If you are using Classic Start menu for Windows XP or Windows 2000,
select Start - Program - EPSON AlbumMaker 2.0 - EPSON
AlbumMaker 2.0.
Basic Workflow 25
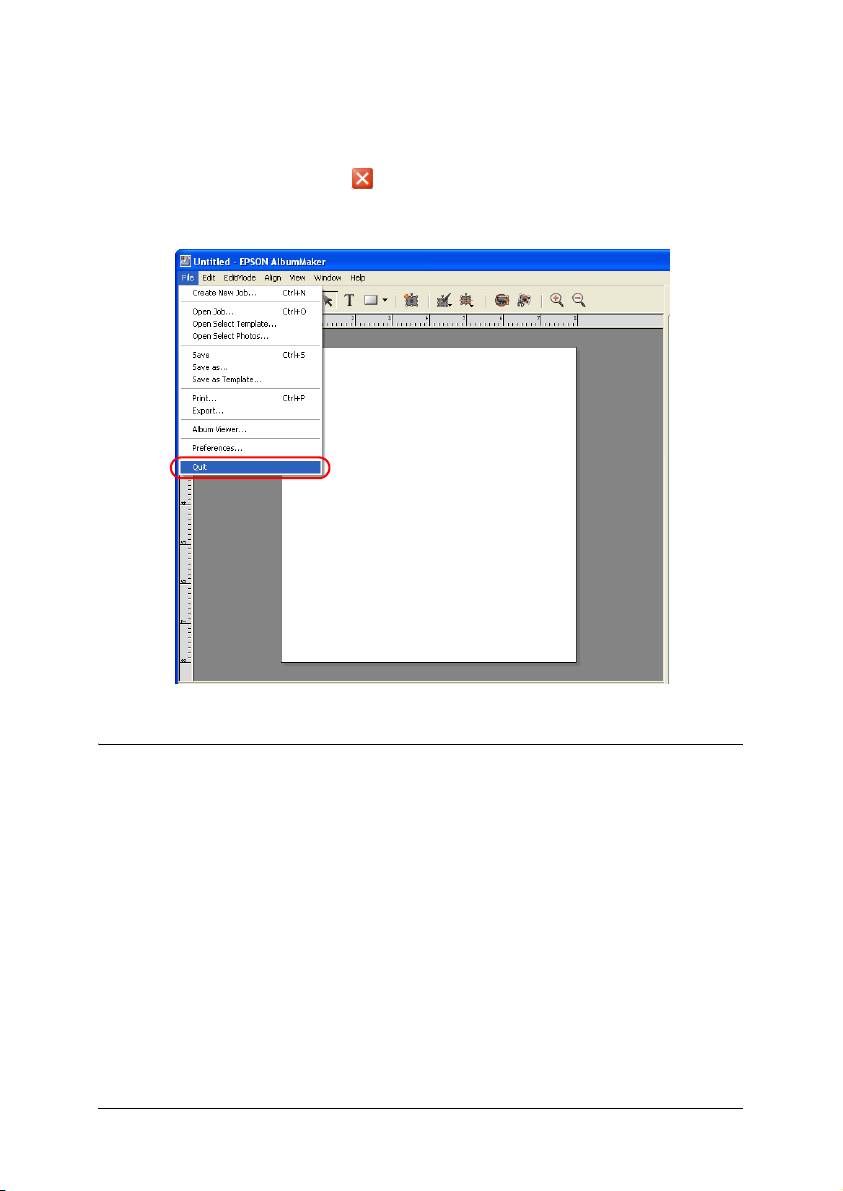
EPSON AlbumMaker shutdown
To shutdown AlbumMaker, select File - Quit in the main window.
You can also click the Close button in the top right corner of
the window.
Creating a New Job
In AlbumMaker, products are created from existing templates or
on freemount pages that you can design yourself. Regardless of
the types of layout, operation procedures for creating products
are similar.
The basic file output procedures on AlbumMaker are explained
below.
Basic Workflow 26
Step 1 Selecting a type of creation
1. Click the Create New Job button on the startup screen of
AlbumMaker.
Note:
If the main window is displayed, click the Create New Job button.
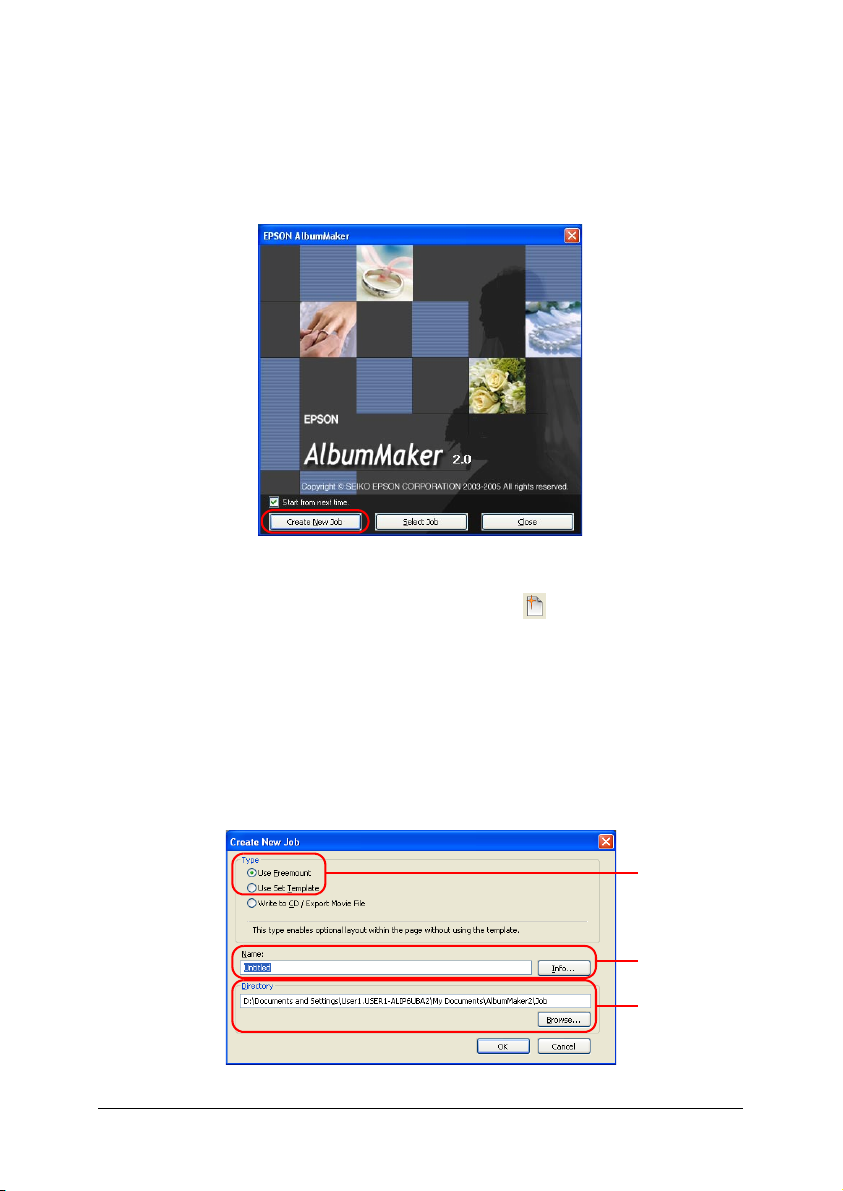
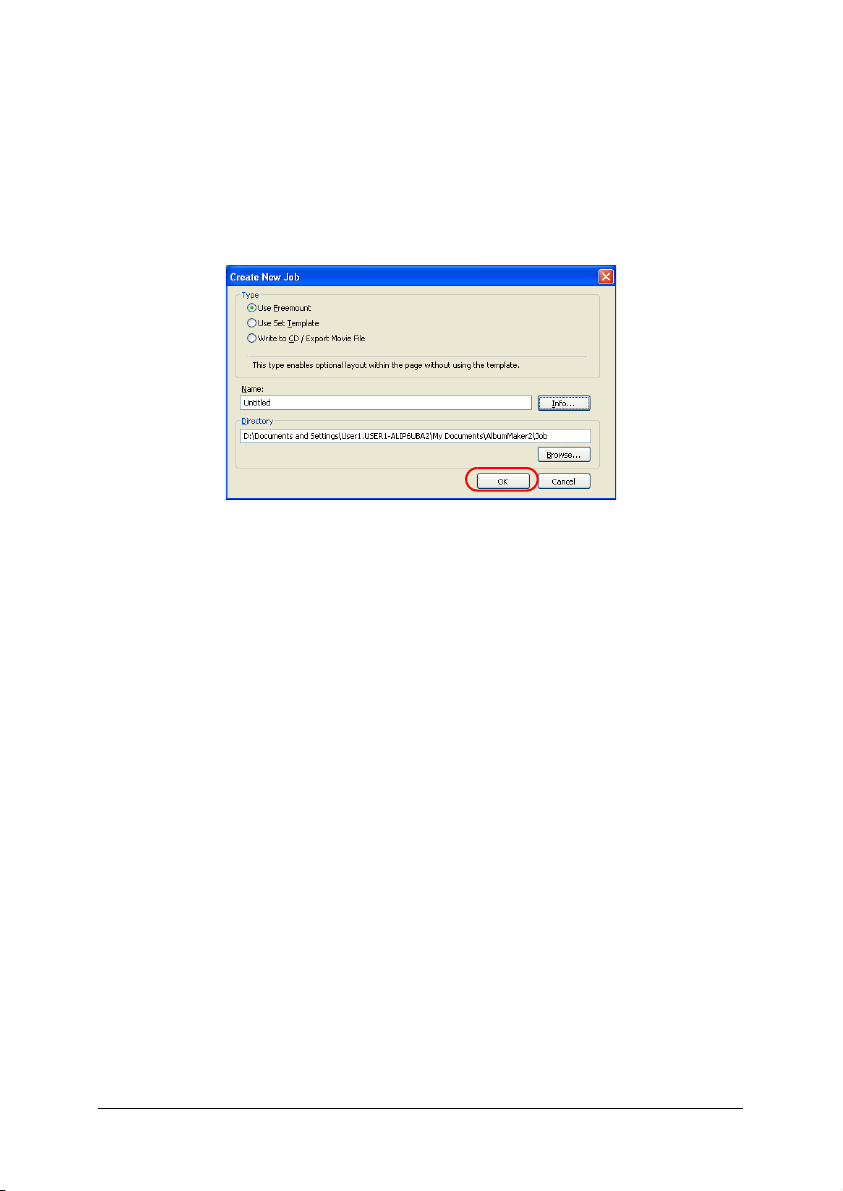
2. Specify a new job in the Create New Job dialog box.
Select Use Freemount to create a product on a freemount
page, or Use Set Template to create a product from
templates. Enter the name for the job, and then click the
Browse button and select the folder for saving the job.
1
2
3
Basic Workflow 27
Note:
Click the Info button, and then enter the customer name and
comment for the job in the Job Info dialog box. Click the OK button
to return to the Create New Job dialog box.
3. Click the OK button.
When the OK button is clicked, a dialog box is displayed
depending on the selected type of page.
❏ When Use Freemount is selected, refer to “Setting job
information” on page 28 to specify the freemount page.
❏ When Use Set Template is selected, refer to “Selecting a
template” on page 35 to select a template.
Setting job information
Specify the paper, the number of pages, and the background
design for a new job in the Freemount dialog box.
Basic Workflow 28
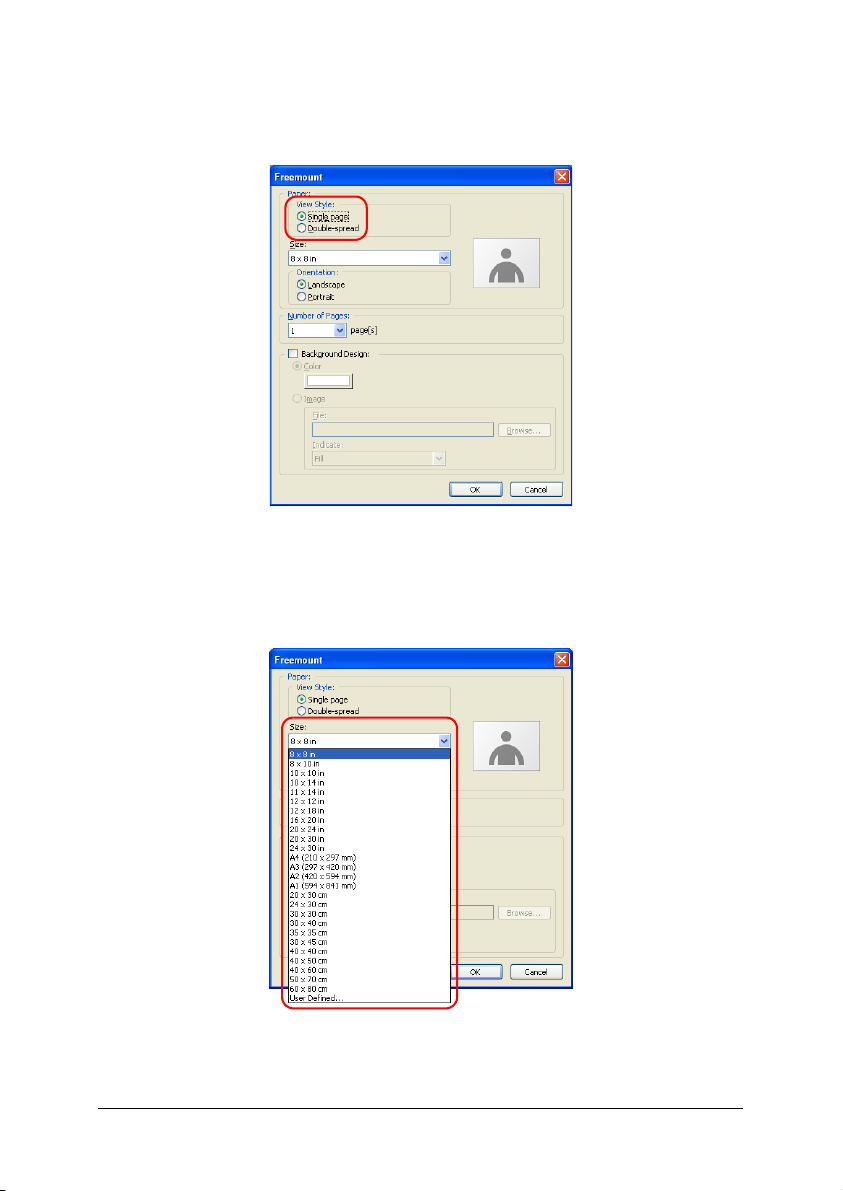
1. Select the View Style from Single page or Double-spread
for the page.
2. Specify the Size of the paper.
Select the page size from the Size drop down list.
Basic Workflow 29
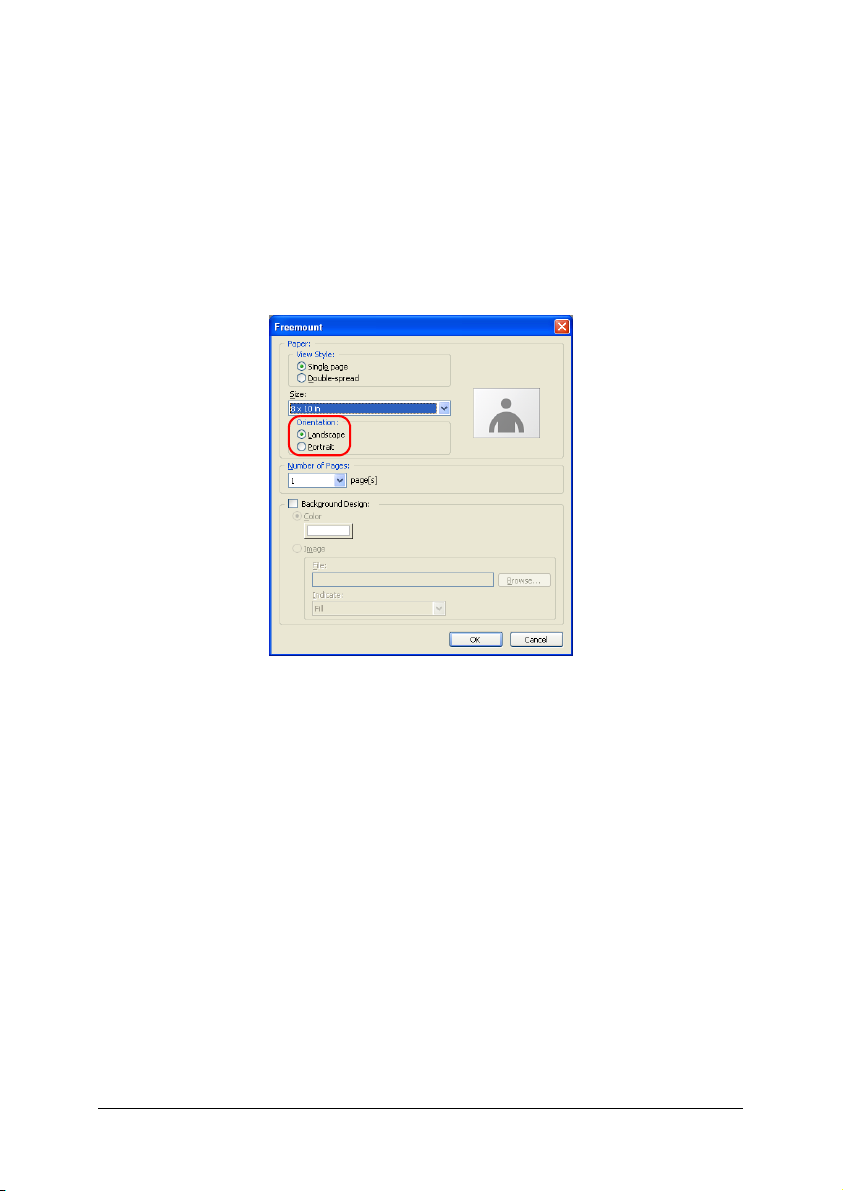
Note:
If the required page size is not listed, select User Defined, and enter
Name, Width, and Height in the Custom Page Size dialog box. Click
the New button to register the custom page size, and then click the
Close button.
3. Select the Orientation from Landscape and Portrait for the
page.
4. Enter the Number of pages.
Basic Workflow 30
 Loading...