

Page 1
User’s Guide
NPD4437-00 EN
Page 2

Epson AcuLaser CX29 Series User’s Guide
Contents
Preface
Copyright and Trademarks.............................................................. 11
About License......................................................................... 13
Using This Guide...................................................................... 14
Conventions...................................................................... 14
Illegal Copies and Printouts.............................................................. 15
Product Features....................................................................... 15
Features.......................................................................... 15
Chapter 1 Specifications
Copy Function......................................................................... 19
Print Function......................................................................... 21
Scan Function......................................................................... 22
Fax Function.......................................................................... 24
Direct Fax Function.................................................................... 25
Chapter 2 Basic Operation
Main Components..................................................................... 26
Front View........................................................................ 26
Rear View......................................................................... 27
Automatic Document Feeder (ADF).................................................. 28
Operator Panel.................................................................... 28
Securing the Printer................................................................ 31
Preparing Printer Hardware.............................................................. 32
Installing Optional Accessories........................................................... 33
Installing the Additional Memory Module.............................................. 34
Installing the Optional Duplex Unit................................................... 39
Installing the Optional 250-Sheet Paper Cassette Unit. . .................................. 44
Setting Initial Settings on the Operator Panel. .............................................. 49
Printing a Panel Settings Page............................................................ 50
Power Saver Mode...................................................................... 50
Exiting the Power Saver Mode........................................................ 51
Contents 2
Page 3

Epson AcuLaser CX29 Series User’s Guide
Chapter 3 Printer Management Software
Print and Scan Drivers.................................................................. 52
EpsonNet Config....................................................................... 52
Creating an Administrative Password................................................. 52
Status Monitor (Windows Only).......................................................... 53
Address Book Editor.................................................................... 54
Express Scan Manager.................................................................. 54
Chapter 4 Network Basics
Overview of Network Setup and Configuration.............................................. 56
Connecting Your Printer. . . . . ........................................................... 56
Connecting Printer to Computer or Network........................................... 58
Setting the IP Address................................................................... 60
TCP/IP and IP Addresses............................................................ 60
Automatically Setting the Printer’s IP Address.......................................... 61
Dynamic Methods of Setting the Printer’s IP Address.................................... 61
Assigning an IP Address (for IPv4 Mode).............................................. 62
Verifying the IP Settings............................................................. 64
Printing and Checking the System Settings Page......................................... 65
Installing Print Driver on Computers Running Windows..................................... 65
Identifying Print Driver Pre-install Status (For Network Connection Setup)................. 65
Inserting the Software Disc.......................................................... 67
USB Connection Setup.............................................................. 67
Network Connection Setup.......................................................... 68
Setting Up for Shared Printing....................................................... 69
Installing Print Driver on Computers Running Mac OS X..................................... 75
Installing Print Driver on Computers Running Linux (CUPS)................................. 75
Installing the Print Driver........................................................... 75
Setting Up the Queue............................................................... 76
Setting the Default Queue........................................................... 80
Specifying the Printing Options...................................................... 81
Setting the Password for Authority as the Printer Administrator. .......................... 83
Uninstalling the Print Driver......................................................... 83
Chapter 5 Printing Basics
About Print Media..................................................................... 86
Contents 3
Page 4

Epson AcuLaser CX29 Series User’s Guide
Print Media Usage Guidelines........................................................ 86
Print Media That Can Damage Your Printer............................................ 87
Supported Print Media.................................................................. 88
Print Media Dimensions............................................................ 88
Usable Print Media................................................................. 88
Loading Print Media.................................................................... 91
Capacity.......................................................................... 92
Loading Print Media in the Standard 250-Sheet Tray and the Optional 250-Sheet Paper Cassette
Unit........................................................................... 92
Loading Print Media in the Single Sheet Feeder (SSF). . . . . ............................... 97
Setting Paper Sizes and Types........................................................... 100
Setting Paper Sizes................................................................ 101
Setting Paper Types............................................................... 101
Printing............................................................................. 102
Sending a Job to Print.............................................................. 102
Canceling a Print Job.............................................................. 102
Using the Stored Print Function..................................................... 104
Direct Print Using the USB Storage Device............................................ 106
Printing PDF Files Using the lpr Command........................................... 107
Duplex Printing................................................................... 108
Selecting Printing Options.......................................................... 110
Printing Custom Size Paper......................................................... 115
Auditron........................................................................ 118
Checking Status of Print Data....................................................... 120
Printing a Report Page............................................................. 120
Printer Settings................................................................... 121
Printing With Web Services on Devices (WSD)............................................ 122
Adding Roles of Print Services...................................................... 123
Printer Setup..................................................................... 123
Chapter 6 Copying
Loading Paper for Copying............................................................. 126
Preparing a Document. . . .............................................................. 126
Making Copies From the Document Glass................................................. 126
Making Copies From the ADF........................................................... 129
Setting Copy Options.................................................................. 130
Number of Copies................................................................. 130
Color........................................................................... 130
Contents 4
Page 5

Epson AcuLaser CX29 Series User’s Guide
Paper Supply..................................................................... 131
M.F. Paper Size................................................................... 132
M.F. Paper Type.................................................................. 133
Collated......................................................................... 135
Reduce/Enlarge................................................................... 136
Document Size................................................................... 138
Document Type.................................................................. 139
Lighten/Darken................................................................... 140
Sharpness........................................................................ 141
Color Saturation.................................................................. 142
Auto Exposure.................................................................... 142
Color Balance.................................................................... 143
2-Sided.......................................................................... 145
N-Up........................................................................... 145
Margin Top/Bottom............................................................... 147
Margin Left/Right................................................................. 148
Margin Middle................................................................... 149
Changing the Default Settings........................................................... 150
Chapter 7 Scanning
Scanning Overview.................................................................... 151
Installing the Scan Driver............................................................... 151
For Windows..................................................................... 151
For Mac OS X.................................................................... 152
Scanning to a Computer................................................................ 153
Scanning From the Operator Panel................................................... 153
Scanning Using the TWAIN Driver.................................................. 154
Scanning Using the WIA Driver..................................................... 156
Using a Scanner on the Network......................................................... 158
Overview........................................................................ 158
Confirming a Login name and Password Using SMB.................................... 159
Specifying a Destination to Store the Document Using SMB.............................. 161
Configuring the Printer Settings..................................................... 172
Sending the Scanned File to the Network.............................................. 178
Scanning to a USB Storage Device........................................................ 179
Sending an E-Mail With the Scanned Image............................................... 180
Setting an E-Mail Address Book..................................................... 180
Sending an E-mail With the Scanned File............................................. 182
Contents 5
Page 6

Epson AcuLaser CX29 Series User’s Guide
Adjusting Scanning Options............................................................ 183
Adjusting the Default Scan Settings.................................................. 183
Changing the Scan Settings for an Individual Job....................................... 186
Scanner Connection Tool............................................................... 187
IP Address Settings................................................................ 187
Password Settings................................................................. 189
Chapter 8 Faxing
Connecting the Telephone Line.......................................................... 190
Configuring Fax Initial Settings.......................................................... 191
Setting Your Region............................................................... 191
Setting the Printer ID.............................................................. 192
Setting the Time and Date.......................................................... 193
Changing the Clock Mode.......................................................... 194
Sending a Fax......................................................................... 194
Loading an Original Document on the ADF........................................... 194
Loading an Original Document on the Document Glass................................. 195
Resolution....................................................................... 196
Lighten/Darken................................................................... 197
Inserting a Pause. ................................................................. 198
Sending a Fax Automatically........................................................ 198
Sending a Fax Manually............................................................ 199
Confirming Transmissions......................................................... 200
Automatic Redialing............................................................... 201
Sending a Delayed Fax................................................................. 201
Sending a Fax from the Driver (Direct Fax)................................................ 202
For Windows..................................................................... 203
For Mac OS X.................................................................... 206
Receiving a Fax....................................................................... 208
About Receiving Modes............................................................ 208
Loading Paper for Receiving Faxes................................................... 208
Receiving a Fax Automatically in the FAX Mode....................................... 208
Receiving a Fax Manually in the TEL Mode............................................ 209
Receiving a Fax Automatically in the TEL/FAX Mode or Ans/FAX Mode................... 209
Receiving a Fax Manually Using an External Telephone. . . . . . ........................... 209
Receiving Faxes Using the DRPD Mode. . ............................................. 210
Receiving Faxes in the Memory...................................................... 210
Polling Receive................................................................... 210
Contents 6
Page 7

Epson AcuLaser CX29 Series User’s Guide
Automatic Dialing..................................................................... 211
Speed Dialing.................................................................... 211
Storing a Number for Speed Dialing.................................................. 211
Sending a Fax Using a Speed Dial.................................................... 212
Group Dialing.................................................................... 213
Setting Group Dial................................................................ 213
Editing Group Dial................................................................ 214
Sending a Fax Using Group Dialing (Multi-address Transmission)........................ 215
Printing a Fax Address Book List.................................................... 215
Other Ways to Fax.................................................................... 216
Using the Secure Receiving Mode.................................................... 216
Using an Answering Machine. ...................................................... 217
Using a Computer Modem......................................................... 218
Setting Sounds........................................................................ 219
Speaker Volume.................................................................. 219
Ringer Volume................................................................... 219
Specifying the Fax Settings.............................................................. 220
Changing the Fax Settings Options................................................... 220
Available Fax Settings Options...................................................... 220
Changing Setting Options.............................................................. 224
Printing a Report Page................................................................. 225
Chapter 9 Using the Operator Panel Menus and Keypad
Understanding the Printer Menus........................................................ 227
Report/List....................................................................... 227
Billing Meters.................................................................... 229
Admin Menu..................................................................... 229
Defaults Settings.................................................................. 273
Tray Settings..................................................................... 293
Panel Language................................................................... 298
Panel Lock Function................................................................... 298
Enabling the Panel Lock............................................................ 298
Disabling the Panel Lock........................................................... 299
Limiting Access to Copy, Fax, Scan, and Print from USB Operations........................... 300
Setting the Power Saver Timer Option. . . . . ............................................... 301
Resetting to Factory Defaults............................................................ 301
Using the Numeric Keypad to Enter Characters............................................ 302
Keypad Letters and Numbers....................................................... 302
Contents 7
Page 8

Epson AcuLaser CX29 Series User’s Guide
Changing Numbers or Names....................................................... 303
Chapter 10 Troubleshooting
Clearing Jams......................................................................... 304
Avoiding Jams.................................................................... 304
Identifying the Location of Paper Jams. . . ............................................. 305
Clearing Paper Jams From the ADF. . . . .............................................. 306
Clearing Paper Jams From the SSF. . . . . .............................................. 310
Clearing Paper Jams From the Standard 250-Sheet Tray................................. 315
Clearing Paper Jams From the Fuser Unit............................................. 319
Clearing Paper Jams From the Optional Duplex Unit................................... 323
Clearing Paper Jams From the Optional 250-Sheet Paper Cassette Unit. . . ................. 324
Jam Problems.................................................................... 329
Basic Printer Problems................................................................. 333
Display Problems..................................................................... 334
Printing Problems..................................................................... 334
Print Quality Problems................................................................. 336
The Output Is Too Light........................................................... 336
Toner Smears or Print Comes Off.................................................... 338
Random Spots/Blurred Images...................................................... 339
The Entire Output Is Blank......................................................... 339
Streaks Appear on the Output....................................................... 341
Part or the Entire Output Is Black.................................................... 341
Pitched Color Dots................................................................ 342
Vertical Blanks................................................................... 343
Mottle........................................................................... 344
Ghosting........................................................................ 344
Light-Induced Fatigue............................................................. 345
Fog............................................................................. 346
Bead-Carry-Out (BCO)............................................................ 346
Jagged Characters................................................................. 347
Banding......................................................................... 348
Auger Mark...................................................................... 349
Wrinkled/Stained Paper............................................................ 349
Damage on the Leading Edge of Paper................................................ 351
The Top and Side Margins Are Incorrect.............................................. 351
Color Registration Is out of Alignment............................................... 352
Protrudent/Bumpy Paper........................................................... 353
Contents 8
Page 9

Epson AcuLaser CX29 Series User’s Guide
Copy Problem........................................................................ 353
Copy Quality Problems................................................................. 354
Adjusting Color Registration............................................................ 354
Performing Auto Adjust............................................................ 355
Printing the Color Registration Chart . . . . ............................................ 355
Determining Values............................................................... 355
Entering Values................................................................... 357
Fax Problems......................................................................... 358
Scanning Problems.................................................................... 361
Problems With Installed Optional Accessories............................................. 364
Scan Driver/Printer Utility Problems..................................................... 364
Other Problems....................................................................... 365
Understanding Printer Messages......................................................... 366
Contacting Service..................................................................... 383
Getting Help......................................................................... 383
LCD Panel Messages. . . . . . . ........................................................ 383
Status Monitor Alerts.............................................................. 383
Non-Genuine Mode................................................................... 384
Chapter 11 Maintenance
Cleaning the Printer................................................................... 385
Cleaning the Scanner.............................................................. 385
Cleaning the ADF Feed Roller....................................................... 387
Cleaning Inside the Printer......................................................... 388
Cleaning the Color Toner Density (CTD) Sensor....................................... 394
Replacing Toner Cartridges. . . . ......................................................... 398
Overview........................................................................ 399
Removing the Toner Cartridges..................................................... 400
Installing a Toner Cartridge......................................................... 401
Replacing the Drum Cartridge........................................................... 403
Removing the Drum Cartridge...................................................... 404
Installing the Drum Cartridge....................................................... 407
Replacing the Fuser Unit............................................................... 412
Removing the Fuser Unit........................................................... 412
Installing the Fuser Unit............................................................ 414
Resetting the Counter of the Fuser Unit............................................... 416
Replacing the Feed Roll Unit............................................................ 416
Removing the Feed Roll Unit in the Standard 250-Sheet Tray............................. 417
Contents 9
Page 10

Epson AcuLaser CX29 Series User’s Guide
Installing the Feed Roll Unit in the Standard 250-Sheet Tray. . ........................... 418
Ordering Supplies..................................................................... 419
Consumables..................................................................... 420
When to Order Supplies............................................................ 420
Storing Print Media.................................................................... 421
Storing Consumables.................................................................. 421
Managing the Printer.................................................................. 422
Checking or Managing the Printer with EpsonNet Config................................ 422
Checking Printer Status with Status Monitor (Windows Only)............................ 422
Checking Printer Status Through E-mail.............................................. 423
Conserving Supplies................................................................... 425
Checking Page Counts................................................................. 426
Moving the Printer.................................................................... 426
Removing Options.................................................................... 429
Removing the Additional Memory Module............................................ 430
Removing the Optional Duplex Unit................................................. 434
Removing the Optional 250-Sheet Paper Cassette Unit. . . . . . ............................ 436
Appendix A Where To Get Help
Contacting Epson Support.............................................................. 440
Before Contacting Epson. . . . . ...................................................... 440
Help for Users in Europe. . . . ....................................................... 440
Help for Users in Taiwan........................................................... 440
Help for Users in Singapore. ........................................................ 442
Help for Users in Thailand.......................................................... 442
Help for Users in Vietnam.......................................................... 443
Help for Users in Indonesia......................................................... 443
Help for Users in Hong Kong....................................................... 445
Help for Users in Malaysia.......................................................... 445
Help for Users in India............................................................. 446
Help for Users in the Philippines.................................................... 447
Index
Contents 10
Page 11

Epson AcuLaser CX29 Series User’s Guide
Preface
Copyright and Trademarks
No part of this publication may be reproduced, stored in a retrieval system, or transmitted in any form
or by any means, mechanical, photocopying, recording, or otherwise, without the prior written
permission of Seiko Epson Corporation. No patent liability is assumed with respect to the use of the
information contained herein.
Neither is any liability assumed for damages resulting from the use of the information contained
herein. Neither Seiko Epson Corporation nor its affiliates shall be liable to the purchaser of this
product or third parties for damages, losses, costs, or expenses incurred by purchaser or third parties
as a result of: accident, misuse, or abuse of this product or unauthorized modifications, repairs, or
alterations to this product, or (excluding the U.S.) failure to strictly comply with Seiko Epson
Corporation’s operating and maintenance instructions.
Seiko Epson Corporation and its affiliates shall not be liable against any damages or problems arising
from the use of any options or any consumable products other than those designated as Original
Epson Products or Epson Approved Products by Seiko Epson Corporation.
Apple
United States and/or other countries.
Microsoft
Corporation in the United States and/or other countries.
PCL
Linux is a registered trademark of Linus Torvalds.
Novell is a registered trademark and SUSE is a trademark of Novell, Inc. in the United States and other
countries.
Red Hat and Red Hat Enterprise Linux are registered trad em ar ks of Red Ha t, In c. in th e U. S. an d o th er
countries.
EPSON is a registered trademark and EPSON AcuLaser is a trademark of Seiko Epson Corporation.
, Bonjour®, ColorSync®, Macintosh®, and Mac OS® are trademarks of Apple Inc. in the
®
, Windows Vista®, Windows®, and Windows Server® are trademarks of Microsoft
®
is a trademark of Hewlett-Packard Corporation in the United States and/or other countries.
®
General Notice: Other product names used herein are for identification purposes only and may be
trademarks of their respective owners. Epson disclaims any and all rights in those marks.
Preface 11
Page 12

Epson AcuLaser CX29 Series User’s Guide
Copyright © 2011 Seiko Epson Corporation. All rights reserved.
Preface 12
Page 13

Epson AcuLaser CX29 Series User’s Guide
About License
RSA BSAFE
RSA BSAFE software, produced by RSA Security Inc., has been installed on this printer.
DES
This product includes software developed by Eric Young.
(eay@mincom.oz.au)
AES
Copyright
©
2003, Dr BrianGladman, Worcester, UK. All rights reserved. This product uses published
AES software provided by Dr Brian Gladmanunder BSD licensing terms.
TIFF(libtiff)
LibTIFFCopyright
©
Copyright
1991-1997 Silicon Graphics, Inc.
©
1988-1997 SamLeffler
ICC Profile (Little cms)
LittlecmsCopyright
©
1998-2004 Marti Maria
JPEG
Our printer software uses some of the codes defined by the Independent JPEG Group.
Preface 13
Page 14
Epson AcuLaser CX29 Series User’s Guide
Using This Guide
Conventions
1. In this guide, personal computers and workstations are collectively called “computers”.
2. The following terms are used throughout this guide:
Important:
Important information that must be read and followed.
Note:
Additional information that merits emphasis.
See Also:
References within this guide.
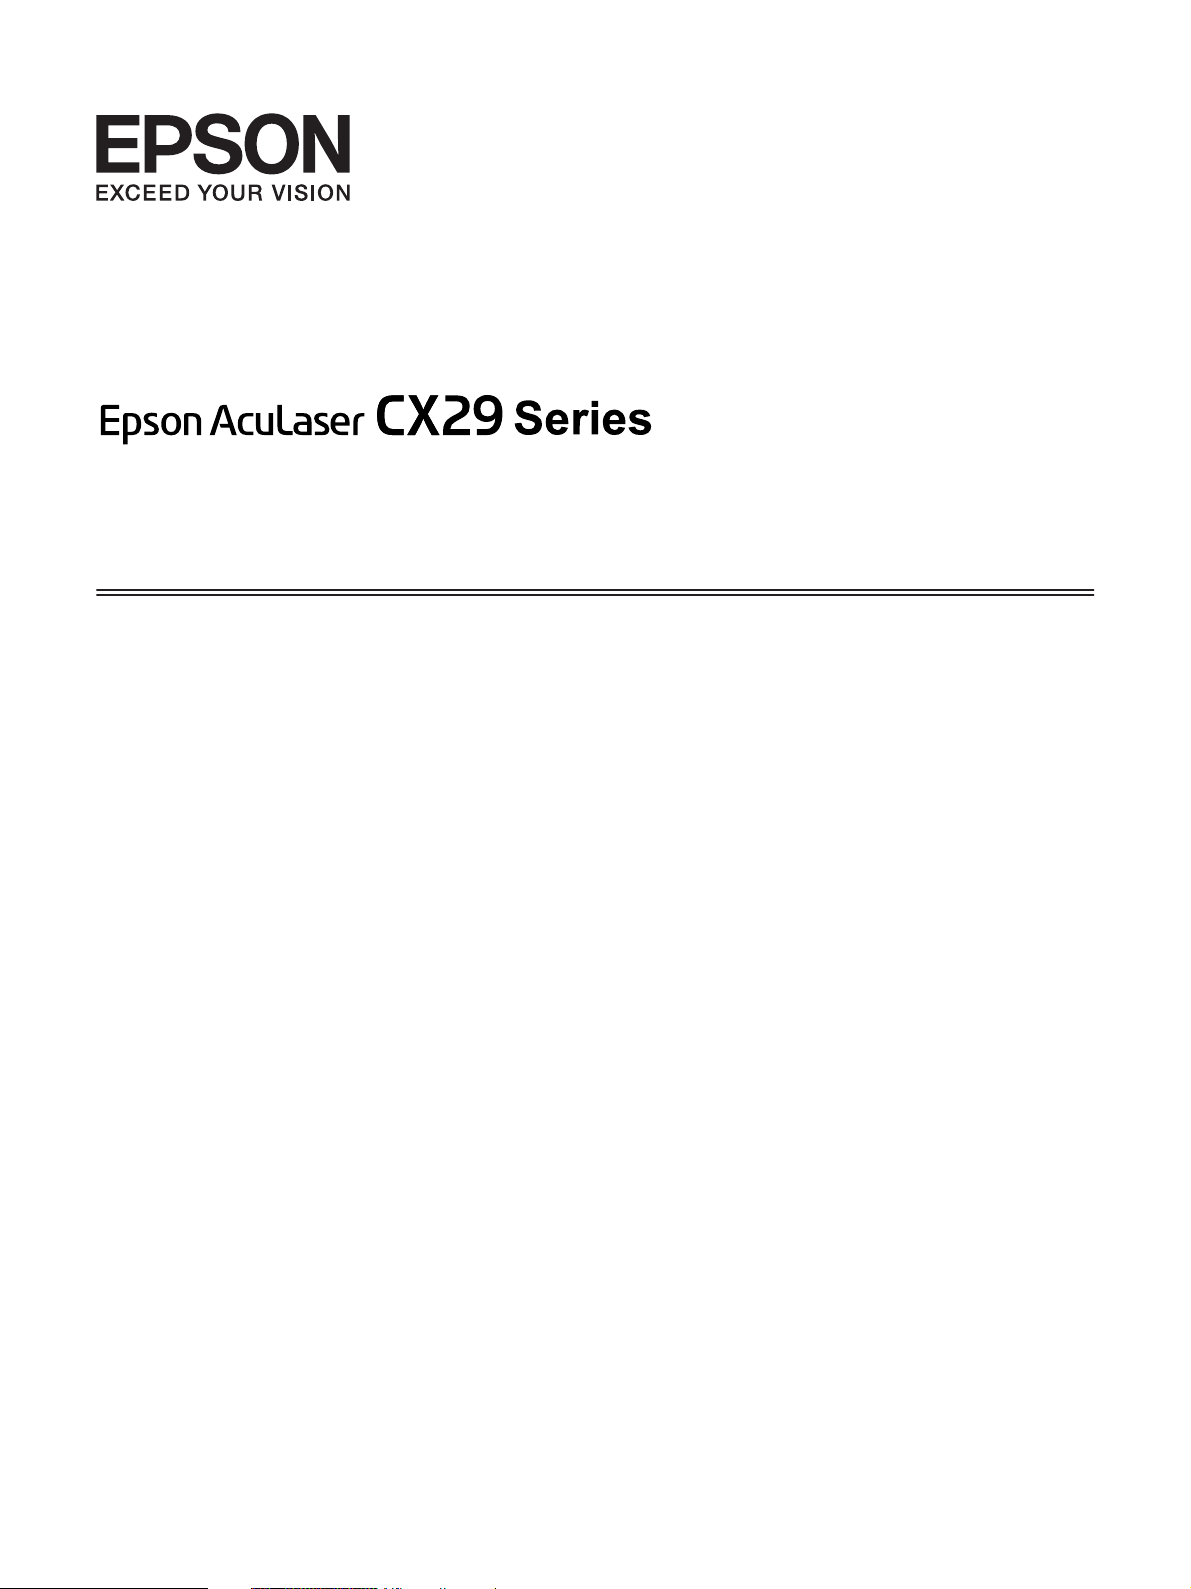
3. Orientation of documents or paper is described in this guide as follows:
, , Long Edge Feed (LEF): Loading the document or paper in portrait orientation.
, , Short Edge Feed (SEF): Loading the document or paper in landscape orientation.
LEF Orientation SEF Orientation
* Paper feed direction
Preface 14
Page 15

Epson AcuLaser CX29 Series User’s Guide
Illegal Copies and Printouts
Copying or printing certain documents may be illegal in your country. Penalties of fines or
imprisonment may be imposed on those found guilty. The following are examples of items that may be
illegal to copy or print in your country.
❏ Currency
❏ Banknotes and checks
❏ Bank and government bonds and securities
❏ Passports and identification cards
❏ Copyright material or trademarks without the consent of the owner
❏ Postage stamps and other negotiable instruments
This list is not inclusive and no liability is assumed for either its completeness or accuracy. In case of
doubt, contact your legal counsel.
Product Features
Features
This section describes the product features and indicates their links.
Preface 15
Page 16
Epson AcuLaser CX29 Series User’s Guide
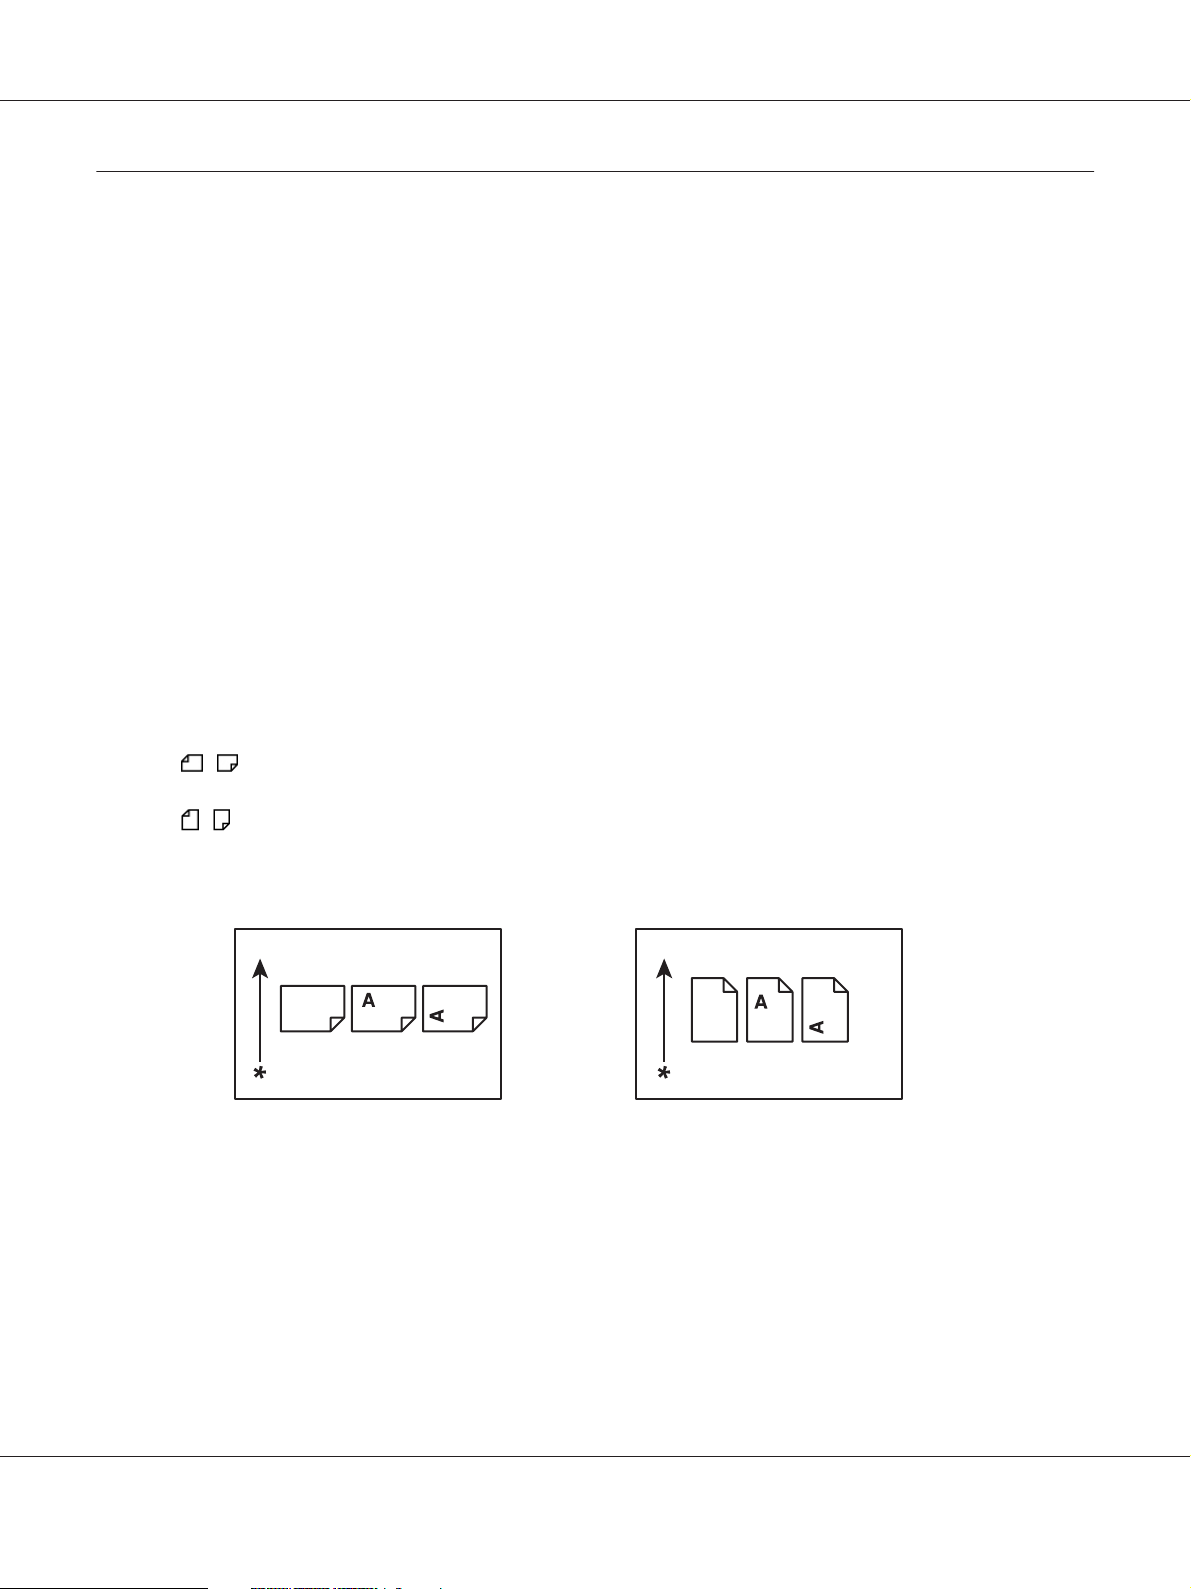
Print From USB Memory (USB Direct Print)
Print From USB Memory feature allows you to
print directly from your USB storage device
without starting your computer. Without
requiring you to start your computer and an
application, this feature allows quick printing
with simple procedures.
For more information, see “Direct Print Using
the USB Storage Device” on page 106.
N-Up (2-in-1 Copy)
Multiple-Up Print
Multiple-Up enables you to print multiple pages
on a single sheet of paper. This feature allows
you to reduce the paper consumption.
For more information, see the print driver’s
help.
2-Sided (Duplex Copy)
You can copy two original pages onto one sheet
of paper by selecting N-Up on the operator
panel when you make a copy. This feature helps
save paper.
For more information, see “N-Up” on
page 145.
You can copy documents on both sides of a sheet
of paper by selecting 2-Sided on the operator
panel when you make a copy. This feature helps
save paper.
For more information, see “2-Sided” on
page 145.
Preface 16
Page 17
Epson AcuLaser CX29 Series User’s Guide
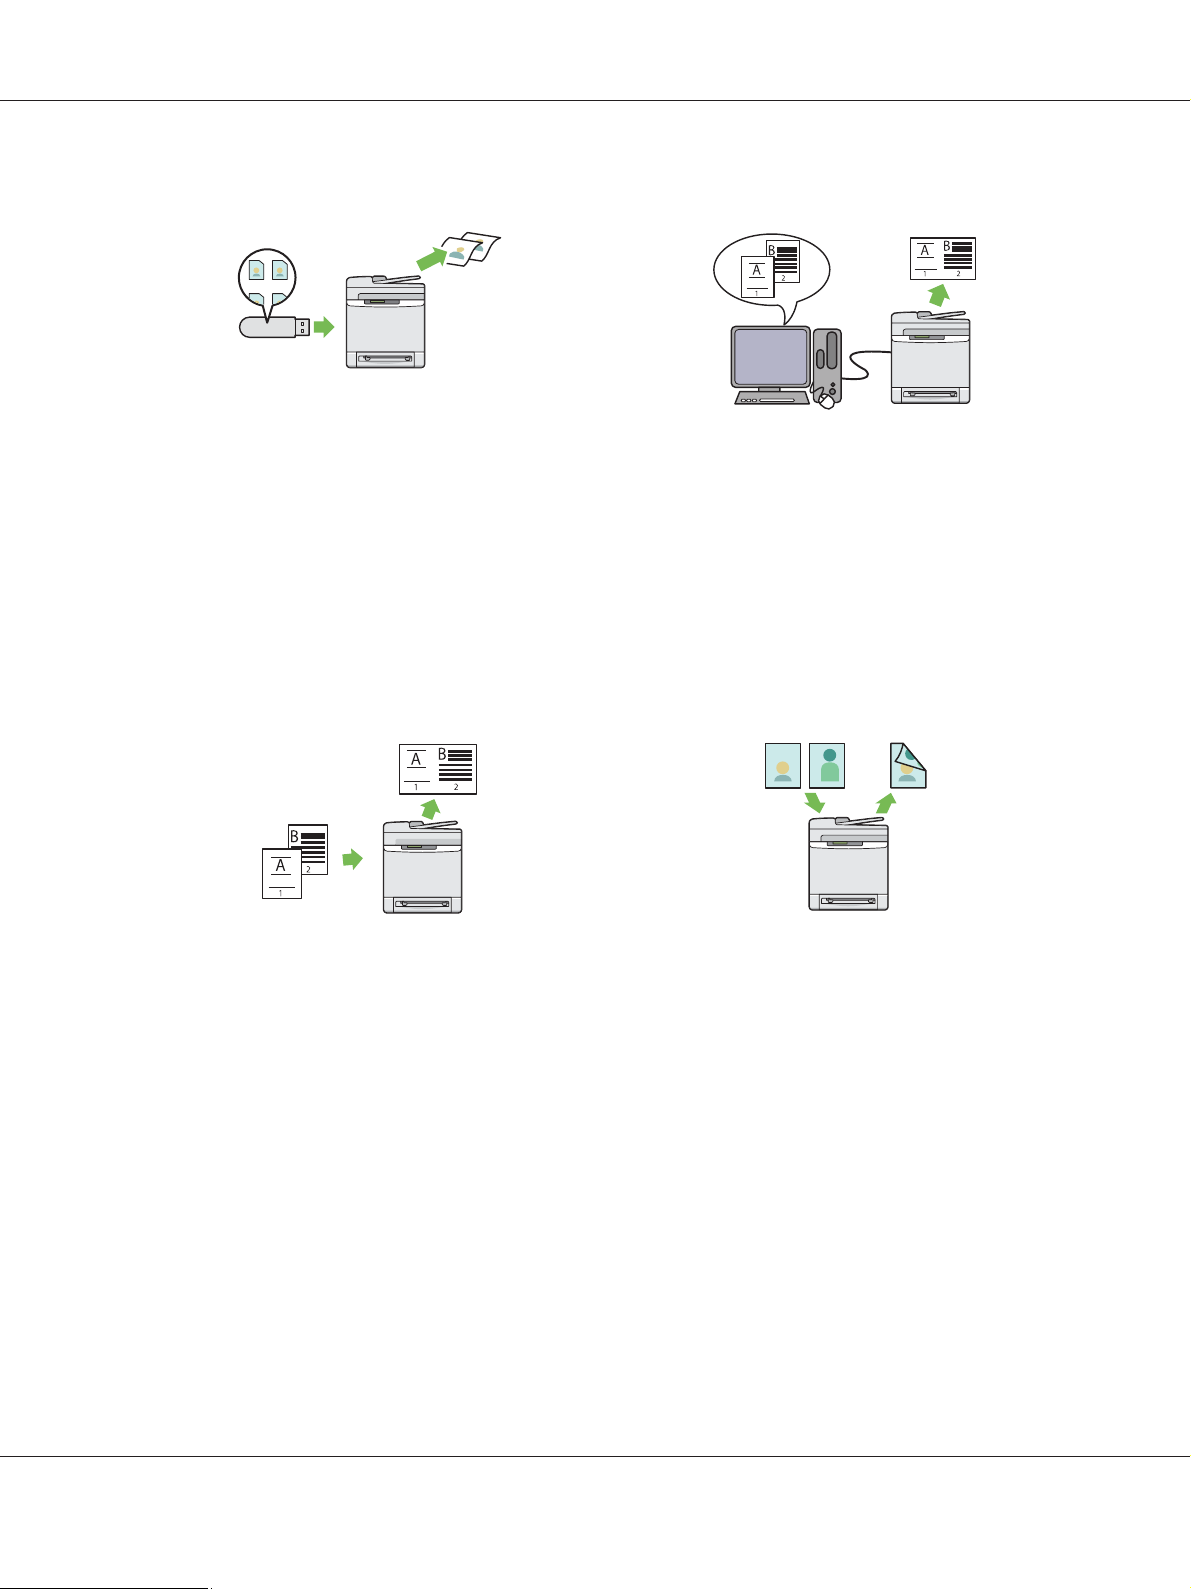
Sending an E-Mail With the Scanned Image
(Scan to E-mail)
When you want to send scanned data by e-mail,
use the Scan to E-mail feature. You can directly
send the data scanned as an e-mail attachment.
You can choose destination e-mail addresses
from the address book on the printer or server.
Or, you can enter the address from the printer’s
operator panel using the numeric keypad.
For more information, see “Sending an E-Mail
With the Scanned Image” on page 180.
Scanning to Network (Scan to SMB)
You can transfer data scanned to a PC or a server
via SMB without service software. Although
prior registration of the destination PC on the
address book is required, it helps save your time.
For more information, see “Using a Scanner on
the Network” on page 158.
Scanning to a USB Storage Device
You don’t need a computer to connect your USB
storage device to save the scanned data. Insert
your USB storage device in the port on the
printer, and save the scanned data directly to
your USB storage device.
For more information, see “Scanning to a USB
Storage Device” on page 179.
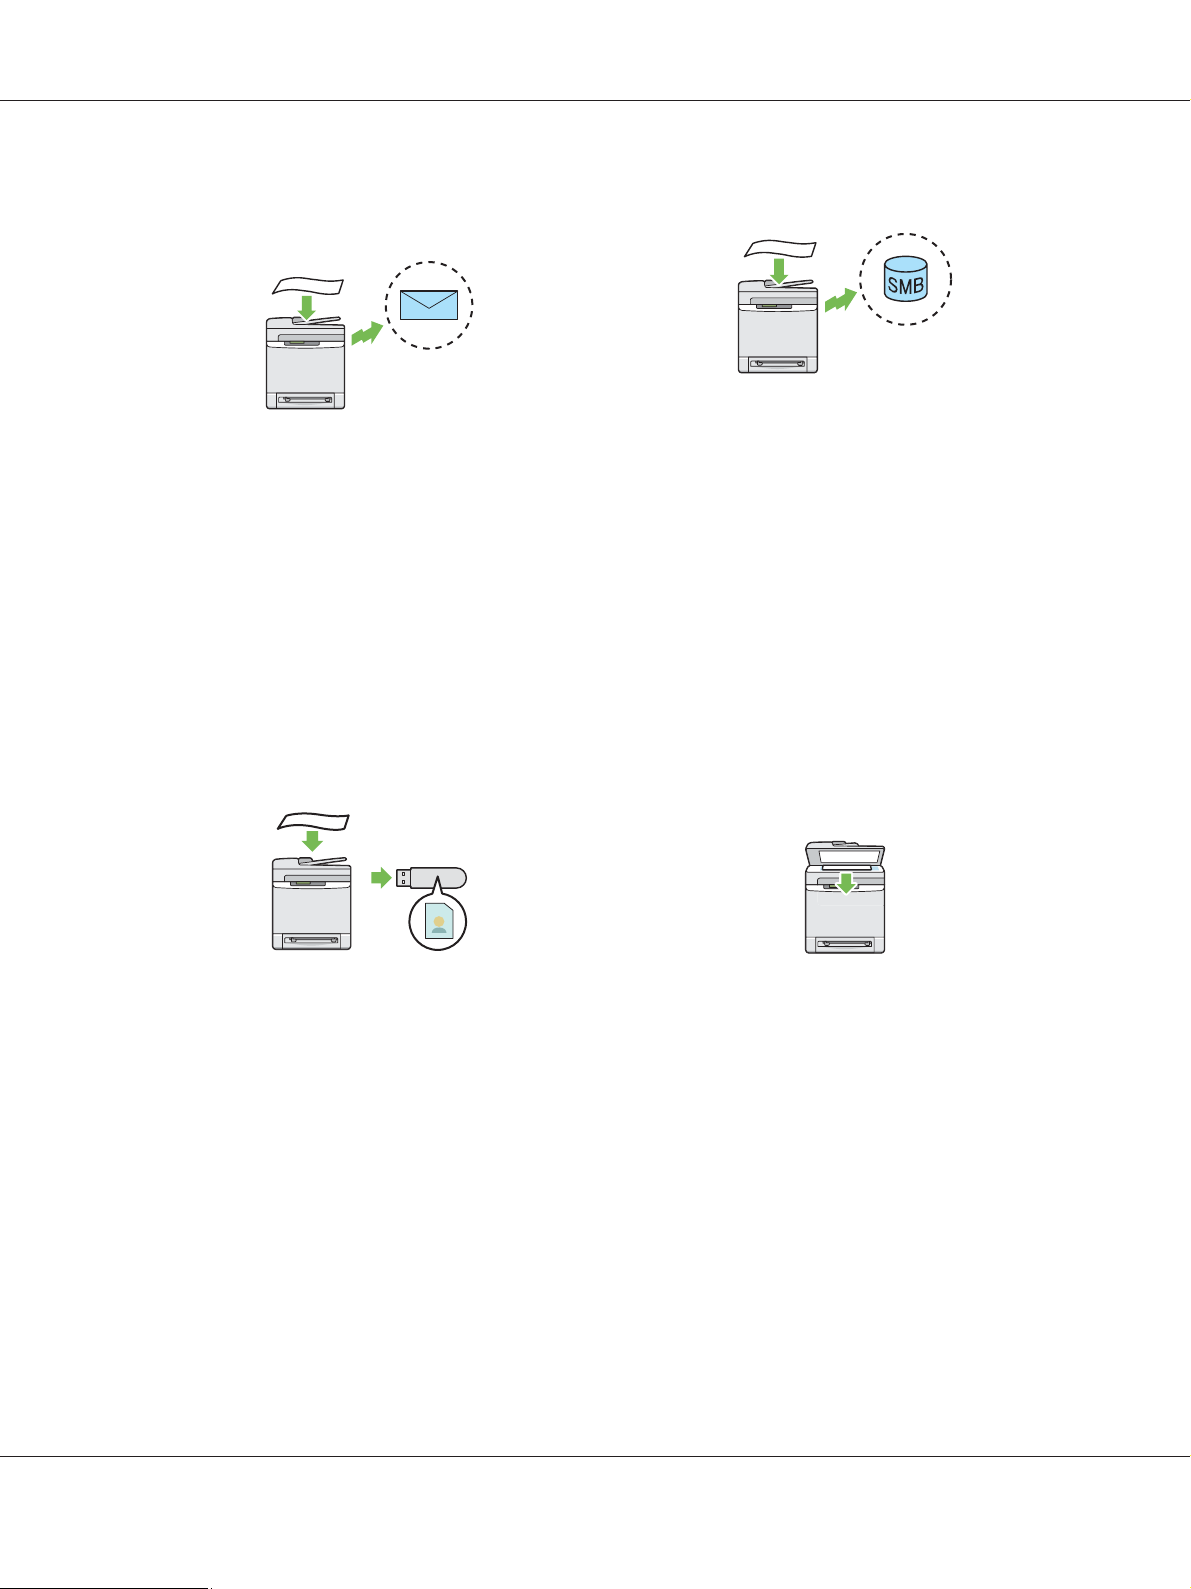
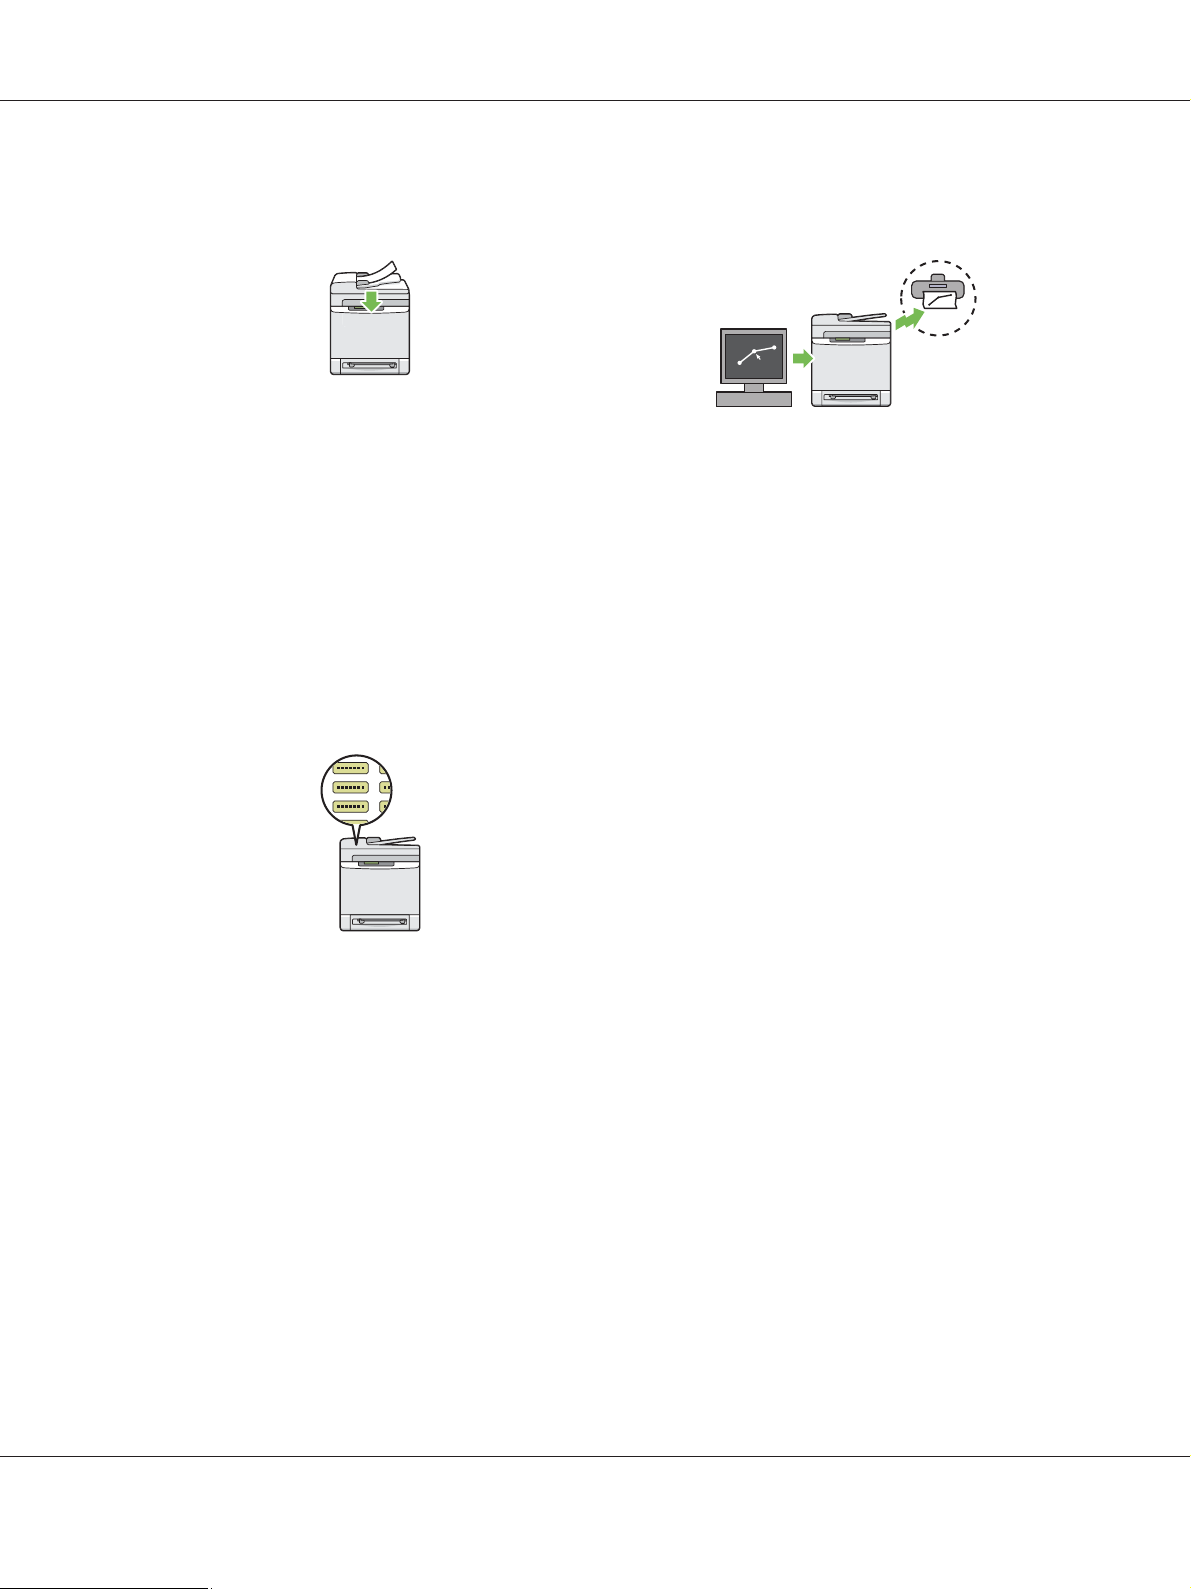
Making Copies From the Document Glass
(Scan From Document Glass)
You can scan the pages of a book or a brochure
from the document glass. When you scan
documents using the document glass, place
them face down.
For more information, see “Making Copies
From the Document Glass” on page 126.
Preface 17
Page 18
Epson AcuLaser CX29 Series User’s Guide
Making Copies From the ADF (Scan From
ADF)
You can scan pieces of unbound paper using the
automatic document feeder (ADF). When you
scan documents using the ADF, load them face
up.
For more information, see “Making Copies
From the ADF” on page 129.
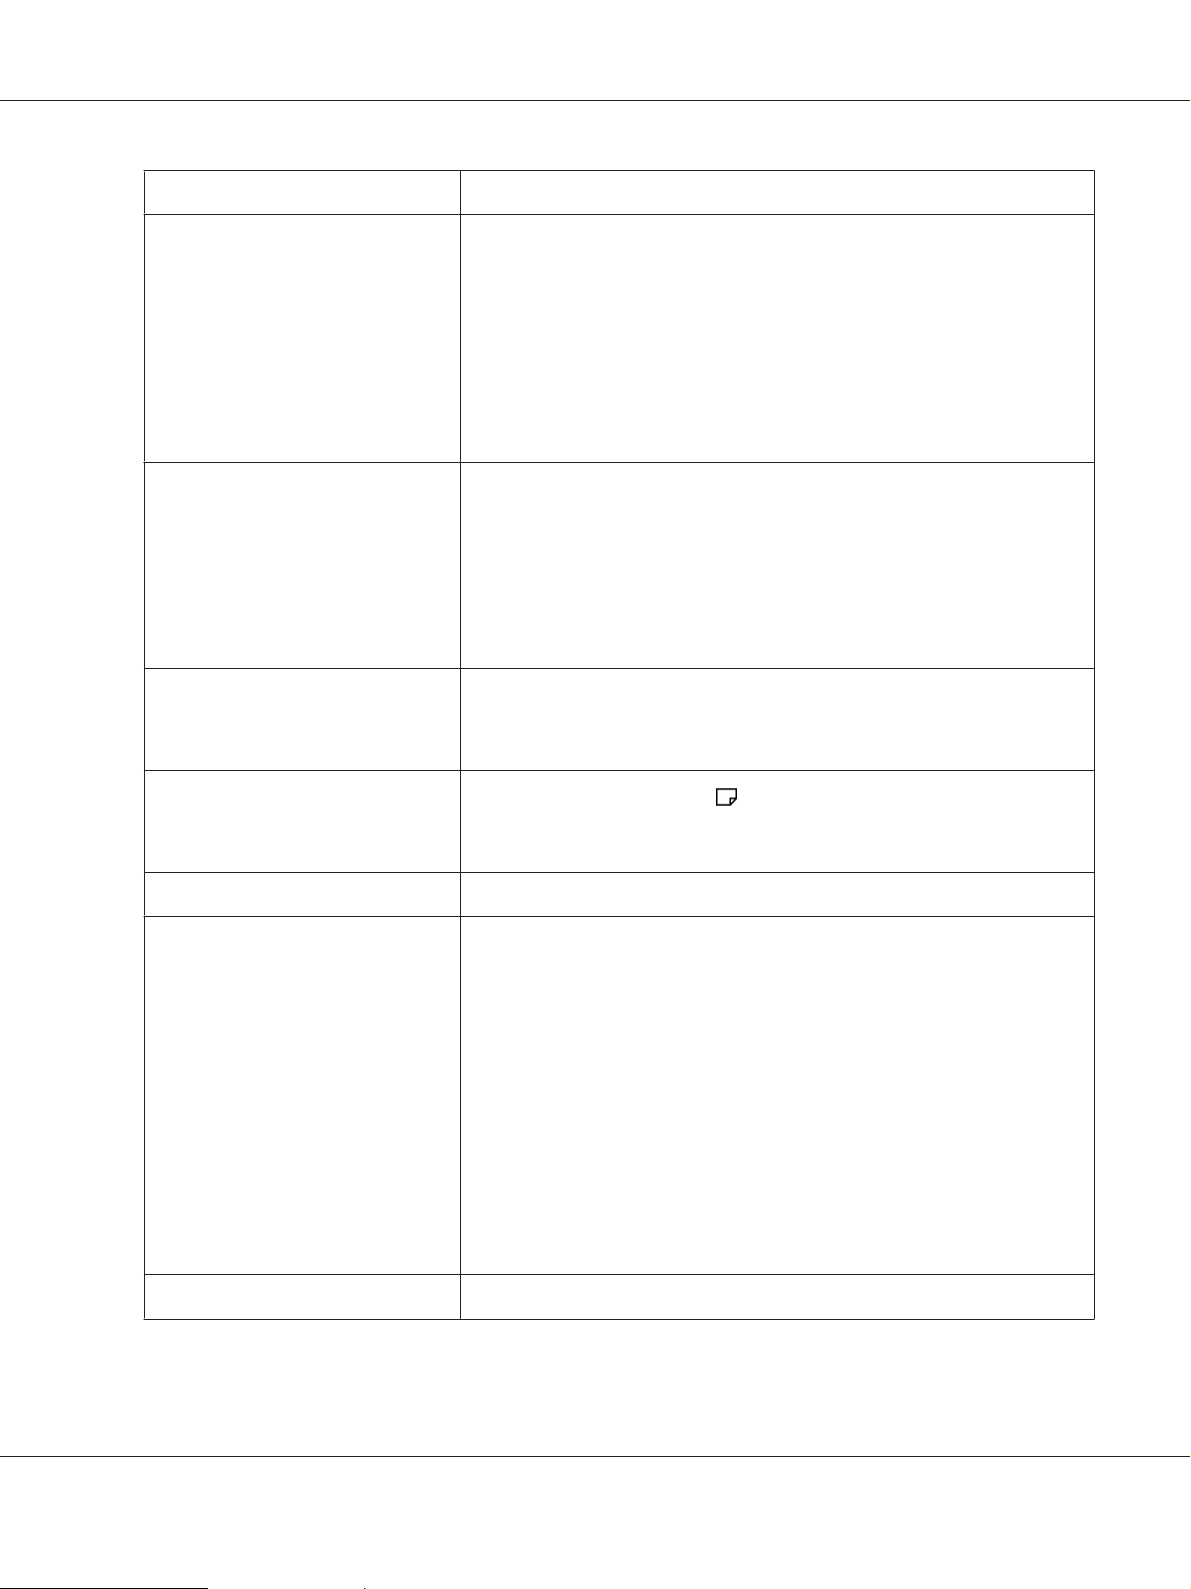
Address Book
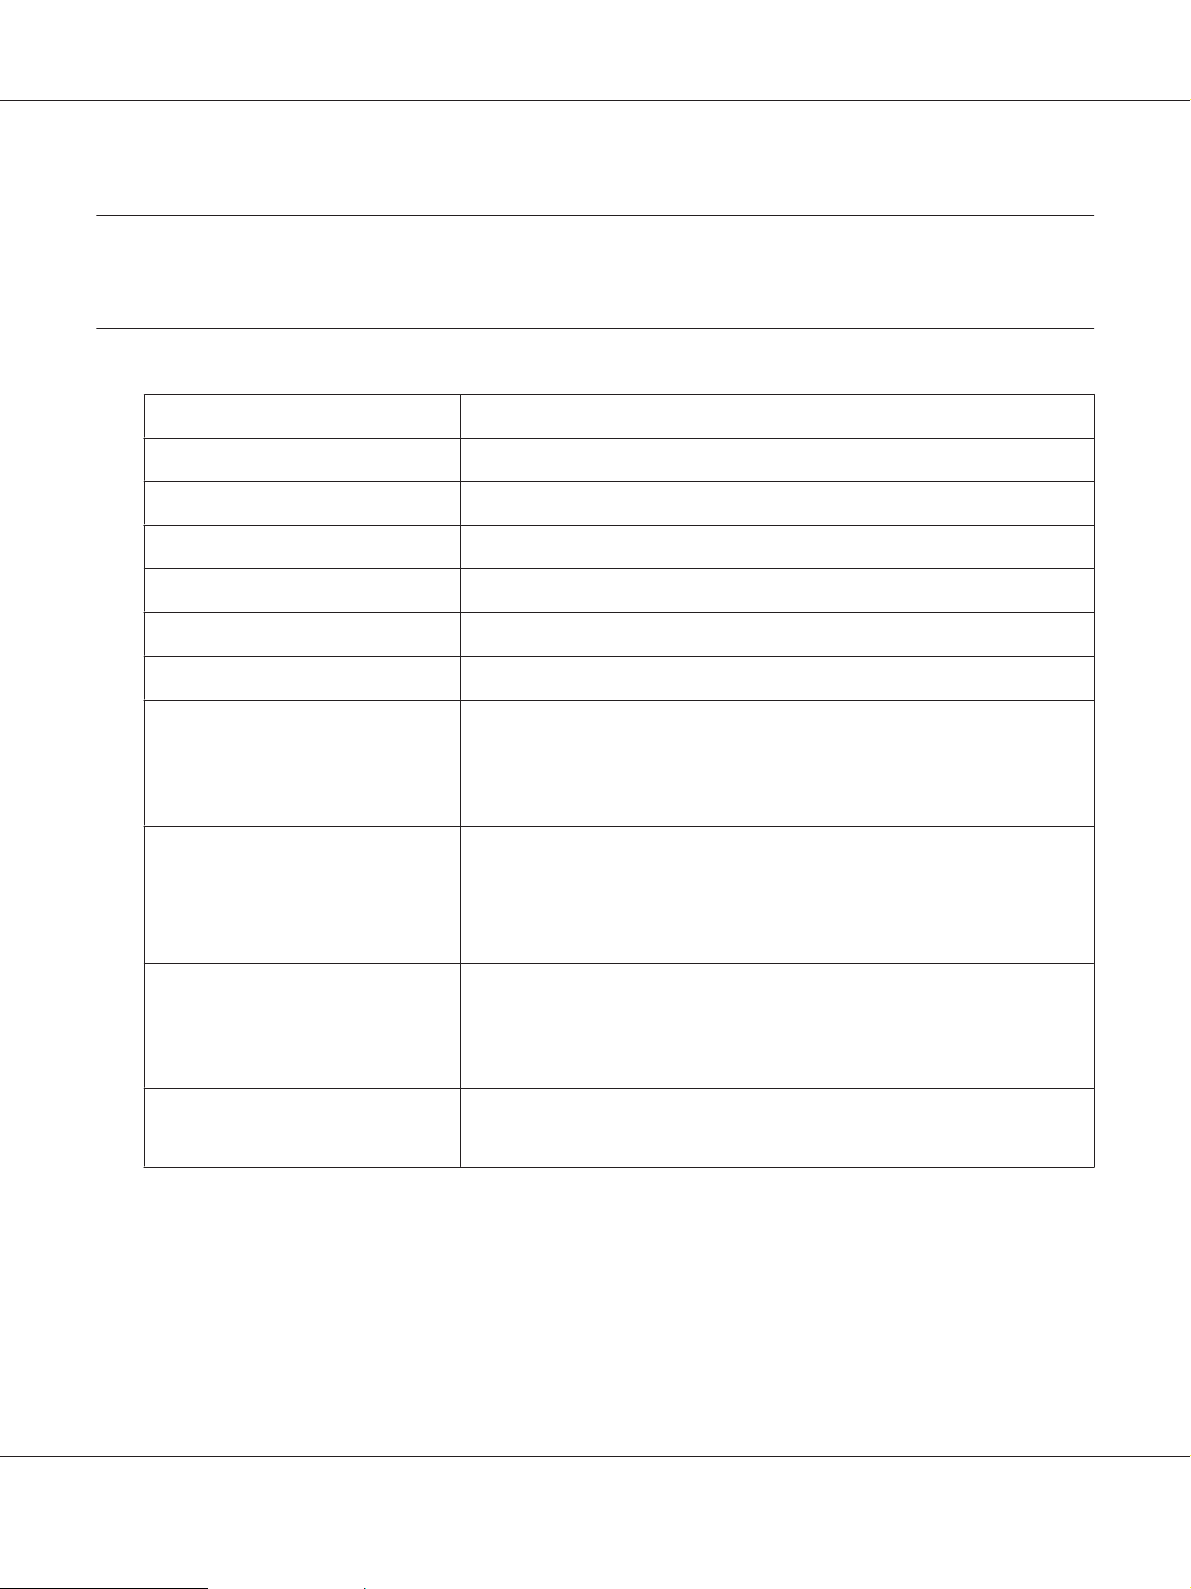
Sending a Fax from the Driver (Direct Fax)
(Direct Fax from PC)
You can directly send faxes from your PC using
the fax driver. You can specify the fax settings
like the normal fax. Also, you can specify the
recipient’s fax number using the numeric
keypad, or the address book or phone book.
For more information, see “Sending a Fax from
the Driver (Direct Fax)” on page 202.
Address Book simplifies the recipient
specification. You can use the address book on
the printer as well as on the server. Select the
desired address or fax number from the address
book when using the Scan to E-mail or Scan to
Network feature, or sending faxes.
For more information, see “Address Book
Editor” on page 54.
Preface 18
Page 19
Chapter 1
Specifications
Copy Function
Items Description
Type Console
Memory 256 MB (Maximum 768 MB)
HDD —
Color Capability Full color
Epson AcuLaser CX29 Series User’s Guide
Printing Resolution
Halftone/Printable Colors 256 color gradation for each color (16,700,000 colors)
Original Paper Size
Output Paper Size
Output Paper Weight 60 – 216 gsm
Reduction/Enlargement Preset: 200%/141%/122%/100%/81%/70%/50%
Output resolution: 600 × 600 dpi
Document glass: The maximum size is 215.9 × 297 mm for both sheets and
books.
Automatic document feeder (ADF): The maximum size is 215.9 × 355.6 mm for
sheets. Acceptable weight range is 50 to 125 gsm.
Maximum: Legal (8.5 × 14"), 215.9 × 355.6 mm
Minimum: Monarch
Image loss width: Top edge, 4 mm or less; bottom edge, 4 mm or less; left and
right edges, 4 mm or less
Important:
Use paper recommended by Epson. Copying may not be performed correctly
depending on the conditions.
Variable: 25% to 400% (Settable in 1% increments)
Specifications 19
Page 20
Items Description
Continuous Copy Speed Monochrome:
A4 : 23 sheets/minute
Color:
A4 : 23 sheets/minute
Important:
❏ The speed may be reduced due to image quality adjustment.
❏ The performance may be reduced depending on the paper type.
Paper Tray Capacity Standard:
250 sheets (Standard 250-sheet tray) + 1 sheet (Single sheet feeder (SSF))
Maximum paper capacity:
501 sheets (standard + Optional 250-sheet paper cassette unit)
Important:
When using 80 gsm paper
Epson AcuLaser CX29 Series User’s Guide
Continuous Copy 99 images
Note:
The machine may pause temporarily to perform image quality adjustment.
Output Tray Capacity Approximately 150 sheets (A4
Important:
When using 80 gsm paper
Power Supply AC 220 – 240 V±10%/110 – 127 V±10%, 5/10A for both 50/60 Hz±3%
Power Consumption Maximum power consumption:
1100 W
Running mode:
410 W (Average)
Standby mode:
60 W (Average)
Low Power mode:
35 W or less
Sleep mode:
18.4 W or less
)
Dimensions
Width 430 × Depth 544.2 × Height 584.4 mm
Specifications 20
Page 21
Items Description
Machine Weight 28.6 kg
Important:
❏ The weight of paper is not included.
❏ The weight of the toner cartridges are included.
Epson AcuLaser CX29 Series User’s Guide
Space Requirement
Print Function
Items Description
Type Built-in
Continuous Print Speed Same as the Copy Function
Print Resolution
PDL PCL 5e, PCL 5c, PCL 6, PostScript 3
Protocol TCP/IP (LPD, Port9100, WSD, HTTP, SMTP, RARP, AutoIP, WINS, D DNS, IPP, SMB),
Width 780 × Depth 1232.4 mm
Important:
❏ The speed may be reduced due to image quality adjustment.
❏ The performance may be reduced depending on the paper type.
Output resolution: 600 × 600 dpi
SNMP, DHCP, BOOTP, Bonjour (mDNS)
Note:
❏ WSD stands for Web Services on Devices.
❏ WSD is available only on Windows Vista
Server
2008, or Windows Server® 2008 R2.
®
, Windows® 7, Windows
®
Specifications 21
Page 22
Epson AcuLaser CX29 Series User’s Guide
Items Description
Operating System Standard: PCL6 and PostScript drivers
Microsoft
Microsoft
Microsoft
Microsoft
Microsoft
Microsoft
Microsoft
Microsoft
Microsoft
Microsoft
Microsoft
Mac OS
Red Hat Enterprise Linux 4 WS/5 Client (x86),
SUSE Linux Enterprise Desktop 10/11 (x86)
Important:
For information about the latest supported OS, contact our Customer Support
Center.
Fonts Build-in fonts
®
®
®
®
®
®
®
®
®
®
®
X 10.4 – 10.6,
®
Windows® XP,
Windows Server® 2003,
Windows Server® 2008,
Windows Vista®,
Windows® 7,
Windows® XP x64,
Windows Server® 2003 x64,
Windows Server® 2008 x64,
Windows Vista® x64,
Windows Server® 2008 R2 x64,
Windows® 7 x64,
Connectivity Standard: Ethernet (1000BASE-TX/100BASE-TX/10BASE-T), USB 2.0
Scan Function
Items Description
Type Color scanner
Original Paper Size Same as the Copy Function
PCL5 and PCL6 fonts: 81 fonts and 36 symbol sets
PostScript3: 136 fonts
PDF Font: 14 fonts
Specifications 22
Page 23
Epson AcuLaser CX29 Series User’s Guide
Items Description
Scanning Resolution 200/300/600/1200 dpi
TWAIN: 50 to 9600 dpi
WIA: 75/100/150/200/300/400/600 dpi
Scanning Halftone 48-bit input / 24-bit output / 8-bit output for each RGB color
Scanning Speed Monochrome : 16 sheets/minute
Color : 8 sheets/minute
Important:
The scanning speed varies depending on documents.
Connectivity Standard: Ethernet (1000BASE-TX/100BASE-TX/10BASE-T), USB 2.0
Scan to PC Protocol: TCP/IP (SMB)
Operating System:
Microsoft
Microsoft
Microsoft
Microsoft
Microsoft
Microsoft
Microsoft
Microsoft
Microsoft
Microsoft
Microsoft
Mac OS X 10.4 – 10.6
Important:
For information about the latest supported OS, refer to the Epson Web site.
File Format:
PDF / JPEG (JFIF format) / TIFF (multi page 1 file) / TIFF (1 page 1 file)
Scan to e-mail Protocol: TCP/IP (SMTP, POP3)
Windows® XP,
®
Windows Vista®,
®
Windows Server® 2003,
®
Windows Server® 2008,
®
Windows® 7,
®
Windows XP x64,
®
Windows Vista® x64,
®
Windows Server® 2003 x64,
®
Windows Server® 2008 x64,
®
Windows Server® 2008 R2 x64,
®
Windows® 7 x64,
®
File Format:
PDF / JPEG (JFIF format) / TIFF (multi page 1 file) / TIFF (1 page 1 file)
Specifications 23
Page 24
Items Description
Scan to SMB Protocol: TCP/IP (SMB)
Scan to USB Memory File Format:
Fax Function
Items Description
Epson AcuLaser CX29 Series User’s Guide
File Format:
PDF / JPEG (JFIF format) / TIFF (multi page 1 file) / TIFF (1 page 1 file)
PDF / JPEG (JFIF format) / TIFF (multi page 1 file) / TIFF (1 page 1 file)
Important:
Operation with all type of USB memories is not guaranteed.
Send Document Size Document glass:
Maximum: 215.9 × 297 mm
ADF:
Maximum: 215.9 × 355.6 mm
Recording Paper Size A4, Letter, Legal
Transmission Time 2 seconds
Important:
When transmitting an A4 size 700-character document in the standard quality
(8 x 3.85 lines/mm) and high speed mode (33 .6 kb ps o r a bo ve : J BI G) . T hi s i s o nl y
the transmission speed for image information and does not include the
controlling time for the communication. Note that the actual transmission time
depends on the content of documents, the machine that the recipient uses,
and the status of the communication line.
Transmission Mode ITU-T Super G3, ITU-T G3 ECM, ITU-T G3
Scanning Resolution Standard:
200 × 100dpi (R8 (8dot/mm) × 3.85dot/mm)
Fine/Photo:
200 × 200dpi (R8 (8dot/mm) × 7.7dot/mm)
Superfine:
400 × 400dpi (R16 (16dot/mm) × 15.4dot/mm)
Coding Method MH, MR, MMR, JBIG
Specifications 24
Page 25
Items Description
Transmission Speed G3:
No. of Fax Lines PSTN, PBX. Leased line (3.4KHz/2-wire)
Direct Fax Function
Items Description
Epson AcuLaser CX29 Series User’s Guide
33.6/31.2/28.8/26.4/24.0/21.6/19.2/16.8/14.4/12.0/9.6/7.2/4.8/2.4kbps
RJ-11, 1 line
Document Size
Transmission Speed Same as the Fax function
Transmission Resolution
Applicable Lines Same as the Fax Function
Operating System Microsoft
A4, Letter, Folio (8.5 × 13"), Legal (8.5 × 14")
Standard: 200 × 100dpi (R8 (8dot/mm) × 3.85dot/mm)
Fine: 200 × 200dpi (R8 (8dot/mm) × 7.7dot/mm)
Superfine: 400 × 400dpi (R16 (16dot/mm) × 15.4dot/mm)
Windows® XP,
®
Microsoft
Microsoft
Microsoft
Microsoft
Microsoft
Microsoft
Microsoft
Microsoft
Microsoft
Microsoft
Mac OS X 10.4 – 10.6
Windows Vista®,
®
Windows Server® 2003,
®
Windows Server® 2008,
®
Windows® 7,
®
Windows® XP x64,
®
Windows Server® 2003 x64,
®
Windows Server® 2008 x64,
®
Windows Vista® x64,
®
Windows Server® 2008 R2 x64,
®
Windows® 7 x64,
®
Important:
For information about the latest supported OS, refer to the Epson Web site.
Specifications 25
Page 26
Chapter 2
Basic Operation
Main Components
This section provides an overview of your Epson AcuLaser CX29 Series.
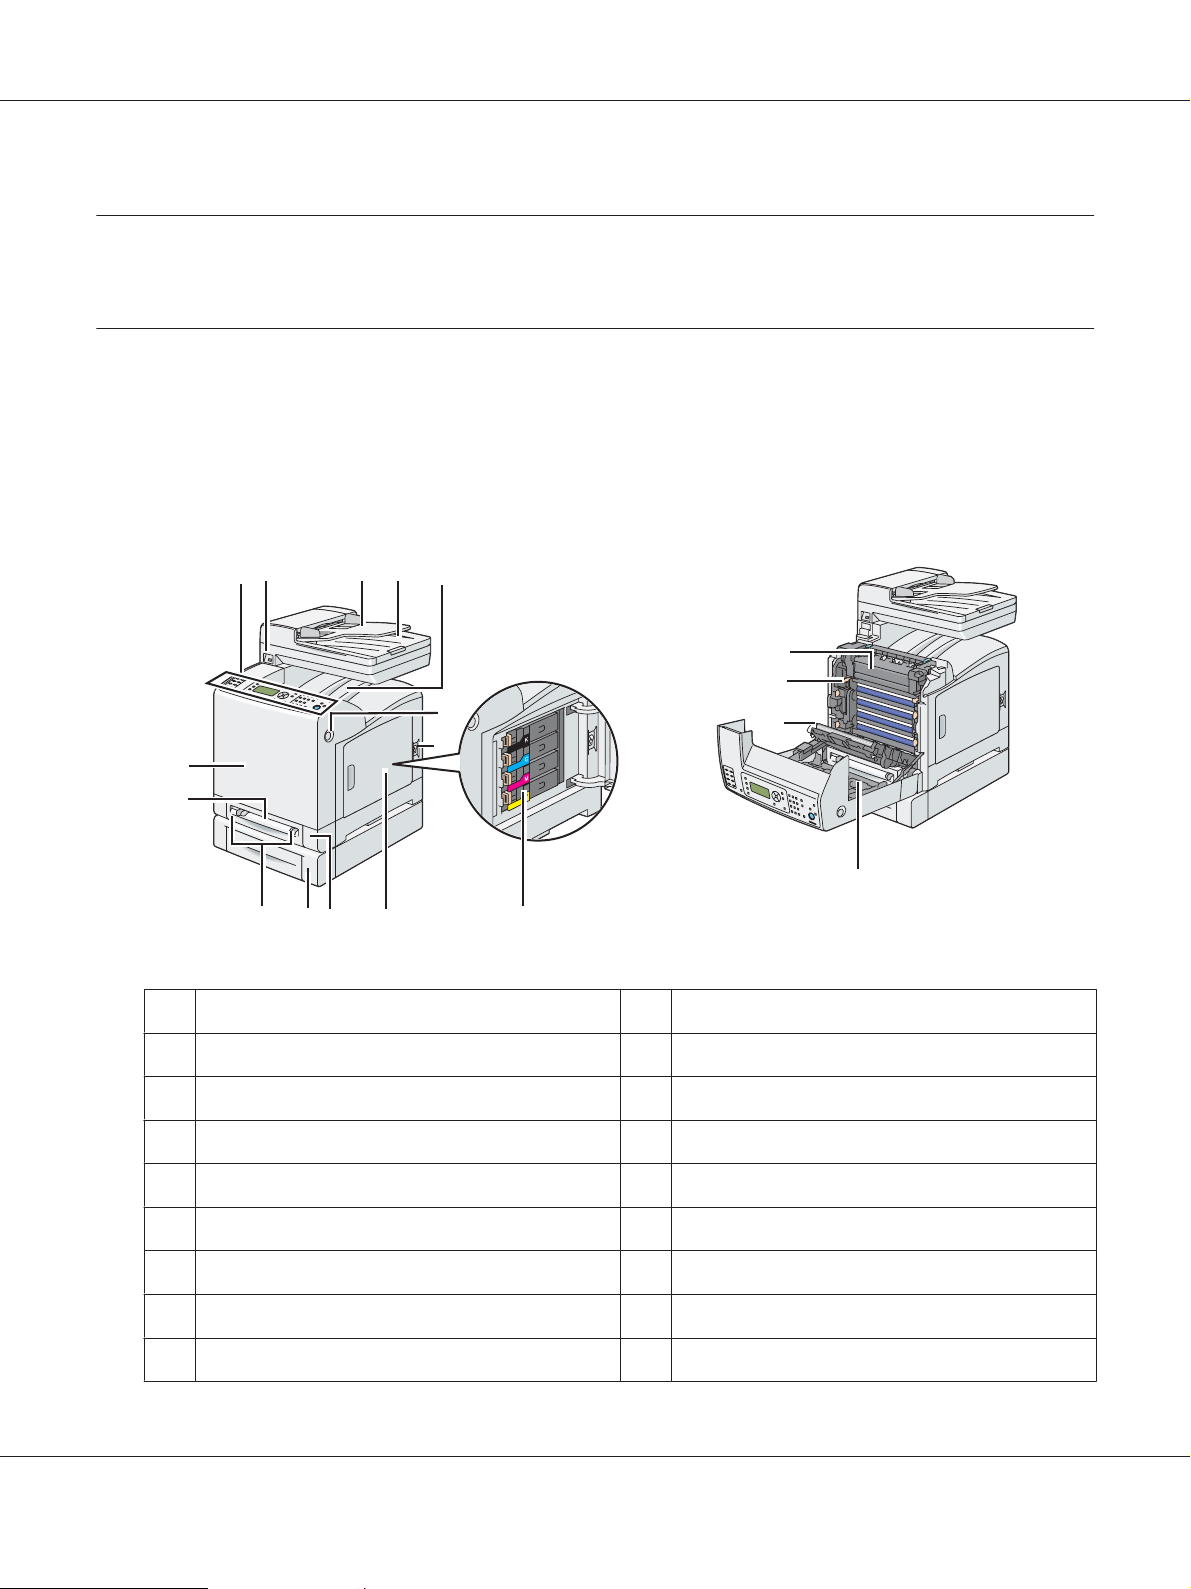
Front View
Epson AcuLaser CX29 Series User’s Guide
1
2
14
13
12 11
1 Operator Panel 2 Front USB Port
3 Document Feeder Tray 4 Document Output Tray
5 Output Tray 6 Side Button
7 Power Switch 8 Toner Cartridge
10
354
9
15
16
6
7
8
17
18
9 Side Cover 10 Standard 250-Sheet Tray
11 Optional 250-Sheet Paper Cassette Unit 12 Width Guides
13 Single Sheet Feeder (SSF) 14 Front Cover
15 Fuser Unit 16 Drum Cartridge
17 Belt Unit 18 Optional Duplex Unit
Basic Operation 26
Page 27
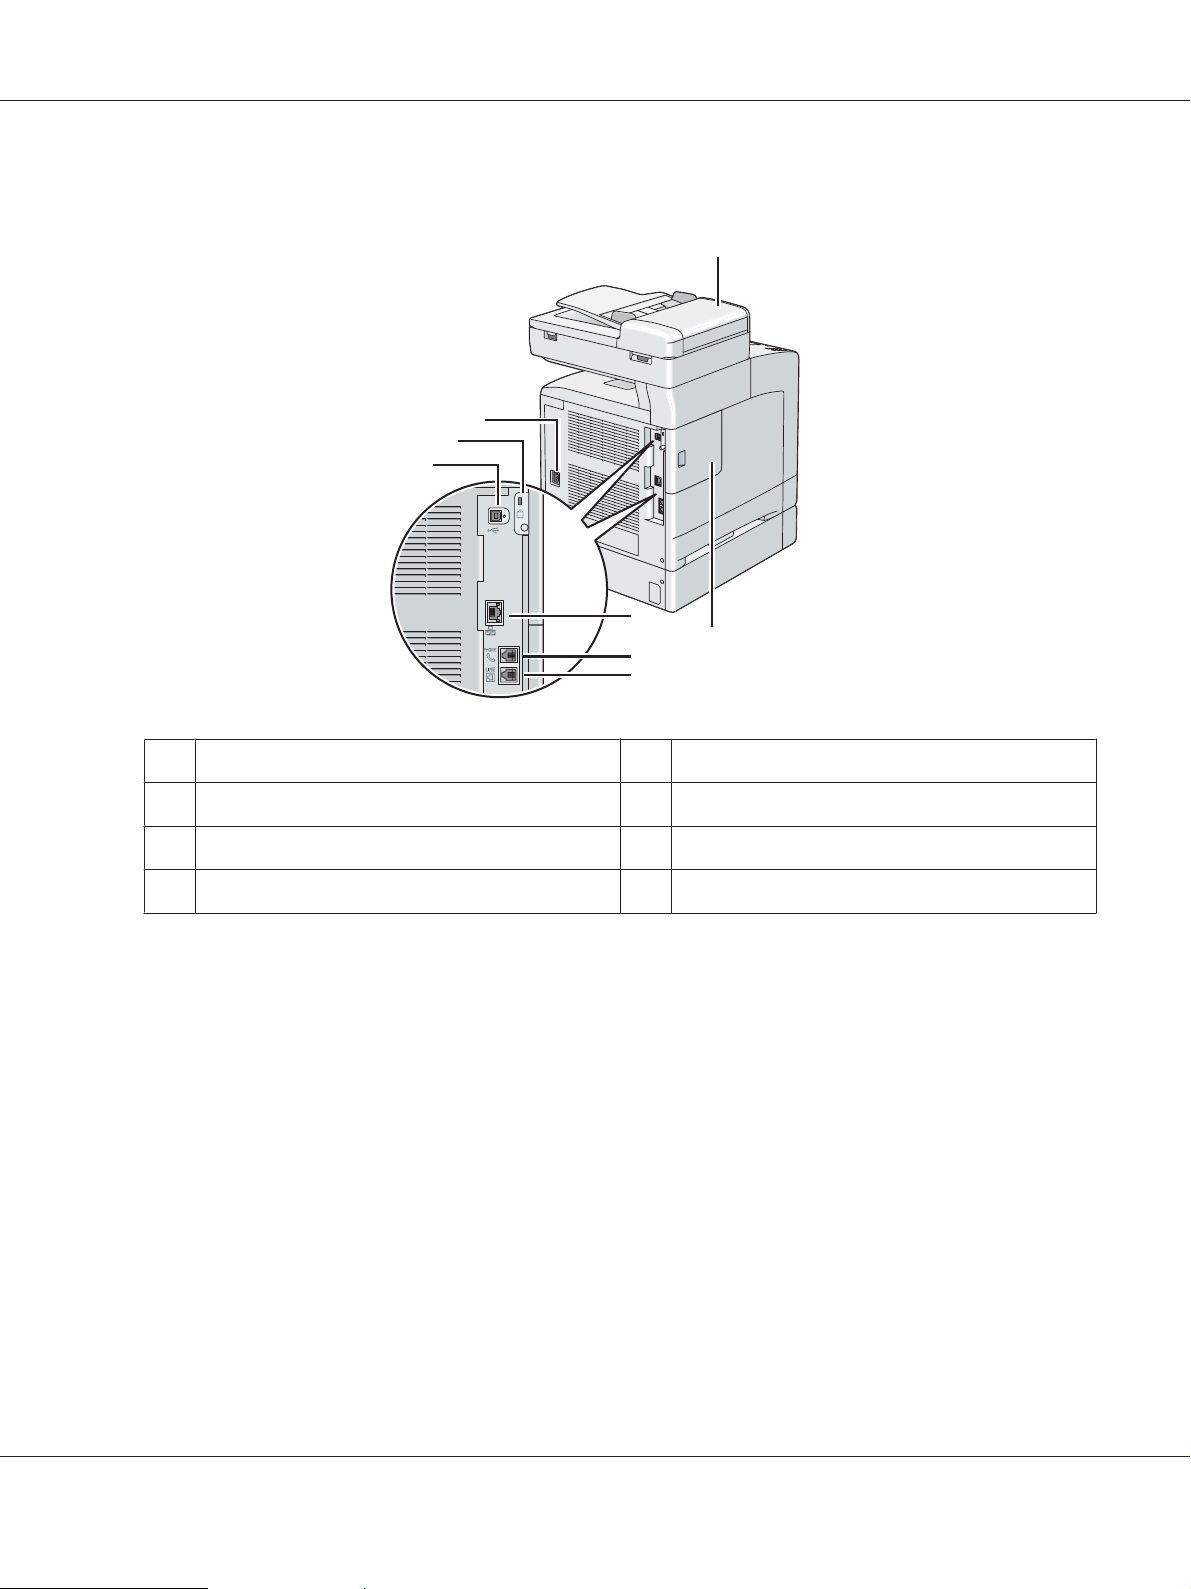
Rear View
Epson AcuLaser CX29 Series User’s Guide
1
8
7
6
3
4
5
1 ADF Cover 2 Control Board Cover
3 Ethernet Port 4 Phone Connector
5 Wall Jack Connector 6 USB Port
7 Security Slot 8 Power Connector
2
Basic Operation 27
Page 28
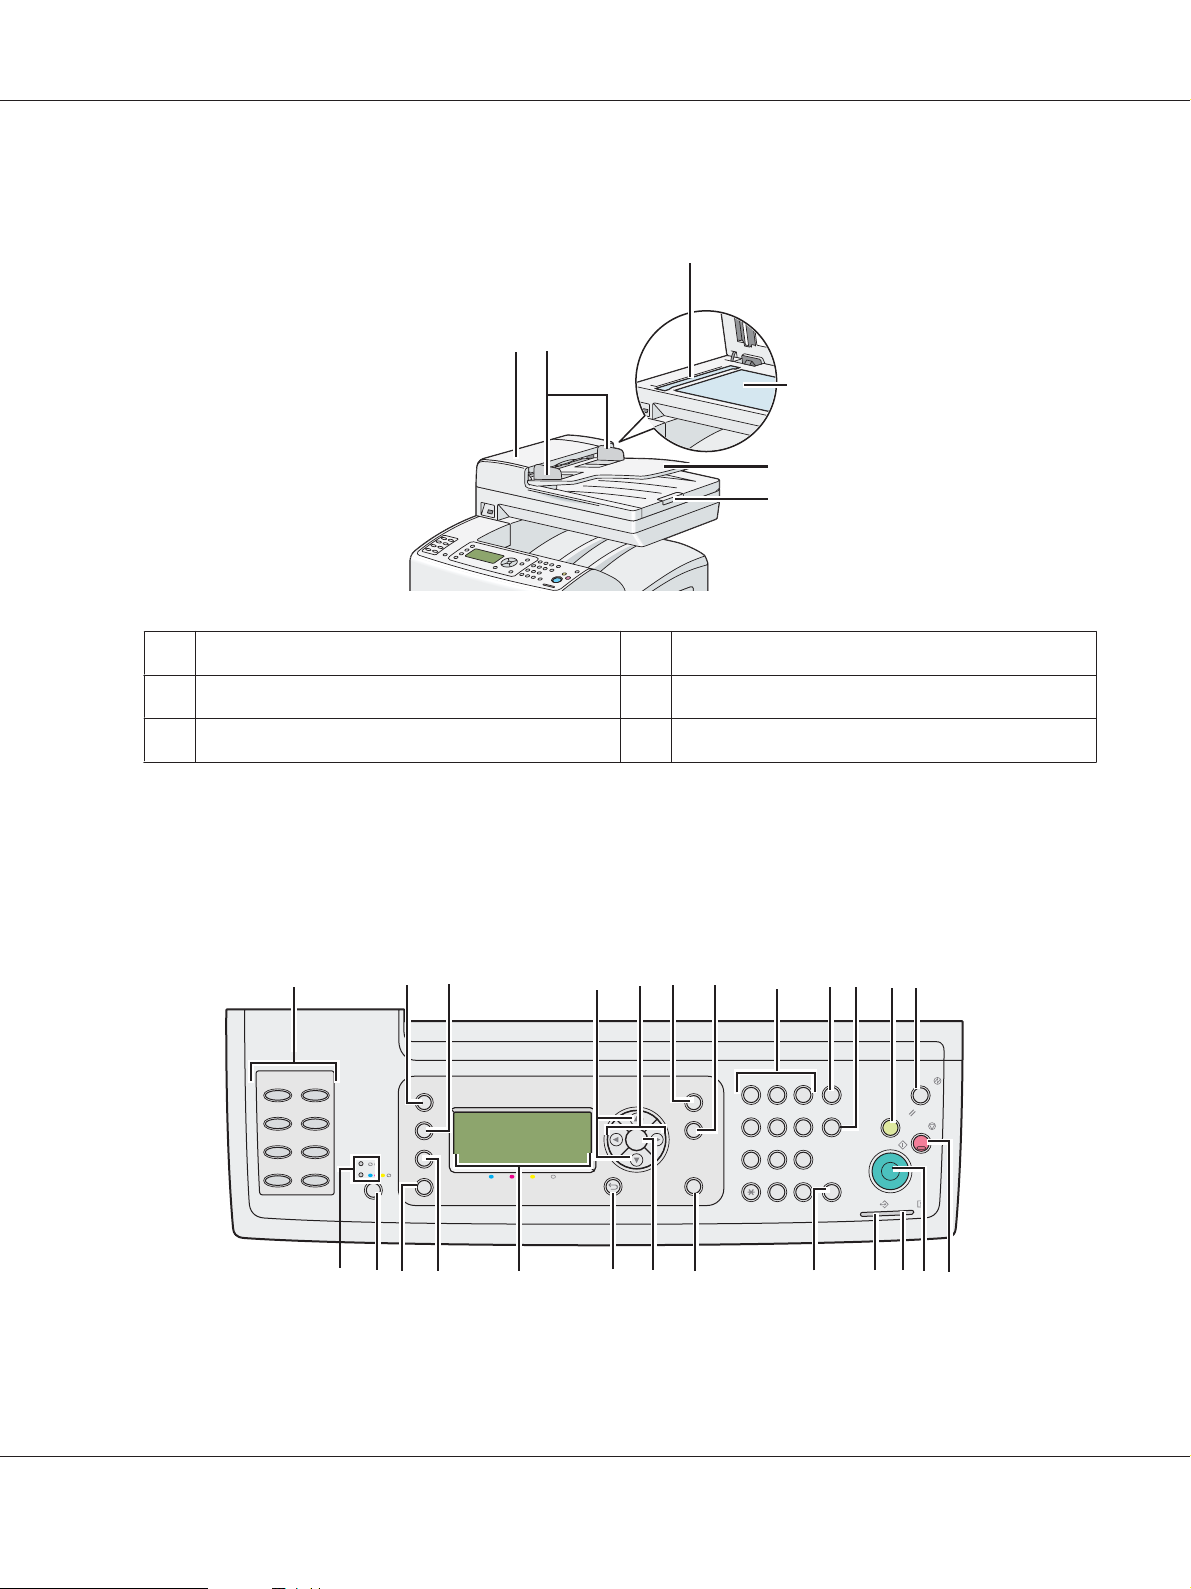
Automatic Document Feeder (ADF)
1
2
1ADF Cover 2Document Guides
Epson AcuLaser CX29 Series User’s Guide
3
4
5
6
3 ADF Glass 4 Document Glass
5 Document Feeder Tray 6 Document Stopper
Operator Panel
The operator panel has a 168 × 64 dots liquid crystal display (LCD), light-emitting diodes (LED),
control buttons, one touch dial buttons and numeric keypad, which allow you to control the printer.
32 4 5 6 7891011121
ABC
@:./
DEF
1
2
3
4
5
6
87
Copy
Scan
Print
Fax
Back
Job Status
System
OK
Address Book
PQRS
1
GHI
4
-_~
3
2
JKL
MNO
5
6
TUV
WXYZ
987
0#
Redial /Pause
Speed Dial
C
Clear All
Start
Energy Saver
Stop
ErrorData
2425
1. One Touch Dial buttons
2223 21 1314151617181920
Basic Operation 28
Page 29

Epson AcuLaser CX29 Series User’s Guide
❏ Calls up the stored Fax number registered in the Phone Book. The first eight fax numbers in the
Phone Book are assigned to the buttons in row order, starting from the left top corner.
2. Copy button
❏ Moves to the top level of the Copy menu.
3. Scan button
❏ Moves to the top level of the Scan menu.
4.
buttons
❏ Moves a cursor or highlight up or down.
buttons
5.
❏ Moves a cursor or highlight left or right.
6. Job Status button
❏ Moves to the top level of the Job Status menu.
7. System button
❏ Moves to the top level of the System menu.
8. Numeric keypad
❏ Enters characters and numbers.
9. Redial / Pause button
❏ Re-dials a telephone number.
❏ Inserts a pause during dialing.
10. Speed Dial button
❏ Calls up a stored telephone number.
11. Clear All button
❏ Resets the current setting, and returns to the top level of each menu.
12. Energy Saver button
Basic Operation 29
Page 30

Epson AcuLaser CX29 Series User’s Guide
❏ Lights up in the Sleep mode. Press this button to exit the Sleep mode.
13. Stop button
❏ Cancels the current processing or pending job.
14. Start button
❏ Starts a job.
15. Error LED
❏ Lights up when the printer has an error.
16. Data LED
❏ Lights up for incoming, outgoing, or pending Fax jobs.
17. C (Clear) button
❏ Deletes characters and numbers.
18. Address Book button
❏ Moves to the top level of the Address Book menu.
19.
button
❏ Confirms the entry of values.
20.
(Back) button
❏ Returns to the previous screen.
21. LCD Panel
❏ Displays various settings, instructions, and error messages.
22. Print button
❏ Moves to the top level of the Print menu.
23. Fax button
❏ Moves to the top level of the Fax menu.
Basic Operation 30
Page 31

Epson AcuLaser CX29 Series User’s Guide
24. Color Mode button
❏ Switches the color mode.
25. B&W/Color LED
❏ Lights up to indicate which color mode is selected.
Note:
❏ Moving to a different menu or returning to a previous screen cancels the current entry or setting.
Make sure to press the
❏ For details on how to use the numeric keypad to enter alphanumeric characters, see “Using the
Numeric Keypad to Enter Characters” on page 302.
button to save the current entry or setting.
Securing the Printer
To protect your printer from theft, you can use the optional Kensington lock.
Attach the Kensington lock to the security slot on your printer.
* Security slot
For details, see the operating instructions supplied with the Kensington lock.
Basic Operation 31
Page 32

Preparing Printer Hardware
1. Open the side cover.
2. Completely pull out the eight yellow ribbons.
Epson AcuLaser CX29 Series User’s Guide
Basic Operation 32
Page 33

Epson AcuLaser CX29 Series User’s Guide
3. Push and slide the latches of the four toner cartridges to the locked position.
4. Close the side cover.
Installing Optional Accessories
You can make the printer more functional by installing the optional accessories. This section describes
how to install the printer’s options such as the additional memory module, optional duplex unit and
optional 250-sheet paper cassette unit.
Basic Operation 33
Page 34

Installing the Additional Memory Module
Note:
Your printer supports additional 512 MB memory module.
1. Turn off the printer.
Epson AcuLaser CX29 Series User’s Guide
2. Turn the screw on the control board cover counterclockwise.
Note:
Loosen the screw. You do not need to remove the screw.
Basic Operation 34
Page 35

Epson AcuLaser CX29 Series User’s Guide
3. Slide the control board cover towards the rear of the printer.
4. Open the control board cover completely.
5. Align the connector of the memory module with the slot and insert the memory module into the
slot.
Basic Operation 35
Page 36

Epson AcuLaser CX29 Series User’s Guide
6. Push the memory module firmly into the slot.
Note:
Ensure that the memory module is firmly fixed in the slot and does not move easily.
7. Close the control board cover, and slide it towards the front of the printer.
Basic Operation 36
Page 37

Epson AcuLaser CX29 Series User’s Guide
8. Turn the screw clockwise.
9. Turn on the printer.
10. Print the System Settings page to confirm that the newly installed memory module is detected by
the printer.
a
Press the System button.
b Select Report/List, and then press the
c Select System Settings, and then press the
button.
button.
The System Settings page is printed.
11. Confirm the amount of Memory Capacity listed under General in the System Settings page.
If the memory capacity has not increased, turn off the printer, unplug the power cord, and
re-install the memory module.
12. If you installed the additional memory module after installing the print driver, update your driver
by following the instructions for the operating system you are using. If the printer is on a network,
update the driver for each client.
Updating Your Driver to Detect Additional Memory Module
The following procedure uses Microsoft® Windows® and the PCL 6 driver as an example.
Basic Operation 37
Page 38

Epson AcuLaser CX29 Series User’s Guide
Microsoft® Windows® 7/
Windows 7 x64/
Windows Server
x64
Windows Vista
Windows Vista x64
Windows Server 2008/
Windows Server 2008 x64
®
/
®
2008 R2
1. Click Start — Devices and Printers.
2. Right-click the printer icon of the Epson AcuLaser CX29 Series and select Printer
properties.
3. Click the Options tab, and then click Get Information from Printer.
4. Click Apply, and then click OK.
5. Close the Devices and Printers folder.
1. Click Start — Control Panel — Hardware and Sound — Printers.
2. Right-click the printer icon of the Epson AcuLaser CX29 Series and select
Properties.
3. Click the Options tab, and then click Get Information from Printer.
4. Click Apply, and then click OK.
5. Close the Printers folder.
1. Click Start — Control Panel — Printers.
2. Right-click the printer icon of the Epson AcuLaser CX29 Series and select
Properties.
3. Click the Options tab, and then click Get Information from Printer.
4. Click Apply, and then click OK.
5. Close the Printers folder.
Windows XP/
Windows XP x64/
Windows Server 2003/
Windows Server 2003 x64
1. Click Start (start for Windows XP) — Printers and Faxes.
2. Right-click the printer icon of the Epson AcuLaser CX29 Series and select
Properties.
3. Click the Options tab, and then click Get Information from Printer.
4. Click Apply, and then click OK.
5. Close the Printers and Faxes folder.
If the printer information is not updated automatically after clicking Get Information from Printer,
follow these steps:
1. Click the Options tab, and then select Memory Capacity in Items.
2. Select the total amount of the installed printer memory in Memory Capacity.
3. Click Apply, and then click OK.
4. Close the Printers and Faxes (, Printers, or Devices and Printers) folder.
Basic Operation 38
Page 39

Installing the Optional Duplex Unit
1. Turn off the printer and disconnect the power cord.
Epson AcuLaser CX29 Series User’s Guide
2. Unpack the optional duplex unit.
Basic Operation 39
Page 40

3. Push the side button to open the front cover.
4. Remove the connector cap.
Epson AcuLaser CX29 Series User’s Guide
Important:
Make sure to remove the cap that is attached to the printer. Installing the optional duplex unit
without removing the cap may result in damage or malfunction of the printer.
Basic Operation 40
Page 41

Epson AcuLaser CX29 Series User’s Guide
5. Face the connectors of the optional duplex unit over the slots and push the optional duplex unit
into them.
Note:
Make sure the optional duplex unit is securely installed in the printer and cannot be easily moved.
6. Close the front cover.
Basic Operation 41
Page 42

Epson AcuLaser CX29 Series User’s Guide
7. Reconnect the power cord to the power connector and turn on the printer.
8. If you installed the optional duplex unit after installing the print driver, update your driver by
following the instructions for each operating system. If the printer is on a network, update the
driver for each client.
Updating Your Driver to Detect Optional Duplex Unit
The following procedure uses Microsoft® Windows® and the PCL 6 driver as an example.
Microsoft Windows 7/
Windows 7 x64/
Windows Server 2008 R2 x64
1. Click Start — Devices and Printers.
2. Right-click the printer icon of the Epson AcuLaser CX29 Series and select Printer
properties.
3. Click the Options tab, and then click Get Information from Printer.
4. Click Apply, and then click OK.
5. Close the Devices and Printers folder.
Basic Operation 42
Page 43

Epson AcuLaser CX29 Series User’s Guide
Windows Vista/
Windows Vista x64
Windows Server 2008/
Windows Server 2008 x64
Windows XP/
Windows XP x64/
Windows Server 2003/
Windows Server 2003 x64
1. Click Start — Control Panel — Hardware and Sound — Printers.
2. Right-click the printer icon of the Epson AcuLaser CX29 Series and select
Properties.
3. Click the Options tab, and then click Get Information from Printer.
4. Click Apply, and then click OK.
5. Close the Printers folder.
1. Click Start — Control Panel — Printers.
2. Right-click the printer icon of the Epson AcuLaser CX29 Series and select
Properties.
3. Click the Options tab, and then click Get Information from Printer.
4. Click Apply, and then click OK.
5. Close the Printers folder.
1. Click Start (start for Windows XP) — Printers and Faxes.
2. Right-click the printer icon of the Epson AcuLaser CX29 Series and select
Properties.
3. Click the Options tab, and then click Get Information from Printer.
4. Click Apply, and then click OK.
5. Close the Printers and Faxes folder.
If the printer information is not updated automatically after clicking Get Information from Printer,
follow these steps:
1. Click the Options tab, and then select Duplexer in Items.
2. Select Available for the optional duplex unit setting in Duplexer.
3. Click Apply, and then click OK.
4. Close the Printers and Faxes (, Printers, or Devices and Printers) folder.
Basic Operation 43
Page 44

Epson AcuLaser CX29 Series User’s Guide
Installing the Optional 250-Sheet Paper Cassette Unit
1. Turn off the printer.
2. Disconnect the power cord from the power connector on the rear of the printer.
3. Remove the tape and the bag holding the screws.
4. Place the optional 250-sheet paper cassette unit in the location that the printer is located.
Basic Operation 44
Page 45

Epson AcuLaser CX29 Series User’s Guide
5. Pull the standard 250-sheet tray out of the printer about 200 mm. Hold the standard 250-sheet tray
with both hands, and remove it from the printer.
6. Lift the printer and align the five guide pins of the optional 250-sheet paper cassette unit with the
holes at the bottom of the printer. Gently lower the printer onto the optional 250-sheet paper
cassette unit.
Caution:
c
Two people are required to lift the printer.
Caution:
c
Be careful not to pinch your fingers when lowering the printer onto the optional 250-sheet
paper cassette unit.
Basic Operation 45
Page 46

Epson AcuLaser CX29 Series User’s Guide
7. Secure the optional 250-sheet paper cassette unit to the printer by tightening the two screws
provided with the cassette unit with a coin or similar object.
8. Insert the standard 250-sheet tray into the printer, and push until it stops.
Important:
Do not use excessive force on the tray. Doing so could damage the tray or the inside of the printer.
9. Reconnect all cables into the rear of the printer and turn on the printer.
Note:
The printer will automatically detect the attached tray but will not detect the paper type.
10. Print the System Settings page to confirm the optional 250-sheet paper cassette unit is installed
correctly.
Basic Operation 46
Page 47

a
Press the System button.
Epson AcuLaser CX29 Series User’s Guide
b Select Report/List, and then press the
c Select System Settings, and then press the
button.
button.
The System Settings page is printed.
11. Confirm Tray 2 (250 Sheet Feeder) is listed under Printer Options in the System Settings
page.
If the cassette unit is not listed, turn off the printer, unplug the power cord, and re-install the
optional 250-sheet paper cassette unit.
12. After loading paper in the optional 250-sheet paper cassette unit, specify the paper type from the
printer operator panel.
a
Press the System button.
b Select Tray Settings, and then press the
c Select Tray 2, and then press the
button.
button.
d Select Paper Type, and then press the
button.
e Select the paper type for the optional 250-sheet paper cassette unit, and then press the
button.
13. If you installed the optional 250-sheet paper cassette unit after installing the print driver, update
your driver by following the instructions for each operating system. If the printer is on a network,
update the driver for each client.
Updating Your Driver to Detect Optional 250-Sheet Paper Cassette Unit
The following procedure uses Microsoft® Windows® and the PCL 6 driver as an example.
Basic Operation 47
Page 48

Epson AcuLaser CX29 Series User’s Guide
Microsoft Windows 7/
Windows 7 x64/
Windows Server 2008 R2 x64
Windows Vista/
Windows Vista x64
Windows Server 2008/
Windows Server 2008 x64
1. Click Start — Devices and Printers.
2. Right-click the printer icon of the Epson AcuLaser CX29 Series and select Printer
properties.
3. Click the Options tab, and then click Get Information from Printer.
4. Click Apply, and then click OK.
5. Close the Devices and Printers folder.
1. Click Start — Control Panel — Hardware and Sound — Printers.
2. Right-click the printer icon of the Epson AcuLaser CX29 Series and select
Properties.
3. Click the Options tab, and then click Get Information from Printer.
4. Click Apply, and then click OK.
5. Close the Printers folder.
1. Click Start — Control Panel — Printers.
2. Right-click the printer icon of the Epson AcuLaser CX29 Series and select
Properties.
3. Click the Options tab, and then click Get Information from Printer.
4. Click Apply, and then click OK.
5. Close the Printers folder.
Windows XP/
Windows XP x64/
Windows Server 2003/
Windows Server 2003 x64
1. Click Start (start for Windows XP) — Printers and Faxes.
2. Right-click the printer icon of the Epson AcuLaser CX29 Series and select
Properties.
3. Click the Options tab, and then click Get Information from Printer.
4. Click Apply, and then click OK.
5. Close the Printers and Faxes
folder.
If the printer information is not updated automatically after clicking Get Information from Printer,
follow these steps:
1. Click the Options tab, and then select Paper Tray Configuration in Items.
2. Select Two trays for the optional 250-sheet paper cassette unit setting in Paper Tray
Configuration.
3. Click Apply, and then click OK.
4. Close the Printers and Faxes (, Printers, or Devices and Printers) folder.
Basic Operation 48
Page 49

Epson AcuLaser CX29 Series User’s Guide
Setting Initial Settings on the Operator Panel
You need to set the printer language, region, clock date, and time when you turn on printer for the first
time.
When you turn on the printer, a wizard appears on the LCD panel. Follow the steps below to set the
initial settings.
Note:
If you do not start configuring the initial settings, Ready appears on the LCD panel in three minutes.
After that, you can set the following initial setup by enabling Power On Wizard on the LCD panel or
EpsonNet Config if needed.
For more information on operator panel, see “Understanding the Printer Menus” on page 227.
For more information on EpsonNet Config, see “EpsonNet Config” on page 52.
1. Please Select Language appears. Select the language you want to use on the operator panel
from the following drop-down list, and then press the
button.
English
Français
Italiano
Deutsch
Español
Nederlands
Português
Pусский
Türkçe
Traditional Chinese
Korean
2. Press the button to start setting the region.
3. Select your region, and then press the
button.
4. Select the appropriate time zone, and then press the
button.
Basic Operation 49
Page 50

5. Specify the current date, and then press the button.
Epson AcuLaser CX29 Series User’s Guide
6. Specify the current time, and then press the
7. Press the
If you want to skip the Fax Setup, press the Start button to exit the wizard and to restart the
printer.
8. Enter your fax number, and then press the
9. Enter a name, and then press the
10. Press the
button for Fax Setup.
button.
button to exit the wizard and to restart the printer.
button.
button.
Printing a Panel Settings Page
The Panel Settings page shows current settings for the operator panel menus.
1. Press the System button.
2. Select Report/List, and then press the
3. Select Panel Settings, and then press the
The Panel Settings page is printed.
button.
button.
Power Saver Mode
The printer has a power saving feature that reduces power consumption during periods of inactivity.
This feature operates in two modes: the Low Power mode and Sleep mode. As delivered, the printer
switches to the Low Power mode three minutes after the last print job is printed. The printer then
switches to the Sleep mode after another six minutes of inactivity. When the printer is in the Low
Power mode, the LCD backlight turns off. In the Sleep mode, Energy Saver button lights up. The
display also goes blank and displays nothing.
The factory default settings of three minutes (Low Power mode) and six minutes (Sleep mode) are
changeable within the range of 3 to 60 minutes (Low Power mode) and 1 to 6 minutes (Sleep mode).
The printer returns to the ready-to-print state in about 30 seconds when re-activated.
Basic Operation 50
Page 51

Epson AcuLaser CX29 Series User’s Guide
See Also:
“Setting the Power Saver Timer Option” on page 301
Exiting the Power Saver Mode
The printer automatically exits the Power Saver mode when it receives a print job from a computer. To
manually exit the Low Power mode, press any button on the operator panel. To exit the Sleep mode,
press the Energy Saver button.
Note:
❏ Opening and closing a cover will cause the printer to exit the Low Power mode and the Sleep mode.
❏ Opening and closing the ADF cover will cause the printer to exit the Sleep mode.
❏ When the printer is in the Sleep mode, all buttons on the operator panel except for the Energy Saver
button do not function. To use the buttons on the operator panel, press the Energy Saver button to
exit the Sleep mode.
See Also:
“Setting the Power Saver Timer Option” on page 301
Basic Operation 51
Page 52

Epson AcuLaser CX29 Series User’s Guide
Chapter 3
Printer Management Software
Print and Scan Drivers
To access all of your printer’s features, install the print and scan drivers from the Software Disc.
❏ The print drivers enable your computer and printer to communicate and provide access to your
printer features.
❏ The scan drivers enable you to scan images directly to your personal computer and place scanned
images directly into an application via USB or the network.
See Also:
“Installing the Scan Driver” on page 151
EpsonNet Config
This section provides information on EpsonNet Config, a hyper text transfer protocol (HTTP)-based
web page service that is accessed through your web browser.
These pages give you instant access to printer status, and printer configuration options. Anyone on
your network can access the printer using their web browser software. In administrative mode you can
change the configuration of the printer, set up your fax directories, and manage your printer settings
without leaving your computer.
Note:
Users who are not given passwords by the administrator can still view the configuration settings and
options in user mode. They will not be able to save or apply any changes to the current configuration.
Creating an Administrative Password
1. Launch your web browser.
2. Enter the IP address in the browser’s Address field, and then press the Enter key.
3. Click the Properties tab.
Printer Management Software 52
Page 53

Epson AcuLaser CX29 Series User’s Guide
4. In the left navigation panel, scroll down to Security and select Administrator Settings.
5. Select Enabled for Administrator Mode.
6. In the Administrator Login ID field, enter a name for the administrator.
Note:
The default ID and password are both blank (NULL).
7. In the Administrator Password and Re-enter Password fields, enter a password for the
administrator.
8. In the Maximum Login Attempts field, enter the number of login attempts allowed.
9. Click Apply. Your new password has been set and anyone with the administrator name and
password can log in and change the printer configuration and settings.
Status Monitor (Windows Only)
You can check the printer status with Status Monitor. Double-click the Status Monitor printer icon on
the taskbar at the bottom right of the screen. The Select Printer window appears, which displays the
printer name, printer connection ports, and printer status. Check the column Status to know the
current status of your printer.
Status Settings button: Displays the Status Settings dialog box and allows you to modify the Status
Monitor settings.
Click the name of the desired printer listed on the Select Printer window. The Printer Status
window appears.
The Printer Status window alerts you when there is a warning or when an error occurs, for example,
when a paper jam occurs or toner is running low.
By default, the Printer Status window launches when printing and an error occurs. When an error
occurs, the error message appears on the Printer Status window. You can specify the conditions for
starting the Printer Status window in Auto start setup.
To change the pop-up settings for the Printer Status window:
The following procedure uses Microsoft
Windows® XP as an example.
®
Printer Management Software 53
Page 54

Epson AcuLaser CX29 Series User’s Guide
1. Click start — All Programs — EPSON — Status Monitor — Activate Status Monitor.
The Select Printer window appears.
2. Click Status Settings.
The Status Settings dialog box appears.
3. Select the Pop up setting tab, and then select the type of the pop-up from Auto start setup.
You can also check the toner level of your printer.
The Status Monitor is installed with your Epson print driver.
Address Book Editor
The Address Book Editor provides a convenient interface for modifying the printer’s address book
entries. With it you can create:
❏ Fax entries
❏ Email entries
❏ Server entries
When you start the software, if the printer is connected to your computer via USB or to a network, the
Address Book Editor reads the printer’s address book. You can create, edit, and delete entries. After
making changes, you can then save the updated address book to the printer or to your computer.
The Address Book Editor can be installed from the Software Disc. It is available for Windows and
Mac OS
X.
®
Express Scan Manager
The Express Scan Manager handles scan jobs sent from the printer to your computer via USB. When a
scan job is sent from the printer to the computer, Express Scan Manager automatically manages the
scan job.
Before scanning to your computer, start Express Scan Manager and configure the scan settings. You
can specify settings for output destination.
Printer Management Software 54
Page 55

Epson AcuLaser CX29 Series User’s Guide
The Express Scan Manager can be installed from the Software Disc. It is available for Windows and
Mac OS X.
See Also:
“Scanning” on page 151
Printer Management Software 55
Page 56

Epson AcuLaser CX29 Series User’s Guide
Chapter 4
Network Basics
Overview of Network Setup and Configuration
To set up and configure the network:
1. Connect the printer to the network using the recommended hardware and cables.
2. Turn on the printer and the computer.
3. Print the System Settings page and keep it for referencing network settings.
4. Install the driver software on the computer from the Software Disc. For information on driver
installation, see the section in this chapter for the specific operating system you are using.
5. Configure the printer’s TCP/IP address, which is required to identify the printer on the network.
❏ Microsoft
automatically set the printer’s IP address if the printer is connected to an established TCP/IP
network. You can also manually set the printer’s IP address on the operator panel.
❏ Mac OS
panel.
6. Print a System Settings page to verify the new settings.
See Also:
“Printing a System Settings Page” on page 121
Windows® operating systems: Run the Installer on the Software Disc to
®
X and Linux systems: Manually set the printer’s TCP/IP address on the operator
®
Connecting Your Printer
Your Epson AcuLaser CX29 Series interconnection cables must meet the following requirements:
Connection Type Connection Specifications
USB USB 2.0
Ethernet 10 Base-T/100 Base-TX/1000 Base-TX
Network Basics 56
Page 57

Wall jack connector RJ11
Phone connector RJ11
1
Epson AcuLaser CX29 Series User’s Guide
2
1USB port
2 Ethernet port
3 Phone connector
4 Wall jack connector
3
4
Network Basics 57
Page 58

Epson AcuLaser CX29 Series User’s Guide
Connecting Printer to Computer or Network
Connect the printer via Ethernet or USB. A USB connection is a direct connection and is not used for
networking. An Ethernet connection is used for networking. Hardware and cabling requirements
vary for the different connection methods. Ethernet cable and hardware are generally not included
with your printer and must be purchased separately.
The available features for each connection type are shown in the following table.
Connection Type Available Features
USB When connected via USB you can:
❏ Instruct print jobs from a computer.
❏ Scan and print an image into an application.
❏ Scan and print an image to a folder on the computer.
❏ Use the Address Book Editor to manage address book entries.
Ethernet When connected via Ethernet you can:
❏ Instruct print jobs from a computer on the network.
❏ Scan to a computer on the network.
❏ Scan to email.
❏ Use EpsonNet Config to manage address book entries.
USB Connection
A local printer is directly connected to your computer using the USB cable. If your printer is connected
to a network instead of your computer, skip this section and go to “Network Connection” on
page 59.
To connect the printer to a computer:
Network Basics 58
Page 59

Epson AcuLaser CX29 Series User’s Guide
1. Connect the smaller USB connector into the USB port on the rear of the printer.
Note:
Ensure that you match the USB symbol on the cable to the USB symbol on the printer.
2. Connect the other end of the cable into a USB port of the computer.
Note:
Do not connect the printer USB cable to the USB port available on the keyboard.
Network Connection
To connect the printer to a network:
Network Basics 59
Page 60

Epson AcuLaser CX29 Series User’s Guide
1. Connect an Ethernet cable.
To connect the printer to the network, connect one end of the Ethernet cable into the Ethernet port on
the rear of the printer, and the other end to a LAN drop or hub.
Setting the IP Address
TCP/IP and IP Addresses
If your computer is on a large network, contact your network administrator for the appropriate TCP/
IP addresses and additional system settings information.
If you are creating your own small Local Area Network or connecting the printer directly to your
computer using Ethernet, follow the procedure for automatically setting the printer’s IP address.
Computers and printers primarily use TCP/IP protocols to communicate over an Ethernet network.
W it h TC P/ IP p ro to c ol s, e ac h p r in te r an d c o mp ut er m us t ha ve a u n iq ue I P a dd r es s. I t i s i m po rt a nt th a t
the addresses are similar, but not the same; only the last digit needs to be different. For example, your
printer can have the address 192.168.1.2 while your computer has the address 192.168.1.3. Another
device can have the address 192.168.1.4.
Many networks have a Dynamic Host Configuration Protocol (DHCP) server. A DHCP server
automatically programs an IP address into every computer and printer on the network that is
configured to use DHCP. A DHCP server is built into most cable and Digital Subscriber Line (DSL)
routers. If you use a cable or DSL router, see your router’s documentation for information on IP
addressing.
Network Basics 60
Page 61

Epson AcuLaser CX29 Series User’s Guide
Automatically Setting the Printer’s IP Address
If the printer is connected to a small established TCP/IP network without a DHCP server, use the
installer on the Software Disc to detect or assign an IP address to your printer. For further
instructions, insert the Software Disc into your computer’s CD/DVD drive. After the Installer
launches, follow the prompts for installation.
Note:
For the automatic installer to function, the printer must be connected to an established TCP/IP network.
Dynamic Methods of Setting the Printer’s IP Address
There are two protocols available for dynamically setting the printer’s IP address:
❏ DHCP (enabled by default)
❏ AutoIP
You can turn on/off both protocols using the operator panel, or use EpsonNet Config to turn on/off
DHCP.
Note:
You can print a report that includes the printer’s IP address. On the operator panel, press the System
button, select Report/List, press the
button. The IP address is listed on the System Settings page.
button, select System Settings, and then press the
Using the Operator Panel
To turn on/off either the DHCP or AutoIP protocol:
1. On the operator panel, press the System button.
2. Select Admin Menu, and then press the
3. Select Wired Network, and then press the
4. Select TCP/IP, and then press the
button.
button.
button.
5. Select IPv4, and then press the
6. Select Get IP Address, and then press the
button.
button.
Network Basics 61
Page 62

Epson AcuLaser CX29 Series User’s Guide
7. Select DHCP / Autonet, and then press the button.
Using EpsonNet Config
To turn on/off the DHCP protocol:
1. Launch your web browser.
2. Enter the IP address in the browser’s Address field, and then press the Enter key.
3. Select Properties.
4. Select the Protocol Settings folder on the left navigation panel.
5. Select TCP/IP.
6. In the Get IP Address field, select the DHCP / Autonet option.
7. Click the Apply button.
Assigning an IP Address (for IPv4 Mode)
Note:
❏ When you assign an IP address manually in IPv6 mode, use the EpsonNet Config. To display the
EpsonNet Config, use the link local address. To check a link local address, see “Printing and Checking
the System Settings Page” on page 65 on page 68.
❏ Assigning an IP address is considered as an advanced function and is normally done by a system
administrator.
❏ Depending on the address class, the range of the IP address assigned may be different. On Class A, for
example, an IP address in the range from 0.0.0.0 to 127.255.255.255 will be assigned. For
assignment of IP addresses, contact your system administrator.
You can assign the IP address by using the operator panel.
1. Turn on the printer.
Ensure that Ready message appears on the LCD panel.
2. On the operator panel, press the System button.
Network Basics 62
Page 63

3. Select Admin Menu, and then press the button.
Epson AcuLaser CX29 Series User’s Guide
4. Select Wired Network, and then press the
5. Select TCP/IP, and then press the
6. Select IPv4, and then press the
button.
button.
7. Select Get IP Address, and then press the
8. Select Panel, and then press the
button.
button.
button.
9. Ensure that the message This Setting Becomes Effective after Restart appears, and
then press any button.
10. Press the
button to select IP Address, and then press the button.
The cursor is located at the first octet of the IP address.
11. Enter the value of the IP address using the numeric keypad.
12. Press the
button.
The cursor moves to the next octet.
13. Repeat steps 11 to 12 to set all of the digits in the IP address, and then press the
button.
14. Ensure that the message This Setting Becomes Effective after Restart appears, and
then press any button.
15. Press the
button to select Subnet Mask, and then press the button.
The cursor is located at the first octet of the subnet mask.
16. Enter the value of the subnet mask using the numeric keypad.
17. Press the
button.
The cursor moves to the next octet.
18. Repeat steps 16 to 17 to set subnet mask, and then press the
button.
Network Basics 63
Page 64

Epson AcuLaser CX29 Series User’s Guide
19. Ensure that the message This Setting Becomes Effective after Restart appears, and
then press any button.
20. Press the
The cursor is located at the first octet of the gateway address.
21. Enter the value of the gateway address using the numeric keypad.
22. Press the
The cursor moves to the next octet.
23. Repeat steps 21 to 22 to set gateway address, and then press the
24. Ensure that the message This Setting Becomes Effective after Restart appears, and
then press any button.
25. Turn off and turn on the printer.
See Also:
“Operator Panel” on page 28
button to select Gateway Address, and then press the button.
button.
button.
Verifying the IP Settings
You can confirm the settings by printing the system settings report or using the ping command.
The following procedure uses Windows XP as an example.
1. Print the System Settings page.
2. Look under the IPv4 heading on the System Settings page to ensure that the IP address, subnet
mask, and gateway are appropriate.
To verify if the printer is active on the network, run the ping command in your computer:
1. Click start, and select Run.
2. Enter cmd, and then click OK.
A black window is displayed.
Network Basics 64
Page 65

Epson AcuLaser CX29 Series User’s Guide
3. Enter ping xx.xx.xx.xx (where xx.xx.xx.xx is the IP address of your printer), and then press the
Enter key.
4. Reply from the IP address denotes printer is active on the network.
See Also:
“Printing and Checking the System Settings Page” on page 65
Printing and Checking the System Settings Page
Print the System Settings page and check your printer’s IP address by using the operator panel.
1. On the operator panel, press the System button.
2. Select Report/List, and then press the button.
3. Select System Settings, and then press the
The System Settings page is printed.
4. Confirm the IP address next to IP Address under Network (Wired) on the System Settings page.
If the IP address is 0.0.0.0, wait for a few minutes to resolve the IP address automatically, and then
print the System Settings page again.
If the IP address is not resolved automatically, see “Assigning an IP Address (for IPv4 Mode)” on
page 62.
button.
Installing Print Driver on Computers Running Windows
Identifying Print Driver Pre-install Status (For Network Connection Setup)
Before installing the print driver on your computer, print the System Settings page to check the IP
address of your printer.
The Operator Panel
1. Press the System button.
Network Basics 65
Page 66

2. Select Report/List, and then press the button.
Epson AcuLaser CX29 Series User’s Guide
3. Select System Settings, and then press the
button.
The System Settings page is printed.
4. Find the IP address under Network (Wired) on the System Settings page.
If the IP address is 0.0.0.0, wait for a few minutes to resolve the IP address automatically, and then
print the System Settings page again.
If the IP address is not resolved automatically, see “Assigning an IP Address (for IPv4 Mode)” on
page 62.
Disabling the Firewall Before Installing Your Printer
Note:
For Windows XP, Service Pack 2 or 3 must be installed.
If you are running one of the following operating systems, you must disable the firewall before
installing the Epson printer software:
❏ Windows 7
❏ Windows Vista
❏ Windows Server 2008 R2
❏ Windows Server 2008
❏ Windows XP
The following procedure uses Windows XP as an example.
1. Click start — Help and Support.
Note:
For Windows Vista, Windows Server 2008, Windows Server 2008 R2 and Windows 7 operating
systems, if you use Online Help, switch to Offline Help on Windows Help and Support window.
2. In the Search box, enter firewall and then press the Enter key.
In the list, click Turn Windows Firewall on or off and then follow the instructions on the screen.
Network Basics 66
Page 67

Epson AcuLaser CX29 Series User’s Guide
Enable the firewall after the installation of the Epson printer software is complete.
Inserting the Software Disc
For Installing PCL Print Driver
1. Insert the Software Disc into your computer to start Easy Install.
Note:
If the Software Disc does not automatically launch, click Start (start for Windows XP) — All Programs
(for Windows Vista and Windows 7) — Accessories (for Windows Vista and Windows 7) — Run, and
then enter D:\setup.exe (where D is the drive letter), and then click OK.
For Installing PostScript Print Driver
1. Insert the Software Disc into your computer.
USB Connection Setup
For Installing PCL Print Driver
1. Turn on the printer.
2. Click Easy Install.
The SOFTWARE LICENSE AGREEMENT appears.
3. If you agree to the terms of the SOFTWARE LICENSE AGREEMENT, select Agree and then click
Next.
The Easy Install Navi launches.
4. Click Installing Driver and Software.
5. Click Print/Fax Driver.
6. Click Connect via USB.
7. Follow the procedures described in the Help to install the print driver.
Network Basics 67
Page 68

Epson AcuLaser CX29 Series User’s Guide
USB Printing
A personal printer is a printer attached to your comput er or a p rint ser ver usi ng a US B. If yo ur prin ter
is attached to a network and not your computer, see “Network Connection Setup” on page 68.
For Installing PostScript Print Driver
Windows users should read the PostScript User's Guide for information on how to install the print
driver.
Network Connection Setup
Note:
❏ To use this printer in a Linux environment, you need to install a Linux driver. For more information
on how to install and use these, see also “Installing Print Driver on Computers Running Linux
(CUPS)” on page 75.
❏ When using a CD drive in a Linux environment, you need to mount the CD according to your system
environment. The command strings are mount/media/CD-ROM.
For installing PCL print driver
1. Turn on the printer.
2. Click Easy Install.
The SOFTWARE LICENSE AGREEMENT appears.
3. If you agree to the terms of the SOFTWARE LICENSE AGREEMENT, select Agree and then click
Next.
The Easy Install Navi launches.
4. Click Installing Driver and Software.
5. Click Print/Fax Driver.
6. Select Standard or Custom setup.
7. Follow the on-screen instructions to install the print driver.
Network Basics 68
Page 69

Epson AcuLaser CX29 Series User’s Guide
For installing PostScript print driver
Windows users should read the PostScript User's Guide for information on how to install the print
driver.
Setting Up for Shared Printing
You can share your new printer on the network using the Software Disc that comes with your printer,
or using Microsoft peer-to-peer method. However, if you use the Microsoft method, some features,
such as the Status Monitor and other printer utilities, installed with the Software Disc, may not be
available.
If you want to use the printer on a network, share the printer and install its drivers on all the computers
on the network.
Note:
You need to purchase an Ethernet cable for shared printing.
For Windows XP, Windows XP 64-bit Edition, Windows Server 2003, and Windows Server
2003 x64 Edition
1. Click Start (start for Windows XP) — Printers and Faxes.
2. Right-click the printer icon and select Properties.
3. On the Sharing tab, select the Share this printer radio button, and then enter a name in Share
name text box.
4. Click Additional Drivers and select the operating systems of all network clients that print to the
printer.
5. Click OK.
If you are missing files, you are prompted to insert the server operating system CD.
6. Click Apply, and then click OK.
For Windows Vista and Windows Vista 64-bit Edition
1. Click Start — Control Panel — Hardware and Sound — Printers.
Network Basics 69
Page 70

Epson AcuLaser CX29 Series User’s Guide
2. Right-click the printer icon and select Sharing.
3. Click Change sharing options.
The message Windows needs your permission to continue appears.
4. Click Continue.
5. Select the Share this printer check box, and then enter a name in Share name.
6. Click Additional Drivers and select the operating systems of all network clients that print to the
printer.
7. Click OK.
8. Click Apply, and then click OK.
For Windows Server 2008 and Windows Server 2008 64-bit Edition
1. Click Start — Control Panel — Printers.
2. Right-click the printer icon and select Sharing.
3. Select the Share this printer check box, and then enter a name in Share name.
4. Click Additional Drivers and select the operating systems of all network clients that print to the
printer.
5. Click OK.
6. Click Apply, and then click OK.
For Windows 7, Windows 7 64-bit Edition, and Windows Server 2008 R2
1. Click Start — Devices and Printers.
2. Right-click the printer icon and select Printer properties.
3. On the Sharing tab, select the Share this printer check box, and then enter a name in Share
name text box.
Network Basics 70
Page 71

Epson AcuLaser CX29 Series User’s Guide
4. Click Additional Drivers and select the operating systems of all network clients that print to the
printer.
5. Click OK.
6. Click Apply, and then click OK.
To confirm that the printer is properly shared:
❏ Ensure that the printer object in the Printers, Printers and Faxes or Devices and Printers
folder is shared. The shared icon is shown under the printer icon.
❏ Browse Network or My Network Places. Find the host name of the server and the shared name
you assigned to the printer.
Now that the printer is shared, you can install the printer on network clients using the peer-to-peer
method.
Peer-to-Peer
If you use the peer-to-peer method, the print driver is fully installed on each client computer. Network
clients retain control of driver modifications. The client computer handles the print job processing.
For Windows XP, Windows XP 64-bit Edition, Windows Server 2003, and Windows Server
2003 x64 Edition
1. Click start (Start for Windows Server 2003 / Windows Server 2003 x64 Edition) — Printers and
Faxes.
2. Click Add a printer (Add Printer for Windows Server 2003 / Windows Server 2003 x64 Edition)
to launch the Add Printer Wizard.
3. Click Next.
Network Basics 71
Page 72

Epson AcuLaser CX29 Series User’s Guide
4. Select A network printer, or a printer attached to another computer, and then click Next. If
the printer is not listed, enter the path to the printer in the text box.
For example:\\[server host name]\[shared printer name]
The server host name is the name of the server computer that identifies it on the network. The
shared printer name is the name assigned during the server installation process.
5. Click Browse for a printer, and then click Next.
6. Select the printer, and then click Next.
If this is a new printer, you may be prompted to install a print driver. If no system driver is
available, you need to specify the path to available drivers.
7. Select Yes if you want this printer to be set as the default printer, and then click Next.
If you want to verify installation, click Yes to print a test page.
8. Click Finish.
When a test page prints successfully, installation is complete.
For Windows Vista and Windows Vista 64-bit Edition
1. Click Start — Control Panel — Hardware and Sound — Printers.
Network Basics 72
Page 73

Epson AcuLaser CX29 Series User’s Guide
2. Click Add a Printer to launch the Add Printer wizard.
3. Select Add a network, wireless or Bluetooth printer, and then click Next. If the printer is
listed, select the printer and click Next, or select The printer that I want isn’t listed and enter the
path of the printer in Select a shared printer by name and click Next.
For example:\\[server host name]\[shared printer name]
The server host name is the name of the server computer that identifies it on the network. The
shared printer name is the name assigned during the server installation process.
4. If this is a new printer, you may be prompted to install a print driver. If no system driver is
available, you need to specify the path to available drivers.
5. Select Yes if you want this printer to be set as the default printer, and then click Next.
6. If you want to verify installation, click Print a test page.
7. Click Finish.
When a test page prints successfully, installation is complete.
For Windows Server 2008 and Windows Server 2008 64-bit Edition
1. Click Start — Control Panel — Printers.
Network Basics 73
Page 74

Epson AcuLaser CX29 Series User’s Guide
2. Click Add a Printer to launch the Add Printer wizard.
3. Select Add a network, wireless or Bluetooth printer, and then click Next. If the printer is
listed, select the printer and click Next, or select The printer that I want isn’t listed and enter the
path to the printer in Select a shared printer by name and click Next.
For example: \\[server host name]\[shared printer name]
The server host name is the name of the server computer that identifies it on the network. The
shared printer name is the name assigned during the server installation process.
4. If this is a new printer, you may be prompted to install a print driver. If no system driver is
available, you will need to provide a path to available drivers.
5. Select Yes if you want this printer to be set as the default printer, and then click Next.
6. Click Print a test page if you want to verify installation.
7. Click Finish.
When a test page prints successfully, installation is complete.
For Windows 7, Windows 7 64-bit Edition, and Windows Server 2008 R2
1. Click Start — Devices and Printers.
2. Click Add a Printer to launch the Add Printer wizard.
3. Select Add a network, wireless or Bluetooth printer. If the printer is listed, select the printer
and click Next, or select The printer that I want isn’t listed. Click Select a shared printer by
name and enter the path of the printer in the text box, and then click Next.
For example: \\[server host name]\[shared printer name]
The server host name is the name of the server computer that identifies it to the network. The
shared printer name is the name assigned during the server installation process.
4. If this is a new printer, you may be prompted to install a print driver. If no system driver is
available, you will need to provide the path to the available driver.
5. Confirm the printer name, and then click Next.
Network Basics 74
Page 75

Epson AcuLaser CX29 Series User’s Guide
6. Select Yes if you want this printer to be set as the default printer, and then click Next.
7. Click Print a test page if you want to verify installation.
8. Click Finish.
When a test page prints successfully, installation is complete.
Installing Print Driver on Computers Running Mac OS X
For information on how to install the print driver, refer to the PostScript User's Guide.
Installing Print Driver on Computers Running Linux (CUPS)
This section provides information for installing or setting up the print driver with CUPS (Common
UNIX Printing System) on Red Hat
Desktop 10/11.
Enterprise Linux® 4 WS/5 Client or SUSE® Linux Enterprise
®
Installing the Print Driver
Note:
❏ The print driver Epson-AcuLaser_CX29-x.x-y.noarch.rpm is included in the Linux folder in the
Common folder on the Software Disc.
❏ In the file name, “x.x” represents the version number and “y” represents the release number.
For Red Hat Enterprise Linux 4 WS/5 Client
Important:
Before you install the print driver on Red Hat Enterprise Linux 4, confirm that Update 8 or higher is
applied to your operating system. Consult your Linux distributor for the upgrade of your system.
1. Double-click Epson-AcuLaser_CX29-x.x-y.noarch.rpm in the Software Disc.
2. Enter the administrator’s password.
3. Click Continue in the Completed System Preparation window.
Network Basics 75
Page 76

Epson AcuLaser CX29 Series User’s Guide
Installation starts. When the installation is complete, the window is automatically closed.
For SUSE Linux Enterprise Desktop 10
1. Double-click Epson-AcuLaser_CX29-x.x-y.noarch.rpm in the Software Disc.
2. Enter the administrator password, and click Install.
Installation starts. When the installation is complete, the window is automatically closed.
For SUSE Linux Enterprise Desktop 11
1. Double-click Epson-AcuLaser_CX29-x.x-y.noarch.rpm in the Software Disc.
2. Enter the administrator password, and click Continue.
Installation starts. When the installation is complete, the window is automatically closed.
Setting Up the Queue
To execute printing, you must set up the print queue on your workstation.
Note:
When you have finished setting up the queue, you can print jobs from the applications. Start the print job
from the application, and specify the queue in the print dialog box.
However, you may be able to print only from the default queue depending on the application (for
example Mozilla). In these cases, before you start printing, set queue you want to print to as the default
queue. For information on specifying the default queue, see also “Setting the Default Queue” on
page 80.
For Red Hat Enterprise Linux 4 WS/5 Client
1. Open the URL “http://localhost:631” using a web browser.
2. Click Administration.
3. Enter root as the user name, and enter the administrator password.
4. Click Add Printer.
Enter the name of the printer in Name in the Add New Printer window, and click Continue.
Network Basics 76
Page 77

Epson AcuLaser CX29 Series User’s Guide
You can optionally specify the location and description of the printer for further information.
For network connections:
a
Select LPD/LPR Host or Printer from the Device menu, and click Continue.
b
Enter the IP address of the printer in Device URI.
c
Format: lpd://xxx.xxx.xxx.xxx (the IP address of the printer)
For USB connections with Red Hat Enterprise Linux 4 WS:
a
Select USB Printer #1 from the Device menu.
For USB connections with Red Hat Enterprise Linux 5 Client:
a
Select Epson AcuLaser CX29 USB #1 or Epson AcuLaser CX29 from the Device menu.
5. Select Epson from the Make menu, and click Continue.
6. Select Epson AcuLaser CX29 from the Model menu, and click Continue.
The message Printer Epson AcuLaser CX29 has been added successfully. appears.
The setup is complete.
For SUSE Linux Enterprise Desktop 10
1. Select Computer — More Applications... and select YaST on the Application Browser.
2. Enter the administrator password.
YaST Control Center is activated.
3. Select Hardware on YaST Control Center, and select Printer.
4. Printer setup: Autodetected printers is activated.
For network connections:
Network Basics 77
Page 78

Epson AcuLaser CX29 Series User’s Guide
a
Click Add.
b
Select Network Printers as Printer Type, and click Next.
c
Select the Print via LPD-Style Network Server as Printer Type, and click Next.
d
Enter the IP address of the printer in Host name of the printer server.
e
Enter the name of the printer queue in Name of the remote queue, and click Next.
f
Enter the printer name in Name for printing.
Note:
The Description of Printer and Location of Printer do not have to be specified.
g
Select the Do Local Filtering check box, and click Next.
h
Select Epson as Select manufacturer. Select Epson AcuLaser CX29 as Select Model, and
click Next.
i
Confirm the settings in Edit configuration, and click OK.
For USB connections:
a
Select Epson AcuLaser CX29 on USB (//Epson/AcuLaser CX29 or /dev/usblp*) as
Available are, and click Configure….
b
Confirm the settings in Edit configuration, and click OK.
5. Click Finish.
For SUSE Linux Enterprise Desktop 11
1. Select Computer — More Applications..., and select YaST on the Application Browser.
2. Enter the administrator password.
YaST Control Center is activated.
3. Select Hardware on YaST Control Center, and select Printer.
Network Basics 78
Page 79

Epson AcuLaser CX29 Series User’s Guide
The Printer Configurations dialog box opens.
For network connections:
a
Click Add.
The Add New Printer Configuration dialog box opens.
b
Click Connection Wizard.
The Connection Wizard dialog box opens.
c
Select Line Printer Daemon (LPD) Protocol from Access Network Printer or
Printserver Box via.
d
Enter the IP address of the printer in IP Address or Host Name:.
e
Select Epson in Select the printer manufacturer:.
f
Click OK.
The Add New Printer Configuration dialog box appear.
g
Select Epson AcuLaser CX29 vx.x [Epson/AcuLaser_CX29.ppd.gz] from the Search for
Drivers: list.
Note:
You can specify the printer name in Set Name:.
h
Confirm the settings, and click OK.
For USB connections:
a
Click Add.
The Add New Printer Configuration dialog box opens.
The printer name is displayed in the Determine Connection list.
Network Basics 79
Page 80

b
Select Epson AcuLaser CX29 vx.x [Epson/AcuLaser_CX29.ppd.gz] from the Search for
Drivers: list.
Note:
You can specify the printer name in Set Name:.
Setting the Default Queue
For Red Hat Enterprise Linux 4 WS/5 Client
1. Select Applications — System Tools — Terminal.
2. Enter the following command in the terminal window.
su
Epson AcuLaser CX29 Series User’s Guide
(Enter the administrator password)
lpadmin -d (Enter the queue name)
For SUSE Linux Enterprise Desktop 10
1. To activate the Printer setup: Autodetected printers, do the following.
a
Select Computer — More Applications... and select YaST on the Application Browser.
b Enter the administrator password.
YaST Control Center is activated.
c
Select Hardware on YaST Control Center, and select Printer.
2. Select the printer you want to set to default on the Printer Configuration, and select Set default
in the Other button menu.
3. Click Finish.
For SUSE Linux Enterprise Desktop 11
1. Select Computer — More Applications... and select YaST on the Application Browser.
Network Basics 80
Page 81

Epson AcuLaser CX29 Series User’s Guide
2. Enter the administrator password.
YaST Control Center is activated.
3. Select Hardware on YaST Control Center, and select Printer.
The Printer Configurations dialog box opens.
4. Click Edit.
A dialog box to modify the specified queue opens.
5. Confirm that the printer you want to set is selected in the Connection list.
6. Select the Default Printer check box.
7. Confirm the settings, and click OK.
Specifying the Printing Options
You can specify the printing options such as the color mode or 2-sided printing.
For Red Hat Enterprise Linux 4 WS/5 Client
1. Open the URL “http://localhost:631” using a web browser.
2. Click Manage Printers.
3. Click Configure Printer of the queue for which you want to specify the printing options.
4. Enter root as the user name, and enter the administrator password.
5. Specify the required settings, and click Continue.
The message Printer Epson AcuLaser CX29 has been configured successfully. appears.
The setting is complete.
For SUSE Linux Enterprise Desktop 10
1. Open a web browser.
Network Basics 81
Page 82

Epson AcuLaser CX29 Series User’s Guide
2. Enter http://localhost:631/admin in Location, and press the Enter key.
3. Enter root as the user name, and enter the administrator password.
The CUPS window appears.
Note:
Set the password for authority as the printer administrator before setting the printer queue. If you
have not set it, go to “Setting the Password for Authority as the Printer Administrator” on
page 83.
4. Click Manage Printers.
5. Specify the required settings, and click Continue.
The message Printer Epson AcuLaser CX29 has been configured successfully. appears.
The setting is complete. Execute printing from the application.
For SUSE Linux Enterprise Desktop 11
1. Open a web browser.
2. Enter http://localhost:631/admin in Location, and press the Enter key.
3. Enter root as the user name, and enter the administrator password.
The CUPS window appears.
Note:
Set the password for authority as the printer administrator before setting the printer queue. If you
have not set it, go to “Setting the Password for Authority as the Printer Administrator” on
page 83.
4. Click Manage Printers.
5. Specify the required settings, and click Continue.
The message Printer Epson AcuLaser CX29 has been configured successfully. appears.
The setting is complete. Execute printing from the application.
Network Basics 82
Page 83

Epson AcuLaser CX29 Series User’s Guide
Setting the Password for Authority as the Printer Administrator
For SUSE Linux Enterprise Desktop 10 and 11, you must set the password for authority as the printer
administrator to do operations as the printer administrator.
For SUSE Linux Enterprise Desktop 10
1. Select Computer — More Applications... and select Konsole on the Application Browser.
2. Enter the following command in the terminal window.
su
(Enter the administrator password)
lppasswd -g sys -a root
(Enter the password for authority as the printer administrator after the Enter password prompt.)
(Reenter the password for authority as the printer administrator after the Enter password again prompt.)
For SUSE Linux Enterprise Desktop 11
1. Select Computer — More Applications... and select GNOME Terminal on the Application
Browser.
2. Enter the following command in the terminal window.
su
(Enter the administrator password)
lppasswd -g sys -a root
(Enter the password for authority as the printer administrator after the Enter password prompt.)
(Reenter the password for authority as the printer administrator after the Enter password again prompt.)
Uninstalling the Print Driver
For Red Hat Enterprise Linux 4 WS/5 Client
1. Select Applications — System Tools — Terminal.
2. Enter the following command in the terminal window to delete the print queue.
Network Basics 83
Page 84

su
(Enter the administrator password)
/usr/sbin/lpadmin -x (Enter the print queue name)
3. Repeat the command above for all queues for the same model.
4. Enter the following command in the terminal window.
su
(Enter the administrator password)
rpm -e Epson-AcuLaser_CX29
The print driver is uninstalled.
For SUSE Linux Enterprise Desktop 10
Epson AcuLaser CX29 Series User’s Guide
1. Select Computer — More Applications... and select Konsole on the Application Browser.
2. Enter the following command in the terminal window to delete the print queue.
su
(Enter the administrator password)
/usr/sbin/lpadmin -x (Enter the print queue name)
3. Repeat the command above for all queues for the same model.
4. Enter the following command in the terminal window.
su
(Enter the administrator password)
rpm -e Epson-AcuLaser_CX29
The print driver is uninstalled.
For SUSE Linux Enterprise Desktop 11
1. Select Computer — More Applications... and select GNOME Terminal on the Application
Browser.
Network Basics 84
Page 85

Epson AcuLaser CX29 Series User’s Guide
2. Enter the following command in the terminal window to delete the print queue.
su
(Enter the administrator password)
/usr/sbin/lpadmin -x (Enter the print queue name)
3. Repeat the command above for all queues for the same model.
4. Enter the following command in the terminal window.
su
(Enter the administrator password)
rpm -e Epson-AcuLaser_CX29
The print driver is uninstalled.
Network Basics 85
Page 86

Epson AcuLaser CX29 Series User’s Guide
Chapter 5
Printing Basics
About Print Media
Using paper that is not appropriate for the printer can cause paper jams, image quality problems, or
printer failure. To achieve the best performance from your printer, we recommend you to use only the
paper described in this section.
When using paper other than that recommended, contact the Epson local representative office or an
authorised dealer.
Print Media Usage Guidelines
The printer tray accommodates most sizes and types of paper and other specialty media. Follow these
guidelines when loading paper and media in the tray:
❏ Envelopes can be printed from the single sheet feeder (SSF) and standard 250-sheet tray.
❏ Fan paper or other specialty media before loading in the paper tray.
❏ Do not print on label stock once a label has been removed from a sheet.
❏ Use only paper envelopes. Do not use envelopes with windows, metal clasps, or adhesives with
release strips.
❏ Print all envelopes single-sided only.
❏ Some wrinkling and embossing may occur when printing envelopes.
❏ Do not overload the paper tray. Do not load print media above the fill line on the inside of the paper
width guides.
❏ Adjust the paper width guides to fit the paper size.
❏ If excessive jams or wrinkles occur, use paper or other media from a new package.
Warning:
w
Do not use conductive paper such as origami paper, carbonic paper or conductively-coated paper.
When paper jam occurs, it may cause short-circuit and eventually a fire accident.
Printing Basics 86
Page 87

Epson AcuLaser CX29 Series User’s Guide
See Also:
❏ “Loading Print Media in the Standard 250-Sheet Tray and the Optional 250-Sheet Paper Cassette
Unit” on page 92
❏ “Loading Envelope in the Standard 250-Sheet Tray” on page 94
❏ “Loading Print Media in the Single Sheet Feeder (SSF)” on page 97
❏ “Loading Envelope in the Single Sheet Feeder (SSF)” on page 98
❏ “Printing on Custom Size Paper” on page 117
Print Media That Can Damage Your Printer
The following paper types are not recommended for use with the printer:
❏ Chemically treated paper used to make copies without carbon paper, also known as carbonless
paper, carbonless copy paper (CCP), or no carbon required (NCR) paper.
❏ Preprinted paper with chemicals that may contaminate the printer.
❏ Preprinted paper that can be affected by the temperature in the fuser unit.
❏ Preprinted paper that requires a registration (the precise print location on the page) greater than
±0.09 inches, such as optical character recognition (OCR) forms.
In some cases, you can adjust registration with your software program to successfully print on
these forms.
❏ Coated paper (erasable bond), synthetic paper, and thermal paper.
❏ Rough-edged, rough or heavily textured surface paper, or curled paper.
❏ Recycled paper containing more than 25% post-consumer waste that does not meet DIN 19 309.
❏ Multiple-part forms or documents.
❏ Print quality may deteriorate (blank spaces or blotches may appear in the text) when you print on
talc or acid paper.
Warning:
w
Do not use conductive paper such as origami paper, carbonic paper or conductively-coated paper.
When paper jam occurs, it may cause short-circuit and eventually a fire accident.
Printing Basics 87
Page 88

Epson AcuLaser CX29 Series User’s Guide
Supported Print Media
Using unsuitable print media may lead to paper jams, poor print quality, breakdown and damage to
your printer. To use the features of this printer effectively, use the suggested print media that is
recommended here.
Important:
The toner may come off the print media, if it gets wet by water, rain, steam and so on. For details, contact
the Epson local representative office or an authorised dealer.
Print Media Dimensions
The maximum dimensions of print media that the standard 250-sheet tray and SSF can handle are:
❏ Width: 76.2 mm (3.00 inches) to 215.9 mm (8.5 inches)
❏ Length: 127 mm (5.00 inches) to 355.6 mm (14.00 inches)
The maximum dimensions of print media that the optional 250-sheet paper cassette unit can handle
are:
❏ Width: 148 mm (5.83 inches) to 215.9 mm (8.5 inches)
❏ Length: 210 mm (8.27 inches) to 355.6 mm (14.00 inches)
Usable Print Media
The types of print media that can be used on this printer are as follows:
Printing Basics 88
Page 89

Single Sheet Feeder (SSF)
Epson AcuLaser CX29 Series User’s Guide
Paper Size
Paper Type (Weight)
A4 SEF (210 × 297 mm)
A5 SEF (148 × 210 mm)
B5 SEF (182 × 257 mm)
Letter SEF (8.5 × 11 inches)
Folio SEF (8.5 × 13 inches)
Legal SEF (8.5 × 14 inches)
Executive SEF (7.25 × 10.5 inches)
Com-10 SEF (4.125 × 9.5 inches)
Monarch Envelope SEF (3.875 × 7.5 inches)
DL Envelope SEF (110 × 220 mm)
C5 Envelope SEF (162 × 229 mm)
Custom Size:
Width: 76.2–215.9 mm (3–8.5 inches)
Length: 127–355.6 mm (5 –14 inches)
Plain
Lightweight Cardstock
Heavyweight Cardstock
Loading Capacity
Envelope
Letterhead
Lightweight Glossy Cardstock
Heavyweight Glossy Cardstock
Hole Punched
Colored
Special
1 sheet of standard paper
Printing Basics 89
Page 90

Standard 250-Sheet Tray
Epson AcuLaser CX29 Series User’s Guide
Paper Size
A4 SEF (210 × 297 mm)
A5 SEF (148 × 210 mm)
B5 SEF (182 × 257 mm)
Letter SEF (8.5 × 11 inches)
Folio SEF (8.5 × 13 inches)
Legal SEF (8.5 × 14 inches)
Executive SEF (7.25 × 10.5 inches)
Com-10 SEF (4.125 × 9.5 inches)
Monarch Envelope SEF (3.875 × 7.5 inches)
Monarch Envelope LEF (7.5 × 3.8 inches)
DL Envelope SEF (110 × 220 mm)
DL Envelope LEF (220 × 110 mm)
C5 Envelope SEF (162 × 229 mm)
Custom Size:
Width: 76.2–215.9 mm (3–8.5 inches)
Length: 127–355.6 mm (5 –14 inches)
*1
*2
Paper Type (Weight)
Plain
Lightweight Cardstock
Heavyweight Cardstock
Envelope
Labels
Letterhead
Hole Punched
Colored
Special
Loading Capacity
*1
Maximum width 220 mm for envelope (DL LEF)
250 sheets of standard paper
DL and Monarch can be supported by LEF with flap opened.
*2
Minimum length 98.4 mm for envelope (Monarch LEF)
Printing Basics 90
Page 91

Optional 250-Sheet Paper Cassette Unit
Epson AcuLaser CX29 Series User’s Guide
Paper Size
Paper Type (Weight)
Loading Capacity
A4 SEF (210 × 297 mm)
A5 SEF (148 × 210 mm)
B5 SEF (182 × 257 mm)
Letter SEF (8.5 × 11 inches)
Folio SEF (8.5 × 13 inches)
Legal SEF (8.5 × 14 inches)
Executive SEF (7.25 × 10.5 inches)
Plain
Letterhead
Hole Punched
Colored
250 sheets of standard paper
Note:
SEF and LEF indicate the paper feed direction; SEF stands for short-edge feed. LEF stands for long-edge
feed.
See Also:
❏ “Loading Print Media in the Standard 250-Sheet Tray and the Optional 250-Sheet Paper Cassette
Unit” on page 92
❏ “Loading Envelope in the Standard 250-Sheet Tray” on page 94
❏ “Loading Letterhead in the Standard 250-Sheet Tray and the Optional 250-Sheet Paper Cassette
Unit” on page 96
❏ “Loading Print Media in the Single Sheet Feeder (SSF)” on page 97
❏ “Loading Envelope in the Single Sheet Feeder (SSF)” on page 98
Printing on print media that differs from the paper size or paper type selected on the print driver, or
loading print media into an unsuitable paper tray for printing, may lead to paper jams. To ensure that
printing is correctly done, select the correct paper size, paper type, and paper tray.
Loading Print Media
Loading print media properly helps prevent jams and ensures trouble-free printing.
Printing Basics 91
Page 92

Epson AcuLaser CX29 Series User’s Guide
Before loading any print media, identify the recommended print side of the print media. This
information is usually indicated on the print media package.
Capacity
The standard 250-sheet tray and optional 250-sheet paper cassette unit can hold:
❏ 250 sheets of the standard paper.
The SSF can hold:
❏ 1 sheet of the standard paper.
Loading Print Media in the Standard 250-Sheet Tray and the Optional 250-Sheet Paper Cassette Unit
Note:
❏ To avoid paper jams, do not remove the tray while printing is in progress.
❏ Use only laser print media. Do not use ink jet paper in your printer.
1. Pull the tray out of the printer about 200 mm. Hold the tray with both hands, and remove it from
the printer.
Printing Basics 92
Page 93

2. Adjust the paper guides.
Epson AcuLaser CX29 Series User’s Guide
Note:
Extend the rear side of the tray when you load Legal size paper.
3. Before loading the print media, flex the sheets and fan them. Straighten the edges of the stack on a
level surface.
4. Load the print media into the tray with the recommended print side facing up.
Note:
❏ Do not exceed the maximum fill line in the tray. Overfilling the tray may cause paper jams.
❏ When loading coated paper, load coated paper one sheet at a time.
Printing Basics 93
Page 94
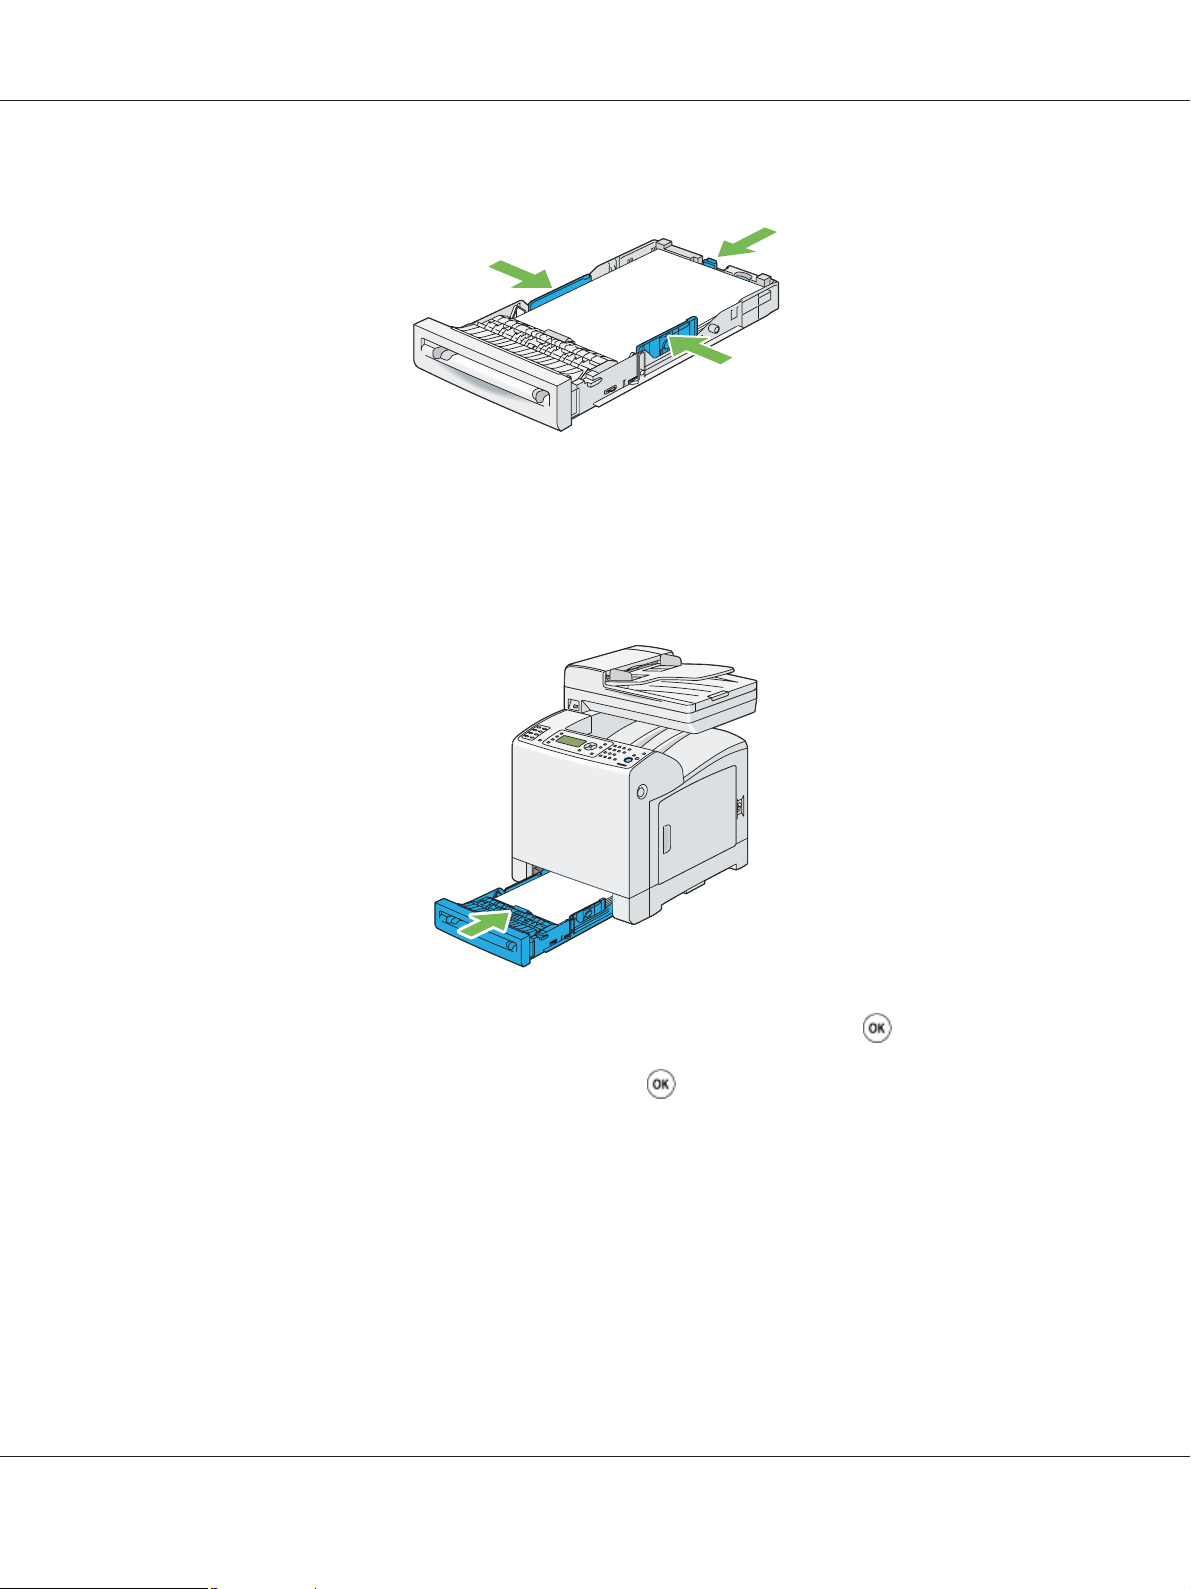
Epson AcuLaser CX29 Series User’s Guide
5. Align the width guides against the edges of the paper.
Note:
When loading user-specified print media, adjust the width guides and slide the extendable part of the
tray by pinching the length guide and sliding it until it rests lightly against the edge of the paper.
6. After confirming that the guides are securely adjusted, insert the tray into the printer.
7. On the operator panel, select the desired paper size, and then press the button.
8. Select the desired paper type, and then press the
button.
Loading Envelope in the Standard 250-Sheet Tray
Use the following guidelines when loading envelopes in the standard 250-sheet tray:
Printing Basics 94
Page 95

Epson AcuLaser CX29 Series User’s Guide
Note:
If you do not load envelopes in the standard 250-sheet tray right after they have been removed from the
packaging, they may bulge. To avoid jams, flatten them as shown below before loading the envelopes in
the tray.
Com-10
Load the envelopes short edge feed with the flaps closed and the print side up. Ensure that the flaps
come at the right when you face towards the printer.
Monarch or DL
The Monarch or DL envelopes can be loaded in one of the following ways:
Load the envelopes short edge feed with the flaps closed and the print side up. Ensure that the flaps
come at the right when you face towards the printer.
OR
Printing Basics 95
Page 96

Epson AcuLaser CX29 Series User’s Guide
Load the envelopes long edge feed with the flaps open and the print side up. Ensure that the flaps come
at the top when you face towards the printer.
C5
Load the envelopes short edge feed with the flaps closed and the print side up. Ensure that the flaps
come at the bottom when you face towards the printer.
Loading Letterhead in the Standard 250-Sheet Tray and the Optional 250-Sheet Paper
Cassette Unit
When you use the standard 250-sheet tray and optional 250-sheet paper cassette unit, letterhead and
hole punched paper enter the printer with the print side facing up.
Printing Basics 96
Page 97

Epson AcuLaser CX29 Series User’s Guide
Loading Print Media in the Single Sheet Feeder (SSF)
1. Adjust the width guides to the print media’s width.
2. Hold both sides of the print media face down close to the SSF, and push it 8 cm to 9 cm (4 inches)
into the printer until it automatically feeds.
Note:
❏ Do not force the print media into the SSF.
❏ Load letterhead face down, with the top of the sheet entering the printer first.
❏ If you experience problems with paper feed, turn the paper around.
Printing Basics 97
Page 98

Epson AcuLaser CX29 Series User’s Guide
Loading Envelope in the Single Sheet Feeder (SSF)
Com-10, Monarch, or DL
To load an envelope into the SSF, insert the envelope short edge feed with the flap closed and the print
side down. Ensure that the flap comes at the right when you face towards the printer.
Important:
Never use envelopes with windows, coated linings, or self-stick adhesives. These lead to paper jams and
can cause damage to the printer.
Note:
❏ Ensure that you load an envelope with the flap completely closed.
❏ Insert an envelope with the flap side face up and with the stamp area on the top right side.
Printing Basics 98
Page 99
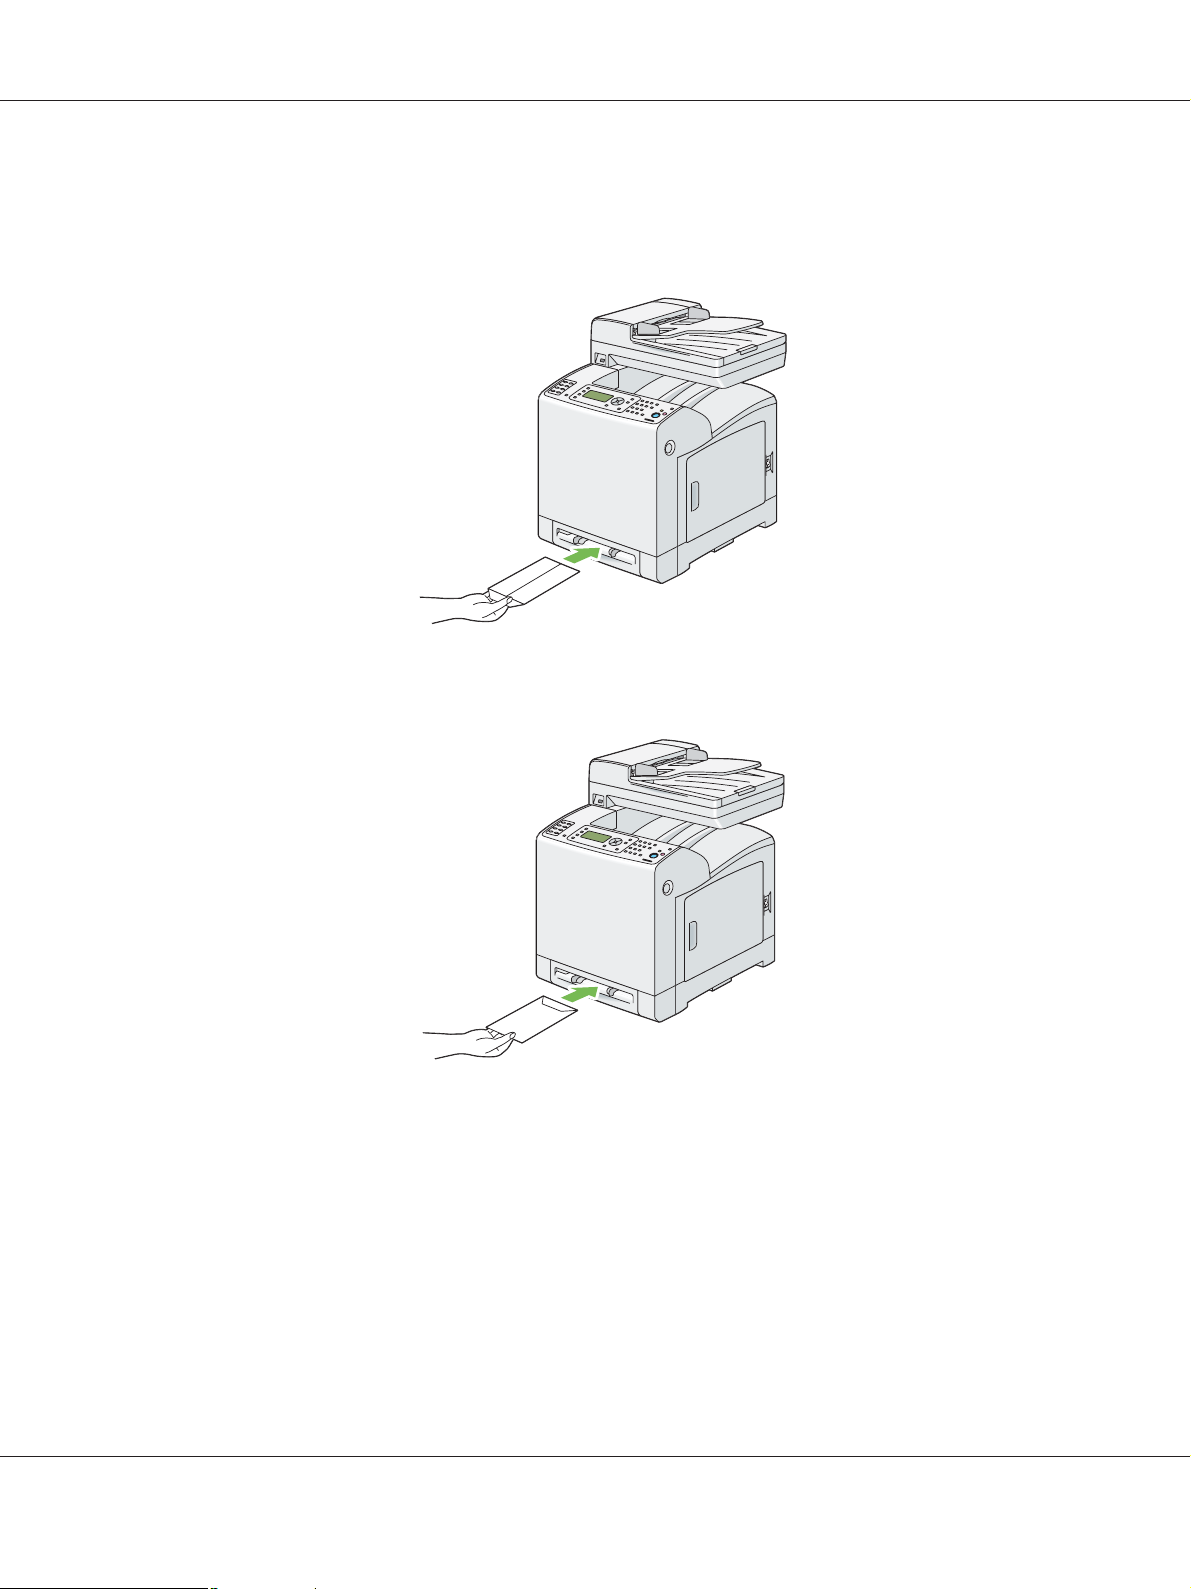
Epson AcuLaser CX29 Series User’s Guide
C5
To load an envelope into the SSF, insert the envelope short edge feed with the flap open and the print
side down. Ensure that the flap comes at the bottom when you face towards the printer.
OR
Important:
Never use envelopes with windows, coated linings, or self-stick adhesives. These lead to paper jams and
can cause damage to the printer.
Note:
❏ Ensure that you load an envelope with the flap completely opened.
❏ Insert an envelope with the flap side face up and with the stamp area on the bottom right side.
Printing Basics 99
Page 100

Epson AcuLaser CX29 Series User’s Guide
Loading Letterhead in the Single Sheet Feeder (SSF)
When you use the SSF letterhead enters the printer first with the print side facing down.
Using the Single Sheet Feeder (SSF)
❏ Load only one size and type of print media during a single print job.
❏ To achieve the best possible print quality, use only high-quality print media that is designed for use
in laser printer. For more guidelines on print media, see “Print Media Usage Guidelines” on
page 86.
❏ Do not add or remove print media when the printer is printing from the SSF. This may result in a
paper jam.
❏ Print media should be loaded with the recommended print side down and the top of the print
media going into the SSF first.
❏ Do not place objects on the SSF. Also, avoid pressing down or applying excessive force on it.
❏ The icons on the SSF show how to load the SSF with paper, and how to turn an envelope for
printing.
Setting Paper Sizes and Types
When loading print media in the standard 250-sheet tray and optional 250-sheet paper cassette unit,
set the paper size and type on the operator panel before printing.
Printing Basics 100
 Loading...