

Page 1

Owner’s Manual
MICROWAVE OVEN
Model: MC-3010D
Page 2
Please read these instructions carefully before installing and operating the oven.
Record in the space below the SERIAL NO. found on the nameplate on your oven
and retain this information for future reference.
SERIAL NO.
PRECAUTIONS TO AVOID POSSIBLE EXPOSURE TO
EXCESSIVE MICROWAVE ENERGY
1. Do not attempt to operate this oven with the door open since open door operation
can result in harmful exposure to microwave energy. It is important not to
defeat or tamper with the safety interlocks.
2. Do not place any object between the oven front face and the door or allow soil
or cleaner residue to accumulate on sealing surfaces.
3. Do not operate the oven if it is damaged. It is particularly important that the
oven door close properly and that there is no damage to the
a. Door (bent),
b. Hinges and latches (broken or loosened),
c. Door seals and sealing surfaces.
4. The oven should not be adjusted or repaired by anyone except properly
qualified service personnel.
Page 3

CONTENTS
PRECAUTIONS TO AVOID POSSIBLE EXPOSURE TO EXCESSIVE
MICROWAVE ENERGY ................................................................................... 2
SPECIFICATIONS .......................................................................................... 4
BEFORE YOU CALL FOR SERVICE ................................................................ 4
INSTALLATION............................................................................................... 4
GROUNDING INSTRUCT IONS ....................................................................... 5
RADIO INTERFERENCE ................................................................................. 5
IMPORTANT SAFETY INSTRUCTIONS.......................................................... 5
MICROWAVE COOKING PRINCIPLES ........................................................... 6
UTENSILS GUIDE .......................................................................................... 7
PART NAMES ................................................................................................ 7
CONTROL PANEL .......................................................................................... 8
HOW TO SET THE OVEN CONTROLS ........................................................... 9
SETTING THE CLOCK ................................................................................... 9
MICROWAVE COOKING ................................................................................ 9
GRILL ............................................................................................................. 9
CONVECTION.............................................................................................. 10
ROAST ........................................................................................................ 10
SPECIAL FEATURES ................................................................................... 11
POPCORN .................................................................................................. 11
REHEAT....................................................................................................... 11
POTATO ....................................................................................................... 11
COMPU DEFROST ...................................................................................... 11
COMPU COOK ........................................................................................... 12
COMPU PIZZA ............................................................................................. 12
COMPU GRILL ............................................................................................ 12
COMPU ROAST .......................................................................................... 12
COMPU BAKE ............................................................................................. 12
OTHER CONVENIENT FEATURES ............................................................... 13
CLEANING AND CARE ................................................................................. 13
Page 4

SPECIFICATIONS
Power Consumption: 220-230V, 50Hz, 1500W (Microwave)
Rated Microwave Output: 1000W
Operation Frequency: 2450MHz
Outside Dimensions: 305mm(H) x 525mm(W) x 490mm(D)
Oven Cavity Dimensions: 219mm(H) x 350mm(W) x 355mm(D)
Cooking Uniformity: Turntable System {314mm}
Net Weight: Approx. 22kg
220-230V, 1400W (Convection)
220-230V, 1000W (Heater)
BEFORE YOU CALL FOR SERVICE
If the oven fails to operate:
1. Check to ensure that the oven is
plugged in securely. If it is not,
remove the plug from the outlet, wait
10 seconds, and plug it in again
securely.
2. Check for a blown circuit fuse or a
tripped main circuit breaker. If these
seem to be operating properly, test
the outlet with another appliance.
3. Check to ensure that the control panel
is programmed correctly and the
timer is set.
4. Check to ensure that the door is
securely closed engaging the door
safety lock system. Otherwise, the
microwave energy will not flow into
the oven.
IF NONE OF THE ABOVE RECTIFY THE
SITUATION, THEN CONTACT A
QUALIFIED TECHNICIAN. DO NOT TRY
TO ADJUST OR REPAIR THE OVEN
YOURSELF.
INSTALLATION
1. 1. Make sure that all the packing
materials are removed from the
inside of the door.
2. Warning: Check the oven for any
damage, such as misaligned or bent
door, damaged door seals and sealing
surface, broken or loose door hinges
and latches and dents inside the
cavity or on the door. If there is any
damage, do not operate the oven and
contact qualified service personnel.
3. This microwave oven must be
placed on a flat, stable surface to hold
its weight and the heaviest food
likely to be cooked in the oven.
4. Do not place the oven where heat,
moisture, or high humidity are generated,
or near combustible materials.
5. For correct operation, the oven must
have sufficient airflow. Allow 20cm
of space above the oven, 10cm at
back and 5cm at both sides. Do not
cover or block any openings on the
appliance. Do not remove feet.
6. Do not operate the oven without
glass tray, roller support, and shaft
in their proper positions.
7. Make sure that the power supply
cord is undamaged and does not run
under the oven or over any hot or
sharp surface.
8. The socket must be readily
accessible so that it can be easily
unplugged in an emergency.
9. Do not use the oven outdoors.
Page 5

GROUNDING INSTRUCTIONS
This appliance must be grounded. This
oven is equipped with a cord having a
grounding wire with a grounding plug.
It must be plugged into a wall receptacle
that is properly installed and grounded.
In the event of an electrical short circuit,
grounding reduces risk of electric shock
by providing an escape wire for the
electric current. It is recommended that
a separate circuit serving only the oven
be provided. Using a high voltage is
dangerous and may result in a fire or
other accident causing oven damage.
Warning: Improper use of the
grounding plug can result in a risk of
electric shock.
RADIO INTERFERENCE
Operation of the microwave oven can
cause interference to your radio, TV, or
similar equipment.
When there is interference, it may be
reduced or eliminated by taking the
following measures:
1. Clean door and sealing surface of
the oven.
2. Reorient the receiving antenna of
radio or television.
Note
1. If you have any questions about the
grounding or electrical instructions,
consult a qualified electrician or
service person.
2. Neither the manufacturer nor the
dealer can accept any liability for
damage to the oven or personal injury
resulting from failure to observe the
electrical connection procedures.
The wires in this cable main are colored
in accordance with the following code:
Green and Yellow = EARTH
Blue = NEUTRAL
Brown = LIVE
3. Relocate the microwave oven with
respect to the receiver.
4. Move the microwave oven away
from the receiver.
5. Plug the microwave oven into a
different outlet so that microwave
oven and receiver are on different
branch circuits.
IMPORTANT SAFETY INSTRUCTIONS
When using electrical appliance basic
safety precautions should be followed,
including the following:
Warning: To reduce the risk of burns,
electric shock, fire, injury to persons or
exposure to excessive microwave
energy:
1. Read all instructions before using
the appliance.
2. Use this appliance only for its
intended use as described in this
manual. Do not use corrosive
chemicals or vapors in this
3. Do not operate the oven when empty.
4. Do not operate this appliance if it has
appliance. This type of oven is
specifically designed to heat, cook or
dry food. It is not designed for
industrial or laboratory use.
a damaged cord or plug, if it is not
working properly or if it has been
damaged or dropped. If the supply
cord is damaged, it must be replaced
by the manufacturer or its service
agent or a similarly qualified person
in order to avoid a hazard.
Page 6

5. Warning: Only allow children to
use the oven without supervision
when adequate instructions have
been given so that the child is able
to use the oven in a safe way and
understands the hazards of
improper use.
6. To reduce the risk of fire in the
oven cavity:
a. When heating food in plastic or paper
container, keep an eye on the oven
due to the possibility of ignition;
b. Remove wire twist-ties from paper
or plastic bags before placing bag
in oven.
c. If smoke is observed, switch off or
unplug the appliance and keep the
door closed in order to stifle any
flames.
d. Do not use the cavity for storage
purposes. Do not leave paper
products, cooking utensils or food
in the cavity when not in use.
7. Warning: Liquid or other food must
not be heated in sealed containers
since they are liable to explode.
8. Microwave heating of beverage can
result in delayed eruptive boiling,
therefore care has to be taken when
handling the container.
9. Do not fry food in the oven. Hot oil
can damage oven parts and utensils
and even result in skin burns.
10. Eggs in their shell and whole hardboiled eggs should not be heated in
microwave ovens since they may
explode even after microwave
heating has ended.
11. Pierce foods with heavy skins such
as potatoes, whole squashes, apples
and chestnuts before cooking.
12. The contents of feeding bottles and
baby jars should be stirred or shaken
and the temperature should be
checked before serving in order to
avoid burns.
13. Cooking utensils may become hot
because of heat transferred from the
heated food. Potholders may be
needed to handle the utensil.
14. Utensils should be checked to
ensure that they are suitable for use
in microwave oven.
15. Warning: It is hazardous for
anyone other than a trained person
to carry out any service or repair
operation which involves the
removal of any cover which gives
protection against exposure to
microwave energy.
MICROWAVE COOKING PRINCIPLES
1. Arrange food carefully. Place
thickest areas towards outside of
dish.
2. Watch cooking time. Cook for the
shortest amount of time indicated
and add more as needed. Food
severely overcooked can smoke or
ignite.
3. Cover foods while cooking. Covers
prevent spattering and help foods to
cook evenly.
4. Turn foods over once during
microwaving to speed cooking of
such foods as chicken and
hamburgers. Large items like roasts
must be turned over at least once.
5. Rearrange foods such as meatballs
halfway through cooking both from
top to bottom and from the center of
the dish to the outside.
Page 7

UTENSILS GUIDE
1. The ideal material for a microwave
utensil is transparent to microwave,
it allows energy to pass through the
container and heat the food. Only
use a temperature probe
recommended for this oven.
2. Microwave can not penetrate metal,
so metal utensils or dishes with
metallic trim should not be used.
3. Do not use recycled paper products
when microwave cooking, as they
may contain small metal
fragments which may cause
sparks and/or fires.
Cookware Microwave Grill Convection Combination*
Heat–Resistant Glass Yes Yes Yes Yes
Non Heat–Resistant Glass No No No No
Heat–Resistant Ceramics Yes Yes Yes Yes
Microwave–Safe Plastic Dish Yes No No No
Kitchen Paper Yes No No No
Metal Tray No Yes Yes No
Metal Rack No Yes Yes No
Aluminum Foil & Foil Container No Yes Yes No
* Combination: applicable for both «microwave+grill», and «microwave+convection» cooking.
4. Round /oval dishes rather than
square/oblong ones are
recommend, as food in corners tends
to overcook.
5. Narrow strips of aluminum foil may
be used to prevent overcooking of
exposed areas. But be careful don’t
use too much and keep a distance of
1 inch (2.54cm) between foil and
cavity.
The list below is a general guide to help
you select the correct utensils.
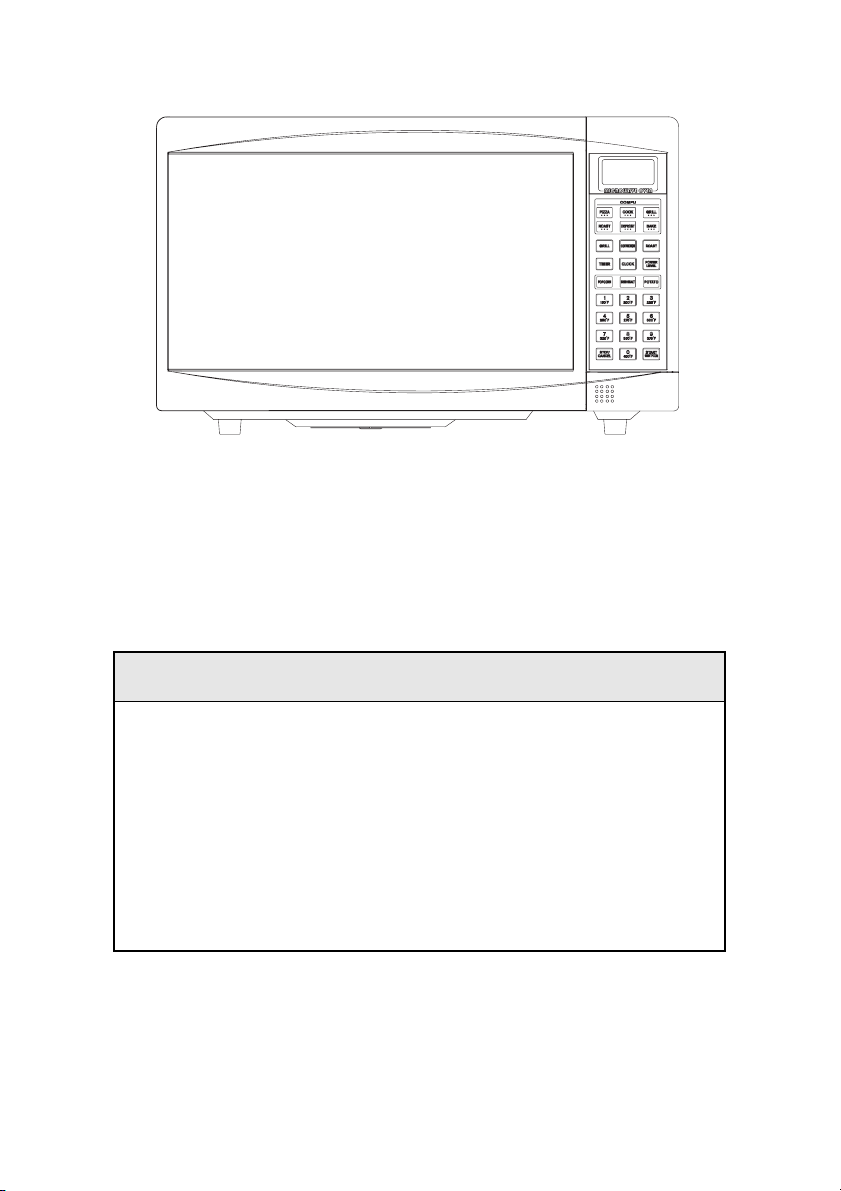
PART NAMES
1. Door Safety Lock System
2. Oven Window
3. Oven Air Vent
4. Shaft
5. Roller Ring
6. Glass Tray
7. Control Panel
8. Grill Heater
9. Baking plate
Page 8
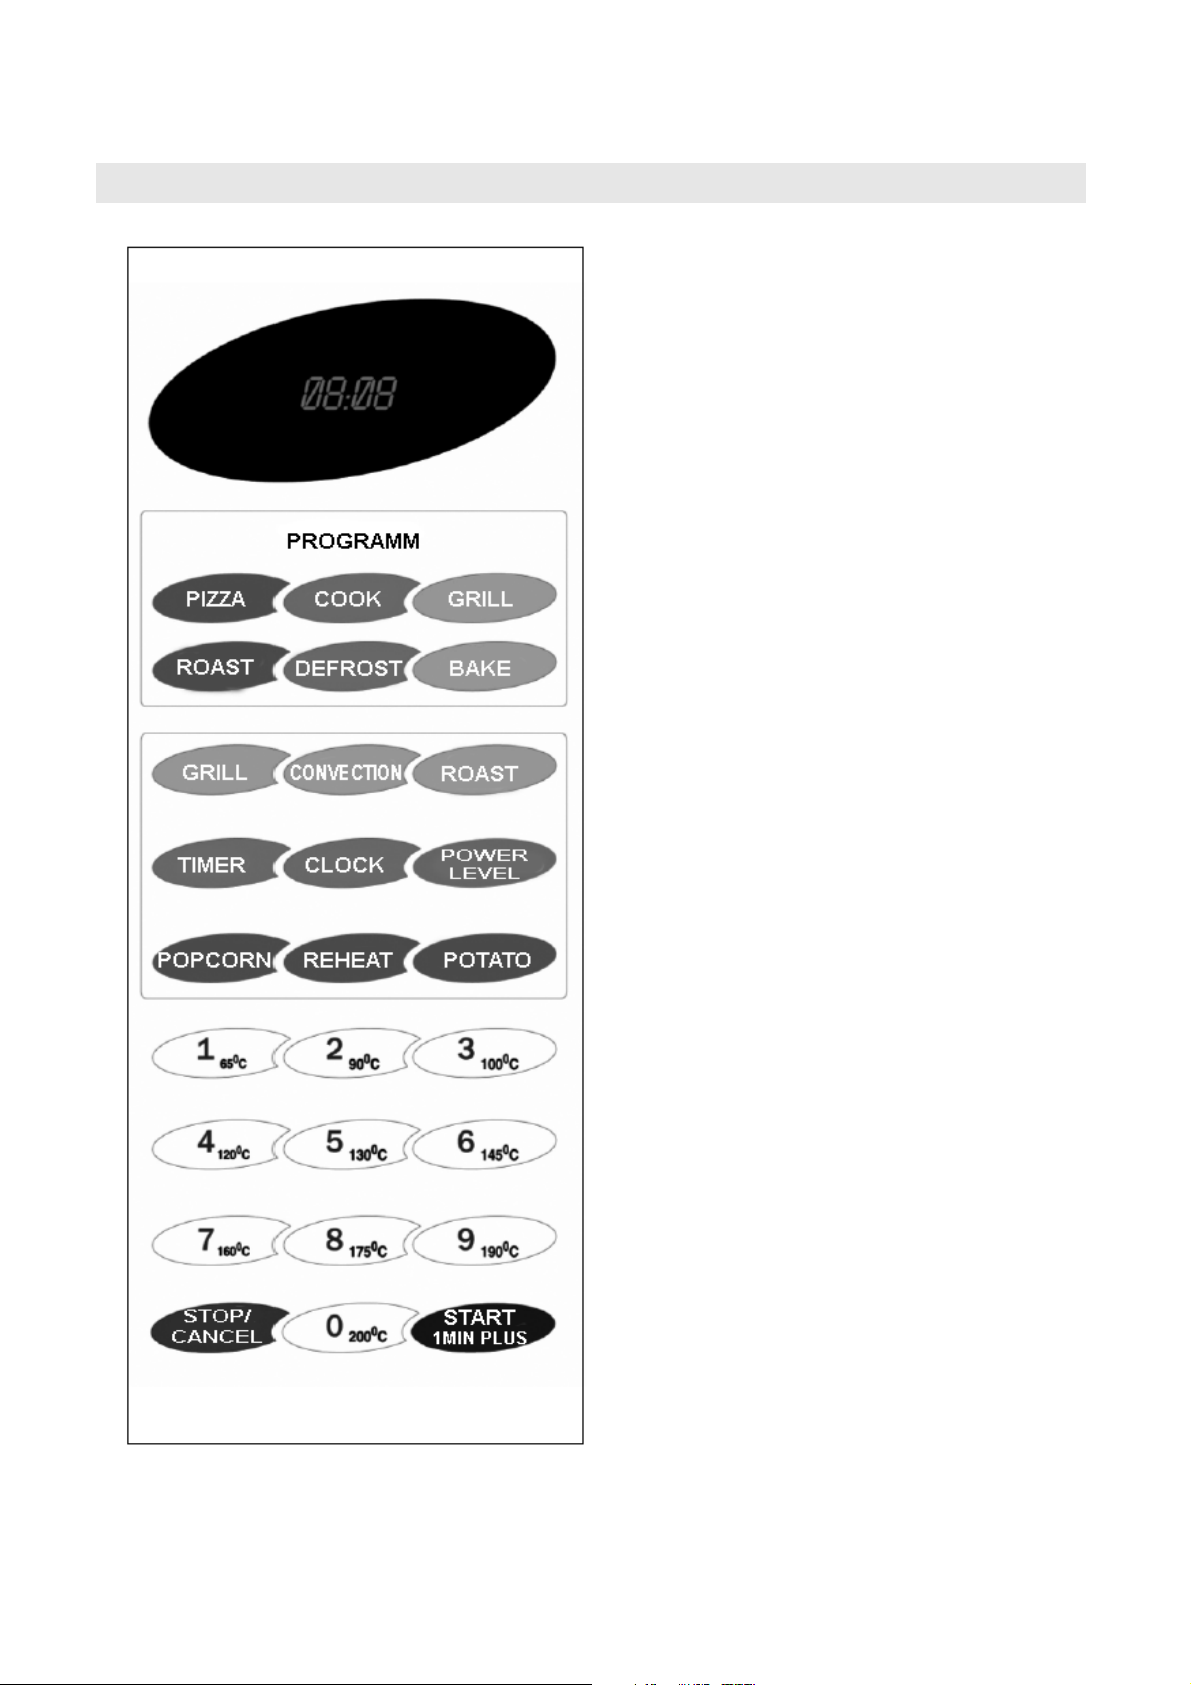
CONTROL PANEL
(Please also see the following pages for more detail)
DISPLAY SCREEN
Cooking time, power, indicators
and
present time are displayed.
COMPU COOKING
Easy settings to cook/defrost
popular
food.
POWER LEVEL
Touch POWER LEVEL and then
use
number pads to set cooking
power level.
GRILL
Press to set a grill-cooking
program.
CONVECTION
Press to program convection
cooking.
ROAST
Touch to roast food
CLOCK
Use to set the clock
TIMER
Use to set the oven timer
QUICK COOK BUTTONS:
POPCORN REHEAT POTATO
START/1MIN PLUS
Press to start cooking or add to
cooking
time.
STOP/CANCEL
Touch to stop cooking program
or clear
all previous settings before
cooking
starts
NUMBER PADS/CONVECTION
TEMPERATURE ENTRY
Touch to set cooking time, enter
weight
or number of servings, or
program
convection temperature.
Page 9

HOW TO SET THE OVEN CONTROLS
BEEPS DURING OVEN SETTINGS
• ONE BEEP: Oven accepts the entry.
• TWO BEEPS: Oven does not accept
the entry. Please check and try again.
SETTING THE CLOCK
The clock works in 12-hour cycle. When
the oven is first plugged in, the display
will briefly show “ENTER CLOCK
TIME”, you can set the clock time now
or later. To set the clock time later,
1. Press CLOCK button.
2. Use the numeric pads (in the
natural sequence of time) to enter
clock time
3. Press CLOCK to confirm.
MICROWAVE COOKING
Microwave cooking allows you to
customize cooking power and time.
First, you select a power level by pressing
the POWER LEVEL button a number of
times (see the table below). Then you
set the cooking time (maximum 99
min. plus 99 sec. ) using the numeric
pads, before pushing the START button.
Press POWER button to select
cooking power
Press Power Description
once 100%(P-100) High
twice 90%(P-90)
3 times 80%(P-80)
4 times 70%(P-70) Medium
High
5 times 60%(P-60)
6 times 50%(P-50) Medium
7 times 40%(P-40)
8 times 30%(P-30) Med.
Low/Defrost
9 times 20%(P-20)
10 times 10%(P-10) Low
11 times 0%(P-00)
Suppose you want to cook for 5 minute
at 60% power level.
1. Press POWER LEVEL button 5 times
2. Press number pads to enter cooking
time until the correct cooking time
(5:00) is displayed.
3. Press START button.
Note:
1. If you want to temporarily stop a
cooking session, press the STOP/
CANCEL pad once and then you can
start the cooking again by press
START; or press the STOP/
CANCEL twice to cancel the cooking
program altogether.
2. After the cooking time ends, the
system will beep four times and
END is displayed. Before starting
another cooking session, press
STOP/CANCEL pad to clear the
display and reset the system.
GRILL
Grill cooking is particularly useful for
thin slices of meat, steaks, chops,
kebabs, sausages and pieces of chicken.
It is also suitable for hot sandwiches
and au gratin dishes.
Suppose you want to program grill
cooking for 12 minutes.
1. Make sure the system is reset by
pressing the STOP/CANCEL pad
once.
2. Press GRILL button.
3. Use the number pads to enter
cooking time.
4. Press START button.
Note:
Grill cooking power is set at full power
level by the system. Maximum cooking
time for grill is 99:99.
Page 10

CONVECTION
During convection cooking, hot air is
circulated throughout the oven cavity to
brown and make crisp foods quickly and
evenly. This oven can be programmed
for ten different cooking temperatures.
To Cook with Convection
To cook with convection, press
CONVECTION button once and then
press the number pads to enter the
desired convection temperature.
Suppose you want to cook at 325
0
for 40
minutes.
1. Press CONVECTION button.
2. Press number pad 7.
3. Press number pads 4,0,0,0 to enter
cooking time.
4. Press START button.
Note:
1. The maximum convection cooking
time is 99 min. 99 sec. After time
has elapsed four beeps sound and
END appears in display. Press
STOP/CANCEL button or open door
to clear END before starting another
cooking function.
2. You can check the convection
temperature while cooking is in
progress by pressing the
CONVECTION button.
To Preheat and Cook with
Convection
Your oven can be programmed to
combine preheating and convection
cooking operations.
Suppose you want to preheat to 160
0
and
then cook 35 minutes.
1. Press CONVECTION.
2. Press number pad 2 to indicate
convection temperature 90
0
3. Press START button. Beeps will
sound when the designated
temperature is reached.
4. Open the door and place container of
food at the center of the turntable.
5. Use the number pads to enter
cooking time.
6. Press START button.
ROAST
This oven has four pre-programmed
settings that make it easy to cook with
both convection heat and microwave
whereby meats can be made juicy and
tender with just the right amount of
browning and crispness.
Press ROAST button and then use the
number pads 1-4 to program convection
temperature:
Program Press number Temp.
pad (0)
COMB1 1 150
COMB2 2 180
COMB3 3 200
COMB4 4 230
Suppose you want to roast for 24
minutes on COMB3.
1. Press ROAST button
2. Use the number pads 1-4 to enter
convection temperature. In this case,
press number pad 3.
3. Use the number pads to enter
cooking time. In this case, press
number pads 2,4,0,0.
4. Press START button to start.
Note:
The maximum cooking time is 99 min.,
99 sec. After time has elapsed four beeps
sound and END appears in display.
Press STOP/CANCEL button or open
door to clear END before starting another
cooking function. You can check the
convection temperature while cooking is
in progress by pressing the ROAST
button.
Page 11

SPECIAL FEATURES
In this special feature section, you can
find easy settings to cooking popular
food.
POPCORN
This feature allows a regular sized bag
of popcorn to be popped.
1. Press POPCORN once, the display
will show code and cooking time
2. Press START button.
NOTE:
To reset POPCORN time: Press
POPCORN twice, and use the number
pads to enter the new popcorn time, and
then press START button to verify. The
new popcorn time will remain whenever
you use the POPCORN function until
you reset it.
2. Press POTATO pad twice and use
the number pads 1-4 to select
number of servings (150-210 g)
Press Press number Cooking
BEVERAGE pad time
2 1 5 min 40 sec
2 2 10 min
2 3 15 min
2 4 19 min
Note:
After the cooking program have finished,
let food stand in the oven for 5~10 minutes.
The cooking time quoted here is for
reference only. Please always take
the cooking timings actually show
on the screen of your oven as the
correct settings.
REHEAT
Touch the reheat pad will allow the
reheating of a chilled dinner plate.
1. Press REHEAT pad once, the
display will show code and cooking
time.
2. Press START button.
POTATO
1. Touch POTATO pad once or twice
for potato 4-6 oz or 5-7 oz per serving.
2. Use the number pads 1-4 to select
the number of servings.
3. Press START button.
Please refer to the following charts for
cooking guide:
1. Press POTATO pad once and use
the number pads 1-4 to select
number of servings (100-180 g)
Press Press Cooking
POTATO number pad time
1 1 3 min 50 sec
1 2 7 min 10 sec.
1 3 11 min
1 4 14 min
COMPU DEFROST
Compudefrost automatically defrost
foods to the weight you entered.
To defrost 2.0 pound of chicken pieces,
do the following:
1. touch DEFROST pad up to 5 times
to select the type of food to be defrosted,
in this case, touch it 3 times.
2. Use the number pads to enter
weight, in this case, touch 2,0.
3. Touch START pad.
Defrost chart
Press Food Amount
DEFROST
Once 1. Ground meat 0.2~1.40lb
Twice 2. Steaks, chops, fish 0.2~1.80lb
3 times 3. Chicken pieces 0.2~1.50lb
4 times 4. Roast 0.8~1.80lb
5 times 5. Casserole 2~6 cups
1. If you happen to enter weight above or
below the weights allowed, the screen
will clear to 0.0 allowing you reenter.
2. To defrost other food, use 30% power
and program defrosting time.
Page 12

COMPU COOK
Compu cook and the following Compu
settings leave you no more to do with
cooking than selecting the food to be
cooked and entering its weight or
number of servings, before pushing the
START button.
For example, to cook 1.5 lb of fish
1. Indicating the type of food placed into
the oven by pressing COOK pad 5
times.
2. Use the number pads to enter
weight within the range indicated
in the charts below, in this case,
touch 1 and 5.
3. push START button.
Press SETTING Food Amount
COOK
Once 1. baked potato 1 ~4
medium
Twice 2. fresh vegetable 1~4 cups
3 times 3. frozen vegetables 1~4 cups
4 times 4. ground meat 0.1~1.0 lb
5 times 5. seafood, fish 0.1~1.0 lb
COMPU PIZZA
For items 1~4, you just need to indicate
what kind of a pizza you want it to come
out of the oven and push the START
pad. Step 2 is skipped.
Press SETTING Food Quantity
PIZZA
Once 1. bake frozen pizza
regular crust 1
Twice 2. bake frozen pizza
rising crust 1
3 times 3. bake refrig pizza 1
4 times 4. Microwave pizza 1
5 times 5. Casserole 1~6 slices
COMPU GRILL
Press SETTING Food Quantity
Grill
Once 1. hamburgers 1-7 (0.1lb
each)
Twice 2. steaks 0.2~0.9lb
3 times 3. fish steaks 0.2~0.9lb
4 times 4. boneless poultry 0.2~0.9 lb
5 times 5. chicken pieces 0.2~1.4 lb
COMPU ROAST
Press SETTING Food Quantity
ROAST
Once 1. Chicken, turkey 1.1~3.2
(whole)
Twice 2. Pork loin 0.9~1.6
3 times 3. turkey breast 1.4~1.6
4 times 4. beef eye of round 0.9~1.6
5 times 5. Cornish hens 0.2~1.4
COMPU BAKE
Press SETTING Food Quantity
BAKE
Once 1. French fries 0.1~0.4
Twice 2. Frozen snack 0.9~1.6
3 times 3. Brownies 10x10x5
4 times 4. Snack cake 10x10x5
5 times 5. biscuits 8~10 (1 package of
convenience
biscuits)
Page 13

OTHER CONVENIENT FEATURES
MINUTE TIMER
The timer works independently as a
reminder and the time countdown ends
in beeps sounding.
1. Press TIMER.
2.Use the numeric pads to enter the
time to be counted down.
3. Press START.
CHILD PROOF LOCK
The child proof lock prevents
unsupervised operation by little children.
To set the child proof lock: Press STOP/
CANCEL button for 3 seconds, then a
beep will sound and the indicator light
will come on. In the lock state, all buttons
are disabled.
To cancel the child proof lock: Press
STOP/CANCEL button for three
seconds, then a beep will sound and the
indicator light will come off.
TO STOP THE OVEN WHILE THE
OVEN IS OPERATING
1. Press STOP/CANCEL button.
You can restart the oven by pressing
START pad.
Touch STOP/CANCEL to erase all
instructions.
2. Open the door.
You can restart the oven by closing
the door and pressing START pad.
Note:
Oven stops operating when door is
opened.
Page 14

CLEANING AND CARE
1. Turn off the oven and remove the power plug from the wall socket before
cleaning.
2. Keep the inside of the oven clean. When food splatters or spilled liquids adhere
to oven walls, wipe with a damp cloth. Mild detergent may be used if the oven
gets very dirty. Avoid the use of spray and other harsh cleaners as they may
stain, streak or dull the door surface.
3. The outside surfaces should be cleaned with a damp cloth. To prevent damage
to the operating parts inside the oven, water should not be allowed to seep into
the ventilation openings.
4. Wipe the door and window on both sides, the door seals and adjacent parts
frequently with a damp cloth to remove any spills or spatters. Do not use
abrasive cleaner.
5. Do not allow the control panel to become wet. Clean with a soft, damp cloth.
When cleaning the control panel, leave oven door open to prevent oven from
accidentally turning on.
6. If steam accumulates inside or around the outside of the oven door, wipe with
a soft cloth. This may occur when the microwave oven is operated under high
humidity condition. And it is normal.
7. It is occasionally necessary to remove the glass tray for cleaning. Wash the
tray in warm sudsy water or in a dishwasher.
8. The roller ring and oven floor should be cleaned regularly to avoid excessive
noise. Simply wipe the bottom surface of the oven with mild detergent. The
roller ring may be washed in mild sudsy water or dishwasher. When removing
the roller ring from cavity floor for cleaning, be sure to replace in the proper
position.
9. Remove odors from your oven by combining a cup of water with the juice and
skin of one lemon in a deep microwaveable bowl, microwave for 5 minutes.
Wipe thoroughly and dry with a soft cloth.
10. When it becomes necessary to replace the oven light, please consult a dealer to
have it replaced.
Page 15

Page 16

MADE IN CHINA
Galanz Enterprises Corporation of Guandong
Address: 25 Ronggui Nan Rd. Ronggui, Shunde,
Guangdong, China.
Page 17

Руководство пользователя
КОНВЕКЦИОННАЯ
МИКРОВОЛНОВАЯ ПЕЧЬ
Модель: MC-3010D
Page 18

Перед установкой и использованием печи внимательно прочтите эти инструкции.
Запишите ниже серийный номер, который вы можете найти на табличке на
вашей печи, и сохраните эту информацию для дальнейшего использования.
СЕРИЙНЫЙ ¹
МЕРЫ ПРЕДОСТОРОЖНОСТИ ВО ИЗБЕЖАНИЕ
ВОЗМОЖНОГО ВОЗДЕЙСТВИЯ МИКРОВОЛН
1. Не пытайтесь использовать эту печь с открытой дверью, это может привести к опасному воздействию микроволн. Не нарушайте функции защитной блокировки.
2. Не помещайте никаких предметов между передней панелью печи и
дверью, и не допускайте скопления грязи или осадка от чистящих
средств на уплотняющих поверхностях.
3. Не используйте печь, если она повреждена. Особенно важно, чтобы дверь
печи закрывалась должным образом и не было повреждений
a. Двери (искривление),
b. Петель и защелок (поломка или отвинчивание),
c. Уплотнений и уплотняющих поверхностей двери.
4. Печь должна регулироваться или ремонтироваться только квалифицированным обслуживающим персоналом.
18
Page 19

СОДЕРЖАНИЕ
МЕРЫ ПРЕДОСТОРОЖНОСТИ ВО ИЗБЕЖАНИЕ ВОЗМОЖНОГО
ВОЗДЕЙСТВИЯ МИКРОВОЛН .................................................................... 2
ТЕХНИЧЕСКИЕ ХАРАКТЕРИСТИКИ ............................................................ 4
ПЕРЕД ВЫЗОВОМ ОБСЛУЖИВАЮЩЕГО ПЕРСОНАЛА ............................ 4
УСТАНОВКА ................................................................................................. 4
ИНСТРУКЦИИ ПО ЗАЗЕМЛЕНИЮ .............................................................. 5
РАДИОПОМЕХИ ........................................................................................... 5
ВАЖНЫЕ ИНСТРУКЦИИ ПО БЕЗОПАСНОСТИ ........................................... 5
ПРАВИЛА МИКРОВОЛНОВОГО ПРИГОТОВЛЕНИЯ ПИЩИ ...................... 6
РЕКОМЕНДАЦИИ ПО ИСПОЛЬЗОВАНИЮ ПОСУДЫ ................................. 7
НАИМЕНОВАНИЯ КОМПОНЕНТОВ ............................................................ 7
ПАНЕЛЬ УПРАВЛЕНИЯ ................................................................................ 8
УСТАНОВКА ЭЛЕМЕНТОВ УПРАВЛЕНИЯ ПЕЧИ ....................................... 9
УСТАНОВКА ЧАСОВ .................................................................................... 9
МИКРОВОЛНОВОЕ ПРИГОТОВЛЕНИЕ ..................................................... 9
ГРИЛЬ........................................................................................................... 9
КОНВЕКЦИОННОЕ ПРИГОТОВЛЕНИЕ ..................................................... 10
ЖАРКОЕ...................................................................................................... 10
ОСОБЫЕ ВОЗМОЖНОСТИ ....................................................................... 11
ПОПКОРН (ВОЗДУШНАЯ КУКУРУЗА) ...................................................... 11
РАЗОГРЕВАНИЕ ........................................................................................ 11
КАРТОФЕЛЬ ............................................................................................... 11
КОМПЬЮТЕРИЗИРОВАНОЕ ОТТАИВАНИЕ ............................................. 11
КОМПЬЮТЕРНАЯ ГОТОВКА ..................................................................... 12
КОМПЬЮТЕРИЗИРОВАННАЯ ПИЦЦА ...................................................... 1 2
КОМПЬЮТЕРИЗИРОВАННЫЙ ГРИЛЬ ..................................................... 13
КОМПЬЮТЕРИЗИРОВАННОЕ ЖАРКОЕ ................................................... 13
КОМПЬЮТЕРИЗИРОВАННАЯ ЗАПЕКАНКА.............................................. 13
ДРУГИЕ УДОБНЫЕ ФУНКЦИИ ................................................................... 14
ОЧИСТКА И УХОД ...................................................................................... 1 5
19
Page 20

ТЕХНИЧЕСКИЕ ХАРАКТЕРИСТИКИ
Потребляемая мощность: 220-230 В, 50 Гц, 1500 В (Микроволновая)
Номинальная микроволновая
выходная мощность: 1000 Вт
Рабочая частота: 2450 МГц
Наружные размеры: 305 мм(В)х 525 мм(Ш) х 490 мм(Г)
Размеры полости печи: 219 мм(В) х 350 мм(Ш) х 355 мм(Г)
Емкость печи: 30 ë
Равномерность приготовления: Система поворотного круга {314 мм}
Масса нетто: Около 22 кг
220-230 В, 1400 Вт (Конвекционная)
220-230 В, 1000 Вт (Нагреватель)
ПЕРЕД ВЫЗОВОМ ОБСЛУЖИВАЮЩЕГО ПЕРСОНАЛА
Если печь не работает:
1. Проверьте правильность подключения печи. В случае неправильного подключения извлеките вилку из розетки, подождите 10 секунд
и снова подключите ее к розетке.
2. Проверьте предохранитель и
выключатель. Если они работают
нормально, проверьте розетку с
другим прибором.
3. Убедитесь, что панель управления правильно запрограммирована и таймер установлен.
4. Убедитесь, что дверь плотно закрывается с задействованием системы защитной блокировки двери. В противном случае микроволновая энергия не будет поступать
в печь. Если ни одна из вышеуказанных процедур не прояснила
ситуацию, свяжитесь с квалифицированным техником. Не пытайтесь регулировать или ремонтировать печь самостоятельно.
УСТАНОВКА
1. Убедитесь, что из двери извлечены все упаковочные материалы.
2. Предупреждение: Проверьте печь на
наличие повреждений, например,
не искривлена ли дверь, не повреждены ли уплотнения и уплотняющие поверхности двери, не сломаны ли или не отвинтились ли петли и защелки и нет ли вмятин внутри печи или на двери. Если вы обнаружили повреждения, не используйте печь и обратитесь за квалифицированным обслуживанием.
3. Эта микроволновая печь должна
быть установлена на ровной, устойчивой поверхности, способной
выдерживать ее вес и вес самых
тяжелых блюд, которые могут
приготавливаться в печи.
4. Не устанавливайте печь в местах повышенного выделения
тепла, влаги или относительной
влажности или вблизи легко воспламеняющихся материалов.
5. Для правильной работы печи
должен быть обеспечен достаточный поток воздуха. При установке оставьте 20 см свободного пространства над печью, 10 см сзади и по 5 см по бокам. Не накрывайте и не блокируйте отверстия
на печи. Не удаляйте ножки.
6. Не используйте печь, если стеклянный лоток, роликовая опора и вал находятся в неправильном положении.
7. Убедитесь, что шнур питания не
поврежден и не протянут под печью или поверх любой горячей
или острой поверхности.
8. Розетка должна быть легко доступна, чтобы печь можно было
легко отключить от сети в случае
необходимости.
9. Не используйте печь вне помещения.
20
Page 21

ИНСТРУКЦИИ ПО ЗАЗЕМЛЕНИЮ
Этот прибор должен быть заземлен.
Эта печь оснащена шнуром с заземляющим проводом и вилкой с заземлением. Он должен подключаться к
стенной розетке, установленной и заземленной должным образом. В случае короткого замыкания заземление
снижает риск удара электрическим
током, т.к. имеется провод для отвода электрического тока. Рекомендуется обеспечивать для обслуживания
печи отдельный контур. Использование высокого напряжения опасно и
может привести к возгоранию или
другой ситуации, вызывающей повреждение печи.
Предупреждение: Неправильное использование заземляющей вилки
может создать риск удара электрическим током.
РАДИОПОМЕХИ
Работа микроволновой печи может
вызывать помехи вашего радио, телевизора или подобного оборудования.
При наличии помех вы можете снизить или устранить их, приняв следующие меры:
1. Очистите дверь и уплотняющую
поверхность печи.
2. Измените ориентацию принимающей антенны радио или телевизора.
Примечания
1. Если у вас есть какие–либо вопросы, касающиеся заземления
или электрических инструкций,
свяжитесь с квалифицированным электриком или специалистом по обслуживанию.
2. Ни производитель, ни дилер не
несут никакой ответственности за
повреждения печи или вред, нанесенный чьему–либо здоровью
в результате неправильного выполнения процедур электрического подключения.
Провода в кабельной сети окрашены
в соответствии со следующим кодом:
Зеленый и желтый = ЗЕМЛЯ
Синий = НЕЙТРАЛЬ
Коричневый = Провод под напряжением
3. Измените положение микроволновой печи по отношению к приемнику.
4. Переместите микроволновую
печь подальше от приемника.
5. Подключите микроволновую
печь к другой розетке, чтобы
микроволновая печь и приемник оказались в разных ответвлениях цепи.
ВАЖНЫЕ ИНСТРУКЦИИ ПО БЕЗОПАСНОСТИ
При использовании электрического
бытового прибора необходимо выполнять основные меры безопасности, включая следующее:
Предупреждение: Для снижения риска возгорания, удара электрическим током, вреда чьему-либо здоровью или
воздействия микроволновой энергии:
1. Прочтите все инструкции перед
использованием прибора.
2. Используйте этот прибор только по
назначению и как описано в этом
руководстве. Не используйте коррозийных химикатов или паров
в печи. Этот тип печи специально предназначен для подогрева,
приготовления или высушивания пищи. Она не предназначена для промышленного или лабораторного использования.
3. Не эксплуатируйте печь в пустом
состоянии.
4. Не эксплуатируйте этот прибор при
поврежденном шнуре или вилке,
если он не работает правильно или
если он был поврежден или упал.
Если шнур питания поврежден, он
должен быть заменен производи-
21
Page 22

телем, его агентом по обслуживанию или квалифицированным
специалистом во избежание возникновения опасных ситуаций.
5. Предупреждение: Разрешайте
детям использовать печь без присмотра только после того, как вы дадите им соответствующие инструкции и убедитесь, что они смогут
пользоваться печью безопасным
образом и понимают всю опасность
неправильного использования.
6. Для снижения риска возго-
рания в полости печи:
a.При подогревании пищи в
пластиковом или бумажном
контейнере следите за печью,
т.к. возможно возгорание;
b. Снимайте обвязку с бумажных
и пластиковых пакетов перед
помещением их в печь.
c. При появлении дыма отклю-
чите прибор или отсоедините его
от сети и оставьте дверь закрытой, чтобы огонь потух.
d. Не используйте полость печи
для хранения продуктов. Не
оставляйте бумагу, кухонную
утварь или пищу в печи, когда
она не используется.
7. Предупреждение: Жидкая или
другая пища не должна подогреваться в закрытых контейнерах,
т.к. они могут взорваться.
8. Микроволновое подогревание напитков может привести к задер-
жанному вулканическому кипению, так что будьте осторожны с
контейнером.
9. Не жарьте пищу в печи. Горячее
масло может повредить части
печи и посуду и даже привести к
ожогам кожи.
10. Яйца в скорлупе и целые яйца,
сваренные вкрутую, не должны
подогреваться в микроволновых
печах, т.к. они могут взрываться
даже после окончания микроволнового подогрева.
11. Прокалывайте пищевые продукты с твердой кожурой, например,
картофель, целые фрукты и каштаны перед приготовлением.
12. Взбалтывайте содержимое бутылочек с детским питанием и проверяйте их температуру во избежание ожогов.
13. Посуда может нагреваться из–за
передачи тепла от нагретой пищи.
Для обращения с посудой могут
потребоваться прихватки.
14. Проверяйте посуду, чтобы убедиться, что она подходит для использования в микроволновой печи.
15. Предупреждение: Для лиц, не
относящихся к подготовленному
персоналу, очень опасно выполнять любые операции по обслуживанию и ремонту, связанные
с удалением любых крышек, обеспечивающих защиту от воздействия микроволновой энергии.
ПРАВИЛА МИКРОВОЛНОВОГО ПРИГОТОВЛЕНИЯ ПИЩИ
1. Правильно размещайте продукты. Помещайте более толстые места ближе к внешнему краю тарелки.
2. Следите за временем приготовления. Готовьте пищу в течение
самого короткого указанного времени и добавляйте еще по необходимости. Слишком долго приготовляемая пища может задымиться или загореться.
3. Накрывайте пищу крышкой при
приготовлении. Крышки предот-
вращают разбрызгивание и обеспечивают более равномерное
приготовление.
4. Переворачивайте пищу во время
обработки для ускорения приготовления таких блюд, как цыпленок
или гамбургеры. Большие куски,
например, жаркое, должны переворачиваться как минимум один раз.
5. Перемещайте такие продукты как,
например, мясные шарики, во
время приготовления сверху вниз
и от центра тарелки к краям.
22
Page 23

РЕКОМЕНДАЦИИ ПО ИСПОЛЬЗОВАНИЮ ПОСУДЫ
1. Идеальный материал для посуды
должен быть прозрачным для микроволн, т.е. позволять энергии проходить через контейнер и нагревать
пищу. Используйте только температурные зонды, рекомендованные
производителем для этой печи.
2. Микроволны не могут проходить
сквозь металл, поэтому металлическая посуда или тарелки с металлической отделкой не должны
использоваться.
3. Не используйте упаковку из переработанной бумаги при микроволновой обработке, т.к. она может содержать небольшие части-
цы металла, которые могут вызвать искрение и/или возгорание.
4. Рекомендуются круглые/овальные тарелки, а не квадратные или
прямоугольные, т.к. пища в углах обычно быстрее готовится.
5. Для предотвращения пережаривания открытых частей можно использовать узкие полоски алюминиевой
фольги. Но будьте осторожны и не используйте слишком много фольги и
сохраняйте дистанцию 2,54 см между фольгой и полостью печи.
Ниже приводятся общие указания,
которые помогут вам выбрать правильную посуду.
Посуда Микровол- Гриль Конвекци- Комби-
Жаростойкое стекло Äà Äà Äà Да
Нежаростойкое стекло Íåò Íåò Íåò Нет
Жаростойкая керамика Äà Äà Äà Да
Защищенная от микроволн
пластиковая посуда Äà Íåò Íåò Нет
Бумажная посуда Äà Íåò Íåò Нет
Металлические лотки Íåò Äà Äà Нет
Металлическая подставка Íåò Äà Äà Нет
Алюминиевая фольга или
контейнер из фольги Íåò Äà Äà Íåò
* Комбинация: применимо к приготовлению «микроволновое + гриль» и «микроволно-
вое + конвекционное».
новое приго- онное приго- нация*
товление товление
НАИМЕНОВАНИЯ КОМПОНЕНТОВ
1. Система защитной блокировки
двери
2. Îêíî ïå÷è
3. Вентиляционное отверстие печи
4. Âàë
5. Роликовое кольцо
6. Стеклянный лоток
7. Панель управления
8. Нагреватель гриля
9. Тарелка для запекания
23
Page 24

ПАНЕЛЬ УПРАВЛЕНИЯ
Дисплей
Дисплей
На дисплее показывается время
приготовления, индикатор питания
и текущее время.
Программы
Простые установки для приготовления/разморозки популярных продуктов.
Уровень мощности
Прикоснитесь к кнопке МОЩНОСТЬ
и затем используйте цифровые кнопки для установки уровня мощности
приготовления.
Гриль
Нажмите для установки программы
приготовления на гриле.
Конвекция
Нажмите для программирования
конвекционного приготовления.
Поджаривание
Прикоснитесь для приготовления
жаркого.
×àñû
Используйте для установки часов.
Таймер
Используйте для установки таймера
печи.
Кнопки быстрого приготовления:
Попкорн, разогрев, картофель.
Старт/1 мин.
Нажмите для запуска приготовления
или добавления времени приготовления.
Стоп/Отмена
Коснитесь для остановки программы
приготовления или удаления всех
предыдущих установок перед началом приготовления.
Цифровые кнопки/Ввод конвекционной температуры
Коснитесь для установки времени приготовления, ввода веса или количества порций или программирования конвекционной температуры.
24
Page 25

УСТАНОВКА ЭЛЕМЕНТОВ УПРАВЛЕНИЯ ПЕЧИ
Звуковые сигналы во время установки печи
• Один сигнал: Печь принимает ввод.
• Два сигнала: Печь не принимает
ввод. Проверьте и попробуйте еще раз.
УСТАНОВКА ЧАСОВ
Часы работают в 12–часовом цикле. При
первом включении печи дисплей на
мгновение покажет «ENTER CLOCK
TIME», вы можете установить время на
часах в этот момент или позднее. Для
установки времени на часах позднее
1. Нажмите кнопку CLOCK.
2. Используйте цифровые кнопки (в
естественной последовательности
времени) для ввода времени.
3. Нажмите CLOCK для подтверждения.
МИКРОВОЛНОВОЕ ПРИГОТОВЛЕНИЕ
Микроволновое приготовление позволяет выбирать мощность и время приготовления. Сначала выберите уровень мощности, нажав кнопку МОЩНОСТЬ несколько раз (см. таблицу
ниже). Затем установите время приготовления (максимум 99 мин плюс
99 с) с использованием цифровых кнопок перед нажатием кнопки СТАРТ.
Нажмите кнопку POWER для вы-
бора мощности приготовления
Нажмите Мощность Описание
1 ðàç 100%(P-100) Высокая
2 раза 90%(P-90)
3 раза 80%(P-80)
4 ðàçà 70%(P-70) Средняя-
5 ðàç 60%(P-60)
6 ðàç 50%(P-50) Средняя
7 ðàç 40%(P-40)
8 ðàç 30%(P-30) Средняя-
9 ðàç 20%(P-20)
10 ðàç 10%(P-10) Низкая
11 раз 0%(P-00)
высокая
низкая
(разморозка)
Предположим, вы хотите готовить 5
мин при уровне мощности 60%.
1. Нажмите кнопку МОЩНОСТЬ 5 раз.
2. Нажимайте цифровые кнопки для
ввода времени приготовления,
пока на дисплее не появится нужное время приготовления (5:00).
3. Нажмите кнопку СТАРТ.
Примечание:
1. Если вы хотите временно остановить
сеанс приготовления, нажмите кнопку СТОП/ОТМЕНА один раз и потом вы сможете начать готовить снова, нажав СТАРТ; или нажмите
СТОП/ОТМЕНА дважды для отмены всей программы приготовления.
2. По окончании времени приготовления система издаст 4 звуковых сигнала и на дисплее появится END.
Перед запуском следующего сеанса
приготовления нажмите СТОП/
ОТМЕНА для очистки дисплея и
переустановки системы.
ГРИЛЬ
Приготовление на гриле особенно
удобно для тонких ломтиков мяса,
бифштексов, отбивных, кебабов, сосисок и кусочков курятины. Он подойдет и для сэндвичей и обжаренных в сухарях блюд.
Допустим, Вам необходимо запрограммировать приготовление на гриле в течение 12 минут с помощью
верхнего и нижнего нагревателей.
1. Необходимо сбросить систему, нажав
1 раз на кнопку СТОП/ОТМЕНА.
2. Нажмите кнопку ГРИЛЬ до трех раз,
чтобы выбрать режим гриля - в
данном случае дважды.
1 нажатие Верхний гриль
2 нажатия Верхний и нижний гриль
3 нажатия Нижний гриль
3. При помощи кнопок с цифрами
введите время готовки.
4. Нажмите кнопку пуска СТАРТ.
Примечание:
Приготовление на гриле осуществляется на полной мощности системы. Максимальная продолжительность приготовления на гриле составляет 99:99.
25
Page 26

КОНВЕКЦИОННОЕ ПРИГОТОВЛЕНИЕ
Во время конвекционного приготовления горячий воздух циркулирует по
всей полости печи, и пища быстро и
равномерно покрывается золотистой
хрустящей корочкой. Этот режим может быть запрограммирован на 10 различных температур приготовления.
Для конвекционного приготовления
Нажмите кнопку КОНВЕКЦИЯ один раз
и затем нажмите цифровые кнопки для
ввода желаемой конвекционной температуры. Предположим, вы хотите готовить при 160 в течение 40 минут.
1. Нажмите кнопку КОНВЕКЦИЯ.
2. Нажмите кнопку с цифрой 7.
3. Нажмите цифровые кнопки
4,0,0,0 для ввода времени приготовления.
4. Нажмите кнопку СТАРТ.
Примечание:
1. Максимальное время конвекционного приготовления - 99 мин
99 с. По прошествии указанного
времени вы услышите 4 звуковых сигнала, и на дисплее появится END. Нажмите СТОП/
ОТМЕНА или откройте дверь для
удаления END перед запуском
другой функции приготовления.
2. Вы можете проверить конвекционную температуру в процессе
приготовления, нажав кнопку
КОНВЕКЦИЯ.
Для разогрева и конвекционного приготовления
Вы можете запрограммировать вашу
печь на комбинацию операций подогрева и конвекционного приготовления.
Предположим, вы хотите подогреть пищу
до 90 и затем готовить 35 минут.
1. Нажмите КОНВЕКЦИЯ.
2. Нажмите кнопку с цифрой 2 для
обозначения конвекционной температуры 90 .
3. Нажмите кнопку СТАРТ. При достижении указанной температуры
вы услышите звуковые сигналы.
4. Откройте дверь и поместите контейнер с пищей в центр поворотного круга.
5. Используйте цифровые кнопки для
ввода времени приготовления.
6. Нажмите кнопку СТАРТ.
ПОДЖАРИВАНИЕ
Эта печь имеет четыре предварительно запрограммированных установки,
которые позволяют готовить одновременно конвекционным и микроволновым способом, при этом мясо остается сочным и нежным и одновременно в меру поджаренным и хрустящим.
Нажмите кнопку ПОДЖАРИВАНИЕ и
затем используйте цифровые кнопки
1-4 для программирования конвекционной температуры:
Программа Нажмите цифро- Температура
вую кнопку (0)
COMB1 1 150
COMB2 2 180
COMB3 3 200
COMB4 4 230
Предположим, вы хотите жарить
мясо в течение 24 минут с использованием программы COMB3.
1. Нажмите кнопку ПОДЖАРИВАНИЕ.
2. Используйте цифровые кнопки 14 для ввода конвекционной температуры. В данном случае нажмите цифровую кнопку 3.
3. Используйте цифровые кнопки
для ввода времени приготовления. В данном случае нажмите
цифровые кнопки 2,4,0,0.
4. Нажмите кнопку СТАРТ для запуска.
Примечание:
Максимальное время приготовления 99 мин 99 с. По прошествии указанного
времени вы услышите 4 звуковых сигнала, и на дисплее появится END. Нажмите СТОП/ОТМЕНА или откройте
дверь для удаления END перед запуском другой функции приготовления. Вы
можете проверить конвекционную температуру в процессе приготовления, нажав кнопку ПОДЖАРИВАНИЕ.
26
Page 27

ОСОБЫЕ ВОЗМОЖНОСТИ
В данном разделе Вы найдете настройки, подходящие для приготовления популярных блюд.
ПОПКОРН
(ВОЗДУШНАЯ КУКУРУЗА)
Данным способом можно поджарить
порцию попкорна обычного размера
(приблизительно 100 г).
1. Один раз нажмите на кнопку
ПОПКОРН. На дисплее появится
код и исходное значение времени приготовления 2:40.
2. Нажмите кнопку пуска СТАРТ.
Если с точки зрения результата время приготовления попкорна неподходящее, его всегда можно переустановить, выполнив следующую процедуру:
1. Дважды нажмите кнопку ПОПКОРН.
2. При помощи кнопок с цифрами
введите предпочтительное время
приготовления.
Новое время жарки попкорна всегда
будет выводиться при нажатии кнопки ПОПКОРН - до тех пор, пока Вам
не захочется вновь изменить его.
РАЗОГРЕВ
Нажав на кнопку разогрева РАЗОГРЕВ, можно подогреть остывшую тарелку с ужином.
1. Один раз нажмите кнопку разогрева РА- ЗОГРЕВ. На дисплей
выводится код и исходное значение времени разогрева 4:10.
2. Нажмите кнопку пуска СТАРТ.
КАРТОФЕЛЬ
1. Один раз нажмите кнопку КАРТОФЕЛЬ для порции 100-180 г
или дважды - для порции 150210 г.
2. При помощи кнопок с цифрами
1-4 введите количество порций.
3. Нажмите кнопку пуска СТАРТ.
При приготовлении картофеля, пожалуйста, руководствуйтесь следующей
процедурой:
1. Один раз нажмите кнопку КАРТОФЕЛЬ и при помощи кнопок с
цифрами 1-4 выберите количество порций (100-180 г).
Нажать Нажать кнопку Время
КАРТОФЕЛЬ
1 1 3 ìèí 50 c
1 2 7 ìèí 10 c.
1 3 11 ìèí
1 4 14 ìèí
2. Дважды нажмите кнопку КАРТОФЕЛЬ и при помощи кнопок с
цифрами 1-4 выберите количество порций (150-210 г).
Нажать Нажать кнопку Время
КАРТОФЕЛЬ
2 1 5ìèí. 40 c.
2 2 10 ìèí.
2 3 15 ìèí.
2 4 19 ìèí.
Примечание:
По завершении программы готовки
оставьте картофель в печи на 5~10
минут.
КОМПЬЮТЕРИЗИРОВАНАЯ
РАЗМОРОЗКА
Для продуктов типа 1-4 процедура
компьютеризированного оттаивания
автоматически оттаивает продукты
до введенного Вами веса.
Процедура приготовления:
1. Нажмите кнопку РАЗМОРОЗКА
1-4 раза, чтобы выбрать тип оттаиваемого продукта.
2. При помощи кнопок с цифрами
введите требующийся вес оттаиваемого продукта.
3. Нажмите кнопку пуска СТАРТ.
с цифрой готовки
с цифрой готовки
27
Page 28

Для позиции 5 приведенной ниже
таблицы выберите время разогрева
по экрану:
1. Нажмите кнопку РАЗМОРОЗКА
5 раз.
2. При помощи кнопок с цифрами
введите время приготовления.
3. Нажмите кнопку пуска СТАРТ.
Таблица оттаивания
Нажать Продукты Êîëè-
РАЗМОРОЗКА
1 раз 1. Мясной фарш 0,2–1,4
2 раза 2. Бифштексы, 0,2–1,8
отбивные, ê ã
ðûáà
3 раза 3. Куски курицы 0,2–1,5
4 ðàçà 4. Ìÿñî 0,8–1,8
5 ðàç 5. Гарнир 2 ~ 6
1. Если по ошибке введен вес выше
или ниже допустимого, экран обнулится (0.0), чтобы Вы ввели
правильное значение.
2. Чтобы оттаивать другие продукты, включите 30% мощности и
запрограммируйте время оттаивания.
КОМПЬЮТЕРНАЯ ГОТОВКА
Для позиций 1-3 приведенной ниже
таблицы следует выполнить такую
процедуру:
1. Нажав кнопку АВТО-ПОВАР 1-3
раза, выберите тип помещенных
в печь продуктов.
2. При помощи кнопок с цифрами
введите время приготовления.
3. Нажмите кнопку пуска СТАРТ.
Для позиций 4-5 приведенной ниже
таблицы следует выполнить такую
процедуру:
чество
êã
êã
êã
порций
4. Нажав кнопку АВТО-ПОВАР 4-5
раз, выберите тип помещенных
в печь продуктов.
1. При помощи кнопок с цифрами
введите вес в пределах, указанных в таблице,
2. Нажмите кнопку пуска СТАРТ.
Во время приготовления готовка автоматически приостанавливается и
подается звуковой сигнал, чтобы Вы
смогли перевернуть продукт для его
равномерной готовности.
Нажать Продукты КолиАВТО-ПОВАР
1 раз 1.Запеченный 1~4
картофель средних
2 раза 2.Свежие овощи 1~4
3 раза 3.Замороженные 1~4
овощи порции
4 раза 4.Мясной фарш 0,1~1,0
5 раз 5.Морепродукты, 0,1~1,0
ðûáà êã
КОМПЬЮТЕРИЗИРОВАННАЯ
ПИЦЦА
Для позиций 1-4 таблицы выполните следующую процедуру:
1. Нажмите кнопку ПИЦЦА 1-4 раза,
чтобы выбрать тип продукта.
2. Нажмите кнопку пуска СТАРТ.
Начнется обратный отсчет времени приготовления.
Для последнего типа продукта:
1. Нажмите кнопку ПИЦЦА 5 раз.
2. Введите время приготовления
при помощи кнопок с цифрами 16, а затем
3. Нажмите кнопку пуска СТАРТ.
чество
порции
êã
28
Page 29

Нажать Продукт КолПИЦЦА âî
1 1. Запеченная замо-
ðàç роженная пицца
ðàçà замороженная
ðàçà денная пицца 1
ðàçà волновой печи 1
ðàç
КОМПЬЮТЕРИЗИРОВАННЫЙ
ГРИЛЬ
Для позиции 1просто нажмите кнопку ГРИЛЬ (с тремя точками внизу),
а затем при помощи кнопок с цифрами 1-7 выберите время приготовления, прежде чем нажать на кнопку
пуска СТАРТ. Для позиций 2-5 потребуется ввести вес продукта.
1. Нажмите кнопку ГРИЛЬ от 2 до 5 раз.
2. При помощи кнопок с цифрами
3. Нажмите кнопку пуска ГРИЛЬ.
Во время приготовления готовка ав-
томатически приостанавливается и
подается звуковой сигнал, чтобы Вы
смогли перевернуть продукт для его
равномерной готовности.
Нажать Продукт Кол-во
ГРИЛЬ
1 раз 1.Гамбургеры 1-7 (100 ã
2 раза 2.Бифштексы 0,2~0,9êã
3 ðàçà 3.Ðû á íûå 0,2~0,9
4 раза 4.Птица без костей 0,2~0,9кг
5 раз 5.Куски курицы 0,2~1,4кг
с равномерной
корочкой. 1
2 2. Запеченная
пицца с расправленной корочкой. 1
3 3. Запеченная охлаж-
4 4. Пицца из микро-
5 5. Запеканка 1~6
слоев
введите вес продукта в пределах,
указанных в приведенной ниже
таблице.
каждый)
бифштексы ê ã
КОМПЬЮТЕРИЗИРОВАННОЕ
ЖАРКОЕ
Для позиций 1-54 таблицы выполните следующую процедуру:
1. Выберите тип помещенного в
печь продукта, нажав кнопку
ПОДЖАРИВАНИЕ 1-5 раз.
2. При помощи кнопок с цифрами
введите вес продукта в пределах,
указанных в приведенной ниже
таблице.
3. Нажмите кнопку пуска СТАРТ.
Во время приготовления готовка автоматически приостанавливается и
подается звуковой сигнал, чтобы Вы
смогли перевернуть продукт для его
равномерной готовности.
Нажать Продукт Кол-во
ПОДЖАРИВАНИЕ
1 раз 1. Курица, индейка
(целиком) 1,1~3,2 кг
2 раза 2.Свиное филе. 0,9~1,6 кг
3 раза 3. Грудка индейки 0,9~1,6 кг
4 раза 4. Мясной огузок 0,9~1,6 êã
5 раз 5.Курица 0,2~1,4 êã
КОМПЬЮТЕРИЗИРОВАННАЯ
ВЫПЕЧКА
Для позиции 1:
1. Нажмите кнопку ВЫПЕЧКА один
раз.
2. При помощи кнопок с цифрами
введите вес продукта в пределах,
указанных в приведенной ниже
таблице.
3. Нажмите кнопку пуска СТАРТ.
Для позиций 2-5 выбранных продуктов:
1. Нажмите кнопку ВЫПЕЧКА от 2
до 5 раз.
2. Нажмите кнопку пуска СТАРТ.
29
Page 30

Нажать Продукт Кол-во
ВЫПЕЧКА
1 ðàç 1.Свежее мясо 0,1~0,4
êã
2 ðàçà 2.Замороженные 0,9~1,6
закуски êã
3 ðàçà 3.Шоколадное 10x10x5
пирожное см
с орехами
4 ðàçà 4.Пирог 10x10x5
ñì
5 ðàçà 5.Бисквиты 8~10
ДРУГИЕ УДОБНЫЕ ФУНКЦИИ
Точный таймер
Таймер работает независимо и служит
для напоминания; в конце отсчета
времени раздается звуковой сигнал.
1. Нажмите ТАЙМЕР.
2. Используйте цифровые кнопки
для ввода времени для отсчета.
3. Нажмите СТАРТ.
Блокировка для защиты от детей
Предотвращает неконтролируемое
использование маленькими детьми.
Для установки блокировки: Нажимайте кнопку СТОП/ОТМЕНА в течение 3 секунд, затем вы услышите
звуковой сигнал и загорится индикатор. В заблокированном состоянии
все кнопки отключаются.
При приготовлении продуктов позиция 3-4 печь сначала прогревается
до 350, после чего предлагает Вам
помесить продукт в печь.
При приготовлении продуктов позиция 5 печь сначала прогревается до
350, после чего предлагает Вам помесить продукт в печь.
Если достигнута температура разогрева, но продукт не сразу помещен в
печь, температура в печи понижается до определенного значения,
после чего вновь запускается программа разогрева. Разогрев необходим для достижения должного качества продукта.
Для отмены блокировки: Нажимайте
кнопку СТОП/СТОП в течение 3 секунд, затем вы услышите звуковой
сигнал и индикатор погаснет.
Для остановки печи во время работы
1. Нажмите кнопку СТОП/ОТМЕНА. Вы можете снова запустить
печь, нажав кнопку СТАРТ.
Коснитесь СТОП/ОТМЕНА для
удаления всех инструкций.
2. Откройте дверь.
Вы можете запустить печь, закрыв дверь и нажав кнопку
СТАРТ.
Примечание:
Печь перестает работать, когда дверь
открыта.
30
Page 31

ОЧИСТКА И УХОД
1. Отключите печь и отсоедините вилку питания от розетки перед очисткой.
2. Поддерживайте чистоту внутри печи. Если частицы пищи или пролитые
жидкости осели на стенках печи, протрите стенки влажной тканью. Если
печь очень сильно загрязнена, можно использовать мягкое моющее средство. Избегайте использования спреев и других сильных очистителей,
т.к. они могут вызвать образование пятен, полос или потускнения поверхности двери.
3. Наружные поверхности необходимо протирать влажной тканью. Во избежание повреждения рабочих частей внутри печи не допускайте попадания воды в вентиляционные отверстия.
4. Периодически протирайте дверь и окно с обеих сторон, дверные уплотнения и прилегающие части влажной тканью для удаления брызг и осадка.
Не используйте абразивные очистители.
5. Не допускайте попадания излишков влаги на панель управления. Протирайте ее мягкой влажной тканью. Во время очистки панели управления оставляйте дверь печи открытой во избежание случайного включения печи.
6. Если внутри или снаружи двери печи скапливается пар, протрите мягкой
тканью. Это может случиться, когда микроволновая печь используется в
условиях повышенной влажности. Это нормально.
7. Время от времени необходимо извлекать стеклянный лоток для очистки.
Мойте лоток в теплой мыльной воде или в посудомоечной машине.
8. Необходимо регулярно очищать роликовое кольцо и пол печи во избежание излишнего шума. Просто протирайте дно печи с мягким моющим
средством. Роликовое кольцо можно мыть в теплой мыльной воде или в
посудомоечной машине. Если вы удалили роликовое кольцо из пола печи
для очистки, убедитесь, что вы установили его потом в правильном положении.
9. Вы можете удалить запахи из вашей печи, смешав чашку воды с соком и
кожурой одного лимона в глубокой посуде для микроволнового приготовления и оставив ее в печи в микроволновом режиме на 5 минут. Затем
тщательно протрите печь и вытрите насухо мягкой тканью.
10. Если возникает необходимость в замене лампы в печи, свяжитесь с вашим дилером для замены.
31
Page 32

СДЕЛАНО В КИТАЕ
Галанз Энтерпрайсес Корпорейшин оф Гуэндонг
Адрес: 25 Ронггуи Нэн Рд. Ронггуи, Шунд, Гуэнгдонг,
Китай.
 Loading...