

Page 1
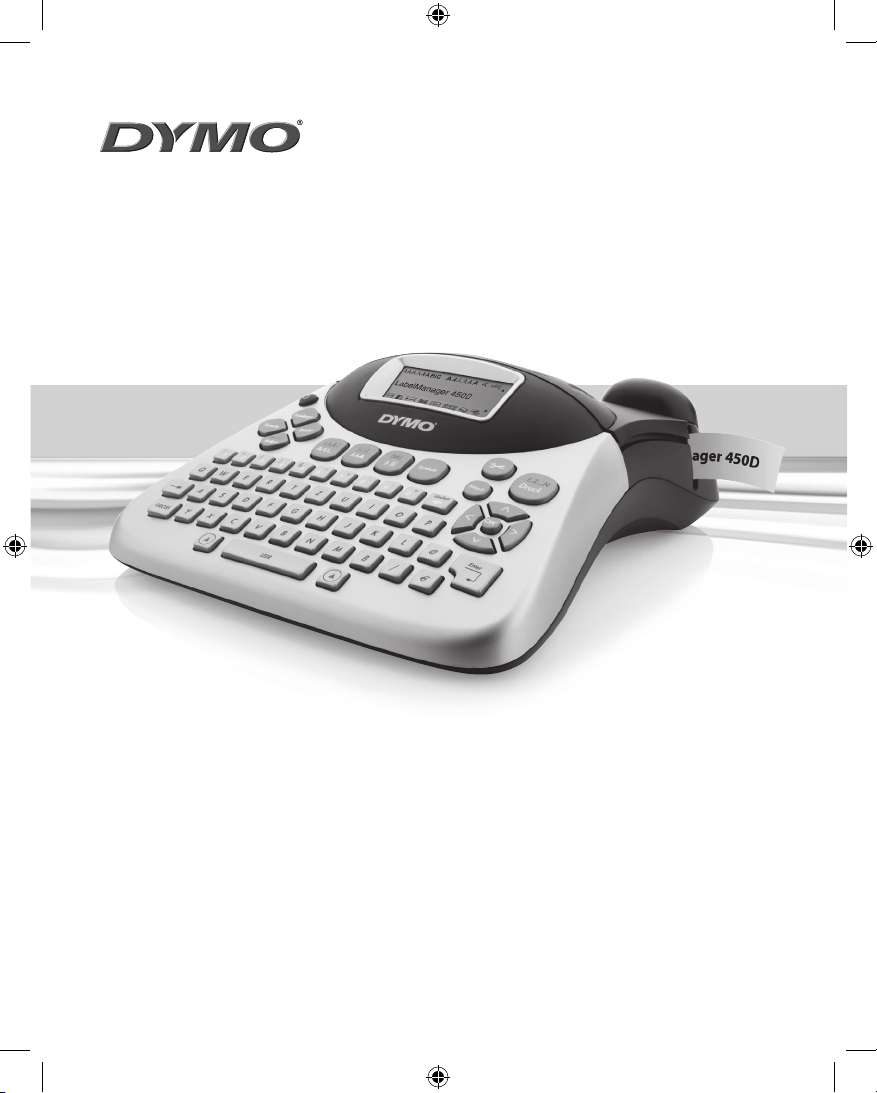
www.dymo.com
User Guide
LabelManager 450D
Cr ea te a ny l ab el y ou ne ed , st an d-a lo ne o r fro m yo ur P C/ Mac
LM450D_manual_UK_WEU.indd 1 13-08-2007 13:26:59
Page 2

Contents
About Your New Label Maker . . . . . . . . . . . . . . . . . . . . . . . . . . . . . . . . . . . . . . . . . . . . . . . . . . . . . 5
Warranty Registration . . . . . . . . . . . . . . . . . . . . . . . . . . . . . . . . . . . . . . . . . . . . . . . . . . . . . . . . . . . . . . . . 5
Getting Started . . . . . . . . . . . . . . . . . . . . . . . . . . . . . . . . . . . . . . . . . . . . . . . . . . . . . . . . . . . . . . . . . 5
Connecting the Power . . . . . . . . . . . . . . . . . . . . . . . . . . . . . . . . . . . . . . . . . . . . . . . . . . . . . . . . . . . . . . . . . . 5
Inserting the Batteries . . . . . . . . . . . . . . . . . . . . . . . . . . . . . . . . . . . . . . . . . . . . . . . . . . . . . . . . . . . . . . . . 5
Connecting the Power Adapter . . . . . . . . . . . . . . . . . . . . . . . . . . . . . . . . . . . . . . . . . . . . . . . . . . . . . . . . . 5
Inserting the Label Cassette . . . . . . . . . . . . . . . . . . . . . . . . . . . . . . . . . . . . . . . . . . . . . . . . . . . . . . . . . . . . . . 6
Settings . . . . . . . . . . . . . . . . . . . . . . . . . . . . . . . . . . . . . . . . . . . . . . . . . . . . . . . . . . . . . . . . . . . . . . . . . . . . . . . 6
Selecting a Language . . . . . . . . . . . . . . . . . . . . . . . . . . . . . . . . . . . . . . . . . . . . . . . . . . . . . . . . . . . . . . . . . 6
Setting the Current Date. . . . . . . . . . . . . . . . . . . . . . . . . . . . . . . . . . . . . . . . . . . . . . . . . . . . . . . . . . . . . . . 7
Setting the Current Time . . . . . . . . . . . . . . . . . . . . . . . . . . . . . . . . . . . . . . . . . . . . . . . . . . . . . . . . . . . . . . 7
Selecting Units of Measure. . . . . . . . . . . . . . . . . . . . . . . . . . . . . . . . . . . . . . . . . . . . . . . . . . . . . . . . . . . . . 7
Printing Your First Label . . . . . . . . . . . . . . . . . . . . . . . . . . . . . . . . . . . . . . . . . . . . . . . . . . . . . . . . . . . . . . . . . 7
Getting to Know the Label Maker . . . . . . . . . . . . . . . . . . . . . . . . . . . . . . . . . . . . . . . . . . . . . . . . . 7
Power . . . . . . . . . . . . . . . . . . . . . . . . . . . . . . . . . . . . . . . . . . . . . . . . . . . . . . . . . . . . . . . . . . . . . . . . . . . . . . . . 7
LCD Display . . . . . . . . . . . . . . . . . . . . . . . . . . . . . . . . . . . . . . . . . . . . . . . . . . . . . . . . . . . . . . . . . . . . . . . . . . . . 7
CAPS Mode . . . . . . . . . . . . . . . . . . . . . . . . . . . . . . . . . . . . . . . . . . . . . . . . . . . . . . . . . . . . . . . . . . . . . . . . . . . . 8
Shift Key . . . . . . . . . . . . . . . . . . . . . . . . . . . . . . . . . . . . . . . . . . . . . . . . . . . . . . . . . . . . . . . . . . . . . . . . . . . . . . 8
Space Bar . . . . . . . . . . . . . . . . . . . . . . . . . . . . . . . . . . . . . . . . . . . . . . . . . . . . . . . . . . . . . . . . . . . . . . . . . . . . . 8
Clear/Delete . . . . . . . . . . . . . . . . . . . . . . . . . . . . . . . . . . . . . . . . . . . . . . . . . . . . . . . . . . . . . . . . . . . . . . . . . . . 8
Cancel . . . . . . . . . . . . . . . . . . . . . . . . . . . . . . . . . . . . . . . . . . . . . . . . . . . . . . . . . . . . . . . . . . . . . . . . . . . . . . . . 8
Navigation Keys . . . . . . . . . . . . . . . . . . . . . . . . . . . . . . . . . . . . . . . . . . . . . . . . . . . . . . . . . . . . . . . . . . . . . . . . 8
Connecting to Your Computer . . . . . . . . . . . . . . . . . . . . . . . . . . . . . . . . . . . . . . . . . . . . . . . . . . . . . 8
Formatting Your Label . . . . . . . . . . . . . . . . . . . . . . . . . . . . . . . . . . . . . . . . . . . . . . . . . . . . . . . . . . . 9
Changing the Font . . . . . . . . . . . . . . . . . . . . . . . . . . . . . . . . . . . . . . . . . . . . . . . . . . . . . . . . . . . . . . . . . . . . . . 9
Adding Font Styles . . . . . . . . . . . . . . . . . . . . . . . . . . . . . . . . . . . . . . . . . . . . . . . . . . . . . . . . . . . . . . . . . . . . . 9
Adding Box and Background Styles . . . . . . . . . . . . . . . . . . . . . . . . . . . . . . . . . . . . . . . . . . . . . . . . . . . . . .10
Creating Multi-Line Labels . . . . . . . . . . . . . . . . . . . . . . . . . . . . . . . . . . . . . . . . . . . . . . . . . . . . . . . . . . . . . .11
Using Mixed Formats . . . . . . . . . . . . . . . . . . . . . . . . . . . . . . . . . . . . . . . . . . . . . . . . . . . . . . . . . . . . . . . . . .11
Using Tabs . . . . . . . . . . . . . . . . . . . . . . . . . . . . . . . . . . . . . . . . . . . . . . . . . . . . . . . . . . . . . . . . . . . . . . . . . . . 11
Using Symbols and Special Characters . . . . . . . . . . . . . . . . . . . . . . . . . . . . . . . . . . . . . . . . . . . . . . . . . . . .12
Adding Symbols. . . . . . . . . . . . . . . . . . . . . . . . . . . . . . . . . . . . . . . . . . . . . . . . . . . . . . . . . . . . . . . . . . . . .12
Adding International Characters . . . . . . . . . . . . . . . . . . . . . . . . . . . . . . . . . . . . . . . . . . . . . . . . . . . . . . .12
2
Page 3

Currency Symbols. . . . . . . . . . . . . . . . . . . . . . . . . . . . . . . . . . . . . . . . . . . . . . . . . . . . . . . . . . . . . . . . . . . 13
Adding Date and Time . . . . . . . . . . . . . . . . . . . . . . . . . . . . . . . . . . . . . . . . . . . . . . . . . . . . . . . . . . . . . . . . . 13
Changing the Date Format . . . . . . . . . . . . . . . . . . . . . . . . . . . . . . . . . . . . . . . . . . . . . . . . . . . . . . . . . . . 13
Adding the Date to Your Label . . . . . . . . . . . . . . . . . . . . . . . . . . . . . . . . . . . . . . . . . . . . . . . . . . . . . . . . 13
Changing the Time Format . . . . . . . . . . . . . . . . . . . . . . . . . . . . . . . . . . . . . . . . . . . . . . . . . . . . . . . . . . . 13
Adding the Time to your Label . . . . . . . . . . . . . . . . . . . . . . . . . . . . . . . . . . . . . . . . . . . . . . . . . . . . . . . . 13
Printing Options . . . . . . . . . . . . . . . . . . . . . . . . . . . . . . . . . . . . . . . . . . . . . . . . . . . . . . . . . . . . . . . 14
Printing Multiple Copies . . . . . . . . . . . . . . . . . . . . . . . . . . . . . . . . . . . . . . . . . . . . . . . . . . . . . . . . . . . . . . . 14
Serializing Your Labels . . . . . . . . . . . . . . . . . . . . . . . . . . . . . . . . . . . . . . . . . . . . . . . . . . . . . . . . . . . . . . . . . 14
Printing a Fixed-Length Label . . . . . . . . . . . . . . . . . . . . . . . . . . . . . . . . . . . . . . . . . . . . . . . . . . . . . . . . . . 14
Adding Barcodes to Labels . . . . . . . . . . . . . . . . . . . . . . . . . . . . . . . . . . . . . . . . . . . . . . . . . . . . . . . . . . . . . 14
Previewing Your Label . . . . . . . . . . . . . . . . . . . . . . . . . . . . . . . . . . . . . . . . . . . . . . . . . . . . . . . . . . . . . . . . . 15
Aligning the Text . . . . . . . . . . . . . . . . . . . . . . . . . . . . . . . . . . . . . . . . . . . . . . . . . . . . . . . . . . . . . . . . . . . . . 15
Changing the Cutting Option . . . . . . . . . . . . . . . . . . . . . . . . . . . . . . . . . . . . . . . . . . . . . . . . . . . . . . . . . . . 15
Adjusting the Print Contrast . . . . . . . . . . . . . . . . . . . . . . . . . . . . . . . . . . . . . . . . . . . . . . . . . . . . . . . . . . . . 16
Using Label Maker Memory . . . . . . . . . . . . . . . . . . . . . . . . . . . . . . . . . . . . . . . . . . . . . . . . . . . . . 16
Storing Label Text . . . . . . . . . . . . . . . . . . . . . . . . . . . . . . . . . . . . . . . . . . . . . . . . . . . . . . . . . . . . . . . . . . . . 16
Storing Formats . . . . . . . . . . . . . . . . . . . . . . . . . . . . . . . . . . . . . . . . . . . . . . . . . . . . . . . . . . . . . . . . . . . . . . 16
Recalling Stored Labels and Formats . . . . . . . . . . . . . . . . . . . . . . . . . . . . . . . . . . . . . . . . . . . . . . . . . . . . . 16
Caring for Your Label Maker . . . . . . . . . . . . . . . . . . . . . . . . . . . . . . . . . . . . . . . . . . . . . . . . . . . . . 17
Troubleshooting . . . . . . . . . . . . . . . . . . . . . . . . . . . . . . . . . . . . . . . . . . . . . . . . . . . . . . . . . . . . . . . . . . . . . . 18
Documentation Feedback . . . . . . . . . . . . . . . . . . . . . . . . . . . . . . . . . . . . . . . . . . . . . . . . . . . . . . . . . . . . 19
3
Page 4

AC Power C onnecto r
Label cassette
door release
Power
Settings
Memory
Language
Preview/Insert
CAPS
Tab
USB Connector
w
Settings
Language
Memory
Preview
Insert
,
!
?
1
2
CAPS
+
–
3
4
E
R
S
D
X
C
Shift Shift
=
/
65
7
Y
T
F
G
B
V
SPACE
U
H
N
Space Bar
Shift
Figure 1 LabelManager 450D Professional Label Maker
Auto-cutter
LCD D isp lay
Label Exit
Font S ize/St yle
w
w
m
.
o
d
c
.
y
m
o
Font/Fixed Length
Underline-Box/Align
Symbols
Manual Cutter
1,2...n
Symbols
Cancel
,
Clear
&
0
98
,
.
P
O
I
L
K
J
,
Enter
$
.
Print
Cancel
Navigation Arrows
& OK
Clear/Delete
Return/Enter
Currenc y
4
Page 5
About Your New Label Maker
With your new DYMO LabelManager™ 450D label
maker, you can create a wide variety of high-quality,
self-adhesive labels. You can choose to print your
labels in many different sizes and styles. The label
maker uses DYMO D1 label cassettes in widths of 1/4”
(6 mm), 3/8” (9 mm), 1/2” (12 mm),
3/4” (19 mm), or 1” (24 mm). Label cassettes are also
available in a wide range of materials.
Visi t www.dymo.com for information on obtaining
labels and accessories for your label maker.
Warranty Registration
Please complete the warranty registration card and
return it to the appropriate Customer Support address
within seven days of purchase. Visit
www.dymo.com/registration for details.
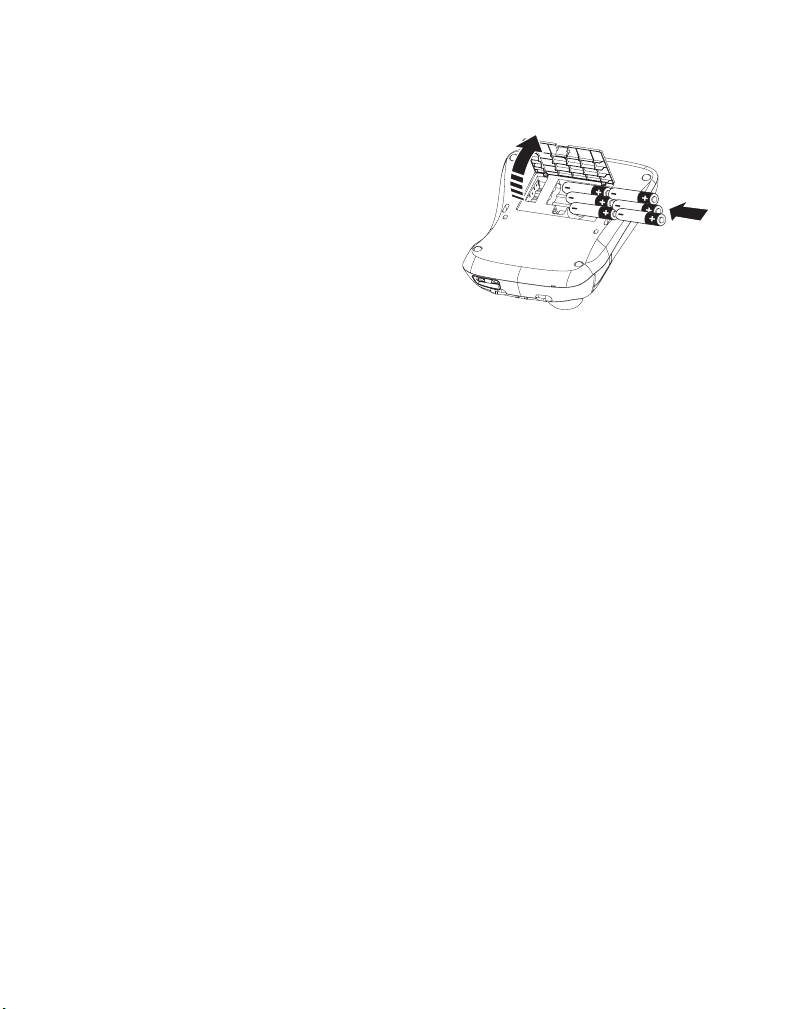
To insert the batteries
1. Remove the battery compartment cover.
See Figure 2.
Figure 2
2. Insert the batteries following the polarity
markings (+ and –).
3. Replace the battery compartment cover.
x Remove the batteries if the label maker will not
be used for a long period of time.
Getting Started
Follow the instructions in this section to print your
first label.
Connecting the Power
The label maker can operate on AC or battery power. To
save power, the label maker will automatically turn off
after two minutes of inactivity.
Inserting the Batteries
The label maker uses six 1.5 volt high-capacity AA
alkaline batteries.
Connecting the Power Adapter
An optional AC power adapter can also be used to
power the label maker. Connecting the power
adapter to the label maker disconnects the batteries
as a power source.
To connect the power adapter
1. Plug the power adapter into the power connector
on the top, left side of the label maker.
2. Plug the other end of the power adapter into a
power outlet.
x Make sure the label maker power is turned off
before you disconnect the power adapter from the
main power source. Otherwise, your most recent
memory settings will be lost.
5
Page 6

Inserting the Label Cassette
Your label maker comes with one DYMO D1 label
cassette. Visit www.dymo.com for information
about purchasing additional label cassettes.
To insert the label cassette
1. Press and release the label cassette cover to open
the label compartment. See Figure 3.
Figure 3
x The first time you use the label maker, remove
the protective cardboard insert from between the
print head and pinch roller. See Figure 4.
Remove
cardboard insert
CLICK!
Figure 5
4. Press firmly until cassette clicks into place. When
positioned correctly, you will hear the label maker
wind the label ribbon into place.
5. Close the label cassette cover and press
A
to turn
on the power.
The Label Settings menu automatically appears
immediately after inserting a new label cassette.
6. Use the arrow keys to select the label width of the
label cassette currently in the label maker and
press .
Settings
You can set the language, current date and time, and
the units of measure you want the label maker to use.
Figure 4
2. Make sure the label and ribbon is taut across the
mouth of the cassette and that the label passes
between the guideposts. If necessary, turn the spool
clockwise to tighten the ribbon.
3. Insert the cassette with the label and ribbon
positioned between the print head and pinch roller.
See Figure 5.
6
Selecting a Language
You can select from a number of different language
options. By default, the language is set to English.
To s elect a lan guage
Language
1. Press .
2. Use the arrow keys to select the language you want
and press .
Page 7
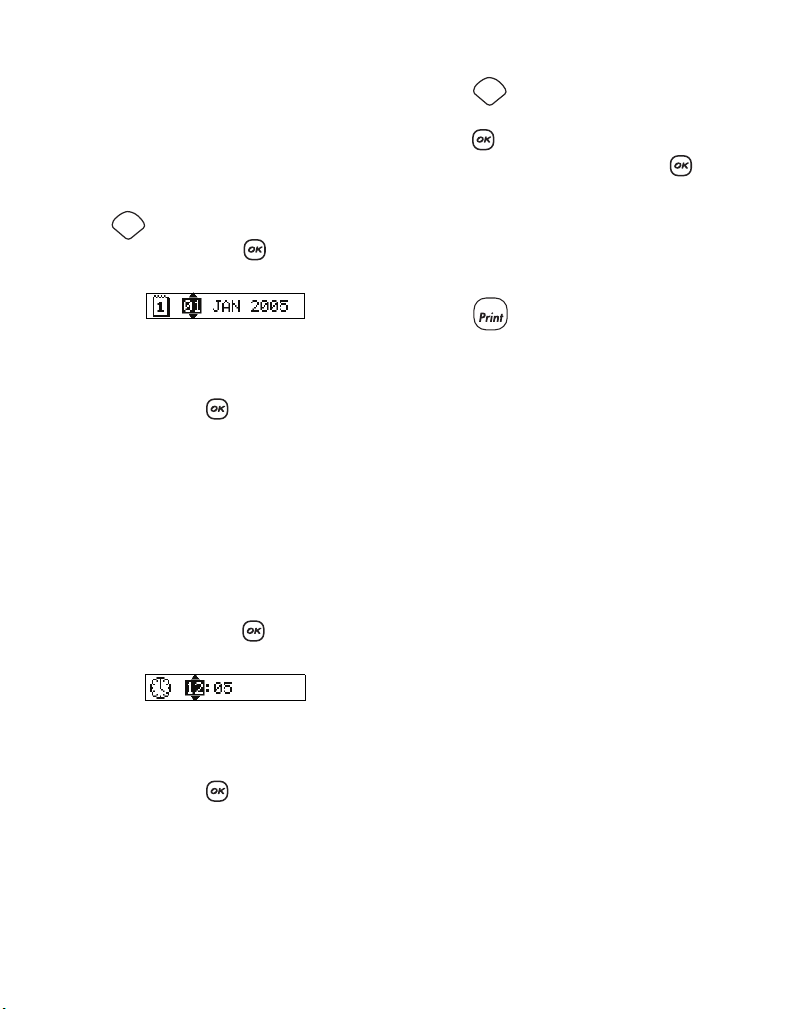
Setting the Current Date
The default date format depends upon the language
selection for the label maker. You can change the
default date format by following the instructions in
Changing the Date Format on page 13.
To set the date
Settings
1. Press .
2. Select Set Date, and press . The default date
is displayed.
3. Move the cursor over each setting (month, day, and
year) and use the arrow keys to increase or decrease
the value.
4. When finished, press .
Setting the Current Time
The default time format depends upon the language
selection for the label maker. You can change the
default time format by following the instructions in
Changing the Time Format on page 13.
To set the time
1. Press Settings.
2. Select Set Time, and press . The default time
is displayed.
3. Move the cursor over each setting (hours and
minutes) and use the arrow keys to increase or
decrease the value.
4. When finished, press .
Selecting Units of Measure
You can choose to show measurements in inches or
millimeters. The default units of measure depends
upon the language chosen.
To set the units of measure
Settings
1. Press .
2. Use the arrow keys to select Set Units and
press .
3. Select inches or millimeters and press .
Printing Your First Label
You are now ready to print your first label.
To print a label
1. Enter text to create a simple label.
1,2...n
2. Press . The label is automatically cut.
The Auto Cut feature is turned on by default. To
disable the Auto Cut feature, see Changing the
Cutting Option on page 15.
3. Remove the label.
Congratulations! You have printed your first label.
Continue reading to learn more about the options
available for creating labels.
Getting to Know the Label Maker
The following sections describe each feature in detail.
Become familiar with the location of the feature and
function keys on your label maker. See Figure 1 on the
inside front cover.
Power
The A button turns the power on and off. After two
minutes of no activity, the power is switched off
automatically. The last label created is remembered
and displayed when the power is turned back on. The
previously selected style settings are also restored.
LCD Display
The label maker’s LCD display shows a row of up to 16
characters. However, you can enter up to 99 characters
and spaces.
7
Page 8

The display window can accommodate 16 upper-case
characters. As you type more characters, they begin to
scroll to the left. (See Figure 6.) The number of
characters actually displayed can vary due to
proportional spacing.
Clear
press , the character to the left of the cursor is
deleted; however, when you press
Clear
+ together, the entire label text and
Shift
formatting is deleted and the display is ready for you
to type a new label.
The quick brown fox jumps over the lazy dog.
brown fox jumps
Figure 6
In addition, feature indicators appear on the display to
let you know when a feature is selected. See Figure 7.
Font and Size Style
BIG
CAPS mode
Multiple Lines
Align/Justify
Fixed Length
Underline/Box
Figure 7
Mixed Formats
Scroll
Auto Cut
# of Copies
CAPS Mode
CAPS
The key toggles capitalization on and off. Wh en
CAPS mode is turned on, the CAPS mode indicator is
shown on the display and all letters that you enter will
be capitalized. The default setting is CAPS mode on.
When CAPS mode is off, all letters entered appear in
lower case.
Shift Key
The key, when used in combination with an
Shift
alphabet key, changes the case of the selected letter.
When used in combination with number keys or
function keys, the key selects the alternate
function shown on the key. For example, when you
Shift
Space Bar
The
your text.
key inserts one or more blank spaces in
V
Clear/Delete
Clear
The key removes the character to the left of the
cursor. + clears all label text and
Clear
Shift
formatting.
Cancel
Cancel
The key allows you to exit from a menu without
making a selection or to cancel an action.
Navigation Keys
With the C keys, you can review and edit your
label, and navigate through the menus. Use the left
and right arrow keys to move the cursor along the
label text or to move through fields. Use the up and
down arrow keys to increase or decrease settings and
to select menu items, and then press to accept
the selection.
Connecting to Your Computer
Your label maker can be used as a standalone label
printer or you can print labels from your computer
using DYMO Label Software. Your label maker connects
to your computer using the USB connection located on
the top of the label maker. See Figure 8.
8
Page 9

Figure 8
Refer to the LabelManager 450 Quick Start card for
installation instructions and the DYMO Label Sof tware
User Guide for information about designing and
printing labels.
Formatting Your Label
You can choose from a number of formatting options
to enhance the appearance of your labels.
x The label maker remembers the last feature
selection made so that each time you enter one of the
feature menus described in this section, you are
positioned at the last item selected from that menu.
Changing the Font
Seven fonts are available for your labels:
Arial Narrow
Arial Normal
Arial Wide
Times New Roman
When you specify a font, that font applies to all
characters on the label. If you want to use more than
one font, you must insert format breaks. See Using
Mixed Formats on page 11 for more information.
BIG
To set the font
1. Press the key.
2. Use the arrow keys to move to the desired font and
then press .
Adding Font Styles
You can choose from many different font styles to
apply to your text:
Normal
Bold
Italic
Outline
Shadow
3D
Strike-through
Ver tic al
Mirror
Italic + Bold
Italic + Outline
Italic + Shadow
Italic + 3D
When you select a style, that style applies to all
characters on a label. If you want to use more than one
style, you must insert format breaks. See Using Mixed
Format s on page 11 for more information.
However,when you use mirror or vertical style, that
style applies to the whole label.
Styles can be used with alphanumeric characters and
symbols. See Using Symbols and Special
Characters on page 12 for more information on
printing symbols.
9
Page 10

To set the font style
DYMO
1. Press the key.
2. Use the arrow keys to move to the desired style and
then press .
Adding Box and Background Styles
You can further highlight your text by choosing a box,
underline, or background style. You can also use label
text stored in memory as background text on your
label. See Storing Label Text on page 16 for
information on storing text in memory.
A label can be underlined or enclosed in a box or
background, but not both together. The styles
available are shown in Figure 9.
x Background patterns are not available for 6 mm
label.
To set the box style
1. Press the key.
2. Select a frame style and then press .
On multi-line labels, all lines are underlined. In box
style mode, all lines are enclosed in one box style.
To s elect a tex t backgro und
1. Press the key.
2. Select Text Bac kgro und (T XT ) and then press .
The first memory location is displayed.
Use the arrow keys to select the stored text you wish to
use as a background and press .
DYMO
DYMO
DYMO
DYMO
DYMO
DYMO
DYMO
LabelManager 450D
DYMO
Underline
Square Box
Point ed Box
Rounded Box
Crocodile Box
Scroll Box
3D Box
Dots
Woo d Gra in
Bricks
Checkers
Parqu et
Diamonds
Wea ve
Tex t B ack gro und
Figure 9
10
Page 11

Creating Multi-Line Labels
The number of lines you can print on a label depends
on the width of the label you are using:
• Maximum of five lines on 3/4" (19 mm) and 1”
(24 mm) labels
• Maximum of three lines on 3/8" (9 mm) and 1/2"
(12 mm) labels
• Maximum of one line on 1/4" (6 mm) labels
To create a multi-line label
1. Type the text for the first line, and press Enter. A
new line character is placed at the end of
the first line in the display, but will not print on
the label.
2. Type the text for the second line.
The display shows the line on which you are currently
entering text. The example below indicates that the
second line is the current line on the label.
Use the arrow keys to move between lines.
Using Mixed Formats
You can apply different fonts and format styles to the
text on a label by inserting format breaks to divide the
label into blocks or sections of text. Each section is
separated by a format break. You can add two format
breaks, allowing you to apply three separate formats
to a label.
Alignment, underline, box styles, and background
patterns cannot be mixed on a label.These styles are
common to the entire label.
To add a format break
1. Enter and format text for the first section.
2. Press .
3. Select Insert Format Break and press .
Preview
Insert
4. Continue entering and formatting text for the next
section of the label.
Using Tabs
You can add tabs to a label to align text on multi-line
labels. Tabs are left justified and the default spacing
is 2.0” (50 mm).
To change the tab spacing
Settings
1. Press .
2. Select Set Tab Length and press .
3. Use the up and down arrow keys to increase or
decrease the tab setting, and then press .
To i nsert a ta b
1. Enter your text.
2. Press the key and continue entering text.
11
Page 12
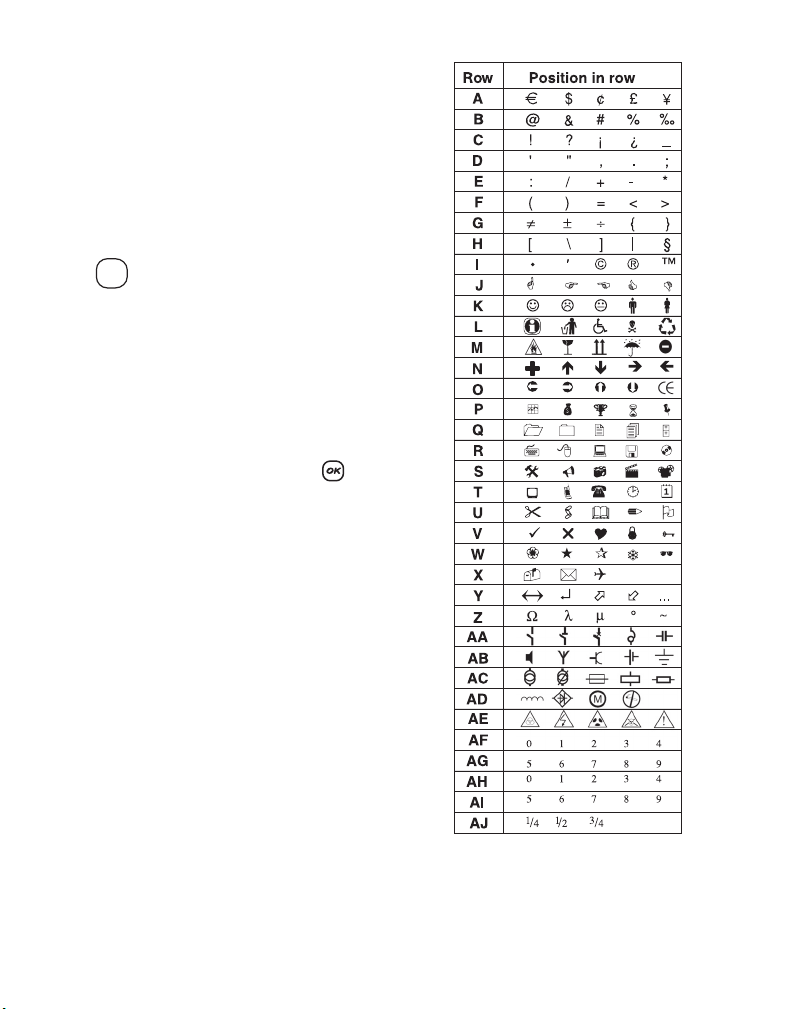
Using Symbols and Special Characters
Symbols and other special characters can be added to
your labels.
Adding Symbols
The label maker supports the extended symbol set as
shown in Figure 10.
To a dd a sym bol
Symbols
1. Press . The first row of symbols shown in the
table appears in the display.
2. Use the arrow keys to move to the desired symbol.
The left and right arrows move horizontally along a
row of symbols. The up and down arrow keys scroll
vertically through the rows of symbols.
To quickly see a row of symbols, you can press the
letter corresponding to the row you want.
3. When you locate the desired symbol, press to
add the symbol to your label text.
Adding International Characters
The label maker supports the extended Latin character
set using RACE technology. Similar to using a mobile
phone keypad, if you type a letter multiple times
within a very short time, you will scroll through
variations on that letter.
For example, if French is selected as the language and
you repeatedly press the letter a, you will see a à â æ
and so on through all the variations available. The
character variations and the order in which the
variations appear depend on the language you have
selected to use.
Figure 10
12
Page 13

Currency Symbols
The currency key $ also uses RACE technology to scroll
through a number of currency symbols:
€ £ $ ¢ ¥
The order these symbols appear depends on the
language you have selected.
Adding Date and Time
You can add the date and time to your labels.
Changing the Date Format
You can choose from twelve different date formats:
24/12/2007 12/24/2007
24/12/07 12/24/07
24 Dec 2007 Dec 24, 2007 (US default)
24 Dec 07 (EU default) Dec 24, 07
24 December 2007 December 24, 2007
24 December 07 December 24, 07
To change the date format
Settings
1. Press , select Set Date, and press .
2. Use the arrow keys to select the date format and
press .
The display shows the currently set date.
3. Use the arrow keys to change each part of the date
(month, day, year) and press after each part.
Adding the Date to Your Label
The date can be added as fixed text (the date remains
the same) or as variable text that is automatically
updated with the current date when the label is
actually printed.
To add the date
1. Press .
2. Select Insert Date and press .
Preview
Insert
3. Select Fixed Date or Autom. Updated and
press .
When Autom. Updated is selected, a date icon is
inserted on your label. When Fixed Date is selected,
the actual date is inserted on your label in the format
specified.
Changing the Time Format
You can choose to show the time in 12-hour format or
24-hour format.
To set the time format
Settings
1. Press , select Set Time, and press .
2. Use the arrow keys to select the time format
(24 Hour Clock or 12 Hour Clock) and press .
The display shows the default time.
3. Use the arrow keys to change each part of the time
(hours and minutes) and press after each part.
Adding the Time to your Label
The time can be added as fixed text (the current time)
or as variable text that is automatically updated with
the current time when the label is actually printed.
To a dd the time
Preview
1. Press .
2. Select Insert Time and press .
3. Select Fixed Time or Autom. Updated and
When Autom. Updated is selected, a time icon is
inserted on your label. When Fixed Time is selected,
the actual time is inserted on your label in the format
specified.
Insert
press .
13
Page 14

Printing Options
You can print multiple copies of a label at one time,
print serialized labels, print fixed-length labels, review
label text and format, and adjust the printing contrast.
Printing Multiple Copies
You can print up to 16 copies of a label at one time.
When printing multiple copies, a dotted cut-line is
printed between each label.
To print multiple copies of the label
Settings
1. Press .
2. Select Set # Copies and press .
3. Press the up arrow key to increase the number of
copies to print.
4. Press the down arrow key to begin decreasing the
number of copies from 16.
5. Press .
1,2...n
6. Press to begin printing.
x You may notice a brief pause in printing between
each label for more complex formats.
When printing is finished, the number of copies to
print returns to the default value of 1.
Serializing Your Labels
You can print a series of labels with the last number
incremented by one number. The number of labels
serialized depends upon the number of copies you
selected to print. Only the last series of numbers that
follows any letter, space, or punctuation will be
serialized. For example, abc123 will print as abc123,
abc124, abc125; and 123-998 will print as 123-998,
123-999, 123-1000, and so on.
To s eri ali ze you r la bel s
1. Enter the text for your label.
Settings
2. Press .
3. Select Set # Copies and press .
4. Press the up arrow key to increase the number of
increments to print and press .
5. Press + .
1,2...n
Shift
The labels automatically print, each label incremented
by one number.
Printing a Fixed-Length Label
Normally, the length of the label is determined by the
length of the text entered. However, you may wish to
make a label for a specific purpose that is a fixed
length regardless of the length of the text.
You can specify a fixed length for a label in 0.1”(2 mm)
increments between 1.5” (40 mm) and 15.0” (400
mm). The preset fixed length is 4”(100 mm). Any
change you make to the fixed-length setting remains
in effect until you change it.
To set the label length
1. Press + .
Shift
2. Press the up arrow to select Fixed Length On and
then press .
3. Use the arrow keys to set the length.
4. Press .
After you print the label, you must reset the fixedlength label setting to OFF; otherwise, all your
subsequent labels will print with this fixed length.
Adding Barcodes to Labels
The label maker can print barcodes in six standard
formats: UPC-A, UPC-E, EAN-8, EAN-13,
CODE-39, and CODE-128.
You can print a barcode on 3/4” (19 mm) and
1”(24 mm) labels; and you can print only one barcode
per label.
14
Page 15

The barcode prints horizontally along the label with
the text in small print underneath the barcode. You
can optionally add text before and after the barcode.
Or, you can add text above or below the barcode by
creating a two-line label. See Creating Multi-Line
Labels on page 11.
Four of the standard barcodes require a fixed number
of characters to generate the barcode: EAN-8, EAN-13,
UPC-A, and UPC-E. CODE-39 and CODE-128 barcodes
allow a variable number of characters to be entered.
To set the barcode type
Settings
1. Press .
2. Select Set Barcode and press .
3. Use the arrow keys to select the barcode type, and
press .
One or more question marks appear between the
barcode symbols ( ).
???????0
You may see a 0 in the far right positio n for som e
barcode types. This is a check digit and will be
replaced with a number when the barcode data
is entered.
4. Enter the data for the barcode, replacing the
question marks, and press when finished.
Once you select a barcode type, that setting remains
until you select a different barcode type.
To ins ert a bar code
1. Enter the text you wish to appear before the
barcode on the label. (Optional)
Preview
2. Press .
Insert
3. Select Insert Barcode and press .
4. Enter any text you wish to appear after the
barcode. (Optional)
1,2...n
5. Press .
Previewing Your Label
You can preview the text or format of your label prior
to printing. A multi-line label is previewed as a singleline label.
To p revi ew yo ur l abel
Preview
1. Press + .
Insert
Shift
2. Select Te xt or Form at, and then press .
If you select Text, the text of the label scrolls across
the display. If you select Format , the format selected
displays briefly.
Aligning the Text
When you print a fixed length label you can choose to
align the text at the left, center, or right side of the
label. For multi-line labels, all lines of text are aligned
left, center, and right relative to each other.
To align the text
1. Press + .
Shift
2. Use the arrow keys to select the desired alignment
and press .
The alignment setting remains active until you reset
the alignment.
Changing the Cutting Option
You can choose to have each label automatically cut
after printing or you can manually cut the labels using
the key. By default, labels are cut automatically.
When manual cutting is selected and you print
multiple copies or serialized labels, a dotted cut-line is
printed between each label.
To change the cutting option
Settings
1. Press .
2. Select Set Auto Cut and press .
3. Select On or Off, and then press .
This setting will remain until you change it.
15
Page 16

Adjusting the Print Contrast
You can adjust the print contrast to fine tune the print
quality of your label.
To set the contrast
Settings
1. Press .
2. Select Set Contrast and press .
3. Select a contrast setting and press .
Using Label Maker Memory
The label maker has a powerful memory feature that
stores text and formatting as follows:
• Automatically stores the last fifteen labels printed.
• Allows you to store the text of up to ten labels you
use frequently.
• Allows you to name and store up to ten commonly
used label formats.
Storing Label Text
The label maker automatically keeps the last fifteen
labels printed in a text buffer. In addition, you can
store up to ten specific labels you use frequently.
To store the current label text
Memory
1. Press .
2. Select Save and then press .
3. Use the arrow keys to select Label and then
press .
Ten fields, which represent memory locations, are
displayed. Fields that are filled indicate stored label
text. You can store new text in any of the memory
locations, however, if you select a location that is
filled, the previous label text will be overwritten.
4. Select a memory location and press .
Your label text is saved and you are returned to
the label.
Storing Formats
In additio n to label text, you can sto re up to ten specific
label formats you use frequently. This feature stores
only the formatting information not the label text.
To store the current format
Memory
1. Press .
2. Select Save and press .
3. Select Fo rmat and press .
Ten fields, which represent memory locations, are
displayed. Fields that contain formats display a
name in the field. You can store new formats in any
of the fields, however, if you select a location that is
filled, the previous label format will be overwritten.
4. Select a field and press . The word Name?
appears in the field.
5. Enter a name for the format and press . Your
label format is saved and you are returned to
the label.
Recalling Stored Labels and Formats
You can easily recall labels and formats stored in
memory to use at a later time.
To recall labels or formats
Memory
1. Press .
2. Select Recall and then Label, Format , or
Last Printed.
A list of memory locations is displayed similar to
storing a label or format.
3. Select a label or format to recall and press .
16
Page 17

Caring for Your Label Maker
Your label maker is designed to give you long and
trouble-free service, while requiring very little
maintenance.
Clean your label maker from time to time to keep it
working properly. Clean the cutter blade each time you
replace the label cassette.
To clean the cutter blade
1. Press
2. Open label cassette compartment and
3. Press and then
4. While holding down the key, repeatedly press
5. When you are able to access both sides of the blade,
6. Use a cotton ball and alcohol to clean both sides of
7. After cleaning the blade, press to return the
to turn off the power.
A
remove cassette.
together. The message,
A
Cut Test, appears on the display.
Shift
. The cutter blade will move into view in
small steps.
release the keys.
the cutter blade.
èThe cutter blade is extremely sharp. Use caution
when cleaning.
blade to its home position.
To clean the print head
1. Remove the tape cassette.
2. Remove the cleaning tool from inside the label
compartment cover.
3. Gently wipe the padded side of the tool across the
print head. See Figure 11.
Figure 11
x You can also follow this procedure if the cutter
blade becomes lodged in the forward position and will
not move.
17
Page 18

Troubleshooting
Review the following possible solutions if you encounter a problem while using your label maker.
Problem/Error Message Solution
No display
Poor Print Quality
Poor Cutter Performance Clean the cutter blade. See Caring for Your Label Maker.
Printing
Too many characters
Exceeded maximum number of characters in buffer.
Too many lines
Exceeded maximum number of lines allowed.
Insert Tape Cassette
Label cassette missing or empty.
Battery low
Batteries almost discharged.
Tape Jam
Motor is stalled due to label jam.
Too many pages
Exceeded maximum number of format breaks allowed. Change label layout.
Page not empty Delete all content on the page.
Tape size too small Change label size or change the formatting on the label.
Set
Fixed-length label selected and the length necessary to print the label
exceeds the selected length.
• Ensure the label maker is turned on.
• Repla ce discharged batteries.
• Replace discharged batteries or attach power adapter.
• Ensure label cassette is installed properly.
• Clean the print head.
• Replace the label cassette.
No action required.
Message disappears when printing is finished.
Delete some or all of the buffer text.
Select another format.
Insert a new label cassette
Replace batteries or connect AC power adapter.
• Remove jammed label and replace label cassette.
• Clean cutter blade.
• Following this message, a fixed-length value is displayed
which indicates the minimum label length necessary to fit
the text. Do one of the following:
• Adjust the fixed-length label setting appropriately, or
• Select a narrower font size.
If you still need assistance, contact DYMO Customer Support for your country. Refer to Contacting Customer
Support on the inside back cover to locate the contact number for your country.
18
Page 19

Documentation Feedback
We are constantly working to produce the highest quality documentation for our products. We welcome
your feedback.
Send us your comments or suggestions about our user guides. Please include the following information with
your feedback:
• Product name, model number, and User Guide page number
• Brief description of content (instructions that are inaccurate or unclear, areas where more detail is needed,
and so on)
We also welcome your suggestions about additional topics you would like to see covered in the documentation.
Send email messages to: documentation@dymo.com
Please keep in mind that this email address is only for documentation feedback. If you have a technical question,
please contact Customer Support.
This product is CE marked in accordance with the EMC directive and the low voltage directive and is designed to conform with the following international
standards:
US FCC Class B Compatibility
Safety – UL, CUL, TUV, CE, T-Mark, SAA, BABT, C-Tick
EMC - EMI Compatibility
EN 55022; EN 61000 (+ addendums)
Plastic components of this pri nter have been marked to enable final disposal in a manner that is sensitive to the environment.
19
Page 20

©2007 DYMO
A Newell Rubb ermaid Com pany
931764
Produced by:
DYMO
Stamford CT 069 02
800-426-7827: w ww.dymo.com
LM350D manual UK_WEU.indd 20 03-08-2007 11:56:36
 Loading...