


Quick Start Guide
WECB
Version 1.0
Wireless Ethernet Coaxial Bridge
DXN-W224 Quick Start Guide
2
WECB
Minimum Requirements
• Windows® 8, 7, Vista®, or XP; Mac OS® X (10.5 or higher)
•
An installed Ethernet adapter (10/100/1000)
• Any device that has a WiFi adapter. I.E. Xbox, IPad, IPhone
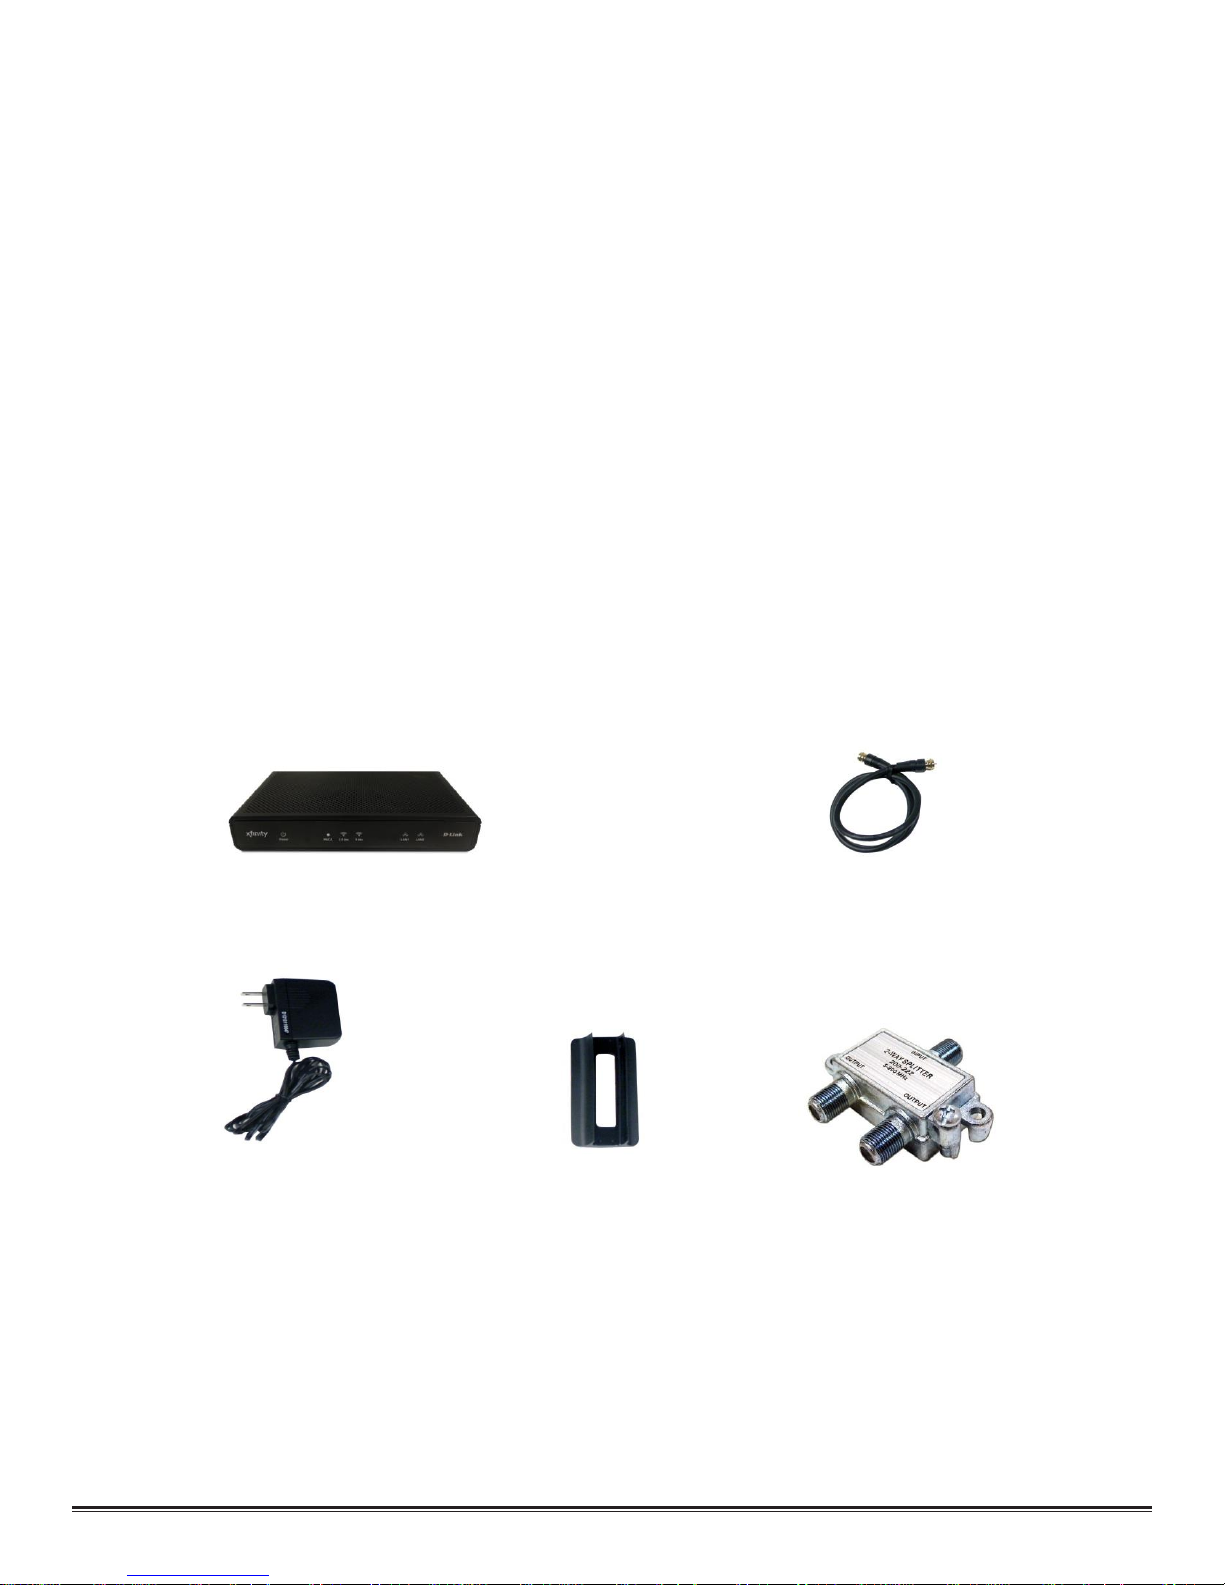
Package
Contents
Wireless Ethernet Coaxial Bridge (WECB) COAX Cable
Power Adapter Stand Splitter

DXN-W224 Quick Start Guide
3
Front Panel
Power LED
A solid light indicates the device is receiving power.
MoCA LED
A solid light indicates the device has formed a network over the coaxial
cable with at least one other MoCA device (Wireless Gateway 2). The LED
will blink during data transmission.
2.4 GHz LED
A solid light indicates the 2.4 GHz Wi-Fi network is ready.
5 GHz LED
A solid light indicates the 5 GHz Wi-Fi network is ready.
LAN LEDs (1-2)
A solid light indicates a connection on the Ethernet port. The LED will blink
during data transmission.
Power
MoCA
2.4
GHz
LAN1
LAN2
5 GHz

DXN-W224 Quick Start Guide
4
Back
Reset Button
Press and hold the reset button with a paper clip for 15 seconds to reset the
WECB to the factory default settings. Do not unplug the power during this
process.
LAN Ports (1-2)
Connect Ethernet devices such as computers, media players, and game
consoles using a CAT5 cable (not included)
Cable Out
Connect one end of the coaxial cable to the Cable Out port and the other
end to your Wireless Gateway 2 or the COAX IN port on your set-top box.
Cable In
Connect one end of another coaxial cable to the Cable In port and the other
end to the cable outlet on the wall.
Power Port
Connect the supplied power adapter to power your WECB.
Reset Button
LAN Ports
Cable Out
Cable In
Power Port

DXN-W224 Quick Start Guide
5
Hardware Installation
1. Power
Plug the WECB’s power adapter into an AC wall outlet or power strip.
Note: Power source is confirmed when the Power LED indicator on the front panel is lit.
2. Connect the Ethernet Cable
Connect one end of the included Ethernet cable to the LAN port located on the WECB’s back
panel and attach the other end to your network or computer.
3. Connect the Coaxial Cable
Connect one end of the coaxial cable to the Cable port located on the WECB’s back panel
and attach the other end to your cable outlet inside the house or directly to the Wireless
Gateway 2.
Note: There is no MoCA mode switch for configuration on the WECB.

DXN-W224 Quick Start Guide
6
Software Installation
D-Link WECB has a web-based configuration utility to allow control over certain coaxial
networking parameters. The unit is shipped with default parameters that will allow operation on
most coaxial network without any additional configuration.
Note: If you are connecting to a Wireless Gateway 2, it will automatically configure the settings on
your WECB.
However, if a special network security password is required or if a specific channel operating
frequency is required, then the default parameters will need to be
Gateway’s web interface (Admin Tool) at http://10.0.0.1 to make any changes.
modified.
Use the Wireless
Web-based Configuration Utility
To access WECB’s configuration utility, open a web-browser (such as Internet Explorer) and
enter the default IP address of the WECB (192.168.0.50). If you are connected to the Wireless
Gateway 2 via Coax cable, then you will have to log in using the IP address assigned by the DHCP
server.
Example: (http://10.0.0.x) where “x” is something other than “1”
Select “User” from the User Name drop-down menu and then enter your password (“Null” by
default):
Note: The WECB will configure itself automatically when connected to a compatible Wireless
Gateway 2.
 Loading...