

Page 1
Page 2
System Requirements
©
2
0
1
0
D
-
L
i
n
k
,
a
l
l
r
i
g
h
t
s
r
e
s
e
r
v
e
d
.
D
-
L
i
n
k
a
n
d
t
h
e
D
-
L
i
n
k
l
o
g
o
a
r
e
r
e
g
i
s
t
e
r
e
d
t
r
a
d
e
m
a
r
k
s
o
f
t
h
e
D
-
L
i
n
k
C
o
r
p
o
r
a
t
i
o
n
.
A
l
l
o
t
h
e
r
t
r
a
d
e
m
a
r
k
s
o
r
r
e
g
i
s
t
e
r
e
d
t
r
a
d
e
m
a
r
k
s
a
r
e
t
h
e
p
r
o
p
e
r
t
y
o
f
t
h
e
i
r
r
e
s
p
e
c
t
i
v
e
h
o
l
d
e
r
s
.
w
w
w
.
d
l
i
n
k
.
c
o
m
INSTALLASTION CD
ETHERNET COAXIAL BRIDGE
DXN-220
VER 1.10
part no. cd-dxn220
• Windows Vista® or XP (with Service Pack 2)
• 233MHz processor and at least 64MB of RAM
• An available Ethernet Adapter (100Mbit/s)
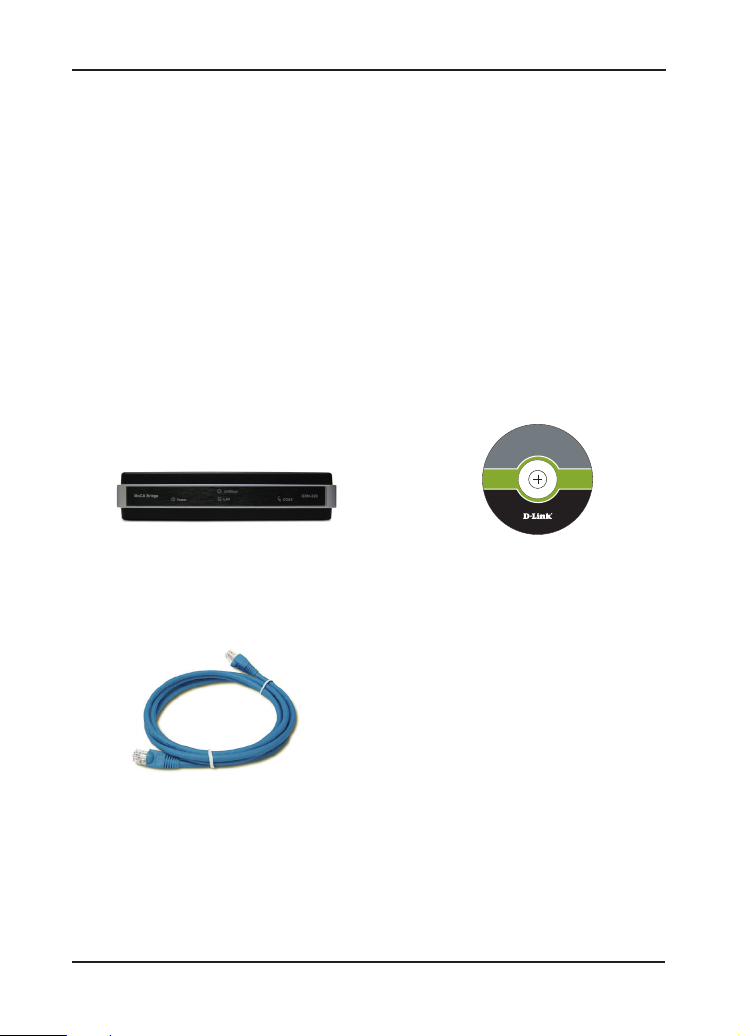
Package Contents
DXN-220 Ethernet
CD-ROM with Manual
Coaxial Bridge
CAT5 Ethernet Cable
If any of the above items are missing, please contact your reseller.
D-Link DXN-220 Quick Install Guide 2
Page 3

Front Panel
Power LED
A solid light indicates that the
device is receiving power.
LAN LED
A solid light indicates a connection on the Ethernet
port. The LED blinks during data transmission
100Mbps LED
A solid light indicates that the
device has detected a 100Mbps
connection.
COAX LED
A solid light indicate that the device
has formed a network over the coaxial
cable with at least one other DXN-220
D-Link DXN-220 Quick Install Guide 3
Page 4
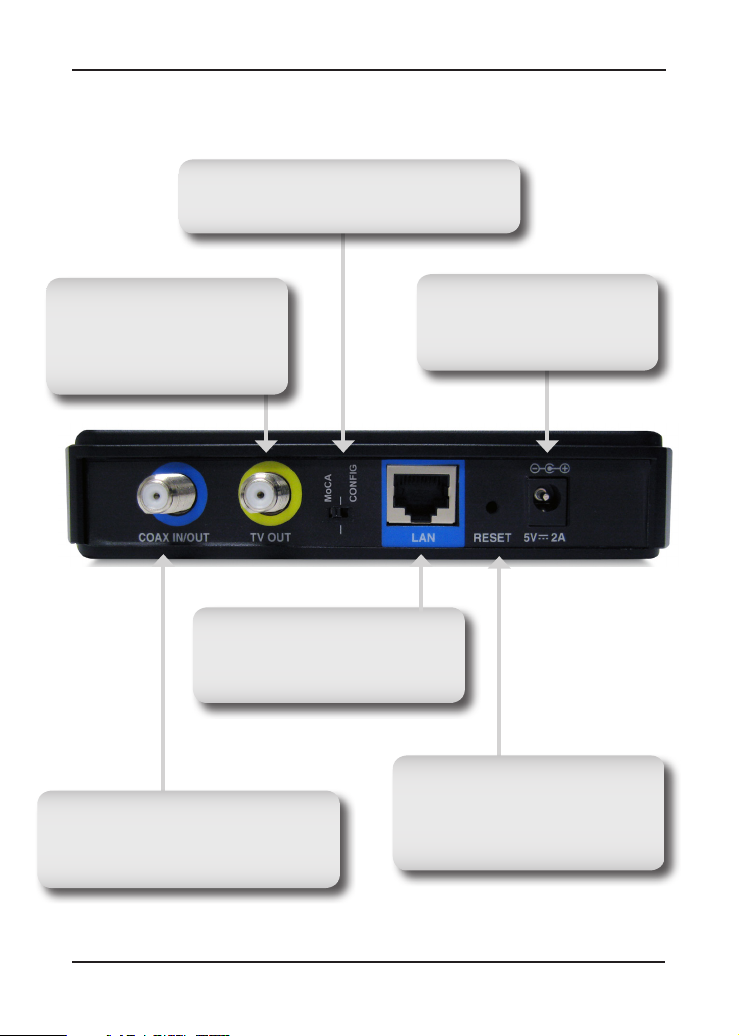
Rear Panel
Conguration Switch
Select either MoCA mode or Cong mode. Default
mode is MoCA mode.
TV OUT
Connect one end of a coaxial
cab le to the DXN-22 0 TV out
port and the other end to your
television.
LAN
Connect one end of the CAT5 Ethernet
cable to DXN-220 LAN port and the
other end to your Ethernet device.
COAX IN/OUT
Connect one end of a coaxial cable to the
DXN-220 Coax Input/Output port and the
other end to your cable outlet.
Power
Co nnec t the po wer adapt er
included in the product package
of the DXN-220.
Reset
Press and hold at least 10 seconds
to restore device back to the factory
default settings. Press 1 second for
system reboot.
D-Link DXN-220 Quick Install Guide 4
Page 5

Installation Planning Overview
The proper cable installation, placement of lter/amplier, frequency
planning and home preparation for signal coexistence should be planned
out thoroughly before deploying the DXN-220. Inadequate planning
will not only aect the DXN-220 network, but also cause unwanted
interference with other existing services. The following section discusses
these installation considerations in more detail.
Proper Cable Installation
The rooms qualied to be part of the DXN-220 network should have an
existing coaxial connection and the following characteristics:
• The room is capable of receiving good quality analog
television service (no set-top box required) over the coaxial
cable.
• The room is capable of receiving digital television services
using a set-top box.
If the room cannot receive digital or good quality analog television
services, the Ethernet-Coaxial network capabilities may be compromised
to this location.
Amplier Bypassing
An electronic amplier is a device that boosts a weak signal. The typical
amplier cannot pass DXN-220 network signal because they are designed
to be unidirectional devices. Hence, the amplier should be uninstalled
or bypassed if possible. To bypass an amplier, user will need to install
Diplexers to separate the DXN-220 signal and other signal rst and only
install the amplier between the paths of none DXN-220 network signal.
D-Link DXN-220 Quick Install Guide 5
Page 6

Frequency Planning
The DXN-220 is capable of operating between frequenc y bands
of 800MHz and 1500MHz. In order to avoid interference between
the DXN-220 device and other devices on the same cable network,
DXN-220 device must operate at a frequency spectrum that is dierent
from other devices.
• 5-42MHz (High-speed Internet Access Upstream)
• 42-850MHz (High-speed Internet Access downstream)
• 50-806MHz (O-Air TV)
• 50-860MHz (Cable TV)
• 950-2150MHz (Satellite L-Band)
On e common scenar io is when DXN-22 0, cable te levision and
high-speed Internet service need to coexist. The cable television
in United States operates between 50-860MHz while high-speed
Int ernet ser vice upstre a m and down s tream opera te be t ween
5-42MHz and 42-850 MHz respectively. Hence, the logical choice for
DXN-220 frequency would be between 940-1500MHz. Similar frequency
planning approach should be taken into consideration when dealing
with Satellite and o-air antenna.
Terrestrial Television (O-Air)
If you are receiving terrestrial television service using a broadband
antenna, then additional components may have to be installed in order
to be compliant with governmental regulations. DXN-220 network
signals operating in the 800 to 1500 MHz range should be prevented
from radiating out of the antenna by using a small, in-line Low Pass Filter
(LPF-860Mhz). This lter will prevent DXN-220 network signals from
reaching the antenna.
D-Link DXN-220 Quick Install Guide 6
Page 7

Cable Television (CATV)
For a cable television subscriber, there are no additional components
required to be installed to work with the DXN-220 on the same
cable network. The user may choose to install the DXN-220 on the
network and use it as-is if data rate is acceptable. Also, the user may
improve DXN-220 network performance by inserting a Low Pass Filter
(LPF-860Mhz) at Point of Entry (POE) where the drop cable enters the
house.
DBS Satellite Television with Terrestrial Television (O-Air)
The Direct Broadcast Satellite (DBS) uses proprietary satellite channel
stacking switch or Low-Noise Block (LNB) to distribute the resulting signal
(usually 950 to 2150 MHz) in the same cable network that carries the
lower-frequency terrestrial television from an outdoor antenna. Another
Diplexer then separates the signals to the receiver of the TV set and the
DBS set-top box (STB).
Most of the satellite switches are not designed to pass the DXN-220
network signal and prevents it from forming a network. It is recommended
that satellite signal and the DXN-220 network signal should remain
on separate cable networks. If separate wiring cannot be done, then
additional components have to be installed:
1. Install Triplexer to separate UHF/VHF, DXN-220, and DBS
signals.
2. Install MoCA Coupler switch before the satellite switch.
Existing OSP installed MoCA network
The DXN-220 will automatically scan for an available channel and form
Ethernet-Coaxial network. This may cause issue with the existing OSP
MoCA network. It will not be permitted to join the OSP MoCA network
unless utilizing the same frequency and password.
The remediation in this situation is to use the DXN-220 software utility
to congure the DXN-220 to be on the same frequency with the same
privacy network as the existing OSP MoCA network.
D-Link DXN-220 Quick Install Guide 7
Page 8

Hardware Installation
Power
Plug the DXN-220 into an AC wall outlet or power strip.
Note: Power source is conrmed when the green LED Power indicator on the
DXN-220 is illuminated.
Connect the Ethernet Cable
Connect the included Ethernet cable to the LAN port located on the DXN-220 and
attached the other end of the Ethernet cable to the network or PC.
Connect the Coaxial Cable
Connect coaxial cable to the Coax I/O port located on DXN-220 and attached the
other end of the coax cable to your cable jack inside the house.
Note: Please make sure the DXN-220’s conguration switch is in MoCA mode.
Coaxial Network Connectivity is conrmed when the green LED COAX indicator
on the DXN-220 is illuminated.
If there is TV service being received in the room and you wish to continue
viewing the service, connect the other coax cable to the TV Out port on
the DXN-220 and attach the other end of the coax cable to your television,
Set-top Box (STB), or VCR as desired.
D-Link DXN-220 Quick Install Guide 8
Page 9

Software Installation
D-Link DXN-220 comes with software utility to allow control over certain
coaxial networking parameter. The unit is shipped with default parameters
that will allow operation on most coaxial network without any additional
conguration. However, if a special network security password is required
or if a specic channel operating frequencies is required, then the default
parameters will need to be modied.
Follow the simple steps below to run the Setup Wizard to guide you quickly
through the installation process.
Insert the D-Link DXN-220 Ethernet Coaxial Bridge CD into your CD-ROM
drive. If the CD Autorun function does not automatically start on your
computer, click Start > Run.
In the Run command box type “D:\autorun.exe” where D: represents the
drive letter of your CD-ROM and press Enter.
Click on Install Utility
D-Link DXN-220 Quick Install Guide 9
Page 10

The InstallShield Wizard will begin the DXN-220 software installation.
Click Next
Click Next
Click Next
D-Link DXN-220 Quick Install Guide 10
Page 11

Click Finish
D-Link DXN-220 Quick Install Guide 11
Page 12

Conguration
After you have completed the D-Link DXN-220 Ethernet Coaxial Bridge
Utility installation wizard, double-click the D-Link DXN-220 Utility icon on
your desktop to start the conguration of the DXN-220.
Note: Please make sure the locally connected DXN-220’s conguration
switch is in Cong mode before you click on the D-Link DXN-220 Utility
Icon. When the device is in Cong mode, it will lose coaxial network
connectivity temporarily until the device is switched back to MoCA mode.
Double-click the DXN-220 Utility icon.
Enter admin on the Login Password eld and click Login.
Note: The default login password is admin.
D-Link DXN-220 Quick Install Guide 12
Page 13

The utility provides you with the option of setting your own unique
Network Privacy Password and the ability to observe the coaxial network
information.
Note: After you finished configuring the DXN-220, close the utility
application and switch the DXN-220 back to MoCA mode to reestablish
the coaxial network connectivity again.
D-Link DXN-220 Quick Install Guide 13
Page 14

Setup section allows user to congure coaxial network and privacy setting:
Channel: Select the specic channel frequency to use or select “SCAN” to
automatically scan for available channel frequency.
Diplexer mode: Select either “MoCA D Band” mode or “All Pass” mode.
“MoCA D Band” mode allow channel frequency range from 1150 – 1500
MHz. “All pass” mode allow channel frequency range from 875 – 1500 MHz.
Privacy Password: Select to turn the coaxial network security mode on
(Enable) or o (Disable). Type in the password to use for the network. Your
password must be 12 to 17 numeric characters long, and it cannot contain
any letters. The password must be the same for all nodes on the coaxial
network to ensure connectivity. The factory default for the password is
“99999999988888888”.
Restore Default: Click the “Restore Default” button to restore the system
settings to factory default.
Note: When you restore to factory default settings, all previous settings will
be lost.
D-Link DXN-220 Quick Install Guide 14
Page 15

Notes
D-Link DXN-220 Quick Install Guide 15
Page 16

Technical Support
D-Link’s website contains the latest user documentation and software
updates for D-Link products.
U.S. and Canadian customers can contact D-Link Technical Support
through our website or by phone.
United States
Telephone
(877) 453-5465
World Wide Web
http://support.dlink.com
Canada
Telephone
(800) 361-5265
World Wide Web
http://support.dlink.ca
Version 1.2
June 10, 2010
Copyright ©2008-2010 D-Link Corporation/D-Link Systems, Inc. All rights reserved. D-Link and the D-Link logo
are registered trademarks of D-Link Corporation or its subsidiaries in the United States and other countries. Other
trademarks are the property of their respective owners. Network conditions and environmental factors, including
volume of network trac, building materials and construction, and network overhead lower actual data throughput
rate. Product specications, size and shape are subject to change without notice, and actual product appearance may
dier from that depicted on the packaging. Visit www.dlink.com for more details.
D-Link DXN-220 Quick Install Guide 16
 Loading...