

D-Link DSB-C110 User Manual

D-Link VisualStream
TM
100K Pixel PC Camera
Manual
Rev. 101102
1

Contents
Package Contents ------------------------------------------------------------------------------- 4
Introduction------------------------------------------------------------------------------------------------------------5
TM
Getting To Know Your VisualStream
Features And Benefits----------------------------------------------------------------------------------------------5
Installing ArcSoft® PhotoImpression and VideoImpression ----------------------- 6
How to Use Your D-Link VisualStream
Setting the Focus ---------------------------------------------------------------------------------------------------8
PC Camera ---------------------------------------------------------5
TM
Camera ------------------------------------- 8
Preview ----------------------------------------------------------------------------------------------------------------- 8
Record and Playback -----------------------------------------------------------------------------------------------8
How to Install Microsoft NetMeeting ------------------------------------------------------ 9
Using Your PC Camera With Microsoft NetMeeting ------------------------------------------------------ 10
How to Install MSN Messenger------------------------------------------------------------ 10
Using Your PC Camera With Microsoft NetMeeting ------------------------------------------------------ 11
Getting Started With VideoImpression 1.6 -------------------------------------------- 11
Working with Albums --------------------------------------------------------------------------------------------- 12
2

Working with the Storyboard ------------------------------------------------------------------------------------ 14
Editing Images ----------------------------------------------------------------------------------------------------- 15
Editing a Video ----------------------------------------------------------------------------------------------------- 16
Editing Audio -------------------------------------------------------------------------------------------------------- 17
Printing an Image From a Video File ------------------------------------------------------------------------- 18
Saving a Movie ----------------------------------------------------------------------------------------------------- 18
Getting Started With PhotoImpression 3.0 -------------------------------------------- 19
Opening an Image From a Disk Drive ------------------------------------------------------------------------ 21
Acquiring Images From a TWAIN Device ------------------------------------------------------------------- 21
Downloading Images From the Internet --------------------------------------------------------------------- 21
Working with Albums --------------------------------------------------------------------------------------------- 22
Editing Images ----------------------------------------------------------------------------------------------------- 22
Creative Project Templates ------------------------------------------------------------------------------------- 25
Saving Images ----------------------------------------------------------------------------------------------------- 26
Printing Images ---------------------------------------------------------------------------------------------------- 26
Getting Help--------------------------------------------------------------------------------------------------------- 27
Warranty Information ------------------------------------------------------------------------- 28
3

Package Contents
Contents of Package
D-Link VisualStreamTM DSB-C110 100K Pixel PC Camera
Manual on CD
Quick Installation Guide
If any of the above items are missing, please contact your reseller.
System Requirements
Computer with Windows Operating System and available USB port
4

Introduction
Thank you for purchasing the D-Link DSB-C110 VisualStreamTM PC Camera. The DSB-C110 is a
great addition to your home PC, enabling you to personalize your e-communications. Talk to your
family, friends, and colleagues face-to-face over the Internet, create videos, digital photo albums, and
more, all the software needed to start creating digital content and enabling video communication is
included. This manual will guide you through the features of your new PC Camera and provides stepby-step instructions for getting you started with the bundled Arcsoft® software.
Getting To Know Your VisualStream
Swivel Base
Features And Benefits
True 352 X 288 Pixels Resolution
TM
PC Camera
Indicator Light
Manual
Focus Ring
ArcSoft® Software Included
Video Chat and Conferencing Capability with Microsoft NetMeeting
Add Video Messages to Your Email
Create VideoAlbums and Video Presentations
Create Personalized Greeting Cards, Calendars, and More
5
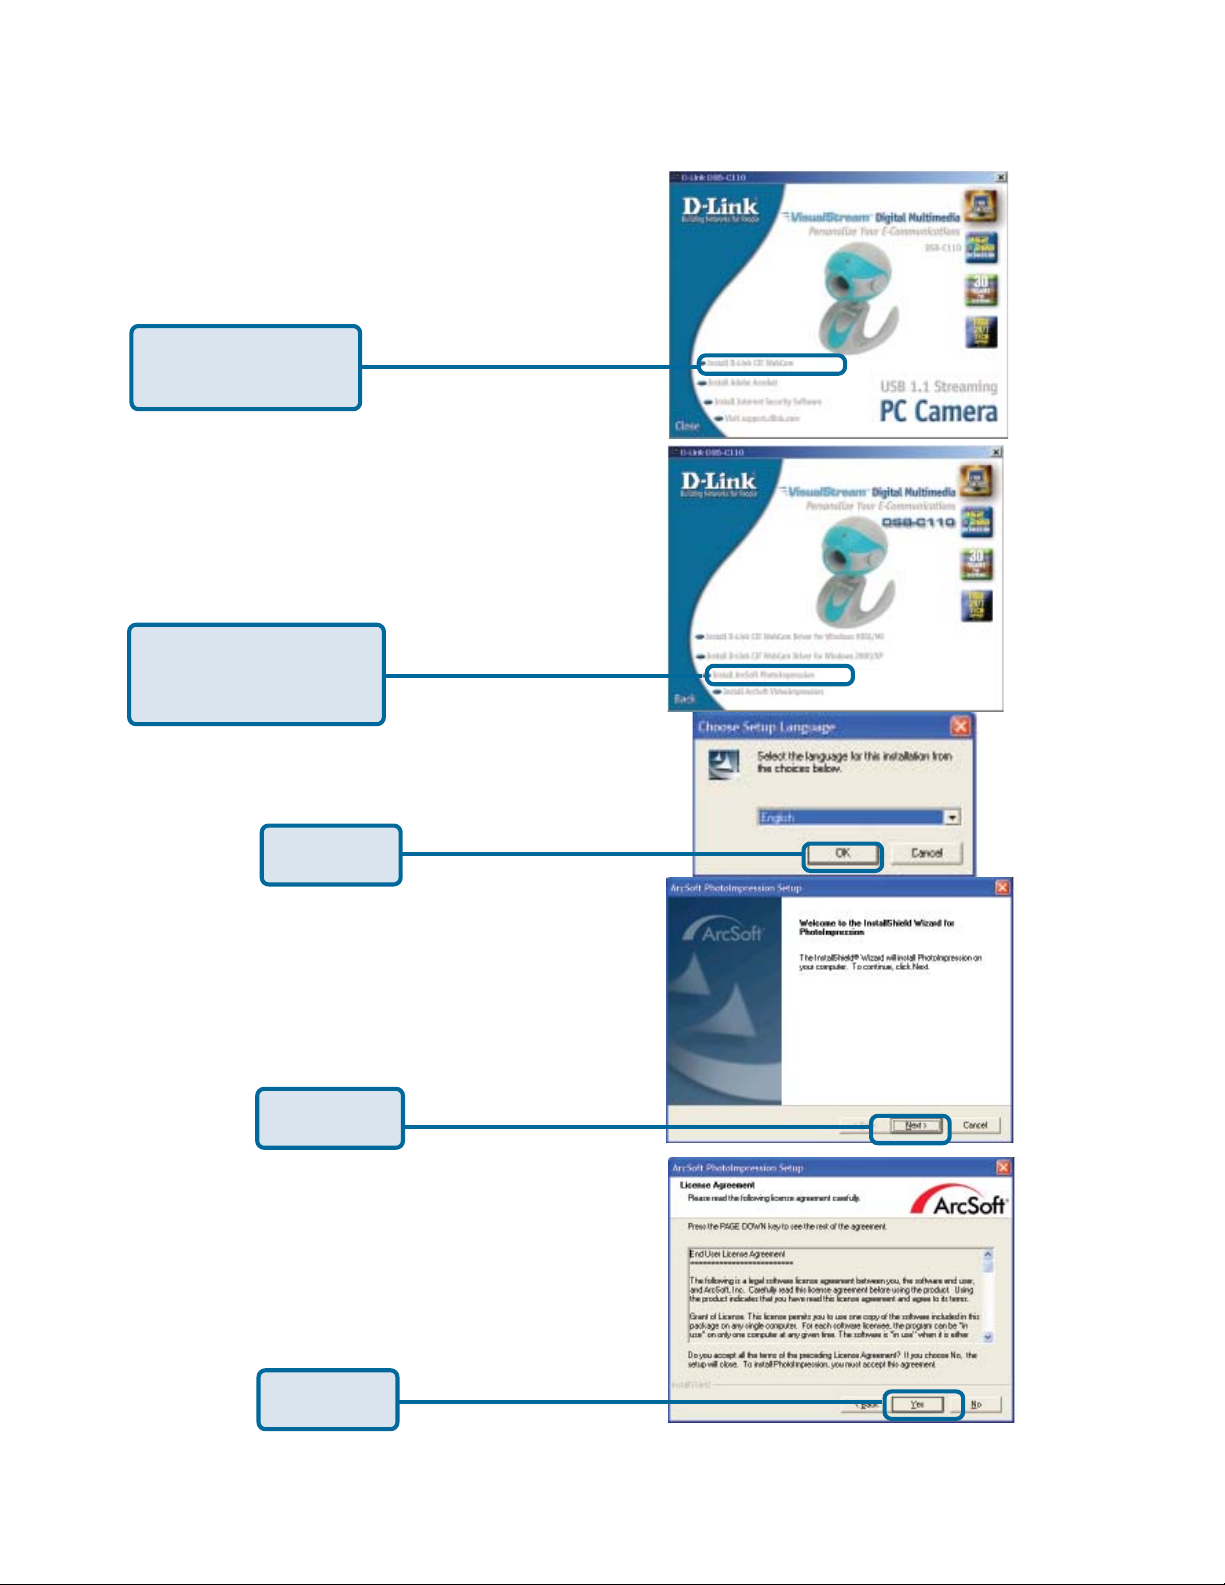
Installing ArcSoft® PhotoImpression and
VideoImpression
Click D-Link CIF
WebCam
Click Install ArcSoft
PhotoImpression
Click OK
Click Next
®
Click Yes
6
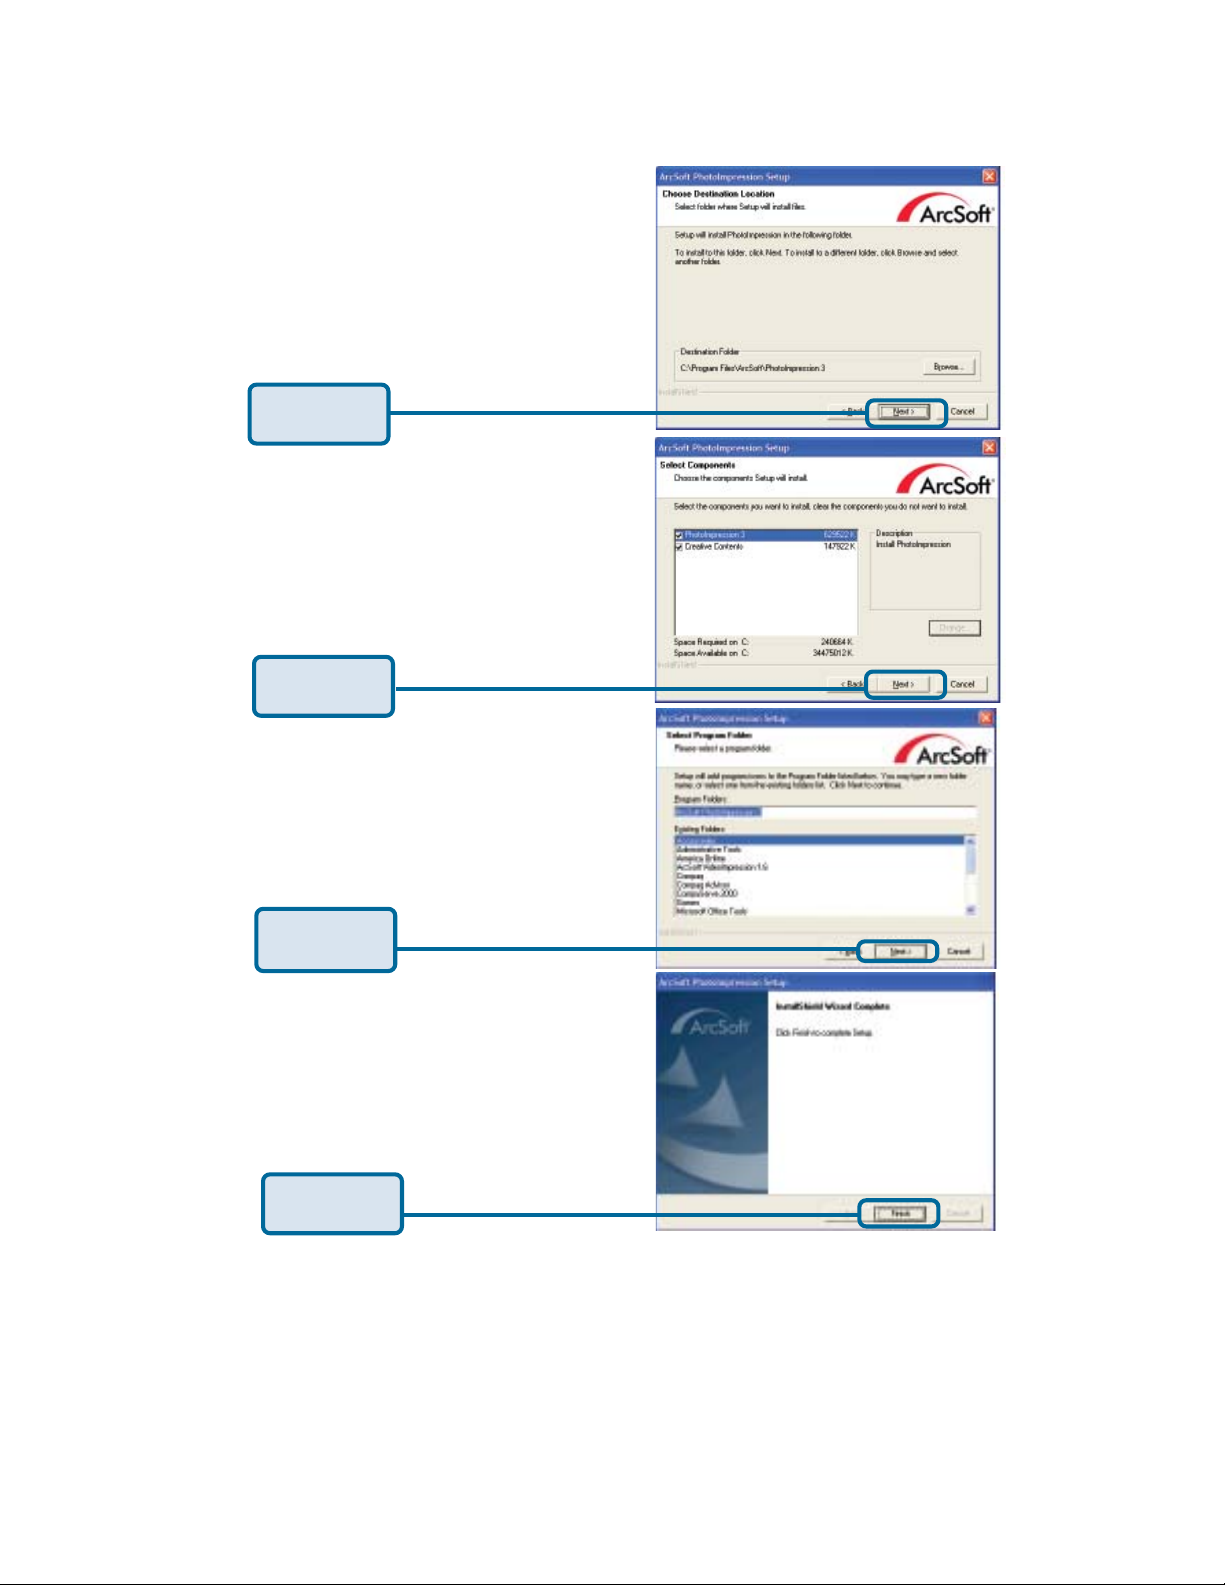
Click Next
Click Next
Click Next
Click Finish
ArcSoft® PhotoImpression is now ready to use. Please repeat these steps to install ArcSoft
VideoImpression software.
7

How To Use Your D-Link VisualStreamTM Camera
Setting the Focus
1. Start VideoImpression.
2. Select “New. “
3. Select “Capture Video.” A live preview from the video camera will appear in the
window.
4. Turn the manual focus ring until the image becomes sharp.
Preview
1. Follow steps 1~3 in the “Setting the Focus” section of this manual to
enable a live preview.
2. To stop the preview, click on “Stop” ( ).
3. To resume the preview, click on “Preview” ( ).
Record and Playback
* Video Recording:
1. Follow steps 1~3 in the “Setting the Focus” section to enable a live preview.
2. To start video recording, click on “Record” ( ).
3. To stop video recording, click on “Stop” ( ) or ESC.
4. To save captured video, click on “Save” ( ).
* Playback:
1. In VideoImpression, select “New.”
2. Select the source for playback by clicking on “Add” or from the drop down menu.
The selected source appears in the album.
3. Double click the source to add it to the Edit Board.
4. To replay captured video, click on “Play.”
8

How To Install Microsoft Netmeeting
For Windows 98Second Edition/Me/2000 Users
Click Start, point to Programs, point to Accessories, point to Internet Tools and then click
NetMeeting.
For Windows 2000 Users
Click Start, point to Programs, point to Accessories, point to Communications, and click
Netmeeting.
For Windows XP Users
Click Start, point to Run, type in conf in the dialog box and click OK.
Proceed with steps 1-4 for Microsoft NetMeeting Installation
1. Click Next, type the appropriate information in the First Name, Last Name, E-Mail
Address, Location, and Comments dialog boxes, and then click Next. NOTE: The
Location and Comments information is optional.
2. Click Next, click and select the Log into a directory server when NetMeeting starts
check box (this is optional), and then type the name of the directory server in the
Server Name dialog box. If you do not want your name to be visible in the directory,
click and select the Do not list my name in this directory check box.
3. Click Next, and then select the appropriate location for the shortcuts.
4. Click Next, follow the instructions in the Audio Tuning Wizard, and then click Finish.
After you run NetMeeting for the first time, you can modify the information you entered
about yourself or the directory server name that you want to connect to. To do so, click
Options on the Tools menu, click the General tab, and then enter the appropriate
information. Also, you can run the Audio Tuning Wizard again, and to do so, click Audio
Tuning Wizard on the Tools menu.
If you can’t install the NetMeeting from your PC directly, please log on to http://
www.microsoft.com/windows/netmeeting/ to downloaad.
9
 Loading...