

D-Link DPH-850S User Manual

1
Contents
1 INTRODUCTION........................................................................ 4
1.1 ANDROID IP VIDEO PHONE DPH-850S OVERVIEW....................................................... 4
1.2 PHONE COMPONENT DESCRIPTIONS ........................................................................... 5
1.3 THE INSTALLATION OF BACKPLANE ............................................................................. 7
1.4 INTERFACE INTRODUCTION....................................................................................... 7
1.5 TOUCH SCREEN DESCRIPTION................................................................................... 9
1.6 UPDATE OF THE PHONE......................................................................................... 11
2 BASIC FUNCTION.....................................................................12
2.1 SCREEN KEYBOARD.............................................................................................. 12
2.2 STATUS BAR ....................................................................................................... 12
2.3 MAIN SCREEN .................................................................................................... 14
2.4 THE APPLICATION OF DPH-850S’S FUNCTION: ......................................................... 16
2.5 DESKTOP WIDGETS.............................................................................................. 18
3 SETTINGS ................................................................................21
3.1 SYSTEM INFO...................................................................................................... 21
3.2 NETWORK ......................................................................................................... 22
3.2.1 Network........................................................................................................................22
3.2.2 PPPoE ...........................................................................................................................24
3.2.3 QoS...............................................................................................................................25
3.2.4 Port...............................................................................................................................28
3.2.5 Stun ..............................................................................................................................28
3.3 ACCOUNT.......................................................................................................... 29
3.4 CALL ................................................................................................................ 32
3.4.1 General.........................................................................................................................32
3.4.2 Dial plan .......................................................................................................................34
3.4.3 Accounts.......................................................................................................................35
3.5 DISPLAY ............................................................................................................ 35
3.5.1 Screen...........................................................................................................................36
3.5.2 Hibernate .....................................................................................................................36
3.5.3 Display..........................................................................................................................37
3.6 TONE ............................................................................................................... 38
3.6.1 Tone..............................................................................................................................38
3.6.2 Volume .........................................................................................................................39
3.7 LANGUAGE ........................................................................................................ 39
3.8 DATE TIME......................................................................................................... 40
3.9 MAINTAIN ......................................................................................................... 41
3.9.1 Update..........................................................................................................................41

2
3.9.2 Web server ...................................................................................................................45
3.9.3 Menu password............................................................................................................46
3.9.4 Factory reset.................................................................................................................47
3.9.5 Reboot..........................................................................................................................47
3.10 AUDIO............................................................................................................ 48
3.10.1Audio...........................................................................................................................48
3.10.2 Audio param...............................................................................................................48
3.11 VIDEO ............................................................................................................ 49
3.11.1 Video param...............................................................................................................49
3.11.2 Bandwidth..................................................................................................................50
3.12 CALL FIREWALL ................................................................................................. 51
4 PHONE APPLICATION...............................................................53
4.1 PHONE ............................................................................................................. 53
4.2 CONTACTS ......................................................................................................... 58
4.3 CALL LOGS ......................................................................................................... 63
4.4 MEMORY KEY..................................................................................................... 65
4.5 NETWORK PHONEBOOK .........................................................................................67
4.6 MWI ............................................................................................................... 69
4.7 MULTI-LINE OPERATION ........................................................................................ 69
5 OTHER APPLICATION ...............................................................70
5.1 EMAIL ...............................................................................................................70
5.2 CALCULATOR .......................................................................................................72
5.3 NOTE PAD...........................................................................................................74
5.4 BROWSER.......................................................................................................... 75
5.5 RECORDER......................................................................................................... 75
5.6 DIGITAL CLOCK.................................................................................................... 77
5.7 ALARM CLOCK.................................................................................................... 77
5.8 GALLERY ............................................................................................................78
5.9 FILE MANAGER................................................................................................... 79
5.10 CAMERA ......................................................................................................... 80
5.11 MUSIC............................................................................................................ 81
5.12 CALIBRATION.................................................................................................... 83
5.13 CALENDAR....................................................................................................... 83
5.14 PINGBOX ........................................................................................................ 83
6 ANDROID SETTINGS ................................................................85
6.1 BASIC SETTINGS .................................................................................................. 85
6.1.1 WAN .............................................................................................................................85
6.1.2 Sound & display............................................................................................................86
6.1.3 Configuration management .........................................................................................88

3
6.1.4 Language & keyboard...................................................................................................89
6.1.5 Date & time..................................................................................................................89
6.2 VOIP SETTINGS................................................................................................... 90
6.3 CALL SETTINGS.................................................................................................... 94
6.4 ADVANCED SETTINGS............................................................................................ 96
6.4.1 Location & security.......................................................................................................96
6.4.2 Privacy..........................................................................................................................96
6.4.3 Applications..................................................................................................................97
6.4.4 Accounts & sync ...........................................................................................................97
6.4.5 SD card and memory....................................................................................................97
6.4.6 Search...........................................................................................................................98
6.5 ABOUT PHONE.................................................................................................... 98
7 WEB PAGE CONFIGURATION DESCRIPTION............................. 100
7.1 BASIC.............................................................................................................101
7.2 NETWORK .....................................................................................................102
7.3 VOIP ..............................................................................................................105
7.4 PHONE ..........................................................................................................111
7.5 MAINTENANCE..............................................................................................114
7.6 SECURITY.......................................................................................................120
7.7 LOGOUT ........................................................................................................122
4
1 Introduction
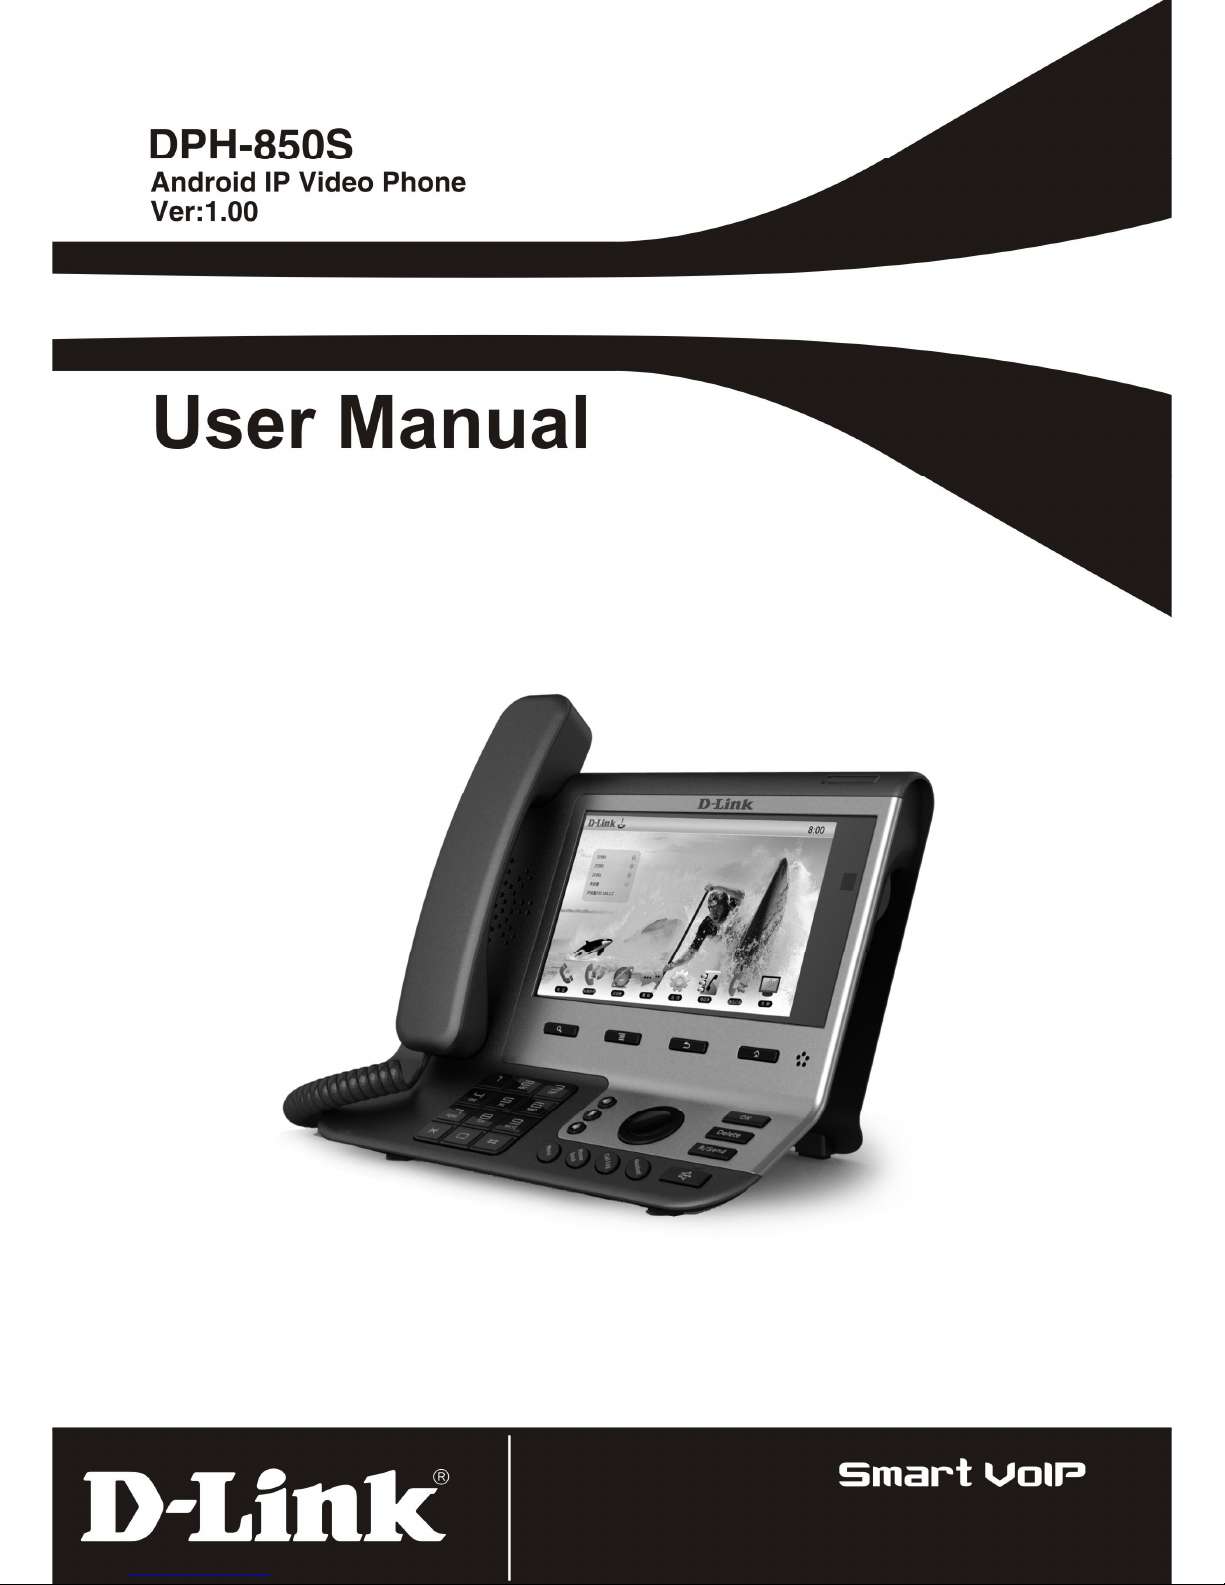
1.1 Android IP Video Phone DPH-850S Overview
Item Description
DPH-850S Phone
DPH-850S IP Video Phone with display and
keypad.
Power Adapter
Power supply for telephone.
Network Cable
Used to access network for the phone.
Handset
Make phone calls with the phone’s basic
functions.
Handset Cord
Connected with the handset and the phone.
Quick Installation Guide
Quick install the DPH-850S guide.
CD
Containing manual and quick installation guide.
Warranty Safety
Information
Warranty Safety Information for DPH-850S.
5
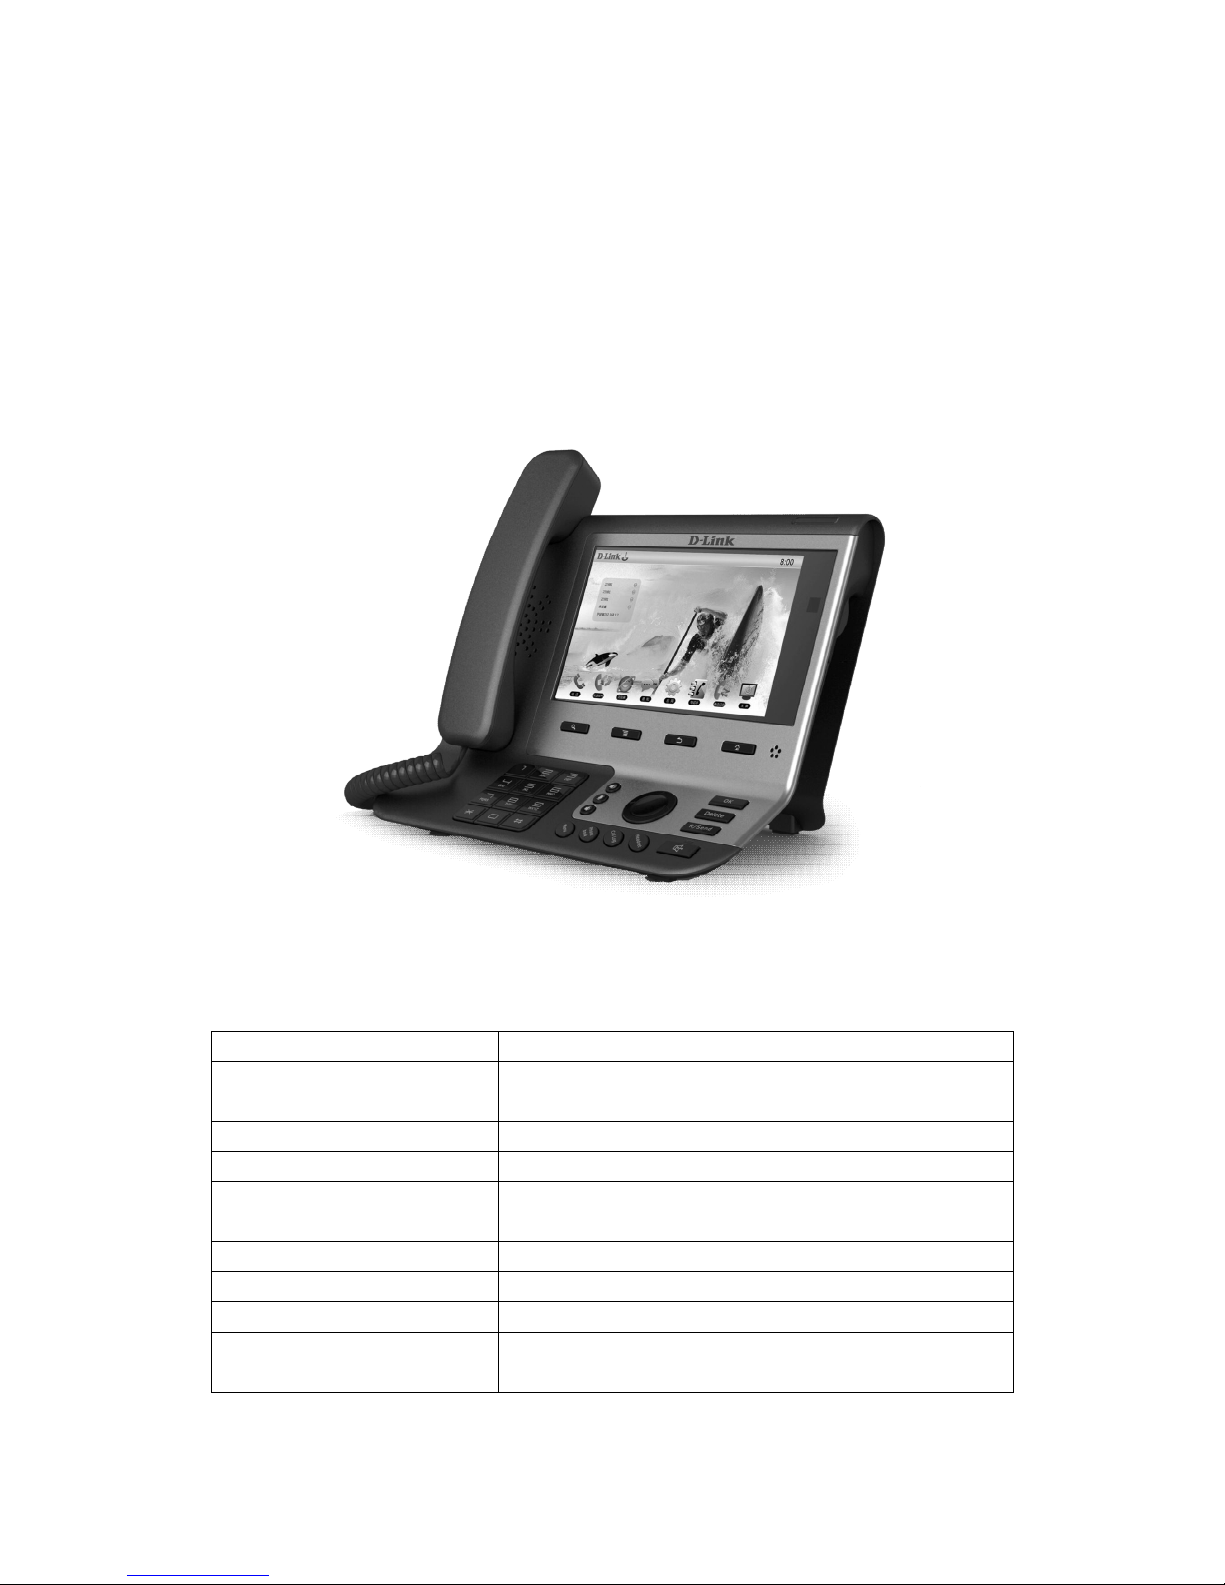
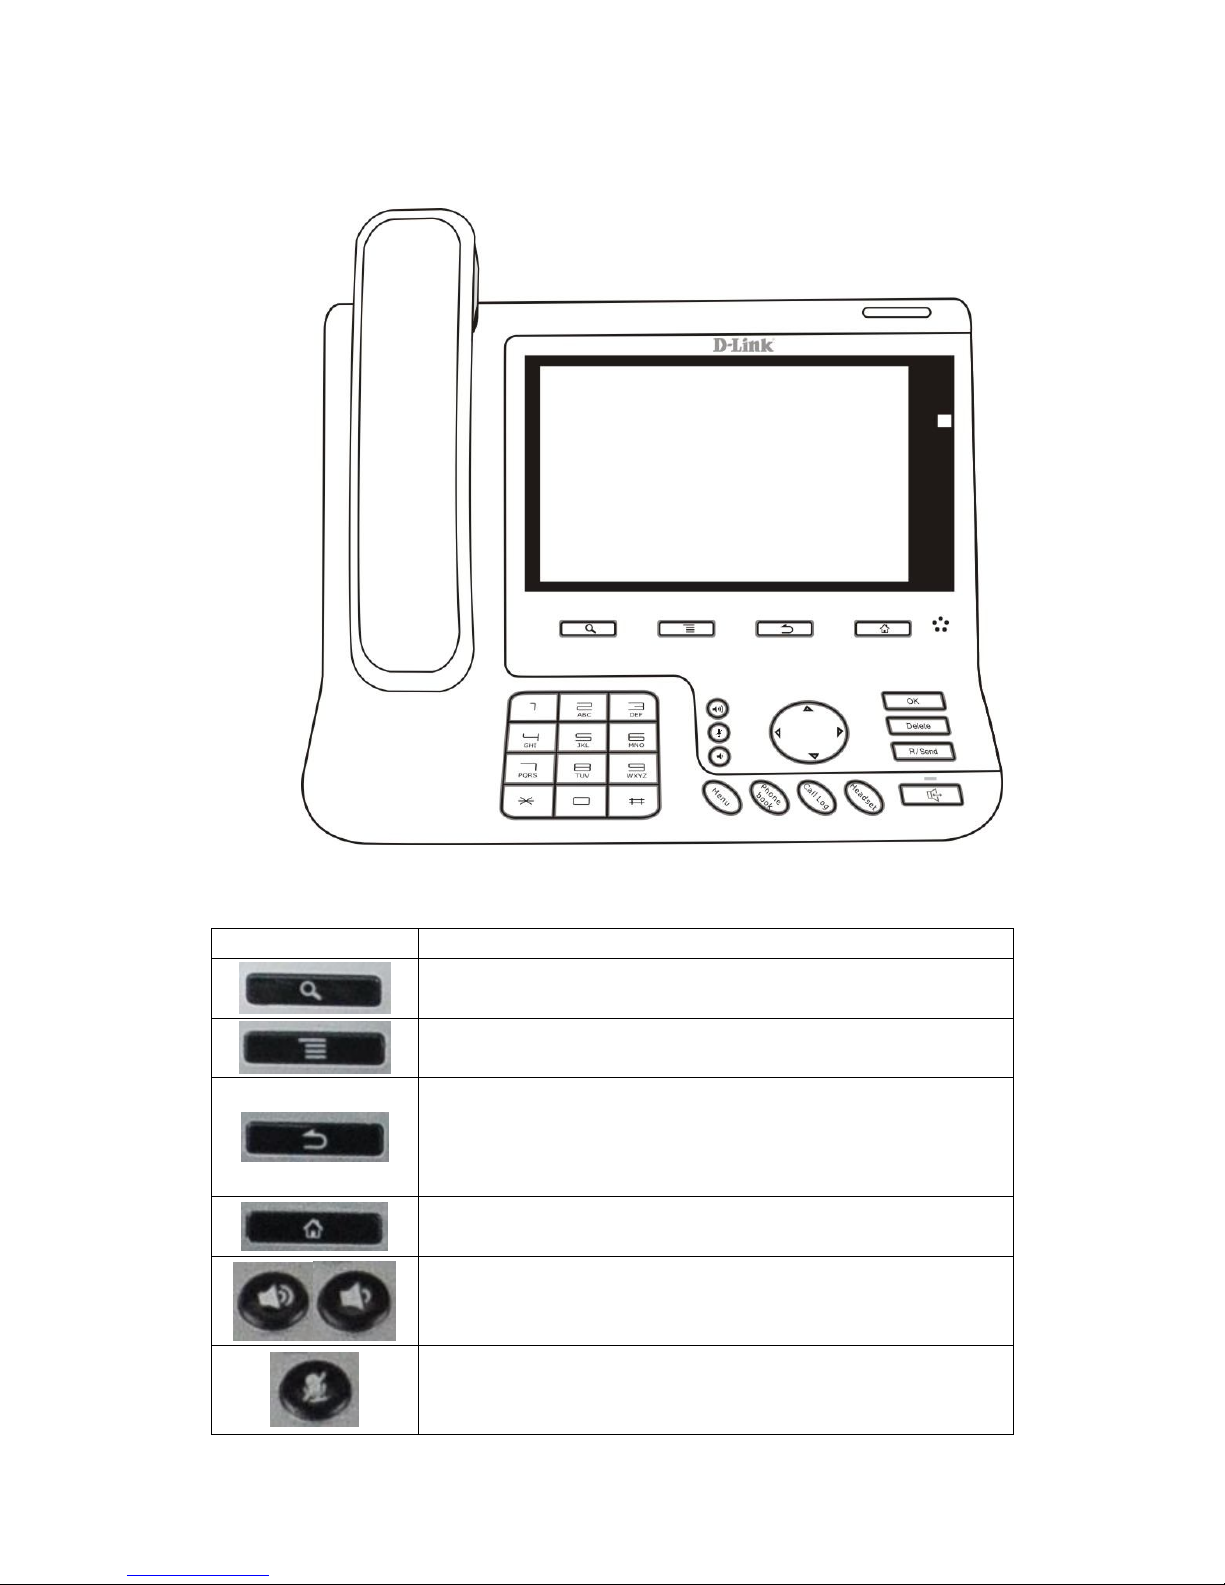
1.2 Phone component descriptions
Key Function
Search key. Tap the key and you can enter the search
interface.
Menu key. You can browse and accomplish all functions
of the phone through pressing this key.
Return key. Press this button in the detailed interface, it
will return to the previous interface; If it is pressed in the
application program interface, the current program will be
closed.
Home key. Press this key, the phone will return to the idle
screen.
Volume control key. Turn down or turn up all kinds of
volume by pressing these two keys.
Mute key. In the call mode, press this key in calling mode,
you can hear the other side, and the other side cannot hear
you; press this button again to leave this mode.
6
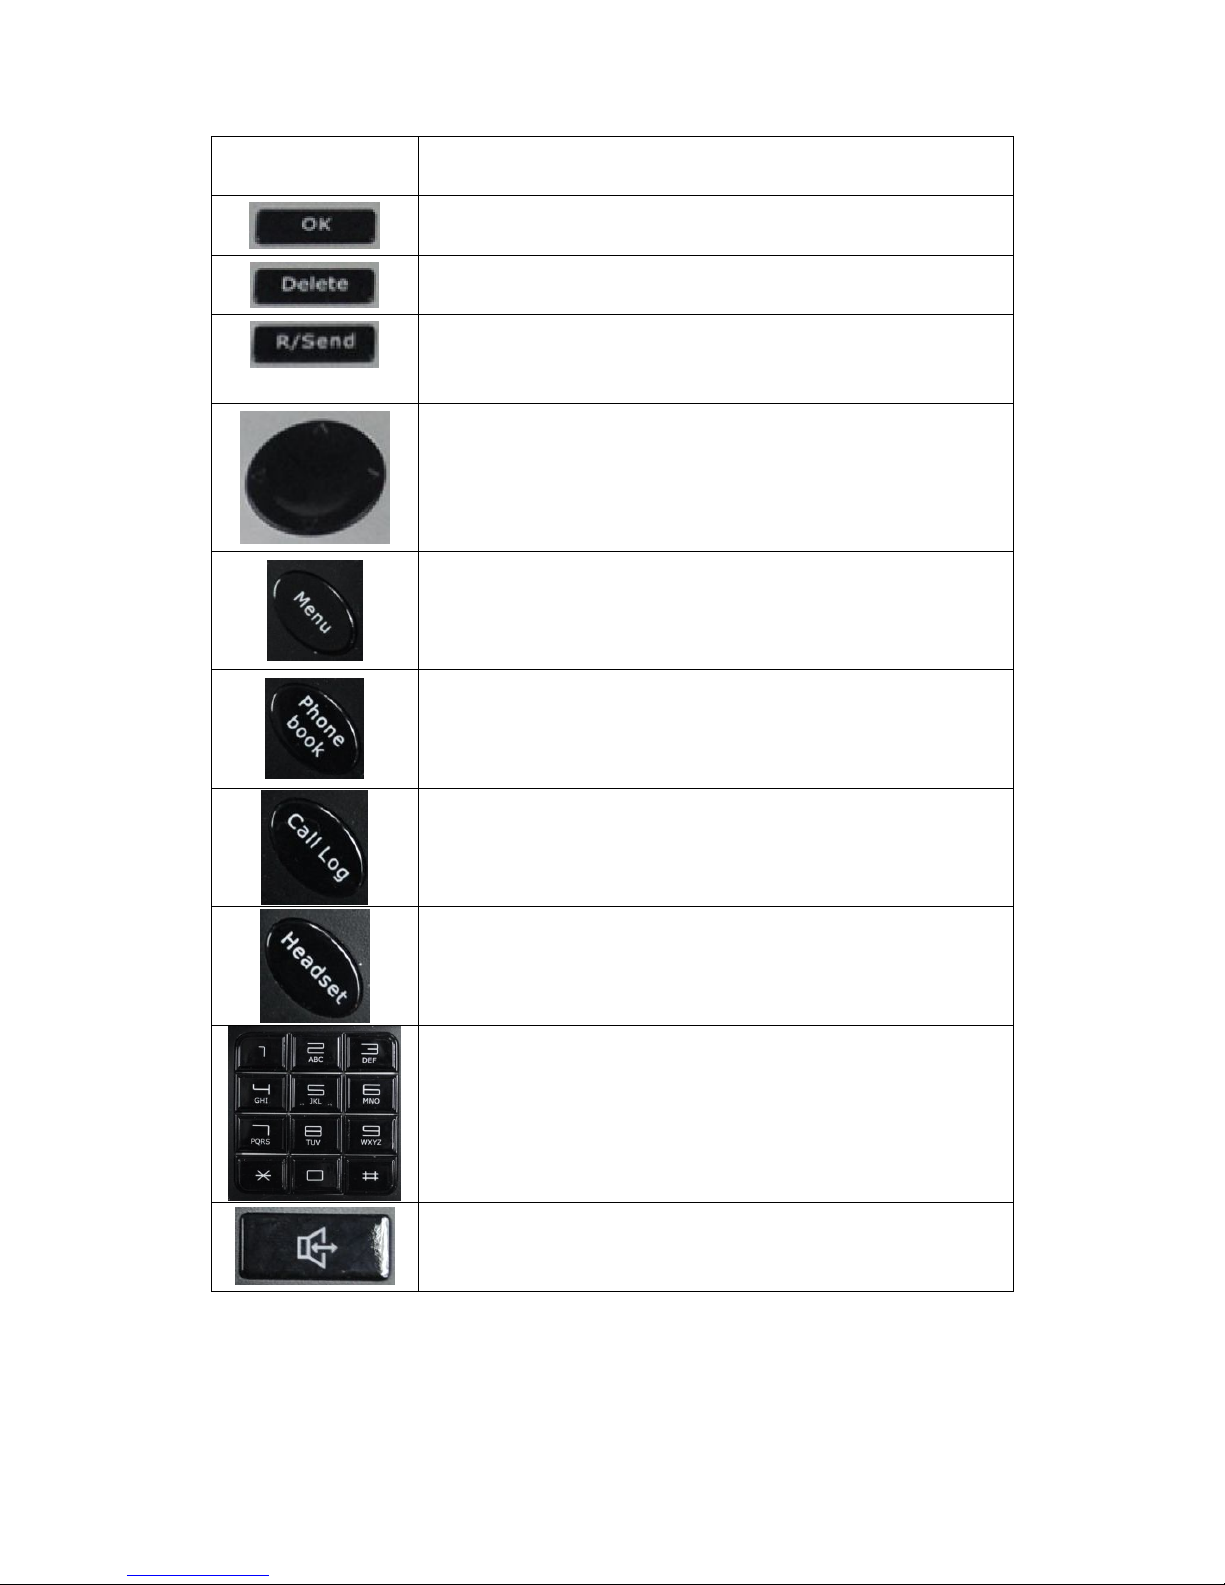
When the phone call is ringing, press this button to turn
off the ring tips.
Confirm key.
Delete key.
R/Send key. Use the key to dial the last call number. It
also could be used to make a phone call by sending a
phone number.
Navigation key.
Menu key.
Phone book. Tap to enter the contacts interface.
Call log. Tap to see call log.
Headset key.
Digital keyboard.
The hands-free key.
7
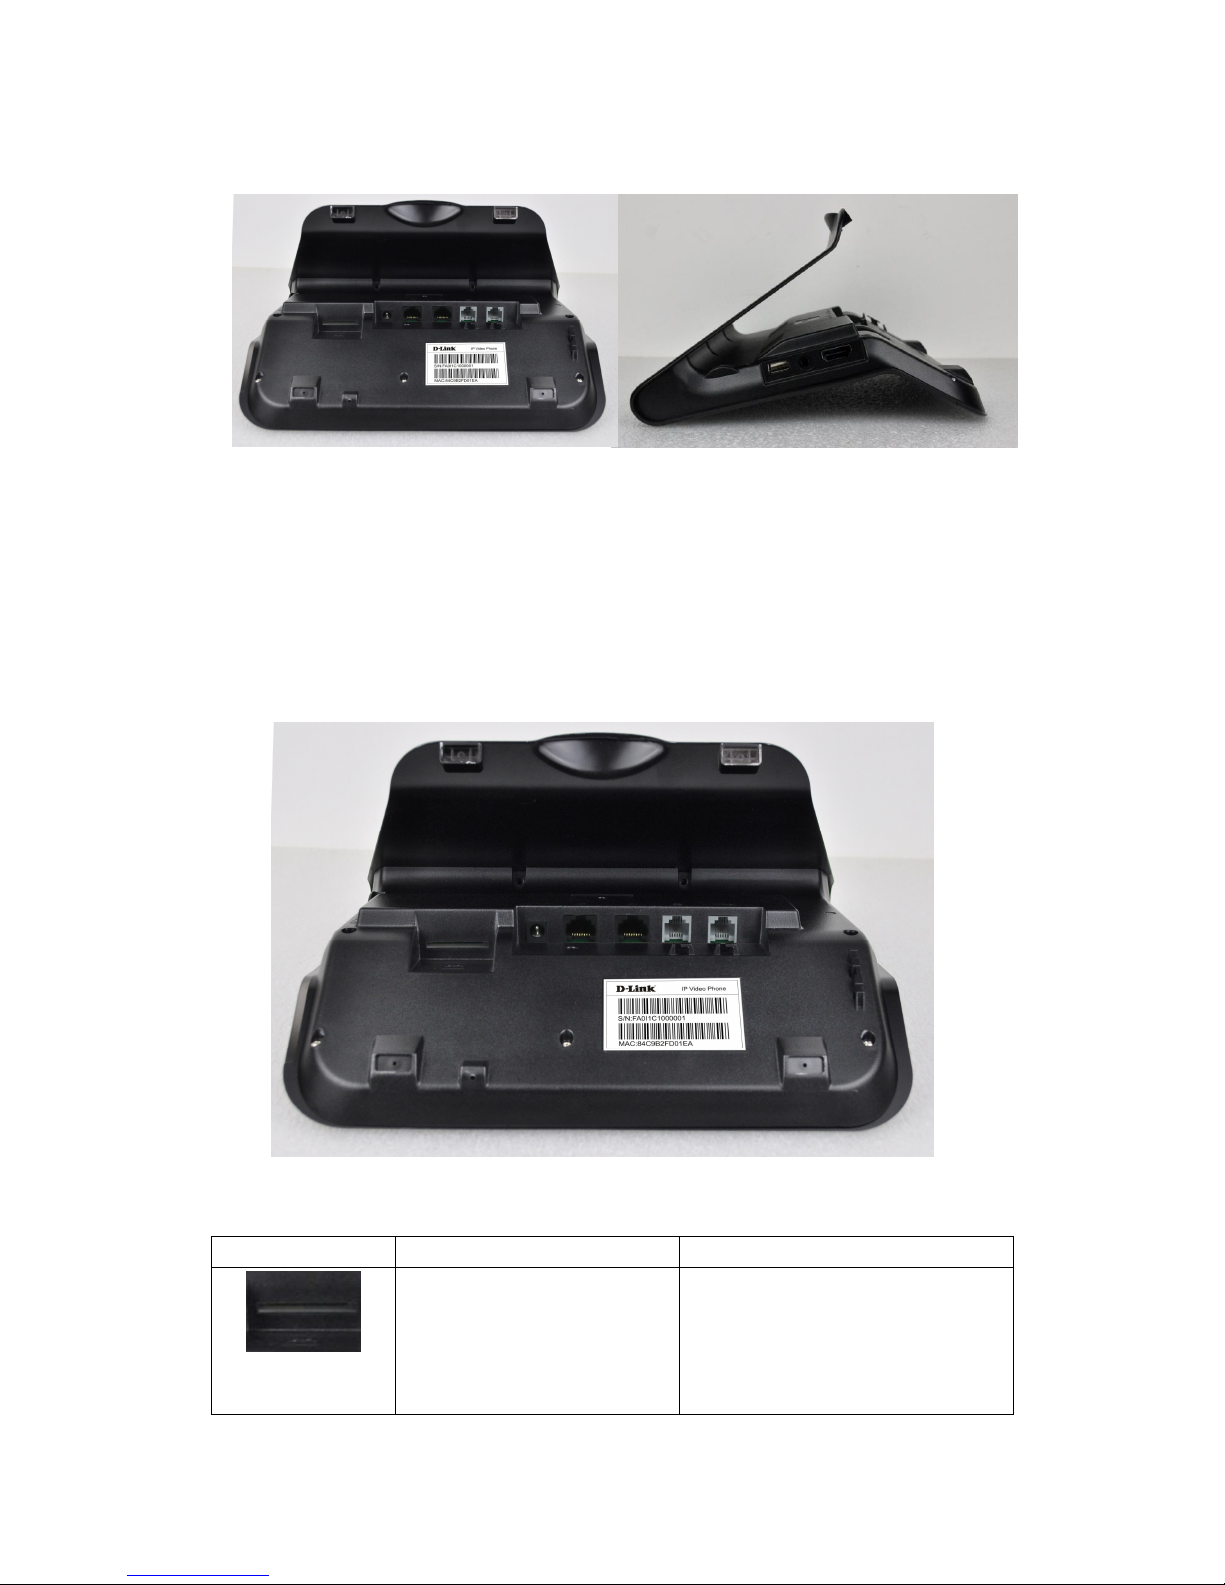
1.3 The Installation of backplane
Set the telephone
The back plate is horizontally placed in the telephone at the bottom, and makes
the phone and joint part of the two screws tightened, right now its steady
placed on the desktop.
1.4 Interface introduction
Name Meaning
(Left first)
SD Card interface
Connect SD Card for saving
data.
8
(Left second)
DC Power Interface
Input: 220V AC
Output: 12V DC
(Left third)
LAN Network interface
Specification RJ45, connect it
computer.
(Right third)
WAN Internet interface
Specification RJ45, connect it
to network.
(Right second)
PSTN Normal phone
interface
Specification RJ11, connect the
general public telephone
network. (Option)
(Right first)
Handset interface
Specification RJ9, used to
connect the handset to the
phone.
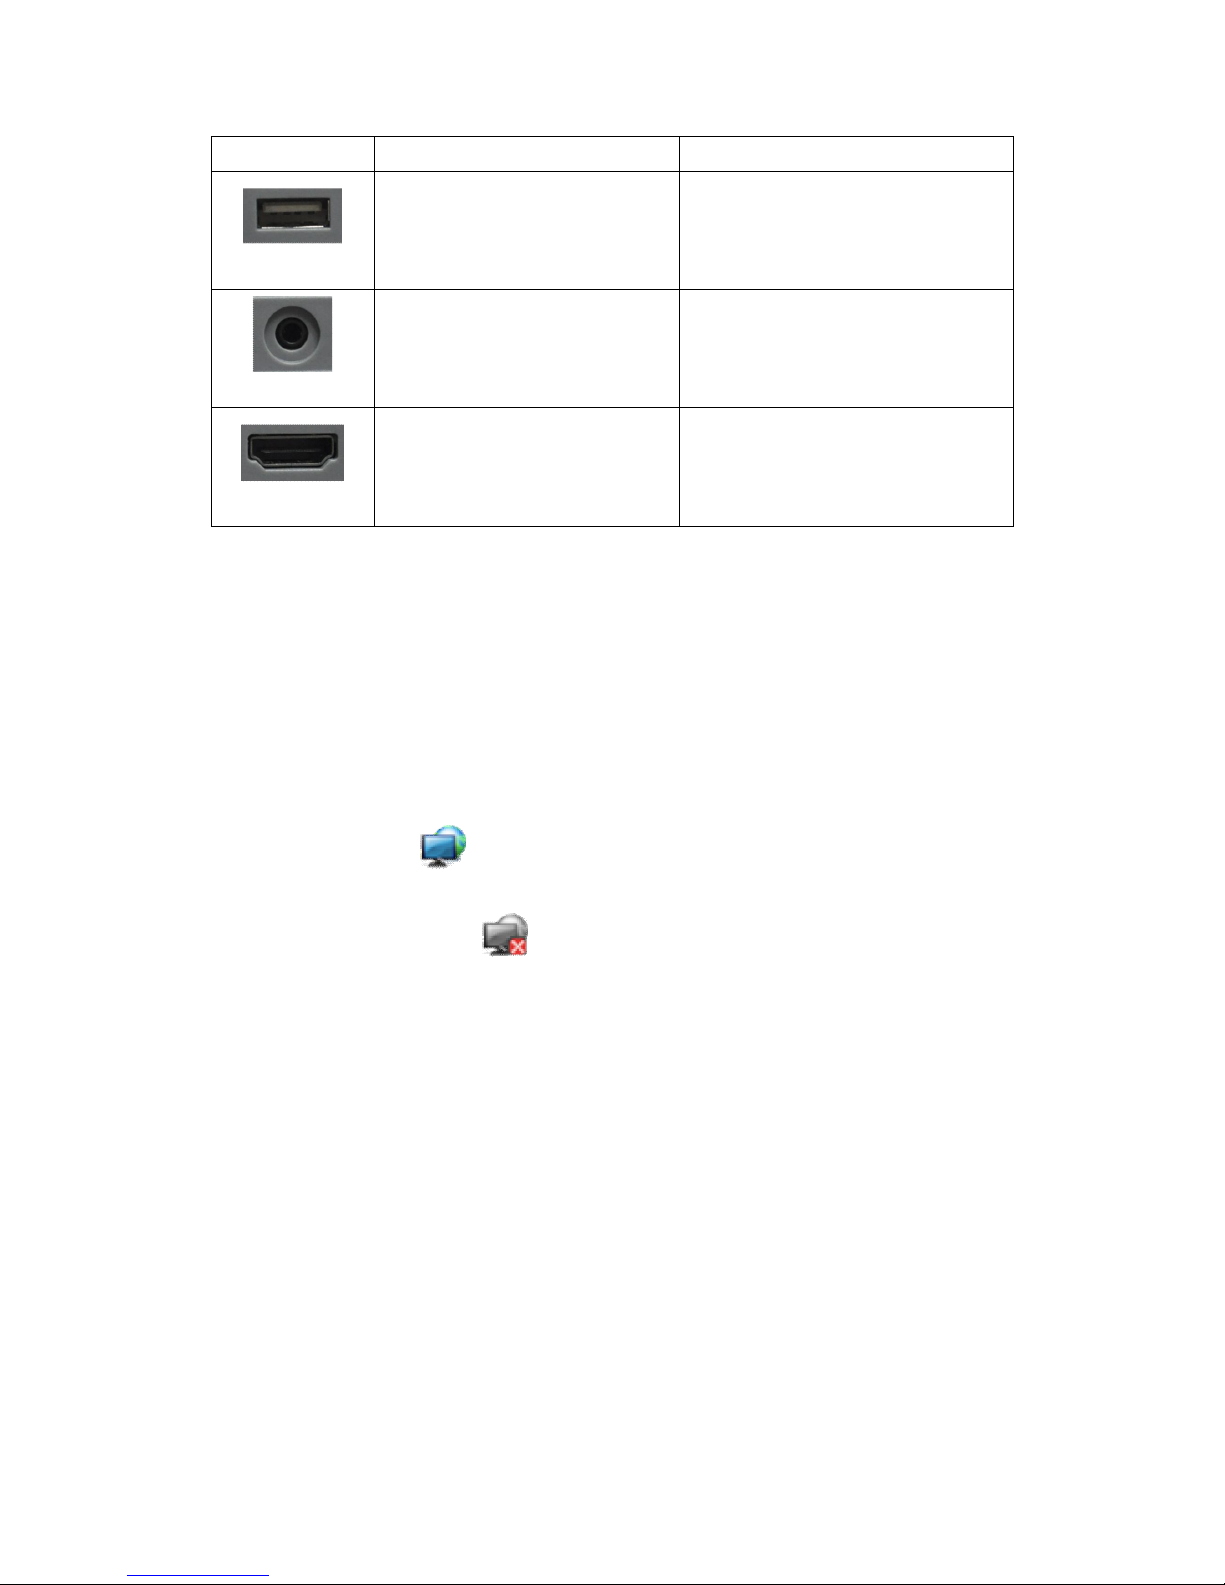
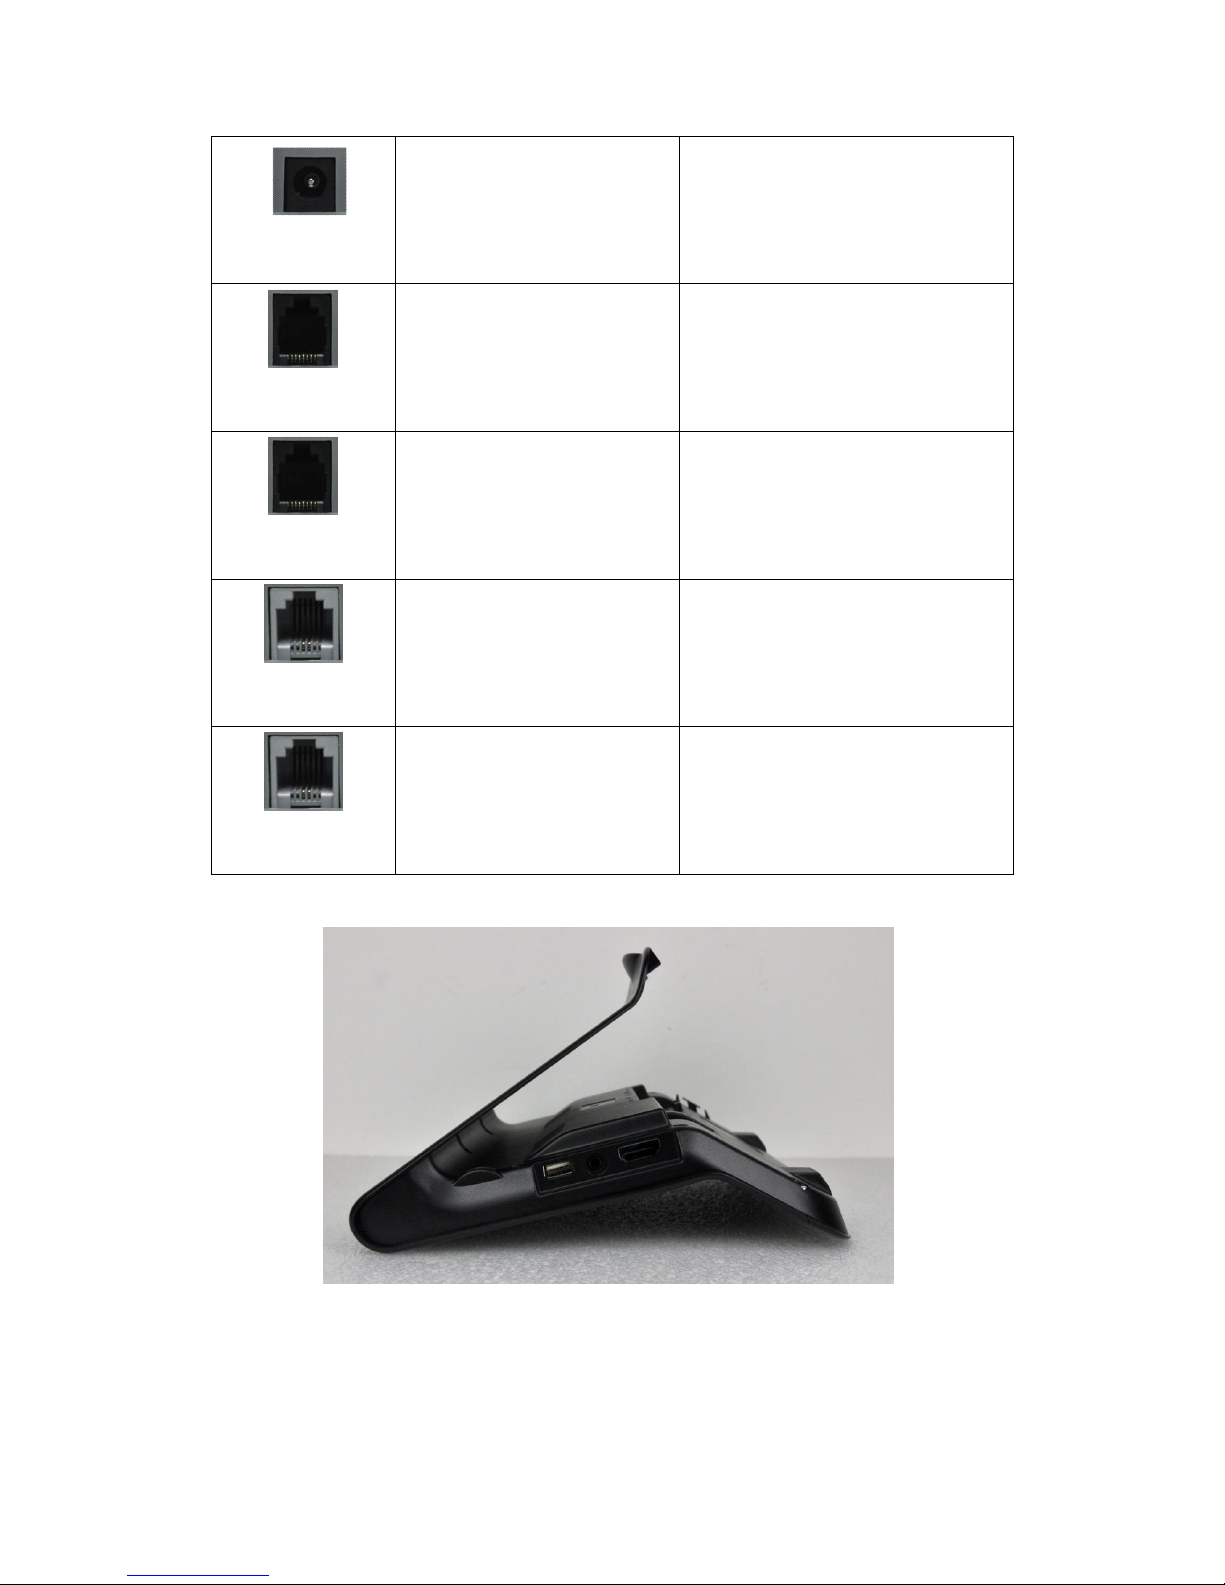
9
Name Meaning
(Left first)
USB interface. Connect it to USB disk.
(Center)
Handset interface. Connect the handset.
(Right first)
HDMI interface.
Interface for high-definition
audio and video. A-A interface,
A to A interface.
Note:
1. Put the handset line into the handset interface according to the interface
illustration picture.
2. Install the backplane to the bottom of the phone with the above method.
3. Plug the power adapter into the DC port; poke the other side of the power
adapter into an electric socket.
4. Insert one end of RJ45 network cable into the phone’s WAN port (Please
refer to the interface illustration picture 1) and put the other end into the
network equipment. After that, if the network connection status on the status
bar is displayed as , actions such as making some telephone calls and
surfing the internet could be done. If the network connection status on the
status bar is displayed as , please verify whether the network was
configured correctly and the network cable was plugged in correctly.
1.5 Touch Screen Description
You can touch the screen manually to complete the corresponding operation.
Here are three ways to use:
Click: Any icon or button can be clicked to realize its function.
10
Long press:
Long press the idle desktop. After that, an option box could be popped up,
and then you can do more according to the prompt.
Long press one list such as a list of contact list. After that, another option
box could be popped up, and then you can do more about this list according
to the prompt.
Figure:

11
Slide:
Slide your hand on the screen upward or downward slowly to move the
interface on the screen.
On some kinds of screen such as idle desktop, you can switch the desktop just
by moving your fingers on the screen to left or right. Dragging your finger to
slide will not select or activate anything on the screen.
You can just wait or gently press any place of the screen to stop the sliding
after your fingertips rapidly sliding on the screen. Gently pressing or touching
to stop the scrolling will not select or activate anything on the screen.
1.6 Update of the phone
Please contact with service provider to get the new version to upgrade.
Auto provision: Keep phone registered successfully and configure parameters
about automatic updates such as server address, upgrade file name, time
interval and so on. And then the phone will check for updates from the server
at a fixed time intervals and upgrade itself. See the specific automatically
upgrade instructions, please switch to Update.
Manual upgrade: USB update.
USB update. It has two update methods:
1. Create a directory named "impinstall" in the USB disk, and copy the update
file to this directory, and then insert the USB into the phone. The phone will
automatically compare the update image, if the image name is different from
the phone has, it will automatically update. (Upgrade where needs to be
updated)
2. Create a directory named "implinux" in the USB disk, and copy the update
file to this directory, and then insert the USB into the phone. The phone will
automatically compare the update version number and the image in the U disc
and telephone after rebooting. If the version and image are different from the
phone has, then it will automatically update. (Upgrade all system)
12
2 Basic Function
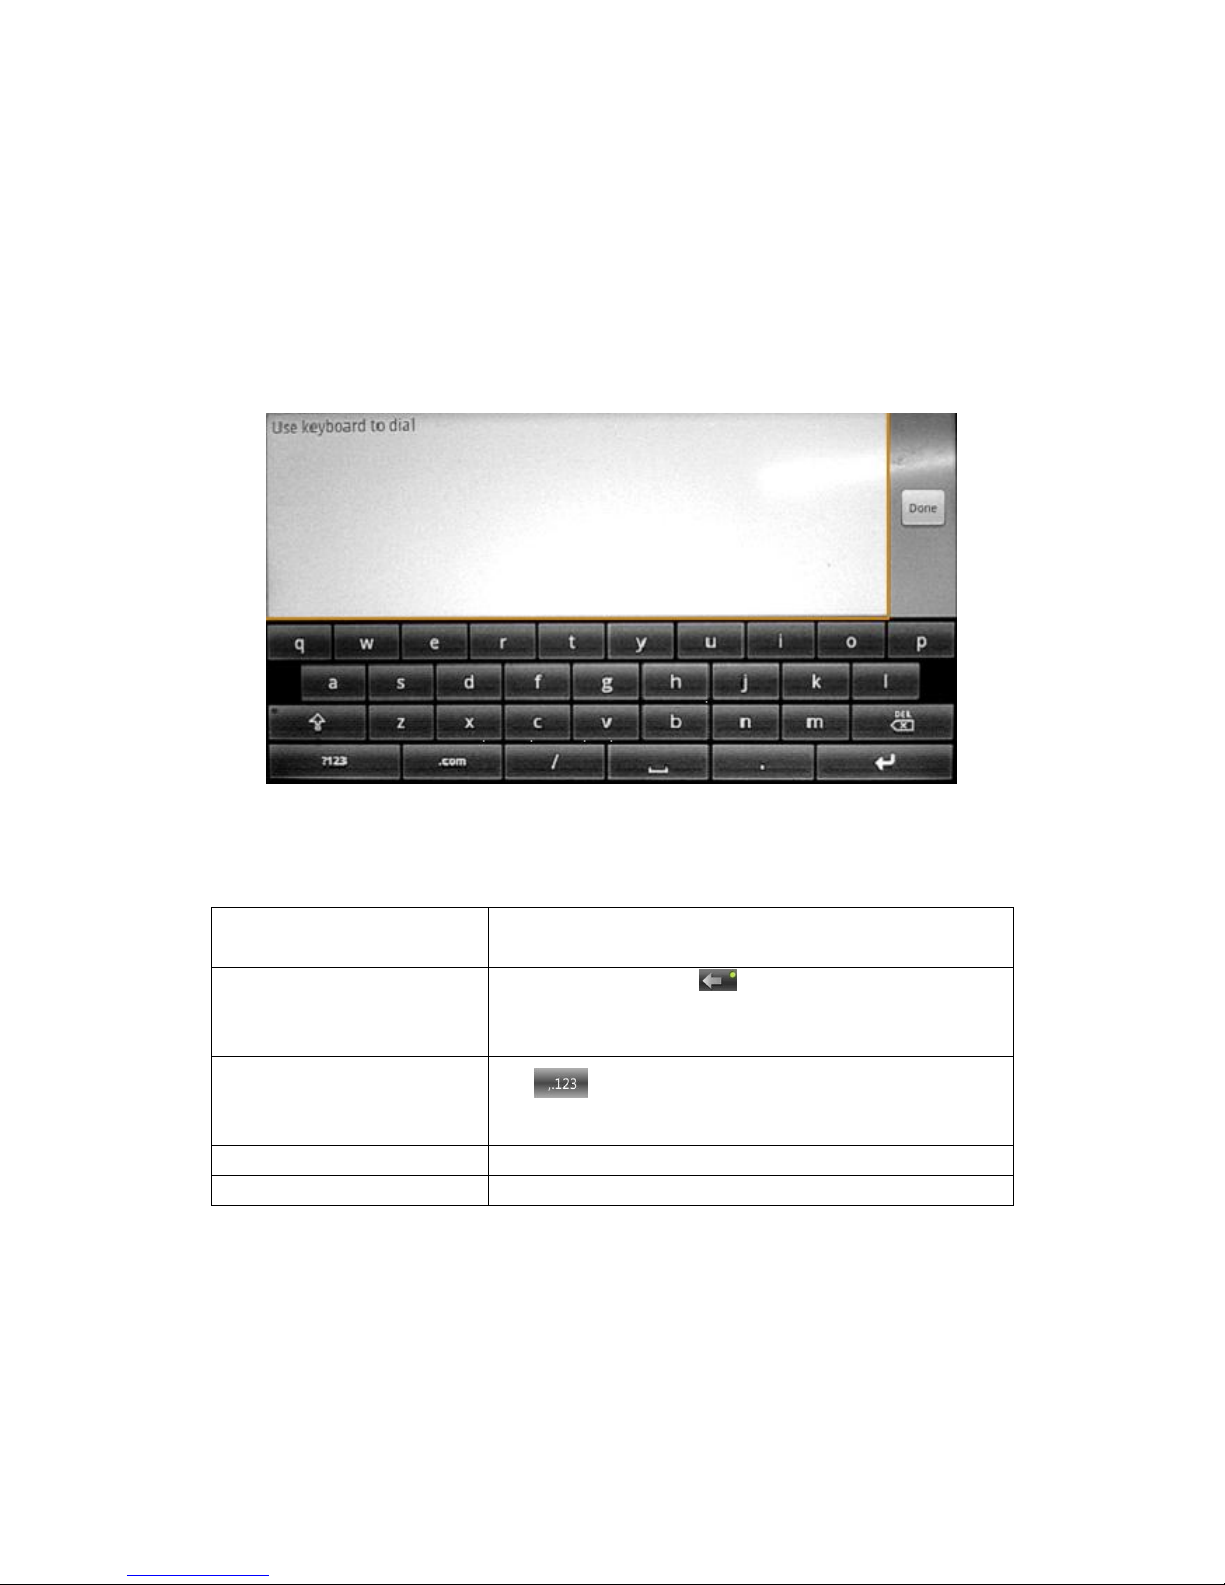
2.1 Screen Keyboard
If you need to input, click on the input box. A screen keyboard will
automatically be displayed. (Every input method has its own unique screen
keyboard).For instance:
Press the return key to close the screen keyboard after finishing the input.
Input Text:
1. Tap the text field.
2. Tap the screen keys on the keyboard.
Type in capital letters
Shift key, tapping shift key can switch the
uppercase and lowercase.
Delete character
Delete character, tab key to delete a character, if
you want to delete many characters, tap this icon
for a long time.
Type in digital,
punctuation and
symbols
Tap key to switch to digital, punctuation and
symbols input interface.
Space
Space symbol.
Enter
Enter symbol, tap this key to switch to next line.
2.2 Status Bar
All of the status information about Android IP Video Phone DPH-850S is
displayed on the top of the screen. You can click on the notification icon in the
left of the status bar or drag down the drop-down list with your fingers to enter
the notification panel to further review and deal with all of the information.
13
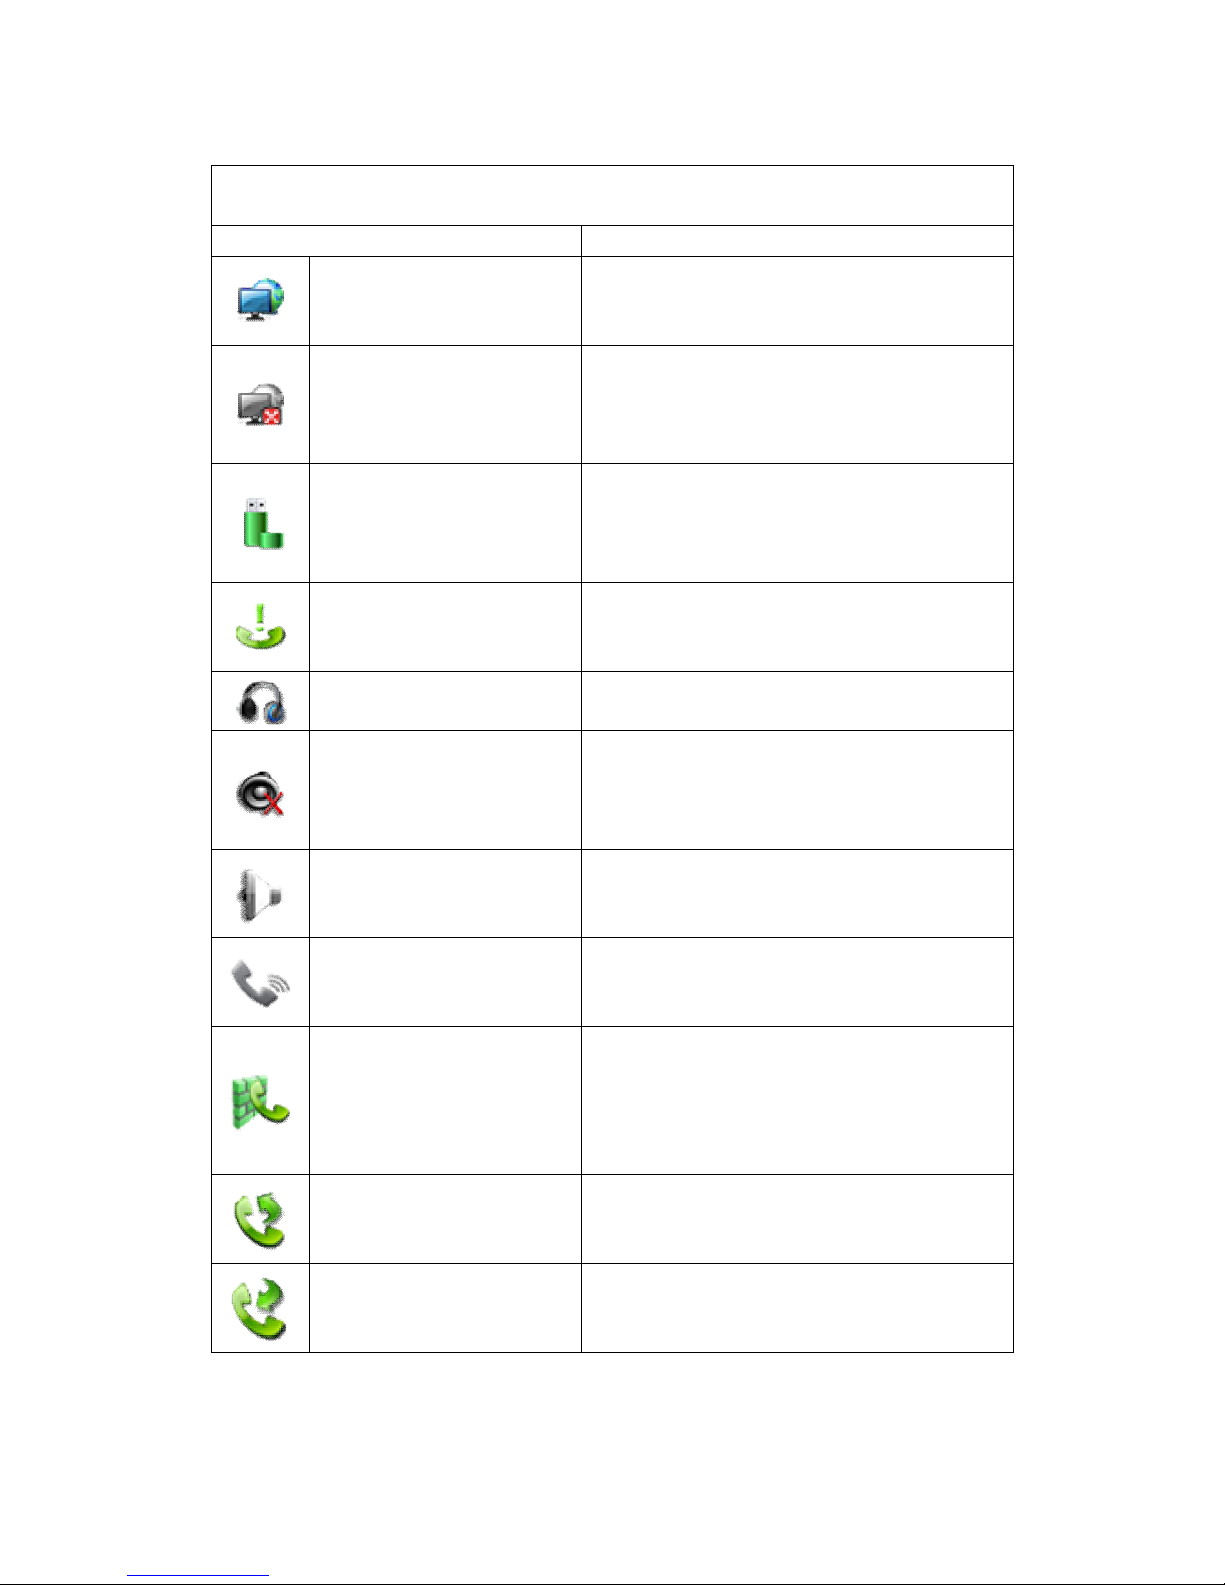
Status bar
Name Meaning
Network
status (successful)
Displays that the network connection is
successful. Tap the icon directly into
the network settings.
Network status (failed)
Shows no network connection. You need
to check the network is properly
connected and the parameters are
configured correctly.
USB
Displays that the phone successfully
identifies the USB device. Tap the icon
directly to switch into the USB
application wizard.
Missed calls
Shows that there are several missed
calls. You can click on the icon directly
to switch into the call log.
Headset mode
Indicates that the call is in the headset
mode.
Silent mode
Shows that the phone is in silent mode.
This mode can be canceled by directly
clicking the mute button when the screen
is in the idle interface.
Hands-free mode
Indicates that the call is in hands-free
mode.
Handset mode
Shows that the call is in handset mode.
Open the DND
Shows that the phone is on Do Not
Disturb mode. Any of the call could be
directly rejected before its ring interface
appears. There is only a missed call icon
leaving in the status bar.
Call forward
Shows that the call forward function is
opened.
Auto answer
Shows that the auto answer function is
opened.
14
Call firewall
If a phone number is
added to the firewall, then open
the firewall function, all calls about this
phone number could be rejected directly.
Alarm clock
If you set an alarm clock, the alarm clock
icon will display on the status bar.
New record
Indicates that there are several new
unread phone recordings.
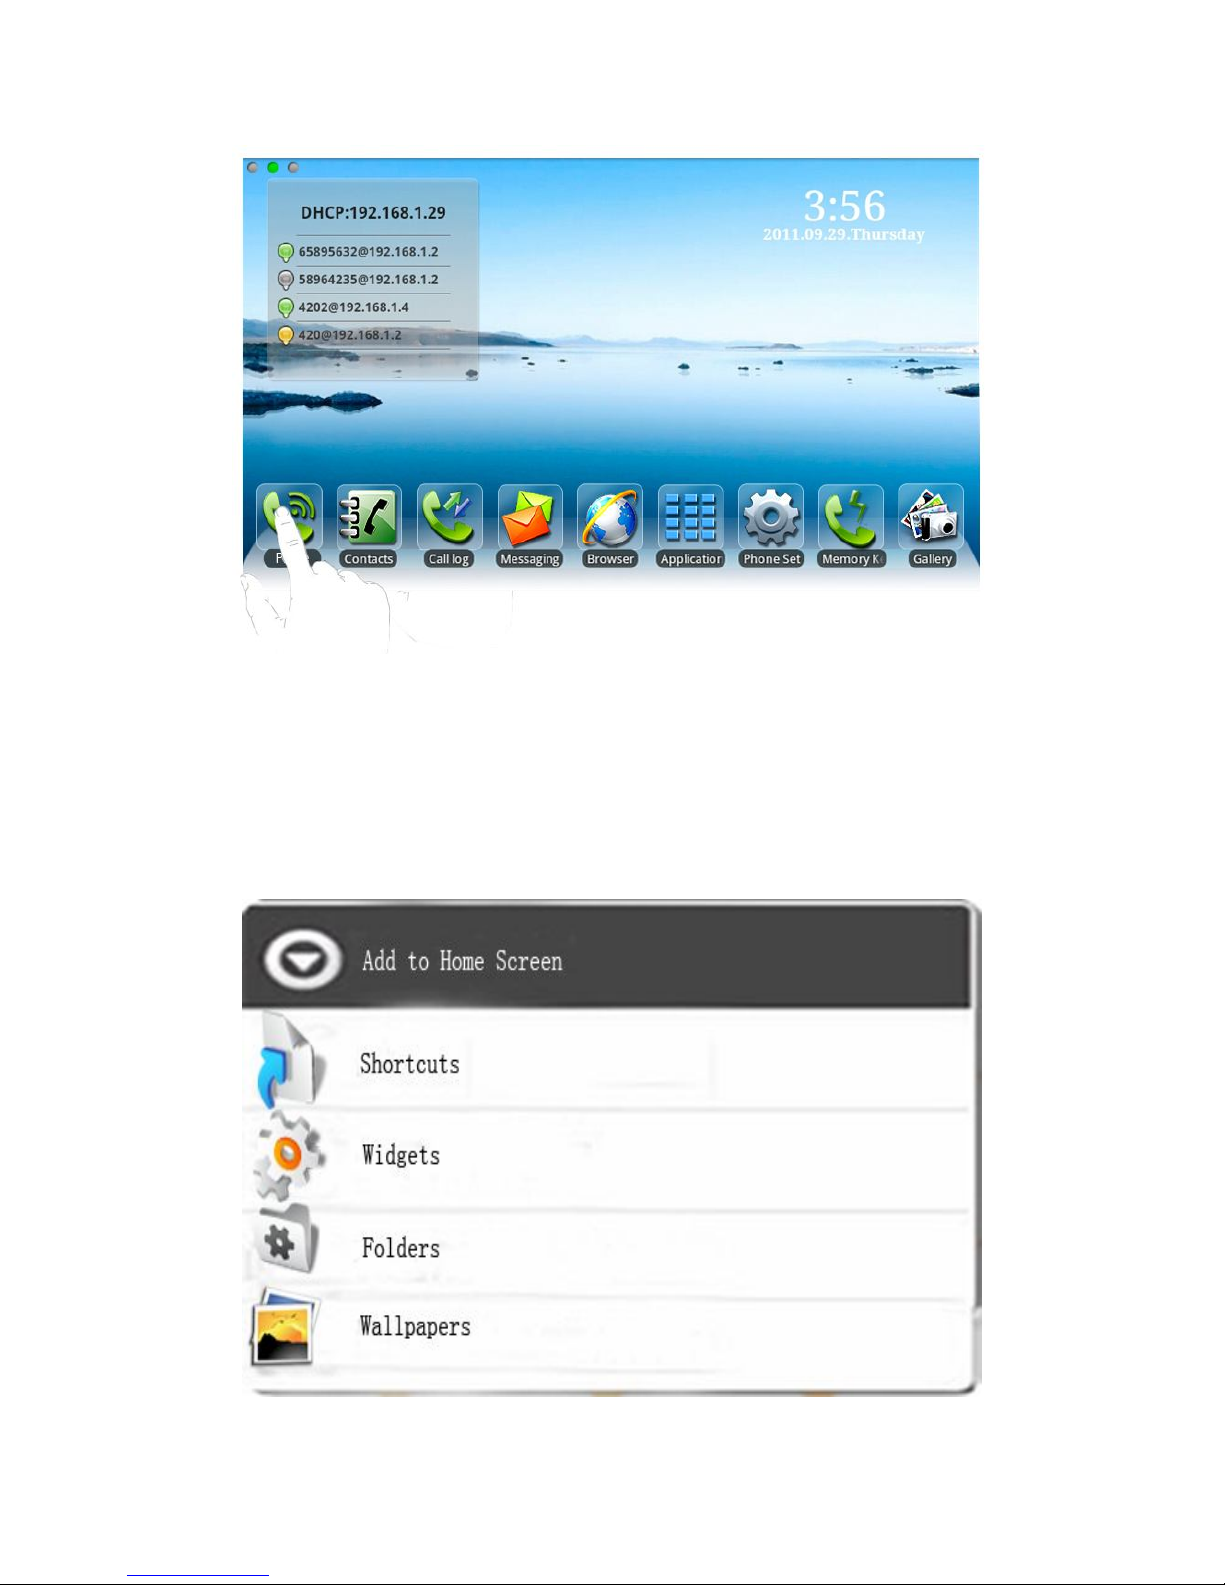
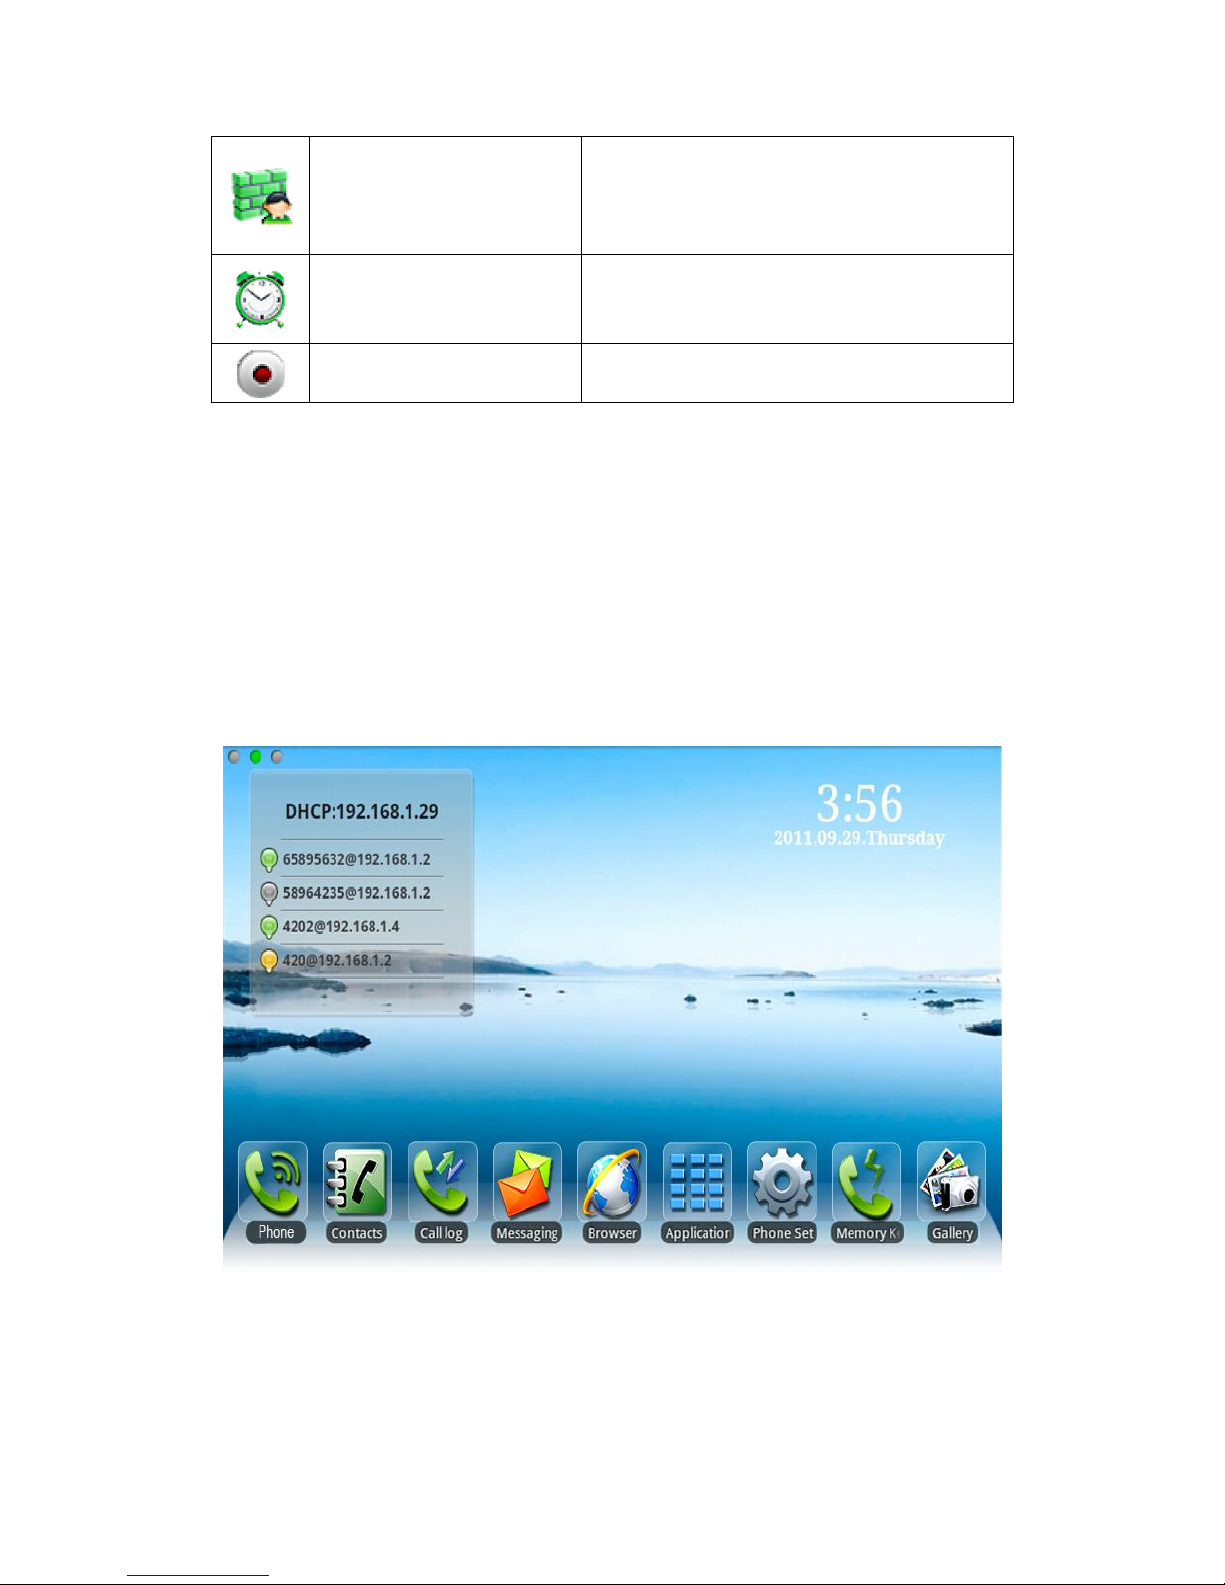
2.3 Main Screen
Android IP Video Phone DPH-850S will go directly to the main screen after
rebooting.
The main screen contains three idle interfaces. Each one can display some
programs shortcuts. You can switch the desktop just by moving your fingers on
the screen to left or right.
Default Screen:
The idle interface
The icon at the upper left of the idle interface is the phone status icon. It can
display some state including network connection status and the registration
status of each line in time.
15
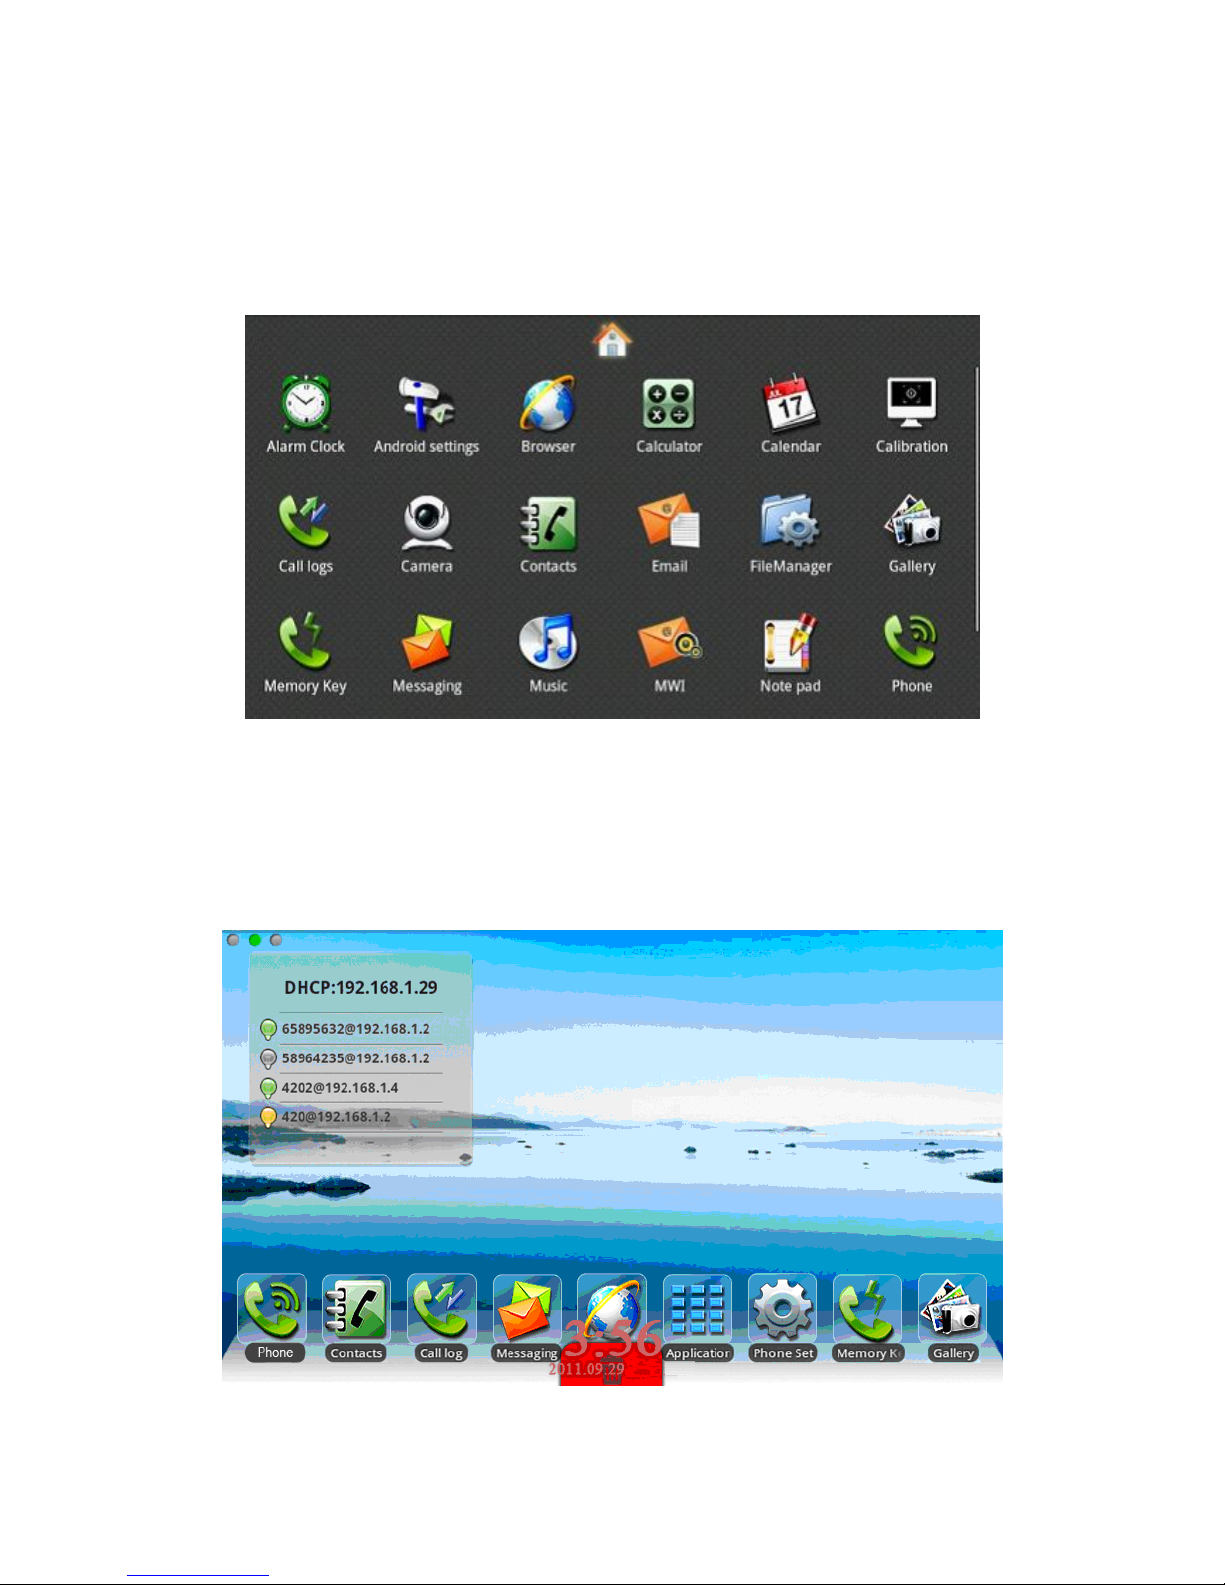
Click the "Application" icon, and then it will jump to the following interface.
You can slide your fingers on this interface to glance over all of the
applications. You can click on some program icons to open the corresponding
application program.
The application program interface
If you want to delete application shortcuts on the idle interface, you can long
press the shortcut, and then put it into the dustbin at the bottom of the interface.
(Note: Let it go just as the icon and the dustbin turned red as is shown at the
following picture.)
16
2.4 The Application of DPH-850S’s Function:
Phone
Click this icon, and it will switch to pre-dial interface. You can
make some phone calls through the screen or keyboard.
Email
Has the function of sending and receiving e-mail. When an
account has been configured successfully, you can send and
receive your e-mail on the phone and this account will
automatically sync the contacts to the mailbox account.
Settings
It contains System, Network, Account, Call, Display and so on.
You can configure some settings.
Calculator
Work with simple calculation operations such as add, subtract,
multiply, divide and some advanced operations.
Note pad
Record a number of important events or you can record
information such as phone number when press the "Note pad"
during a call.
Memory
Key
Make a rapid call through your contacts in the memory key.
Contacts
Support functions such as search, add, remove and edit.
Browser
Surf the internet through this browser as convenient as a
computer.
Recorder
Provide call recording and the ordinary recording.
17
Alarm
Clock
Set the time and the alarm will remind you at the appointed
time.
Android
settings
It contains the Call settings, Basic settings ,Advanced settings,
VOIP and so on, you can configure some settings in the
corresponding menu.(Android system settings)
Gallery
View photos stored on the phone, or through the USB storage
device storing photos or videos, you can enter the photo gallery
for dynamic playing.
File
Manager
Easily manage the files.
Camera
Take High-definition pictures and make other operations
through the camera.
Message
Like the mobile phone, with messages to write, read and send
function.
Music
Music player. It can play music in various formats.
MWI
All calls will be transferred into voice mail when the MWI is
enabled.
Screen
Calibrate the screen to ensure the accuracy of the screen.

18
Calibration
Calendar
Enter into the calendar and you can view the accurate date.
Call logs
Enter the call logs and you can view all call records. You can
also view the "Incoming Calls", "Outgoing Calls" and "Missed
Calls" records by pressing the menu key.
Ping Box
Ping box is the system's built-in toolbox of network testing tool;
You can use it to check whether the network is unobstructed.
Reboot
Reboot the system more quickly.
ScreenOff
Shut down the screen.
2.5 Desktop Widgets
Operation steps:
Long press the idle screen and the list named "Add to Home Screen" will
appear. Tap the "Widgets" and then choose the widgets you want to display on
the desktop. It is easy to quick operate which saves the time and look beautiful.
Power
indicator:
It can control the power light to turn on or turn off. If the power
light is turned off, like the first picture. As this time whether
making calls or doing other operations, power light is often
destroyed.
If power light is turned on, like the second picture. As this time
when the telephone is called or it has missed calls, the power
light will twinkle;when the telephone is calling or in the idle
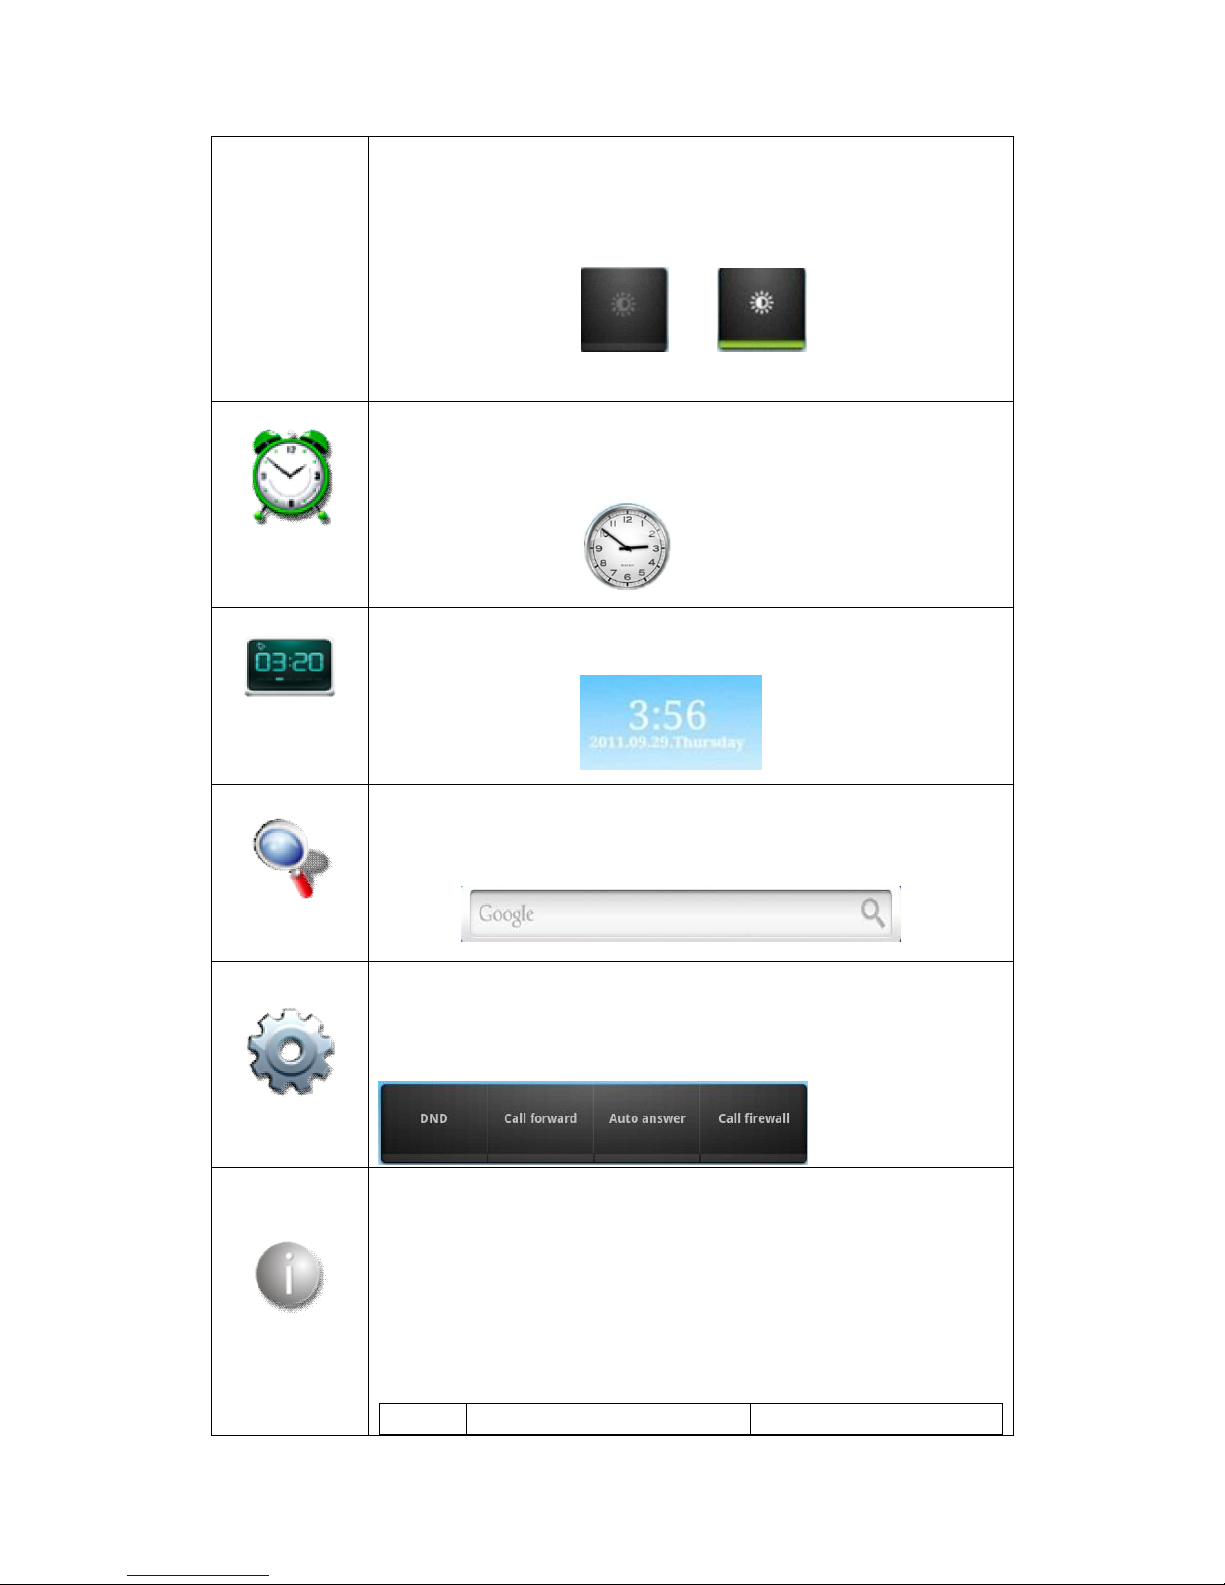
19
status, the power light have been always light;when the
telephone has one call, then another call is ringing, the power
light will twinkle.
Idle screen display:
Light off Light up
Analog
clock:
Analog clock which looks like a watch can be displayed on any
space of the idle screen; It is convenient for you to check the
time.
Idle screen display:
Digital
clock:
Digital clock is displayed with white fonts and time or date
could be seen directly. You can move it to any space.
Idle screen display:
Search:
The default search bar is the Google’s Quick Search Box; You
can enter any content you want to search.
Idle screen
display:
Call set:
It controls four functions: DND, Call forward, Auto answer,
Call firewall. You can make some settings quickly just by
clicking the button to turn on or turn off the function.
Idle screen display:
Phone
status:
This widget shows the network connection status and the
registration status of each line.
network connection status:
It shows the network connection modes and IP information if it
is successful. But it shows "Network disconnect" once it is
failed.
Registration status:
lamp Contents of registration Status

20
gray null not registered
red
phone number@ server
address
Failed
green
phone number@ server
address
successful on the main
server
yellow
phone number@ backup
server address
successful on the
backup server
Idle screen display:
Picture
frame:
You can display anyone of your favorite picture on the idle
screen through this picture frame.
Idle screen display:
Music:
Using this widget, you can listen to your music quickly and
enjoy your life easily at any time.
Idle screen display:
Long press the idle screen, and the "Add to Home Screen" list will be popped
up, tap "Folders" and enter to the "Select folder" list, select the appropriate file
to add to the desktop:
New
folder:
Move the application shortcuts on the desktop to the new folder.
Notes:
Show recently added content's title, tap the title to view the
detailed information.
All
contacts:
Show all contacts in it.
21
Starred
contacts:
Show favorites contacts in it; tap a contact to view detailed
information.
Contacts
with phone
numbers:
Show the contact which has the number and do not show the
contact which has no phone number.
3 Settings
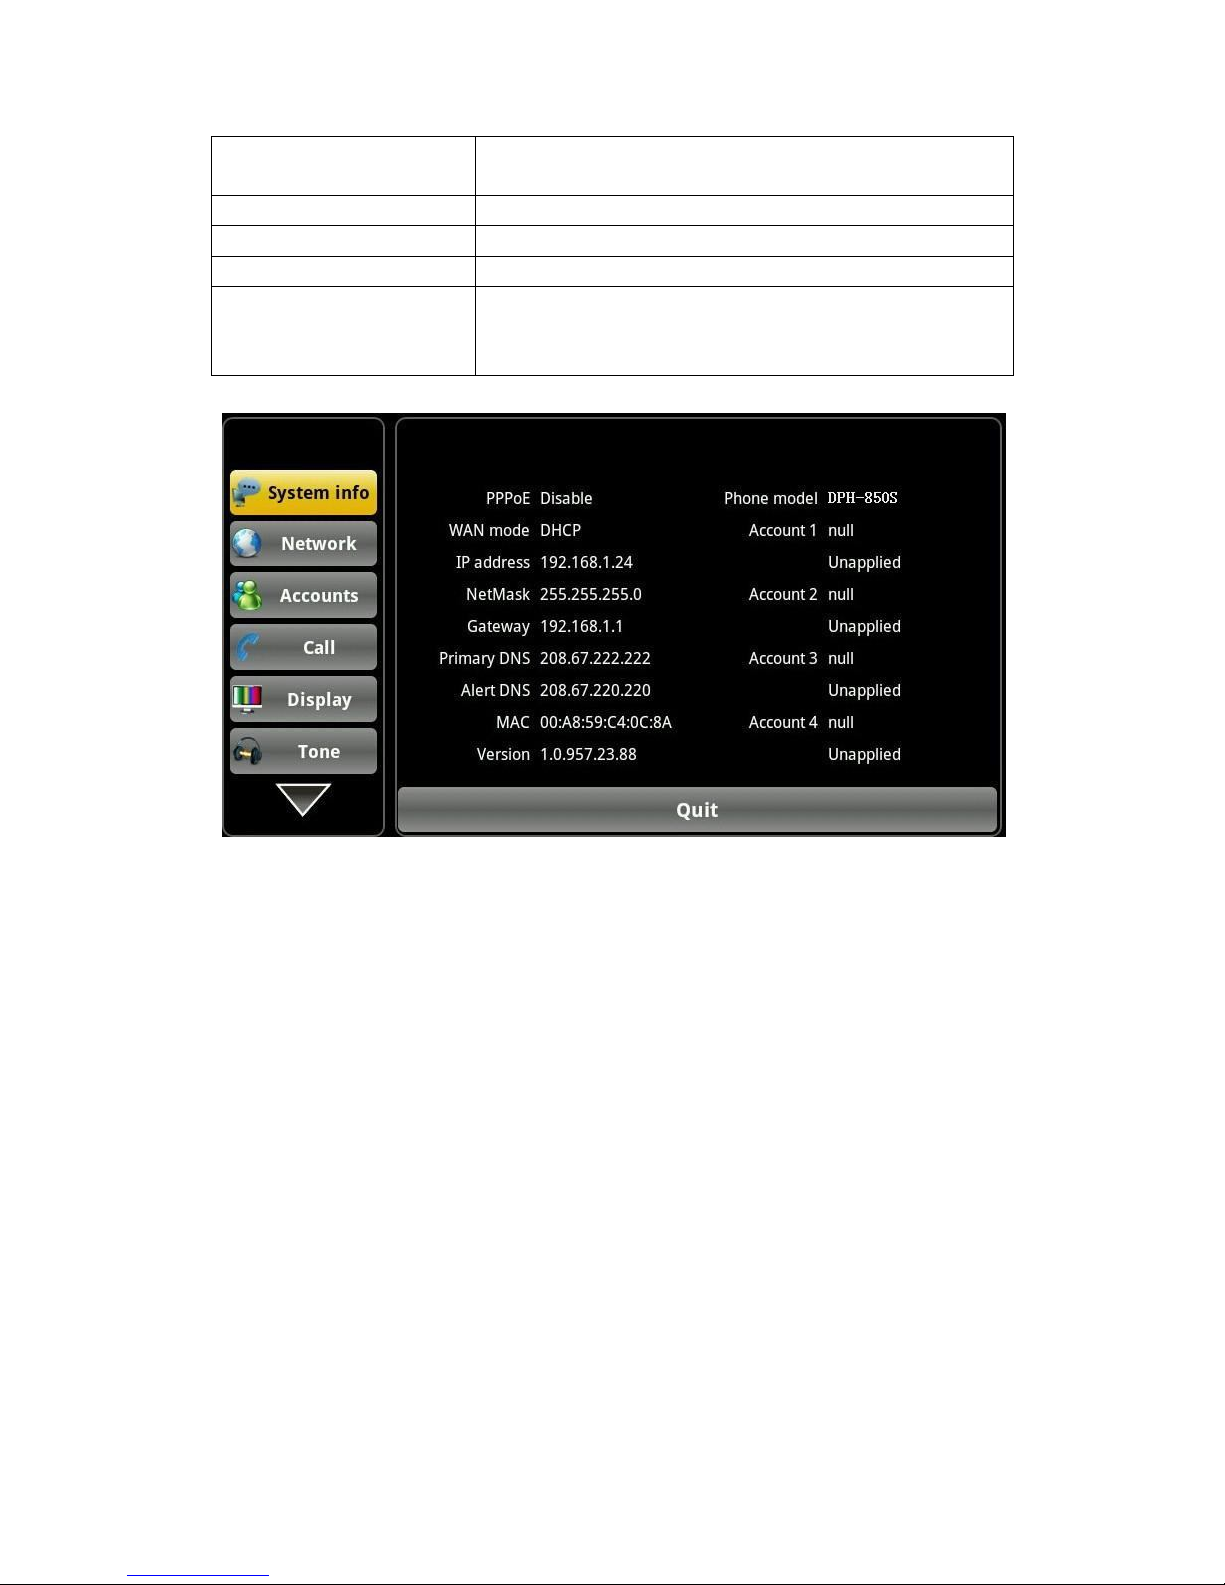
3.1 System info
Tap "Settings" can directly enter the default window "System info". It displays
the current system information state.
Configuration item Meaning
PPPoE
Displays the connection status of the PPPoE, there
are three display states : Disable、Connection and
the IP address.
WAN mode
Displays the selected network mode, DHCP or St
atic
IP.
IP address
Display the IP address of the current network model.
NetMask
Display the Subnet Mask of the current network
model.
Gateway
Display the default gateway of the current network
model.
Primary DNS
Display the primary DNS server address of the
current network model.
22
System info interface
3.2 Network
3.2.1 Network
Tap "Network"----> "WAN mode" interface, the default interface is "DHCP":
click "Save" button to save successfully after the configuration of each
interface is finished. Then a tip box "save successfully" will be shown.
Alert DNS
Display the standby DNS server address of the
current use of the network model.
MAC
Display the current MAC address.
Phone model
Display the current phone model.
Version
Display the current version of the phone.
Account
Display the current configuration of the Account
and more detailed information will be displayed on
the desktop widget.

23
DHCP interface
Static IP interface
Configuration Meaning
DHCP
Select to use DHCP, which means whether to use the
DNS to connect network assigned by the DHCP
server.
Static IP
IP address: Input the assigned IP address.
NetMask: Input the assigned subnet mask.
Gateway: Input the assigned gateway.
Primary DNS: Input the assigned DNS server
address.
Alert DNS: Input the assigned Alert DNS server
address.
24
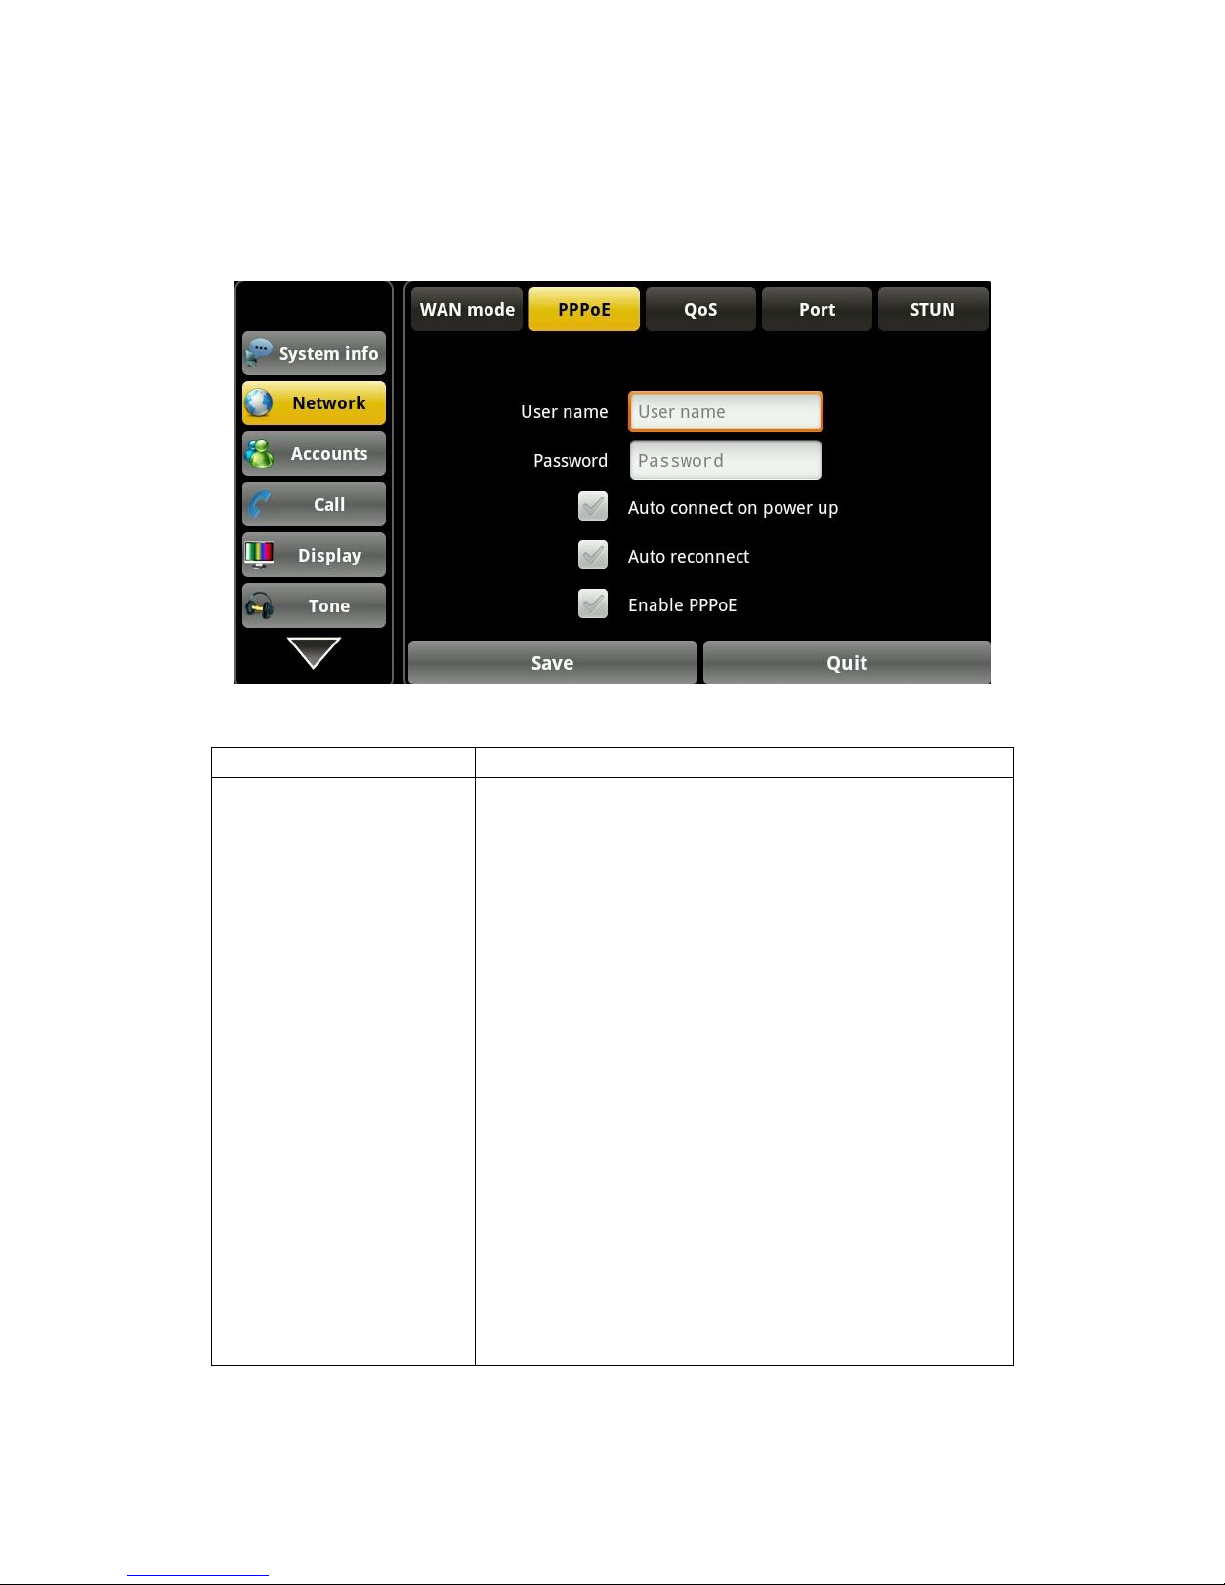
3.2.2 PPPoE
Tap "Network" ----> "PPPoE". After configuring the parameters, you can click
"Save" button to save successfully.
PPPoE interface
Configuration Meaning
PPPoE
User name: Input the assigned PPPoE Username.
Password: Input the assigned PPPoE Password.
Auto connect on power up: Whether to
automatically connect PPPoE on boot.
Auto reconnect When connect failed whether to
automatically connect PPPoE.
Enable PPPoE: Whether to enable PPPoE.
After the parameter configuration is completed, if
you do not select "enable PPPoE", then you can
click on the "save" button, it only saves the
configuration parameters; but if you select "enable
PPPoE" and click "save" button, it can
immediately use the PPPoE mode to connect the
network, at the same time it will pop up PPPoE
connection box, clicking the "disconnected" will
pop up PPPoE configuration frame; if you click
"connect" ,it will reconnect PPPoE; if you click
"Cancel" button, it will only save the
configuration parameters which have been set, not to
enable PPPoE connection.

25
3.2.3 QoS
Tap "Network"----> "QoS", after selecting or modifying the default settings
click the "Save" button to save successfully.
QoS:Quality of Service is a security mechanism of network. It is used to solve
the network delay and congestion of a technology. For the network service,
quality of service including the transmission bandwidth, transmission delay,
data packet loss rate and so on. In the network it can ensure the transmission
bandwidth, reduce the transmission delay, and reduce the data packet loss rate
and delay jitter and other measures to improve the quality of service.
QoS-DSCP Settings
DSCP is one standard of QoS. It can set the priority of Voice, Video and
Signal.
Configuration item Meaning
QoS- DSCP
Enable DSCP: Enable/Disable DSCP.
Set Voice DSCP: Set the number of Voice DSCP.
Set Video DSCP: Set the number of Video DSCP.
Set Signal DSCP: Set the number of Signal DSCP.
Click Next to enter the QoS-VLAN page,
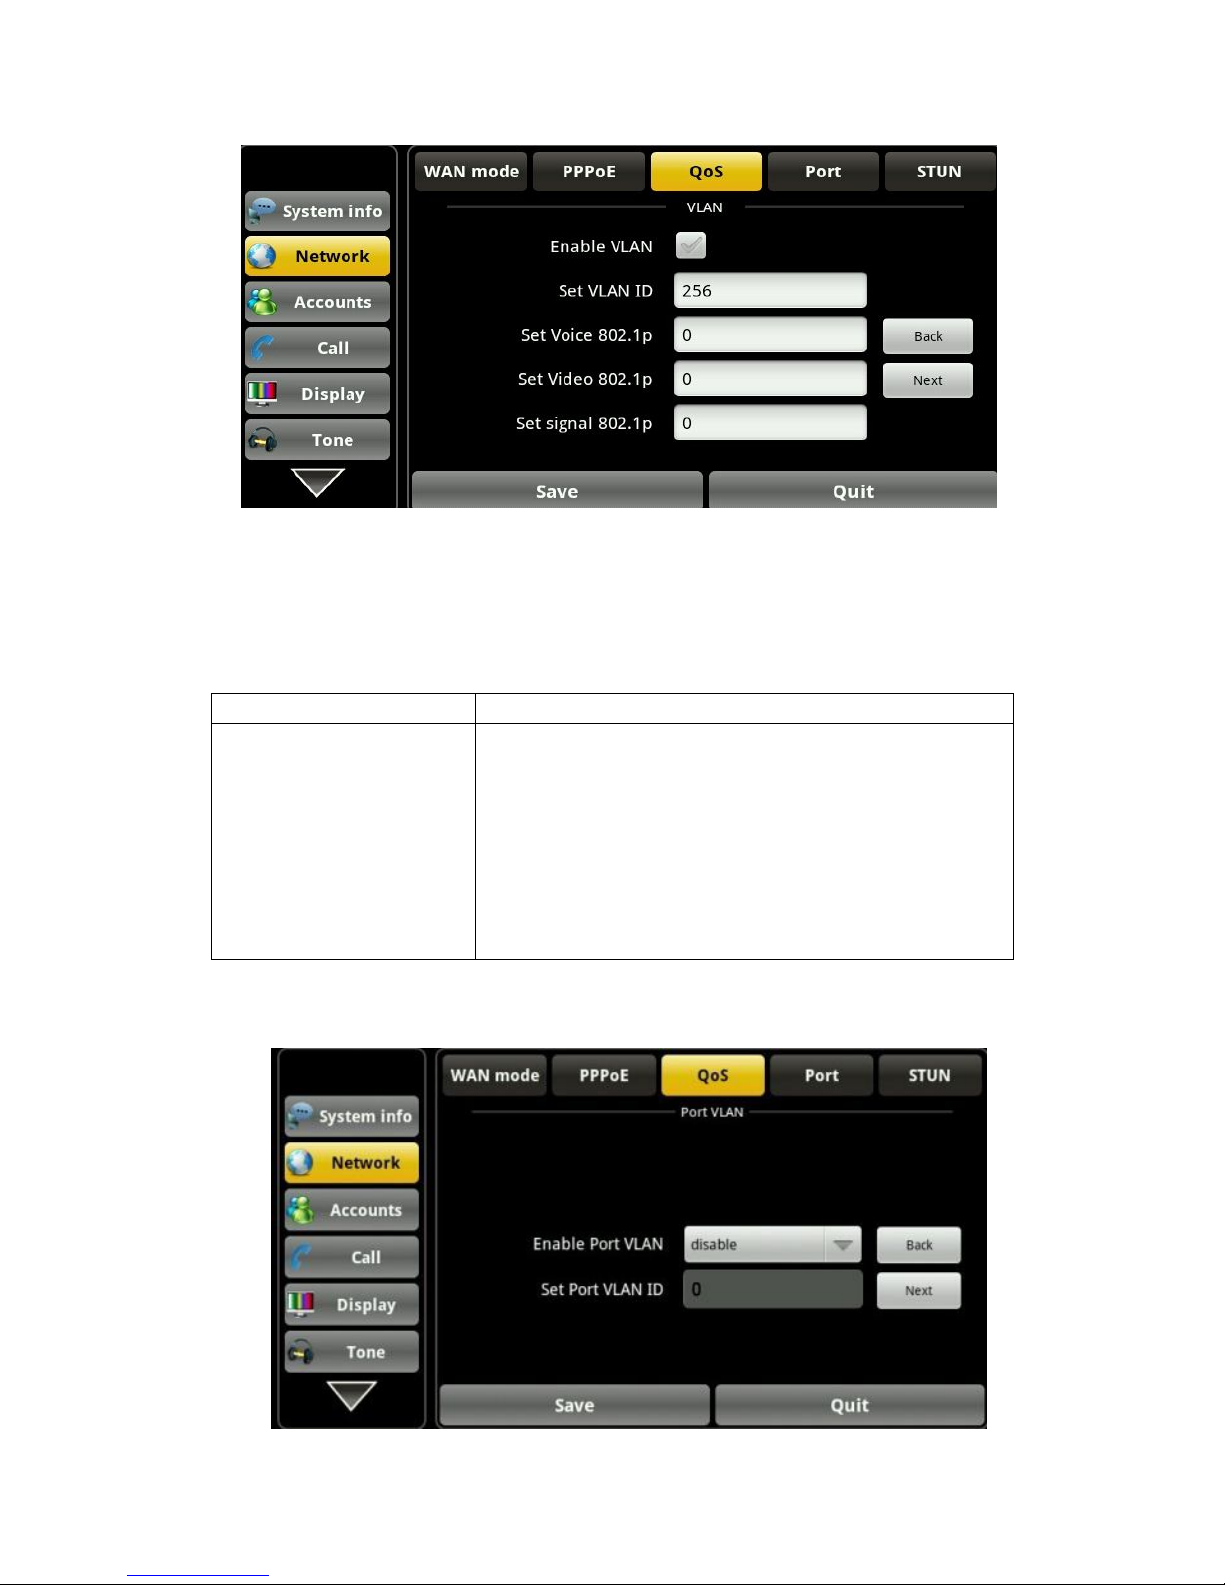
26
QoS-VLAN interface
VLAN is Virtual Local Area Network.
Enable VLAN, then you can set VLAN ID,from 0 to 4095; you can set the
priority of 802.1p from 0 to 7.
Note: It must enable DSCP before you set 802.1p .
Configuration item Meaning
QoS- VLAN
Enable VLAN: Enable/Disable VLAN.
Set VLAN ID: Set the number of VLAN ID.
Set Voice 802.1p: Set the priority number of Video
802.1p.
Set Video 802.1p: Set the priority number of Video
802.1p.
Set Signal 802.1p: Set the priority number of Signal
802.1p.
Click Next,enter QoS-Port VLAN interface

27
Port VLAN interface
Port VLAN is based on port VLAN, in the same VLAN port to communicate
with each other.
Configuration item Meaning
QoS- Port VLAN
Enable Port VLAN: Enable/Disable Port VLAN.
Untagged: Disable Port VLAN.
Disable: Follow the ID number of WAN.
Enable: Enable Port VLAN and set the Port
VLAN ID different from WAN.
Set Port VLAN ID: Set the number of Port VLAN
ID different from WAN.
Click Next, enter LLDP interface,
LLDP interface
Configuration item Meaning
QoS- Port LLDP
Enable LLDP: Enable/Disable LLDP.
Enable LLDP Learn: After enabling LLDP Learn,
telephone can automatically learn the number of
DSCP, 802.1p, VLAN ID of the network. If the
number is different from the number of network,
telephone will change its own value to the value of
the network.
Set LLDP Timer: The time interval of sending
LLDP Packet. Default is 60.

28
3.2.4 Port
Tap "Network" ----> "Port", after selecting or modifying the default settings
click "Save" button to save successfully.
Port interface
Configuration item Meaning
Port Media initial port(10000-60000):
Set the telephone’s media initial port. This port is
distributed to dynamic allocation.
Media port quantial:
Set the maximum number of allocated RTP port, the
default is 200.
3.2.5 Stun
Tap "Network" ----> "Stun", after selecting or modifying the default settings
click "Save" button to save successfully.
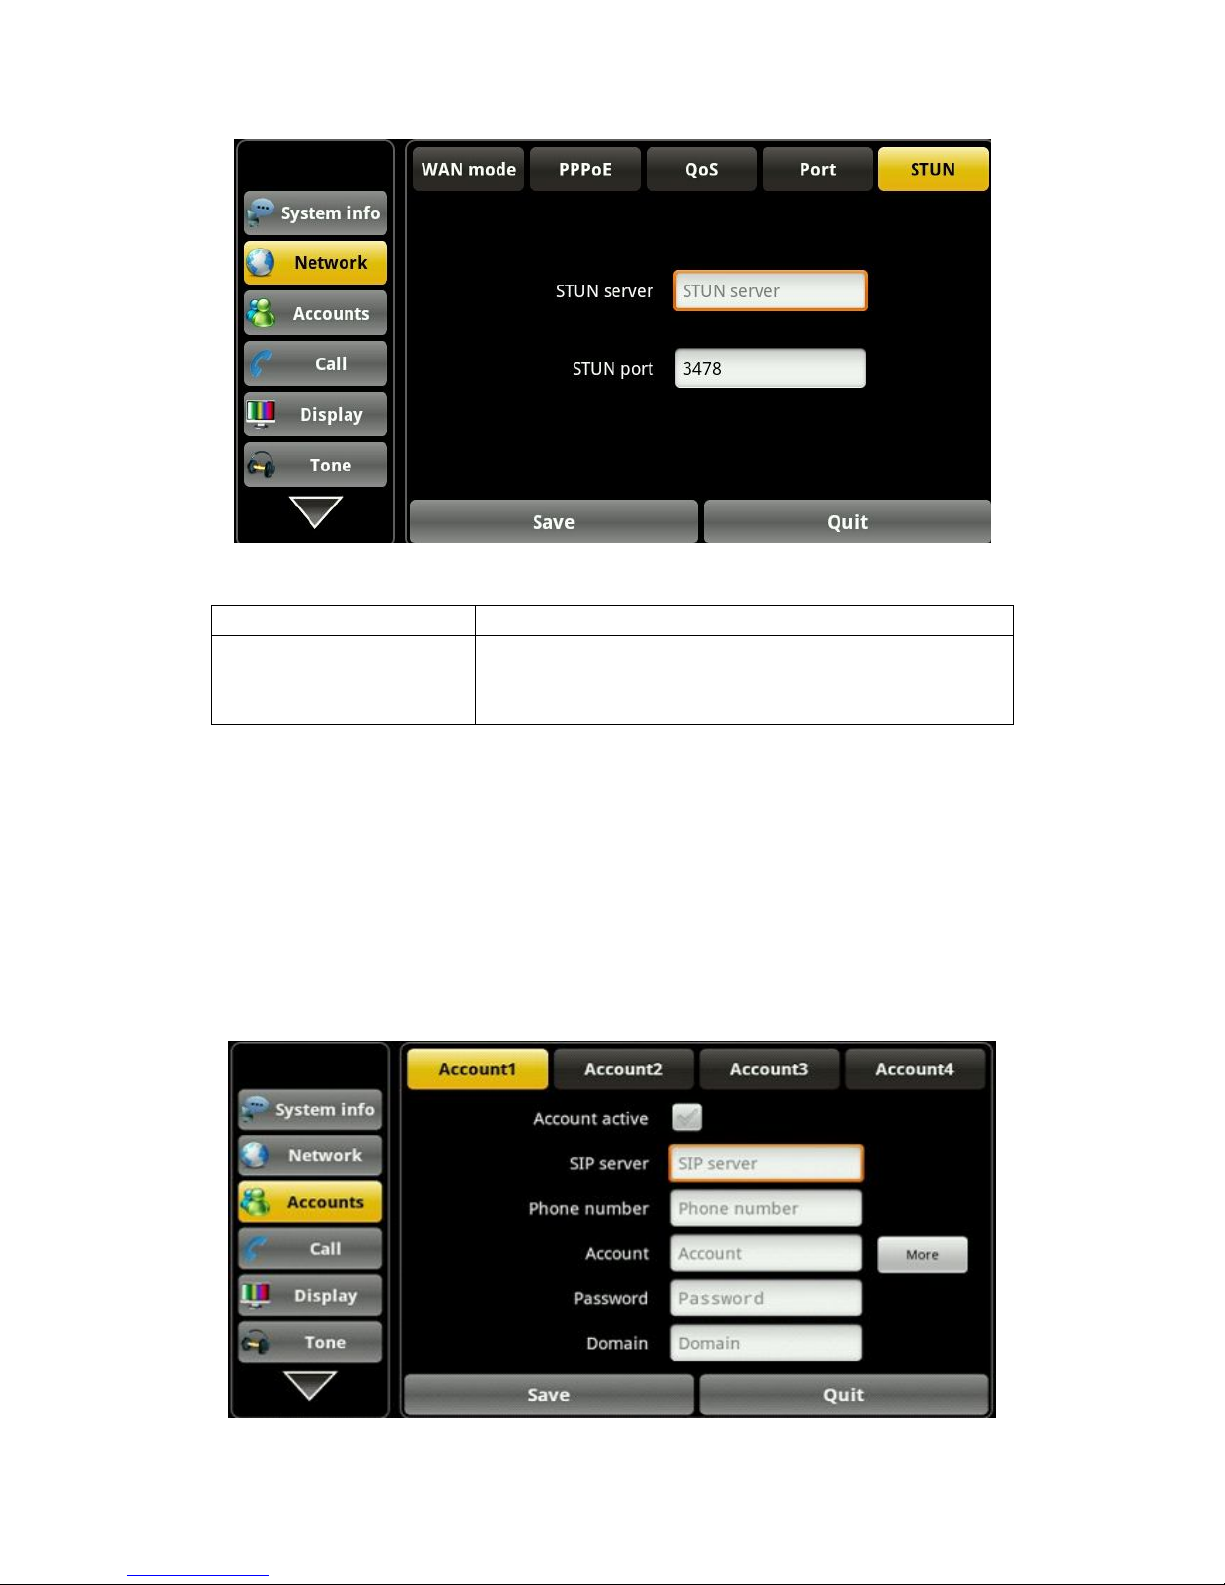
29
Stun interface
Configuration item Meaning
Stun
Stun Server: Configure the SIP STUN server
address.
Stun port: Configure the SIP STUN server port.
3.3 Account
Tap "Account"---->"Account1", after setting the parameters you can click the
"More" button to switch to the next page to set; it has a total of five interfaces,
after all the parameters are set, you can click "Save" button to save successfully.
(You can also save single page.)
(Note: The Account1, 2, 3, 4 has the same settings.)
 Loading...