

D-Link DLM-3500 Quick Installation Manual

DLM-3500 Quick Installation Guide
1
1. Introduction
1.1 Preface
This Quick Installation Guide provides instructions and reference material for getting started with the
DLM-3500. The Guide will illustrate how to install the DLM-3500 and configure its basic settings.
1.2 Package Contents
DLM-3500 x 1
CD-ROM x 1
Quick Installation Guide x 1
Console Cable x 1
Ethernet Cable (Crossover) x 1
Switching US Power Adapter x 1
Power Translator (for EU/UK/AU only) x 1
DLM-3500 Quick Installation Guide
2
1.3 System Overview
1.3.1 Hardware Introduction
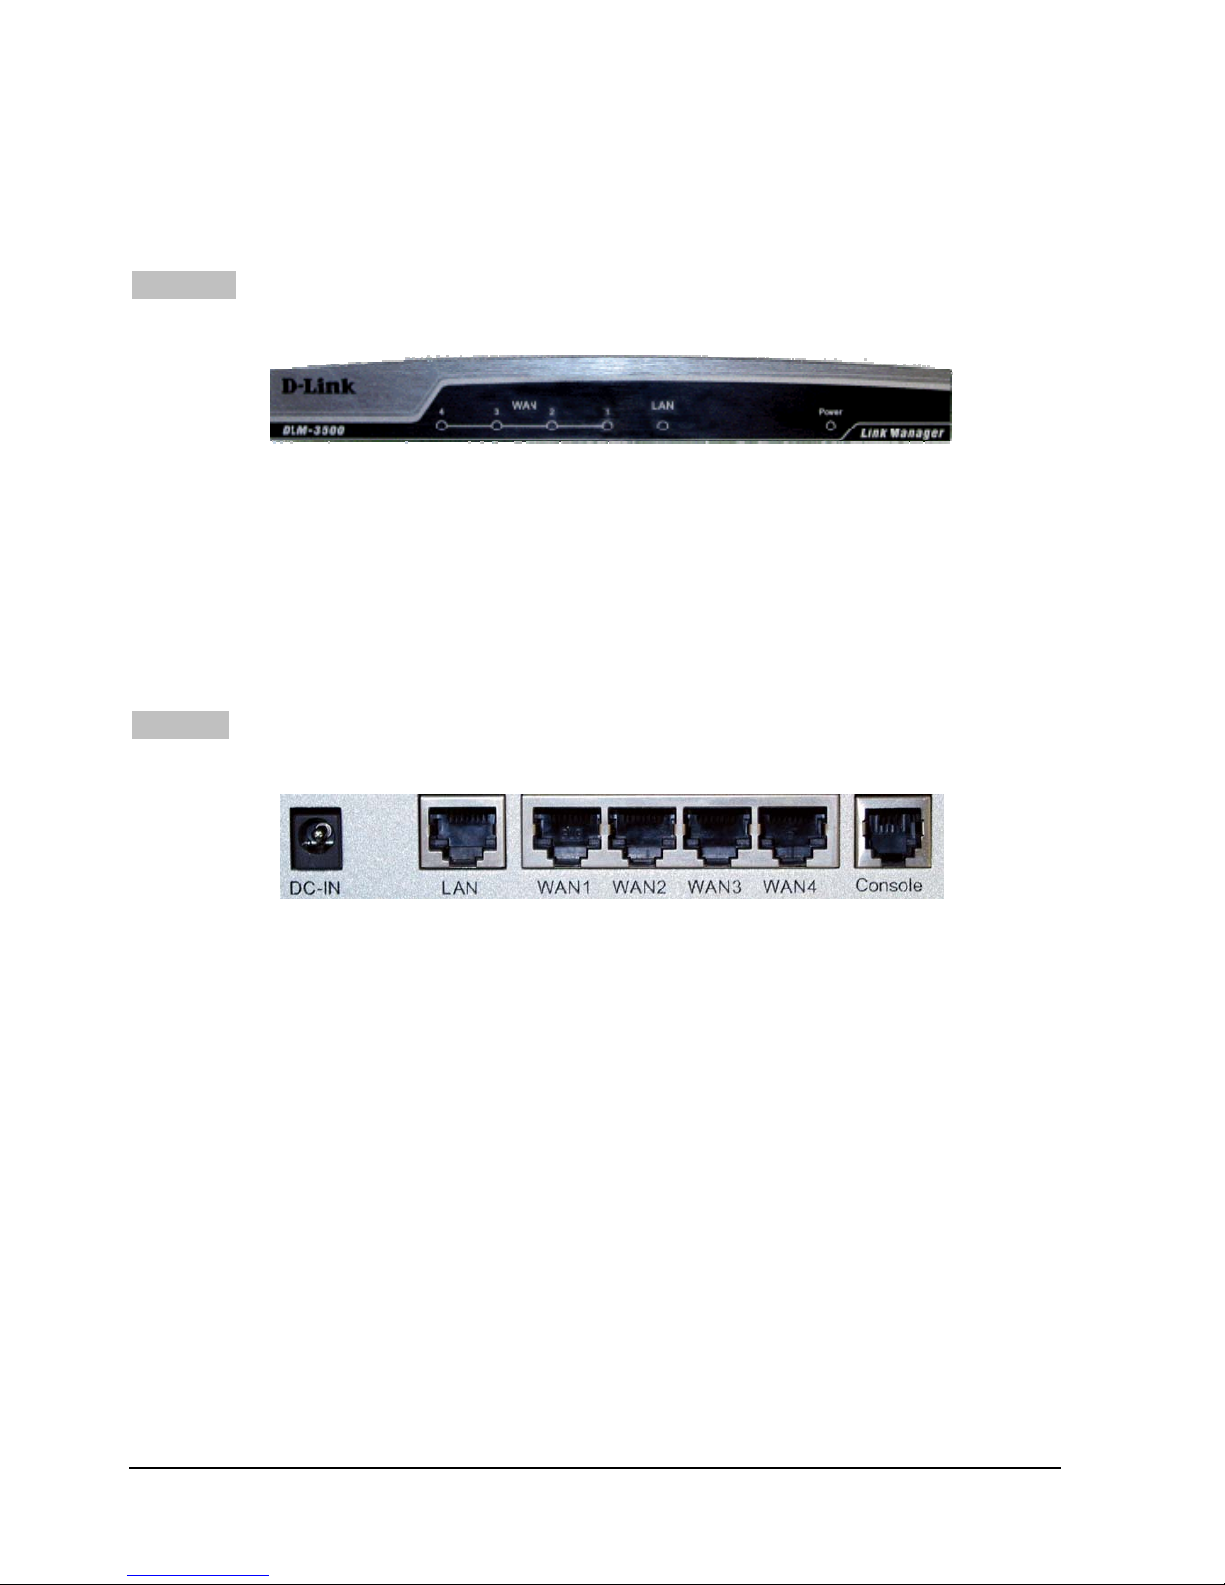
Front Panel
LED’s:
1. WAN1/WAN2/WAN3/WAN4: OFF indicates the line is not connected, and ON indicates the line is
connected.
2. LAN: OFF indicates the line is not connected, and ON indicates the line is connected.
3. Power: ON indicates that power is on and OFF indicates that power is off.
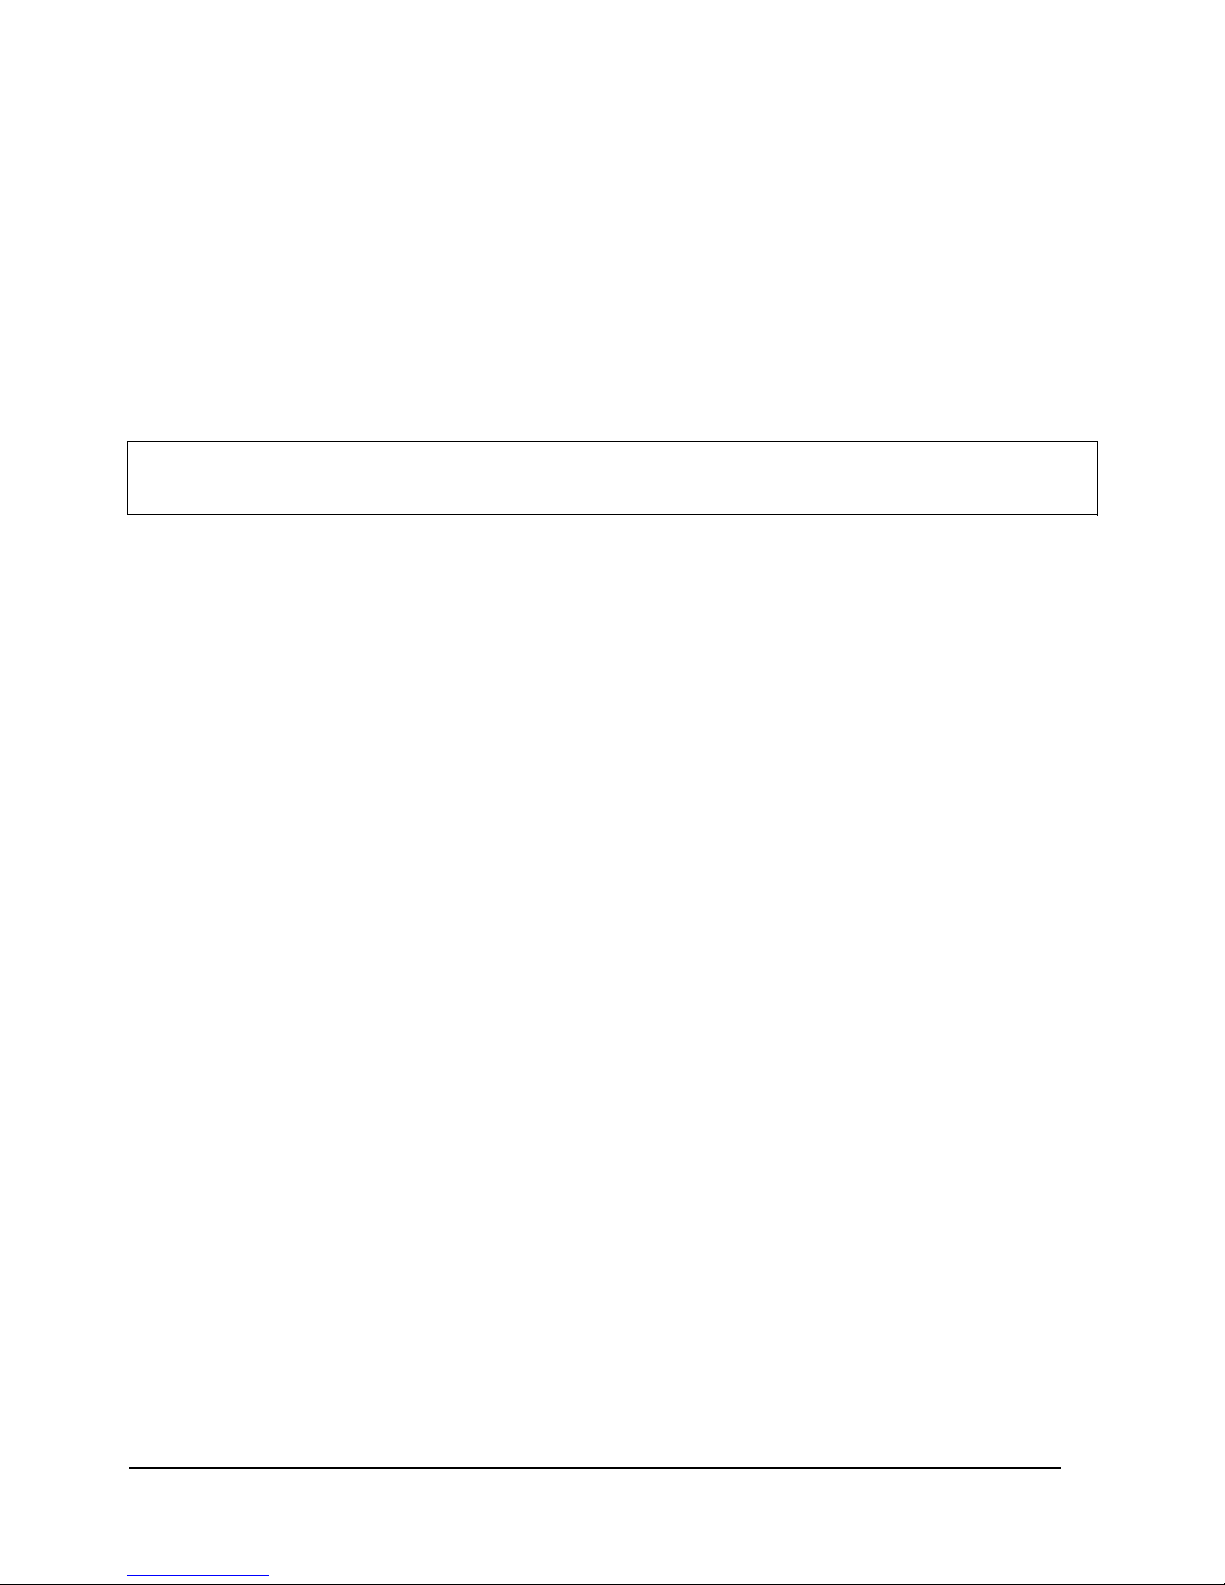
Rear Panel
DC-IN: The power cord attaches here.
LAN: The LAN port is connected to internal private network for users access Internet. Default LAN port IP is
192.168.0.1. By connecting to LAN port, user could access the web management interface to configure DLM-3500.
WAN1/WAN2/WAN3/WAN4: The four WAN ports are connected to a network which is not managed by the
DLM-3500 system, and this port can be used to connect the ATU-Router of ADSL, the port of Cable Modem, or the
Switch or Hub on the LAN of a company. Default WAN1/WAN2/W AN3/WAN4 port IPs are 192.168.1.1, 192.168.2.1,
192.168.3.1 and 192.168.4.1 respectively. Example in next chapter leads you to configure WA N ports to correspond
to your network environment.
Console Port: The system can be configured via HyperTerminal. The terminal’s configuration must be 9600bps, 8,
N, 1, flow control - none.
DLM-3500 Quick Installation Guide
3
1.3.2 Hardware Installation
1. Connect the power cord to the power socket on the rear panel. The Power LED will light up.
2. Connect an Ethernet cable to the WAN1 Port on the rear p anel. Connect the other end of the Ethernet
cable to the WAN connection of Internet.
3. Connect an cross-over Ethernet cable to LAN Port on the rear panel. The LAN port is referred to as
Private LAN and the administrator can enter the web management interface to perform
configurations via this Private LAN. Connect the other end of the Ethernet cable to a client’s PC.
Attention: Usually, a straight RJ-45 can be applied if the DLM-3500 is connected to a hub/computer
which supports automatic crossover.

DLM-3500 Quick Installation Guide
4
2. Getting Started
While getting started with DLM-3500, you may encounter with complicated settings which may hinder your
progress. This chapter serves to explain the basic functionalities of DLM-3500 and how to operate and
configure the system.It will also cover related subjects in network structures and hardware installation which
will help you during your setup of DLM-3500.
2.1 Preparation
Before you get started, there are few things you need to know:
1. The position of the DLM-3500 LAN Port: It has five network interfaces and the last port is LAN Port which
is marked on the machine.
2. The default IP address for LAN interface is 192.168.0.1
3. Your IP addresses for computers in the LAN should be changed to 192.168.0.2 (or 192.168.0.x) and
subnet mask 255.255.255.0 in order to avoid conflicts with the default LAN port.
4. Check your network environment carefully before installing DLM-3500. A well-designed network
environment with the necessary information such as your network structure, IP addresses, and network
segments information will help you complete the setup of DLM-3500 parameters.
5. DLM-3500 uses a web-based management user interface (Web-based UI). Due to internal design
constraints, you have to use Microsoft Internet Explorer 6.0 (IE 6.0), or higher to access the Web-based
UI. A screen resolution of 800x600 or higher is recommended.
DLM-3500 Quick Installation Guide
5
2.2 Access to the Web-based UI
The Web-based UI enables you to easily perform every configuration task. Fo llow th e steps below to access
the Web-based UI.
1. Connect your PC Ethernet LAN interface to LAN port of DLM-3500 with a cross-over cable, which is in
standard packing. The default management LAN port of DLM-3500 is LAN port.
2. After powering on DLM-3500, the LED of LAN port will turn on. This indicates that it is on-line.
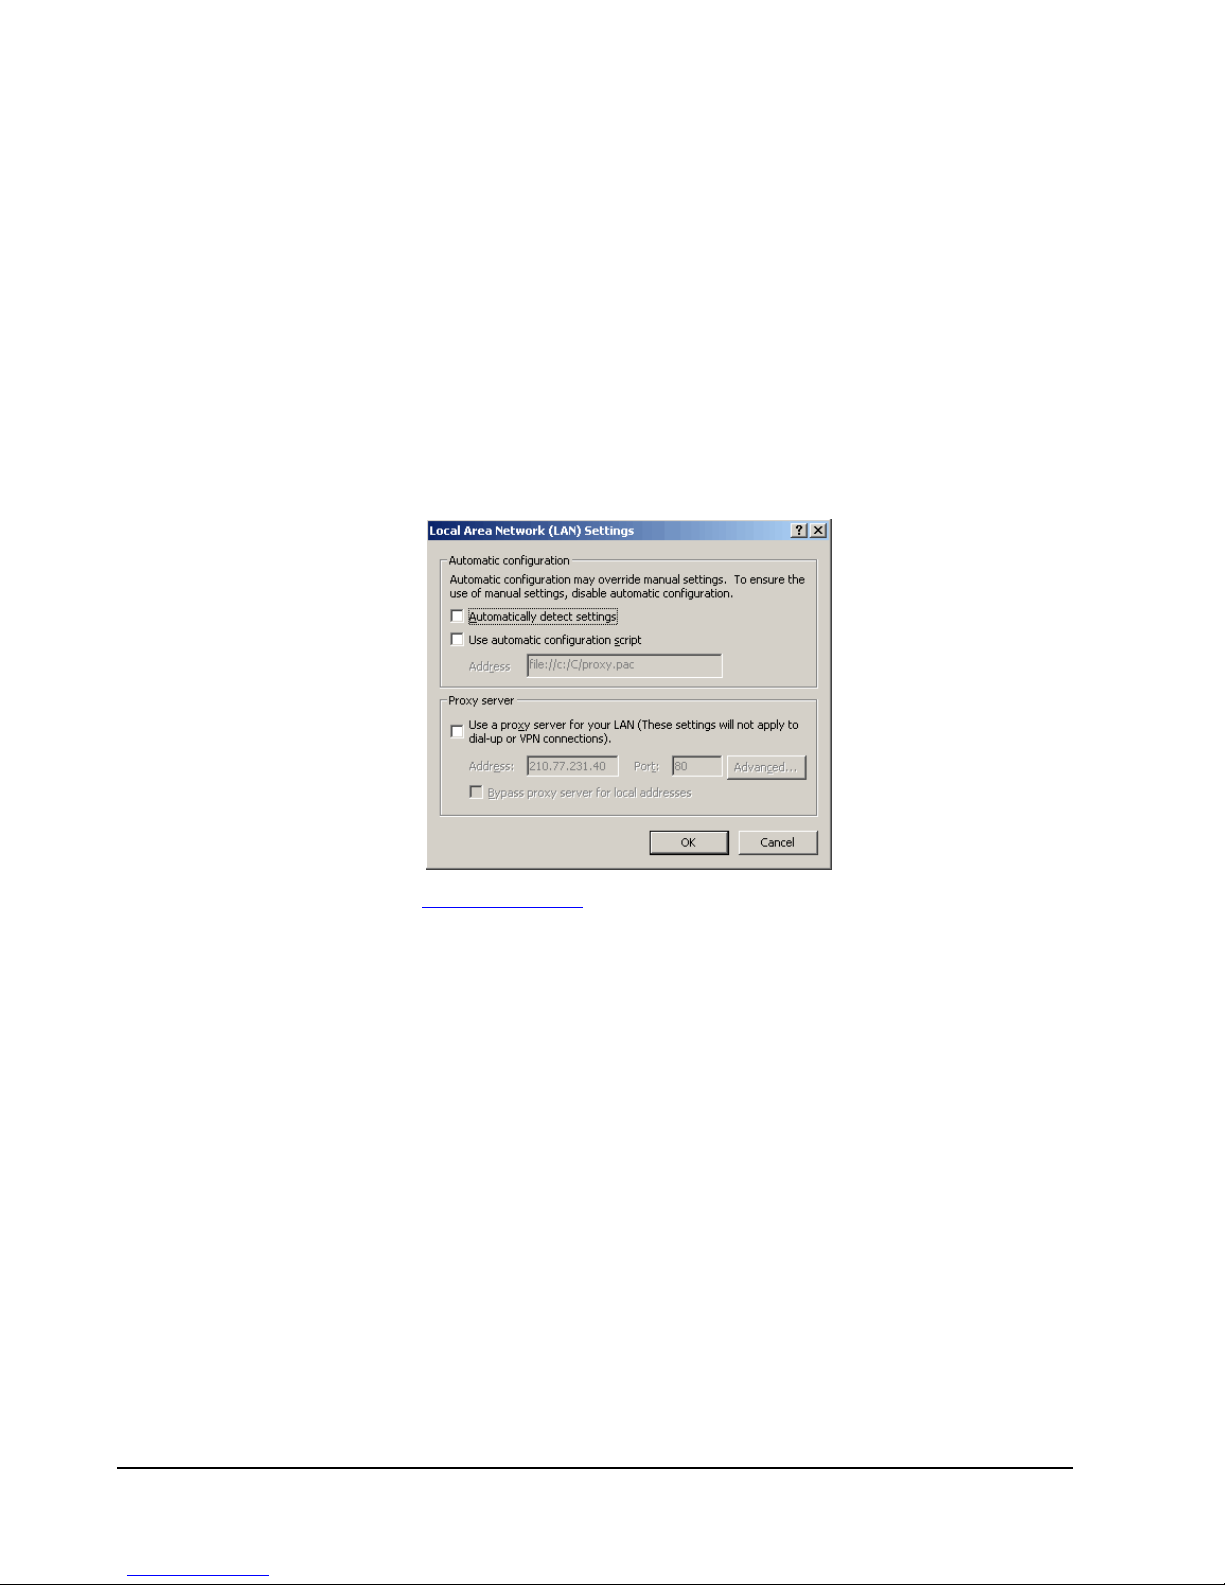
3. Check that the proxy setting of your IE browser is turned off, no proxy server is required in order to
access DLM-3500’s Web-based UI. Open IE, select Internet Option on the menu bar of Tools, click the
Connection tab, and then click LAN settings to open Local Area Network Settings dialog box, under
Proxy server, make sure proxy server is not selected.
4.
5. In the URL filed of IE, type in http://192.168.0.1
to access the Web-based UI.
6. DLM-3500 provides two types of user accounts:
admin – Has privileges to monitor and modify system parameters.
monitor – Has privileges to monitor only.
DLM-3500 allows up to 1 administrator and 1 monitor to access concurrently.
Default password for admin and monitor are “admin” and “monitor”, respectively. We strongly recommend
you to modify the passwords at the first time you log into the web-based UI.
 Loading...