

Page 1
Using the Configuration Menu
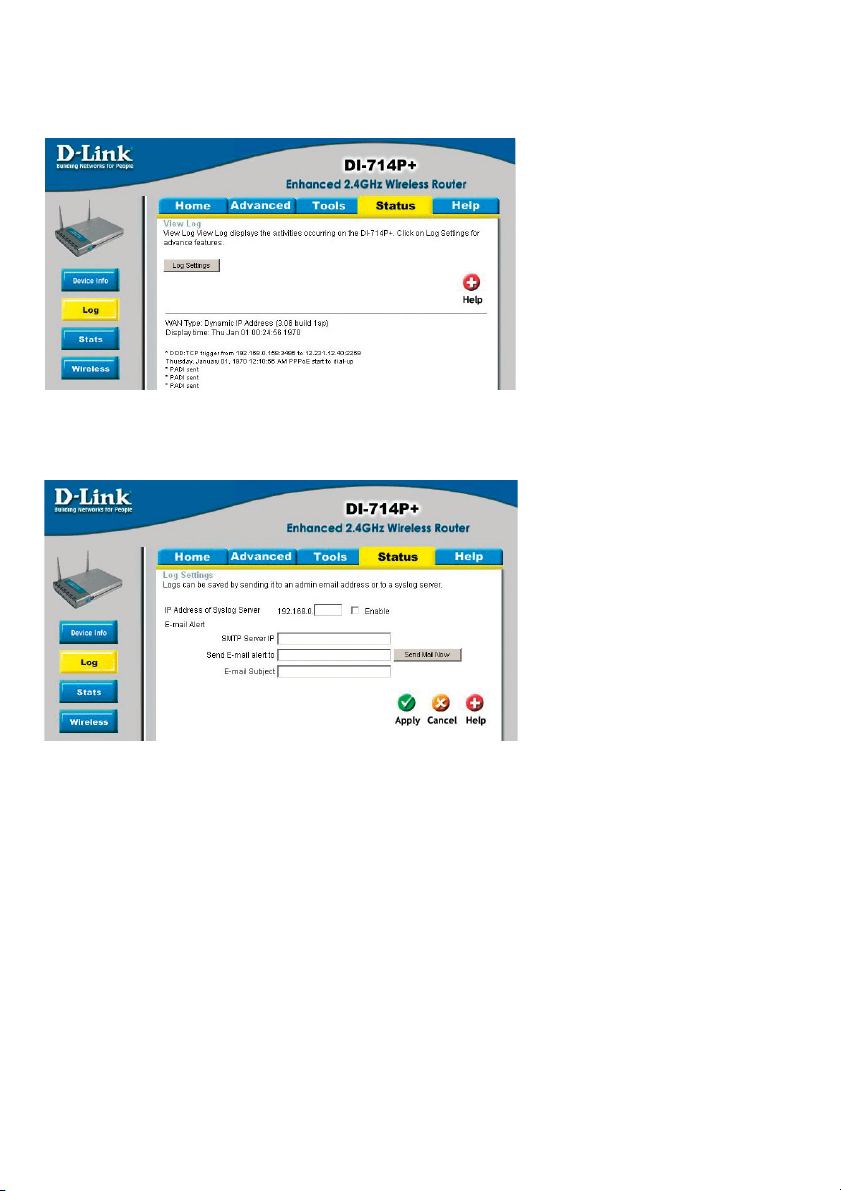
Status > Log
This log page displays logs of activities and events that are occuring through the
DI-714P+
Status > Log Settings
Syslog Server-
E-Mail Alert-
SMTP Server IP-
Send E-Mail alert to-
E-Mail Subject-
Enter in the IP address of a syslog server within the network.
Click Enable to activiate the policy. The DI-714P+ will send all
of it’s logs to the specified syslog server.
The DI-714P+ can be set up to send the log files to a specific
email address.
Enter in the IP address of the mail server.
Enter in the email address of the recipient who will receive
the email log.
Enter in the email subject. Click on Send Mail Now to send
the email log.
38
Page 2
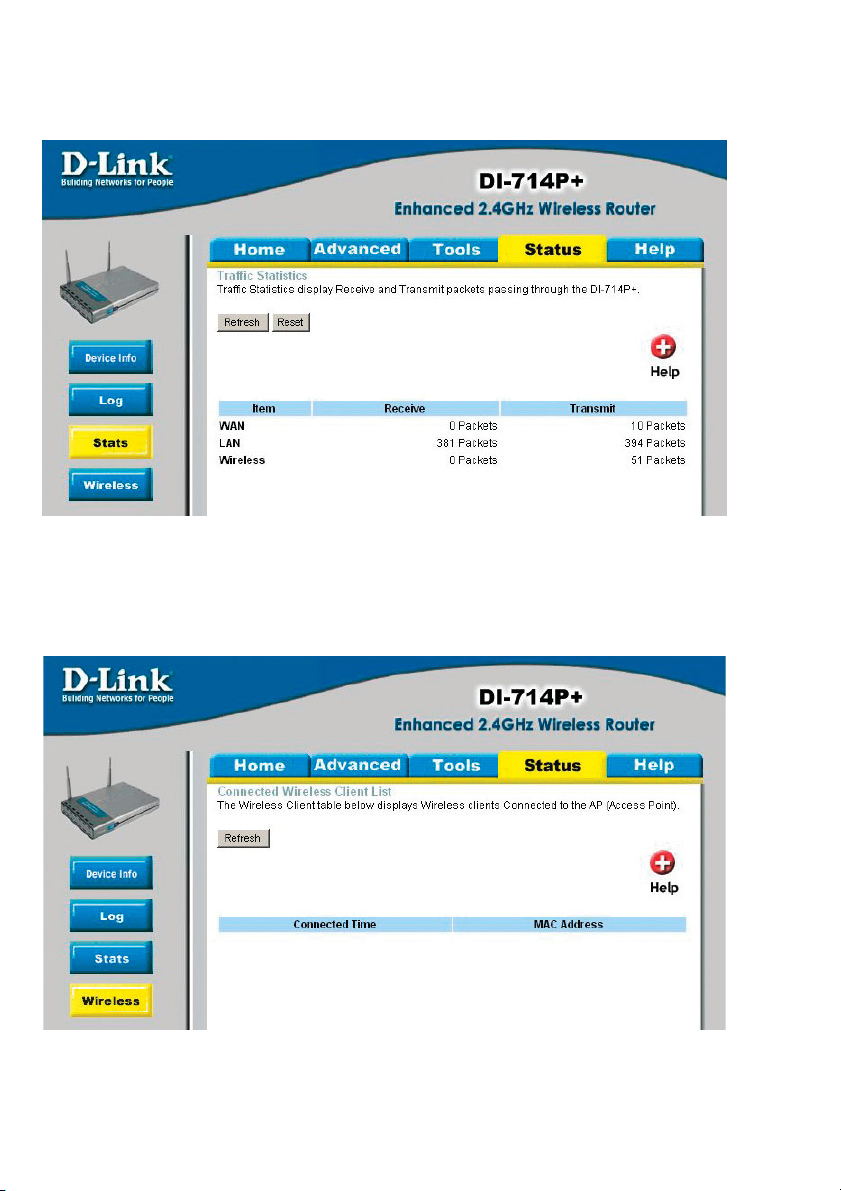
Using the Configuration Menu
Status > Stats
This screen displays the Receive and Transmit packets passing through the DI-714P+.
Click on Refresh for the most recent information and Reset to clear the counter.
Status > Wireless
This screen displays the connection time and the MAC Address of the connected wireless clients. Click on Refresh for the most recent information..
39
Page 3
Using the Configuration Menu
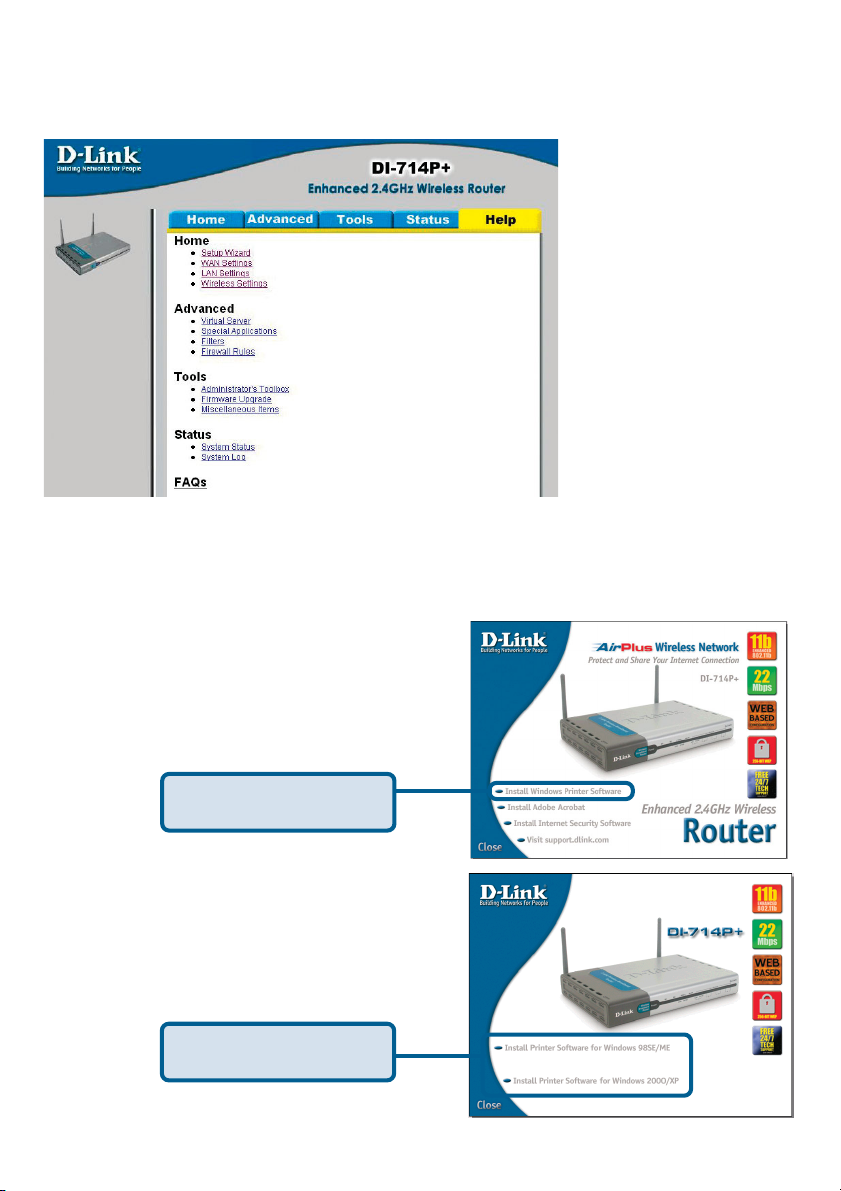
Help
This screen displays the complete Help menu. For help at anytime, click the Help tab
in the Configuration menu.
Installing the Print Server Software
Insert the installation CD-ROM into the
CD-ROM drive. The following window
will be shown automatically. If it is not,
please run “autorun.exe” on the CDROM.
Click Install Windows
Printer Software
Select your Windows
operating system
40
Page 4
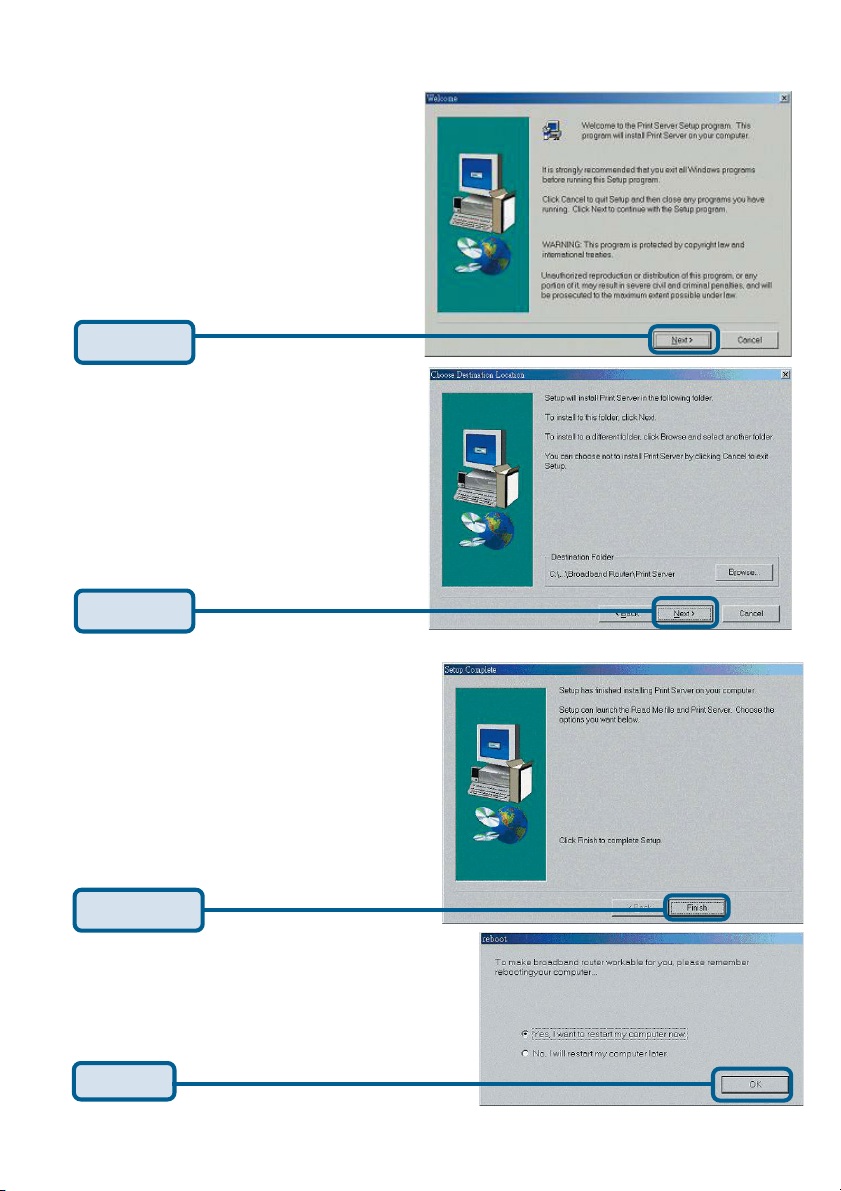
Installing the Print Server Software (continued)
Wait until the following Welcome
dialog appears.
Click Next
Select the destination folder.
Click Next
Then, the setup program will begin
to install the programs into the
destination folder.
When the following window is
displayed.
Click Finish
Click OK
After rebooting your computer, the software installation procedure is finished.
41
Page 5
Configuring on Windows 98se/Me Platforms
After you finish the software installation
procedure, your computer will be capable
of network printing provided by the DI714P+. For convenience, we call the
printer connected to the printer port of the
DI-714P+ a printer server. On a Windows
95/98 platform, open the Printers window
in the My Computer menu.
Now, you can configure the print server of
the DI-714P+:
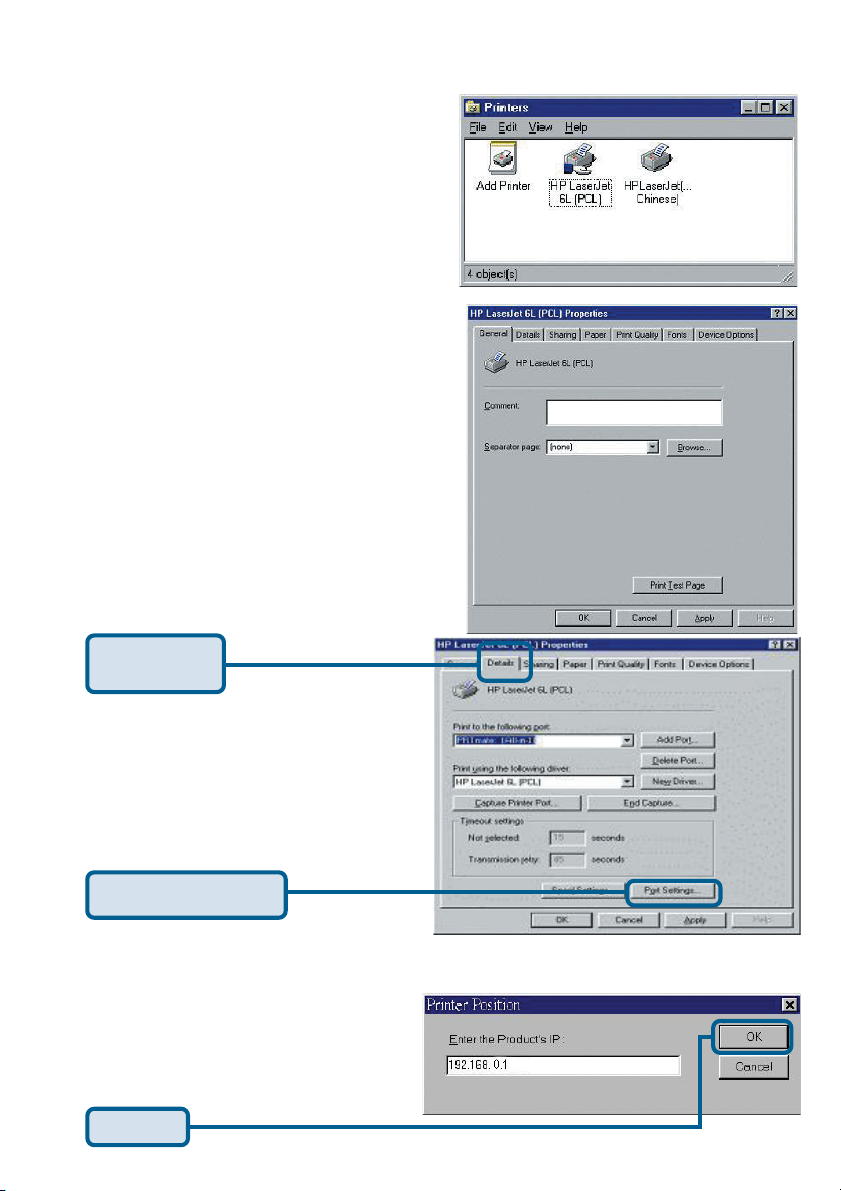
Find out the corresponding icon of your
printer server, for example, the HP
LaserJet 6L. Right click on that icon,
and then select Properties.
The following screen appears:
Click on the
Details tab
Choose the “PRTmate: (All-in-1)”
from the list attached at the Print
To item. Be sure that the Printer
Driver item is configured to the
correct driver of your printer server.
Click Port Settings
Type in the IP address of the
DI-714P+.
Click OK
42
Page 6
Configuring on Windows 2000/XP Platforms
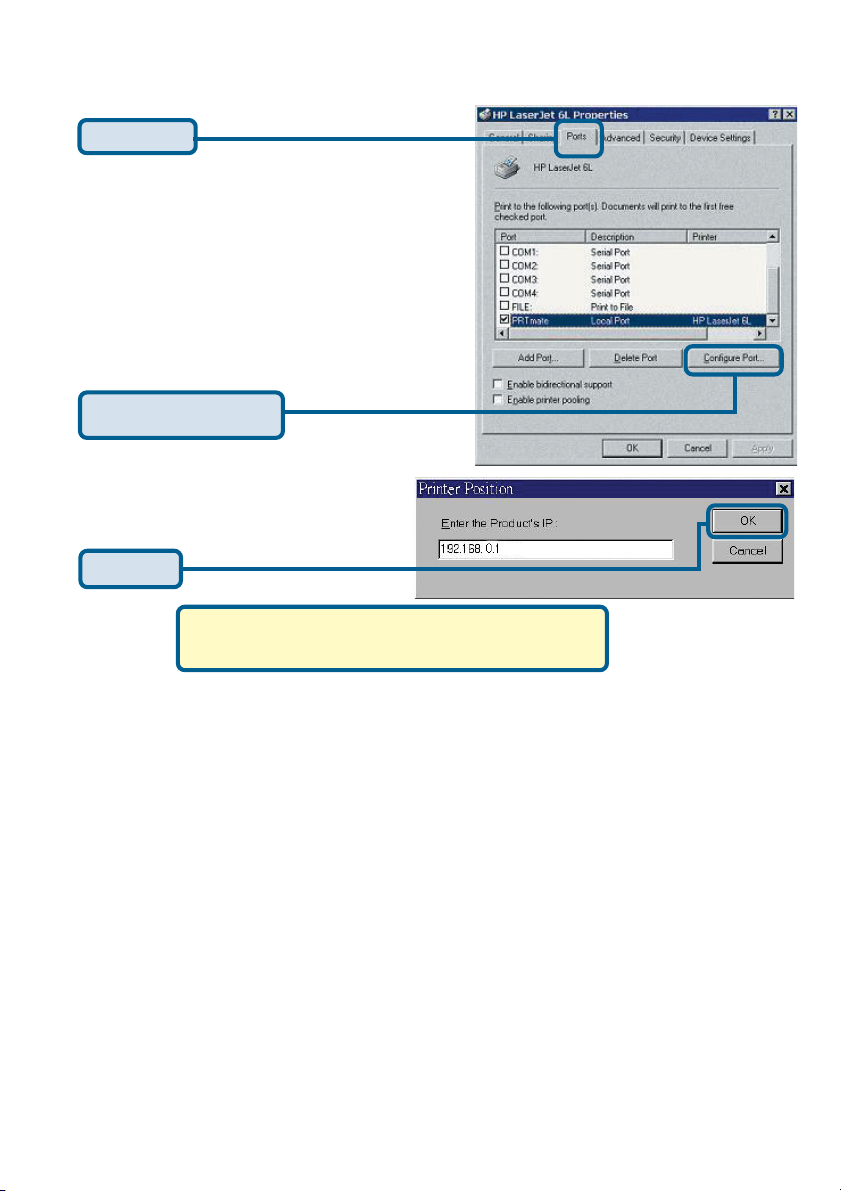
Click Port
The configuration procedure for a
Windows 2000/XP platform is similar to
that of Windows 95/98 except the
screen of printer Properties:
Click Configure Port
Type in the IP address of the
DI-714P+.
Click OK
(Note: Screen shots are taken in Windows 2000,
similar screens will appear in Windows XP.)
43
Page 7
Networking Basics
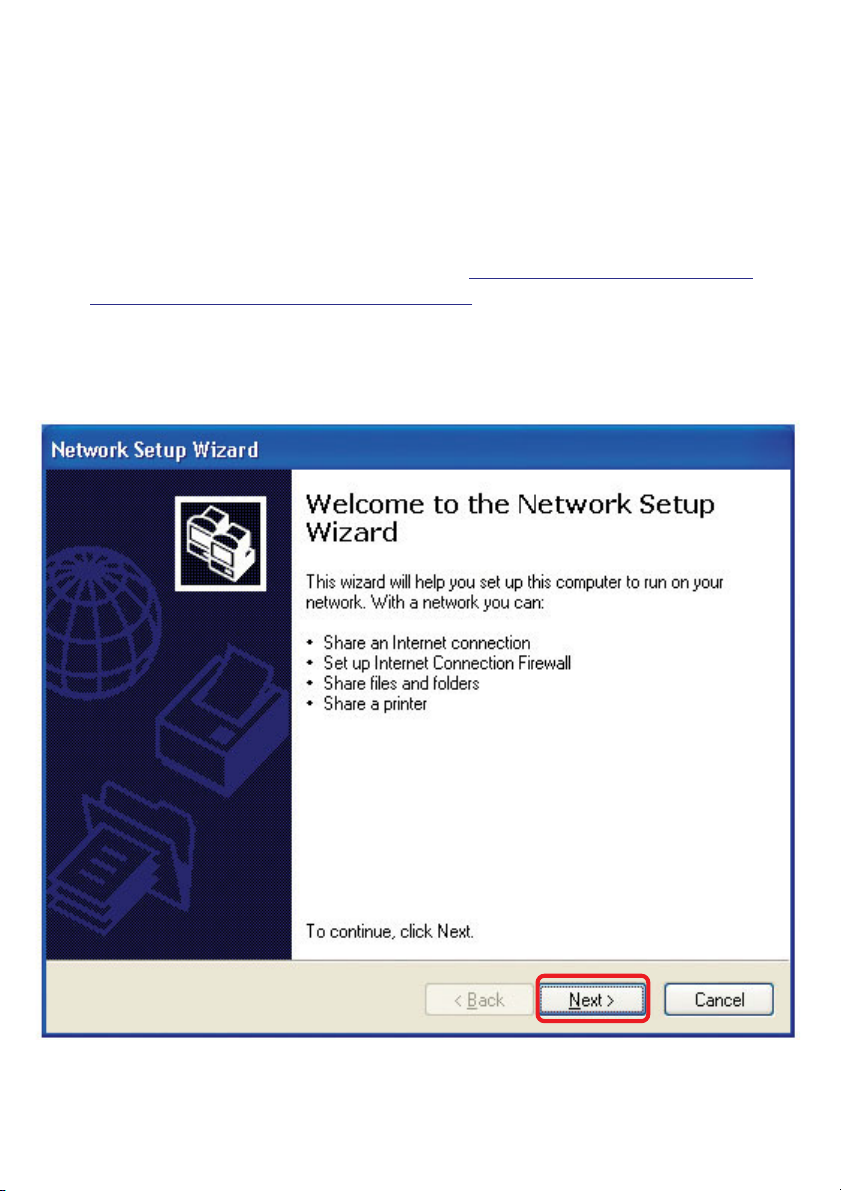
Using the Network Setup Wizard in Windows XP
In this section you will learn how to establish a network at home or work,
using Microsoft Windows XP.
Note: Please refer to websites such as
and http://www.microsoft.com/windows2000 for information about networking
computers using Windows 2000, ME or 98.
Go to Start>Control Panel>Network Connections
Select Set up a home or small office network
http://www.homenethelp.com
When this screen appears, Click Next.
44
Page 8

Networking Basics
Please follow all the instructions in this window:
Click Next
In the following window, select the best description of your computer. If your
computer connects to the internet through a gateway/router, select the
second option as shown.
Click Next
45
Page 9

Networking Basics
Enter a Computer description and a Computer name (optional.)
Click Next
Enter a Workgroup name. All computers on your network should have the
same Workgroup name.
Click Next
46
Page 10

Networking Basics
Please wait while the Network Setup Wizard applies the changes.
When the changes are complete, click Next.
Please wait while the Network Setup Wizard configures the computer.
This may take a few minutes.
47
Page 11

Networking Basics
In the window below, select the option that fits your needs. In this example, Create a
Network Setup Disk has been selected. You will run this disk on each of the
computers on your network. Click Next.
Insert a disk into the Floppy Disk Drive, in this case drive A.
48
Page 12

Networking Basics
Please read the information under Here’s how in the screen below. After you complete
the Network Setup Wizard you will use the Network Setup Disk to run the Network
Setup Wizard once on each of the computers on your network. To continue click Next.
49
Page 13

Networking Basics
Please read the information on this screen, then click Finish to complete the
Network Setup Wizard.
The new settings will take effect when you restart the computer. Click Yes to
restart the computer.
You have completed configuring this computer. Next, you will need to run the
Network Setup Disk on all the other computers on your network. After running the Network Setup Disk on all your computers, your new wireless network will be ready to use.
50
Page 14

Networking Basics
Naming your Computer
To name your computer, please follow these directions:In Windows XP:
Click Start (in the lower left corner of the screen)
!
Right-click on My Computer
!
Select Properties and click
!
Select the Computer
!
Name Tab in the System
Properties window.
!
You may enter a Computer Description if you
wish; this field is optional.
To rename the computer
!
and join a domain, Click
Change.
51
Page 15

Networking Basics
Naming your Computer
!
In this window, enter the
Computer name
Select Workgroup and enter
!
the name of the Workgroup
All computers on your network
!
must have the same
Workgroup name.
Click OK
!
Checking the IP Address in Windows XP
OK
The wireless adapter-equipped computers in your network must be in the same IP Address range (see Getting Started in this manual for a definition of IP Address Range.) To
check on the IP Address of the adapter, please do the following:
Right-click on the
!
Local Area
Connection icon
in the task bar
Click on Status
!
52
Page 16

Networking Basics
Checking the IP Address in Windows XP
This window will appear.
Click the
!
Support tab
Click Close
!
Assigning a Static IP Address in Windows XP/2000
Note: Residential Gateways/Broadband Routers will automatically assign IP Addresses to the computers on the network, using DHCP (Dynamic Host Configuration Protocol) technology. If you are using a DHCP-capable Gateway/Router you
will not need to assign Static IP Addresses.
If you are not using a DHCP capable Gateway/Router, or you need to assign a Static IP
Address, please follow these instructions:
!
Go to Start
!
Double-click on
Control Panel
53
Page 17

Networking Basics
Assigning a Static IP Address in Windows XP/2000
Double-click on
!
Network
Connections
Right-click on Local Area
!
Connections
Double-click on
!
Properties
54
Page 18

Networking Basics
Assigning a Static IP Address
in Windows XP/2000
Click on Internet Protocol
!
(TCP/IP)
Click Properties
!
!
Input your IP address and
subnet mask. (The IP
Addresses on your network
must be within the same
range. For example, if one
computer has an IP Address
of 192.168.0.2, the other
computers should have IP
Addresses that are
sequential, like 192.168.0.3
and 192.168.0.4. The
subnet mask must be the
same for all the computers
on the network.)
Input your DNS server
!
addresses. (Note: If you
are entering a DNS
server, you must enter the
IP Address of the Default
Gateway.)
The DNS server information will be supplied
by your ISP (Internet Service Provider.)
!
Click OK
55
Page 19

Networking Basics
Assigning a Static IP Address with Macintosh OSX
Go to the Apple Menu and se-
!
lect System Preferences
!
cClick on Network
Select Built-in Ethernet in the
!
Show pull-down menu
Select Manually in the Con-
!
figure pull-down menu
Input the Static IP Address,
!
the Subnet Mask and the
Router IP Address in the ap-
propriate fields
Click Apply Now
!
56
Page 20

Networking Basics
Selecting a Dynamic IP Address with Macintosh OSX
!
Go to the Apple Menu and select
System Preferences
Click on Network
!
Select Built-in Ethernet in the
!
Show pull-down menu
Select Using DHCP in the
!
Configure pull-down menu
Click Apply Now
!
The IP Address, Subnet
!
mask, and the Router’s IP
Address will appear in a few
seconds
57
Page 21

Networking Basics
Checking the Wireless Connection by Pinging in Windows XP and
2000
Go to Start > Run >
!
type cmd. A window
similar to this one
will appear. Type
ping
xxx.xxx.xxx.xxx,
where xxx is the IP
Address of the
Wireless Router or
Access Point. A
good wireless
connection will show
four replies from the
Wireless Router or
Acess Point, as
shown.
Checking the Wireless Connection by Pinging in Windows Me and
98
Go to Start > Run
!
> type command.
A window similar to
this will appear.
Type ping
xxx.xxx.xxx.xxx
where xxx is the IP
Address of the
Wireless Router or
Access Point. A
good wireless
connection will
show four replies
from the wireless
router or access
point, as shown.
58
Page 22

Networking Basics
Adding and Sharing Printers in Windows XP
After you have run the Network Setup Wizard on all the computers in your network
(please see the Network Setup Wizard section at the beginning of Networking Basics,)
you can use the Add Printer Wizard to add or share a printer on your network.
Whether you want to add a local printer (a printer connected directly to one computer,)
share an LPR printer (a printer connected to a print server) or share a network printer
(a printer connected to your network through a Gateway/Router,) use the Add Printer
Wizard. Please follow the directions below:
First, make sure that you have run the Network Setup Wizard on all of the computers
on your network.
On the following pages, we will show you these 3 ways to use the Add Printer Wizard:
1. Adding a local printer
2. Sharing an network printer
3. Sharing an LPR printer
(Other Networking Tasks)
For help with other tasks, that we have not covered here, in home or small office networking, see Using the Shared Documents folder and Sharing files and folders in
the Help and Support Center in Microsoft Windows XP.
59
Page 23

Networking Basics
Adding a local printer (a printer connected directly to a computer)
A printer that is not shared on the network and is connected directly to one computer
is called a local printer. If you do not need to share your printer on a network, follow
these directions to add the printer to one computer.
Go to
!
Start>
Printers
and Faxes
Click on Add a printer
!
60
 Loading...