Disaster Area Designs DMC.micro User Manual

DMC.micro
User Manual
v1.02c
2" of 14"
Revision History: v1.02c 12/18/2018
Added MID3 option to Setup Menu / MultiJack Config
v1.02 11/16/2018
Added support for several new devices Fixed some issues with Utility Mode
v1.00c 12/24/2017
Corrected an error in the setup mode
v1.00b 12/11/2017
Corrected an error in the MID-2 setting description
v1.00 12/4/2017
Initial Release
Disaster Area Designs |
DMC.micro Gen3 |

3" of 14"
DMC.micro User Manual
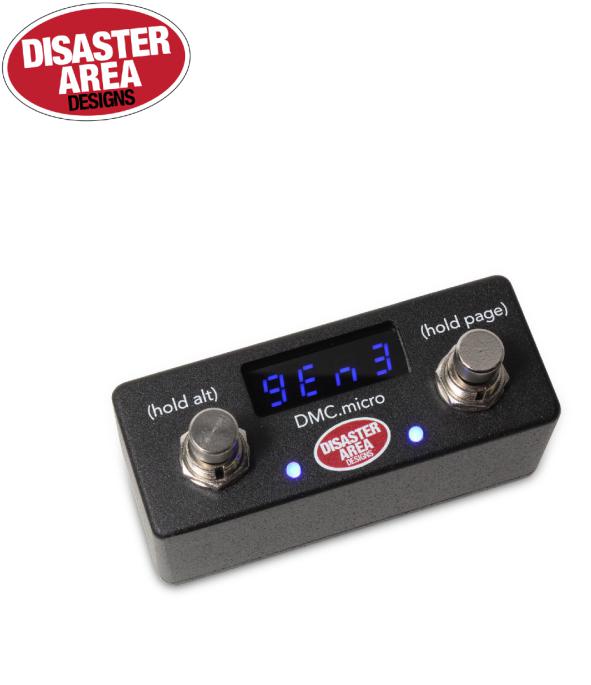
Thanks for purchasing a Disaster Area Designs DMC.micro controller. The DMC.micro is our smallest MIDI controller, but don’t let its size fool you - it packs quite a punch!
Let’s take a look at the DMC.micro and see what it can do for your rig:
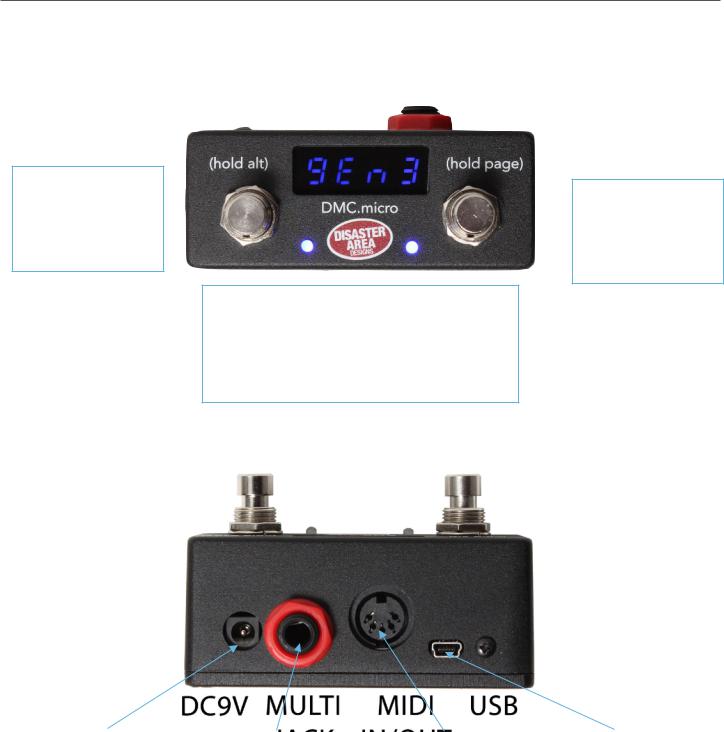
Left Button
Tap to activate left function
Hold to activate ALT function
LED Display shows current preset or status
Left LED shows left status (BLUE) and ALT status (RED.)
Right Button
Tap to activate right function
Hold to advance to next Page
Right LED shows right status (BLUE.)
DC Power: |
|
MultiJack: |
|
MIDI Port: |
|
USB Mini-B |
9V, 64mA minimum |
|
Connects to expression |
|
Standard MIDI OUT on |
|
USB MIDI for computer |
|
|
pedal, foot switch, MIDI, |
|
pins 4&5 |
|
or iPad, USB HOST for |
|
|
tap tempo, and more |
|
MIDI INPUT on pins 1&3 |
|
other USB devices |
|
|
|
|
|
|
|
Disaster Area Designs |
DMC.micro Gen3 |

4" of 14"
Setting Up the DMC.micro
Setting up a pedalboard or rig with several MIDI devices is kind of like introducing some friends to each other.
You: “Hi, MIDI controller, this is Pedal.”
You: “And Pedal, this is MIDI controller.”
Pedal: “Pleased to meet you!”
MIDI Controller: “Nice to meet you, too!”
Seems pleasant enough, right? So there’s no need to stress out, we’re here to help make it an easy process. Here’s what to do:
1.Figure out which MIDI devices you want to connect to the DMC.micro
2.Make sure you have the correct cabling to hook everything up
3.Tell the DMC.micro what you’re hooking up - this is the part where you said, “Hi, MIDI controller, this is Pedal.”
4.Tell your pedals about your MIDI control needs - this is the part where you said, “And Pedal, this is MIDI controller.”
Not too bad, right? Let’s take it step by step.
Connecting your MIDI devices: MIDI connections come in one of three forms - 5-pin DIN, 1/4”, or USB.
(Yes, these are ALL MIDI Jacks!)
In order to connect your device or devices to the DMC.micro you will need the correct cabling! The DMC.micro may control up to THREE MIDI devices in any combination. For example, three devices chained to the 5-pin port, or two 1/4” devices and one USB.
Here’s a handy chart to help you figure out what you need:
Connection Type |
Cable Type |
Connects To |
Configuration Menu |
|
|
|
|
|
|
5-pin DIN (1, 2 or 3 devices total) |
MIDI Cable |
DMC MIDI port |
|
|
|
|
|
|
|
1/4” Meris, Empress, Alexander |
1/4” patch cable |
MultiJack |
Configure JACK = MIDI |
|
|
|
|
|
|
1/4” Chase Bliss |
MJ-CBA |
MultiJack |
Configure JACK = MIDI |
|
|
|
|
|
|
2x |
1/4” Meris, Empress, Alexander |
MJ-Y |
MultiJack |
Configure JACK = MID2 |
|
|
|
|
|
2x |
1/4” Chase Bliss |
MJ-Y-RP2 |
MultiJack |
Configure JACK = MID2 |
|
|
|
|
|
Chase Bliss & Meris, Empress, Alexander |
MJ-Y-RP1 |
MultiJack |
Configure JACK = MID2 |
|
|
|
|
|
|
USB MIDI / Zoom |
USB + gHOST Adaptor |
USB Port |
Configure USB = HOST |
|
|
|
|
|
|
The MIDI port can connect to multiple devices by “daisy-chaining” them from input to output. For example, if you wish to connect both a Timeline and a BigSky to your DMC.micro, simply plug one MIDI cable from the DMC MIDI port to the MIDI input of your Timeline. Plug a second MIDI cable from the Timeline’s MIDI output to the MIDI input of the BigSky. You may connect up to three MIDI devices to the DMC.micro MIDI port.
The MultiJack may connect to one or two MIDI devices, depending on the cable you have connected, see the chart above.
The USB port may connect to one MIDI device, by using the gHOST Adaptor cable plus the correct type of USB cable.
Disaster Area Designs |
DMC.micro Gen3 |
"5 of "14
(Setting up the DMC.micro, continued)
Once you have plugged in all of your cables, it’s time to introduce the DMC.micro to your devices. Power on the DMC, wait one second, then hold the left button to enter the Setup menu. Release the button when you see the word “SETUP” scroll across the screen.
Tap the left or right buttons to navigate through the setup menu options.
Hold the left button to enter or exit from the menus.
Hold the right button to save and exit setup.
First, navigate to the dev menu. This item tells the DMC how many MIDI devices you would like to control. use the left or right buttons to select either one device (devA,) two devices (devB,) or three devices (devC.) to exit the dev menu.
Hold the left button, then Hold the left button again
Once you have decided the number of MIDI devices you’re controlling, you need to tell the DMC what those devices actually are! So navigate to the devA menu and pick the device you want to use. Check the Supported Device section at the end of this manual for full details of each device.
Scroll through the available devices until you see the Menu code that matches what you want to hook up, then hold the left button to accept and return to the main menu. Repeat this for each device you have connected.
If you are connecting any devices to the MultiJack or the USB port, please navigate to those menus and set them up according to the chart in the previous section.
If you are using the MutliJack to send MIDI, then go to the JACK menu and set it to either MIDI or MID2 as indicated by the previous chart. You’ll also need to set the MultiJack DIP switches inside the DMC.micro to ON-ON-ON.
If you are using the USB port, set the USB menu to HOST.
Hold the right button to save the configuration and exit.
(Setting up the DMC.micro, continued)
Finally, you’ll need to set up your MIDI devices to recognize the commands that the DMC.micro is sending. This step represents the part of the “conversation” where you introduce your pedal to the MIDI controller.
This step is different for every type of MIDI device, so the best thing to do is consult the user manual for your device. What we need to do is to assign each device to the correct MIDI channel, and in some cases map the other control parameters including bypass, tap tempo, and expression input.
We’ve included some handy info to help you configure the most common devices. If you don’t see your device listed, don’t panic! Just check its instruction manual to find out how to change its MIDI channel. The pedal you want to use as Device A should be assigned to MIDI channel 1, Device B should be MIDI channel 2 and of course Device C should be MIDI channel 3.
STRYMON
Strymon devices need to be configured correctly in order to pass incoming data through to the next device in line. They also need to be set up in order to maintain bypass “trails” and to use the Timeline looper.
Strymon Timeline: Enter the Globals menu and configure as follows:
MIDITH = ON |
MIDIPA = OFF |
MIDICT = OFF |
MIDICH (Must match device selection - 1 for DevA, 2 for DevB, etc.)
LPEXIT = PLAY |
BYPASS = BUFBYP |
Strymon Mobius and BigSky: Enter the Globals menu and configure as follows:
MIDITH = ON |
MIDIPA = OFF |
MIDICT = OFF |
MIDICH (Must match device selection - 1 for DevA, 2 for DevB, etc.)
BYPASS = BUFBYP (recommended for BigSky, optional for Mobius)
Disaster Area Designs |
DMC.micro Gen3 |
 Loading...