Disaster Area Designs DMC-4 Gen2, DMC-3XL Gen2 Quick Start Guide

Disaster Area Designs
DMC-3XL & DMC-4 Gen2
Quick Start Guide
Rev 2.04
May 2015
Firmware v2.02c
DMC-3XL Gen2
QUICK START
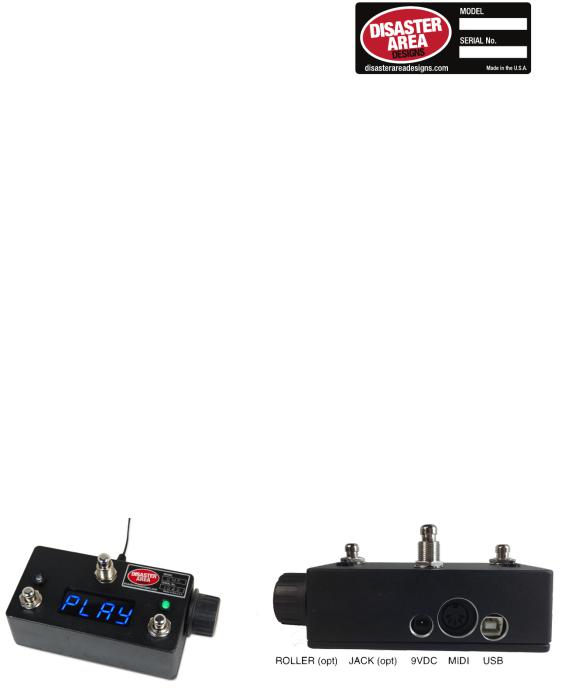
Thank you for purchasing a DMC controller! The DMC-3XL Gen2 and DMC-4 Gen2 are super-compact MIDI controllers designed to help you get the most out of your existing equipment. The DMC offers a comprehensive setup mode that enables you to control many different types of MIDI devices. Throughout this manual, we will refer to the DMC-3XL Gen2 and the DMC-4 Gen2 interchangeably as “DMC.” The controllers are identical other than the enclosure size and the extra button on the DMC-4 Gen2.
To connect your DMC to your MIDI device, you’ll need a standard 5-pin MIDI cable. These are available from Disaster Area Designs and from many online and retail shops. You will also need an isolated 9V power supply capable of supplying 64mA. Disaster Area Designs tests all pedals using a Voodoo Labs Pedal Power 2+ power supply.
Connect the 9V power supply to the DMC, and connect the MIDI cable from the DMC MIDI port to the MIDI input of the device that you would like to control. The DMC may also be powered by its USB port, although you may experience noise or other interference when using this connection in combination with the MIDI port.
The Expression Input requires a TRS expression input, Sleeve = GND, Ring = 5V, Tip = 0-5V signal. If used with a footswitch, please use an SPST Momentary footswitch, normally open. The Disaster Area DMT-1 Micro Tap is an excellent choice.
The DMC USB port is a class-compliant MIDI device and may be used to control any USB host that can accept MIDI signals. The USB port is CoreMIDI compliant, and may be used with the Apple Camera Connection Kit with the iPad or iPhone models (iOS 4.2 or higher required.) The DMC may also be used with Ableton Live, Mainstage, Logic, and other audio applications / DAWs. If the DMC is connected to a host as a MIDI device, any commands sent to the Disaster MIDI interface from the computer or iPad will be transmitted to the MIDI output on the DMC. This means you can send messages, sync, clock, or other data from your computer to your MIDI devices using the DMC as a USB interface. Please visit our website for tips on updating your Strymon device firmware with the DMC as an interface.
The DMC-3XL Gen2 and DMC-4 Gen2 are available with an optional side roller that sends expression or other MIDI data. If a pedal or switch is plugged into the expression jack, the roller will be disabled.

Configuration:
In order to configure the DMC for your MIDI devices, please press and hold the center button on the controller (upper-right button on the DMC-4 Gen2) at boot. The display will scroll “SETUP” and the pedal will enter setup mode. Once the controller has entered setup mode, the left button will cycle through the available menus, the right button will change the options in each menu. Press and hold the mode button to save and exit setup.
Holding the left button and the mode button at boot will factory-reset your controller. If installing v2.0 over v1.08 or lower, you will need to reset the controller before use.
HOLD THE CENTER / UPPER RIGHT BUTTON TO SAVE SETUP
D
B
 Loading...