


DW-VA1P8
Default Login Information Username: admin Password: no password
Quick Start Guide
NOTE: Download all your support materials and tools in one place.
1. Go to: http://www.digital-watchdog.com/support-download/
2. Search for your product by entering the p art number in the “Search by Product ” search bar.
Result s for applica ble part numbers will populate automatically based on the part number you e nter.
3. Click “Search”. All supported materials, including manuals, Quick Star t Guides (QSG), software
and firmware will a ppea r in the results.
Tel: +1 (866) 446-3595 / (813) 888-9555
Technical Support Hours: 9:00AM – 8:00PM EST, Monday through Friday
digital-watchdog.com
Attention: This document is intended to serve as a quick reference for initial setup. It is
recommended that the user read the entire instruction manual for complete and proper installation
and usage.
4-Channel 8-Channel 16-Channe l
DW-VA 1P4 DW- VA1P 8 DW-VA1P16
DW-VA 1P4 1T DW-VA 1P 81 T DW-VA 1P 162T
DW-VA 1P42 T DW-VA 1P 82T DW-VA1 P163T
DW-VA 1P43T DW -VA1 P83T DW-VA1 P164T
DW-VA 1P4 4T DW-VA 1P 84T DW-VA1 P166T
DW-VA 1P46T DW- VA1P 86T DW-VA 1P 168T
DW-VA 1P4 8T D W-VA1 P88T DW-VA1P 161 0T
DW-VA 1P4 10T DW-VA1 P8 10T DW-VA 1P 1612T
DW-VA 1P 1616T
DW-VA 1P 1620T
Quick Start Guide
1. Mount and install all necessary cameras and external devices. Refer to their individual
manuals for additional information.
2. The DVR supports the following analog signals:
• HD-Analog
• HD-TVI
• Analog signal up to 960H
The DVR supports cameras up to 5MP in resolution. Please refer to the product’s data
sheet and full manual for recording specifications per product.
3. The DVR supports automatic signal detection. This means you do not have to perform
any additional steps to assign signals to each BNC input. The DVR will detect the proper
signal automatically.
4. Place the DVR in its final position. See installation tips below.
5. Connect all necessary cables to the DVR.
6. Once all additional devices have been properly connected
to the DVR, connect the DVR to an appropriate power supply.
The DVR will boot up automatically.
1. When the DVR boots up, it will be in
protective mode. This means you will not
be able to access the DVR’s setup menu
until you login.
2. To unlock the DVR, right-click anywhere
on the screen. The login screen will
appear. (Default Username / Password:
admin / no password)
3. When the DVR boots up for the first time,
you will be guided through the Startup
Wizard.
1. Make sure the cameras and the monitors are properly connected to the DVR.
2. The DVR should be placed in a dust and moisture free environment. It must never
be directly exposed to sunlight. A room temperature is highly recommended to reduce
the chance of overheating, (room temperature is considered as 68~78°F), which may
cause the DVR to become unstable.
3. During the boot up process, the DVR should not be interrupted by pressing any
buttons on the mouse. Do not unplug the power adapter or turn the DVR o during the
boot up process.
4. A UPS (uninterrupted power supply) is highly recommended to prevent damage to the
DVR during a power outage.
STEP 1 – CONNECTING THE DVR STEP 2 – POWERING UP THE DVR
SAFETY TIPS
NOTE: HD M onitor output and VGA output ca nnot be used at the same time for dual mo nitoring.
To prevent the DVR from overheating, do not operate it in an area that exceeds the maximum
recommended ambient temperature of 104°F (40°C). To prevent airflow restric tion, allow
at least 3 inche s (7.6 cm) of clea rance around the ventilation openings.
Model Power consumption
DW-VA 1 P4 xT DC12V, 1.5A
DW-VA 1 P 8 xT DC12V, 3 . 3A
DW-VA 1 P 1 6xT DC12V, 5A
WHAT’S IN THE BOX
Quick start guide
and download card
1 set
DC 12V ad apter a nd
power ca ble
(*4-channel models do
not come with powe r
ca bl e)
1 set
IR remo te contro l
(optional)
1 Rubbe r mounts – 4pc s 1 set
USB mo use 1
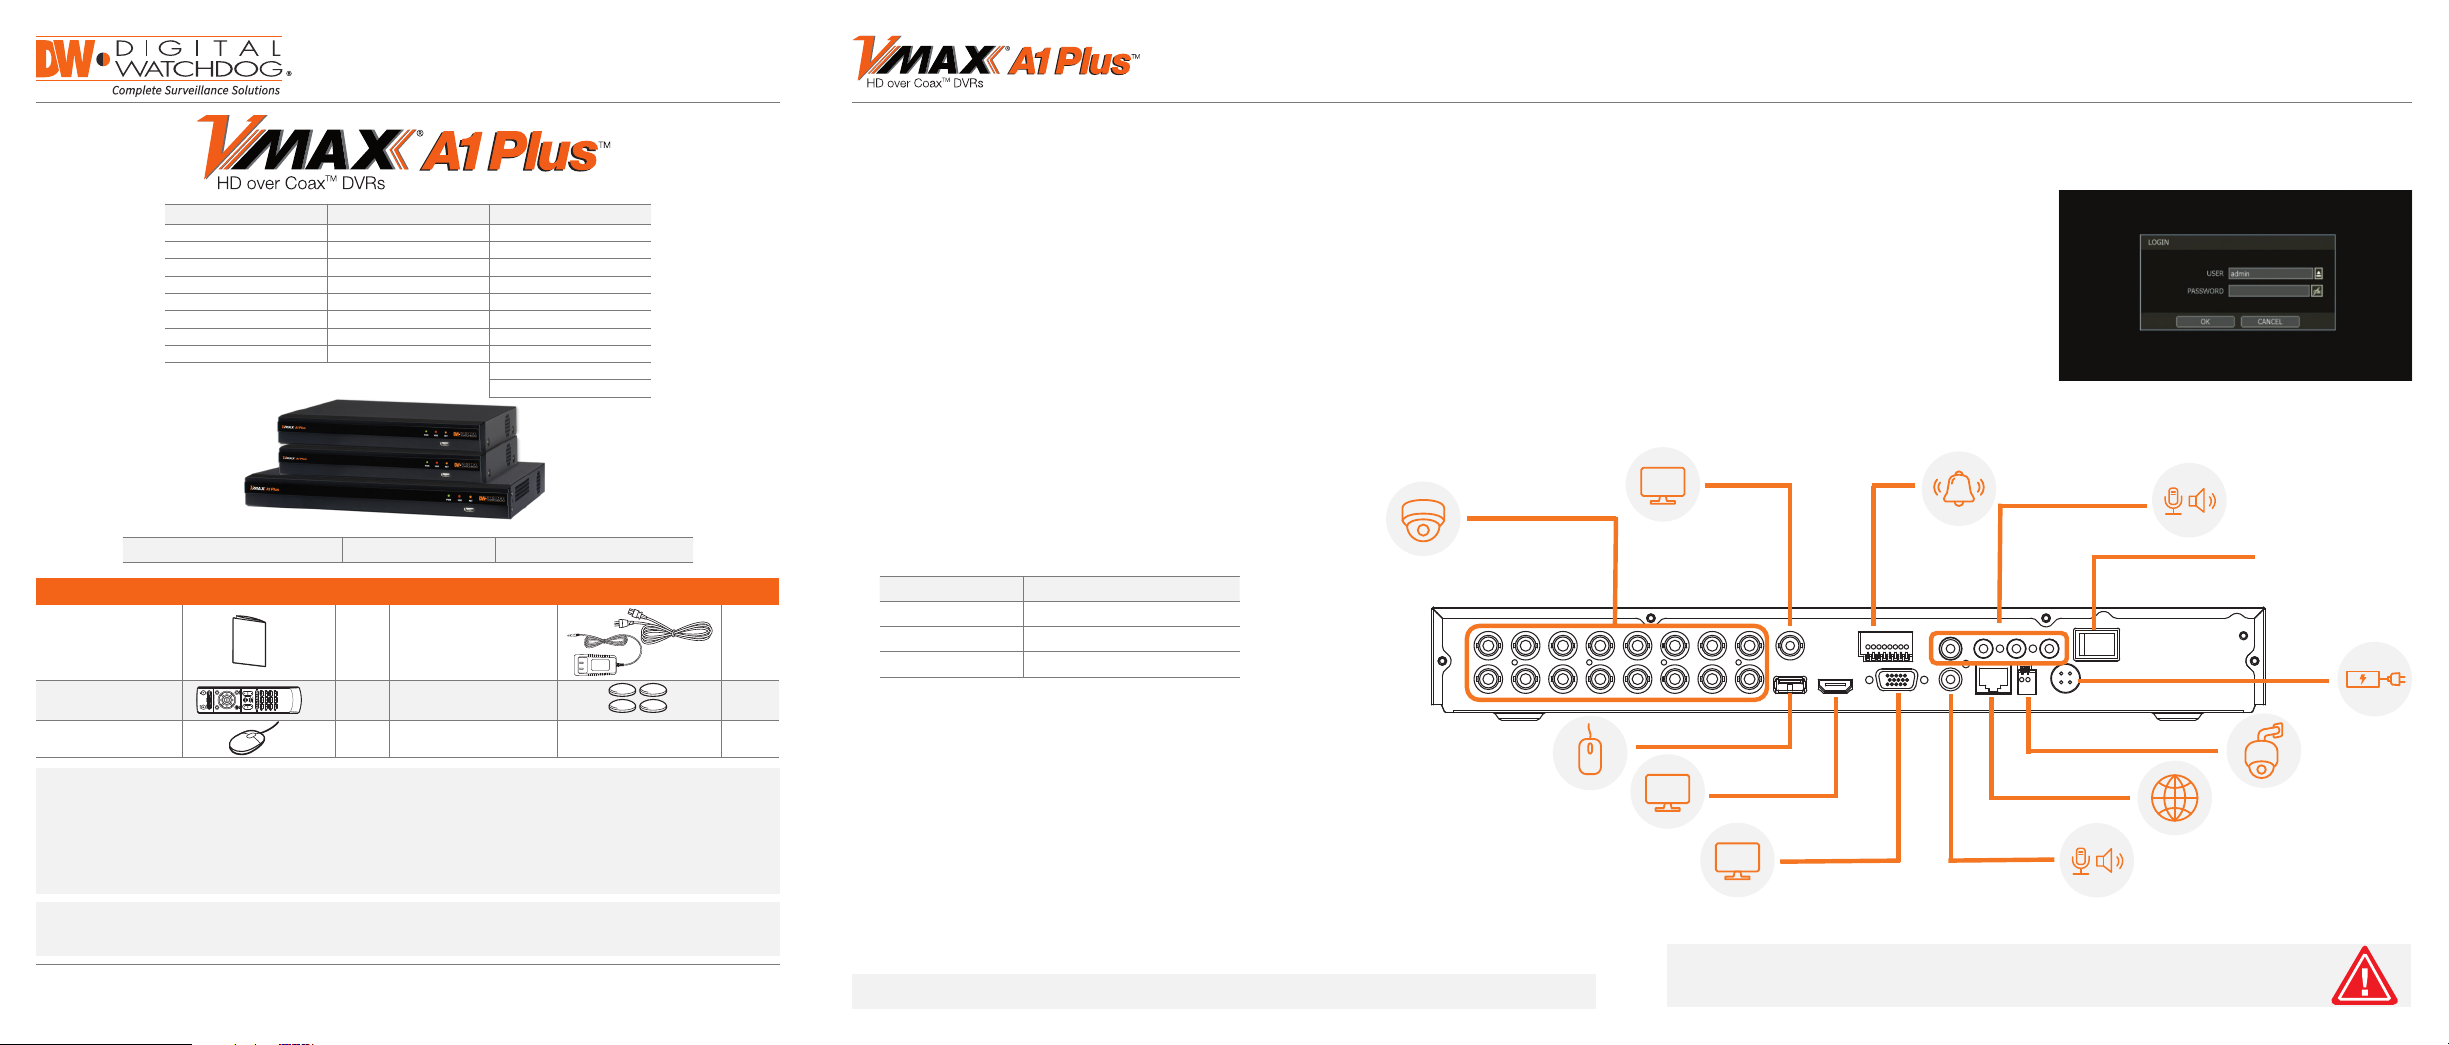
VGA
HD
ADAPTOR
POWER ON/OFF SWITCH
ANALOG/TVI/AHD CAMERA
SPOT
MONITOR
AUDIO IN
SPOT
ALARM
IN/OUT
VGA MONITOR
PTZ CAMERA
NETWORK CABLE
AUDIO OUT
HD MONITOR
USB MOUSE
 Loading...