

Denon DVD-3800BDCI Service Bulletin OST-F1295-1

100 Corporate Drive Mahwah, NJ 07430
Service Bulletin
No. : OST-F1295-1
Date: April 25, 2008
_____________________________________________________________
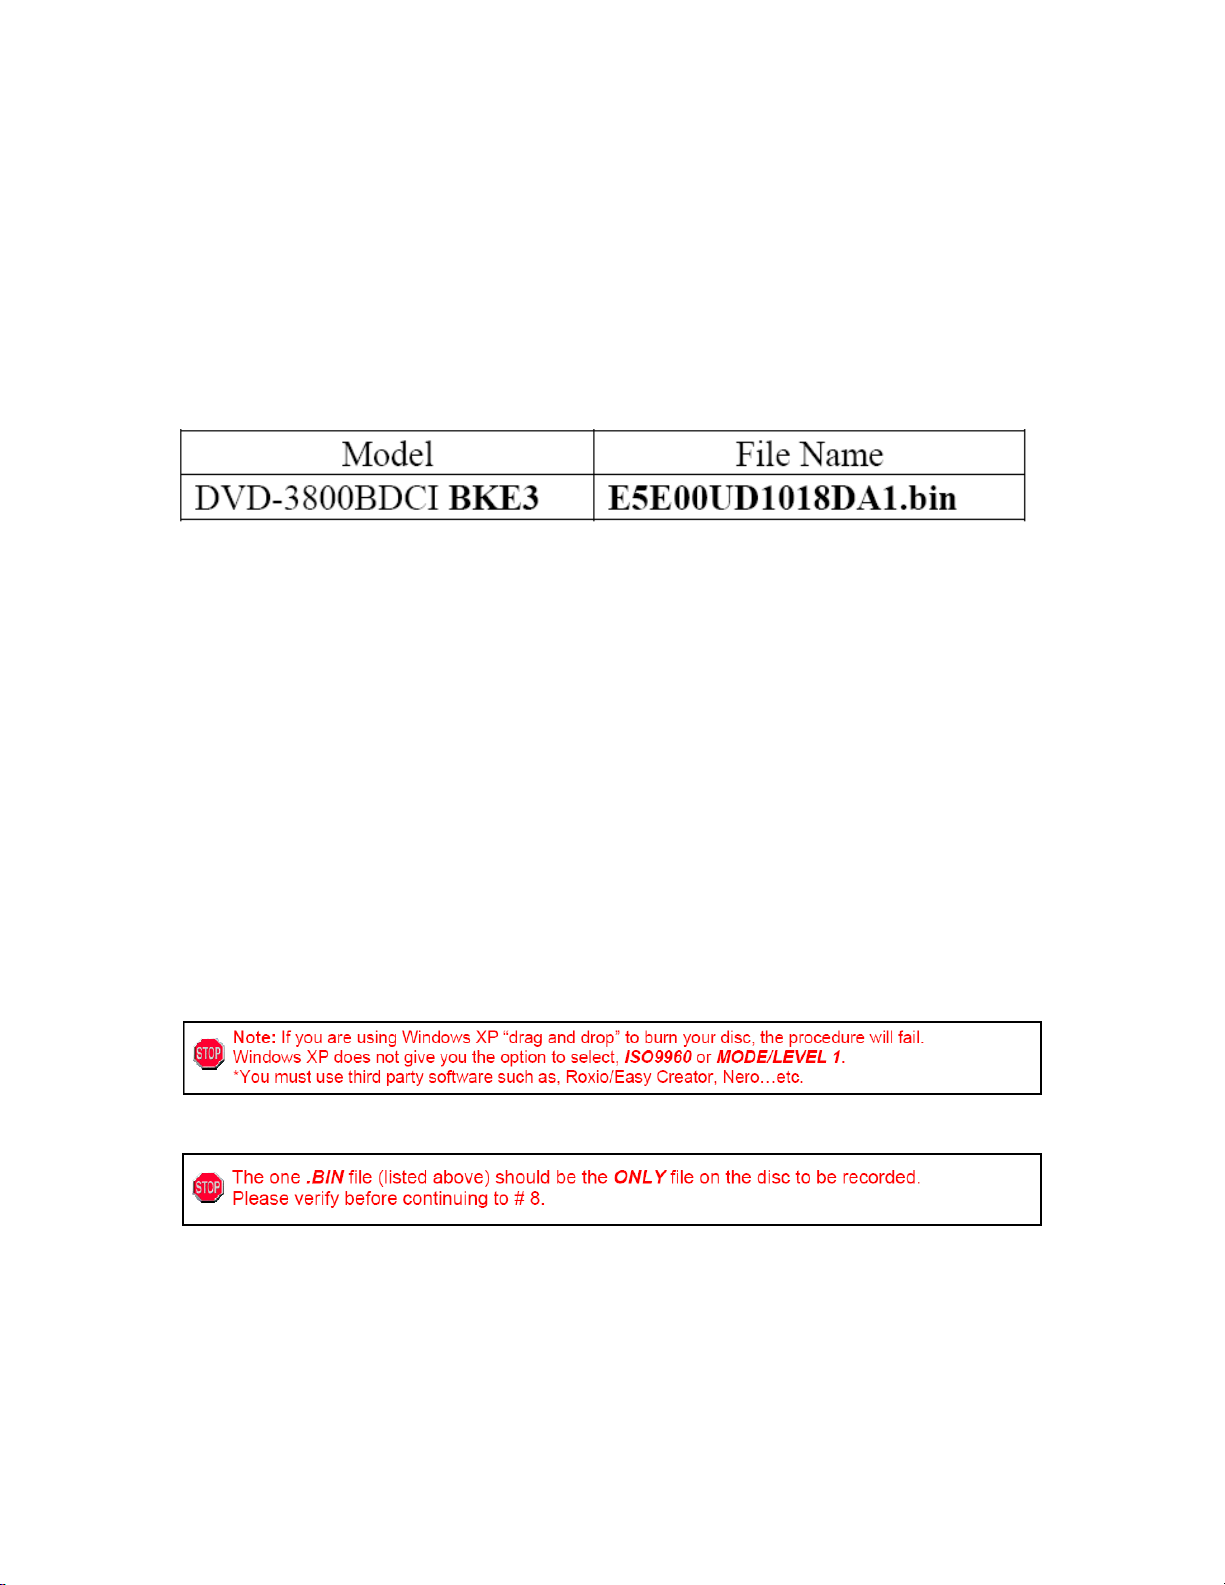
Model: DVD-3800BDCI
Subject: Firmware Correction.
Countermeasure is applicable only upon claim from the customer.
Symptom: 1. When Component is set to 480i, wallpaper may not be displayed
properly when a standard DVD disc is played after a Blu-ray disc.
2. When wallpaper is displayed, Component output might not change from 480i
to Excluding 480i.
3. Set-up does not initialize even though the display indicated initialize occurred.
4. Loss of picture when IP Direct function is selected and the titles Cars or Aliens
versus Predator Requiem Blu-ray discs are played.
5. When IP Direct function is selected and used in conjunction with an AVPA1HDCI and an Epson EMP-TW1000 display connected via an HDMI cable, and
when Blu-ray discs are played back, S-Video and Composite video are still
output.
6. When returning to Menu using the Top Menu button during playback and
turning IP Direct on, noise may be generated from HDMI and Component outputs
during a video stream test using SMPTE VC-1 1920x1080 24P of STD-100N.
7. When MP3 files are played continuously using the SD memory card slot, the
beginning of the next song to be played is sometimes lost.
8. When an HDCD is played back using an HDMI cable, sound becomes
interrupted.
9. When DivX disc is played back, the sound from the first file becomes
interrupted.
10. MP3 files with a sampling rate of 32kHz will not play.
11. If an AAC1+1 disc is played and skip is used with Main excluded, the voice
will be directed to Main.
12. When an AAC1+1 disc is played, Main/Sub is reproduced as default.
13. When Blu-ray Disc-RE made by BDZ-X90 is played and skip mode is used,
the image may not display even though audio is present.
______________________________________________________________________________________
The information contained in this document is intended for the exclusive use by DENON Authorized Service Centers and their
employees. This document may contain information that is privileged, confidential and may be protected from disclosure under
applicable laws and terms of the DENON Service Agreement. Any distribution, disclosure, dissemination or copying of this
document and the information it contains is prohibited. No responsibility will be accepted by DENON for any damage, injury or loss
resulting from the misuse of the information contained in this document.
CONFIDENTIALITY NOTICE:
14. When a DVD disc is played, the AV amplifier may display PCM 5.1 after the
DVD player’s output is switched in the order of PCM 2ch > DD5.1/DTS5.1 >
PCM 2ch.
15. When a WMA track name is displayed using the display button, if skip is
pressed during the track name scroll, the track name is not displayed.
Solution:
MODIFICATION: Record each program file onto a blank CD-R separately, and
update the unit upon repair of the unit.
* Program Files to be supplied:
Version after the update: 1.018
Step 1: CD-R/RW Creation
1. You should have already downloaded the Zip file to a folder of your choice at
this point and unzipped the files. Example: (C:\DVD-xxxxx or Desktop)
2. Launch your disc burning software. (Roxio, Nero. Etc.)
3. Within your software options, select make a DATA disc. (Not Audio!)
4. Go to the properties of your burning software and find the ISO9660 format
setting. Refer to our “Software Burning Guide” on pages 6 & 7 or contact your
software provider if you cannot find it. (You must find and select ISO9660 or the
procedure will fail)
5. Go to the properties of your burning software and find the MODE/LEVEL
setting. In most cases, they are referred to as, MODE 1/LEVEL1 CD-ROM.
Refer to our “Software Burning Guide” on pages 6 & 7 or contact your software
provider if you cannot find it. (You must find and select MODE 1/LEVEL1 CDROM or the procedure will fail)
Also within properties, you must select “Long File Names” or the procedure will
fail)
The firmware has been corrected so no malfunction occurs.
6. Locate the (1) .BIN file from where you initially saved it on your PC.
7. Drag and drop the (1) .BIN file into your burner’s software project window.
8. Finalize the CD-R/RW at the slowest possible recording speed. (You must
finalize/close the disc or the procedure will fail). We suggest the disc at once
setting. If you’re not sure of what you are doing, please use a CD-RW disc so
you can erase it and start over if necessary.
9. Take the finalized disc over to your Denon DVD player and go to Step 2.
______________________________________________________________________________________
CONFIDENTIALITY NOTICE:
The information contained in this document is intended for the exclusive use by DENON Authorized Service Centers and their
employees. This document may contain information that is privileged, confidential and may be protected from disclosure under
applicable laws and terms of the DENON Service Agreement. Any distribution, disclosure, dissemination or copying of this
document and the information it contains is prohibited. No responsibility will be accepted by DENON for any damage, injury or loss
resulting from the misuse of the information contained in this document.
 Loading...