


Denon DVD-2930CI Service Manual DZ09-207
100 Corporate Drive Mahwah, NJ 07430
Service Bulletin
No. : DZ09-207
Date:
November 5, 2009
_____________________________________________________________
Model: DVD-2930CI
Subject: Correction of the Firmware.
Countermeasure is applicable only upon claim from the customer.
Symptom: The tray can not be opened while playing a specific DVD-R.
Solution:
MODIFICATION: Please use the following program files for updating the Back-
end. Record the Folder (include the firmware) onto a blank CD-R separately and
individually, and update the firmware in the Back-end on your customer's unit
upon claim.
1) Preparation of the CD-R for rewriting.
(1) Create the following folder on your PC and store the supplied program file for
rewriting into the folder. DVD_2930¥ D293SAVD.ROM
(2) Record the created folder on a blank CD-R and create the Disc for rewriting.
We corrected the Software so that the malfunction does not occur.
Note: Upon recording the Disc:
1) When recording the supplied file on the blank CD-R, the format shall be
"ISO9660" and the session shall be "CLOSE".
2) When recording the supplied file on the disc, please use the lowest recording
speed that is available on your PC. If the file is recorded at a higher speed, the
rewriting operation may fail due to improperly recorded data on the disc.
______________________________________________________________________________________
CONFIDENTIALITY NOTICE:
The information contained in this document is intended for the exclusive use by DENON Authorized Service Centers and their
employees. This document may contain information that is privileged, confidential and may be protected from disclosure under
applicable laws and terms of the DENON Service Agreement. Any distribution, disclosure, dissemination or copying of this
document and the information it contains is prohibited. No responsibility will be accepted by DENON for any damage, injury or loss
resulting from the misuse of the information contained in this document.
2) Rewriting procedures of the FE/BE ROMs.
(1) Turn the Power Supply of the unit on. Press the "OPEN/CLOSE" button and
open the Disc Tray.
(2) Put the recorded CD-R for rewriting the FE/BE on the Disc Tray and press the
"OPEN/CLOSE" button.
a.) The Disc Tray closes, the FL Display indicates "LOADING" and the update of
the firmware starts automatically.
b.) During the rewriting operation, the FL Display indicates "DISC READING" >
"ERASE" > "WRITING" > "VERIFY" > "COMPLETE".
(3) After indicating the "COMPLETE" on the FL Display, the Disc Tray opens
automatically upon completion of the rewriting. Take out the Disc from the Disc
Tray.
(4) Turn off the Power Supply of the unit once.
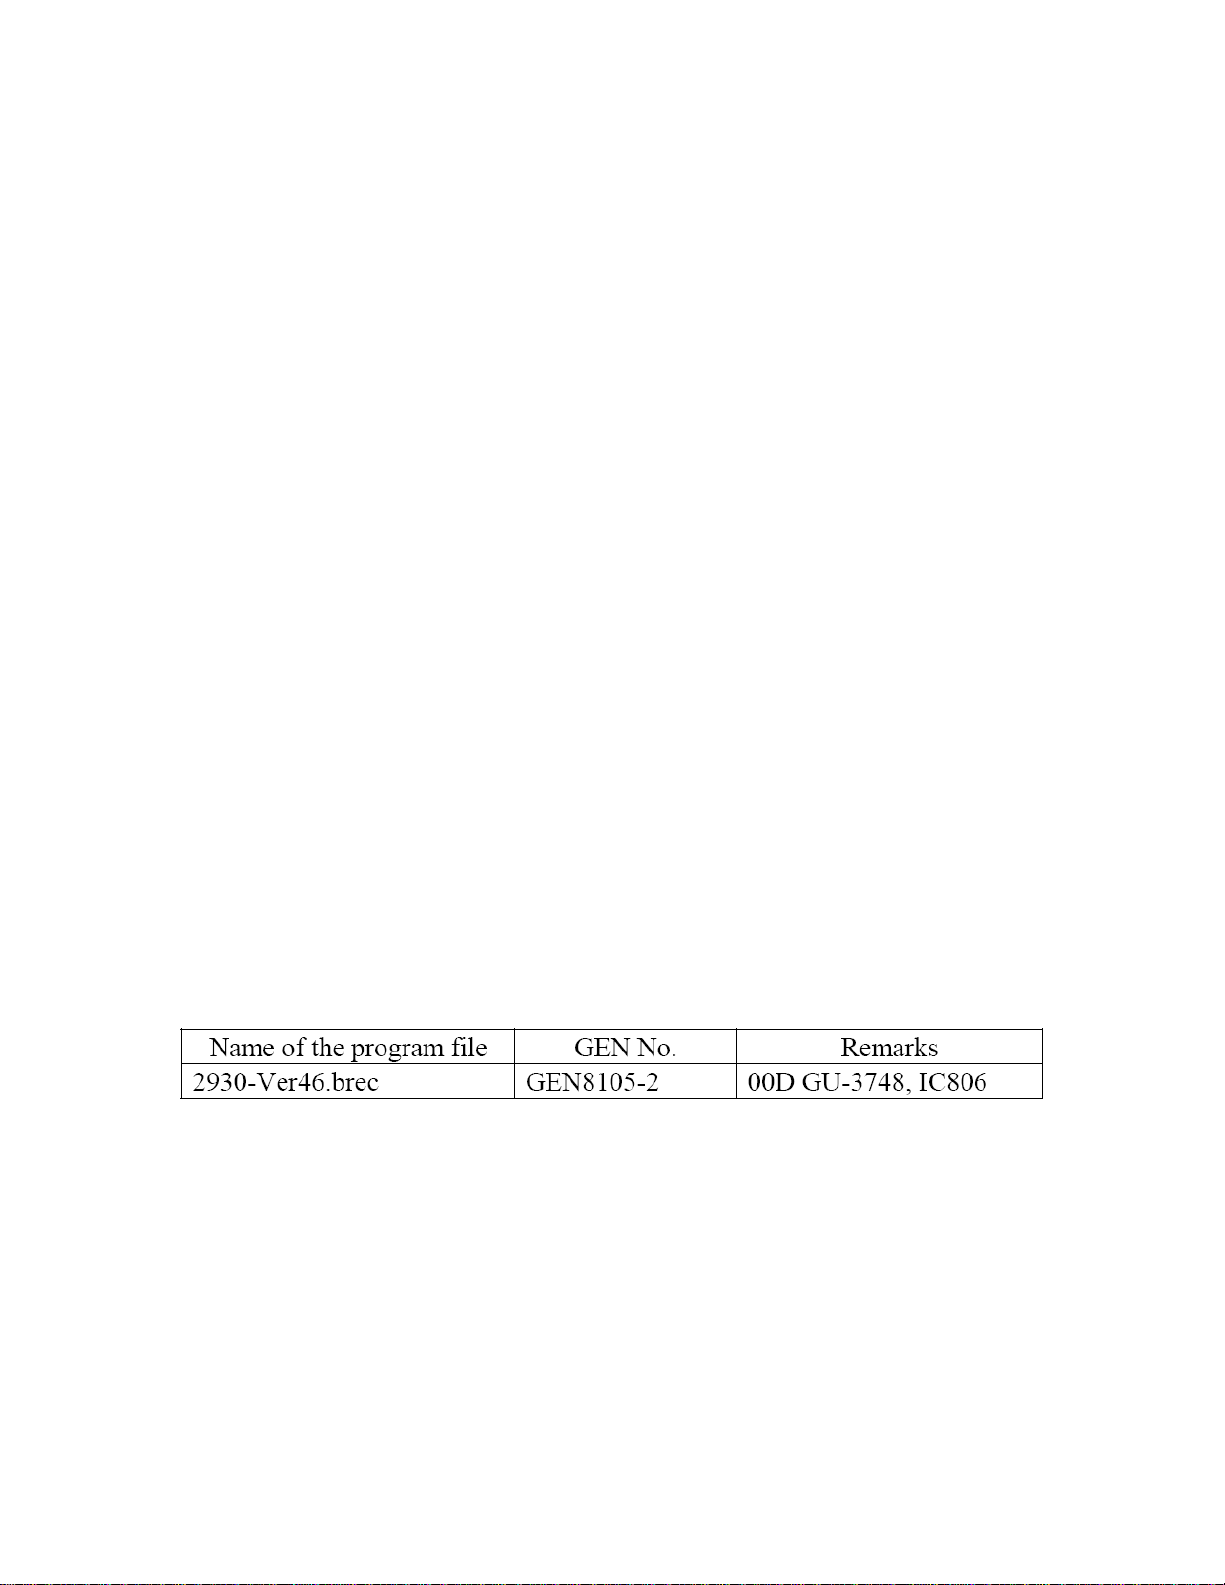
3) Confirmation of the version:
(1) Turn the Power Supply of the unit off once. While holding the "PLAY" and
"OPEN/CLOSE" buttons down simultaneously, turn the Power Supply of the unit
on.
(2) After indicating the " I>II " mark on the FL Display, press the numeral buttons
on the remote control in the order of "3", "2", "6" and "5".
(3) Press the "MENU" button on the remote control and confirm that the following
firmware versions appear when the button was pressed at the first and the
second times.
At the first time: BE 8283-F
At the 2nd time: MAKE DAY A15
If you did not update the IP firmware (as informed by service bulletin OST-F1179-
2), please update the IP firmware by the following instruction.
Therefore, please download the improved program file to your PC. Then, update
the MICON software of your customer's unit by following instruction. It takes
about 6 minutes.
Confirmation of the Version:
(1) Update from Item (1) to item (6) of H/W Setting for DVD2930/3930 IP
firmware.
(2) Update Item "(1) Open API debugger" and "(2) Open File Manager" of S/W
Setting for DVD3930 IP firmware.
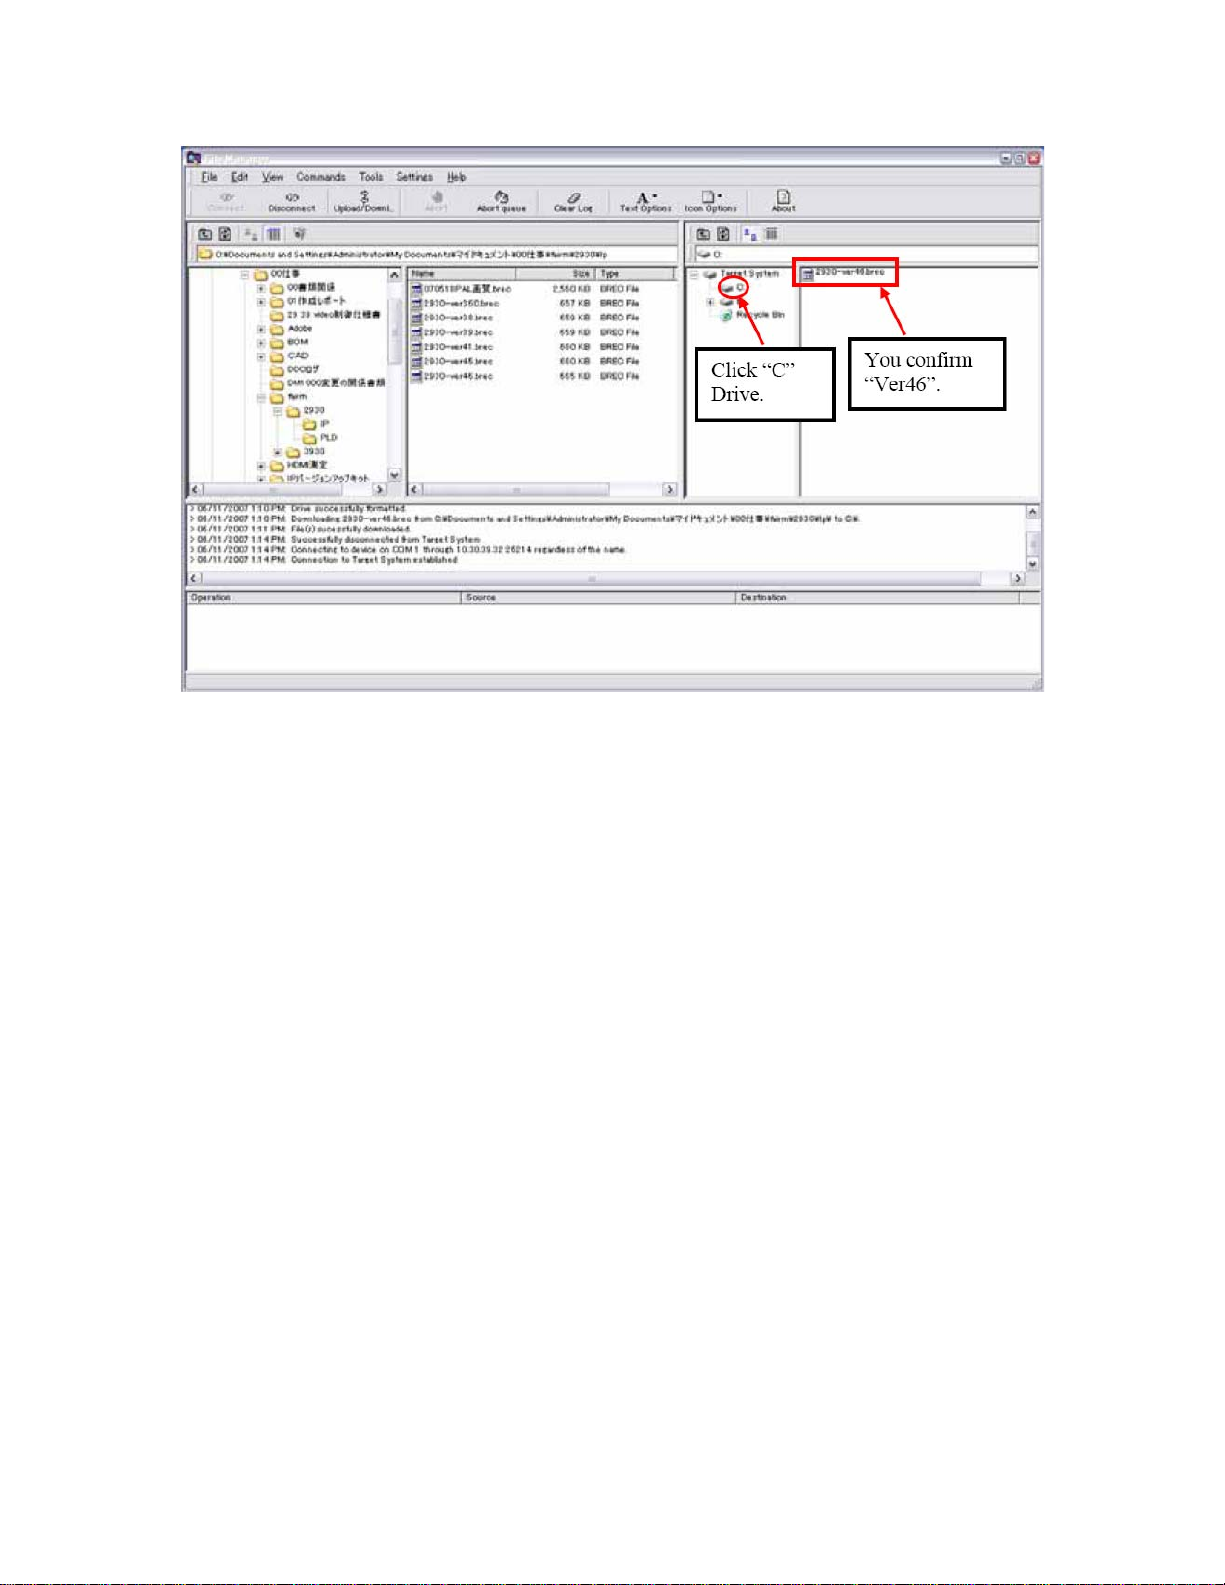
(3) Click "C" Drive.
(4) You can confirm the firmware version "Ver46" on "(2) Open File
Manager".Cautions during the rewriting operation:
______________________________________________________________________________________
CONFIDENTIALITY NOTICE:
The information contained in this document is intended for the exclusive use by DENON Authorized Service Centers and their
employees. This document may contain information that is privileged, confidential and may be protected from disclosure under
applicable laws and terms of the DENON Service Agreement. Any distribution, disclosure, dissemination or copying of this
document and the information it contains is prohibited. No responsibility will be accepted by DENON for any damage, injury or loss
resulting from the misuse of the information contained in this document.
* Cautions during the rewriting operation: Do not turn off the Power of the unit
during the rewriting operation.
Cautions during the rewriting operation:
1) Please do not turn off the Power of the unit during the rewriting operation.
2) If the Display has kept indicating "LOADING" without turning into
"COMPLETE" during the rewriting operation, wait longer than 5 minutes after
closing the Disc Tray. Then, turn off the Power of the unit and start the rewriting
operation from the beginning again.
Note: In the case of these models, the Flash ROM for replacement on which the
above improved firmware has been recorded is not available. Therefore, please
be sure to rewrite the BE ROM after replacement of the Flash ROM.
Serial Number Range:
Please apply the above modification to the production models in the following
serial numbers.
All models
______________________________________________________________________________________
The information contained in this document is intended for the exclusive use by DENON Authorized Service Centers and their
employees. This document may contain information that is privileged, confidential and may be protected from disclosure under
applicable laws and terms of the DENON Service Agreement. Any distribution, disclosure, dissemination or copying of this
document and the information it contains is prohibited. No responsibility will be accepted by DENON for any damage, injury or loss
resulting from the misuse of the information contained in this document.
CONFIDENTIALITY NOTICE:
Version Up tool setup
1. Download the "SiOptix_Developer_ToolKit.zip" file and
"DTK_Install_GUD_1.004.pdf" file to your PC.
2. Click the "setup.exe" file.
(Instructions will be provided in DTK install shield GUI)
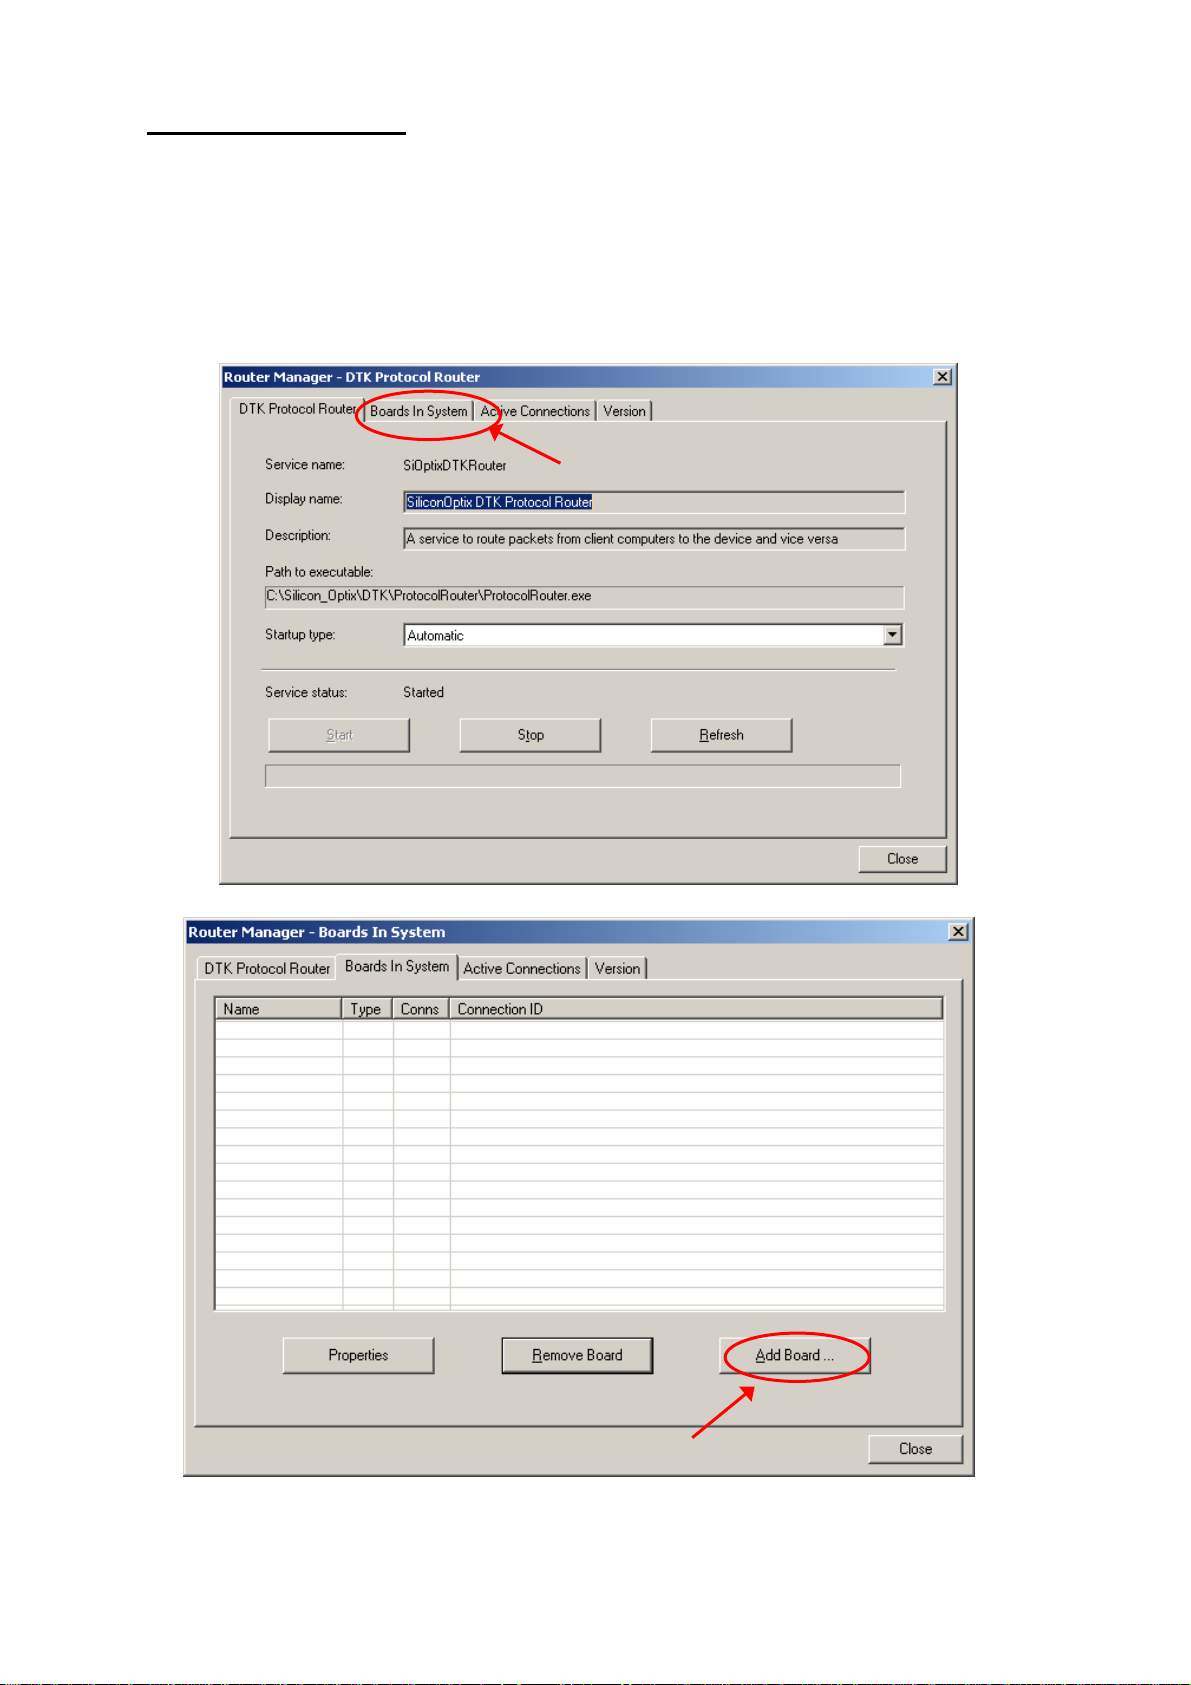
3. Open the "Router Manager" for comport setting.
(Starts > All Programs > Silicon Optix > Developers ToolKit > Router
Manager)
(ⅰ)
(i) Select "Boards In System" tab
Click "add Board…" button
Page 4/21
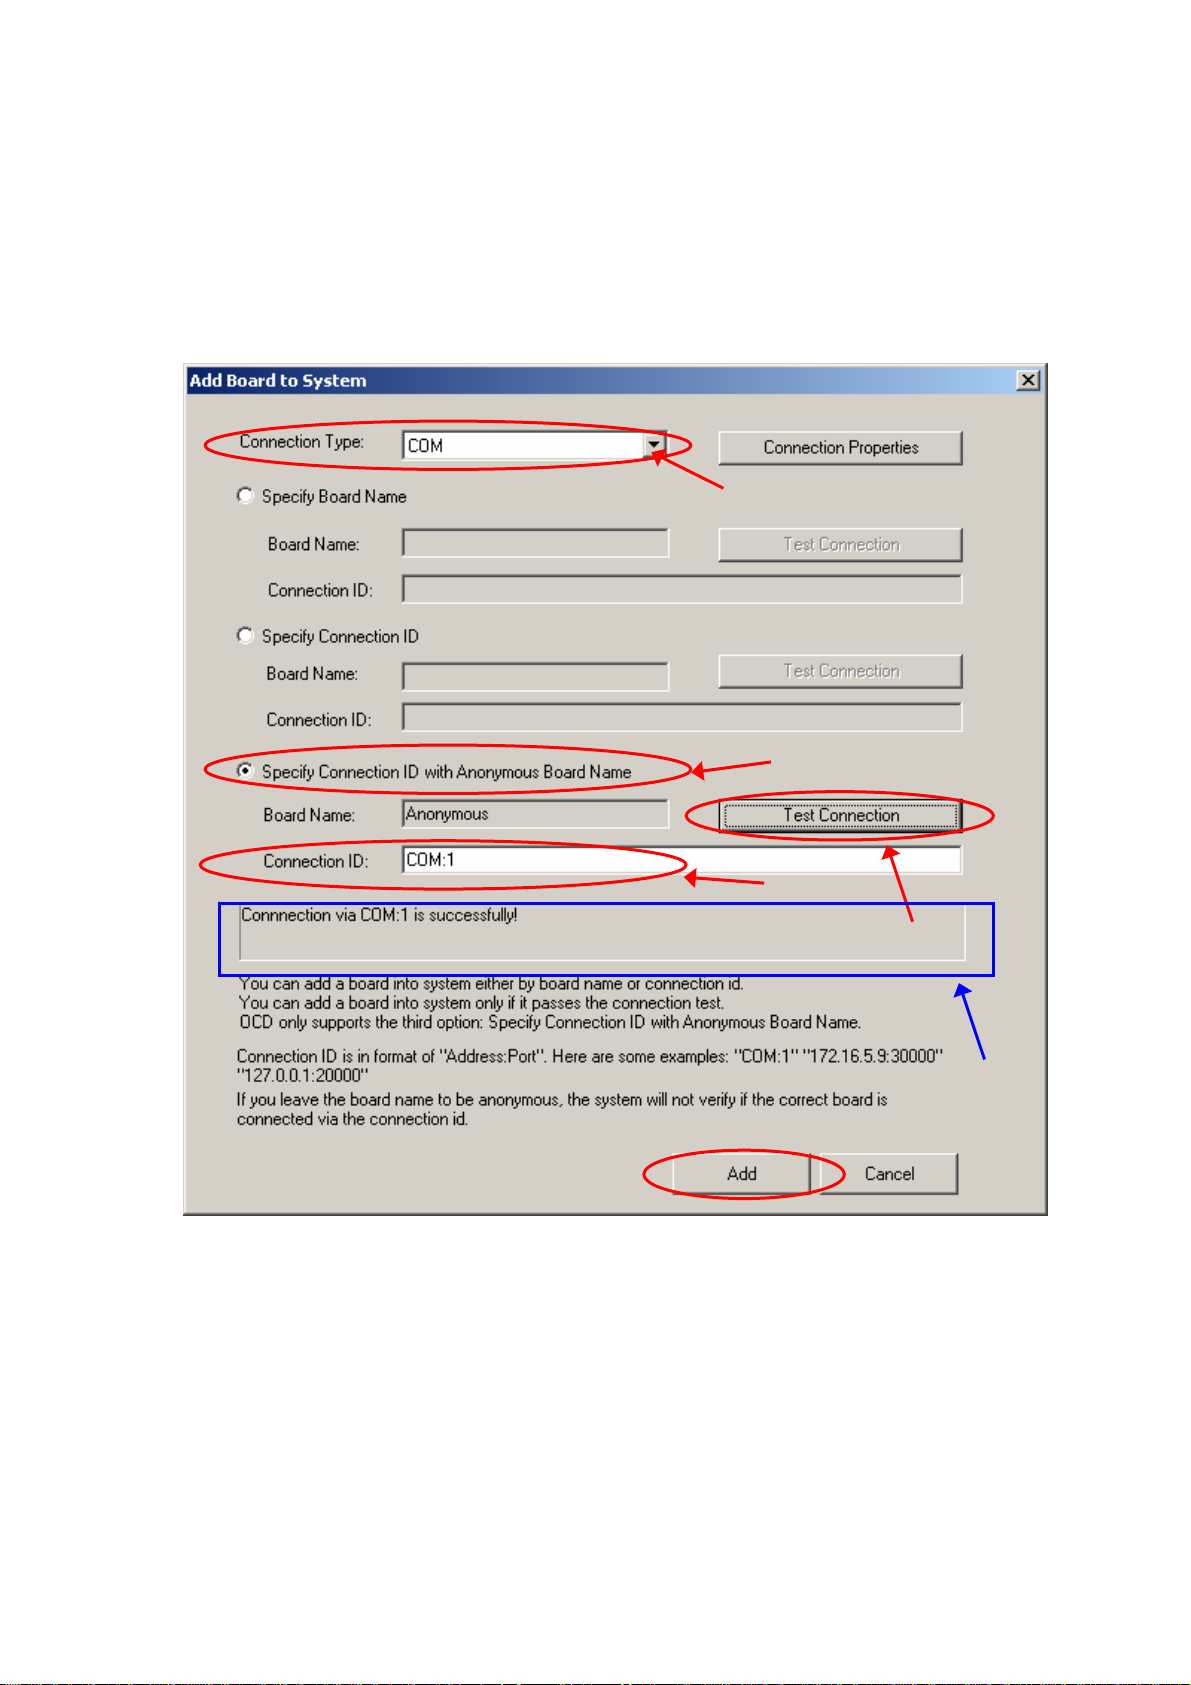
(ii) Choose "Connection type": COM
(iii) select radio button "Specify Connection ID with ‘Anonymous Board Name"
(iv) set "Connect ID": COM:1 (if the user connect the 3930 DVD player to PC
through COM2 or COM3, then set Connect ID to COM:2 or COM:3
(v) then click 'Test Connection' button
(vi) After "Connection via COM:1 is successfully" message shown in the status
window,
(ⅱ)
(ⅲ)
(ⅳ)
(ⅴ)
(ⅵ)
Click "Add" button. The following will be shown in the "Boards in System"
Page 5/21
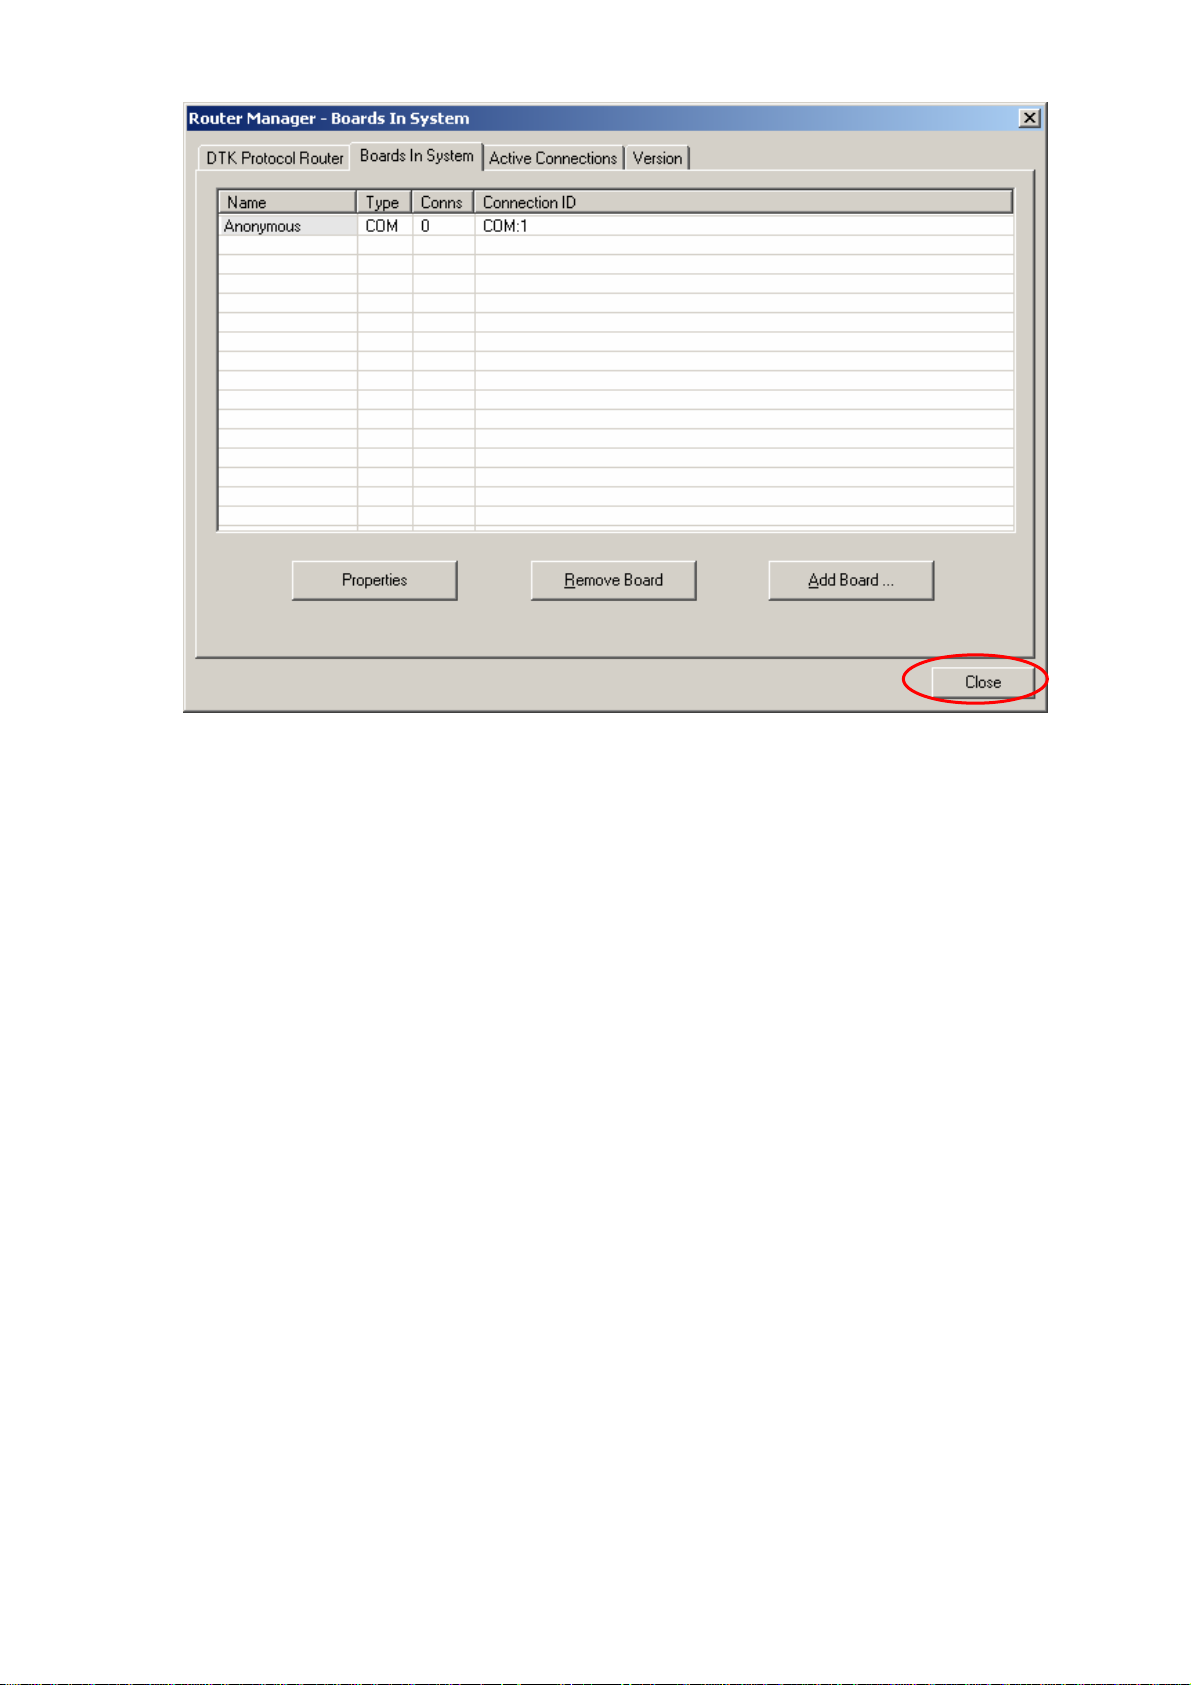
Click "Close" button
* step 4 only need to be done once on the PC having SOI DTK installed
Page 6/21
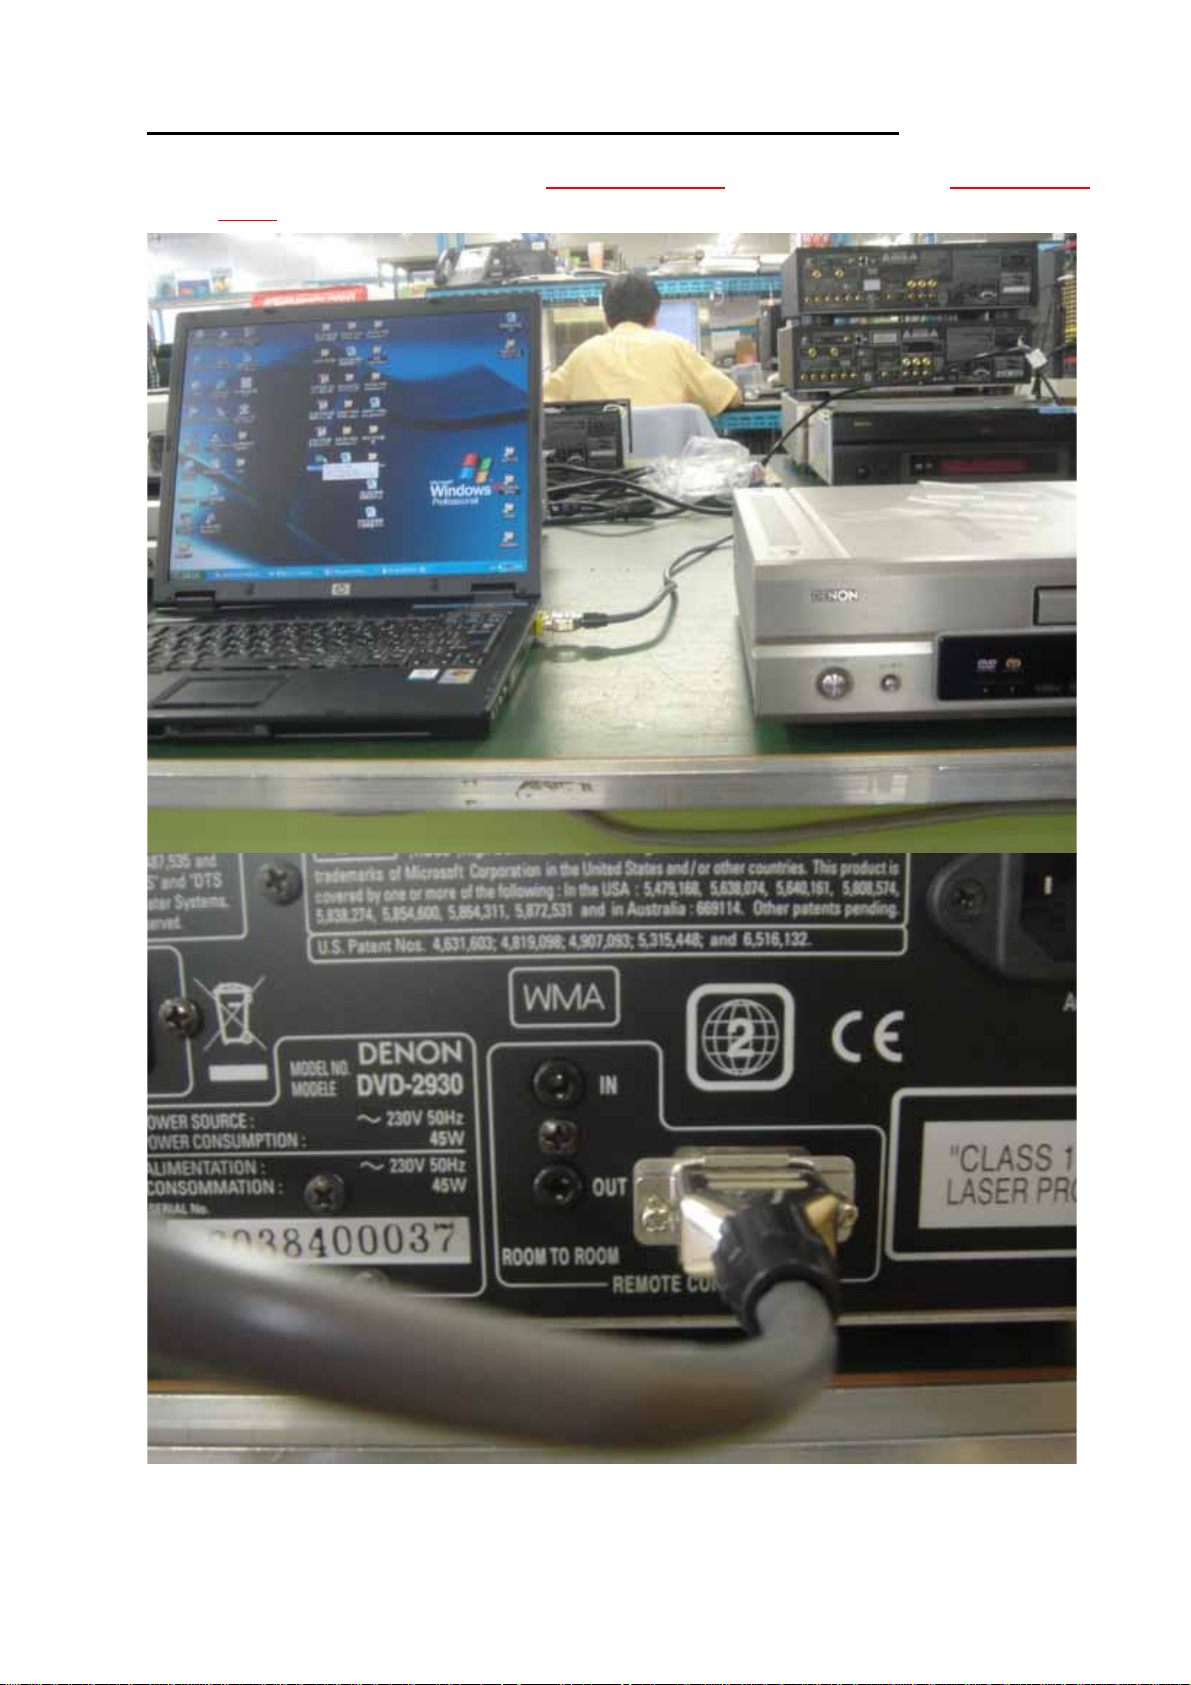
H/W Setting for DVD2930/3930 IP firmware update procedure
(1)Connect RS-232C cable
(Choose straight type cable cross type cable
cable use, it is not possible to connect it.)
. If cross type cable straight type
Page 7/21