


13
Thank you for choosing this appliance. This Owner's Manual will provide you with valuable
information necessary for the proper care and maintenance of your new appliance. If properly maintained, your appliance will give you many years of trouble-free operation. Please
take a few moments and read the instructions thoroughly and familiarize yourself with all of the
operational aspects of this appliance.
This unit can be conveniently moved from room to room within your home and prepared for use in just
a few minutes.
Important safeguards
• Use your appliance only as described in this instruction manual.
• As with all electrical equipment, whilst the instructions aim to cover as many eventualities as
possible, common sense and caution must be used when operating and maintaining any
household appliance.
• If the power cable is damaged, it must be replaced by the manufacturer or an authorised
service centre in order to eliminate all risk.
• This appliance is designed to dehumidify domestic rooms and must not be used for other purposes.
• The appliance must not be modified in any way, as any modifications may be extremely
dangerous.
• If the appliance requires repair, always contact a Service Centre authorised by the manufacturer. Always insist on original spare parts. Repairs carried out by unauthorised personnel
may be dangerous and invalidate the guarantee.
• This appliance must be used by adults only. Do not allow children to play with the appliance.
• The appliance must be connected to an efficient earth system. Have your electrical circuit
checked by a qualified electrician.
• Do not use an extension cable.
• Always unplug the appliance from the mains before performing cleaning or maintenance
operations.
• Never unplug the appliance by pulling on the power cable.
• Do not install the appliance in rooms where the air contains gas, oil or sulphur. Do not install near
sources of heat.
• Keep the appliance at least 50 cm away from flammable substances (alcohol etc) or pressurised containers (e.g. aerosol cans).
• Do not rest objects on top of the appliance.
• Clean the air filter regularly.
• The appliance must always remain upright or laid on one side during transportation.
After moving the appliance, it is good practice to wait at least an hour with the appliance
in the vertical before turning it on again.
Remember to drain the condensate tank before moving the appliance.
• R134A refrigerant gas complies with European environmental protection directives.At the
end of its working life, consign the appliance to a specialist collection centre.
• The materials used for packaging can be recycled.
You are therefore recommended to dispose of them in special differentiated waste collec-
tion containers.
Introduction and important safeguards
14
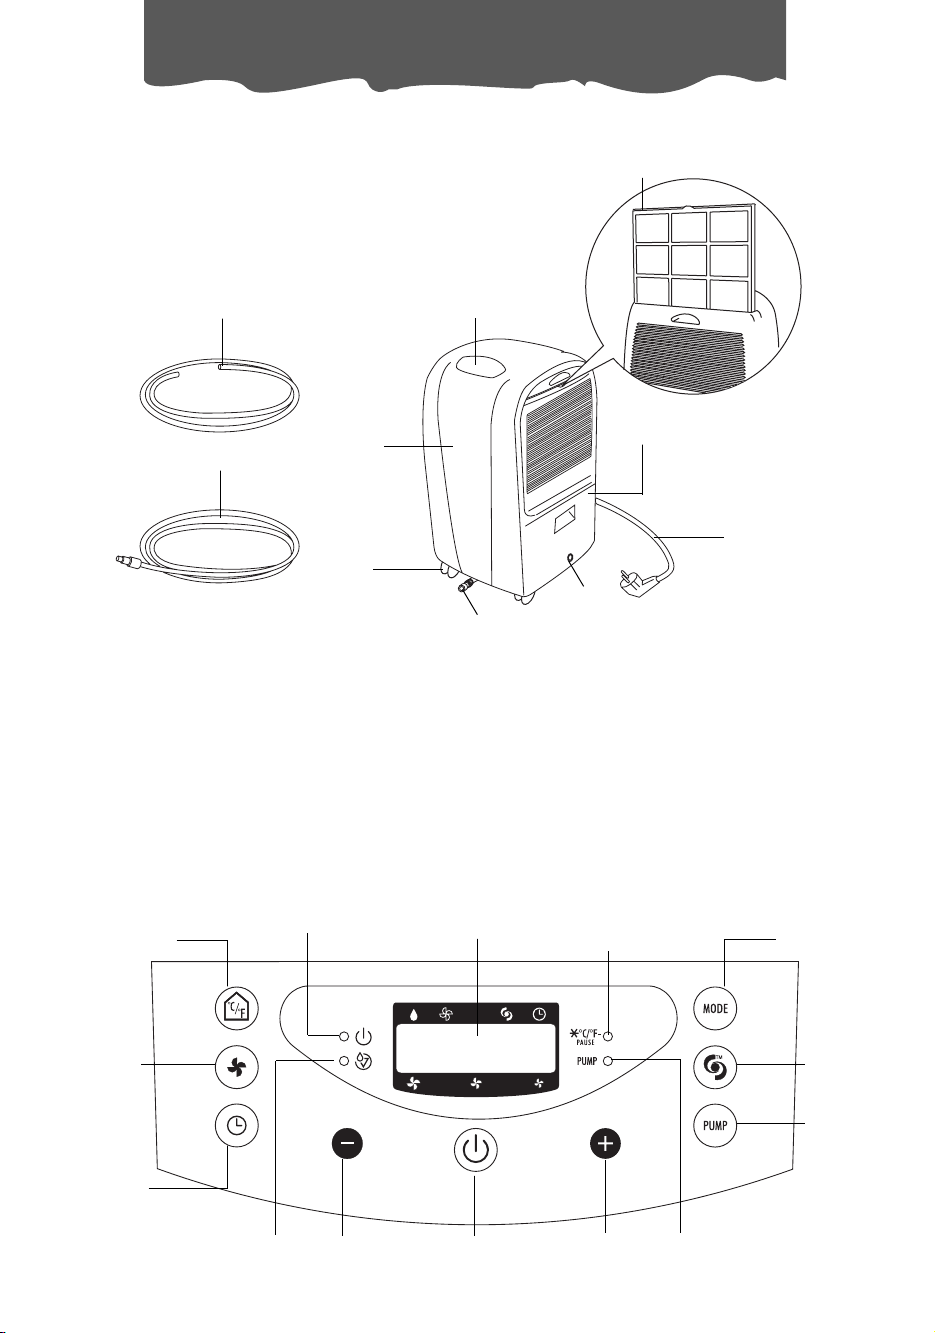
1. Control panel
2. Cabinet
3 Castors
4. Air Filter
5. Condensate collection tank
6. Power plug
7. Continuous drain outlet
8. Continuous drain hose
9. Connection for continuous condensa-
te drain with pump
10. Continuous condensate drain hose
with pump
Description of the appliance
Description
D
escription of the control panel
Room
temperature
button
°F/°C
Fan speed
button
TIMER
button
MODE
button
TURBO
POWER
button
Decrease
humidity level/
time button
Increase
humidity level/
time button
STAND-BY
button
Display
ON light
Defrost light
Tank warning
light
5
4
2
1
3
6
7
9
8
10
PUMP
button
Pump light
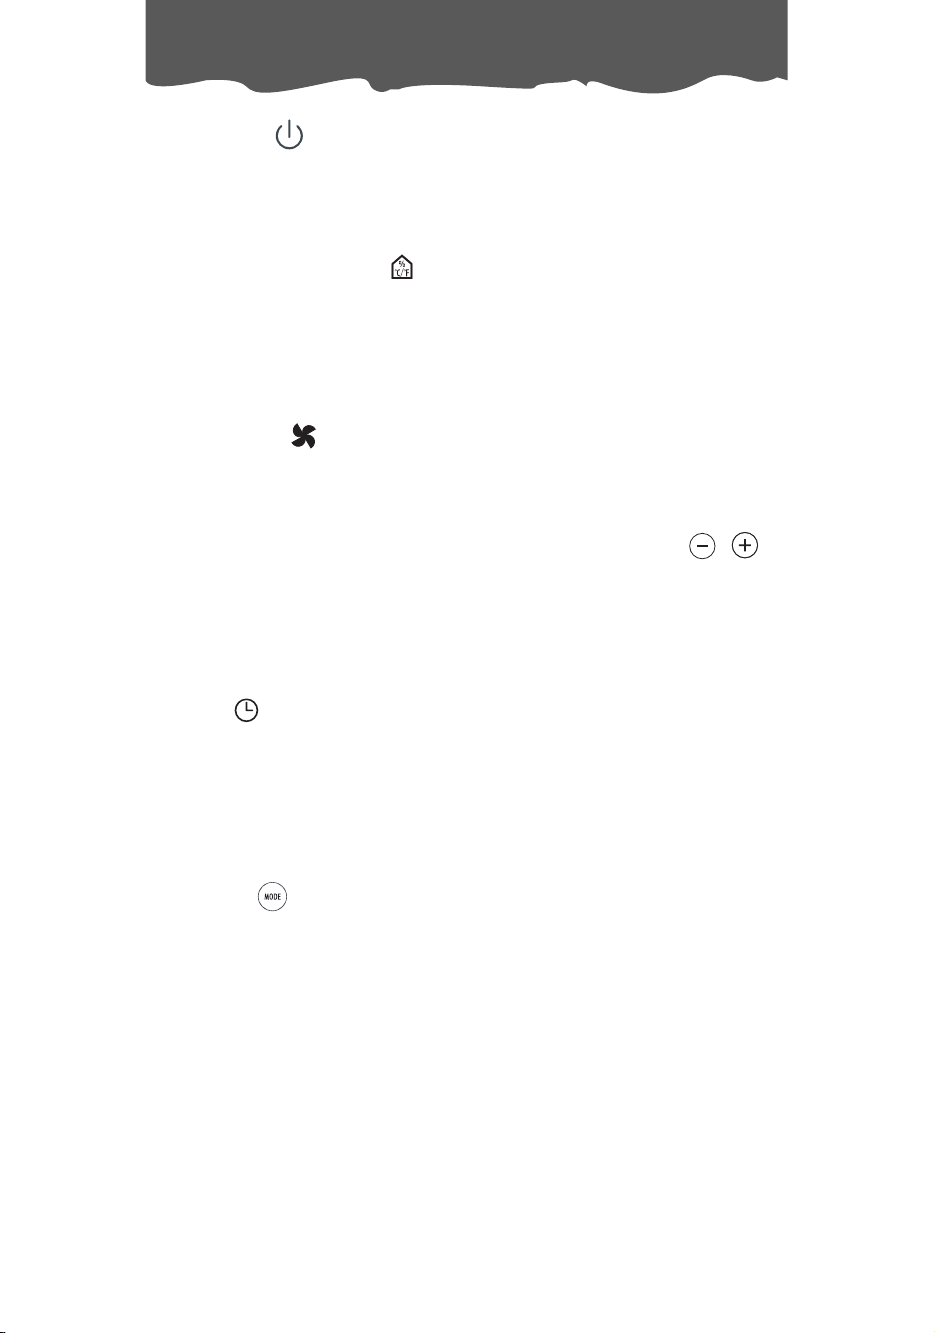
STAND-BY button
Press to turn the appliance on and off. To turn the appliance off completely, unplug from
the mains socket.
R
oom temperature button
Press this button to display the Temperature on the display. If you press the button once the
display will show the °F . If you press the button twice, the display will show °C. After a few
seconds, the display will automatically show the humidity level again.
FAN speed button
Press to select fan speed (High, Medium, Low).
D
ecrease or increase Humidity Level/ Time buttons
These buttons are used to adjust the desired humidity level, with 5% increments; they are
also used to set the timer. the From 0 -10, the hours increase in steps of 30 minutes. From 1024 they increase in steps of 1 hour.
TIMER button
With the appliance switched ON, if you press the TIMER button the display will show the
hours after which you want the appliance to switch OFF (1-2-3... hours ).
With the appliance in the STAND-BY position, if you press the TIMER button the display will
show the hours after which you want the appliance to switch ON (1-2-3... hours ).
M
ODE button
Press this button to select the Fan only or Dehumidifier modes.
TURBO POWER button
Use this button to activate the “turbo power” function. In this mode, the appliance will
operate at maximum fan speed and in continuous mode. If pressed again, the unit will
revert back to the previous settings.
P
UMP button
Use this button to activate the heavy-duty pump system for active drainage.
15
Control panel

16
On light
When the STANDBY button is pressed to start the unit, the ON light comes on. The light will
go off again when the unit is switched off.
NOTE: After a power cut, the unit will not come on again automatically. When power
returns, press the STANDBY button to start the unit again.
Tank Warning light
If the water tank is full, improperly positioned or missing, the tank warning light will flash, followed by a beep.
This alarm continues until the tank is correctly positioned.
Defrosting light
With an ambient temperature of less than 15°C, the appliance performs defrosting cycles.
While the appliance is defrosting, the defrosting light comes on and remains on until defrosting is completed.
During the defrosting cycle only the following 4 keys are active: pump button, standby button, temperature button, timer button.
Pump light
When the pump button is pressed, the pump light comes on.
If the pump light flashes, the pump is not functioning properly.
Control panel

1. Leave a space of at least 30 cm on all sides of the unit for good air circulation.
2. Install your dehumidifier on a floor, table, or shelf. When installing the unit on a table or shelf,
make sure the table or shelf is strong enough to support the weight of the unit with a full
tank.
Note: The dehumidifier needs to be secured when installed on a table or a shelf.
Do not sit or stand on the dehumidifier.
3. The tank must be properly positioned.
4. The castors let you move the dehumidifier easily.
Choosing the proper location for the unit
1. Use the unit in a basement to help prevent moisture damage.
2. Use the unit in cooking, laundry, bathing, and dishwashing areas with excessive moisture
levels.
3. Use the unit to prevent moisture damage wherever books or valuables are stored.
4. Use the unit wherever you want to have comfortable conditions.
List of components
•5 m hose with quick-fit connection
•1 m hose
Required tools and assembly time
Collection tank:
No assembly or plumbing necessary.
Continuous draining outlet:
To use the continuous drain feature, the following tools will be necessary:
•5 mm drill bit (to drill open the drain outlet)
• Drill
Assembly takes an estimated 1-2 minutes.
Continuous drain with quick-fit connection and 5 m hose:
No tools necessary. Assembly takes an estimated 1-2 minutes.
30 cm
30 cm
17
Installation

A) Empty the tank manually.
When the tank is full, remove (fig.1) and
empty into a sink.
When finished, replace it properly.
NOTE: The tank must be positioned correctly.
An intermittent beep means the tank is not
correctly positioned.
B) Continuous drain.
Condensate can be drained via a hose connected to the outlet at the bottom of the tank.
Proceed as follows:
1. Remove the tank.
2. Drill a hole in the bottom of the tank using a 5
mm drill bit as shown in figure 2.
3. Connect the hose to the outlet (fig. 3).
Make sure the hose is free of kinks or bends.
To ensure correct drainage, make sure the
end of the hose is not higher than the outlet
(fig. 4).
NOTE: If you do not wish to use the hose, the
hole can be closed with the rubber bung
provided.
C) Continuous external drain with pump
Thanks to the exclusive condensate drain
system, the hose can be used to drain condensate with a difference in level of up to 4 m
between the end of the hose and the outlet.
For pump assisted drainage, connect the hose
to the connection on the bottom of the appliance (fig. 5).
Select the dehumidifying function and press the
pump button.
Note: If the condensate hose is not in place and
the pump is activated, the pump light will flash.
To eliminate this problem:
• Position the hose correctly;
• Unplug the appliance from the mains socket
then plug in again.
18
Disposing of the collected water
fig. 1
fig. 2
Drill
fig. 3
fig. 4
Hose
Drain
1 PUSH
2
fig. 5

Stand-by position
When the appliance is plugged into the mains socket, the level of humidity to be obtained is
displayed on the left (the default value is 60) and two lines are displayed on the right for one
minute followed by the level of humidity in the room.
How to select the required humidity level
1) Push the stand-by button.
2) Press the buttons to set the required humidty level. (80% to a humid environment,
30% corresponds to a dry environment; when the button is pressed again, “--” is
displayed to indicate continuous operation. ).
3) Push the MODE button to select the dehumidifying function; the function is selected when
the small dot on the display is under the symbol).
4) When the appliance reaches the humidity set point the appliance will automatically stop
working. As soon as the humidity increases above the set point, the appliance will automatically resume dehumidification operation.
Note: The appliance is equipped with a safety device which will not allow dehumidifying to be
activated until three minutes have passed since the last shut down.
How to use the FAN
1) Push the stand-by button.
2) Push the MODE button to select the FAN function; the function is selected when the small
dot on the display is under the symbol).
3) Press the button to modify fan speed (min/med/max).
Turbo power
1) Press the button.
2) The turbo power function is an automatic dehumidifying function for when you want to use
the appliance at maximum power. When in this mode, two lines are displayed on the left
and the level of humidity in the room is displayed on the right.
To stop the turbo power function, simply press the button again.
How to programme delayed start-up with the appliance off
1) With the unit OFF, press the button and use the buttons to set the number of
hours after which the appliance should start functioning.
2) The number of hours after which the appliance should start functioning (1-24h) is displayed
on the left and a small dot under the symbol indicates that the timer function has been
selected.
3) When the selected time is reached, the appliance will start working.
19
Selecting the operations

20
Selecting the operations
How to programme delayed shutdown with the appliance on
1) Press the button and use the buttons to set the number of hours after which the
appliance should stop functioning.
2) The number of hours after which the appliance should stop functioning (1-24h) is displayed
on the left and a small dot under the symbol indicates that the timer function has been
selected.
3) When the selected time is reached, the appliance will stop working.

WARNING
Electrical Shock
Always unplug the appliance from the mains before performing any care and maintenance operation.
Failure to follow this precaution could be dangerous and result in electrical shock.
Maintenance
Your dehumidifier is designed for all-year use.
The care and maintenance instructions are given below.
Cleaning the Front Panel and Cabinet
• Use a soft cloth to clean the front panel and cabinet with warm water and mild soap or
detergent.
•Rinse and dry thoroughly. Wipe the control panel and cabinet with a soft dry cloth.
NOTE: Never sprinkle the appliance with water to avoid the risk of short circuit and fire.
• Never use gasoline, thinner or any other similar chemicals for cleaning.
• Do not use bleach or abrasives.
Cleaning the Air Filter
If the filter is dirty, air circulation is compromised and dehumidifying becomes inefficient. It is therefore good practice to clean
the filter at regular intervals. The frequency depends on the duration and conditions of operation.
•To remove the air filter, pull it out (Fig. 6).
• Use a vacuum cleaner to remove accumulated dust. If the
filter is very dirty, wash in warm water and rinse several
times.
• After washing the filter, allow it to dry completely before
replacing it.
IMPORTANT INFORMATION FOR CORRECT DISPOSAL OF THE PRODUCT IN ACCORDANCE WITH EC DIRECTIVE
2002/96/EC.
At the end of its working life, the product must not be disposed of as urban waste.
It must be taken to a special local authority differentiated waste collection centre or to a dealer
providing this service. Disposing of a household appliance separately avoids possible negative
consequences for the environment and health deriving from inappropriate disposal and enables the constituent materials to be recovered to obtain significant savings in energy and
resources.As a reminder of the need to dispose of household appliances separately, the product is marked with a crossed-out wheeled dustbin.
fig. 6
21
Care and Maintenance

22
Troubleshooting
Check the following points before calling your local Service Centre.
Problem Cause Remedy
•Plug into the mains socket
•Empty the tank
•Position the tank correctly
•Turn the unit on
The unit does not operate
•Check the power cable
connection.
•Check whether the water
tank is full
•Check water tank is properly installed.
•Check the unit is turned
on.
•The required humidity may
be lower than room humidity.
Low dehumidifying capacity
(elimination of moisture)
•Clean the filter
•Increase room temperature
•Remove the obstruction
•Air filter dirty and /or clogged.
•Ambient room temperature
too low.
•Poor air circulation/obstruction
•The humidity level set may
not be low enough.
After a long period of operation, the humidity set point is
not reached.
•TCheck that all doors and
windows are closed.
•Area/room too large for
the capacity of the dehumidifier
•Make sure windows and
doors are closed.
The appliance does not work
for 3 minutes after start-up
•The safety device has tripped
•Wait 3 minutes
The display shows
“
E1”/“E2”/“E3”
•Contact the Service
Center
The pump lamp flashes •The condensate drain
hose is not positioned correctly or has kinks.
•Check that the hose is correctly positioned
•Unplug the appliance from
the mains and plug in
again

23
Power supply voltage See rating plate
Power input in dehumidification mode “
Maximum absorbed input “
Refrigerant R134a
Air flow (min, max) 210/300 m
3
/h
Frost protection device yes
Humidistat yes
Fan speeds 3
Compressor protector yes
Tank controller yes
Dust filter yes
Dimensions WxHxD 350x570x370 mm
Weight (net) 19.5 kg.
Tank capacity 5.5 litres
Operating limits: Dehumidifying
• temperature 5° - 32°
•relative humidity 30 - 90%
Technical Characteristics
 Loading...