

DeLonghi DGS 61 ST User Operating Instructions Manual
Gas Oven
DGS 61 ST
Users Operating Instructions
Installation instructions
Before operating this oven,
please read these instructions carefully

Congratulations on your purchase of this Delonghi Gas Oven which has been
carefully designed and produced to give you many years of satisfactory use.
Before using this appliance it is essential that the following instructions are carefully
read and fully understood.
We would emphasise that the installation section must be fully complied with for your
safety to ensure that you obtain the maximum benefits from your appliance.
Important:
This appliance is designed and manufactured solely for the cooking of domestic
(household) food and is not suitable for any non domestic application and therefore should not be used in a commercial environment.
The appliance guarantee will be void if the appliance is used within a non domestic environment i.e. a semi commercial, commercial or communal environment.
Introduction
Declaration of CE conformity
✓
This oven has been designed, constructed and marketed in compliance with:
- Safety requirements of EU Directive "Gas" 90/396/EEC;
- Safety requirements of EU Directive "Low Voltage" 2006/95/EC;
- Protection requirements of EU Directive "EMC" 89/336/EEC;
- Requirements of EU Directive 93/68/EEC.
GB
2

IMPORTANT INSTRUCTIONS AND ADVICE FOR THE USE OF
ELECTRICAL APPLIANCES
The use of any electrical appliance requires the compliance with some basic rules,
namely:
– do not touch the appliance with wet or damp hands (or feet)
– do not use the appliance whilst in bare feet
– do not allow the appliance to be operated by children or unqualified persons
without supervision.
The manufacturer cannot be deemed responsible for damages caused by wrong or
incorrect use.
BEFORE USING FOR THE FIRST TIME
• Read the instructions carefully before installing and using the appliance.
• After unpacking the appliance, check that it is not damaged. In case of doubt, do
not use the appliance and contact your supplier or a qualified engineer.
• Remove all the packing materials (i.e. plastic bags, polystyrene foam, etc.) and do
not leave it around within easy reach of children, as these may cause serious injuries.
The packaging materials are recyclable.
• Do not attempt to modify the technical characteristics of the appliance, as it may
become dangerous to use.
• The appliance should be installed and all the gas/electrical connections made by a
qualified engineer in compliance with local regulations in force and following the
manufacturer's instructions.
3
USING THE OVEN FOR THE FIRST TIME
You are advised to carry out the following operations:
• Assemble the interior of the oven as described under the heading “Cleaning and
maintenance”
• Switch the empty oven ON at maximum temperature for about two hours to elim-
inate traces of grease and smell from the components.
• Let the oven cool down, switch off the electrical supply, then clean the inside of
the oven with a cloth soaked in water and neutral detergent and dry thoroughly.

IMPORTANT SAFEGUARDS AND RECOMMENDATIONS
• Do not carry out any cleaning or maintenance without first disconnecting the appli-
ance from the electrical supply.
• During and after use of the oven, certain parts will become very hot. Do not touch
hot parts.
• After use always ensure that the knobs are in the OFF position.
• Keep children away from the oven during use.
• Do not allow young children or infirm persons to use the appliance without your
supervision.
• WARNING
When correctly installed, your product meets all safety requirements laid down for
this type of product category. However special care should be taken around the
rear or the underneath of the appliance as these areas are not designed or intended to be touched and may contain sharp or rough edges, that may cause injury.
• Fire Risk! Do not store inflammable materials inside the oven.
• Always use oven gloves when removing the shelves and food trays from the oven
whilst hot.
• Do not line the oven walls with aluminium foil. Do not place baking trays or the
drip tray on the base of the oven chamber.
• Clean the ovens regularly and do not allow fat or oils to build up in the oven base
or trays. Remove spillages as soon as they occur.
• Always stand back from the oven when opening the oven door to allow steam
and hot air to escape before removing the food.
• Do not hang towels, dishcloths or other items on the cooker or its handle – as
this could be a fire hazard.
• Make sure that electrical cords connecting other appliances in the proximity cannot
become entrapped in the oven door.
• Before disposing of an unwanted appliance, it is recommended that it is made inop-
erative and that all potentially hazardous parts are made harmless.
• Important: This appliance has been designed for domestic use only. The appliance
is NOT suitable for use within a semi-commercial, commercial or communal environment
.
•
Safe food handling: leave food in the oven for as short a time as possible before
and after cooking. This is to avoid contamination by organisms which may cause
food poisoning. Take particular care during warmer weather.
SAFETY GUARD
The glass on the oven door reaches high temperatures during operation.
For child safety, a door guard can be fitted to prevent contact with the hot glass.
The door guard (kit for installing the 3rd glass on the oven door) is supplied as an
accessory on request. Contact one of our dealers or Service Centre and indicate the
relevant appliance model.
4
During use the appliance becomes hot. Care should be taken to avoid touching heating elements inside the oven.
Attention: the oven door becomes very hot during operation.
Keep children away.
1 2
3
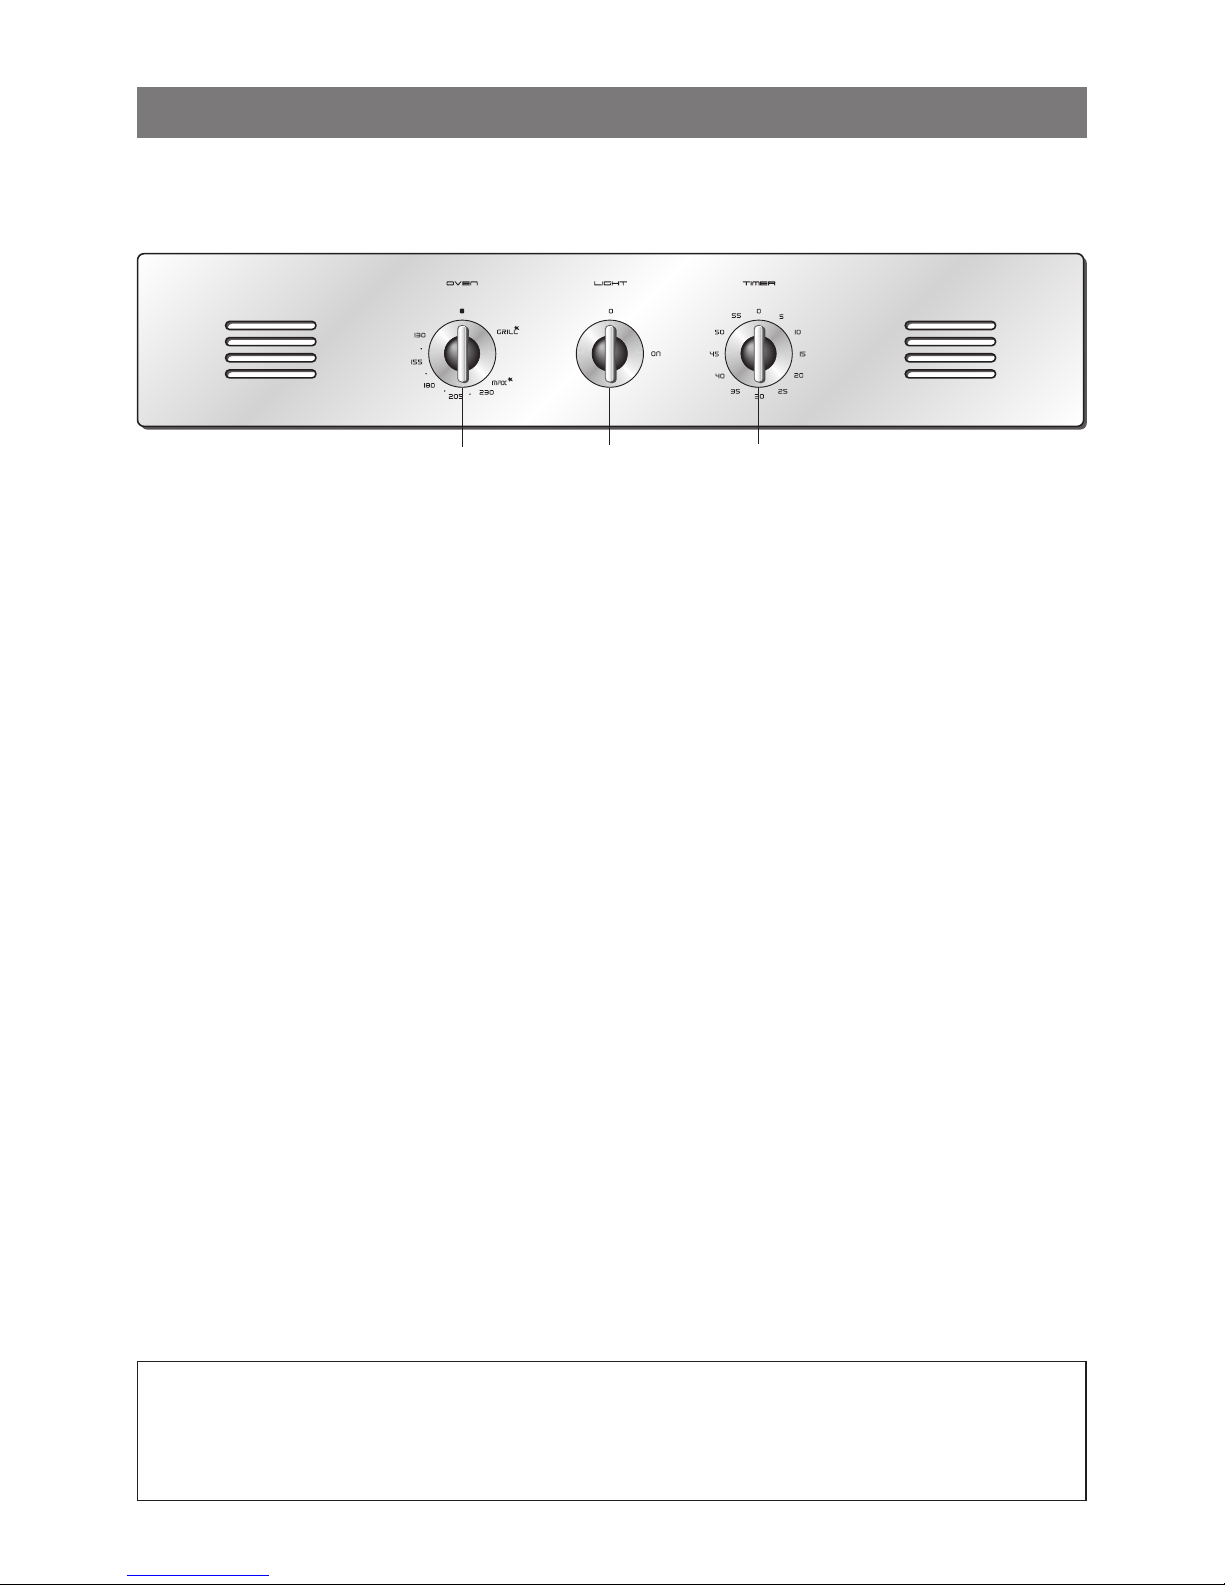
CONTROL PANEL - Controls description
1. Oven/grill gas control knob
2. Oven light selector
3. 60’ timer.
GENERAL FEATURES
The oven is furnished completely clean. It is advisable, however, upon first use, to
turn the oven on to the maximum temperature to eliminate possible traces of grease
from the burner.
The same operation may be done with the grill burner.
The oven is fitted with:
– One gas burner (3,00 kW), located at the bottom, providing self-ignition and safe-
ty device
– One gas grill (2,30 kW), placed on the top, providing self-ignition and safety device.
IMPORTANT:
The oven is supplied with a cooling device for the control panel.
The cooling fan switches on automatically, and will continue to run even if
the oven is switched off, until the correct temperature is reached.
Oven features
1
1
Fig. 1.1
5
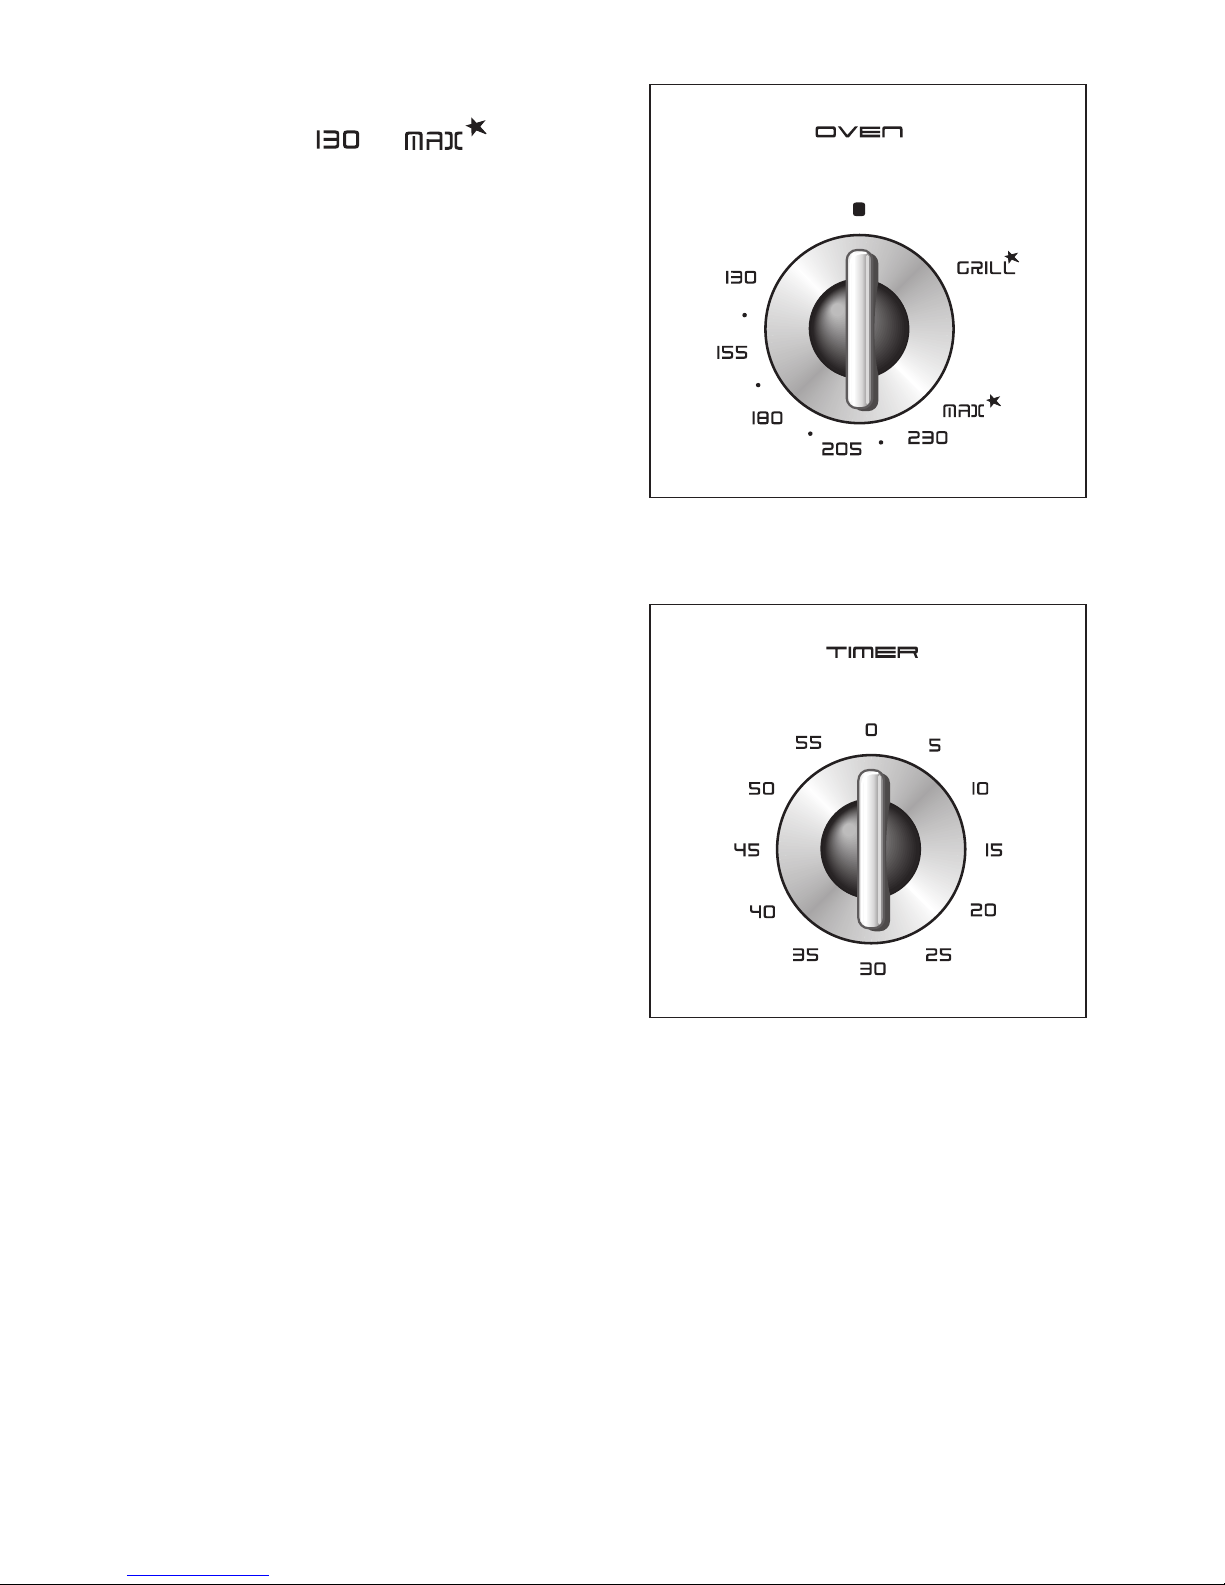
THERMOSTAT KNOB
The values from to printed
on the facia panel around the thermostat
knob (fig. 1.2) show in a growing
sequence the oven temperature in °C.
CAUTION:
If the burner is accidentally extinguished, turn the gas off at the control knob and
wait at least 1 minute before attempting to relight.
CAUTION:
Gas appliances produce heat and humidity in the environment in which they are
installed.
Ensure that the cooking area is well ventilated by opening the natural ventilation
grilles or by installing an extractor hood connected to an outlet duct.
CAUTION:
If the appliance is used for a prolonged time it may be necessary to provide further ventilation by opening a window or by increasing the suction power of the
extractor hood (if fitted).
TIMER
The timer can be set to a maximum of
60 minutes. Turn the dial clockwise to
the maximum setting of 60 minutes
then turn it anti-clockwise until it reaches the desired time. When the set time
expires the timer bell will sound.
NOTE:
The oven will not switch itself off at the
end of the timed period.
Fig. 1.2
Fig. 1.3
6
LIGHTING OF OVEN BURNER
The thermostatic tap controlling the gas supply to the burner is equipped with a safety device which automatically stops the gas flow in case of flame extinction. The temperature is constantly maintained on the set value.
The electric ignition starts up by pressing the thermostat knob.
A safety device prevents the electric ignition from functioning when the
oven door is shut.
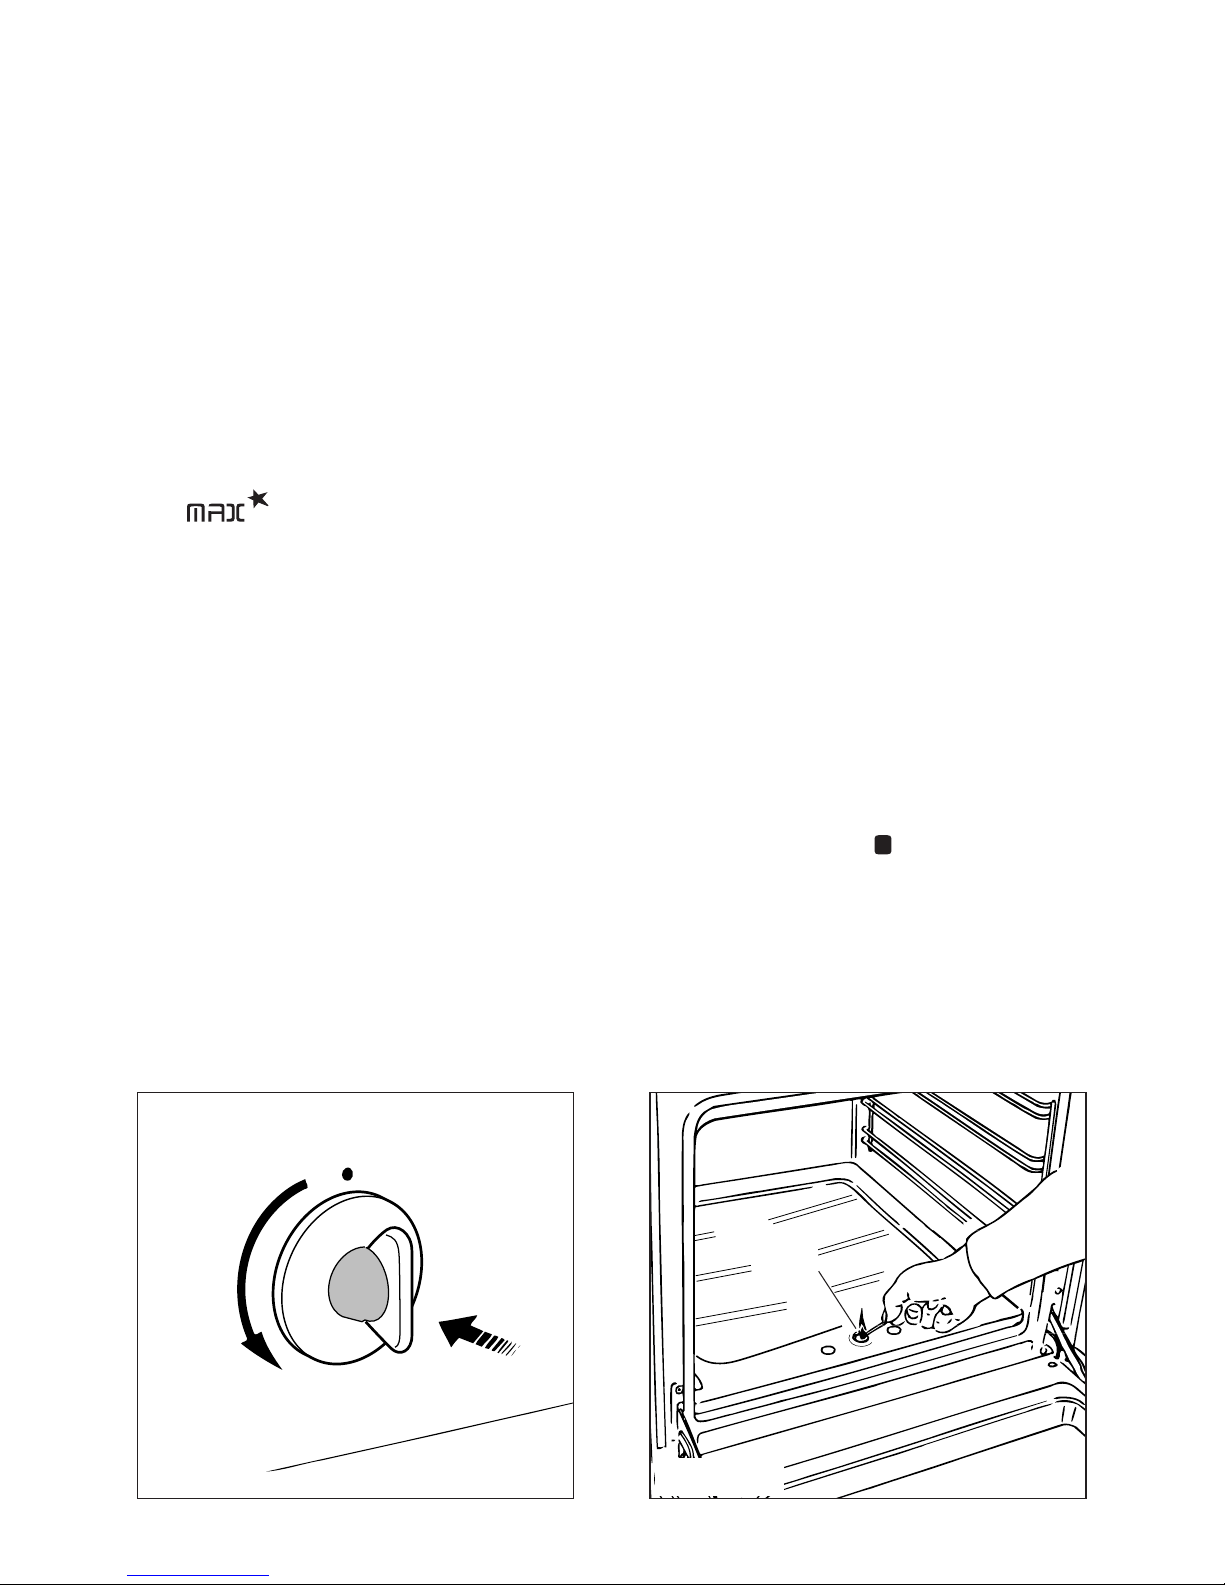
To light the burner, you need to:
1 – Fully open the oven door.
2 – Press the thermostat knob (fig. 1.2) thoroughly to start up the electric ignition and,
keeping the knob under pressure turn it anti-clockwise (fig. 1.4) to position
.
Never continue this operation for more than 15 seconds. If the burner has still
not ignited, wait for about 1 minute prior to repeating the ignition.
To light the oven manually, approach a flame to the hole “A” of the floor (fig.
1.5), then press and turn the thermostat knob.
3 – Wait about ten seconds after lighting the burner to release the knob (priming time
of the thermocouple)
4 – Adjust the thermostat knob on the desired setting.
If the flame extinguishes for any reason, the safety valve will automatically shut off
the gas supply to the burner.
To re-light the burner, first turn the oven control knob to position , wait for at least
1 minute and then repeat the lighting procedure.
For a correct pre-heating, we suggest to remove tray and shelf from the oven and
introduce them again after 15 minutes.
ATTENTION: In case of manual lighting, never turn the thermostat tap before
approaching a flame to the hole “A” of the floor.
A
Fig. 1.4
Fig. 1.5
7
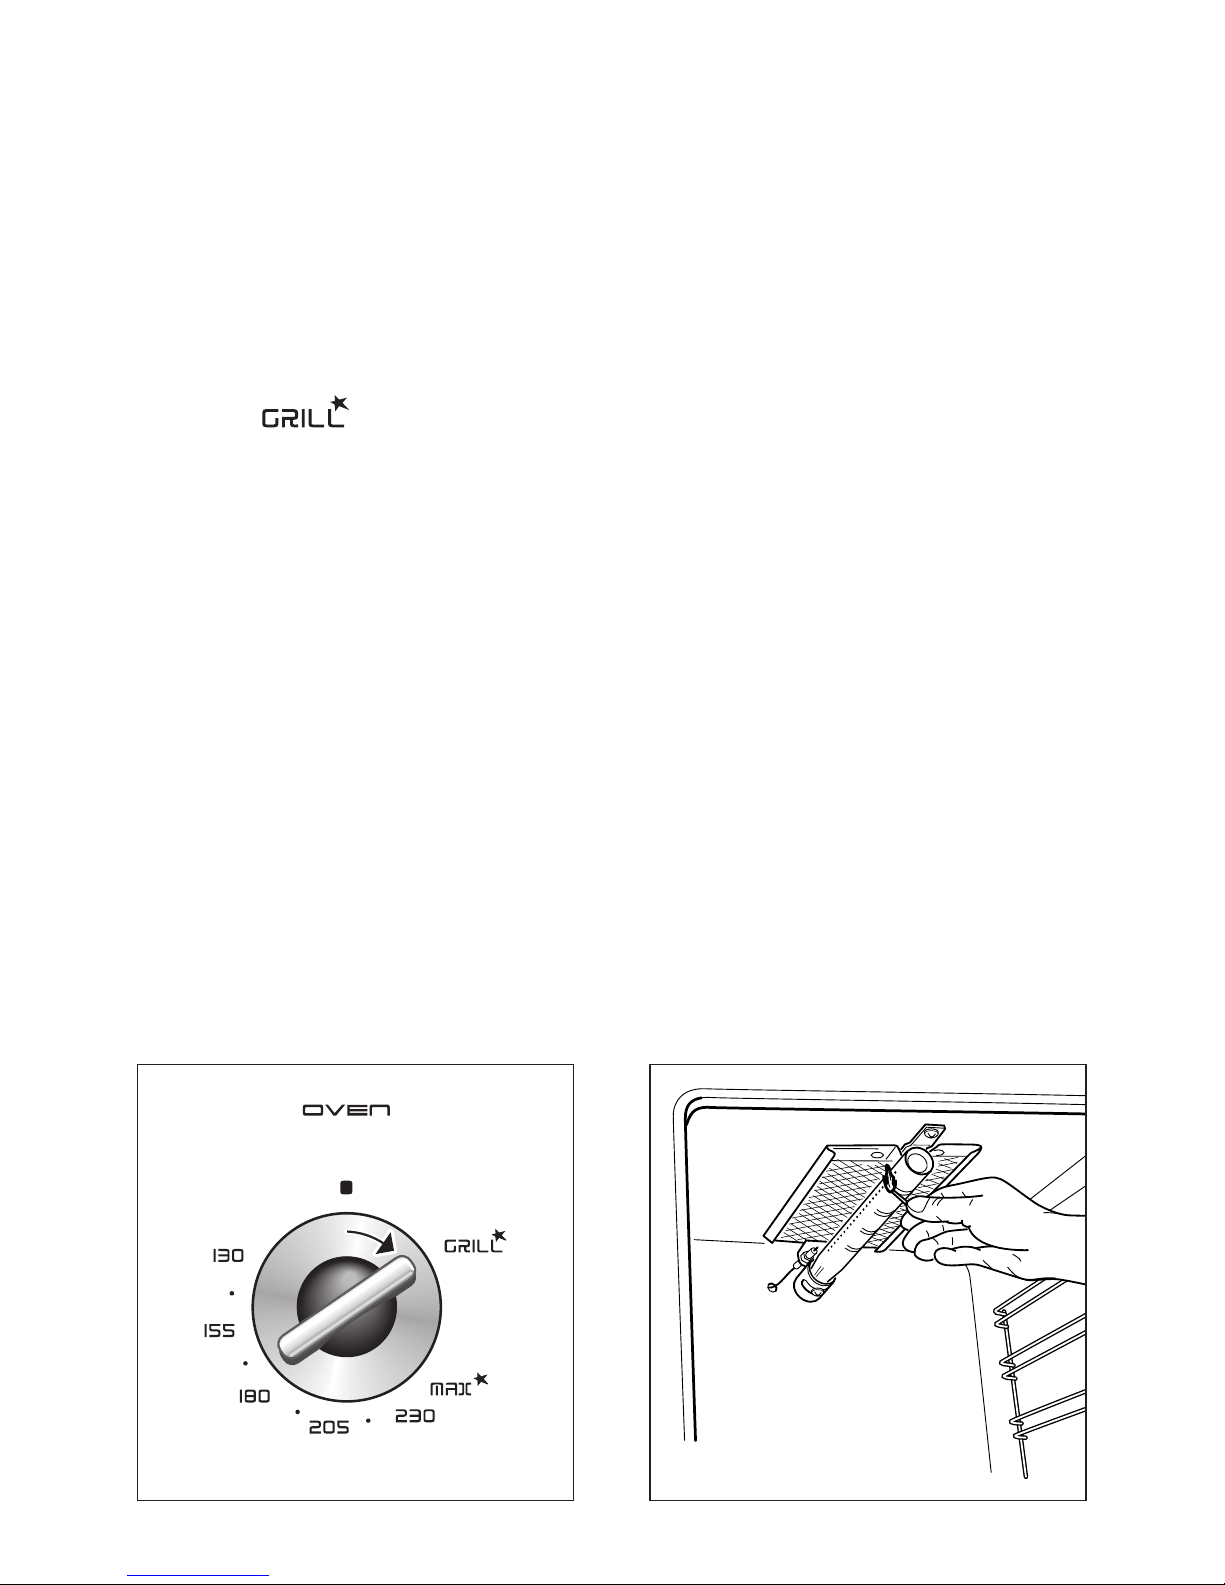
LIGHTING OF GAS GRILL BURNER
The thermostatic tap controlling the gas supply to the burner is equipped with a
safety device which automatically stops the gas flow in case of flame extinction.
The electric ignition starts up by pressing the thermostat knob.
A safety device prevents the electric ignition from functioning when the
oven door is shut.
To turn on the grill burner:
1) Open the oven door.
2) Press thoroughly and turn clockwise the oven gas thermostat knob fig. 1.6 to set
symbol .
To light the grill manually, put a flame to the right and left side of the burner for 2-3
seconds after the thermostat has been opened (fig. 1.7).
3) Wait about ten seconds after the burner lighting before releasing the knob (time of
priming of the valve).
Should the flame of the burner extinguish for any reason, the safety valve will cut off
automatically the gas flow to the thermostat.
IMPORTANT: In case of accidental extinction of the burner, turn off the control knob and wait at least one minute before trying to ignite again.
For correct use see chapter “TRADITIONAL GRILLING”.
Remember to keep children away from the appliance when you use the
grill or oven, since these parts become very hot.
Fig. 1.6
Fig. 1.7
8
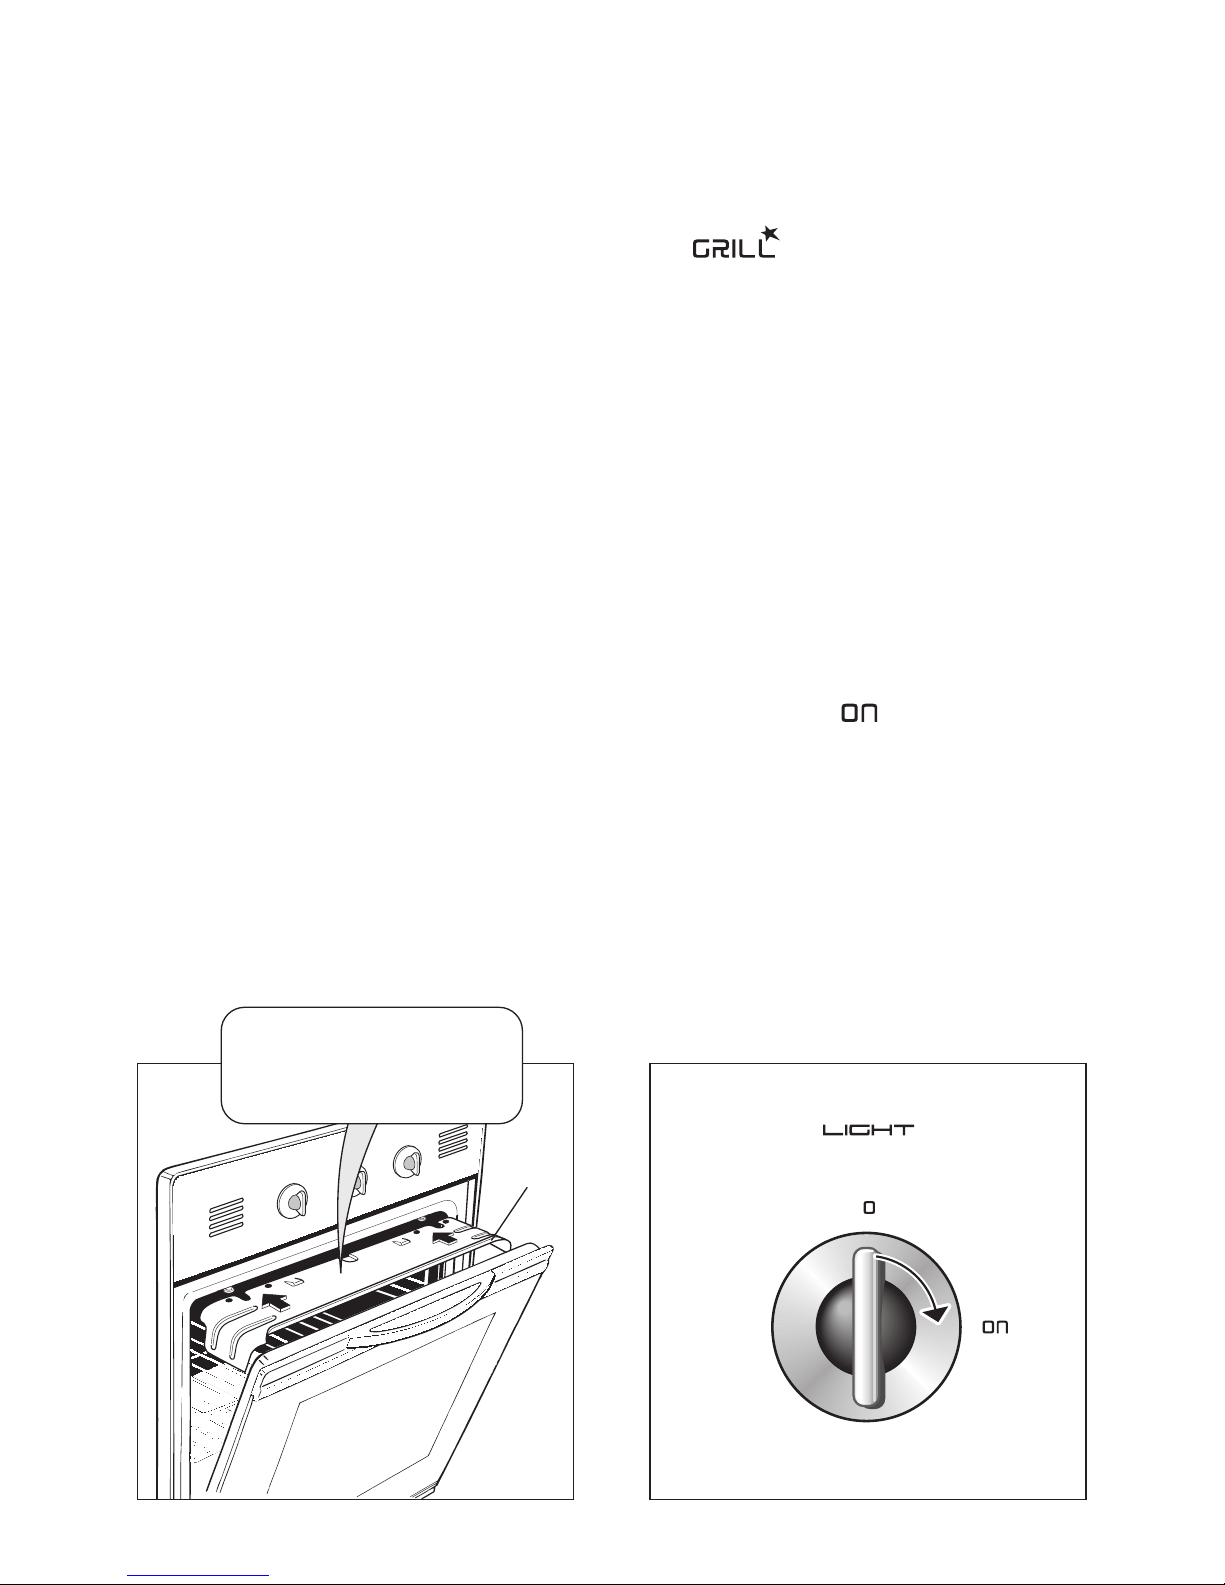
TRADITIONAL GRILLING
Very important: always use with the door ajar and with shield "A” mounted (Fig. 1.8).
Fit the screen A (Fig. 1.8) which protects the control panel from the heat.
Switch the grill on, setting the knob to position .
Leave to warm up for approximately 5 minutes with the door ajar.
Place the food inside positioning the rack as near as possible to the grill.
Insert the drip pan under the rack to collect the cooking juices.
The operation of the grill should not exceed 30 minutes.
Attention: the oven door becomes very hot during operation.
Keep children away.
OVEN LIGHT
The oven provides an interior lamp to allow the visual inspection during the cooking.
To light the oven lamp turn the knob fig. 1.9, to the symbol .
A
Fig. 1.8
Fig. 1.9
9
HOT PART
ALLOW TO COOL
BEFORE REMOVING
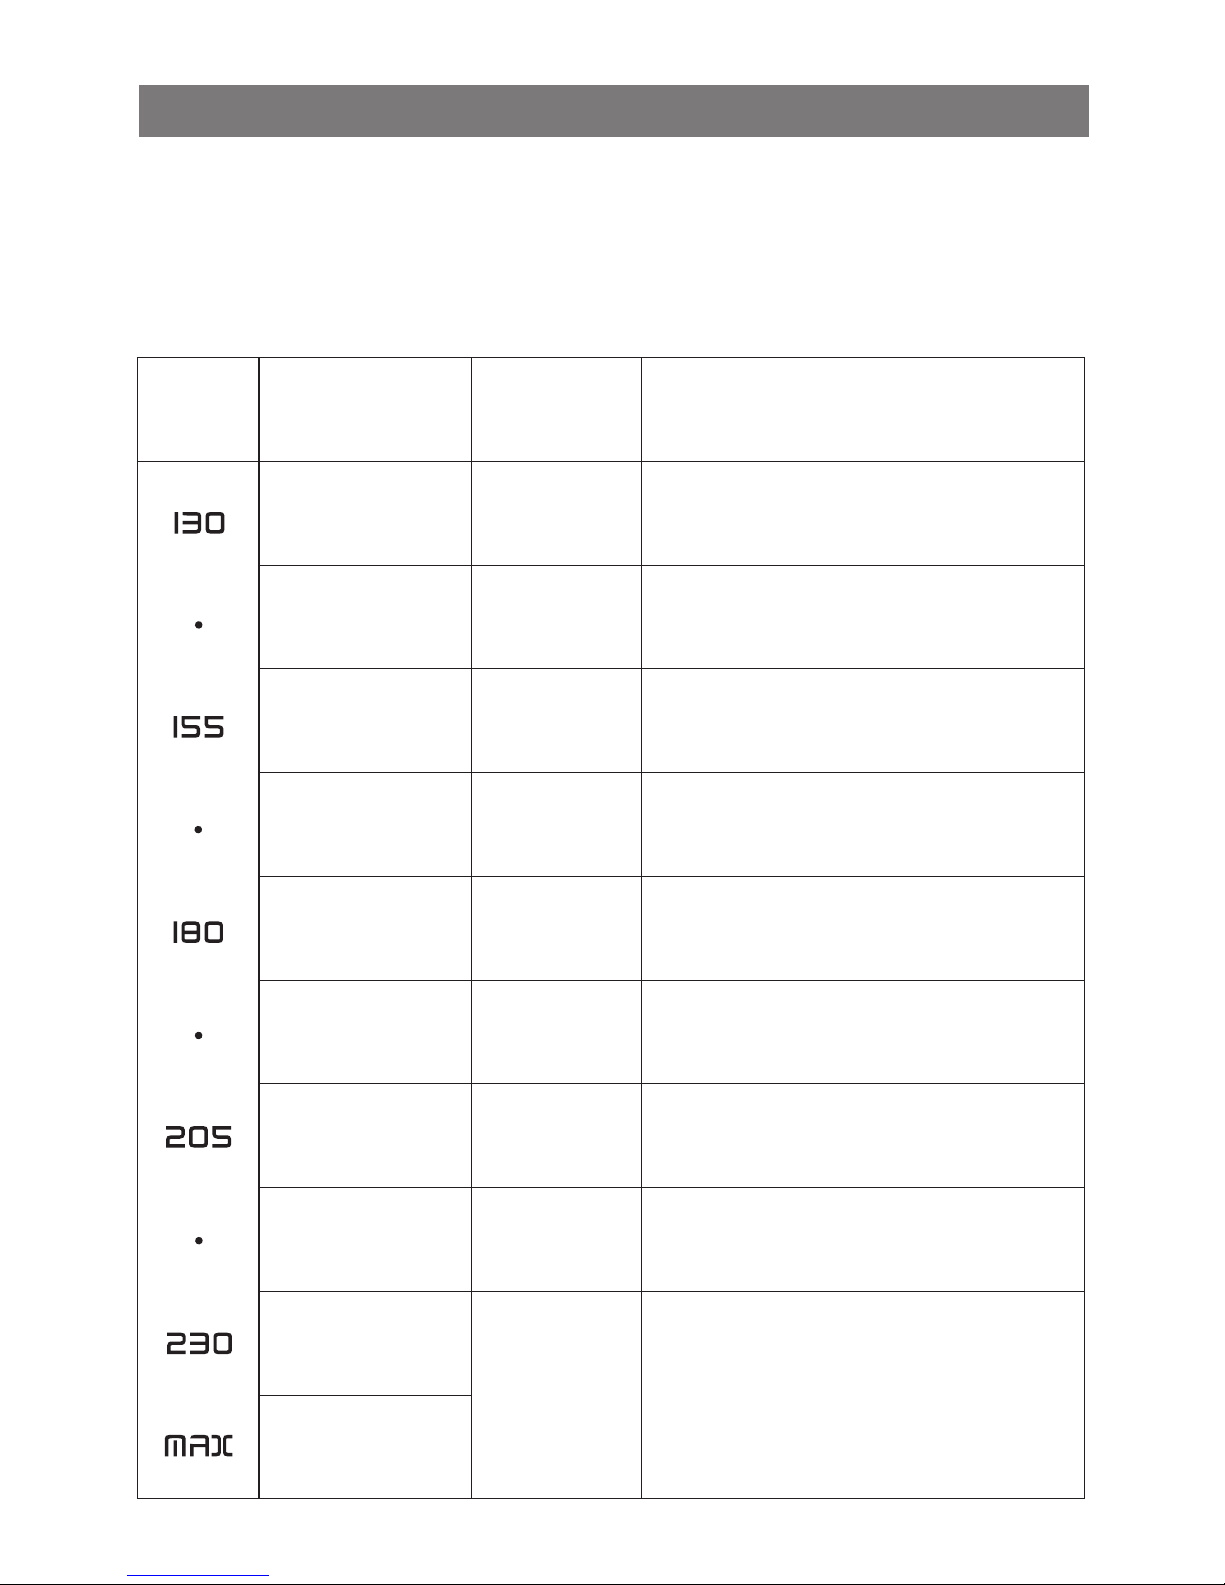
Temperature and times given are approximate, as they will vary depending on the quality
and amount of food being cooked.
Remember to use ovenproof dishes and to adjust the oven temperature during cooking
if necessary.
Cooking guide
2
2
10
KNOB
SETTING
APPROX.
TEMPERATURE
HEAT OF
OVEN
TYPE OF DISH TO COOK
130°C
(266°F)
Very cool
oven
Meringue
slow cooking foods.
140°C - 145°C
(284°F - 293°C)
Cool or
slow oven
Milk puddings, very rich fruit
cakes, eg., Christmas.
155°C
(311°F)
Cool or
slow oven
Stews, casseroles, braising,
rich fruit cakes, eg., Dundee.
165°C - 170°C
(329°F - 338°F)
Warm oven
Biscuits, Low temperature roasting,
rich plain cakes eg., Madeira cake.
180°C
(356°F)
Moderate
oven
Plain cakes, eg., Victoria
sandwich, meat pies.
190°C - 195°C
(374°F - 383°F)
Fairly hot
oven
Small cakes, savoury flans,
fish.
205°C
(401°F)
Hot oven
Plain cakes and buns, swiss rolls,
fruit pies. High temp. roasting.
215°C - 220°C
(419°F - 428°F)
Moderately
hot ovenl
Bread and bread rolls etc., scones,
flaky and rough puff pastry,
Yorkshire pudding
230°C
(446°F)
Very hot
oven
Sausage rolls, mince pies, puff
pastry.
Browning ready cooked dishes.
240°C
(464°F)
 Loading...