

Page 1
Storage Center 5.5
System Manager
User Guide
Page 2

Storage Center System Manager 5.5 User Guide
680-019-009
Revision Date Description
A 03/16/11 Initial release for Storage Center 5.5.2
B 4/12/11 Updated to include new locations for contacting Dell technical support and downloading
product manuals and other editorial changes and corrections.
Disclaimers
Information in this document is subject to change without notice.
Trademarks and Copyright
Trademarks used in this text: DellTM, the DELLTM logo, and CompellentTM are trademarks of Dell Inc.
Other trademarks and trade names may be used in this document to refer to either the entities claiming the
marks and names or their products. Dell Inc. disclaims any proprietary interest in trademarks and trade
names other than its own.
© 2011 Dell Inc. All rights reserved.
Page 3

Contents
Preface
Purpose vii
Related Publications vii
Contacting Dell Support Services vii
1 Introduction
What’s New in this Release 2
Introducing the Storage Center System Manager 7
Navigation 12
2 Quick Start Guide
Introduction 16
3 Servers
Introduction 28
Servers 29
Server Clusters 32
Virtual Servers 42
Common Server Commands 45
Managing HBAs 47
Managing Server Folders 52
Viewing Server Information 54
Topology Explorer Server Functions 62
4 Volumes
Introduction 66
Creating Volumes 67
Mapping Volumes to a Server 73
Import Data to Lowest Tier 80
Creating a Boot from SAN Volume 82
Modifying Volumes 86
Managing Volume Folders 91
Applying Replay Profiles 95
Copy, Mirror, and Migrate 97
iii
Page 4

Viewing Volume Information 100
Recycle Bin 108
Topology Explorer Volume Functions 109
5 Disks
Introduction 114
Viewing Tiers 115
Adding Disks to a Storage Center System 116
Configuring Storage 120
Rebalancing RAID 122
Managing Disks 126
Managed Disk Folders 130
Importing from External Device without Replication License 133
Non-Standard Storage Types 138
6 Controllers
Introduction 142
About Controller Virtual Ports 143
Viewing Controller Properties 144
Viewing Controller Status 146
Viewing FC Folders and Cards 150
Viewing iSCSI Cards 159
Creating a Remote Storage Center Connection 173
Configuring Remote Connections Using CHAP 181
Viewing SAS Cards 190
Rebalancing Local Ports 194
7 System Management
Setting Up a Storage Center 196
Configuring Local Ports 201
Configuring iSCSI IO Cards 211
Allowing Replications to/from Remote Systems 212
Viewing Licensed Applications 213
Configuring System Access via IP Filtering 214
Viewing Disk Space Usage Summary 220
SNMP Server 227
Viewing System Properties 229
Selecting RAID Stripe Width 230
Data Progression 232
Setting System Cache 234
Configuring Global Disk Spares 235
Adding Optional Information about Storage Center 236
Finding Unmanaged Hardware 237
Viewing Background Processes 240
Phoning Home 241
Viewing the System Log 243
Responding to the Alert Monitor 244
Monitoring Storage Space 247
Changing the Storage Alert Threshold 248
Adding Space 249
iv Storage Center 5.5 System Manager User Guide
Page 5

Adding a Controller 250
Shutting Down and Restarting 252
Upgrading Storage Center Software 253
8 Users and Groups
Introduction 262
User Privilege Levels 263
Viewing Users 264
Changing User Properties 268
Configuring User Volume Defaults 272
Managing User Groups 277
9 Data Instant Replay
Introduction 284
Viewing Replay Profiles 285
Applying Replay Profiles to Volumes 288
Viewing Volumes Attached to a Replay Profile 290
Creating Replay Profiles 292
Adding Replay Profile Rules 300
Managing Replay Profiles 305
Recovering Data 321
10 Remote Instant Replay
Introduction 328
Synchronous and Asynchronous Replications 329
Estimating Bandwidth 330
Disallowing Replications Between Storage Center Systems 331
Establishing Physical Connectivity 332
Defining a QoS 333
Creating Volumes on a Remote System 338
Mapping an Existing Volume to a Remote System 339
Creating Replications 341
Creating a Simulated Replication 342
Viewing Replications 346
Modifying Replications 348
Re-creating a Volume from a Replication 349
11 Charting Viewer
Introduction 352
Downloading and Installing Charting Viewer 353
Using Charting Viewer 353
Viewing Storage Center Charts 356
Printing a Chart 357
Saving a Chart as a PNG Image 358
Zooming In and Out 358
12 Additional Hardware
Introduction 360
v
Page 6

Enclosures 360
Removing an Enclosure 371
Uninterruptable Power Supply (UPS) 373
Racks 374
13 IO Card Changes
I/O Card Change Wizard 380
A Storage Profiles
Overview 382
Changing User Volume Defaults 383
Storage Profiles Created by the System 384
Creating Custom Storage Profiles 385
Managing Storage Profiles 388
Manual Storage Mode 392
B Portable Volume
Introduction 398
List of Portable Volumes 398
C Enterprise Solid State Drives
Overview 402
Installation and Setup 403
D Configuring a UPS
Introduction 406
Configuring an APC™ UPS 406
Configuring a Liebert™ UPS 411
E Server HBA Settings
Introduction 416
Settings by HBA Vendor 416
Settings by Server Operating System 419
Glossary 425
vi Storage Center 5.5 System Manager User Guide
Page 7

Preface
Purpose
The Storage Center System Manager User Guide describes the Storage Center System
Manager software that manages an individual Storage Center system.
Related Publications
Compellent Storage Center documentation consists of the following publications:
• Storage Center System Manager Setup Guide
Describes how to set up a new Storage Center.
• Storage Center System Manager Upgrade Guide
Describes how to upgrade Storage Center software from version 4.5.6 and above to
version 5.5 and from version 5.0 and higher to version 5.5.
• Storage Center Enterprise Manager User Guide
Describes how to use Enterprise Manager to view and manage one or more Storage
Centers, as well as generate and view charts and reports on Storage Center usage
statistics. In addition, describes how to use Remote Instant Replay to replicate Replays
to one or more Storage Centers.
To download Dell Compellent product manuals, go to:
http://www.dell.com/manuals
Contacting Dell Support Services
Please contact Dell Technical Support Services from the following address if you need
support assistance:
http://support.dell.com/compellent
vii
Page 8

Preface
viii Storage Center 5.5 System Manager User Guide
Page 9

1 Introduction
What’s New in this Release 2
Introducing the Storage Center System Manager 7
Starting the Storage Center System Manager 7
Possible Messages on System Manager Startup 9
Navigation 12
View Menu 14
1
Page 10

Introduction
What’s New in this Release
Congratulations on making the move to Fluid Data storage from. The new Fluid Data
architecture combines a powerful data movement engine, virtualized software applications
and an agile hardware platform to intelligently manage data at a more granular level. The
patented technology optimizes performance, lowers costs and increases storage
utilization.
Storage Center 5.5
iSCSI Configure IO Card Wizard Improvements
All iSCSI cards are now configurable using the iSCSI Configure IO Cards wizard. In
previous releases, only uninitialized cards could be configured via this wizard. In addition,
all iSCSI IO cards detected by the system can now be configured from a single window
rather than configuring cards one at a time on separate windows. This functionality can be
accessed via the Startup Wizard and via Storage Center System Explorer through multiple
paths.
Search Capability added to GUI
A search capability has been added to the bottom of the system tree in System Explorer.
The search feature provides the ability to search through the system tree for objects . A
dropdown menu allows filtering objects by type: All (default), Volumes, Disks, Servers. Left
and right arrows allow navigating forward and back. An arrow to the left of the search field
allows you to minimize/maximize the search function. A checkbox is provided to match
case.
Configure Local Ports Changes
Front-end values for Fibre Channel ports attached an enclosure can no longer be set via
the Configure Local Ports wizard. In support of this change, a Enclosure Connected column
has been added to the FC ports table (virtual port and legacy port modes).
Demoting Volume Mappings from a Server Cluster to an Individual Cluster Node
In earlier versions of Storage Center, users were required to demote server cluster
mappings one at a time. In this version, users can demote multiple cluster mappings at the
same time using the Demote Mappings to Server Cluster Nodes window.
Restore Deleted User Wizard
The Restore Deleted User wizard enables users to select the deleted user to be restored
and provide a new password for the restored user.
Allow Replays to Coalesce into an Active Replay
The Volume Properties screen now displays an option to allow Replays for the displayed
volume to coalesce into the active Replay. This option is unselected by default. As part of
this change, the Space Consumption Limit and Import Data To Lowest Tier options have
also been moved from the General tab to the new Advanced tab of the Volume Properties
window.
2 Storage Center 5.5 System Manager User Guide
Page 11

What’s New in this Release
OpenVMS Unique Disk IDs Displayed
The Volume Properties screen now allows the user to set the Open VMS Unique Disk Id for
the volume. This attribute is used by Open VMS to uniquely identify the volume. It is
ignored by other operating systems.
Log Filter Improvements
Users can now select a log filter timeframe from a dropdown menu on the Filter Log
Messages window. On dual-controller systems, logging can be set per controller. The
default is to show all log messages.
Enabling / Disabling Secure Console Access
If secure console access to the Storage Center was configured, menu options to restart and
disable this access are now available on the Storage Management > System menu. The
new menu options provide easy access to common secure console actions previously
available only within the Configure Secure Console wizard.
Storage Center 5.4
Model 40 Storage Controller (CT-SC040)
The Model 40 storage controller is based on the SuperMicro X8DTH-iF motherboard with
Intel Nehalem chipset technology.
Fibre Channel over Ethernet – 10Gb
This release adds Fibre Channel over Ethernet (FCoE) capabilities to the product line via
the QLogic FCoE CNA QLE8152 IO card. This card provides PCI Express dual 10Gbps
Ethernet ports with full hardware offload for FCoE protocol processing. While the QLE8152
is capable of standard TCP/IP and Ethernet processing, Storage Center only supports the
card for FCoE capabilities. The card must be connected to a CISCO Nexus 5000 series
switch.
Fibre Channel – 8Gb
This release provides a second source for 8Gb Fibre Channel interfaces via the QLogic
QLE2564 PCI Express, quad port, Fibre Channel adapter. This card provides functional
equivalence to the existing Emulex 8Gb Fibre Channel card and can be used in addition to
as well as a replacement for the Emulex card.
SAS – 6 Gb
This release provides the next step in performance and scalability of the storage back-end
technology with the introduction of SAS 2.0 compliant 6G IO cards to communicate with
new SAS 2.0 6G compliant enclosures and disk drives. The LSI SAS 9200-16e is a quad
wide port full height PCI-e card with support for 16 lanes of 6Gb interfaces. The initial
release of SAS 6G provides support for 48 devices per chain, with the ability to have two
chains of devices per IO Card. SAS connections are described in greater detail in the
Storage Center 5.4 SAS Connections Guide, document number 680-049-001.
3
Page 12

Introduction
iSCSI Card – Enhanced 10Gb Support
This release provides 10Gb iSCSI support for additional network interface, switches, and
server operating systems beyond what was available in the previous release, including
support for the Chelsio S320E-CR (PCIe based) adapter. This is a dual-port IO card utilizing
the Chelsio T3 (terminator 3) ASIC for 10 Gb offload processing.
IO Card Change Wizard
The new IO Card Change Wizard provides a user interface within the Storage Center
System Manager to the utility used to map hardware changes to existing configurations.
The wizard can be used for IO card upgrades and removals or when upgrading controllers.
For more information, see Storage Center 5.4 I/O Change Wizard, document number
685-001-001 available through Dell Support Services.
Storage Center 5.3
iSCSI Card – Limited 10 Gigabit Support
This release introduces limited support for the Chelsio S320E-CR 10Gbps iSCSI card.
Configure Operational Mode
Legacy and Virtual Port operational mode can be selected during initial system setup for a
new Storage Center when Virtual Ports are licensed. This feature is described in the
Storage Center System Setup Guide, document number 680-022-007. After initial system
setup, ports can be configured within Storage Center Manager by using the Configure
Local Ports wizard.
Configure Local Ports Wizard
The redesigned Configure Local Ports wizard combines Legacy and Virtual Port
configuration in a single wizard. The Configure Local Ports screen displays a list of
controllers, slots, and ports present on the Storage Center. For each IO card and port used
on each controller, you can specify a network value of front end or back end and a usage
of primary or reserved.
iSCSI Qualified Names (IQNs)
In previous releases, servers were created using WorldWide Names (WWNs) for HBAs.
Users now have a choice when creating servers — WWN or iSCSI Name. The default is
iSCSI Name. For server ports, the iSCSI name is a user-defined string that might follow the
conventional iSCSI Qualified Name (IQN) format, but does not have to, and is intended to
be globally unique. The Storage Center does not impose the IQN format for servers and
enforces uniqueness only within a single Storage Center system.
Storage Center 5.2.2
Server Cluster
Storage Center 5.2.2 enables the selection of volumes to be promoted to a server cluster
when creating the cluster. Previously, all volumes mapped to server nodes were
automatically promoted to the Server Cluster. Once a volume is mapped to a Server
Cluster, it can be demoted from the Server Cluster to a server node. When a volume is
mapped to a server node, it can be promoted to a Server Cluster.
4 Storage Center 5.5 System Manager User Guide
Page 13

What’s New in this Release
Import Mode
Import Mode allows you to import data directly to the lowest configured tier of storage.
Advanced Mapping Display
An option exists to allow advanced mapping information to be displayed. By default, this
option is turned off.
Storage Center 5.2.1
RAID 6
In addition to RAID 10 and RAID 5-5/5-9, Storage Center allows you to select RAID 6 for
any storage tier. RAID 6 provides greater storage redundancy and efficient use of disks.
Secondary DNS Server
Users now have the option of entering a secondary DNS server. If a path is not available to
the primary DNS server, the Storage Center connects to the secondary DNS server.
Import from External Device
Previously, a synchronous replication license was required for data to be loaded from an
external device. Now the command to Import from an External Device and Classify Disk as
External are available without a synchronous replication license. Import from External
Device uses synchronous replication to import data from a non-Storage Center device.
Storage Center 5.1
System Dashboard
The license window that appeared in previous versions of the System Manager is replaced
with a System Dashboard that displays used and available storage space, and a history of
storage use. The Dashboard lets you monitor your space more efficiently. The license
window is available from the Help menu.
Storage Center 5.0
Virtual Ports
Virtual Ports eliminate the need for reserve ports. When operating in Virtual Port mode all
front-end ports accept IO.
Consistency Groups
Consistency Groups create a synchronized Replay of all volumes within the consistency
group while the IO stream on all volumes is halted. This creates a consistent data set.
Consistency Groups can also be replicated to other Storage Centers.
Mapping
Storage Center adds the ability for you to identify the operating system of each server so
that it can map Volumes to Servers based on the rules of the operating system of the server.
5
Page 14

Introduction
Portable Volume
A Portable Volume is a removable USB drive that moves large quantities of data between
replicating systems to establish a baseline replication. Portable volumes are configured in
Enterprise Manager.
Leibert™ UPS
Storage Center 5 supports the Liebert Uninterruptable Power Supply. The UPS is now
managed through SNMP.
SAS
Storage Center 5 supports SAS (Serial Attached SCSI) protocol enclosures and disks. SAS
achieves data transfer speeds on four wide lanes of each SAS port
6 Storage Center 5.5 System Manager User Guide
Page 15

Introducing the Storage Center System Manager
Introducing the Storage Center System Manager
The Storage Center System Manager:
• Provides a central management interface to create and manage Storage Center
volumes, servers, disks, and users.
• Displays the status of hardware components.
• Enables local and remote backup and restore.
• Provides Phone Home technical support.
• Allows multiple users to have different levels of access privileges.
In addition to the System Manager, Storage Center provides a rich set of separatelylicensed applications that support dynamic storage. To view currently licensed applications,
from the Help menu, select Licensed Features.
Note Figures in this document show views, menus, and options displayed when logged in
with Administrator privileges. If you are logged in as a Volume Manager or Reporter,
what you see displayed may differ from the figures and options described in this User
Guide.
Starting the Storage Center System Manager
Access Storage Center System Manager from a workstation or PC on the same network as
the Storage Center controller. View the Storage Center System Manager through one of
these browsers:
• Microsoft Windows Internet Explorer Versions 7, 8, and 9
• Mozilla Firefox Version 3 on Microsoft Windows
If you log on using an unsupported browser, the system returns a warning stating that some
functions of the Storage Center software may not function as expected.
Note The Storage Center System Manager cannot load with the following unique
combination of applications: Windows 2008 (64 bit), FireFox 3.0, and Java Runtime
Environment 6_10.
To start Storage Center System Manager
1 In the address bar of the web browser, enter the name or IP address of the
Management controller. (This was configured during setup.) A security alert appears.
2 Click Yes to acknowledge the alert. The Storage Center System Manager login window
appears.
7
Page 16
Introduction
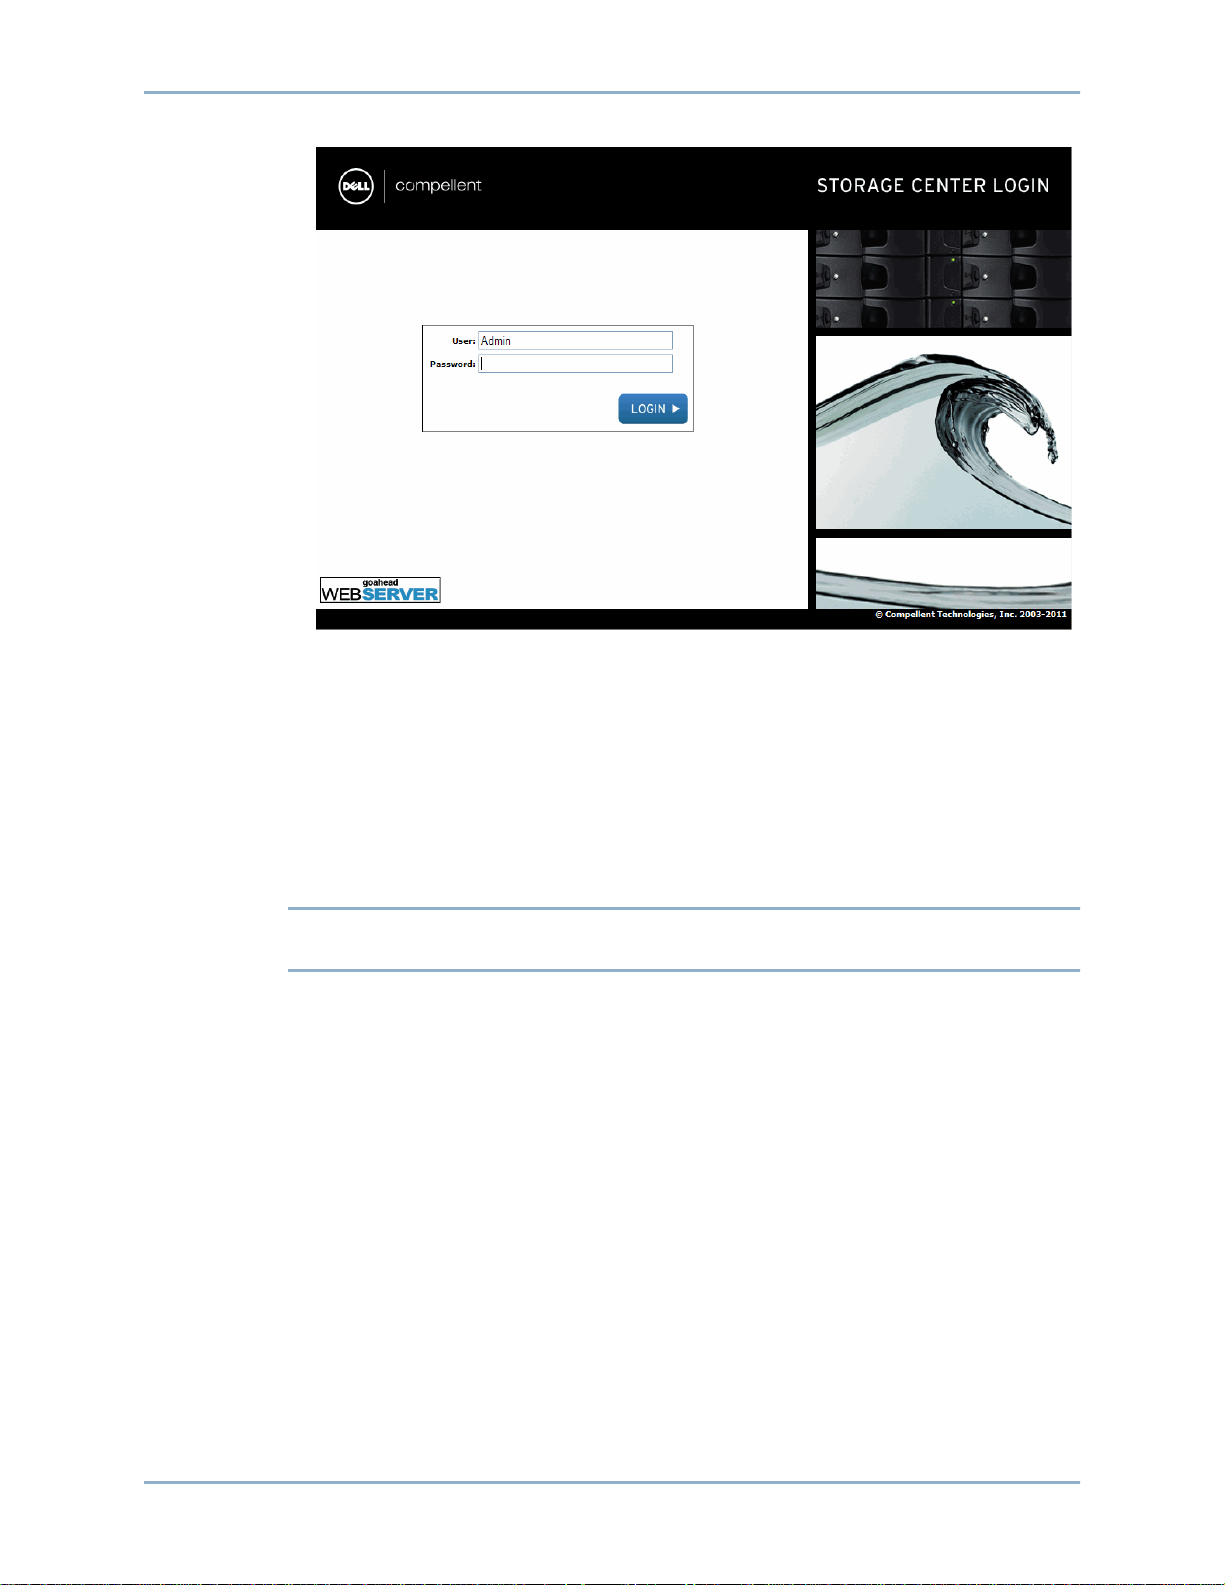
Figure 1. Login Window
3 In the User ID field, enter the default ID:
Admin
4 Enter the default password:
mmm
5 Click Login. If an additional security alert appears, click Yes to continue.
Note The End User License Agreement is displayed the first time a new user logs onto the
Storage Center. Click Accept to continue.
8 Storage Center 5.5 System Manager User Guide
Page 17

Introducing the Storage Center System Manager
Possible Messages on System Manager Startup
Unbalanced Local Ports
If a controller has been added or taken offline, ports can become unbalanced. The Startup
wizard warns you if local ports are unbalanced.
To balance unbalanced ports
Click Yes to rebalance local ports.
To turn off the rebalance ports message
1 Select the Controllers node.
2 From the shortcut menu, select Rebalance Local Ports.
3 Uncheck the option to check for unbalanced local ports at startup.
IO Card Change Detected
If an IO card change is detected on system startup, Storage Center will automatically
launch the IO Card Change Wizard. For information about this wizard, refer to I/O Card
Change Wizard on page 380.
Unmanaged Hardware
If the System Manager finds unmanaged hardware, such as disks or server host bus
adaptors (HBAs), it prompts you to manage them. For more information on managing
unassigned disks, refer to Adding Unassigned Disks to a Folder on page 119. For more
information on HBAs, refer to Managing HBAs on page 47.
Viewing the System Explorer
When the system recognizes the user name and password, the System Explorer opens.
• Storage Management menu: Displays Storage Center commands.
• Shortcut menu: The shortcut menu appears when you select a component. It is
displayed at the top of the System Explorer below the menus as well as when you rightclick an component. The Shortcut menu displays commands specific to the selected
component.
• System Tree: Shown in the left frame of the System Explorer, the System Tree displays
logical and physical components.
• View menu: Displays different views of the system.
• Alert Monitor: Displays component status. Click the System Status button to view
additional information including the system log.
• Advisor Pages: Most windows, include advisor pages with additional information
about commands and information displayed in the window. To open an advisor page,
click on the Advisor button.
9
Page 18

Introduction
System Dashboard
The center frame of the System Explorer opens to the System Dashboard.
Figure 2. System Explorer View
The Storage Summary displays:
• Date and time the summary report was generated
• Status: Normal or Space Low. Space Low indicates that you must add storage.
• Total disk space: The amount of raw disk space available.
• Used disk space: Space used by volumes and replays (blue on the bar graph)
• Free disk space: Space available for volumes and replays (gray in the bar graph).
• Unhealthy/Bad space (if any) Space found on any unhealthy disks, or any bad space
found on disks which are healthy. This appears only if unhealthy or bad disk space has
been found (black in the bar graph).
• A bar graph on the right edge of the window shows the Storage Alert Threshold. If free
space falls below the Low Space Threshold, the System Manager sends an alert,
warning you to add additional disks.
• Search function in the lower left provides the ability to search through the system tree
for objects with matching names. A dropdown menu allows filtering objects by type: All
(default), Volumes, Disks, or Servers. A checkbox is provided to match case (default).
Left and right arrows allow you to navigate forward and backward. The arrow to the left
of the search field allows you to minimize/maximize the search panel.
10 Storage Center 5.5 System Manager User Guide
Page 19

Introducing the Storage Center System Manager
Storage History
The Storage History displays an overview of past storage use:
• Numbers on the left showing the amount of disk space in GB.
• Blue line shows the amount of space used recently.
• Red line shows the amount of raw disk space available.
• Yellow line shows the Storage Alert Threshold
Note In rare instances, a Storage Center system will have more than one disk folder. In
this case, the System Manager displays a Storage Summary and Storage History for
each disk folder.
11
Page 20
Introduction
Navigation
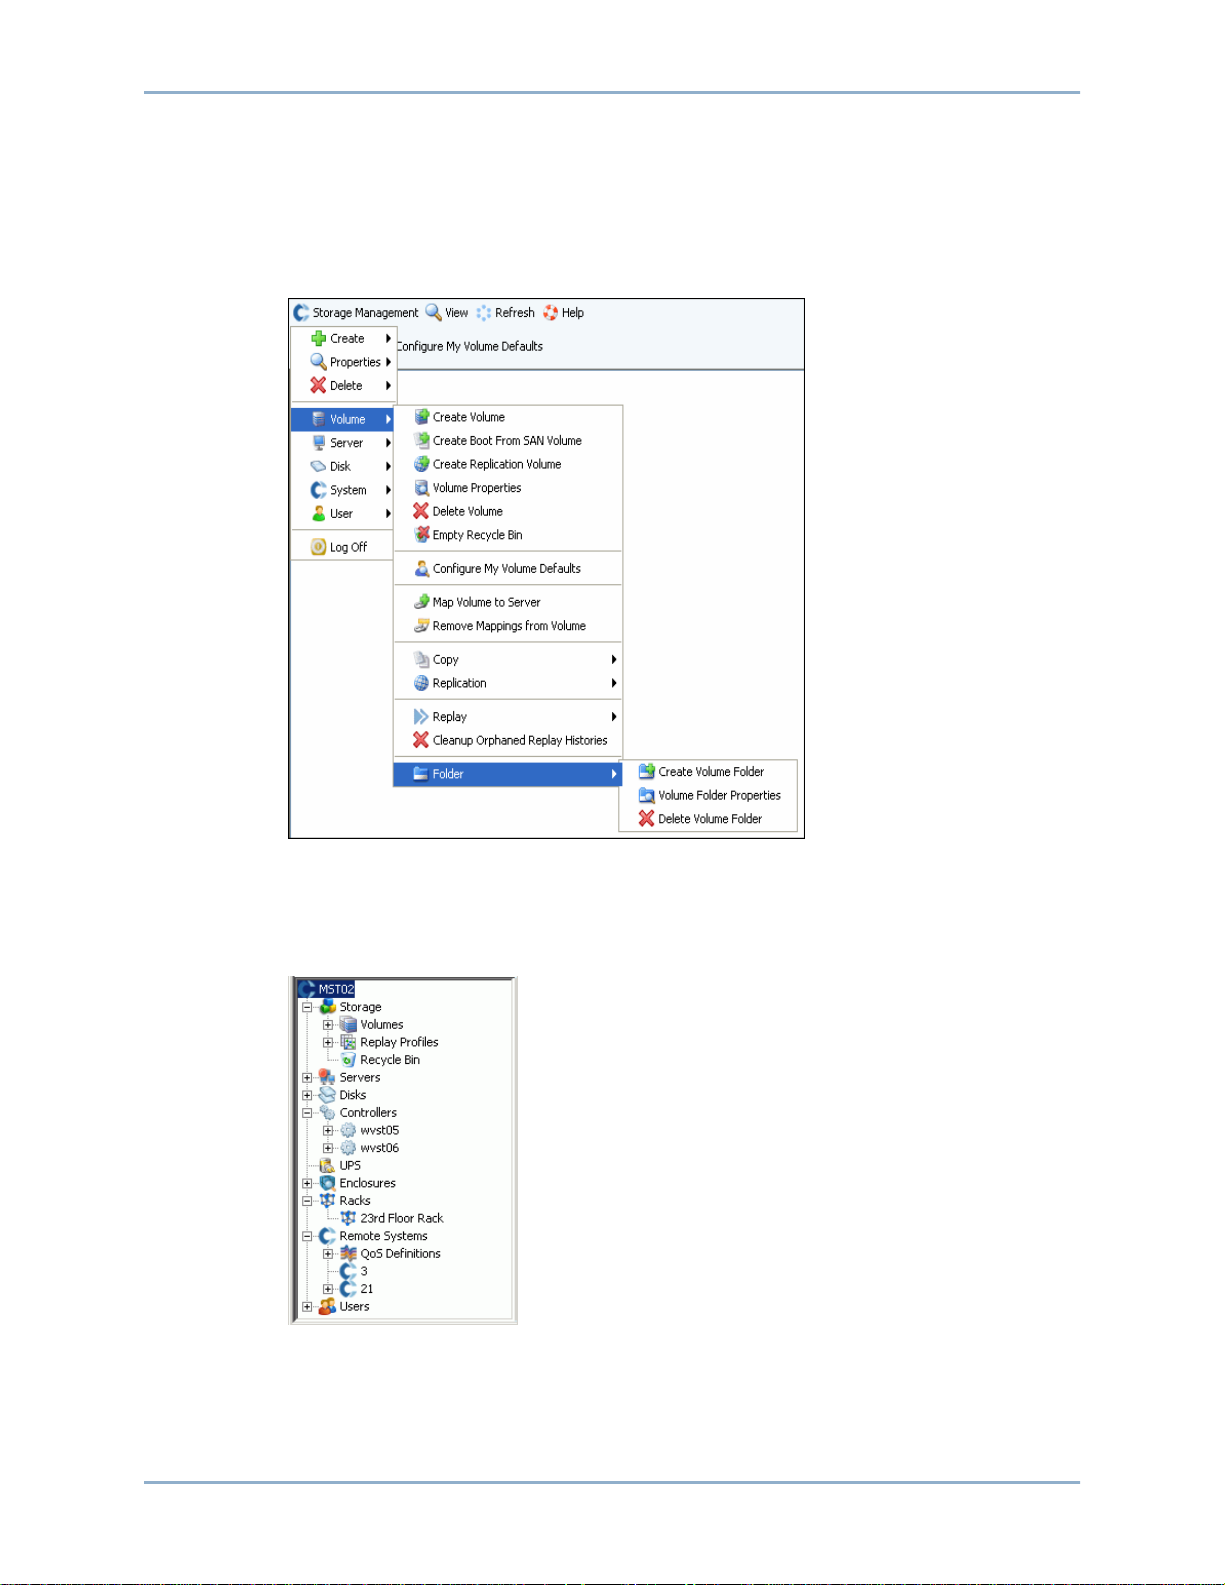
Storage Management Menu
To view System Manager commands, click the Storage Management menu, directly below
the title bar.
Figure 3. Storage Management Menu
System Tree
Expand component folders in the System Tree to view component status.
Figure 4. System Tree
12 Storage Center 5.5 System Manager User Guide
Page 21
Navigation
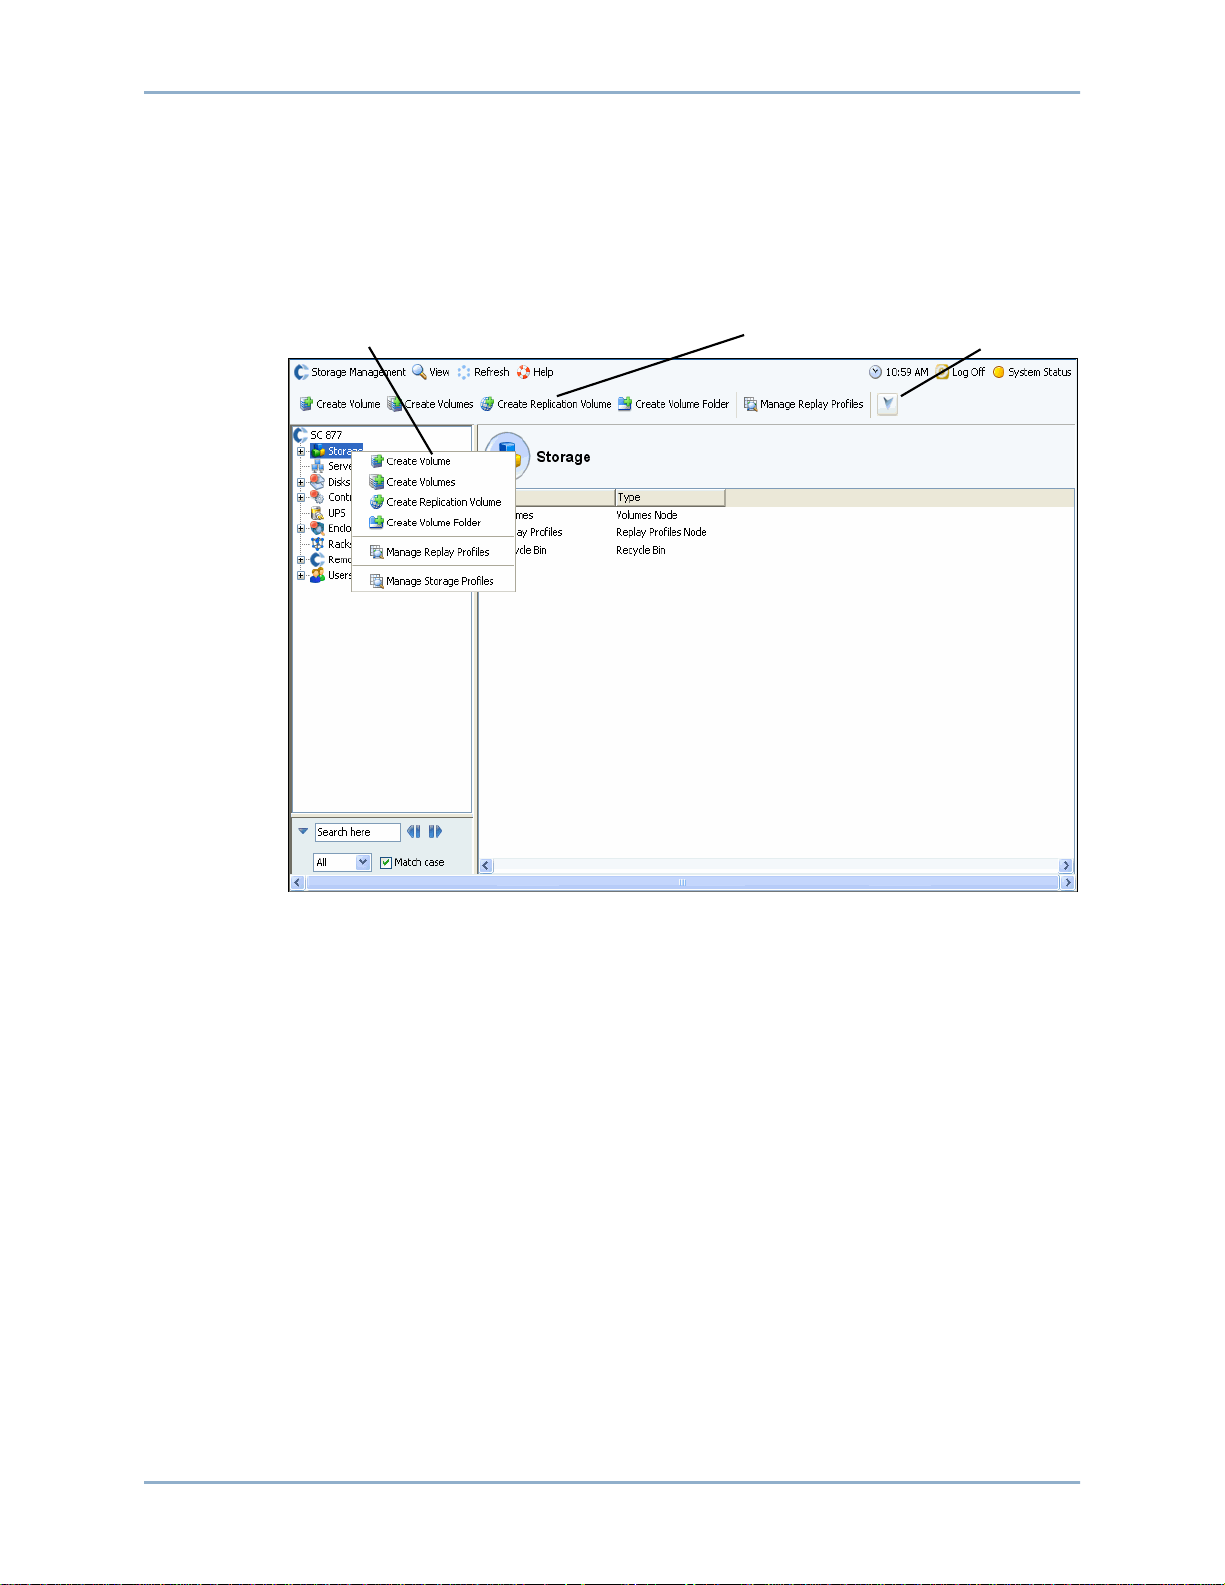
Shortcut Menu
Select an item in the system tree to view a shortcut menu for that item. Commands in the
shortcut menu also appear at the top of the System Explorer window.
If there is not sufficient room to display all shortcut menu commands at the top of the
window, a down arrow is displayed. Click the arrow to display all commands shown in the
shortcut menu.
Shortcut menu
Shortcut menu commands
Down arrow
Figure 5. Shortcut Menu
13
Page 22
Introduction
Selecting Multiple Components
To perform one command on multiple similar components:
1 In the system tree, select a component folder, such as Volumes or Assigned Disks.
2 In the main window, using the Shift or Ctrl key, select multiple objects. The shortcut
menu above the main window displays commands available to multiple objects. For
example, clicking on the Volumes folder icon and selecting volumes in the main window
allows you to delete multiple volumes at once or move multiple volumes to a new folder.
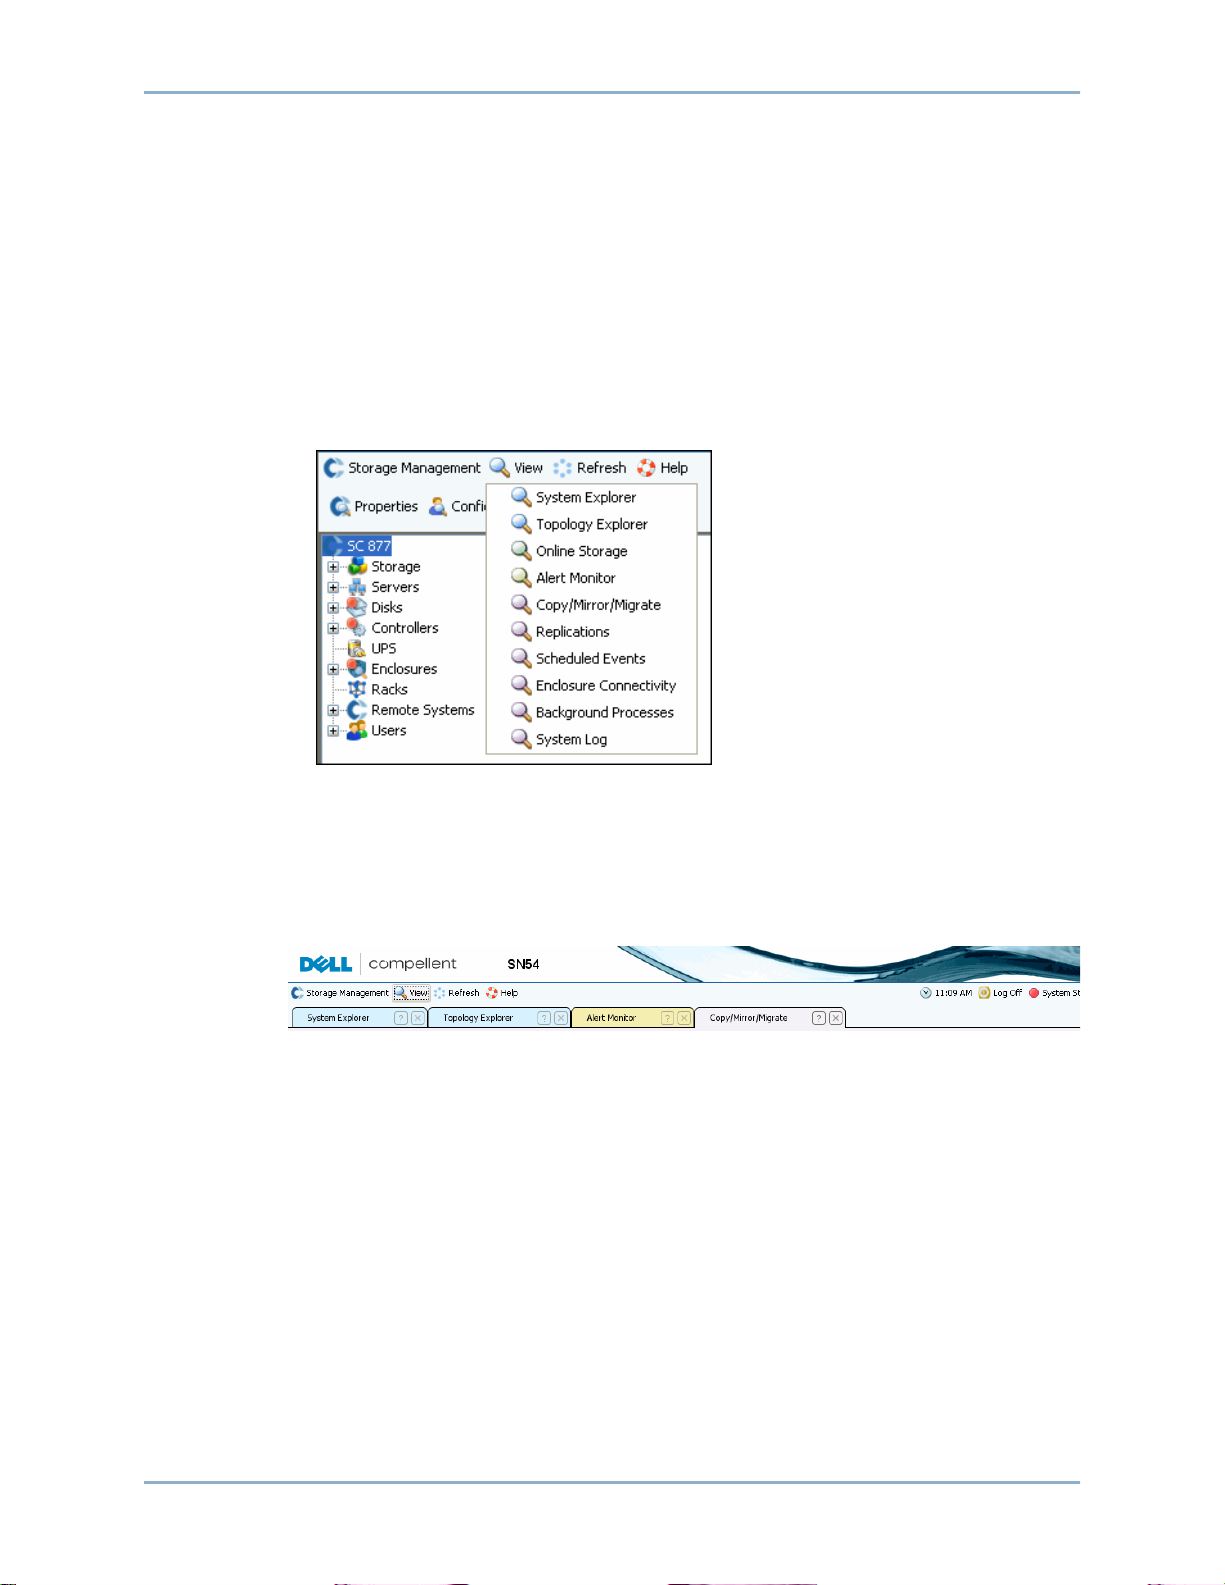
View Menu
Click View to open the View menu.
Figure 6. View Menu
The View menu provides multiple ways to configure a system or view system properties.
Options are specific to each individual view. To display the view menu, click the View menu
at the top of the Storage Center window.
Once a View window is open, the tab for that view appears at the top of the window.
Figure 7. Open View Tabs
If a tab is displayed, click the tab to display the view window. View windows remain open
during a Storage Management session. Close a view window and tab by clicking on the X
in the right corner of the tab. If more tabs are available than can be displayed, click the scroll
arrows at the far right of the tabs to scroll through the open tabs. Selecting a view that is
already opened displays the window; it does not open a second window. Set Update
Frequency, Find, and Scroll Setting appear at the top of most views.
14 Storage Center 5.5 System Manager User Guide
Page 23

2 Quick Start Guide
Introduction 16
Step 1. Manage Unmanaged Hardware 16
Step 2. Change Admin Password 17
Step 3. Create Servers 18
Step 4. Configure Your User Volume Defaults 20
Step 5. Create Multiple Volumes 23
Step 6. Monitor Alerts - Ongoing 25
15
Page 24

Quick Start Guide
Introduction
Though Storage Center has many sophisticated commands, the following six steps allow
you to initially manage a Storage Center system.
A fully redundant system has no single point of failure, as long as a failing physical
component is replaced in a timely manner. Storage Center monitors all of the physical
components, including storage space consumed and available. User properties allow you
to enter up to three telephone numbers (include cell phones) to IT personnel. Alerts inform
you of system and component status.
Step 1. Manage Unmanaged Hardware
It is assumed that the hardware attached to the Storage Center controller was identified
during Installation. If not, Storage Center recognizes unmanaged hardware and asks that
you manage it. If all hardware is managed, turn to Step 2 on page 17.
Storage Center groups disks into a disk folder to create one pool of storage from which
volumes are created. By using one disk folder, you maximize Thin Provisioning and
Dynamic Capacity. Managing unassigned disks means to move them into a managed disk
folder.
To manage unassigned disks
1 In the system tree, expand Disks.
2 Open the Unassigned Disk Folder.
3 From the list of disks, select disks to be managed. For the most efficient use of the
Storage Center, select all the disks.
4 Click Continue. The Select Hot Spare window appears. A hot spare replaces a failed
disk. It is held in reserve until needed. A spare disk must be as large or larger than the
largest disk in the disk folder. At least one hot spare must be reserved for each
enclosure. The system selects the optimal disk to be a spare. Accept the default or
select one or more disks to be used as a hot spare(s).
5 Click Continue. The disk folder confirmation window appears. The default name for the
disk folder is Assigned. Enter another name or accept the default. Optionally, enter
notes for the folder.
6 After verifying all disk folder information, click Create Now. The system asks you to
confirm. Click OK.
7 Select a Disk Folder.
8 From the shortcut menu, select Configure Storage. The System Manager combines
the disks into a single pool of storage from which to create volumes.
9 When the system informs you of the type of storage that it prepared, click Close.
Note If the system asks you to Rebalance RAID devices, select Rebalance Now. For
more information, refer to Rebalancing RAID on page 122
16 Storage Center 5.5 System Manager User Guide
Page 25

Step 2. Change Admin Password
Note You must be an administrator to change this password.
To change the Admin password
1 In the system tree, click the Users icon to view users.
2 Select the an icon, such as Admin.
3 From the shortcut menu, select Change User Password. The Change User
Password window appears.
4 Enter and re-enter a password.
5 Click OK. The password is changed.
Introduction
17
Page 26
Quick Start Guide
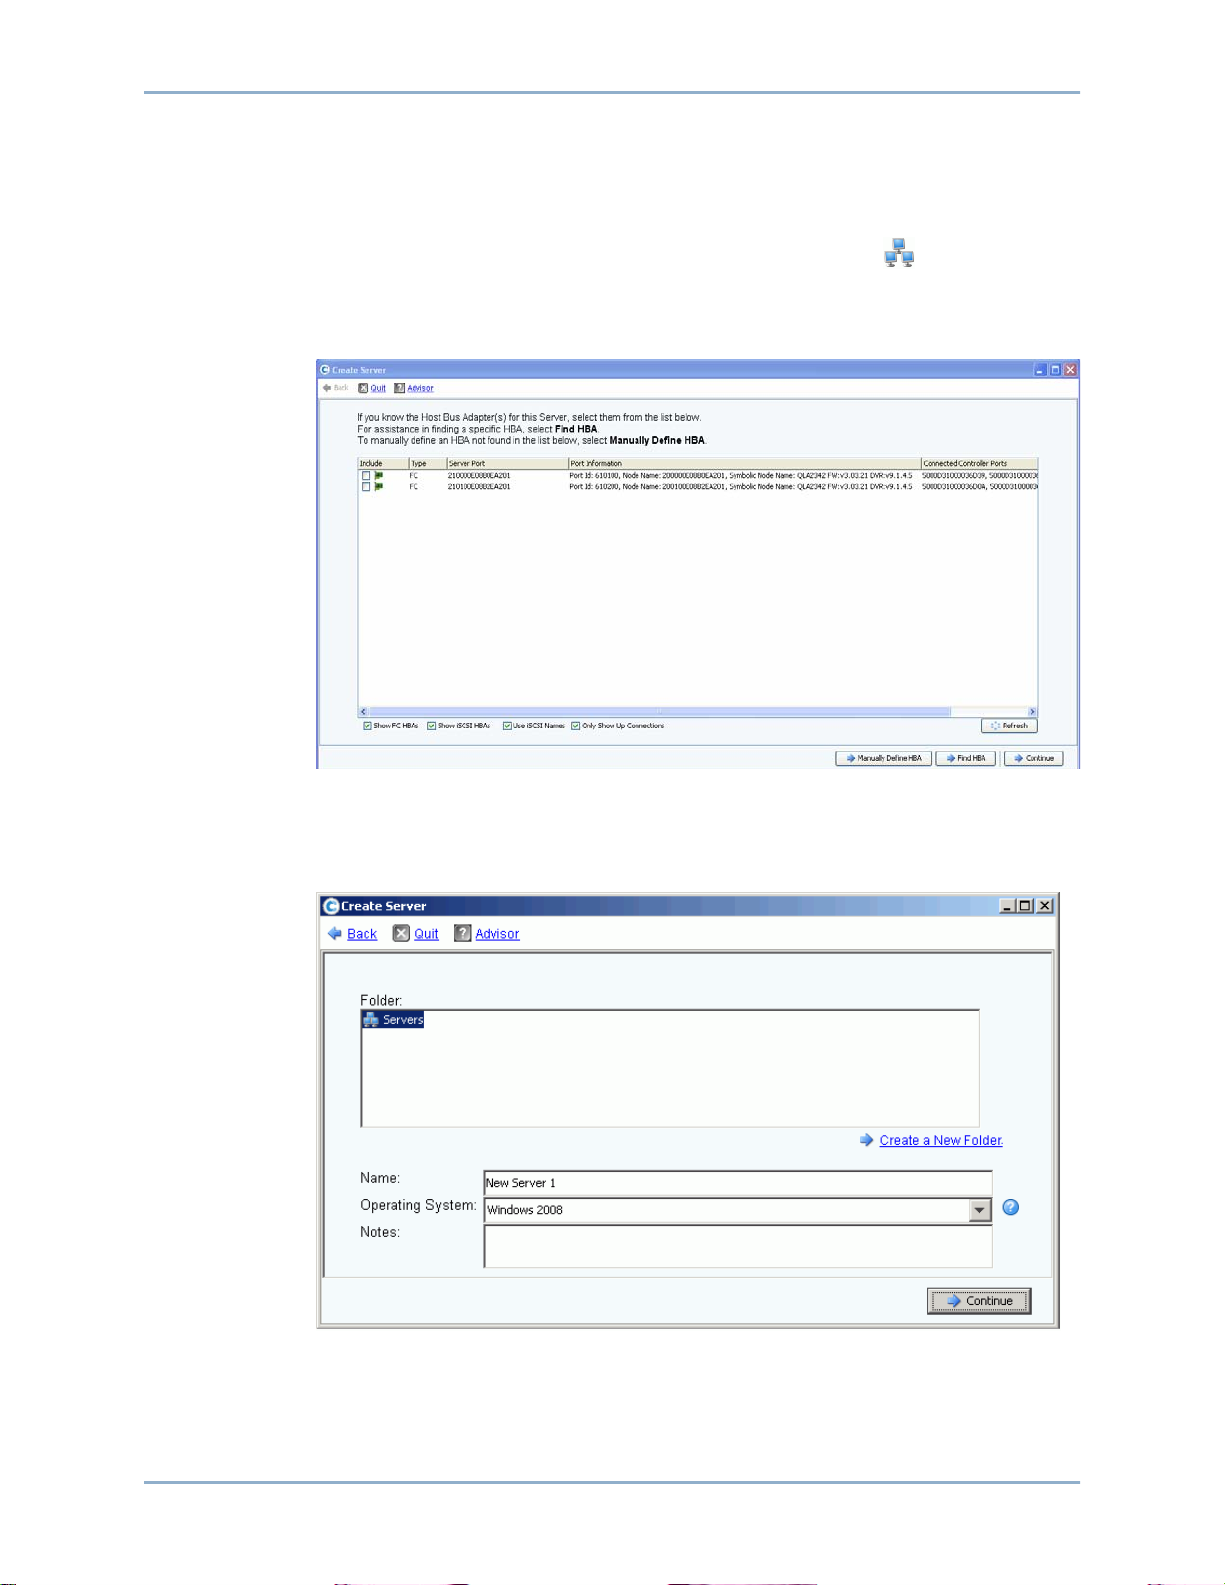
Step 3. Create Servers
To create a new FC or iSCSI server
1 In the Storage Management window, select the servers folder.
2 From the shortcut menu, select Create Server. The Create Server wizard appears,
listing HBAs recognized by the Storage Center.
Figure 8. Create Server
3 Select one or more HBAs and click Continue. A window appears asking you to name
the server.
Figure 9. Name Server
18 Storage Center 5.5 System Manager User Guide
Page 27
Introduction
4 Enter a name for the server or accept the default.
5 From the drop-down menu, select an operating system for this server. Volumes will be
mapped to this server according to the rules of the operating system of the server.
6 Select an existing server folder or create a new server folder. To create a folder at this
time, click Create a New Folder. Enter a folder name and any notes (up to 255
characters). Click OK.
7 Click Continue.
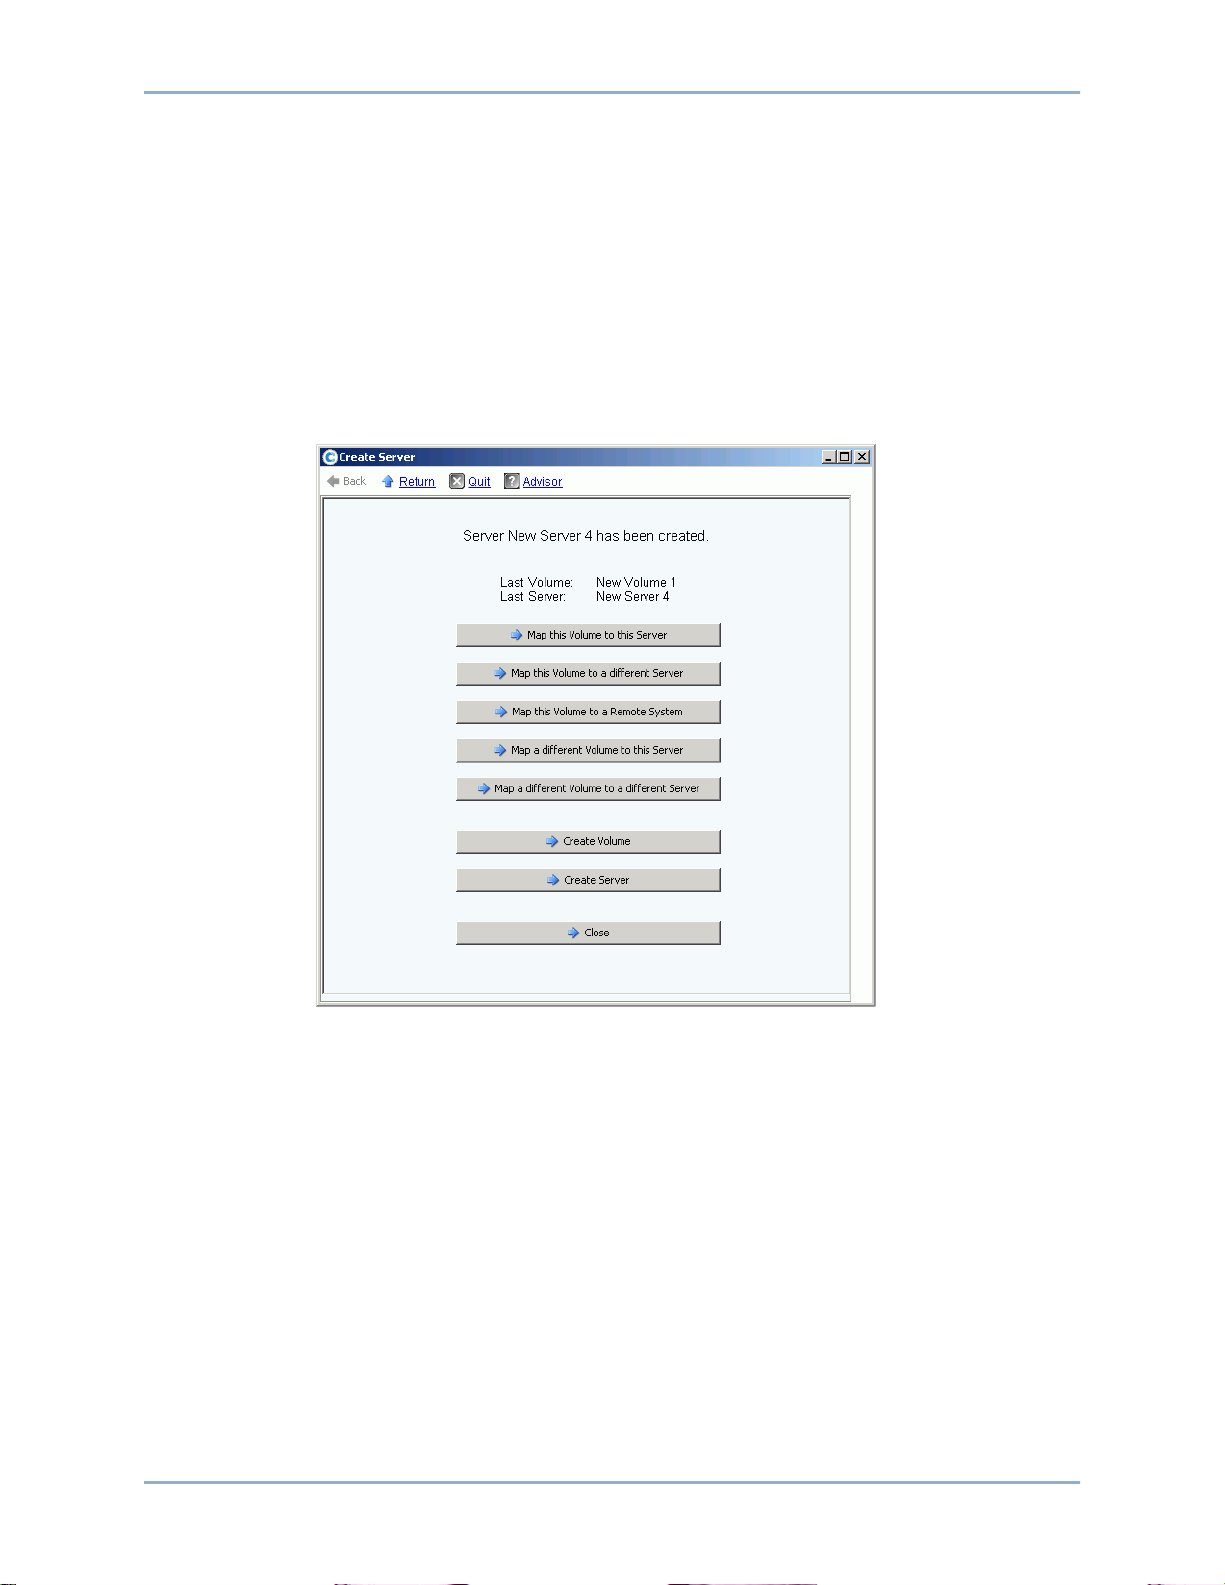
8 Click Create Now. The commands that appear in this window depend on the action you
just completed.
Figure 10. Server Created Window
9 Click Close.
19
Page 28
Quick Start Guide
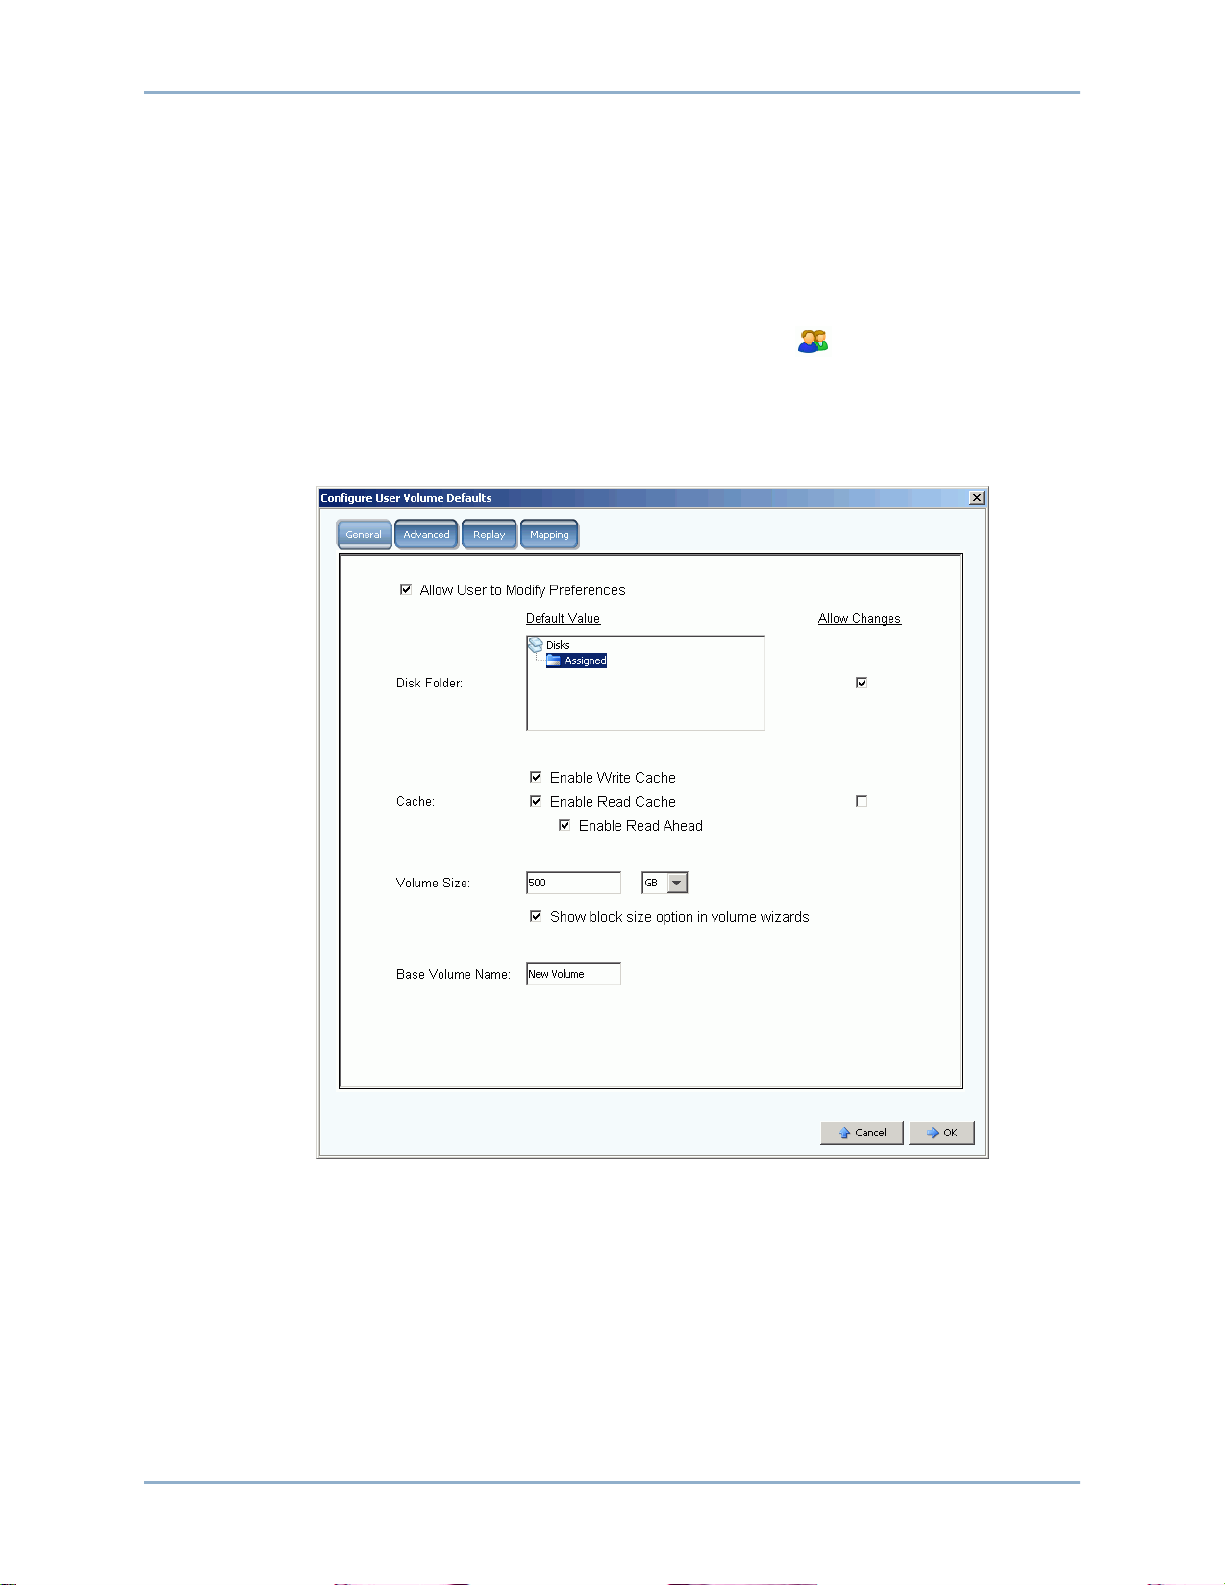
Step 4. Configure Your User Volume Defaults
There are defaults for volumes you create. You can change properties for any individual
volume, but if you are going to create many volumes, streamline the process by configuring
the volume defaults.
To configure your user volume defaults
1 In the system tree, click the Users icon to view users.
2 Select your user icon, such as Admin.
3 From the shortcut menu, select Configure User’s Volume Defaults. The Configure
User Volumes Defaults window appears.
Figure 11. General User Volume Defaults
4 Select a default disk folder from which to draw storage. The default is the folder you
created in Step 1 on page 16.
5 If you enabled system-wide cache in setup, enable or disable cache for volumes you
create. Check or clear the Allow Changes box to the right of the Cache options.
20 Storage Center 5.5 System Manager User Guide
Page 29
6 Enter a Volume Size. The default is 500 GB. Remember, this space is not reserved,
only allocated. This means that you can allocate more disk space than you actually
have. You need to add additional disks when the space actually used reaches 80% of
total physical space.
7 Select or disable Show block size in volume wizards.
8 Enter a Base Volume Name. When you create many volumes at once, the System
Manager increments this name by one. As you quickly add volumes, the names appears
as New Volume 1, New Volume 2, New Volume 3, etc.
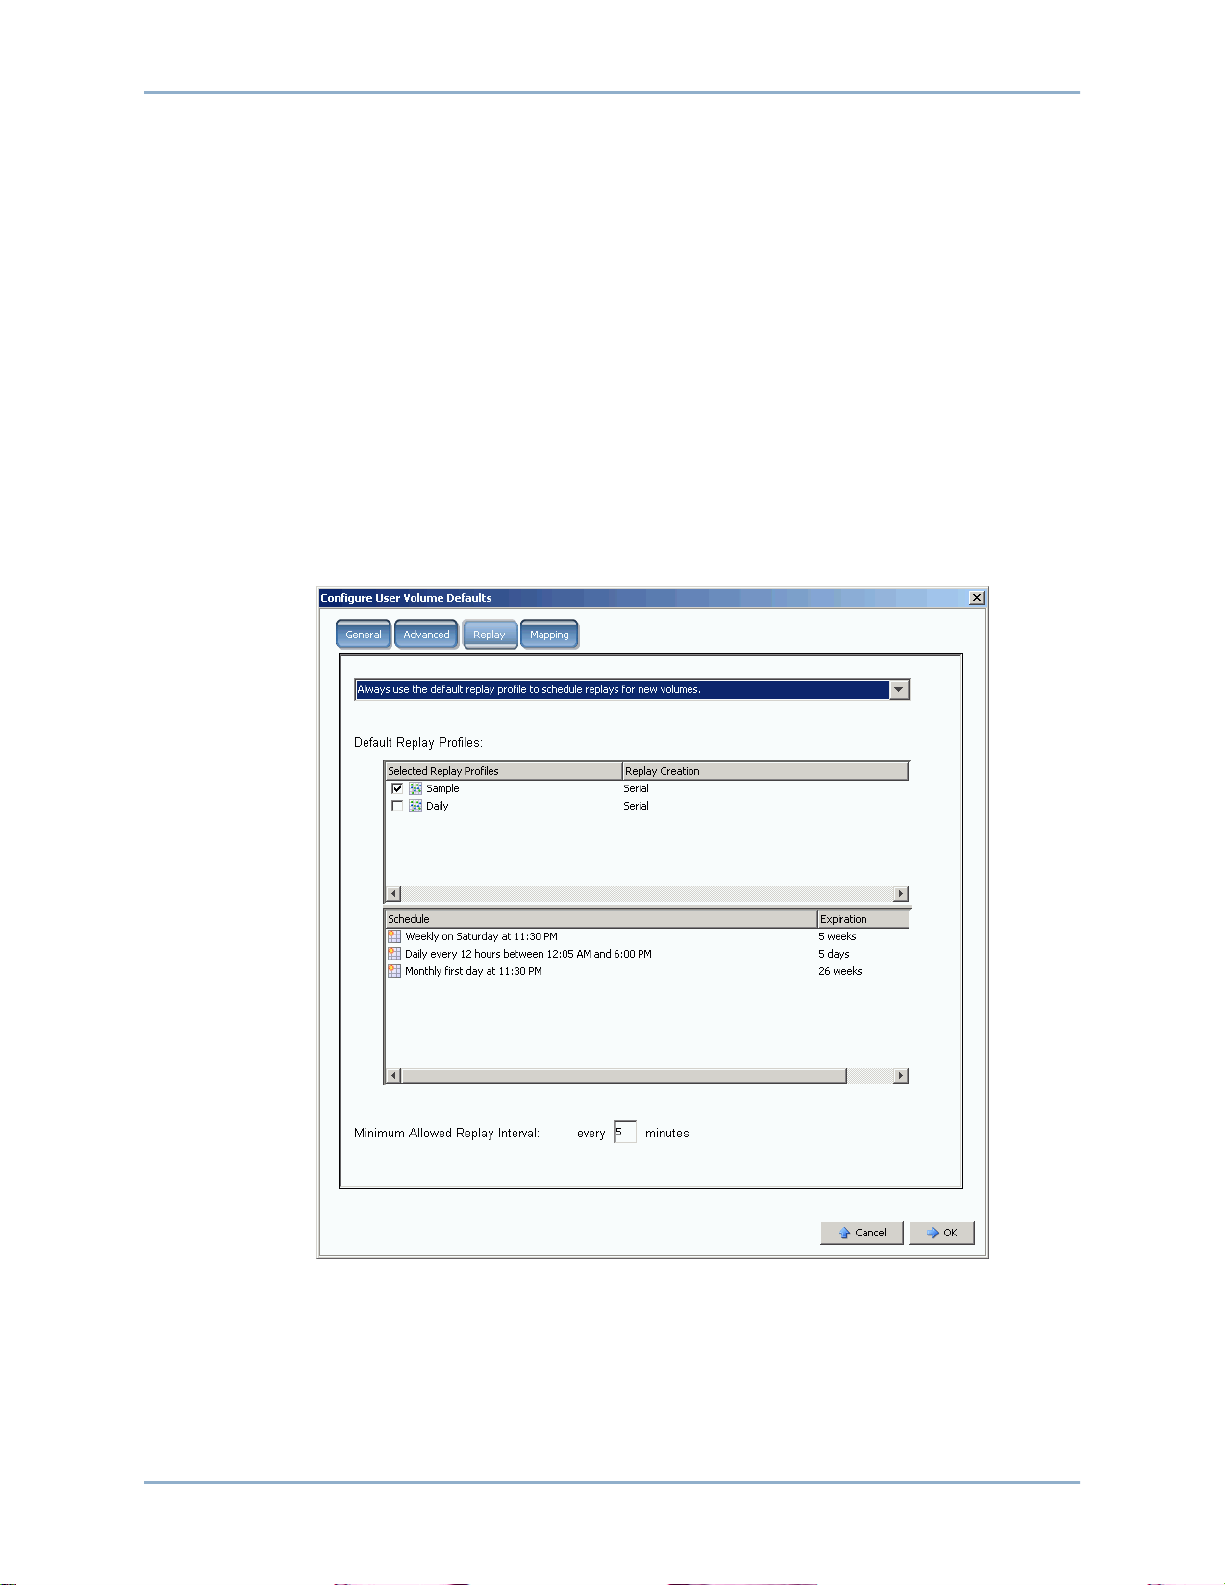
Set Volume Replay Defaults
Volume Replays defaults set the default Replay schedule for volumes you create.
To configure volume Replays
1 In the Configure User Volumes Defaults window, select the Replay tab. The default
Replay schedule appears.
Introduction
Figure 12. Set Volume Replay Defaults
2 From the dropdown menu at the top of the window, choose to be queried for a Replay
schedule when you create a volume or to automatically use the default Replay schedule
for new volumes.
21
Page 30

Quick Start Guide
To configure mapping defaults
Confirm user volume defaults
3 Select a default Replay Profile. The rules in these two Replay Profiles cannot be
changed. (To create your own Replay schedule, refer to the instructions in Creating
Replay Profiles on page 292.)
4 Enter a Minimum Allowed Replay Interval or accept the default. A minimum allowed
Replay restricts the intervals between Replays.
Set Mapping Defaults
Mapping Defaults selects a default sever to which to map volumes.
1 In the Configure User Volumes Defaults window, click on the Mapping tab.
2 From the servers you created in Step 3 on page 18, select a server to which to
automatically map the volumes you create. For more information on mapping options,
including advanced options, refer to User Volume Defaults - Mapping on page 275.
When you have changed volume defaults, click OK. Volumes you create will be created
with these defaults.
22 Storage Center 5.5 System Manager User Guide
Page 31

Step 5. Create Multiple Volumes
To create multiple volumes
1 In the system tree, select Storage.
2 From the shortcut menu, select Create Volumes. The Create Volumes window
appears.
Introduction
Figure 13. Create Multiple Volumes
3 Select Use My Volume Defaults when adding a volume. (The Copy the selected
volume when adding a volume command lets you add volumes based on properties
other than your volume defaults.)
23
Page 32

Quick Start Guide
4 Continue to click Add Volume for as many volumes as you want to create.
Figure 14. Added Volumes
5 When you have added sufficient volumes, click Create Volumes Now. (This may take
several minutes. The system advises you of its progress.)
When the creating volume window closes, the system manager displays the first volume
you created. Volume type is Dynamic Write until Storage Center creates the first
Replay. Data can now be written to the volumes.
24 Storage Center 5.5 System Manager User Guide
Page 33

Step 6. Monitor Alerts - Ongoing
Add Space as Required
Disk drives that are managed by the Storage Center are contained in a disk folder, which
is simply a logical grouping of physical drives. Disk folders can contain a mixture of drive
types, capacities, and speeds. The total capacity of the disk folder is the sum of the
capacities of the drives within the folder. Disk folders also contain disk drives that are
specified as hot spares. Hot spare drives are reserved for use as replacement drives in the
event another disk in the disk folder fails. Since the space on these hot spares is never used
until another drive fails, their capacity is not included in the total capacity for the disk folder.
Storage Center allocates disk space from a disk folder for volume and Replay use as
needed based upon the configurations and IO patterns of each volume. As the Storage
Center approaches the end of the disk space available within the disk folder, it will generate
an alert, warning you to add additional space.
Conservation Mode
Storage Center enters Conservation Mode when remaining free space reaches 32 GB (or
less for systems smaller than 3.2 TB). When Storage Center enters conservation mode, the
system generates a Conservation Mode Alert to inform you that the system will not allow
new volumes to be created and that it will begin to aggressively expire Replays. The
Conservation Alert is close to the boundary where space is exhausted to keep these
actions from being performed unless necessary. Because of its proximity to the emergency
threshold, it is not a tool to manage storage, and should not be used to plan adding
additional disks to the system.
Introduction
Emergency Mode
Emergency threshold means that the system can no longer operate because there is no
more free space. Storage Center:
• Generates an emergency alert
• Expires Replays early
• Will not permit new volumes to be created
• All volumes are taken offline
When Storage Center reaches the Emergency threshold, all server IO is rejected until the
system gets out of Emergency Mode. Because this is service affecting, special care should
be taken to monitor free space on the system to avoid reaching this threshold. Volumes will
not be able to be brought back online until enough space is freed to exit the emergency
state. Before a system reaches Emergency Mode, it is critical that you add space. Refer to
Conservation Mode on page 25.
Monitor Physical Components
Alerts warn you of component failure when the Storage Center requires attention. The
status of the Storage Center is indicated by the color of the System Status icon in the topright corner of the System Manager.
• Red (Critical) The System Status icon appears red when an alert exists that has a status
of Down, Critical, or Emergency. When the System Status icon is red, this indicates a
condition that requires immediate attention.
25
Page 34

Quick Start Guide
To view the System Alert monitor
• Yellow (Warning) The System Status icon is yellow when an alert exists that has a status
of Degraded or Unavailable. This indicates a condition of which you should be aware,
but which does not require immediate attention.
• Green (Normal) The System Status icon appears green when no alerts exist, when the
only alerts that exist are to inform you. The System Status icon returns to green when
all alerts higher than Inform are acknowledged.
Click System Status at the top of the System Explorer. The Alert Monitor view appears.
Click the Alerts folder to view all alerts.
Figure 15. Alert Monitor
Selecting an alert displays additional information about the system message. To view more
information about an alert, select an Alert. The shortcut menu displays additional
commands.
1 Click Show to display the object in the System Manager. Some alerts do not have a
related object to be shown. For these alerts, the Object column is blank.
2 To acknowledge an alert, select Acknowledge. Acknowledging an alert acknowledges
it for all users.
3 Click the Advanced tab in the Alert Properties window to display a reference number.
The reference number may be important for communication with Dell Support Services.
26 Storage Center 5.5 System Manager User Guide
Page 35

3 Servers
Introduction 28
Servers 29
Server Clusters 32
Virtual Servers 42
Common Server Commands 45
Managing HBAs 47
Managing Server Folders 52
Viewing Server Information 54
Topology Explorer Server Functions 62
27
Page 36

Servers
Introduction
This chapter describes how to create, manage, and monitor servers. Defining a server
enables Storage Center to pass IO through the ports on that server. Once a server is
created, volumes can be mapped to it. Storage Center automatically recognizes FC IO
cards within the network to which is connected. iSCSI IO cards must be configured either
during setup or as they are added to the network. A remote Storage Center can act as a
server to a local Storage Center for Replication, as described in Remote Instant Replay on
page 327.
Servers can be organized into server folders either to make them easier to manage or as
a means to restrict access to servers, as described in Users and Groups on page 261.
Several servers can be combined into a Server Cluster. The Storage Center views the
Server Cluster as one server. Volumes can be mapped to the Server Cluster or to a server
that is a member of the cluster. Refer to Creating a Server Cluster on page 32
One server or server cluster can be the host of one or more virtual servers. Each virtual
server can have a different operating system. The Storage Center views each virtual server
as a separate entity. Volumes mapped to one virtual server are not mapped to other virtual
servers residing on the same server. Refer to Creating a Virtual Server on page 42.
Server Icons
In the System Tree, the System Manager uses icons to denote the server type.
Icon Server Type
Server Node - all servers
Folder
Server
Server Cluster
Virtual Server
Remote Systems Node
HBA Node - FC, iSCSI, or SAS - resides under the controller node
28 Storage Center 5.5 System Manager User Guide
Page 37

Servers
Servers
Note For information on preparing an iSCSI server that is recognized by a Storage Center
system, refer to the Storage Center Setup Guide.
Creating a Server
Creating a server means to identify it to a Storage Center system by using the Create
Server wizard. If you are using iSCSI CHAP, add remote CHAP initiators to communicate
with the server. Refer to Adding a Remote CHAP Initiator on page 182.
To create a server
1 In the system tree, select the servers node.
2 From the shortcut menu, select Create Server. The Create Server wizard appears. The
wizard lists Host Bus Adapters (HBAs) recognized by the Storage Center.
Figure 16. List of Available HBAs
3 Select one or more HBAs. For information on finding an HBA, refer to Finding an HBA
on page 48.
Note If you select an iSCSI HBA, you have the option to create the server using WWNs or
iSCSI Qualified Names (IQNs) for HBAs. Default is iSCSI Name.
29
Page 38

Servers
4 Click Continue. A window allowing you to name the server appears.
Figure 17. Name Server Window
5 Enter a name for the server or accept the default. Enter a folder name and any notes
(up to 255 characters).
6 From the drop-down menu, select an operating system (OS) for the server. Default is
Windows 2008. All servers must have an OS defined. Expand operating system folders
to view operating system versions.
Figure 18. Example of an Expanded Operating System Folder
7 Volumes are mapped to servers according to the rules of the server operating system.
To view rules of an operating system, select a system.
8 Click Continue. The screen displays the name and attributes of the server. Click the
question mark icon. A window opens displaying rules for the selected operating system.
30 Storage Center 5.5 System Manager User Guide
Page 39

Figure 19. Server Name and Attributes
Servers
9 Click Create Now. On the next window, choose from the following options:
• Map the server to a Volume
• Map a different Server to a Volume
• Create Volume
• Create Server
10 Close the Create Server wizard
Note For a short time after a server is created, it may appear in the system tree with an
error icon while Storage Center re-evaluates its server connectivity. When the
System Manager is refreshed, the error icon disappears when the server is visible to
Storage Center.
31
Page 40

Servers
Server Clusters
A server cluster is a collection of servers. A server that is a member of a server cluster is
referred to as a cluster node. Volumes can be mapped directly to a server cluster. All
volumes mapped to a server cluster are automatically mapped to all nodes in the cluster.
This increases IO efficiency and, if one server fails, IO continues to other servers within the
cluster. Volumes can also be mapped to only one of the nodes within the server cluster.
Some operating systems require that a volume mapped to multiple cluster nodes use the
same LUN on each node. When creating a server cluster, Storage Center attempts to map
an included volume to the same LUN on all cluster servers. If the LUN selected is not
available on a particular server, the mapping is not performed and the volume is only
partially connected to the cluster.
Note All servers within a server cluster must have the same operating system.
Creating a Server Cluster
1 In the system tree, select the servers node.
2 From the shortcut menu, select Create Server Cluster.
Figure 20. Create Sever Cluster Wizard
3 Choose one of the buttons at the bottom of the window and follow the instructions in the
wizards.
32 Storage Center 5.5 System Manager User Guide
Page 41

Server Clusters
Creating New Servers for Server Cluster
1 Select Create New Server.
2 Follow Steps 3 though 9 for creating a server, starting on page 29. When you select
Create Now, the Create Server Cluster window shown in Figure 20 reappears.
To create a second server to add to a server cluster
1 Select Create New Server.
2 Repeat Steps 3 through 9, starting on page 29.
Note All servers in the server cluster must have the same operating system. If a server is
incorrectly selected to be in the cluster, use the Remove Selected Server button to
remove the server from the list before creating the server cluster.
3 When all the servers that will be part of this cluster are listed, click Continue. A window
allowing you to name the server cluster appears.
Figure 21. Name Server Cluster Window
4 Name the server cluster or accept the default. Add notes if necessary.
5 Click Continue. The system asks you to confirm.
6 Click Create Now.
7 On the next window, map volumes to the server cluster or click Close.
33
Page 42

Servers
Notice that the server cluster appears in the system tree.
Figure 22. System Tree Showing Server Cluster
Adding a Server to a Server Cluster
1 In the Create Server Cluster window, select Add Existing Server.
2 Expand a server folder to view servers within the folder, if necessary, and select a
server.
Figure 23. Select Server to Add to Cluster
3 Click Continue. The Create Server Cluster window reappears.
34 Storage Center 5.5 System Manager User Guide
Page 43

Server Clusters
Figure 24. Create Server Cluster Window
4 Add another server by clicking Add Existing Server again. The Create Server Cluster
window reappears with the servers listed in the Select Servers frame. The window
displays the operating systems of the selected servers.
Note All servers in the server cluster must have the same operating system. If a server is
incorrectly selected to be in the cluster, use the Remove Selected Server button to
remove the server from the list before creating the server cluster.
5 Once the Create Server Cluster window displays all the servers for this server cluster,
click Continue. A window allowing you to name the server cluster appears.
6 Name the server cluster or accept the default. Add notes if necessary.
7 Click Continue. If volumes were mapped to individual server nodes, the system
displays a list of mapped volumes and asks you to select volumes to map to the server
cluster. By default, the system selects all volumes mapped to the server nodes, except
boot volumes; by default, boot volumes are not selected to be mapped to the server
cluster.
35
Page 44

Servers
Figure 25. Select Volumes to Promote to Server Cluster
8 Click Continue. The system asks you to confirm.
9 Click Create Now.
10 From the next window, map volumes or click Close. Notice that the server cluster
appears in the system tree.
36 Storage Center 5.5 System Manager User Guide
Page 45

Server Clusters
Creating a Server Cluster from Selected Servers
1 In the system tree, select the server node or other server folder. A list of servers in that
folder appears.
2 In the main window, select servers to be added to the server cluster.
Figure 26. Creating Server Cluster from Selected Servers
3 From the shortcut menu, select Create Server Cluster. The Create Server Cluster
window appears with the servers you selected.
Note All servers in the server cluster must have the same operating system. If a server is
incorrectly selected to be in the cluster, use the Remove Selected Server button to
remove the server from the list before creating the server cluster.
4 Click Continue. A window allowing you to name the server cluster appears.
5 Name the server cluster or accept the default. Add notes if necessary.
6 Click Continue. If volumes were mapped to individual server nodes, the system
displays a list of mapped volumes.
7 Select volumes to map to the server cluster. By default, the system selects all volumes
mapped to the server nodes, except boot volumes.
8 Click Continue.
9 The system asks you to confirm.
10 Click Create Now.
11 On the next window, map volumes or click Close. Notice that the servers were moved
from the server folder to the new server cluster.
37
Page 46

Servers
Moving an Existing Server to a Server Cluster
1 In the system tree, select a server that is a not a member of a server cluster. From the
shortcut menu, select Move Server to Cluster. The Move Server to Cluster window
appears with a list of server clusters.
2 Select a server cluster.
3 Click Continue. The system asks you to confirm.
4 Click Apply Now. Volumes that were mapped to the server cluster are now mapped to
the server that was added.
Removing a Server from a Server Cluster
1 In the system tree, select a server that is a member of a server cluster. From the
shortcut menu, select Remove Server from Cluster. The Remove Server from
Cluster window appears.
2 Click Remove Now. Because volumes mapped to the server cluster are mapped to all
servers within the cluster, removing a server from a cluster does not affect volumes
mapped to the cluster.
Removing Multiple Servers from a Server Cluster
1 In the system tree, select a server cluster.
2 From the shortcut menu, select Remove Servers from Cluster. The system displays a
list of servers that are members of this cluster.
Figure 27. Remove Servers from Cluster
3 Select one or more servers to remove. Click Continue.
4 The system asks you to confirm. Click Remove Now.
38 Storage Center 5.5 System Manager User Guide
Page 47

Server Clusters
Deleting a Server Cluster
Before you can delete a server cluster, you must remove or delete all the server nodes
within the server cluster.
To delete a server cluster
1 Make sure all nodes that were part of the cluster are removed or deleted. In the system
tree, select an empty server cluster.
2 From the shortcut menu, select Delete. The system asks you to confirm.
3 Click OK.
Promoting and Demoting Server Cluster Mappings
The Storage Center allows users to demote mappings from server clusters to the individual
cluster nodes and to allow users to promote mappings from individual cluster nodes to a
server cluster.
To promote server cluster mappings
Once a volume has been mapped to a server node, it can be promoted from that server
node to a server cluster.
1 In the system tree, select a server cluster.
2 From the shortcut menu, select Promote Mappings to Server Cluster. The Promote
Mappings to Cluster window appears.
Figure 28. Select Mappings to Promote
3 Select the mapping to promote by highlighting it.
39
Page 48

Servers
4 Click Continue. The resulting window displays the volume selected for promotion and
the name of the server cluster to which it will be mapped.
Figure 29. Promote Selected Mappings
5 Click Promote Now to promote volume mappings or click Cancel to exit.
To demote server cluster mappings
Once a volume has been mapped to a server cluster, it can be demoted from that server
cluster to a server node.
1 In the system tree, select a server cluster.
2 From the shortcut menu, select Demote Mappings to Server Cluster Nodes. The
Demote Mappings to Cluster Nodes window appears showing current mappings.
Figure 30. Select Mappings to Demote
3 Use the check boxes to select mappings to be demoted.
40 Storage Center 5.5 System Manager User Guide
Page 49

Server Clusters
4 Click Continue. The resulting window lists servers in the cluster and the volumes that
are mapped to the servers.
Figure 31. Demote Selected Mappings
• Checked server mappings will be demoted from the cluster to the server. By default,
all server mappings are checked.
• Unchecked server mappings will be deleted from the server.
5 Click Demote Now to demote volume mappings or click Cancel to exit.
41
Page 50

Servers
Virtual Servers
Creating a Virtual Server
1 In the system tree, select a server.
Figure 32. Select Server
2 From the shortcut menu, select Create Virtual Server. A list of available HBAs appears.
3 Click Continue. A window allowing you to name virtual server appears.
4 Enter a name or accept the default.
5 From the drop-down menu, select an operating system that can act as an OS for a
virtual machine, such as Windows 2008.
6 Enter notes, if necessary.
7 Click Continue. A confirmation window appears.
8 Click Create Now. The virtual server appears under the host server you selected.
42 Storage Center 5.5 System Manager User Guide
Page 51

Virtual Servers
Figure 33. Virtual Server in System Tree
There is no limit on the number of virtual servers you can create on a server.
Converting a Server to a Virtual Server
1 In the system tree, select a server.
2 From the shortcut menu, select Convert to Virtual Server. The system asks you to
select a host server or server cluster for the selected servers.
Note The destination server or server cluster must be running an operating system that
can act as a virtual server host, such as VMWare ESX or Windows 2008.
3 In the system tree, select a server or server cluster. Click Continue. A confirmation
window appears.
4 Click Convert Now. The clustered server is converted to a virtual server.
43
Page 52

Servers
Converting a Virtual Server to a Physical Server
To convert a virtual server into a server
1 From the system tree, select a virtual server. From the shortcut menu, select Convert
to Server. The Convert Virtual Server to Physical Server window appears.
Figure 34. Convert Virtual Server to Physical Server
2 Click Convert Now. The other virtual servers remain virtual. Only the server you
converted to a physical server is removed from the virtual server group.
Deleting a Virtual Host Server
1 In the system tree, select a virtual host server.
2 From the shortcut menu, select Delete. The system warns you that deleting a virtual
host server also deletes all virtual servers attached to the host.
3 Click Yes. The virtual host server and all virtual servers attached to the host are deleted.
44 Storage Center 5.5 System Manager User Guide
Page 53

Common Server Commands
Renaming a Server
1 In the system tree, select a server.
2 From the shortcut menu, select Properties. The Server Properties window appears
with the General tab selected. This tab shows the server name and operating system.
Common Server Commands
Figure 35. General Server Properties
3 Enter a new name. Enter any notes (up to 255 characters).
4 Click OK. The server is renamed.
Changing the Operating System of a Server
If an operating system changes on a server because of an operating system upgrade or an
operating system capability changes from single path to multipath, you may need to change
the operating system of the server in Storage Center.
To change the operating system of a server
1 In the system tree, select a server.
2 From the shortcut menu, select Properties. The Server Properties window appears
with the General tab selected.
3 Select a new operating system. Enter any notes (up to 255 characters).
4 Click OK. The operating system of that server is changed.
45
Page 54

Servers
Displaying Alerts When Server Connection is Lost
You may wish to disable alerts. For example, when you are doing scheduled maintenance,
you may not need to be notified that connectivity to a server is lost.
To disable alerts
1 In the system tree, select a server.
2 From the shortcut menu, select Properties. The Server Properties window with the
General tab selected appears.
3 Check Do not show alerts when connectivity to this server is lost..
4 Click OK.
Deleting a Server
Deleting a server returns HBAs connected to that server to the list of available HBAs.
To delete a server
1 In the system tree, select a server.
2 From the shortcut menu, select Delete. The system asks you to confirm.
3 Click Yes. The server is deleted. Deleting a server cluster deletes all the servers within
the cluster. Deleting a server node within a server cluster deletes only that server node.
Deleting a server that is part of a virtual server deletes only that server.
46 Storage Center 5.5 System Manager User Guide
Page 55

Managing HBAs
Adding HBAs to a Server from a List
If you added a new card to a server, you can logically identify it to the Storage Center
system.
To add an HBA to a sever
1 In the system tree, select a server.
2 From the shortcut menu, select Add HBAs to Server. The Add HBAs to Server
window appears. In the Connected Controller Ports column, the System Manager lists
the server ports connected to this controller.
Managing HBAs
Figure 36. Add HBAs to Servers
3 Choose the HBAs you want to display: FC, iSCSI, or only Up connections.
Note When you click Refresh, the System Manager does not scan for new HBAs; it
merely re-displays the current list of HBAs.
4 Select an HBA.
Note If you select an iSCSI HBA, you have the option to create the server using WWNs or
iSCSI Qualified Names (IQNs) for HBAs. Default is iSCSI Name.
5 Click Continue. The Storage Center System Manager asks you to confirm.
6 Click Modify Now.
47
Page 56

Servers
Finding an HBA
1 In the system tree, select a server. From the shortcut menu, select Add HBAs to
Server. The Add HBAs to Server window appears.
2 Click Find HBA. The system asks if the server is already cabled to the network.
• If you click Yes, the system asks you to make sure that the network acknowledges the
HBA.
a Locate and unplug the cable to the HBA on the back of the server.
b Wait 60 seconds.
c Plug the cable going to the HBA back into the server.
d Click Find HBA again.
e Select an HBA. Click Continue. The system asks you to confirm.
• If you click No:
a Plug the server into the FC Network or create a connection by logging on to the iSCSI
portal.
b Wait 30 seconds
c Click Continue.
Note If the system does not see a new HBA, check the cabling and connections. Click
Scan Again.
48 Storage Center 5.5 System Manager User Guide
Page 57
Managing HBAs
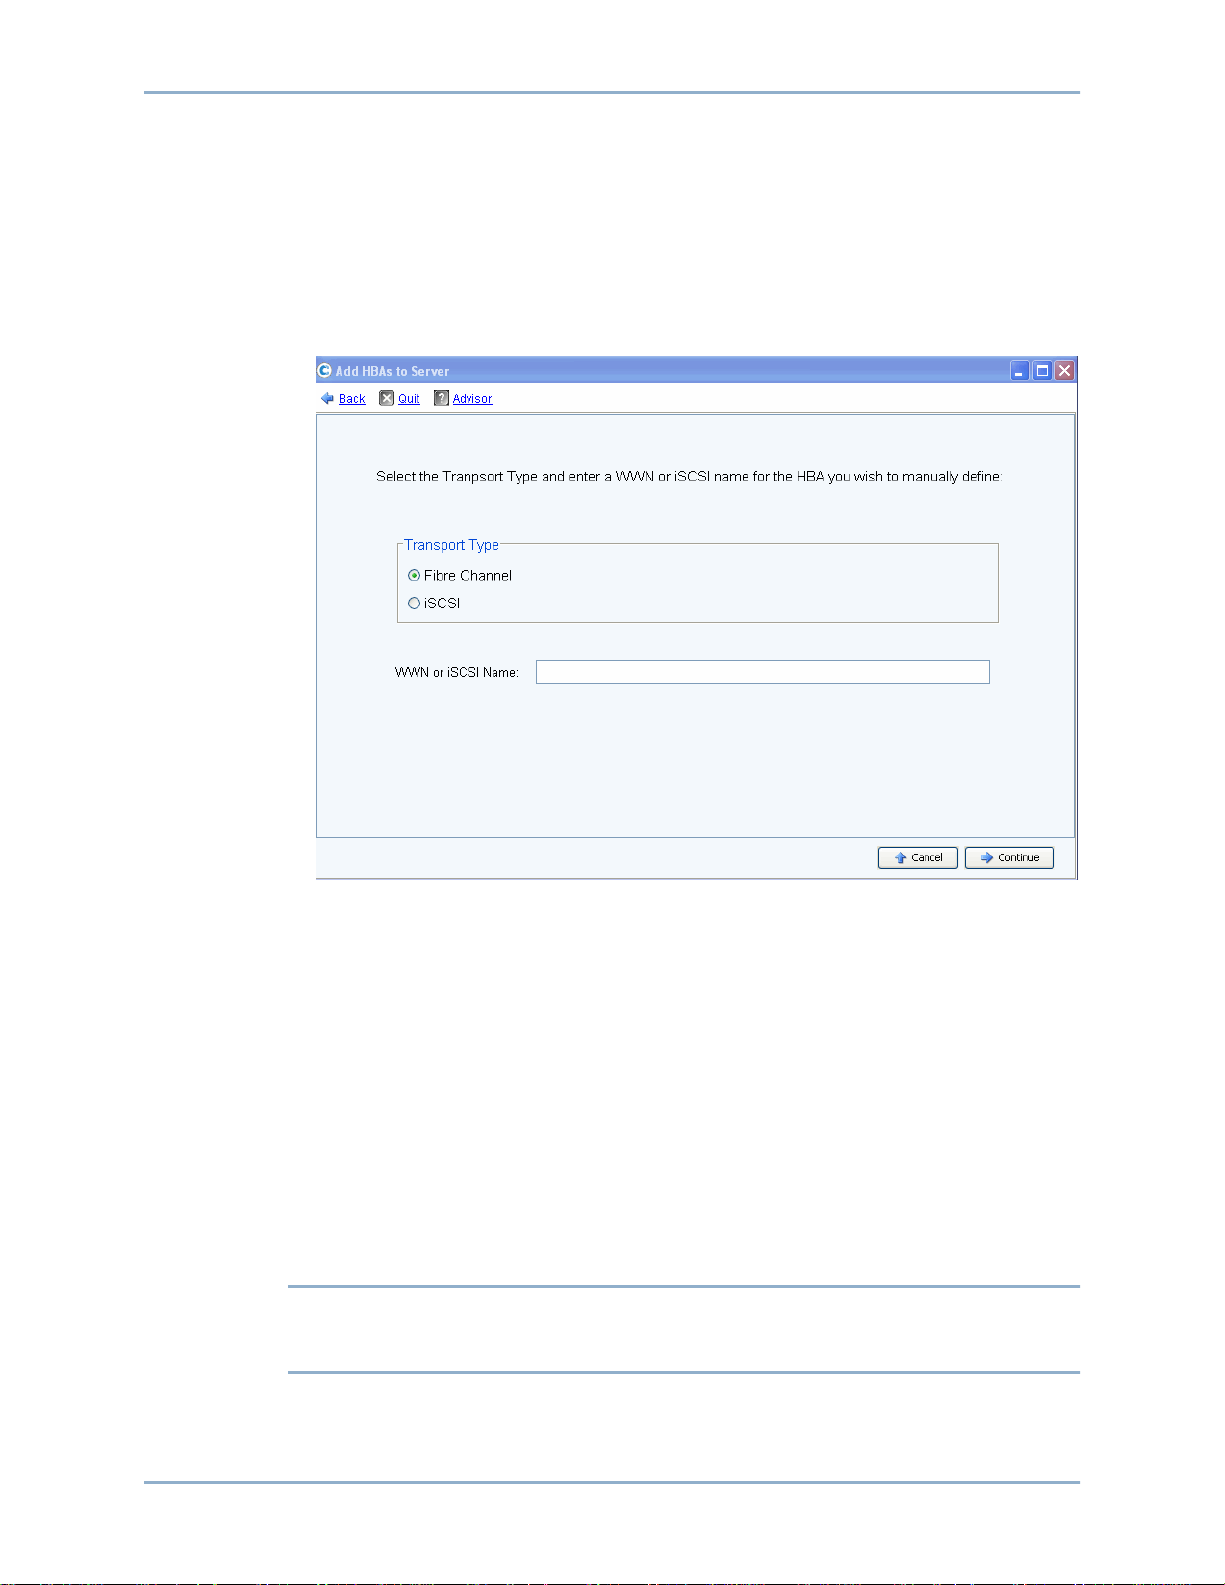
Manually Defining an HBA
1 In the system tree, select a server. From the shortcut menu, select Add HBAs to
Server.
2 In the Add HBA to Server window, click Manually Define HBA. The Add HBAs to
Server window appears.
3 Select a Transport Type and enter a World Wide Name or iSCSI name for the HBA.
Figure 37. Manually Define HBA
4 Select a transport type: FC or iSCSI.
5 Click Continue. The HBA you entered is shown in the list of HBAs.
6 Select the HBA you defined.
7 Click Continue. The HBA is added to the server.
Removing HBAs from a Server
Before removing an HBA, make sure that no volumes are mounted to this server through
this HBA. If you remove an active HBA, the server that is using the volume no longer has
access to that volume and will receive read or write errors. When you map a volume to a
server, you are really mapping that volume to one (or possibly more than one) of the server
HBAs. When you remove an HBA to which a volume is mapped, the maps are also deleted.
Note Note that when an HBA is removed from a server, any mapping through those HBA
ports will be automatically reevaluated and moved to other HBA ports on the server
if any are available.
49
Page 58

Servers
To remove HBAs from a server that does not have volumes mapped to it
1 In the system tree, select a server.
2 From the shortcut menu, select Remove HBAs from Server. Storage Center System
Manager displays the HBAs on that server.
3 Select an HBA.
4 Click Continue. The system asks you to confirm.
5 Click Remove HBAs Now. The HBA is removed.
Deleting an HBA
1 In the system tree, select a server.
2 Click on the HBA tab.
3 From the shortcut menu, select Delete. The Storage Center System Manager asks you
to confirm.
4 Click Yes.
50 Storage Center 5.5 System Manager User Guide
Page 59

Managing HBAs
Remove Mappings from a Server
You can either select a volume and remove the mapping to the server, or select a server
and remove volumes mapped to it. This command is similar for servers, server clusters, or
virtual servers.
To remove mappings from a server
1 In the system tree, select a server.
2 From the shortcut menu, select Remove Mappings from a Server. The system
displays volumes mapped to that server.
3 Select mappings to remove.
• Make sure that the volume mapped to this server is no longer mounted; if you
remove an active map entry, the server using the volume will have read/write errors.
The system warns you if you are attempting to remove an active map entry.
• Make sure that removing this mapping will not create a gap in the LUN sequence.
Most operating systems require contiguous LUN sequencing starting with LUN 0. A
gap in the LUN sequence may cause the server to fail to recognize subsequent
volumes.
4 Click Remove Now. The mapping is removed.
51
Page 60

Servers
Managing Server Folders
Creating a Server Folder
You can use server folders to organize servers and to restrict access to servers by some
users. Servers folders can be hierarchical. Folders appear in the system tree under the
servers node.
To create a server folder
1 In the system tree, select a server.
2 From the shortcut menu, select Create Server Folder. The Create Server Folder
window appears.
3 Enter a name or accept the default.
4 Enter any notes (up to 255 characters).
5 Click OK.
Adding Servers to a Server Folder
1 In the system tree, select one or more servers.
Figure 38. Select Multiple Servers
2 From the shortcut menu, select Move to Folder. The Storage Center System Manager
displays a list of folders.
3 Select a folder.
4 Click Continue. The Storage Center System Manager asks you to confirm.
52 Storage Center 5.5 System Manager User Guide
Page 61

Managing Server Folders
5 Click Apply Now.
Moving Servers to a Different Folder
1 In the system tree, select a server. From the shortcut menu, select Move to Folder.
The Move Servers window appears, displaying server folders.
2 Select a folder to which to move the server.
3 Click Continue. System Manager displays the server and the folder path.
4 Click Apply Now.
53
Page 62

Servers
Viewing Server Information
Viewing Server General Information
1 In the system tree, select the servers node. The main window displays a list of servers
or server folders. To view a server within a folder, in the system tree, select a server.
The server information window with the General tab highlighted appears.
Figure 39. General Server Information
Server information includes:
• Name: Applied when server was created. To change the name, refer to Renaming a
Server on page 45. Another Storage Center system that is acting as a server to the
current system is identified by its Storage Center name. Another Storage Center system
acts as a server to the current system if it is replicating data to the current system.
• Index: Number used by Dell Support Services to assist with component identification.
• Folder: If this Server is organized into a folder, the folder in which it resides.
• Type: Server, Virtual Server, or Server Cluster
• Operating System: Displays server operating system
• Connectivity: Displays connection status of the server.
• Date: Displays date created and updated, and by whom.
• Notes: if any.
54 Storage Center 5.5 System Manager User Guide
Page 63

Viewing Server Information
Viewing Server HBAs
Note Server HBAs do not appear in the server cluster window.
1 In the system tree, select a server. The server information window appears with the
Server HBAs tab highlighted.
Figure 40. Viewing Server HBAs
2 Click the Server HBAs tab. The Server HBAs window appears. The system displays:
• Type: FC or iSCSI
• Server Port: IQN or WWN for iSCSI, WWN for FC
• Status: Up or Down
• Connectivity: Displays connection status of the server port.
• Port information: Displays Port ID, Node Name, and other identifying information.
• Connected controller port ID(s)
55
Page 64

Servers
Viewing Server Connectivity
1 In the system tree, select a server.
2 Click the Connectivity tab. The ports listed in the Server HBA window are displayed.
Figure 41. Viewing Server Connectivity
Note The figure above shows a sample connectivity window for iSCSI. For Fibre Channel,
this window displays the WWN and there is no IP address, Subnet Mask, or
Gateway.
The Connectivity window displays individual HBAs connected to the Storage Center across
controller ports and fault domains.
56 Storage Center 5.5 System Manager User Guide
Page 65
Viewing Server Information
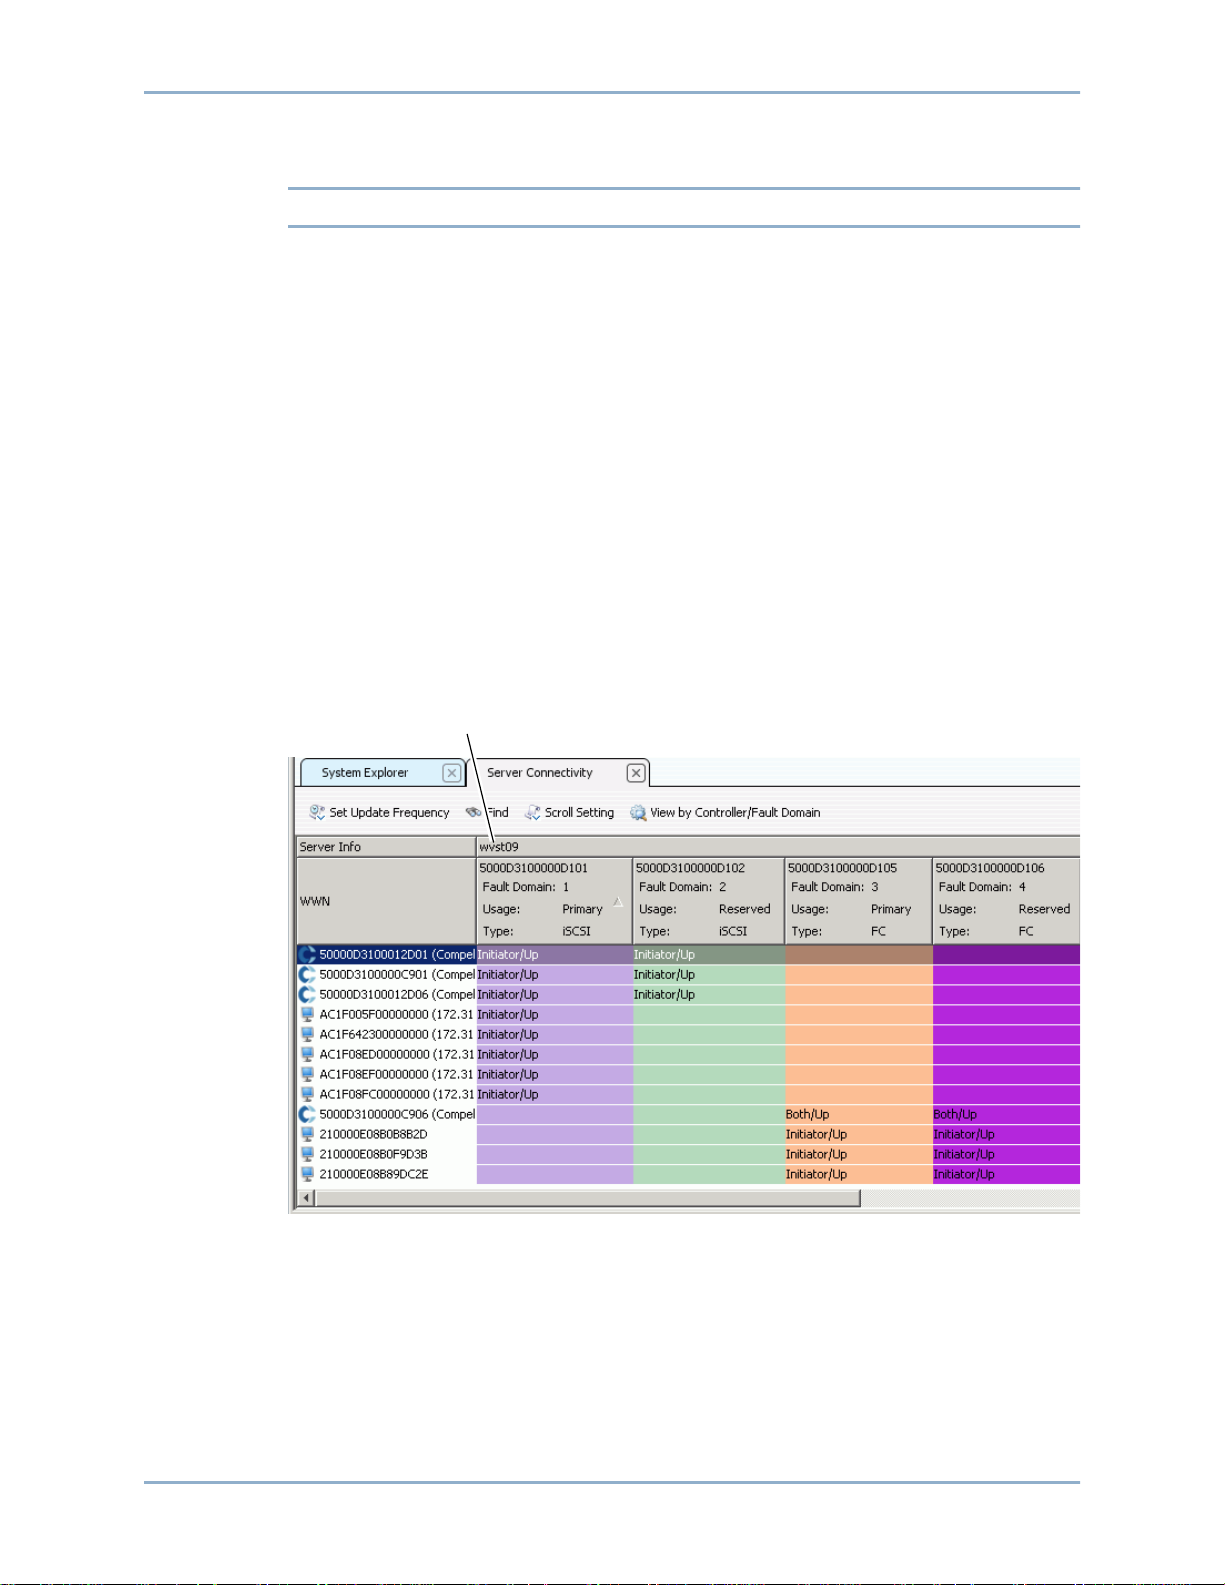
Viewing a Server Connectivity Report
Note Server Connectivity Report appears only if the system does not have Virtual Ports.
1 From the View menu, choose Server Connectivity. The Server Connectivity view
appears. The left side of the Server Connectivity window lists:
• WorldWide Name (WWN)
• Name of server
• Type of server
• Port type of FC or iSCSI
2 Scroll to the right to view additional information for each server. For each server, the
view displays:
• System to which the server is connected
• Server Port ID
• Fault domain
• Usage: Primary or Reserved
• Server type of FC or iSCSI
System to which server is connected
Figure 42. Server Connectivity View
57
Page 66

Servers
Viewing Server Mapping
1 In the system tree, select a server. The server information window appears in the right
frame.
2 Click on the Mapping tab. The mapping window appears.
Figure 43. Volumes Mapped to Selected Server
The server mapping tab shows the volumes to which the server is mapped and a mapping
detail panel showing additional information about the way in which the volume is mapped
to the server.
If the server selected is a virtual server, the virtual server mapping window shows the
volumes that are mapped to the virtual server. When a volume is selected, details are
displayed. Information includes whether the volume is mapped to the virtual server, the host
server of the virtual server, or both.
58 Storage Center 5.5 System Manager User Guide
Page 67

Figure 44. Viewing Virtual Server Mappings
Viewing Server Information
Viewing Advanced Mapping Details
You can view advanced mapping details only if your user volume defaults permit you to. For
information on how to enable Advanced Mapping Details, refer to User Volume Defaults
- Mapping on page 275. If Advanced Mapping Details and Show Advanced Mapping
Details are both enabled, in addition to the mapped volume, volume folder, and server, the
Mapping window displays the information described in Advanced Mapping Options on
page 74.
Information displayed depends whether the volume is mapped to a:
• Server with HBA ports of different transport types (such as Fibre Channel and iSCSI)
• Server with multiple server HBA ports. Select Specify Server Ports. Select the ports to
be used.
• Clustered server
• Virtual server
• If the operating system of the server supports multipathing.
Viewing Volumes Mapped to a Server
1 In the system tree, select a server. The server information window appears.
2 Click the Volumes tab. The system displays the volumes that are mapped to this server,
including volume name, type of volume, whether the volume is redundant, the amount
of disk space consumed by the volume, and the logical size of the volume.
59
Page 68

Servers
Viewing Volumes Mapped to a Server Cluster
If the servers selected form a server cluster, the mapping window displays the volumes that
are mapped to the server cluster. Select a volume to view details about the way that volume
is mapped to the server cluster, including cluster node information.
Viewing Volumes Mapped to a Virtual Server
If the servers selected form a virtual server, the mapping window display shows the
volumes that are mapped to the virtual server. Select a volume to view details about the
way that volume is mapped, including whether the volume is mapped to the virtual server,
the host server of the virtual server, or both.
Figure 45. Viewing Volumes Mapped to a Virtual Server
Viewing Volumes Mapped to a Remote System
If the servers selected is a remote system, the Mapping window displays the volumes that
are mapped to that remote system. Select a volume to view details about the way that
volume is mapped to the remote system.
60 Storage Center 5.5 System Manager User Guide
Page 69

Viewing Server Information
Figure 46. Viewing Volumes Mapped to a Remote System
Server Charts
1 In the system tree, select a server.
2 In the server information window, click on the Charts tab.
• The top of the window displays reads, writes, and total KB per second
• The bottom of the window displays reads, writes, and total IO per second
61
Page 70

Servers
Topology Explorer Server Functions
With Topology Explorer you can map volumes to servers and external (remote) systems
easily by dragging components. The Topology Explorer is divided into three columns. The
left column displays servers. The middle column displays volumes, and the right column
displays external (remote) systems.
• The Connections button, located above the right column, toggles between showing all
connections and showing connections only for selected objects. Numbers that appear
on the connection lines between servers and volumes indicate the logical unit for the
mapping. If there are Replications, there will also be connection lines between volumes
and the remote volumes to which they are Replicating.
• The Folders button, located to the right of the Connections button, toggles between
showing and hiding volume folders. When the Folders button is toggled to show folders,
a red line is drawn through the Folders button and unmapped folders are displayed.
When the Topology Explorer displays folders, two additional command objects appear
at the bottom of the window: Create New Server Folder and Create New Volume
Folder.
The following two server functions are available through Topology Explorer command
objects:
• Create New Server object opens the Create Server wizard
• Create New Server Folder opens the Create Server Folder wizard
For information about Topology Explorer volume functions, see Topology Explorer
Volume Functions on page 109.
To open the Topology Explorer
From the View menu, select Topology Explorer.
Figure 47. Topology Explorer
62 Storage Center 5.5 System Manager User Guide
Page 71

Topology Explorer Server Functions
Creating a New Server with the Topology Explorer
1 Drag the New Server command object to the Topology Explorer window. The Create
Server wizard appears.
2 Follow the instructions described in Creating a Server on page 29.
Creating a New Server Folder with the Topology Explorer
1 Make sure the Show Folders toggle is enabled and the Show Folder command object
appears.
2 Drag the New Server Folder command object to the Topology Explorer window. The
Create New Server Folder wizard appears.
3 Follow the instructions described in Creating a Server Folder on page 52.
63
Page 72

Servers
64 Storage Center 5.5 System Manager User Guide
Page 73

4 Volumes
Introduction 66
Creating Volumes 67
Mapping Volumes to a Server 73
Creating a Boot from SAN Volume 82
Viewing Volume Information 100
Modifying Volumes 86
Managing Volume Folders 91
Applying Replay Profiles 95
Copy, Mirror, and Migrate 97
Recycle Bin 108
Topology Explorer Volume Functions 109
65
Page 74

Volumes
Introduction
This chapter describes creating and managing volumes. Volumes can be created only from
an assigned folder of managed disks.
A volume is a logical storage repository. You can allocate more logical space to a volume
than is physically available on the Storage Center.
Because user access to a volume is controlled by user groups and associated volume
folders and volumes, group volumes into folders based on the way you want to control user
access. You can then create a corresponding user group and grant access to that volume
folder or volume. (Refer to Users and Groups on page 261.)
Types of Volumes
A volume is a single accessible storage area with a single file system. It is the same as a
logical drive. Via RAID, a Storage Center volume is physically located on some or all of the
drives within a Disk Folder. In a Microsoft Operating system, a volume can be assigned a
drive letter; in UNIX, a volume is assigned a mount point. A volume can be one of the
following:
• Standard Volumes are described in this chapter.
• Portable Volumes and Remote Volumes are described in Remote Instant Replay on
page 327.
66 Storage Center 5.5 System Manager User Guide
Page 75

Creating Volumes
Creating a Volume
Volumes are configured through the Configure Volume Defaults window. If some Create
Volume options do not appear, defaults were configured to disallow these choices. For
more information about User Volume Defaults, refer to Configuring User Volume Defaults
on page 272.
To create a volume with the Create Volume wizard
1 From the Storage Management window, select Create > Volume.
2 The Create Volume wizard asks you to enter a volume size.
Creating Volumes
Figure 48. Create Volume Window
3 Enter a volume size in GB, TB, or PB. The maximum size of a volume is 10 PB.
Note If your User Volume Defaults allow you to modify cache settings or Storage Profiles,
an Advanced button appears.
• For more information about Cache settings, refer to To change volume cache
properties on page 88.
• For more information about Storage Profiles, refer to Storage Profiles on page 381.
4 Click Continue.
67
Page 76

Volumes
If Data Instant Replay is licensed for your system, the Replay Profile window appears.
Figure 49. Select Replay Profile
5 Select an existing Replay Profile, or click Create a New Replay Profile. For more
information about creating Replay profiles, refer to Creating Replay Profiles on
page 292.
6 Click Continue. The window on which you can select or create a folder and name the
volume appears.
7 Select a folder in which to create the volume or create a new folder.
8 Enter a volume name or accept the default.
9 Click Continue. The system displays the attributes of the volume.
Figure 50. Volume Attributes
10 Review the attributes. The attributes depend on the options available to you when
creating volumes. Click Create Now.
Note Volumes are automatically mapped to the last server you selected.
68 Storage Center 5.5 System Manager User Guide
Page 77

Next Action Window
This next window presents options that are available after creating a volume.
Creating Volumes
Figure 51. Next Action Window
Depending on your configuration, some or all of the following commands may appear in this
window:
• Map this Volume to this Server
• Map this Volume to a Different Server
• Map this Volume to a Remote System
• Map a different Volume to this Server
• Map a different Volume to a different Server
• Create a Volume
• Create a Server
• Close this window
69
Page 78

Volumes
Creating Multiple Volumes for a Server
The Create Volumes wizard creates multiple volumes and maps them to a server in a single
operation.
Note Adding a volume to the volume list in the Create Volumes for Server wizard does not
cause the volume to be created. Volumes are only created when you select Create
Volumes Now.
To create volumes for a server
1 In the system tree, select a server, server cluster, or virtual server.
2 From the shortcut menu, select Create Volumes. The Create Volume window appears.
By default, the name of the volume is based on the name of the server.
Figure 52. Create Volumes from Server
3 Review Add Volume options:
• Copy the selected volume when adding a volume: The added volume copies all
attributes except name from the volume currently selected in the volume list.
• Use My Volume Defaults when adding a volume: The added volume uses your
user volume defaults for creating a volume. Refer to Configuring User Volume
Defaults on page 272.
• Map Volumes to this server using default settings upon creation: Checking this
automatically maps volumes to this server after they are created using default
mapping options. If there are special considerations for mapping volumes to this
server, uncheck Map Volumes to this server using default settings and manually map
the volumes to the server later.
4 Choose from the following:
70 Storage Center 5.5 System Manager User Guide
Page 79

Creating Volumes
• To add an additional volume to be created, click Add Volume. Adding a volume to
the volume list does not cause the volume to be created. Volumes are only created
when you click Create Volumes Now.
• Continue to click the Add Volume button to add and map multiple volumes.
• To remove the volume currently selected in the volume list, click Remove Selected
Volume.
• To modify the volume currently selected in the volume list, click Modify Selected
Volume. If you are creating multiple volumes, modify the first volume in the list and
make sure the Copy the selected volume when adding a volume box is checked.
• To create volumes, click Create Volumes Now . If the Map Volumes to this server
using default settings upon creation checkbox is selected, the volumes will be
automatically mapped to the selected server after they are created
Creating Multiple Volumes
Create volume options are configured through the Configure Volume Defaults window. If
some Create Volume options do not appear, defaults were configured to disallow these
choices. For more information about User Volume Defaults, refer to Configuring User
Volume Defaults on page 272.
Note If you intend to add multiple volumes with similar attributes, you should modify the
first volume in the list, then copy the attributes from this volume when adding
additional volumes.
To create multiple volumes
1 In the Storage Tree, select Storage or Volumes, from the shortcut menu, select
Create Volumes. The Create Volumes window appears.
Figure 53. Create Multiple Volume Window
71
Page 80

Volumes
2 Choose a Volume Option:
• Select Copy selected volume when adding a volume to copy all volume attributes
except name from the volume currently selected in the volume list. The name is
incremented by one number: Volume 1, Volume 2, etc.
• Select Use My Volume Defaults when adding a volume to use your Volume
Defaults.
3 Select Add Volume to add additional volumes. (Volumes are not created until you click
Create Volumes Now.) Volumes are added to the list of volumes to create.
4 Select Remove Selected Volume to remove the volume currently selected in the
volume list.
5 Select Modify Selected Volume to modify the volume currently selected in the volume
list. The Modify Volume window appears.
Depending upon the user preferences you have selected, you may not be allowed to
change certain attributes. To change your user preferences, select the root of the
System Explorer tree and select Configure My Volume Defaults. Possible modifications
include:
• Name
• Size
• Folder in which volume resides, or create a new folder
• Replay Profile, or create a new Replay Profile
• Storage Profile
• Disk folder to select the disk folder for the volume to use. The disk folder contains
the physical disks the volume will use for storage.
6 Select Apply Changes to make the modification(s) and return to the volume list.
72 Storage Center 5.5 System Manager User Guide
Page 81

Mapping Volumes to a Server
Mapping enables servers to connect to volumes.
Mapping a Volume to a Server
1 In the system tree, select an unmapped volume. Expand the Storage Node if
necessary.
2 From the shortcut menu, select Map Volume to Server. A list of servers is displayed.
Mapping Volumes to a Server
Figure 54. Map Volume to Server – Server List
3 Select a server to map to the selected volume(s).
4 Click Continue.
Figure 55. Map Volume to Server Confirmation
5 Click Create Now. The volume is mapped.
73
Page 82

Volumes
Advanced Mapping Options
To view advanced options, you must map volumes individually. If you map multiple
volumes, the advanced window does not appear. Make sure that Allow Advanced
Mapping is enabled in your User Volume Mapping Defaults. Refer to User Volume Defaults
- Mapping on page 275.
Note The advanced options available differ depending upon the configuration of the server
and the configuration of the Storage Center.
In the Map Volume to Server Confirmation window, click Advanced. The Advanced Map
Volume to Server window appears.
Figure 56. Advance Mapping Options
The options available on the Advanced mapping screen will differ depending upon the
configuration of your system. For the volume you are mapping, choose from the following
options:
Selecting a Logical Unit Number
• If the volume you are mapping is a boot volume, select Map Volume using LUN 0. LUN
0 is reserved for boot volumes. If the volume you are mapping is not a boot volume,
make sure this option is cleared. If a volume has already been mapped to the selected
server using LUN 0, this option does not appear.
• To map the selected volume to the server using a specific LUN, select and enter a LUN.
74 Storage Center 5.5 System Manager User Guide
Page 83

Mapping Volumes to a Server
• By default, Storage Center uses a different LUN if the specified LUN is already in use.
To use the next available LUN, check Use Next Available LUN. If you do not want to
use a different LUN when the specified LUN is already in use, clear the Use Next
Available LUN checkbox.
Restricting Mapping Paths
These options will only appear when mapping to a server with multiple server HBA ports,
when mapping a server on a cluster Storage Center, or when mapping a virtual server to a
volume.
The options that appear depends on the type of server to which you are mapping this
volume:
• Server with HBA ports of different transport types (such as Fibre Channel and iSCSI):
Select Transport option appears. Check to map to only one of the transport types.
Select the transport type.
• Server with multiple server HBA ports: Select Specify Server Ports. Select the ports to
be used.
• Map to Controller: To map to a specific controller, check Map to Controller. Select a
controller.
• Map to host: Select Host, Virtual, or Both.
Configuring Multipathing
If the operating system of a server does not support multipathing, this option will not be
shown.
• Select the maximum number of paths used to map the selected volume to the server.
The maximum number of paths allowed may be limited by the operating system of the
server.
Creating a Read-Only Volume
Under Configure Volume Use, check to present this volume as read-only.
Creating Mapping to Down Server Ports
This is an informational message that appears only if the selected server has down ports:
Enabling mapping to Down Server Ports
Check the box to enable mapping to down server ports.
75
Page 84

Volumes
Mapping Multiple Volumes to a Server or Server Cluster
To create multiple volumes automatically mapped to a server, refer to Creating Multiple
Volumes for a Server on page 70.
To map multiple volumes to a server
1 In the system tree, select a storage folder or the Volumes node. The volumes in that
folder appear in the main window.
2 Select a volume or, using the Ctrl key, select more than one volume.
Figure 57. Select Volumes to Map
3 From the shortcut menu, select Map Volumes to Server. A list of servers appears. By
default, the last server that you selected is selected as the server to map to.
76 Storage Center 5.5 System Manager User Guide
Page 85

Figure 58. Select Server for Volume Mapping
Mapping Volumes to a Server
4 From here, you can:
• Accept the selected server or server cluster
• Choose a different server or server cluster
• Create a server or server cluster to map the volumes to
5 Select Continue. The system asks you to confirm.
Figure 59. Confirm Mapping Multiple Volumes
6 Click Map Volumes Now. The volumes are mapped to a single server. An exception to
this is if the server is part of a server cluster. Refer to Server Clusters on page 32.
77
Page 86

Volumes
When creating a server cluster, Storage Center attempts to map an included volume to the
same LUN on all cluster servers. If the LUN selected is not available on a particular
server, the mapping is not performed and the volume is only partially connected to
the cluster.
Mapping a Volume to Remote System
Mapping a volume to a remote system causes the volume to appear as a remote volume
on the remote system. The volume can then be used as a replication target.
To map a volume to a remote system
1 In the system tree, select an unmapped volume.
2 From the shortcut menu, select Map Volume to Remote System. A list of remote
systems appears.
3 Select a remote system.
a Optional: Click Advanced to restrict mapping paths.
Figure 60. Map Volume to Remote System Advanced
b Restrict the path to one transport, such as FC or iSCSI.
c In a clustered-controller system, select a controller to which to map the volume.
d Click Continue.
4 The system asks you to confirm. Click Create Now.
78 Storage Center 5.5 System Manager User Guide
Page 87

Mapping Volumes to a Server
Removing Mapping from a Volume
1 In the system tree, select a volume.
2 From the shortcut menu, select Remove Mappings from Volume. The Remove
Mappings from Volume window appears.
3 Select the mapping(s) to remove.
4 Click Continue. The mappings confirmation window is displayed.
5 Click Remove Mappings Now. If a mapping is still active, System Manager asks you to
confirm. Before removing the mapping, confirm that the volume is no longer in use by
the server. If you remove a mapping to a volume which is in use, the server will no longer
have access to the volume and will have read/write errors.
79
Page 88

Volumes
Import Data to Lowest Tier
Use Import Data to Lowest Tier to write large amounts of data to the lowest tier of storage
configured for a volume. This is useful when performing an OS-level copy of a data to a
Storage Center volume from a server-attached data source.
To import data to the lowest tier
1 From the system tree, select a target volume.
2 From the shortcut menu, select Properties. The Volume Properties window appears.
Figure 61. Import Data to Lowest Tier
3 Select or clear Import data to lowest tier of storage. If selected, data is written to the
lowest tier of storage available based upon the configuration of the storage profile of the
volume. No Replays are taken for the volume during data import. If this option is
unchecked, by default data is written to the highest tier of storage configured for the
volume.
Note Import mode is not allowed for volumes that are mapped to another Storage Center
system for use as replication destinations. The Import data to lowest tier of storage
option is not displayed on the Volume Properties screen. Importing data is managed
in Enterprise Manager as part of the replication to that volume. For more information,
refer to the Enterprise Manager User Guide.
80 Storage Center 5.5 System Manager User Guide
Page 89

Import Data to Lowest Tier
In the System Explorer, a volume that is set for importing data to the lowest tier appears
with a yellow warning icon and a message that data is being imported to the lowest tier.
Figure 62. Volume in Lowest Tier Import Mode
While a volume is in import mode, replays are not taken for that volume. Replays are
resumed when the volume is taken out of import mode.
Once the data is imported, it is your responsibility to take the volume out of Import mode.
Taking a Volume Out of Import Mode
1 Select a volume that has been placed into import mode. From the shortcut menu,
select Properties. The Properties window appears.
2 Uncheck Import Data to Lowest Tier of Storage.
3 Click OK. The volume is no longer in import mode.
81
Page 90

Volumes
Creating a Boot from SAN Volume
Boot from SAN dramatically reduces the time to recover servers by creating and storing
Replays of the boot volume at the disaster recovery site. The Boot from SAN function
allows servers to use an external SAN volume as the boot volume for the server. In the
event of a failure, power up a spare server, point the server to a boot image on the SAN,
and boot the server up.
Note To use the Boot from SAN wizard, you must already have a boot from SAN volume
created and in use. A boot from SAN volume is operating system-dependent and
requires the server HBA to be specifically configured and enabled to boot from the
SAN. See your respective operating system and HBA provider to create this
configuration.
To create a boot from SAN copy
1 From the Storage Management menu, choose Volume > Create a Boot from SAN
Volume. The Boot from SAN wizard opens.
Figure 63. Boot from SAN Wizard
82 Storage Center 5.5 System Manager User Guide
Page 91

Creating a Boot from SAN Volume
2 Click Continue. The Create Boot from SAN Volume window appears.
Figure 64. Boot Volume Name and Folder
3 Select a name and folder or accept the default. Click Continue. The Replay window
appears.
Figure 65. Boot from SAN Replay Window
83
Page 92

Volumes
4 Click Create Now. The Map Volume to Server window appears.
Figure 66. Map SAN Volume to Server
5 Create a Server, create a Server Cluster, or accept the defaults.
6 Click Continue. The Confirmation window appears.
Figure 67. Confirm Map Boot Volume to Server
84 Storage Center 5.5 System Manager User Guide
Page 93

Creating a Boot from SAN Volume
7 If you select Advanced, the Advanced Options window appears.
Figure 68. Boot from SAN Options Window
8 You can:
• Enter a Logical Unit Number (LUN).
• Restrict Mapping Paths
• Configure the Volume as Read-Only
For more information on these options, refer to Advanced Mapping Options on page 74.
Click Continue.
9 Click Create Now. The Boot from SAN volume is created.
85
Page 94

Volumes
Modifying Volumes
Modifying a Volume
In the Create Volume from a Server window, click Modify. The Modify volume window
appears.
Figure 69. Modify Volume
You can:
• Change the folder in which the volume resides
• If Data Instant Replay is enabled, select a Replay Profile attached to this volume
• If Data Progression is licensed for this system and you are allowed to make changes,
select a Storage Profile attached to this volume.
• If you are allowed to change cache settings, the type of cache enabled.
86 Storage Center 5.5 System Manager User Guide
Page 95

Modifying Volumes
Changing Volume Properties
1 In the system tree, select a volume.
2 From the shortcut menu, select Properties. The Volume Properties window appears
with the General tab selected.
Figure 70. General Volume Properties
3 General Volume Properties include:
• Name and type: You can type in a new volume name.
• Status: Can be up or down. Controller on which volume is active.
• Volume Type: can be dynamic, Replay enabled, or Replication. A volume is dynamic
until at least one Replay has been taken of that volume. Once a Replay has been
taken of a volume, it becomes Replay Enabled. A Replication volume is one that is
being Replicated to another Storage Center system.
• Disk Folder: Disk folder in which this volume resides
• Storage Type: Type of Redundancy and Storage Type size. (Refer to Non-Standard
Storage Types on page 138.)
• Logical Size: Size of volume as seen by the Server.
• Serial Number
4 Click OK to save changes.
87
Page 96

Volumes
To change advanced volume properties
1 Click the Advanced tab.
2 Do any of the following:
• Modify the Volume Space Consumption Limit
• Allow Replays to coalesce into active Replay to allow frozen Replays to coalesce into
an active Replay.
• Import data to the lowest tier of storage available based upon the configuration of the
storage profile of the volume. No Replays are taken for the volume during data
import. If this option is unchecked, by default data is written to the highest tier of
storage configured for the volume.
• If there are volumes on storage running the Open VMS operating system, this tab
displays the Unique Disk ID (UQ ID) used to identify the volume.
You may need to reset this value when recovering a volume from a Replay. For
example, if you mapped a volume to a server, took a Replay, and then mounted a
new view volume up to the server; the new view volume would have a new Disk ID
and you would have to modify the value in this window to match the original Disk ID
for the volume before the server will recognize it as the same volume.
To change volume cache properties
1 Click the Cache tab.
2 In the Volume Properties window, click the Cache tab. (Caching that is set system-wide
overwrites individual volume cache.)
3 Do any of the following:
• Select or clear write cache. Write Cache holds written data in volatile memory until it
can be safely stored on disk. Write Cache protects in the event of a power loss.
• Select or clear read cache. Read Cache anticipates the next Read and holds it in
quick volatile memory, thus improving Read performance. Read Ahead can be used
for sequential reads, such as video.
4 Click OK to save changes.
To change volume folder properties
1 Click the Folders tab. The Volume Folder window appears. System Manager lists all
volume folders and subfolders. The folder in which the volume resides is highlighted.
2 To move the selected volume to a different folder:
a In the Volume Properties window, click Folder. A list of volume folders appears.
b Select a folder to which to move the volume.
c Click OK. The folder is moved.
To change volume information properties
1 Click the Info tab. The Info window appears. Information includes:
• Date Volume was created
88 Storage Center 5.5 System Manager User Guide
Page 97

Modifying Volumes
• User who created the volume
• Date volume was last updated
• User who updated the volume
2 Enter any optional notes (up to 255 characters) and click OK.
Deleting a Volume
1 In the system tree, select a volume.
2 From the shortcut menu, select Delete. System Manager informs you if the volume is
actively mapped to a server and asks you to confirm.
Figure 71. Delete Volume
Note By default, a deleted volume is moved to the Recycle Bin. You can recover the
volume from the Recycle Bin, but once the Recycle Bin is emptied, data on that
volume cannot be recovered.
3 (Optional - and not recommended) You can immediately delete the volume and not save
the metadata in the Recycle Bin by checking Skip Recycle Bin.
4 Click Yes. The volume is deleted.
89
Page 98

Volumes
Deleting Multiple Volumes
1 In the system tree, select a volume folder. The list of volumes appears in the main
frame.
2 In the main window, select volumes by holding down the Shift key or Ctrl key and
clicking on volumes.
3 From the shortcut menu at the top of the window, choose Delete. System Manager
warns you if a volume is mapped to a server.
4 System Manager asks you to confirm. Click Yes. The volumes are deleted.
Restoring a Deleted Volume
When a volume is deleted, it is moved to the Recycle Bin. You can restore a deleted volume
from the Recycle Bin.
Once the Recycle Bin is emptied, any items in the Recycle bin are gone and cannot be
restored.
To restore a volume from the recycle bin
1 In the system tree, expand Storage > Volumes to view volume components including
the Recycle Bin.
2 Expand the Recycle Bin. The Recycle Bin lists restorable volumes.
3 Select the volume to be restored.
4 From the shortcut menu, choose Restore Volume. The volume is restored. Previous
mappings are not restored.
Expanding a Volume
Virtual capacity may be greater than the physical capacity.
To expand the virtual capacity of a volume
1 In the system tree, select a volume.
2 From the shortcut menu, select Expand Volume. The Expand Volume window appears.
3 Choose a number in blocks, Gigabytes, Terabytes, or Petabytes.
4 Click Continue. System Manager warns you that because of overhead, the actual final
size will be slightly larger than the size indicated.
5 Click Expand Volume Now.
90 Storage Center 5.5 System Manager User Guide
Page 99

Managing Volume Folders
Creating a Volume Folder
Volume folders organize volumes. You can restrict access to folders through a combination
of User Groups and User Privileges.
To create a volume folder
1 From the Storage Management window, select Create > Folder > Volume Folder. The
Create Volume Folder window appears.
2 You can create the folder at the root level (Volumes) or within another folder.
Managing Volume Folders
Figure 72. Create Volume Folder
3 Enter a volume folder name, or accept the default. Enter any Notes (up to 255
characters).
4 Click Create Now. The volume folder is created.
91
Page 100

Volumes
Viewing a List of Volume Folders
1 In the System Tree, select Volumes. The system lists volumes and volume folders.
2 In the main window select more than one volume folder by holding down the Shift or
Ctrl key and selecting more than one volume folder.
Figure 73. Select Multiple Volume Folders
Using the shortcut menu, you can:
• Create or apply Replay Profiles to all the volumes in the selected folders.
• Move the selected folders into another folder.
• Delete multiple volume folders.
• Storage Profiles appear if you are allowed to select a Storage Profile. Refer to User
Volume Defaults - Advanced on page 274.
Viewing Volume Folder Properties
1 In the System Tree, select a folder.
2 Click Continue. The General Volume Folder Properties window appears. To change the
name of the folder, enter a new name.
3 Click OK.
4 Click the Info tab to view Date Created, Created By, Date Updated, Updated By, and
Notes (up to 255 characters).
92 Storage Center 5.5 System Manager User Guide
 Loading...