

Page 1

Dell Command | Update
Version 2.1 User's Guide
Page 2

Notes, cautions, and warnings
NOTE: A NOTE indicates important information that helps you make better use of your computer.
CAUTION: A CAUTION indicates either potential damage to hardware or loss of data and tells you
how to avoid the problem.
WARNING: A WARNING indicates a potential for property damage, personal injury, or death.
Copyright © 2015 Dell Inc. All rights reserved. This product is protected by U.S. and international copyright and
intellectual property laws. Dell™ and the Dell logo are trademarks of Dell Inc. in the United States and/or other
jurisdictions. All other marks and names mentioned herein may be trademarks of their respective companies.
2015 - 06
Rev. A00
Page 3

Contents
1 About This Document.......................................................................................... 5
What’s New............................................................................................................................................5
2 Setup....................................................................................................................... 6
Overview................................................................................................................................................6
Installing Dell Command | Update....................................................................................................... 6
Uninstalling Dell Command | Update................................................................................................... 7
Upgrading Dell Command | Update..................................................................................................... 7
Silent Installation....................................................................................................................................7
Activity Log.............................................................................................................................................7
Viewing And Exporting The Activity Log.........................................................................................8
3 Getting Started With Dell Command | Update................................................9
Heading Banner...................................................................................................................................10
Left Pane..............................................................................................................................................10
Content Area........................................................................................................................................ 11
Advanced Driver Restore............................................................................................................... 11
4 Using Dell Command | Update.........................................................................12
Downloading And Installing Driver Libraries...................................................................................... 12
Checking For And Installing Updates..................................................................................................12
Selecting Updates................................................................................................................................14
Customizing Updates.................................................................................................................... 14
Dependency Installation................................................................................................................15
Hidden Updates...................................................................................................................................16
Removing An Update From The List Of Available Updates..........................................................16
Restoring An Update To The List Of Available Updates...............................................................16
Update History.....................................................................................................................................16
System Restore.............................................................................................................................. 17
Viewing Update History................................................................................................................. 17
Viewing And Exporting System Information.......................................................................................17
Dell Command | Update Command Line Interface Options.............................................................17
CLI Reference................................................................................................................................ 18
Using CLI Switch Combinations...................................................................................................20
5 Dell Command | Update Settings.....................................................................21
Configuring General Settings..............................................................................................................21
Updating Source Location............................................................................................................ 22
3
Page 4

Scheduling To Check For Updates.....................................................................................................22
Configuring Update Filter Settings..................................................................................................... 23
Importing Or Exporting Settings.........................................................................................................23
Policy File.............................................................................................................................................24
Creating A Policy File.................................................................................................................... 24
Sample Policy.xml File Data..........................................................................................................24
Adding Settings In A Policy File.....................................................................................................25
Removing Settings From A Policy File..........................................................................................26
Configuring Advanced Driver Restore Settings..................................................................................27
6 Accessing Documents From Dell Support Site............................................. 28
7 Contacting Dell................................................................................................... 29
4
Page 5

1
About This Document
You can use Dell Command | Update to update the Dell system with the latest drivers, BIOS, firmware,
and Dell software applications.
In addition to this guide, there are other product guides you should have for reference. You can find the
following guide on the Dell Support website at dell.com/support/manuals
• Hardware Owner’s Manual provides information about the system, installing system components, and
troubleshooting the system.
What’s New
Dell Command | Update provides the following features in this release.
• Support for Windows 10 operating system
• Support for providing feedback on Dell Command | Update
• Notification if BitLocker is enabled on your system
5
Page 6

2
Setup
This section contains information on prerequisites and requirements needed to use Dell Command |
Update. It also provides an overview of the tool, and lists installation and uninstallation steps.
Overview
Dell Command | Update is an easy-to-use Graphical User Interface (GUI) and Command Line Interface
(CLI) tool that you can use to update Dell client systems with the latest drivers, BIOS, and firmware. It is a
one-to-one standalone utility.
The advantages of using Dell Command | Update are:
• Simplifies system management and the update process for Dell client systems.
• The tool’s easy-to-use CLI can be used for automating driver installation and updates.
• Provides an easy-to-use GUI, which helps in identifying and applying appropriate drivers and updates
for the system.
NOTE: To run Dell Command | Update, .NET 4.0 or a later version is required.
Installing Dell Command | Update
Before you proceed, ensure that you are logged in with administrator privileges on the client system on
which you want to install
To download Dell Command | Update:
1. Go to dell.com/support.
2. Search for Dell Command | Update 2.1.
3. Download Systems-Management_Application_K82GG_WN32_2.1.0_A00.exe.
To install Dell Command | Update:
1. Double-click Systems-Management_Application_K82GG_WN32_2.1.0_A00.exe.
2. Click Install
3. On the Welcome screen, click Next
4. On the License Agreement screen, select I accept the terms in the license agreement, and then
click Next.
5. On the Begin Install screen, click Install
6. On the Installation Complete screen, click Finish.
6
Dell Command | Update.
Page 7

7. Click OK.
Uninstalling Dell Command | Update
For information on uninstalling programs, see the operating system documentation.
Upgrading Dell Command | Update
You can upgrade Dell Command | Update (formerly Dell Client System Update) 2.1 from Dell Client
System Update 2.0 or 1.x using the following methods.
1. Self-update: Use the Check feature on the Welcome screen to check for updates. For more
information, see Checking and Installing Updates.
2. Manual update: Download and install Dell Command | Update 2.1 from dell.com/support and
installing it.
If any newer versions of Dell Command | Update are available, then the latest version of Dell Command |
Update is listed under Recommended updates. Select the update and install the newer version of the
application.
In case of minor upgrades, all the preference settings and polices are retained. In case of major upgrades,
the application is uninstalled and the settings and data are removed.
Silent Installation
You can perform a silent installation of Dell Command | Update by using the following methods:
• For silent installation using the installation command line, use the command —
DCU_Setup_2_1_0.exe /s /v”/qn”.
• For silent installation using Dell Update Packages (DUPs), use the executable file — SysMan_Application_xxxxx_WN_y.y.y_A00.exe /s, where ‘x’ is the software build and ‘y’ is the version
number.
Activity Log
The activity log feature helps you view the updates installed on the system and track any failures or
issues. The activity log generated in Dell Command | Update is classified as follows:
• Normal — Normal messages are created in the log file when the Normal mode setting in Dell
Command | Update is enabled. These messages provide high-level details about the updates.
• Debug — Debug messages are created in the log file when the Debug mode setting in Dell Command
| Update is enabled. These messages provide detailed information about the updates or errors.
The ActivityLog.xml, is stored as an XML formatted text file at the following locations on the system:
7
Page 8

• For systems with Microsoft Windows Vista and later operating systems — C:\ProgramData\Dell
\CommandUpdate
The root element of the log contains the name of the product and the version installed on the system.
The child elements under the root element are listed as follows:
Element Name Description
<level> Activity log level.
<timestamp> Timestamp when the log was created.
<source> Application operations.
<message> Detailed information for the log entry.
<data> Indicates additional information for the log entry.
NOTE: The format and content of the above elements are based on the operating system and can
be modified by the user.
Viewing And Exporting The Activity Log
Perform the following steps to view and export the activity log:
1. On the Welcome screen, click Activity Log.
The Activity Log screen is displayed.
By default, the list of activities performed during the last 7 days, 15 days, 30 days, 90 days, or the last
year, is displayed. You can configure the period from the drop-down list.
2. From the drop-down list, select the number of days for which you want to view the update activities
that Dell Command | Update has performed on the system. For example, if you select Last 15 Days,
you can view the update activities that Dell Command | Update has performed during the last 15
days.
3. NOTE: You cannot undo this action.
(Optional) Click Clear to clear the log.
4. (Optional) Click to view more information about the message log entry, such as application error
messages. This information is also available in the exported log file.
5. (Optional) Click Caution next to error or failure log entries to view information on how to avoid any
potential damage or problem.
6. NOTE: The inventory.xml file is updated from dell.com/support if a newer version is available.
(Optional) Click Export to export the activity log in XML format into a zip file. The inventory.xml file is
also included in the zip file.
7. To reorder or sort the columns according to the date or message type, click next to Date or
Message.
8. Click Save to save changes, or click Cancel to revert to the last saved settings.
9. Click Close to go back to the Welcome screen.
8
Page 9
3
Getting Started With Dell Command | Update
When the Dell Command | Update launches for the first time, either manually or automatically, the Dell
Command | Update – Setup screen displays the following setup options to discover, review, and install
the updates:
Table 1. Setup Options
Option Description
Yes, run automatically with the default settings
(Recommended)
Automatically checks for updates on a regular
basis using the default settings. To view the list of
default settings, click the Settings icon and
view the default settings under Automatically
check for updates
in the Schedule tab.
Yes, run automatically, but allow me to review/
edit my settings now
No, I do not wish Dell Command | Update to
check for updates automatically at this time
If you have just received your system from the Dell factory, Dell Command | Update auto-launches after
the system boots the fourth time and scans for any available updates. In this case, the Welcome screen
will not offer Check for Updates functionality, but will instead display a list of available updates and allow
you install them.
NOTE: Dell Command | Update auto-launches only if,
• Dell Command | Update is factory installed
• Dell Command | Update is not launched manually before it launches automatically
The Dell Command | Update Welcome screen contains the following:
1. Heading Banner
2. Left Pane
3. Content Area
Automatically checks for updates on a regular
basis. Based on your requirements, you can
change the default settings. When you select this
option, the Settings screen is displayed. In the
Schedule tab, you can configure the automatically
check for updates option.
Dell Command | Update does not automatically
check for updates.
9
Page 10

Heading Banner
The heading banner contains the name and version number of the product, and icons for various
activities.
Table 2. Heading Banner Icons
Icon Description
Displays help for each screen (located at the top
right corner of all screens).
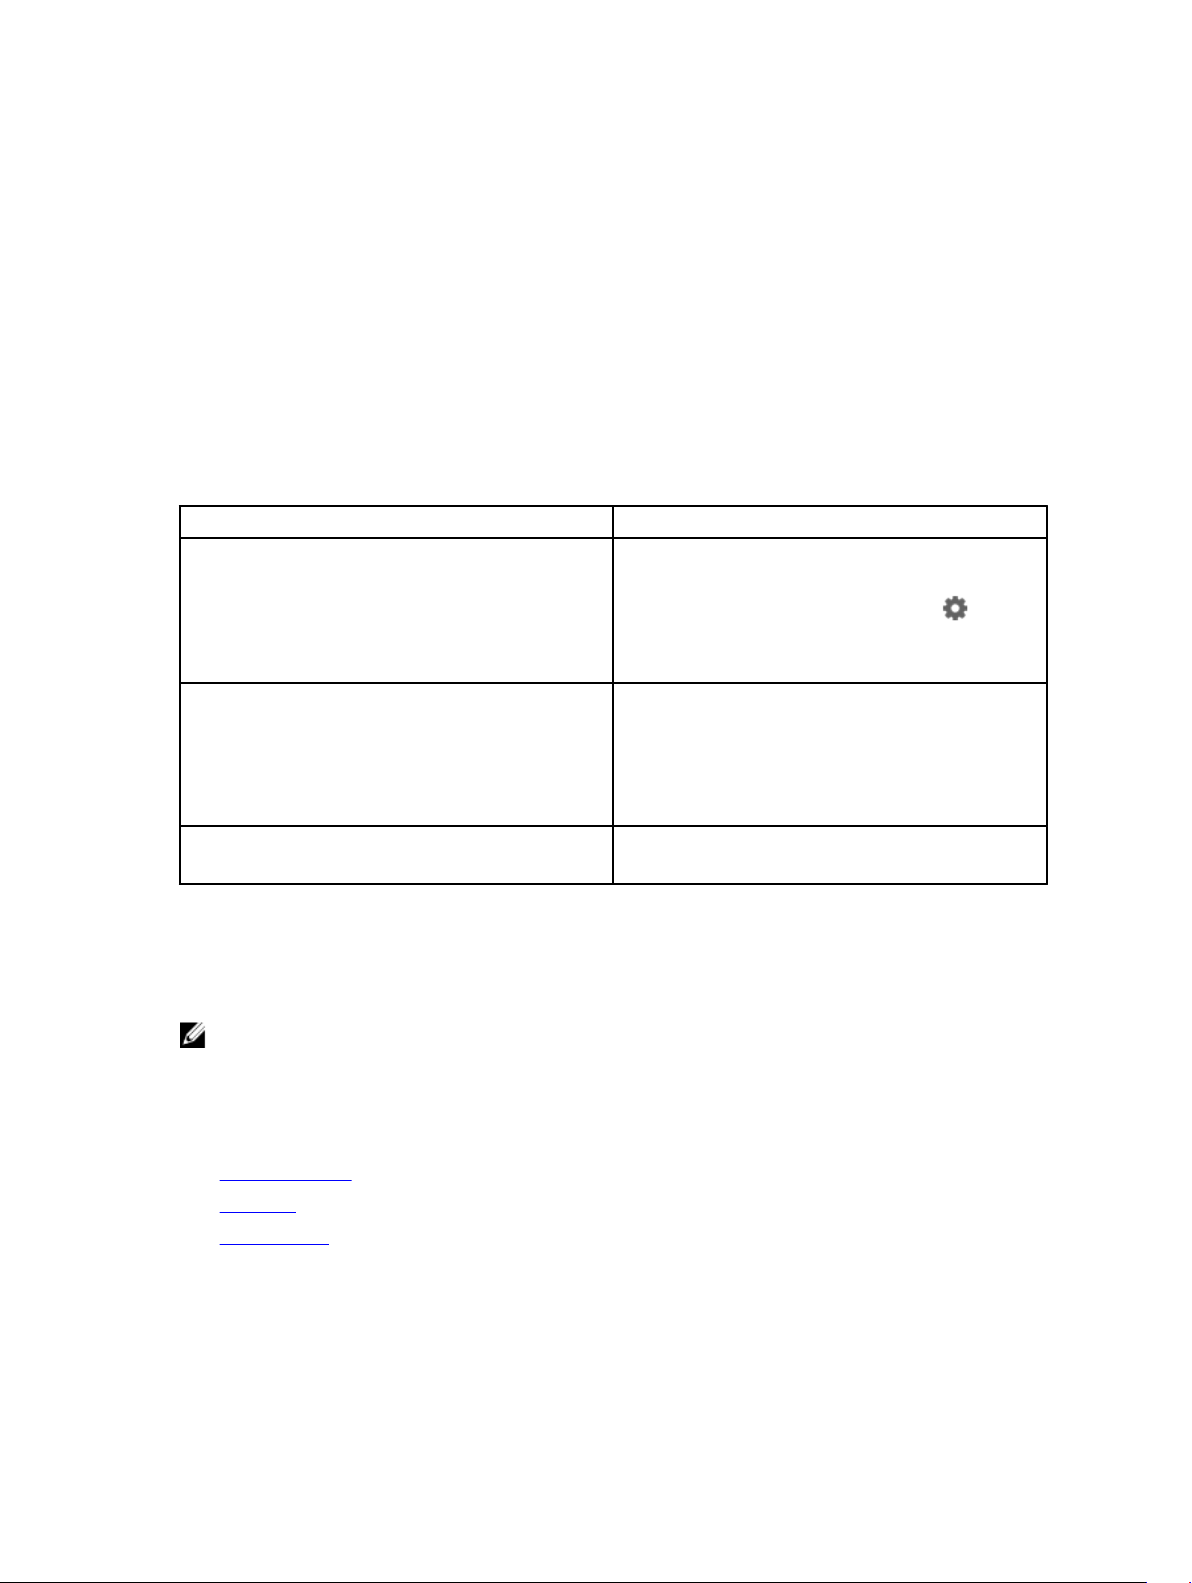
Displays the Settings screen. On the Settings
screen, you can customize the Dell Command |
Update options such as location to store
downloaded updates, scheduling the check for
updates, and customizing updates.
Minimizes the application (located at the top right
corner of all screens).
Maximizes the application (located at the top right
corner of all screens).
Closes the application (located at the top right
corner of all screens).
Left Pane
The following table lists the options available on the left pane and descriptions of the options.
Option Description
System Model Displays the image and model of the Dell system.
Service Tag Product ID provided by the manufacturer for the
system.
Last Check Provides information on the last time the system
was checked for updates.
Last Update Provides information on the last time the system
was updated.
Update History Displays the Update History screen. For more
information, see Update History.
System Information Displays the System Information screen. For more
information, see Viewing And Exporting System
Details.
Activity Log Displays the Activity Log screen. For more
information, see Activity Log.
10
Page 11

Option Description
Give us your feedback Launches an online survey to provide feedback and
satisfaction ratings for Dell Command | Update.
Content Area
From the Content Area, you can check for and install updates. For more information, see Checking For
And Installing Updates.
Advanced Driver Restore
Using the Advanced Driver Restore for Windows Reinstallation option, you can also install drivers on a
new or reconditioned system where the system contains only an operating system, a network adapter
along with a compatible network adapter driver, and an installation of Dell Command | Update. For more
information, see Downloading And Installing Driver Libraries.
11
Page 12

Using Dell Command | Update
Downloading And Installing Driver Libraries
Perform the following steps to download and install a driver library on a Dell system:
1. On the Welcome screen, click click here to download and install a complete driver library.
The Preparing for driver restore screen is displayed. The driver installation task includes the
following:
• Checking for component updates — checks for available driver libraries.
• Scanning system devices — scans the system and gathers information on the various devices that
are present on the system.
• Locating system driver library — locates the driver library on the system and checks the versions
of the drivers and determines the driver updates available for the system.
• Starting download — determines the driver updates available for the system and starts
downloading them.
• Extracting drivers — After the updates are downloaded, extracts them for installation on the
system.
• Preparing for installation — Indicates the progress of the digital signature validation and creation
of restore points on the operating system.
• Installing drivers — displays the installation status in the format x of y, where ‘x’ is the number of
drivers being installed and ‘y’ is the total number of drivers available. Select the Automatically
restart system (when required) check box to restart the system automatically after the driver are
installed.
• Installation complete — denotes the completion of driver installation in the format x of y
successful, where ‘x’ is the number of drivers installed and ‘y’ is the number of drivers available.
4
Click Cancel to exit this activity and return to the Welcome screen.
2. After installation of the drivers is complete, click Close to return to the Welcome screen.
For more information on updating the system drivers to their most current version, see Checking And
Installing Updates.
Checking For And Installing Updates
Perform the following steps to check for and install updates on a Dell system:
1. On the Welcome screen, click Check.
The Inventory Collector, a self-contained application, is used to obtain the device hardware
information. The Inventory Collector gathers the inventory status of BIOS, firmware, and drivers on
the system. The inventory status is provided in XML format. The Inventory Collector copies the
12
Page 13

inventory modules to a temporary location on the local drive of the system, ensuring that the
inventory status gathering is completed even if the network connection is lost.
a. Dell Command | Update connects to ftp.dell.com, or any other source location that you have
configured, and checks for updates.
b. Click Cancel to return to the previous screen without checking for updates. For more information
on changing the source location, see General Settings.
The checking for updates task starts and the Checking for Updates screen is displayed.
The checking for updates task includes the following:
• Checking for component updates
• Scanning for system devices
• Determining available updates
The Checking for Updates screen provides the status of the system scan. When updates are found,
Dell Command | Update prompts you to install the updates.
If no updates are found, the No updates available screen is displayed indicating that the devices on
the system are up-to-date. Click Close to exit Dell Command | Update.
Based on the availability of updates and preferences you have set, the No updates available
message is displayed. The No updates available message is displayed in the following scenarios:
• When you retain the default Download Filter preferences and no updates are available.
• When you select all the available updates for hiding.
Click View to view the updates on the Customize Selection screen. Click Close to return to the
Selected Updates screen.
The No updates are available (Based on the current 'Download Filter'
preference settings) message is displayed when you modify the default Download Filter
preferences and no updates are available.
If updates are found, the Selected Updates screen is displayed. For more information, see Selecting
Updates.
2. Click Customize to choose the updates you want to install on the system. The Customize Selection
screen is displayed.
a. To view updates previously hidden, select Show hidden updates.
b. Click Close to return to the previous screen.
For more information, see Customizing Updates.
3. (Optional) If you want Dell Command | Update to automatically restart the system after installing
updates, select Automatically restart system (when required).
4. Click Install to install the selected updates on the system.
5. NOTE: If you click Cancel, Dell Command | Update does not roll back the updates that are
already applied.
Click Cancel during installation to cancel updates and return to the Welcome screen.
For installing updates on a new or reconditioned system, see Configuring Advanced Driver Restore
Settings.
13
Page 14

Selecting Updates
On the Welcome screen, when you click Check, the checking for updates task is run and if updates are
available for the system, then the Selected Updates screen is displayed. The update summary is displayed
next to the heading in the format — update type <x of y, z MB>, where ‘x’ is the number of
updates to be downloaded, ‘y’ is the total number of updates available, and ‘z’ is the size of the available
updates, in MB. Based on importance, the updates are classified as follows:
• Critical Updates — These updates are important for improving the reliability and availability of the
system.
• Recommended Updates — These updates are recommended for installation on the system.
• Optional Updates — These updates are optional updates.
A warning is displayed if an update that you must install requires an interim version of the update. If there
are multiple intra-component dependencies for an update, Dell Command | Update installs the latest
possible version. However, this may not be the latest version. This task requires more than one update
cycle for installing the latest version of the update. For more information, see Dependency Installation.
A warning is displayed if some updates are blocked because the BitLocker is enabled on your system.
Click control panel and suspend the BitLocker to proceed with the installation. It is recommended to
resume the BitLocker after the updates are installed on your system.
A warning is displayed if some updates cannot be installed unless the power adapter is plugged into the
system.
Customizing Updates
On the Selected Updates screen, click Customize to view the Customize Selection screen. This screen
lists the detailed information of all available updates such as name, size, and release date of the
component along with other information, which helps you to choose the updates you want to apply to
the system. The updates are grouped into the following categories, based on assigned criticality:
• Critical Updates (x of y, size): View the critical updates available for the system. You may also modify
the selection of critical updates. The updates contain the following information:
– Name of the update.
– Size of the update — Displays the approximate number of bytes that are required to download the
update.
– Date on which the update package was last released.
– If an intermediate update is required, then a warning message is displayed.
• Recommended Updates (x of y, size): View the recommended updates available for the system. The
updates contain the following information:
– Name of the update.
– Size of the update — Displays the approximate number of bytes that are required to download the
update.
14
Page 15

– Date on which the update package was last released.
– If an intermediate update is required, then a warning message is displayed.
• Optional Updates (x of y, size): View the optional updates available for the system. The updates
contain the following information:
– Name of the update.
– Size of the update — Displays the approximate number of bytes that are required to download the
update.
– Date on which the update package was last released.
– If an intermediate update is required, then a warning message is displayed.
Table 3. Customize Selection Option
User Interface Description
If this icon appears next to an update, connect a power adapter to
the system to apply the update package. This is restricted to BIOS
and firmware updates on notebook or tablet systems.
If this icon appears next to an update, suspend the BitLocker from
Control Panel to apply the update package.
NOTE: It is recommended to resume the BitLocker after the
updates are installed on your system.
Click the icon to hide the updates. You can hide specific
component updates so that the updates you selected to hide are
not listed on further system scans. Select Show hidden updates
check box to make the hidden update visible, and the icon changes
to
.
NOTE: When you hide updates, the No update available
screen is displayed. Click View to view the updates on the
Customize Selection screen. Click Close to return to the
Selected Updates screen.
Click to view a tool-tip window with some additional details about
the update package.
Click to open the dell.com/support web page for the update
package to view the complete details.
Dependency Installation
Dell Command | Update uses update packages to determine the latest updates for a system. An update
package contains feature enhancements or changes in BIOS, firmware, drivers, and software. In most
cases, the update is self-sufficient and executes the pre-installation and applicable dependencies. If the
existing version of the Dell Command | Update on the system is an old version, it may have to be
upgraded to a later version before it is updated to the recommended version. You can check for
upgrades of the update using Dell Command | Update until the recommended version is installed.
For example, consider that your system has version A01 of BIOS installed and version A05 is available for
update. But, to update to A05 you must first update the system to version A03. Dell Command | Update
updates the system to version A03 before upgrading it to version A05.
15
Page 16

NOTE: If the update you want to install has a dependency, Dell Command | Update notifies you
during the update process with an information alert.
Hidden Updates
The Hidden Updates feature allows you to indicate the updates you want to skip and removes them from
the list of available updates. You can view the hidden updates on the Customize Selection screen by
selecting the Show hidden updates check box.
NOTE: If the installation of the prior version that is a prerequisite for the available updates is hidden,
then the system does not display its subsequent updates. You must unhide and install the prior
version in order to install the latest version.
To remove updates of a particular type on running subsequent scans, use the Update Filter settings. For
more information, see Configuring Update Filter Settings.
Removing An Update From The List Of Available Updates
Perform the following steps to remove an update from the list of available updates:
1. On the Customize Selection screen, click next to the update that you want to hide.
The update is removed from the list of available updates. It does not appear on the list of available
updates on running subsequent system scans.
2. Click Close to return to the Selected Updates screen.
Restoring An Update To The List Of Available Updates
Perform the following steps to restore an update to the list of available updates:
1. On the Customize Selection screen, click next to the update you want to add back to the list of
available updates.
The update is restored to the list of available updates.
2. Click Close to return to the Selected Updates screen.
Update History
You can view details of the updates installed earlier on the system in the Update History screen. The
details comprise the name of the component, type of the component, date when it was updated, and the
current or latest version of the component available on the system.
Whenever you install the updates, Dell Command | Update creates restore points called Dell Updates
within the operating system. Restore points are timestamps which you can use to revert updates to the
system’s files, installed applications, and Windows registry. You can view the list of restore points in the
System Restore window.
16
Page 17

System Restore
You can also use the System Restore window to revert any batch of updates made to the system.
NOTE: You cannot revert BIOS or firmware updates using the System Restore window as these
updates are stored in the hardware.
Viewing Update History
Perform the following steps to view the update history:
1. On the Welcome screen, click Update History.
The Update History screen is displayed.
If multiple updates exist, you can modify the length of each column to view the details.
2. Click Close to return to the Welcome screen.
Viewing And Exporting System Information
Perform the following steps to view and export system information:
1. On the Welcome screen, click System Information.
The System Information screen is displayed with details of drivers, BIOS, and application settings of
the system.
2. Click Export to save the system details in XML format.
3. Click Close to go back to the Welcome screen.
Dell Command | Update Command Line Interface Options
The command line interface (CLI) allows administrators to use automated remote deployment
infrastructure for updates. The command line interface provides basic options and does not include all
features that the GUI version of the application supports.
Dell Command | Update provides a command line version of the application for use with batch and
scripting scenarios. The CLI is fully automatic and has no interactive user prompts. The basic runtime
options are provided as command line parameters, such as setting a catalog location, importing a new
policy file, and changing the default log location.
To run the CLI interface: From the Dell Command | Update installation folder, in command prompt, run
dcu-cli.exe.
To view additional information about which options are available: From the Dell Command | Update
installation folder, in command prompt, run dcu-cli.exe -?.
Dell Command | Update CLI provides the return codes after the execution is complete:
17
Page 18

• 0 = OK/Success
• 1 = Reboot Required
• 2 = Fatal Error
• 3 = Error
• 4 = Invalid System
When you run dcu-cli.exe, if no parameters are provided, the default behavior is to check, download,
and install the available updates.
NOTE:
• Some updates cannot be installed unless the power adapter is plugged into the system.
• If some updates require a restart in order to complete the installation, system does not restart
automatically.
CLI Reference
The following table lists information on the CLI options available in Dell Command | Update.
The CLI syntax is as follows:
dcu-cli.exe <option1> [<value1>] <option2> [<value2>]...
Table 4. CLI Reference
CLI Options Description Syntax
/?
/catalog
/help
/log
/policy
Prints the usage of all CLI options
NOTE: All other options are
ignored with /?.
Sets the repository and catalog
file location. The <value> is the
path for log directory.
The /catalog parameter does
not accept a list of paths and it
only accepts a single path.
If you want to include multiple
paths, for example have a backup
location, then you can use the /
policy
Result is same as /?
Sets the log file directory. The
<value> is the path for log
directory.
Specifies a policy file to
determine settings for the
duration of a single execution.
option.
dcu-cli.exe /?
dcu-cli.exe /catalog \
\MyServer
\MyRepositoryShare
\MyCatalog.xml
For a mapped drive
:dcu-cli.exe /catalog \\Z:
\MyRepositoryFolder
\MyCatalog.xmlMyServer
\MyRepositoryShare
\MyCatalog.xml
dcu-cli.exe /help
dcu-cli.exe /log C:\logs
dcu-cli.exe /policy C:
\temp\MyPolicy.xml
18
Page 19

CLI Options Description Syntax
The <value> is the path for
policy.
A policy file can include one or
more catalog paths for the CLI.
/import
/reboot
/report
/silent
/hidden
/driverRestore
Imports the policy file. The /
policy option is required to
specify the file.
NOTE: You cannot use this
in combination with any
other option.
Reboots the system
automatically (if required by one
or more updates).
Creates a report in XML format of
the available updates only (no
update performed). The <value>
is the path for report output file.
Runs the CLI options silently (no
status output displayed).
Displays the list of current hidden
updates.
NOTE: You cannot use this
in combination with any
other option.
Enables re-installation of drivers.
To use a local CAB file, specify
the cab path.
dcu-cli.exe /import /
policy C:\temp
\MyPolicy.xml
dcu-cli.exe /reboot
dcu-cli.exe /report C:
\report.xml
dcu-cli.exe /silent
dcu-cli.exe /hidden
/driverRestore or /
driverRestore
<path_to_cab>
NOTE: If the path is not
specified, Dell Command |
Update uses the Dell cab file
specific to the system
configuration.
Example Commands
• To set the repository or catalog file location:
<c:\\catalog.xml>:dcu-cli.exe /catalog c:\\catalog.xml
• To import a new policy file:
< c:\log.txt>: dcu-cli.exe /policy c:\log.txt
19
Page 20

Using CLI Switch Combinations
The following table lists the expected behavior when the various switches in Dell Command | Update CLI
are combined.
Table 5. Dell Command | Update CLI Combination Switch Matrix
/reboot
/silent
/log
/catalog
/import
/policy
/report
/hidden
/
driverRestore
/reboot /silent /log /catalog /import /policy /report /hidden /
driverRes
tore
— Denotes that the switch combination is supported.
— Denotes that the switch combination is not supported.
20
Page 21

5
Dell Command | Update Settings
The Settings screen enables you to configure and customize settings for locations to download and
store updates, filter options for updates, schedule for downloading updates, internet proxy, export or
import settings, and location for downloading driver libraries. It has the following tabs:
• General — see Configuring General Settings section for information on configuring or modifying
locations to download and store updates, and internet proxy settings.
• Schedule — see Scheduling To Check For Updates section for information on configuring the
schedule for system updates.
• Update Filter — see Configuring Update Filter Settings for information on modifying and saving filter
options for scheduled updates.
• Import/Export — see Importing Or Exporting Settings for information on importing and exporting
settings.
• Advance Driver Restore see Configuring Advanced Driver Restore Settings for information on
configuring the location for downloading driver libraries.
Click Restore Defaults to remove all configuration/customizations and revert to the original default
settings.
NOTE: The Restore Defaults feature does not revert the updates in the policy file.
Configuring General Settings
In the General tab, you can modify the location to store updates, to download updates, and configure or
modify internet proxy settings.
Perform the following steps to configure the general settings:
1. On the heading banner, click Settings.
The Settings screen is displayed.
2. NOTE: Dell Command | Update automatically deletes the update files from this location after
installing the updates.
Under Download File Location, click Browse to set the default location or to change the default
location for storing the downloaded updates.
3. Under Update Source Location, click New to add a location for downloading the updates. For more
information, see Updating Source Location.
4. Under Internet Proxy, do one of the following:
• Select Use current internet proxy setting to use the current internet proxy settings available on
the system.
• Select Custom proxy setting to configure a proxy server and port.
5. If you select Custom Proxy Settings, and if you want to use proxy authentication, select the Use
Proxy Authentication check box and provide user name and password credentials.
21
Page 22

NOTE: The user name and password credentials are encrypted and saved.
6. NOTE: If an interactive execution of Dell Command | Update is running, you must close Dell
Command | Update
only one instance of the application can be running at a time and the scheduler instance is
blocked by the interactive instance.
Click Ok to save changes or click Cancel to revert to the last saved settings and return to the
Welcome screen.
for the scheduler to check for updates after the set time. This is because
Updating Source Location
Update Source Location displays the list of all configured source locations. The default location is
ftp.dell.com; however, you can add multiple source locations for Dell Command | Update to attempt
access and check for updates.
To add a source location, click New, navigate to the file location, and select the catalog.xml file. The
selected catalog file is added to the list of source locations. Prioritize these locations by clicking the up
and down arrows associated with the source location entry. Click the Delete icon to remove the source
location path from the list.
NOTE: Dell Command | Update uses the first source location/catalog it successfully loads. Dell
Command | Update
will not load each source location listed and aggregate the contents together.
Scheduling To Check For Updates
You can configure Dell Command | Update to automatically check for updates on the system.
Perform the following steps to configure the schedule for checking for updates:
1. On the heading banner, click Settings.
2. On the Settings screen, click Schedule.
3. Under Automatically check for updates → Check for updates, select one of the following:
• Manual updates only — Select this option if you want to manually check for updates. In this case,
Dell Command | Update does not run scheduled updates and all the other fields on this page are
hidden.
• Monthly — Select this option if you want Dell Command | Update to check for updates every
month.
• Weekly — Select this option if you want Dell Command | Update to check for updates every
week.
a. NOTE: The options to select the time and day are available only for the Monthly and
Weekly options.
NOTE: Dell Command | Update checks for updates at random intervals within thirty minutes
of the time set in this field.
NOTE: You must close Dell Command | Update for the scheduler to check for updates after
the set time.
Under Select the time, select the time at which you want Dell Command | Update to check for
updates.
b. Under Select the day, select the day on which you want Dell Command | Update to check for
updates.
22
Page 23

For example, if you want Dell Command | Update to check for updates after 10:00 AM on the first
day of every month, select Monthly under Check For Updates, select 10:00 AM under Select the
time, and select 1 under Select the day.
4. Under When updates are found, select one of the following tasks that Dell Command | Update must
perform when it finds updates:
• Notify Only (When updates are available)
• Download Updates (Notify when ready to install)
• Download And Install Updates (Notify after complete)
5. If you select Download and install updates (Notify after complete), select the time interval after
which you want the system to restart automatically.
6. Click Ok to save changes, or click Cancel to revert to the last saved settings and return to the
Welcome screen.
After you schedule the check for updates activity and if updates are available, the list of updates is
displayed in the Ready for install screen.
NOTE: You must exit Dell Command | Update for the scheduled task to run.
Configuring Update Filter Settings
In the Update Filter tab, you can configure the filters for downloading and displaying available updates.
Perform the following steps to configure the update filter settings:
1. On the heading banner, click Settings.
2. On the Settings screen, click Update Filter.
3. NOTE: All updates downloaded using the All Updates For System Model option may not be
applicable to your system.
Under What To Download, select one of the following options:
• Updates For This System Configuration (Recommended) — Select this option to download
updates specific to the system's configuration.
• All Updates For System Model — Select this option to download updates for all devices
supported by the system model.
4. Under Customize Updates, select the update recommendation level, type of update, and its device
category.
5. Click Ok to save changes or click Cancel to revert to the last saved settings and return to the
Welcome screen.
Importing Or Exporting Settings
The Import/Export tab allows you to save the configuration settings in the form of an XML file. By using
an XML file, you can transfer the settings to another system and also import settings from another system.
Using these XML files you can create common configuration settings for all the installed instances of Dell
Command | Update in the organization.
Perform the following steps to import or export the configuration settings:
1. On the heading banner, click Settings.
2. On the Settings screen, click Import/Export.
23
Page 24

3. Click Export Settings to save the Dell Command | Update settings on the system in XML format. You
can then use this XML file to export the settings to another system.
4. Click Import Settings to import the Dell Command | Update settings from a previously exported
settings XML file.
5. Click Ok to save changes or click Cancel to revert to the last saved settings and return to the
Welcome screen.
Policy File
A policy file enables an administrator to lock program settings so that other users cannot change it.
When the program settings are specified in a policy file, the associated settings are disabled on the GUI.
Creating A Policy File
Perform the following steps to create a policy file:
1. Configure Dell Command | Update settings such as schedule, proxy, and filters on a sample system
and then export the settings by using Export Settings. For more information on exporting settings,
see Import/Export Settings.
You can later import these settings as a policy.xml file on a client system you want to configure.
2. Rename the exported setting file to policy.xml.
3. Open the policy.xml file and review it to ensure that only the attributes you want to lock are included
in it.
You may find it necessary to remove some settings from the exported policy.xml file if more settings
are being locked than required. Ensure that the file is placed in the installation directory for Dell
Command | Update to use it.
4. NOTE: Save the policy.xml file in a different location before you use it as Dell Command |
Update loads the policy data and deletes the policy file. You can use the saved policy file for
modifying the policy settings.
NOTE: It is mandatory to name the file policy.xml and place it into the installation directory for
Dell Command | Update to recognize it as a policy file to be imported.
Place the policy.xml file in the Dell Command | Update installation directory and launch the
application.
Sample Policy.xml File Data
<?xml version="1.0" encoding="utf-16"?>
<dellcommandupdate version="1.0" doctype="settings">
<setting name="filtercriticality_urgent">True</setting>
<setting name="scheduledexecution">On</setting>
<setting name="scheduleddays">1</setting>
<setting name="scheduledminute">0</setting>
<setting name="filterapplicable">ShowAllForPlatform</setting>
<setting name="scheduledhour">12</setting>
<setting name="scheduledfrequency">Monthly</setting>
<setting name="automationmode">ScanNotify</setting>
</dellcommandupdate>
24
Page 25

Adding Settings In A Policy File
Perform the following steps to add the settings in a policy file:
1. Open the saved policy.xml file in an XML editor and add a new <setting> element with a valid
name and value.
For setting the values, refer to the Settings And Applicable Values table. For example: <setting
name=”scheduledminute”>30</setting>
2. Save the file as an XML file and place it in the Dell Command | Update installation directory, and then
launch the application.
NOTE: Save the policy.xml file in a different location before you use it as Dell Command |
Update loads the policy data and deletes the policy file. You can use the saved policy file for
modifying the policy settings.
NOTE: It is mandatory to name the file policy.xml and to place it in the installation directory for
Dell Command | Update to recognize it as a policy file to be imported.
Settings And Applicable Values
Setting Applicable Value
AutomationMode ScanNotify or ScanDownloadNotify or
ScanDownloadApplyNotify or ScanDownloadApplyReboot
AutoReboot True or False
AutoRebootSystemWait 15 or 30 or 60
Catalog <path to catalog file>
DownloadPath <path to download directory>
DriverCabPath <path to driver cab>
FilterApplicable ShowAllForPlatform or ShowOnlyForSystemConfig
FilterCriticality_Optional True or False
FilterCriticality_Recommended True or False
FilterCriticality_Urgent True or False
FilterDeviceCategory_Audio True or False
FilterDeviceCategory_Chipset True or False
FilterDeviceCategory_Input True or False
FilterDeviceCategory_Network True or False
FilterDeviceCategory_Other True or False
FilterDeviceCategory_Storage True or False
FilterDeviceCategory_Video True or False
FilterUpdateType_Application True or False
25
Page 26

Setting Applicable Value
FilterUpdateType_Bios True or False
FilterUpdateType_Driver True or False
FilterUpdateType_Firmware True or False
FilterUpdateType_Other True or False
FilterUpdateType_Patch True or False
FilterUpdateType_Utility True or False
HiddenUpdatesList comma seperated list of updates ReleaseID's
IsAdvancedDriverRestoreEnabled True or False
ProxyAuthenticationEnabled True or False
ProxyEnabled True or False
ProxyPassword Encrypted password created from user entry in the UI
ProxyPort User specified proxy port value
ProxyServer User specified proxy server value
ProxyUserName User specified proxy user name
ScheduledDays 1 to 7
ScheduledExecution Off or On
ScheduledFrequency Weekly or Monthly
ScheduledHour 1 to 24
ScheduledMinute 1 to 60
ScheduledRebootWait 5 or 15 or 60
Removing Settings From A Policy File
Perform the following steps to remove the settings from a policy file:
1. Open the saved policy.xml file in an XML editor.
2. Delete the element tag of the setting that has to be removed.
For example: <setting name=”scheduledminute”>30</setting>
3. Save the file as an XML file, place it in the Dell Command | Update installation directory, and launch
the application.
NOTE: Save the policy.xml file in a different location before you use it, Dell Command | Update
loads the policy data and deletes the policy file. You can use the saved policy file for modifying
the policy settings.
NOTE: It is mandatory to name the file as policy.xml and place it in the installation directory for
Dell Command | Update to recognize it as a policy file to be imported.
26
Page 27

Configuring Advanced Driver Restore Settings
In the Advanced Driver Restore tab, you can configure the location to download the driver library for a
new or reconditioned system.
Perform the following steps to configure the Advanced Driver Restore settings:
1. On the heading banner, click Settings.
2. On the Settings screen, click Advanced Driver Restore.
3. Click Enable to enable or disable the Advanced Driver Restore for Windows Reinstallation option
on the Welcome screen.
By default, the feature is:
• Enabled when you install Dell Command | Update on your system.
• Disabled if Dell Command | Update is factory installed.
• Disabled if you upgrade from Dell Client System Update 1.3 to Dell Command | Update 2.0 or
later.
After the drivers are installed on the system, the feature is disabled.
4. Select one of the following options:
• Download driver library from Dell Update/Support site (Recommended): To download the
driver library from the dell.com/support.
• Use the specified driver library: To download the driver library from a local or network location.
Click Browse to specify the location.
5. Click Ok to save changes, or click Cancel to revert to the last saved settings and return to the
Welcome screen.
27
Page 28

6
Accessing Documents From Dell Support Site
You can access the required documents in one of the following ways:
• Using the following links:
– For all Enterprise Systems Management documents — dell.com/softwaresecuritymanuals
– For OpenManage documents — dell.com/openmanagemanuals
– For Remote Enterprise Systems Management documents — dell.com/esmmanuals
– For OpenManage Connections Enterprise Systems Management documents — dell.com/
OMConnectionsEnterpriseSystemsManagement
– For Serviceability Tools documents — dell.com/serviceabilitytools
– For Client Systems Management documents — dell.com/clientsystemsmanagement
– For OpenManage Connections Client Systems Management documents — dell.com/
dellclientcommandsuitemanuals
• From the Dell Support site:
a. Go to dell.com/support/home.
b. Under Select a product section, click Software & Security.
c. In the Software & Security group box, click the required link from the following:
– Enterprise Systems Management
– Remote Enterprise Systems Management
– Serviceability Tools
– Client Systems Management
– Connections Client Systems Management
d. To view a document, click the required product version.
• Using search engines:
– Type the name and version of the document in the search box.
28
Page 29

7
Contacting Dell
NOTE: If you do not have an active Internet connection, you can find contact information on your
purchase invoice, packing slip, bill, or Dell product catalog.
Dell provides several online and telephone-based support and service options. Availability varies by
country and product, and some services may not be available in your area. To contact Dell for sales,
technical support, or customer service issues:
1. Go to dell.com/support.
2. Select your support category.
3. Verify your country or region in the Choose a Country/Region drop-down list at the bottom of the
page.
4. Select the appropriate service or support link based on your need.
29
 Loading...