

Page 1
Installation of CACStar™ on a
Dell C3765dnf MFD
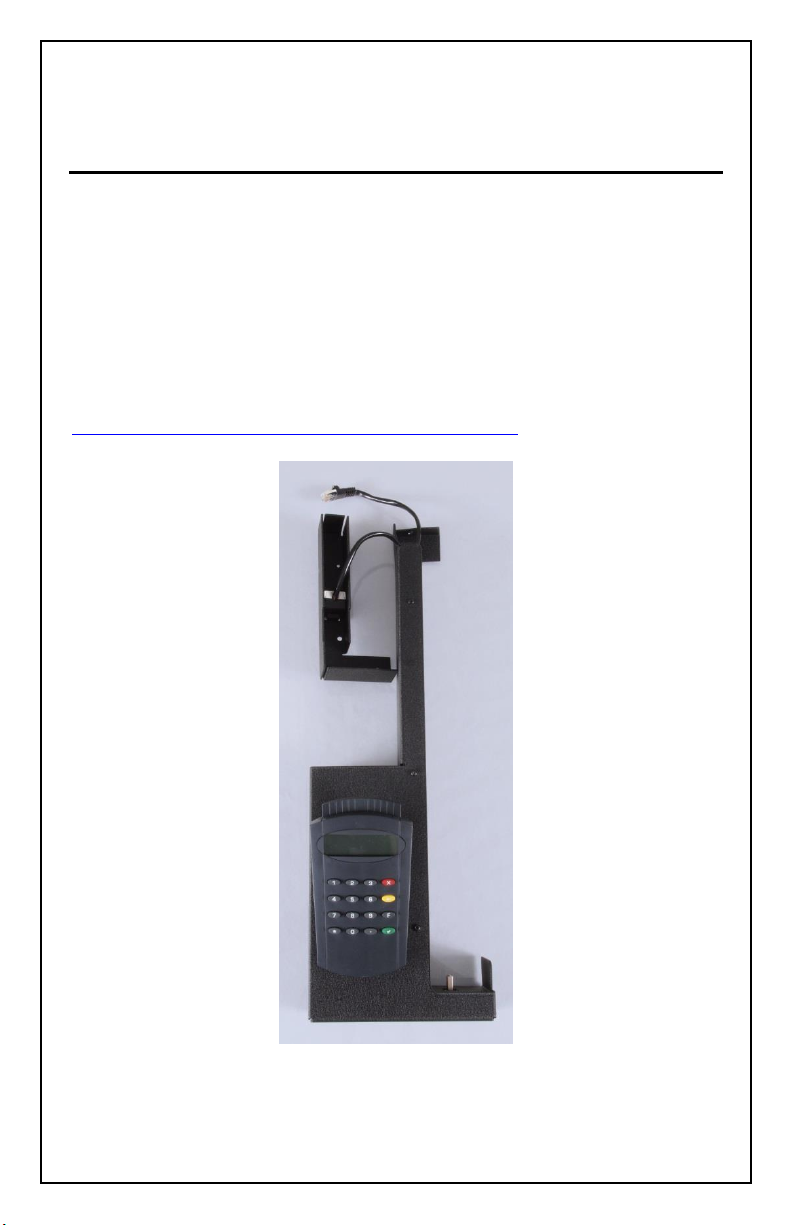
The kit arrives assembled as shown in the photo below. The contents of
the box includes the CACStar option, User’s Guide, and a bag containing
3 screws required for securing the CACStar option to the back of the
printer. The bag contains an M3 x 10mm screw, an M3 x 40mm screw,
and an M4 x 40mm screw. You will need a Phillips #1 screwdriver. If
you wish to see an example of the installation process, go to YouTube at
https://www.youtube.com/watch?v=-SPu4-i4OBY for a 4 minute video.
CACStar™ Installation v5 Dell C3765dnf Page 1
Page 2
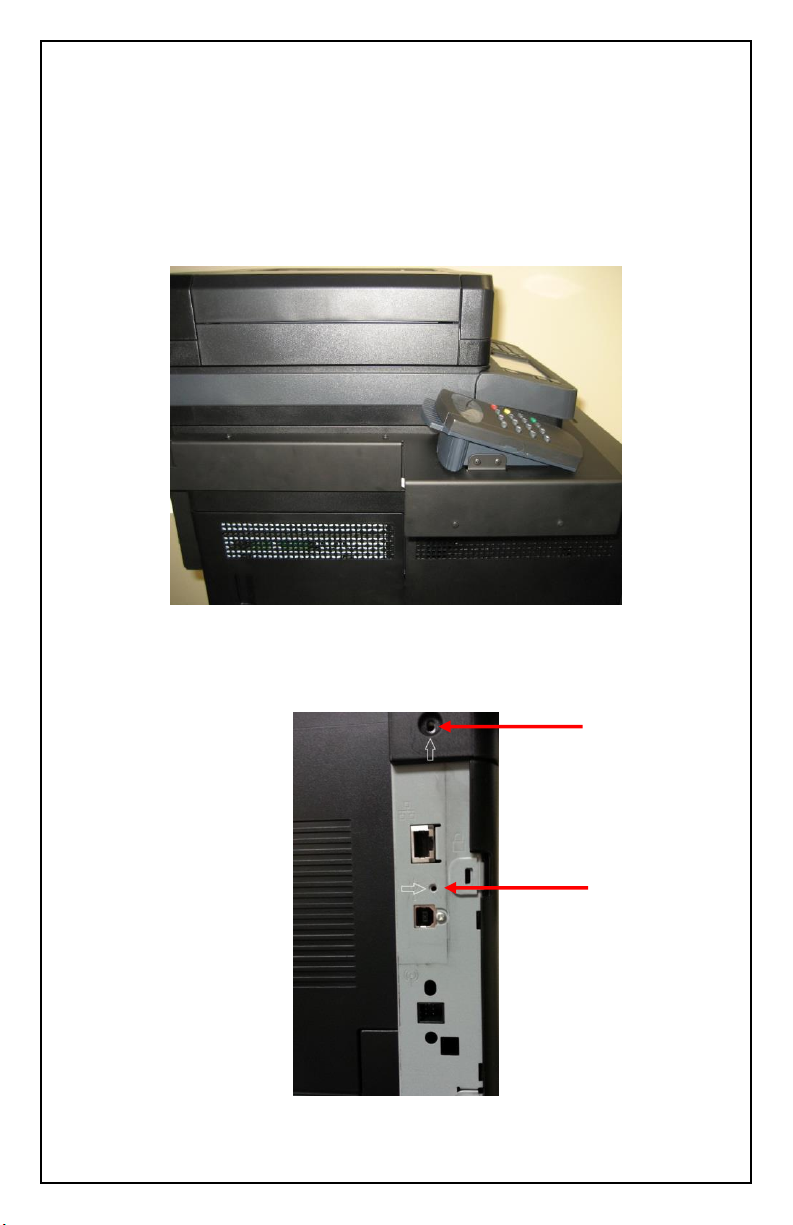
Turn off power to the C3765.
Slide the assembly onto the left hand side of the C3765 so the USB
connector on the CACStar is inserted into the USB socket on the front of
the C3765. The CACStar will wrap around the left scanner post as
shown below.
At the rear of the C3765, remove the two mounting screws indicated by
arrows in the following picture:
CACStar™ Installation v5 Dell C3765dnf Page 2
Page 3
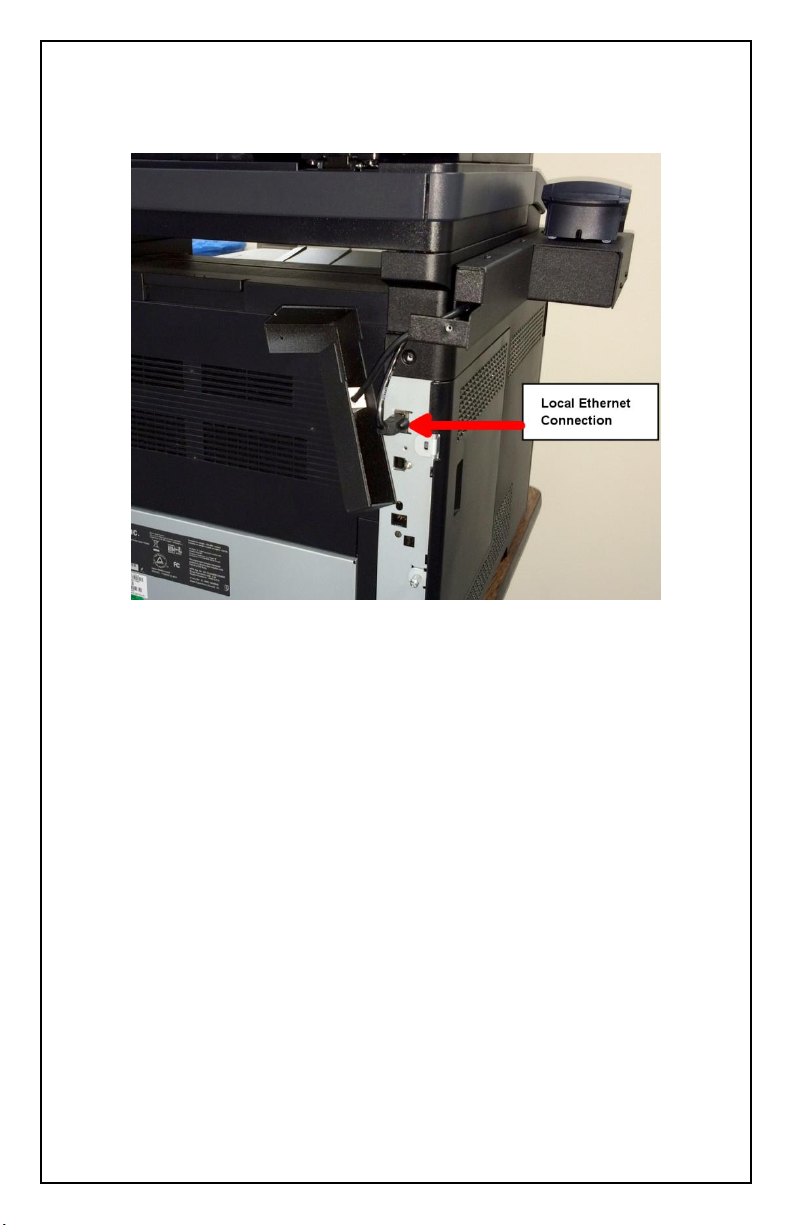
Connect the CACStar Ethernet cable to the C3765 Ethernet port as
shown below:
CACStar™ Installation v5 Dell C3765dnf Page 3
Page 4
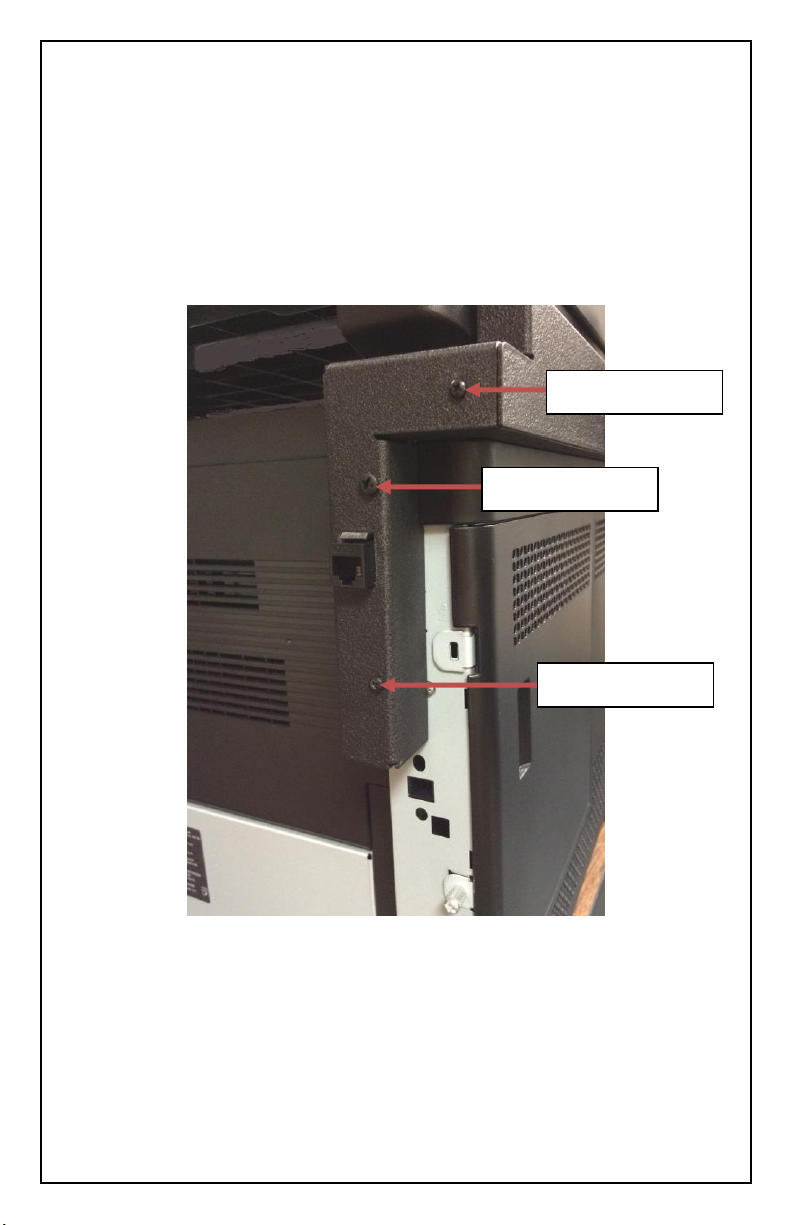
Use three screws to attach the back assembly to the C3765. Use the M4
M3 x 10mm
M4 x 40mm
M3 x 40mm
x 40mm screw for the top hole and the M3 x 40mm screw for the lower
hole. These two screws use the two holes from which screws were
removed in the previous step. Use the M3 x 10mm screw to attach the
back assembly to the base CACStar assembly as shown below.
Turn on the C3765. Refer to the CACStar User’s Guide for
configuration.
CACStar™ Installation v5 Dell C3765dnf Page 4
 Loading...